Connect with us

Juice

Superfood Benefits Of Kale & Kale Juice

Published

on

green leafed plant

The verdant, nutrient-dense leafy vegetable is packed with vital vitamins such as A, C, K, B6, along with manganese, copper, and potassium – all crucial elements required for the body to function at its best. Kale stands out as a superior source of dietary fiber, promoting consistent digestion and assisting in controlling weight. Moreover, it offers a low-calorie option while being rich in nutrients, rendering it a perfect selection for individuals aiming to uphold their well-being without compromising on flavor or fulfillment.

Beyond these basic nutrients though there are many additional advantages of consuming kale regularly such as increased energy levels and better immune system function.

Additionally research suggests that adding kale into your diet could potentially reduce inflammation associated with chronic illnesses like arthritis. The rich antioxidant content found in kale may even protect against cancer cell growth too! All these properties make it clear why so many people turn to this powerhouse veggie when trying to improve their physical condition – but don’t forget about the potential benefits from drinking freshly made kale juice either!

green plant in close up photography
Photo by Eva Bronzini on Pexels.com

Kale is a leafy green vegetable that’s gaining in popularity due to its nutritional benefits. It belongs to the Brassica family, which includes cabbage, cauliflower and Brussels sprouts.

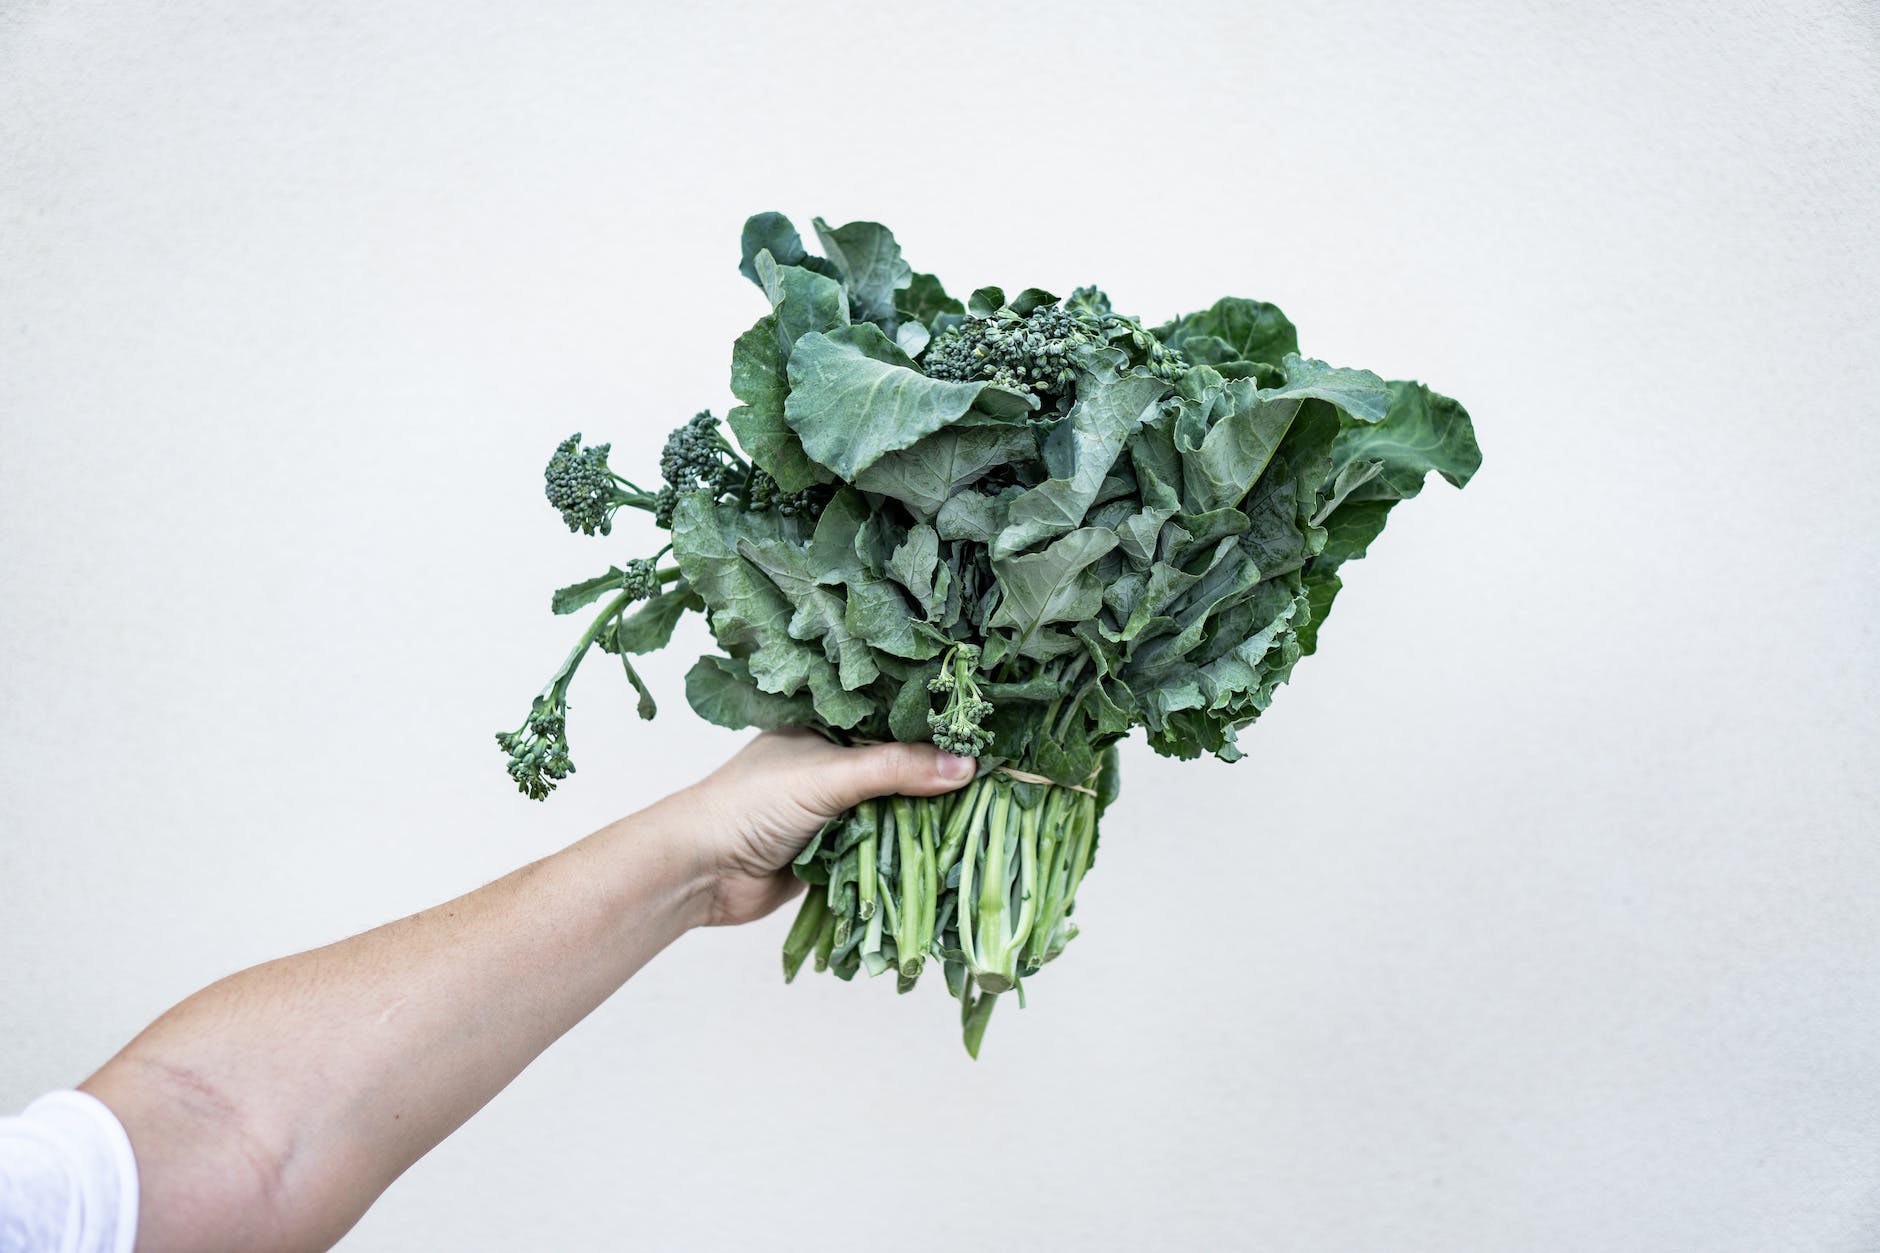
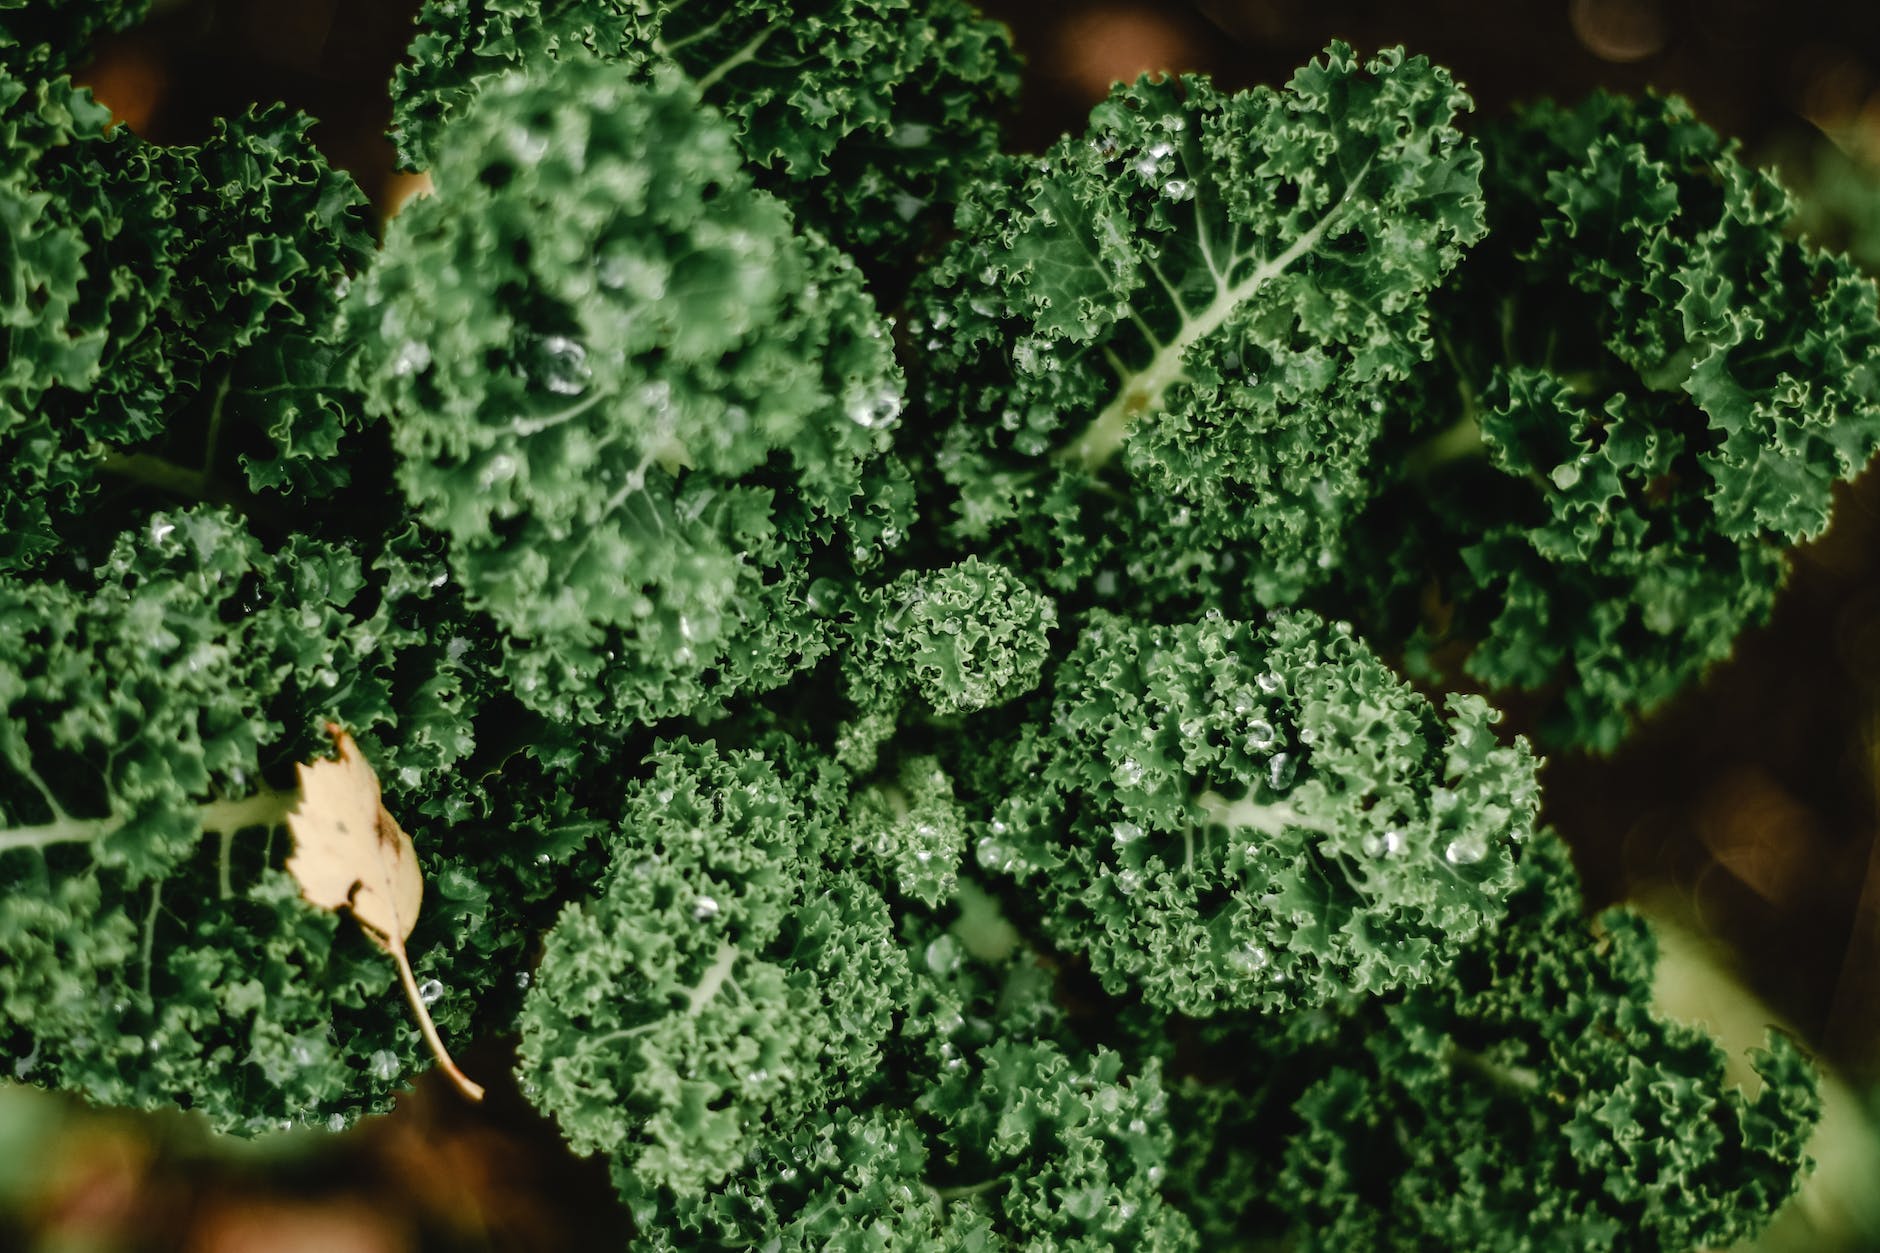
There are many types of kale including curly kale, ornamental kale and dinosaur (Lacinato) kale. All varieties offer excellent nutrition with different textures and flavors. Kale can be eaten raw or cooked, alone or as part of recipes like salads, soups and smoothies.

The health benefits of kale include providing essential vitamins, minerals and antioxidants. One serving of fresh kale contains over 200% of your recommended daily intake for vitamin A and nearly 600% for vitamin K. It also supplies other nutrients like calcium, iron, fiber and potassium. Furthermore, consuming more fruits and vegetables such as kale may help lower cholesterol levels while reducing inflammation throughout the body.

Advertisement

Finally, there are lots of creative ways to incorporate this nutrient-dense superfood into your diet. From chips to pesto sauce to casseroles – you’ll find plenty of delicious ideas online or in cookbooks! With its versatility and growing availability in stores across the world, adding some kale into your meals is an easy way to boost nutrition without sacrificing flavor. As we move on from here let’s take a closer look at one specific benefit: the nutritional value of kale when consumed as juice…

Nutritional Value Of Kale

Kale is a nutritional powerhouse and its health benefits are vast. It’s packed with vitamins, minerals, fiber, protein, and antioxidants that can help support your body’s natural functions. Let’s take a look at the nutrient content of kale:

  • Vitamins A, C & K
  • Calcium
  • Iron
  • Potassium
  • Magnesium

In addition to these essential nutrients, kale is also low in calories – just 33 calories per cup – making it an ideal choice for anyone looking to lose weight or maintain their current weight. The high fiber content helps you feel full longer and keeps your digestive system running smoothly. Plus, the combination of vitamins A, C & K make this superfood great for boosting immunity and protecting against free radicals.

When you consider all the nutrition facts about kale – from its vitamin and mineral content to its calorie count – it’s easy to see why so many people choose it as part of their daily diet. Not only does it provide essential nutrients for optimal health but it also tastes great when added to salads, soups or smoothies! Whether eaten raw or cooked, adding kale into your meal plan brings numerous health benefits without sacrificing flavor.

Health Benefits

Kale is a superfood that comes with numerous health benefits. From weight loss to improved immune system functioning, kale can help you feel your best. Here are some of the most noteworthy advantages of adding this nutrient-dense vegetable into your diet:

Weight Loss – Kale contains very few calories and plenty of fiber, making it an ideal food for those looking to lose weight. The high fiber content helps fill you up without overloading on calories or unhealthy fats.

Advertisement

Immune System Support – This leafy green is packed with Vitamin C which boosts immunity levels and helps keep colds away. Kale also provides vitamins A, E, and B6, helping ensure your body’s defenses stay strong when fighting off illnesses.

Heart Health – Eating more cruciferous vegetables like kale has been linked to lower cholesterol levels as well as decreased risk of coronary artery disease. Regularly consuming kale may reduce inflammation in the arteries while lowering blood pressure too.

Digestion Aid – Fiber binds water to soften stool, meaning it’s easier to pass through the intestines. Plus, regular consumption aids in digestion by stimulating intestinal peristalsis (wave-like contractions).

Cancer Prevention – Studies have shown that antioxidants found in cruciferous veggies such as kale help protect DNA from damage caused by free radicals – reducing one’s risk of developing cancer down the line.

Overall, including kale into your daily meals will provide plenty of nutritional benefits – improving both physical and mental wellbeing! Moving forward let’s look at different types of kale available today…

Advertisement

Different Types Of Kale

Kale is a superfood that comes in many shapes and forms. Like different colored paint on an artist’s palette, each type of kale has its own unique flavor and texture, making it a versatile vegetable to add to any dish. Just like snowflakes, no two types are exactly alike! Here’s a look at some of the most popular varieties:

Redbor Kale – With frilly edges resembling flower petals, Redbor kale is unmistakable with its deep purple-red color. Its mild taste makes it perfect for adding pizzazz to salads or lightly steaming as a side dish.

Lacinato Kale – Also known as dinosaur kale due to its dark green bumpy leaves, Lacinato kale has an earthier taste than other kales which lends itself well towards soups and stews.

Russian Kale – This variety of kale is slightly sweeter than others and can be used both raw and cooked. Russian kale does not become tough when cooked so it can easily be stir fried or sautéed.

Baby Kale – Baby kale leaves are much smaller than standard mature kale plants yet have the same nutritional value. It boasts a sweet flavor that pairs well with salads or smoothies for added nutrition without overpowering other flavors.

Advertisement

No matter what kind you choose, all types of kale offer amazing health benefits making them an ideal addition to your diet. Whether you want something crunchy or tender, bold or subtle, there is certainly a type of kale out there for everyone! From here we will explore how to prepare and cook this remarkable leafy green vegetable.

How To Prepare And Cook Kale

Preparing and cooking kale is easy. There are many ways to make it a delicious, nutrient-rich side dish or main course. It can be steamed, boiled, sautéed in olive oil, baked into chips, added to soups and stir fries, or eaten raw in salads.

When preparing kale for cooking, the first step is to remove any tough stems that may remain after washing. To do this, hold the stem at its base with one hand while using your other hand to pull away leaves from the stem until all of them have been removed. Afterward, roughly chop up the leaves before adding them to whatever recipe you’re making.

If you’re baking kale into chips, toss the chopped pieces in olive oil and season with salt and pepper before spreading them out on a baking sheet lined with parchment paper. Bake at 375 degrees Fahrenheit for 10-15 minutes or until they become crispy – stirring every few minutes so they cook evenly throughout! With these steps in mind, creating healthy recipes with kale will be simple enough for anyone to do.

Popular Recipes With Kale

Kale is one of the most versatile superfoods out there, and it has become a popular ingredient in many delicious recipes. It often gets overlooked as just being a garnish or an accessory to other dishes when in fact, kale can be used to create some truly amazing meals. To jumpstart your own culinary journey with this nutritious vegetable, here are five popular recipes that you can try at home:

Advertisement
RecipePrep Time (min)Cook Time (min)
Kale Smoothie50
Kale Salad150
Kale Chips1030
Kale Pesto200
Kale Soup2545

Let’s start off easy with something like a kale smoothie! All you need is some fresh kale leaves, some banana, almond milk and honey if desired.

Blend all the ingredients together until they’re smooth, pour into glasses and enjoy – takes no time at all and tastes great too! If you have more than 5 minutes to spare then why not attempt a delicious kale salad? Simply clean and tear up the kale leaves before adding them to chopped tomatoes, cucumbers, red onions and feta cheese with a tasty vinaigrette dressing.

Enjoying the crunchy texture of roasted vegetables? Then try out some homemade baked kale chips for a healthy snack option. Just preheat your oven to 375°F (190°C), mix olive oil lightly over torn kale leaves on baking sheets and bake for about 30 minutes.

For those who love Italian flavours, whip up some homemade pesto using ripped-up fresh kale instead of basil; blend garlic cloves, almonds/pine nuts/walnuts, Parmesan cheese with extra virgin olive oil until creamy before stirring through the drained pasta of choice for dinner.

Finally for soup lovers – nothing beats hearty vegetable broth made from sautéed onions & carrots with added potatoes & diced celery plus shredded pieces of steamed kale cooked in stock – doesn’t get much better than that! With these yummy options now available it won’t take long before you’ll be able to make these recipes by heart!

Advertisement

And once mastered why not move onto making your own batch of freshly squeezed natural juice right at home…

Making Kale Juice At Home

Making kale juice at home offers numerous benefits to those who enjoy the taste and nutrition of this superfood. Kale is nutrient-dense, containing vitamins A, C, and K as well as many minerals including calcium, magnesium and potassium.

Studies have shown that drinking freshly made kale juice can enhance overall health by boosting energy levels and improving digestion. Additionally, homemade kale juice has a greater concentration of nutrients than store-bought varieties due to the lack of preservatives or other added ingredients in its preparation.

When making homemade kale juice, it’s important to choose quality produce for maximum flavor and nutritional value. Opting for organic kale is highly recommended since it’s grown without pesticides or herbicides which could adversely affect the flavor of your finished product.

Using fresh fruits such as apples or oranges is also an excellent way to add sweetness and depth of flavor while providing additional key vitamins such as Vitamin C. There are countless variations of recipes available online using combinations of different fruits and vegetables so finding one that suits your palate should be relatively easy.

Advertisement

The process for juicing kale itself is quite simple; wash the leaves thoroughly before placing them into a juicer along with any desired fruit accompaniments. Depending on the type of juicer you use, some may require peeling before adding whereas others will accept unpeeled whole fruits like oranges or apples. After processing the mixture through your juicer according to manufacturer instructions, stir all ingredients together until blended evenly throughout then pour over ice if desired before serving immediately for optimal flavor retention.

Homemade kale juices offer an array of healthful benefits when consumed regularly – plus they’re incredibly delicious too! With just a few steps involved in their creation, making these beverages couldn’t be simpler – now let’s take a look at store-bought versions…

Store-Bought Kale Juices

Gone are the days when you needed to make your own kale juice in order to reap its nutritional benefits. Nowadays, store-bought kale juices from popular brands can be easily found in health food stores and supermarkets alike. But with so many different varieties available, it’s important for consumers to read labels carefully and understand what ingredients are being used.

Organic is always preferable, as these products tend to use higher quality ingredients of a purer source than non-organic options. It’s also important to check for added sugars or sweeteners that could undermine the healthy properties of the product. Additionally, look out for any preservatives or artificial flavors which can reduce nutrient content and affect overall taste.

When choosing a brand, strive for one that uses natural and organic ingredients while minimizing processing steps – this way you can ensure that you’re getting all the nutrition possible without sacrificing flavor. With careful consideration of these factors, store bought kale juices can serve as an excellent addition to any diet!

Advertisement

Side Effects

Despite the benefits of kale juice, it is important to be aware of potential side effects. Kale is a member of the Brassica family and may cause allergic reactions in individuals sensitive or allergic to other members such as cauliflower and Brussels sprouts. Symptoms can include itchiness, rashes, nausea, abdominal pain, vomiting and difficulty breathing.

In some cases, consuming too much kale can also lead to unpleasant symptoms including diarrhea and constipation. This is due to its high fiber content which if consumed excessively can irritate the digestive system leading to an upset stomach. Additionally, consuming large amounts at once has been associated with toxicity that causes fatigue, headaches and dizziness.

Therefore it is recommended to start slowly when introducing kale into your diet, incorporating only one serving per day while monitoring any adverse reactions that might occur. If you experience any unusual signs or sensations after eating kale consult a medical professional for advice on how to proceed safely.

Interaction With Medications

When it comes to kale, there is much to be said about its potential interaction with medications. As with any other food, it is important to consider the possible implications of consuming kale if you are taking certain drugs or supplements. It is also wise to consult your healthcare provider before adding more kale into your diet.

It has been suggested that eating large amounts of raw kale can interfere with some types of medications, such as blood thinners and thyroid hormones. This could potentially increase the risk for side effects or cause an irregular response in patients who take these drugs regularly. Additionally, some people have reported experiencing stomach discomfort after drinking large quantities of kale juice due to its high fiber content; this may affect absorption of certain medicines taken orally.

Advertisement

In general, caution should be used when introducing new foods like kale into a medication regimen since compounds within the plant can interact adversely with certain drugs or supplement regimens. When in doubt, always speak with your healthcare provider first about how adding more greens—like kale—to your diet might impact the effectiveness of any medications you’re on.

Frequently Asked Questions

What Is The Recommended Daily Intake Of Kale?

When it comes to eating kale, understanding the recommended daily intake is key. Eating too much or not enough can have an effect on your overall health and nutrition. With that in mind, let’s explore what the ideal amount of kale should be consumed each day.

The USDA recommends consuming 2-3 cups of leafy greens like kale per day for adults who are following a 2000 calorie diet plan. This means that if you’re looking to get the most out of kale’s nutritional benefits, then you’ll want to strive for around 1 cup (or 56g) of raw or cooked kale at least 5 times a week. However, this recommendation could vary depending on individual dietary needs and caloric intake requirements.

In terms of nutrients, one cup of chopped kale contains 36 calories with 3 grams of protein, 4 grams of fiber and zero fat—all while providing over 100% DV (Daily Value) vitamins A & K as well as seven other essential vitamins and minerals such as calcium and magnesium. Additionally, antioxidants found within kale help fight against free radicals which may lead to inflammation and disease prevention when eaten regularly as part of a healthy diet plan.

Overall, it is important to note that every person has different nutritional needs based upon age, activity level and lifestyle choices; therefore make sure you check with your doctor or dietitian prior to deciding how much kale should be included in your weekly meal plans.

Advertisement

Is Kale Juice More Nutritious Than Eating Raw Kale?

When it comes to nutrition, is kale juice more nutritious than eating raw kale? Eating a diet rich in nutrient-dense foods like kale and its juice can have numerous benefits. But when comparing the two forms of consumption, which offers greater nutritional value?

Nutritionists would agree that the cooked form of kale has slightly fewer nutrients than its raw counterpart. This means that if you want to reap the full range of health benefits from this superfood, you’ll need to consume it uncooked or lightly steamed. The reason for this difference lies in the fact that some vitamins are sensitive to heat and will break down during cooking processes. Therefore, consuming raw kale provides your body with all the essential vitamins and minerals it needs from this leafy green vegetable.

The nutritional profile of kale juice also differs from that of raw kale due to processing methods used by manufacturers. While drinking fresh cold pressed juice offers an array of micronutrients not found in other processed varieties, commercially packaged juices are often deprived of many beneficial properties found in their whole food counterparts. That being said, there is still merit in adding both forms into one’s daily routine as they each provide unique nutritional benefits: Nutrition Benefits Kale include fiber, folate, Iron & Calcium while Nutrition Benefits Kale Juice contain higher concentrations of antioxidants and phytonutrients such as flavonoids & polyphenols.

Ultimately, there isn’t one right answer as it depends on individual dietary needs and preferences – incorporating any form into your lifestyle may be beneficial for overall health. Whether you choose to eat it raw or drink it up – getting enough servings per day ensures your body receives adequate amounts of these key nutrients!

Does Kale Juice Have Any Additional Health Benefits?

Kale juice has been likened to a veritable super-elixir, promising everything from increased energy and improved digestion to better skin. But does it really have any additional health benefits beyond those of raw kale? Let’s take a look at what the research says about the health benefits of kale juice specifically.

Advertisement

When we compare eating raw kale with drinking its juice, it appears that both offer similar nutritional value – but there are some distinct advantages to drinking your greens. Kale juice is easier for our bodies to absorb than eating raw kale, as many of its nutrients are already broken down in liquid form; this means you can get more bang for your buck when consuming them through juicing. Additionally, because all parts of the plant are used in making the juice (including stems and leaves), much higher concentrations of beneficial vitamins and minerals can be obtained through consumption.

Studies suggest that regular consumption of kale juice may help reduce inflammation, boost immunity, improve heart health, lower cholesterol levels, aid weight loss efforts and even provide protection against certain cancers. It seems like every nutrient found in kale – including antioxidants such as Vitamin C & E , omega 3 fatty acids, carotenoids and polyphenols – contributes to these potential health benefits. Ultimately though, research shows that getting most or all of your daily servings of vegetables by way of juices is not an optimal long term solution; rather it should be seen as complementary to a balanced diet consisting mostly of whole foods.

It’s clear then that while there are certainly numerous nutritional perks associated with drinking kale juice regularly – if consumed responsibly – there’s no one miracle food or drink capable alone of singlehandedly providing us with complete nutrition. As always, moderation remains key when considering incorporating new elements into our diets!

Are There Any Special Storage Guidelines For Kale Juice?

Storing kale juice properly is essential for preserving its beneficial properties. With the proper storage guidelines, you can ensure that your kale juice retains its nutrients and remains safe to consume. From keeping it in the right temperature range to making sure the container is adequately sealed, there are a few key tips to follow when storing kale juice.

To start with, it’s important to keep your kale juice between 40-45 degrees Fahrenheit at all times. Refrigeration is best for maintaining such temperatures, however if you don’t have access to a refrigerator then using an ice pack or cool box might work as well. It’s also best not to store kale juice in direct sunlight or heat, so make sure you find a place that has consistent low temperatures before putting away your extract.

Advertisement

Airtight containers are also important when storing kale juice since air exposure can cause degradation of quality over time. Glass bottles are ideal for this purpose since they provide maximum protection from oxygen and other contaminants that could otherwise spoil the contents of your bottle. Additionally, be sure to check for any signs of mold growth within the container prior to consuming; if you notice anything unusual then discard immediately and replace with another container. Finally, try to use up your stored supply within seven days after opening – this will help prevent spoilage due to extended contact with air and light sources.

As long as you follow these storage guidelines carefully, you should be able to enjoy fresh kale juice without worrying about potential health risks associated with improper storage techniques. Remember: always double-check expiration dates on containers before drinking them!

Are There Any Potential Side Effects Of Consuming Too Much Kale Juice?

Understanding potential side effects of consuming too much kale juice is important, as overconsumption can lead to negative health impacts. While kale juice has many positive nutrition benefits, it’s essential to understand the risks associated with drinking too much of it. In this article, we’ll explore the dangers and consequences of excess consumption of kale juice.

The first thing to consider when looking at any food or beverage is its nutrient content. Kale juice contains a variety of vitamins and minerals that are beneficial for humans but in large quantities these nutrients may cause uncomfortable symptoms such as nausea or diarrhea. Excessive consumption could also potentially deplete your body’s stores of certain minerals like potassium, magnesium, and calcium which are all essential for good health.

Another issue to be aware of regarding too much kale juice consumption is that some components found in the juice have been linked to increased risk for kidney stones and other complications. Studies have shown that excessive intake of oxalates (a component naturally found in plants) from foods like spinach, chard, and even kale can contribute to stone formation if consumed in high amounts over time. It’s important then to assess how often you consume these types of juices and make sure not to exceed recommended guidelines set by experts.

Advertisement

In short, while there are many great nutritional benefits associated with fresh-pressed kale juice, it’s important to remember the possible adverse effects that come along with overconsumption – making moderation key when drinking it regularly. As always, consult a qualified healthcare professional before incorporating new dietary habits into your routine so they can best advise on what works best for you!

Conclusion

Kale is one of the most nutrient-rich superfoods on the planet. It’s packed with vitamins, minerals and antioxidants that can help protect your body from disease. With its high levels of dietary fiber and low calorie content, kale is a great addition to any diet.

It turns out that drinking kale juice has even more benefits than just eating raw kale. Kale juice contains higher amounts of certain nutrients such as Vitamin A, C, K and folate which helps boost overall health. Additionally, it may also have potential anti-inflammatory properties and be beneficial for digestion when consumed in moderate amounts.

The phrase “an ounce of prevention is worth a pound of cure” certainly applies here: consuming small amounts of kale juice regularly provides numerous long-term health benefits without having to worry about any adverse side effects. The key takeaway is this: adding some kale juice into your daily routine will give you an abundance of energy while providing essential micronutrients to keep you healthy and feeling good!

Advertisement

Continue Reading
Advertisement

Vegan

How to Make Orange Juice

Published

on

By

Explore three techniques to make your own fresh-squeezed orange juice at home. This single-ingredient, sugar-free option for orange juice can be made either with or without pulp. Rich in vital nutrients, it’s delicious on its own or as part of a mixed juice blend!

How to Make Orange Juice

Making newly squeezed orange juice may take more effort than grabbing a juice box from a shop. However, the difference in the top quality of flavor, as well as freshness, is matchless. Fresh orange juice is fruity and excellent– so much sweeter than any kind of ‘from concentrate’ Orange Juice in stores and with no sugarcoated or anything ‘awful.’.

More than that, when making orange juice in your home, you can pick if you desire orange juice with pulp or without. In addition, it is full of vitamins and health and wellness advantages. Sugar-free orange juice has never tasted so great as when it’s straight from the fruit!

Is Orange Juice Helpful for You?

There are several primary health advantages of oranges. Most people know that this spicy fruit supplies tons of Vitamin C. One tool cup of orange juice provides nearly 100% of your daily recommended Vit C. However, it additionally consists of various other nutrients, including Vitamin A, calcium, folate, and iron.

Is Orange Juice Helpful for You?

Vitamin C helps to support our immune systems and aid with gum health, wound recovery, and bone development. At the same time, Potassium aids in decreasing the threat of cardiovascular disease, strokes, and bone loss. It additionally assists manage blood pressure and also decreases the risk of kidney rocks.

Folate is crucial for pregnant women and decreases the risk of abnormality, and OJ is just one of the most effective all-natural resources. Even much better, orange juice is high in antioxidants, which are fantastic for fighting dangerous complimentary radicals as well as shielding versus numerous persistent conditions and containing anti-inflammatory homes.

Advertisement

Among the only drawbacks of alcohol consumption of orange juice (or significant quantities of fruit juice) is the amount of all-natural sugars in the juice. Therefore, I drink homemade orange juice once or twice a week, freezing leftovers to stand out right into smoothie mixes in smaller-sized dosages or thaw them later.

How to Make Orange Juice (3 techniques)

Just how to make fresh-squeezed orange juice at home by using one of 3 methods. This sugar-free orange juice (with pulp or without) utilizes just one component, is packed with healthy vitamins and is fantastic alone or as part of a juice blend!

Making freshly squeezed orange juice might take much more initiative than getting a juice box from a store, yet the difference in the high quality of taste and the quality is matchless. Fresh orange juice is fruity and pleasant– so much sweeter than any kind of ‘from concentrate’ OJ in stores and without any added sugars or anything ‘unpleasant.’.

More than that, when making orange juice in your home, you can choose if you want orange juice with pulp or without. In addition to that, it contains vitamins and also health advantages. Sugar-free orange juice has never tasted so excellent as when it’s straight from the fruit!

Fresh orange juice

Is Orange Juice Great for You?

There are several main health and wellness advantages of oranges. Most people realize that this vibrant fruit offers tons of Vitamin C. One medium mug of orange juice supplies practically 100% of your everyday advised Vit C. Nonetheless, it also contains several other nutrients, including Vitamin A, calcium, folate, and iron.

Vitamin C supports our body’s immune systems and aids with gum health, wound healing, and bone development (Resource). Meanwhile, Potassium assists in reducing the danger of heart disease, strokes, and bone loss. It likewise helps manage blood pressure and lower the threat of kidney rocks.

Advertisement

Folate is necessary for pregnant females and lowers the danger of abnormality, as well as Orange Juice, is one of the best natural resources (source). Even better, orange juice is high in antioxidants, which are terrific for fighting damaging complimentary radicals, protecting against numerous chronic problems, and including anti-inflammatory properties.

One of the only drawbacks of alcohol consumption of orange juice (or huge amounts of fruit juice) is the number of natural sugars in the juice. Therefore, I tend to consume self-made orange juice one or two times a week and cold leftovers to stand out right into shakes in smaller-sized doses or thaw later.

How to Make Orange Juice with A Juicer

Prepare the oranges by initial peeling them. Then, slice them into smaller-sized parts to fit your juicer chute. Feed a few into your juicer chute at once– voila.

Orange juicer with electric juicer

With a Blender

Peel the oranges and, optionally, get rid of and discard the seeds (if you’re going to strain the juice, then this isn’t required).

Oranges in Blender

Add the orange sectors to a blender. You can add a little water to help them mix if needed (1/4 mug ought to be ample not to water it down too much).

Blend into a juicy, mushy consistency. After that, sieve the resulting pulpy juice via a sieve or nut milk bag or conversely, if you like orange juice with pulp (for even more nutrients), leave it as is.

With a Handheld Juicer

This possibly does not require much of an explanation. If you have a citrus juicer in your home, just slice the fruit in half, area it over it, push down, and squeeze while turning back and forth to get as much juice out as feasible.
For orange juice with pulp, simply spoon some straight off the staying orange (after pressing the juice out) and also include it in your glass.

Advertisement
Handheld Juicer

How to Store Orange Juice

Fresh pressed orange juice is best taken in quickly for the optimum quantity of nutrients. Nevertheless, any leftovers can be stored in a closed glass container in the refrigerator for approximately 3 days.

What to Perform with Any Extra Pulp

Orange pulp can be iced up right into an ice-cube tray for later usage– within smoothie mixes, broths, or baked items. Conversely, the pulp can be composted, which I do a lot in my yard.

What to Do with The Remaining Peel

You can zest some of the skin to include in meals or to flavor teas, lemonades, and even sugar. Alternatively, make some candied orange peel or, if the halves remain in good condition, use them to make orange candle lights.

Continue Reading

Juice

How To Make Low Lying Fog Juice

Published

on

By

I’ve always been captivated by the impact that ground-level mist has at concerts, gatherings, and haunted attractions. Being a person who enjoys diving into DIY activities, I set out to learn how to produce low lying fog juice myself. Following numerous experiments and a bit of trial and error, I’ve now honed the perfect formula, and I’m thrilled to share it with you.

Before we dive into the steps of making low lying fog juice, it is important to understand the chemistry behind fog. Fog is formed when water vapor in the air condenses into tiny droplets that float close to the ground.

To create low lying fog, we need to cool the water vapor and turn it into fog that stays close to the ground. This is where the ingredients and equipment come into play.

Let’s get started!

Key Takeaways

  • Glycerin is the main ingredient in low lying fog juice, with an optimal ratio of 20-30%.
  • Dry ice can be added for a thick, white fog effect.
  • Proper preparation and storage techniques, including the use of pure glycerin and straining the mixture, are crucial for maximizing shelf life.
  • When using a fog machine, follow safety precautions and adjust temperature and fan speed for optimal fog dispersion.

Understanding the Chemistry of Fog

If you want to make low-lying fog juice, you need to understand the chemistry behind how fog is created in the first place.

Fog formation occurs when warm, moist air comes into contact with cooler surfaces, causing the water vapor in the air to condense into tiny droplets.

Advertisement

Atmospheric conditions such as humidity, temperature, and wind speed all play a role in the formation of fog.

Chemical reactions and heat transfer are also involved in the creation of fog. When water vapor in the air condenses into droplets, it releases heat.

This heat is then absorbed by the surrounding air, causing it to rise and mix with cooler air above.

This creates a layer of fog that hovers close to the ground, hence the term ‘low-lying fog’.

Understanding these chemical processes is crucial to creating your own low-lying fog juice.

Advertisement

Now that we have a basic understanding of the science behind fog formation, let’s move on to gathering the necessary equipment and ingredients.

Gathering Equipment and Ingredients

First, you’ll need to round up all the necessary gear and components to whip up this chilling mixture. Choosing the right containers is crucial to ensure that the mixture is safe to handle and won’t react with any other chemicals. I recommend using glass or plastic containers with secure lids to prevent any spills or leaks.

It’s also important to source glycerin that’s at least 99% pure, as impurities can affect the quality of the fog. You can find glycerin at most chemical supply stores or online retailers.

Once you have your containers and glycerin, it’s time to measure out the rest of the ingredients. You’ll need distilled water, propylene glycol, and dry ice. It’s important to measure the ingredients precisely to ensure that the fog juice is safe to use.

Safety precautions are also necessary when handling dry ice, as it can cause burns if it comes into direct contact with skin. With all the necessary ingredients in hand, you’re ready to move on to preparing the glycerin mixture that’ll create the low lying fog effect.

Advertisement

Preparing the Glycerin Mixture

Now that I’ve got my equipment and ingredients, it’s time to mix the glycerin with distilled water and propylene glycol to create the base of my fog solution.

Glycerin is the main ingredient in low lying fog juice because it’s non-toxic and produces a thick and dense fog. However, there are glycerin alternatives, such as triethylene glycol and dipropylene glycol, that can be used instead. These alternatives may adjust the viscosity and density of the fog solution, so it’s important to experiment and find the best mixture that works for your specific needs.

To prepare the glycerin mixture, I’ll need to measure out the correct ratios of glycerin, distilled water, and propylene glycol. Typically, a mixture of 1 part glycerin to 3 parts distilled water and 1 part propylene glycol is a good starting point.

I’ll mix these ingredients together thoroughly until they’re fully combined. Once the mixture is complete, I can move on to the next step of adding the optional additives to enhance the fog solution.

Adding the Optional Additives

Now that I’ve got my glycerin mixture ready, I can move on to adding optional additives to enhance the fog effect.

Advertisement

Choosing the right additives is crucial, as they can affect the thickness, color, and durability of the fog.

I’ll carefully measure and mix the chosen additives into the glycerin mixture, making sure they’re well blended before use.

Choosing Additives

To create a low-lying fog, it’s essential to choose the right additives to mix with your fog juice. One popular additive is glycerin. This viscous liquid helps to create a denser fog that hangs low to the ground, giving off a haunting effect. It also helps to extend the life of the fog by slowing down the evaporation process.

The optimal ratio for glycerin in your fog juice is around 20-30%, but this can vary depending on the desired effect and the type of fog machine you’re using. Another popular additive is dry ice. This creates a thick, white fog that hugs the ground and has a spooky, eerie effect.

The key to using dry ice is to ensure that it’s handled safely, as it can cause burns if it comes into direct contact with the skin. You’ll need to place the dry ice in a container with warm water, and then place the container in the fog machine. The mixing ratio for dry ice is generally 1-2 pounds per gallon of fog juice.

Advertisement

With the right additives, you can create a low-lying fog that will add a spooky, eerie effect to your next event. In the next section, I’ll discuss how to mix these additives for the optimal effect.

Mixing the Additives

Get ready to enhance the haunting effect of your fog machine by mixing the right amount of glycerin and dry ice additives for a thick, white fog that hugs the ground.

To mix the additives, first make sure you have the correct ratio of glycerin to water. Mix one part glycerin to three parts water in a large container.

Next, slowly add small pieces of dry ice to the mixture. Be cautious when handling dry ice, as it can cause frostbite on contact with skin. As you add the dry ice, the mixture will begin to bubble and release carbon dioxide gas.

The glycerin will create a thick and dense fog when it reacts with the carbon dioxide gas. It’s essential to stir the mixture continuously to ensure that the dry ice is evenly distributed and to prevent the mixture from getting too hot.

Advertisement

Once the dry ice has completely dissolved, the fog juice is ready to use. With the right mixing techniques and understanding of chemical reactions, you can create a low lying fog that will add an eerie atmosphere to any event.

Now that the additives are mixed, the next step is to filter the mixture to remove any impurities before using it in your fog machine.

Filtering the Mixture

First, you’ll need to strain the mixture to ensure that no impurities clog up your fog machine. Filtering techniques are crucial to making the perfect low lying fog juice, as any impurities can result in a malfunctioning machine or poor fog output. To do this, you can use a cheesecloth or coffee filter to strain the mixture into a separate container.

This will remove any remaining chunks or particles that may have been missed during the mixing process. After straining, check the mixture’s consistency to ensure that it has an optimal viscosity. The fog juice should be thick enough to create a low-lying fog, but not too thick that it clogs up the machine.

If the mixture is too thick, you can add distilled water in small increments until it reaches the desired consistency. Once you’ve achieved the optimal viscosity, you’re now ready to fill your fog machine with the low lying fog juice.

Advertisement

Filling the Fog Machine

Before using my fog machine, I always make sure to prepare it properly. This involves checking for any damage or leaks and ensuring that the heating element is clean and functioning correctly. Once the machine is ready, I fill the tank with the appropriate amount of fog juice, making sure not to overfill it.

Proper preparation and filling of the fog machine is essential to ensure a consistent and reliable output of fog.

Preparing the Fog Machine

Now, you’ll need to make sure your fog machine is clean and ready to use. Before you begin, it’s important to follow the cleaning instructions and maintenance tips provided by the manufacturer. The last thing you want is for leftover residue or debris to affect the quality of your low lying fog.

Start by unplugging the machine and removing the fill cap. Use a soft cloth and mild soap to clean the exterior of the machine, being careful not to get any liquid inside.

Next, remove the heating element and clean it thoroughly with a cloth dampened with rubbing alcohol. Once everything is clean and dry, reassemble the machine and plug it back in.

Advertisement

With your fog machine now prepped and ready to go, you can move on to filling the tank with your homemade low lying fog juice.

Filling the Tank

Now that the fog machine is prepared, it’s time to fill the tank with the low lying fog juice. Before doing so, make sure that the tank capacity is appropriate for the amount of fog juice needed. This information can be found in the fog machine’s manual or by consulting with a professional.

To properly fill the tank, first make sure the machine is turned off and unplugged. Then, open the tank lid and carefully pour the low lying fog juice into the tank, using a funnel if necessary to avoid spillage. It’s important to take note of the proper filling technique to prevent any leaks or damage to the machine.

Once the tank is filled, securely close the lid and plug the machine back in.

Transitioning into the next section about testing the fog juice, it’s important to note that before using the fog machine, it’s necessary to check if the fog juice is working properly.

Advertisement

Testing the Fog Juice

Before using the fog juice, it’s important to conduct a test run to ensure that it produces the desired effect and doesn’t harm any equipment or surfaces.

I typically pour a small amount of the fog juice into the fog machine and run it for a few minutes to observe the results. If adjustments need to be made, I’ll refer back to the recipe and make changes accordingly.

It’s crucial to test and adjust the fog juice before using it in a performance or event to avoid any potential issues.

Conducting a Test Run

Let’s jump right into it and see the fog machine in action with a test run! Before conducting the test run, I made sure to set the fog machine to its optimal settings.

I adjusted the temperature knob and the fan speed to ensure that the fog was not too thick or too thin, and that it would disperse evenly. Additionally, I took all necessary safety precautions, such as making sure the machine was properly grounded and not placed near any flammable objects.

Advertisement

Once I felt confident that the machine was set up correctly, I poured the low lying fog juice into the reservoir and turned on the machine. I waited a few minutes for the fog to start flowing and then observed how it interacted with the room.

I noticed that the fog was too thick and not spreading evenly, so I decided to adjust the recipe by adding more distilled water to dilute the juice. With this simple adjustment, the fog began to disperse more evenly, creating a stunning low lying effect.

Adjusting the Recipe

You’re probably thinking that adjusting the recipe for your fog machine is as easy as adding more of the fog juice, but let me tell you, it’s not that simple. Adjusting the concentration of the fog juice can be a delicate process that requires careful experimentation and attention to detail. It’s important to keep in mind that adding too much fog juice can cause the fog to be too thick and heavy, while adding too little can result in a lackluster effect.

One way to adjust the concentration of your fog juice is to experiment with additives. For example, adding a small amount of glycerin or distilled water can help to thin out the fog and create a more subtle effect. On the other hand, adding a small amount of dry ice can create a thicker, more intense fog. By carefully adjusting the concentration of your fog juice and experimenting with different additives, you can create a customized effect that is perfect for your event or production. Once you’ve perfected your recipe, it’s time to move on to using the low lying fog juice to create a stunning and memorable visual display.

Using the Low Lying Fog Juice

To create an eerie atmosphere, simply pour the low lying fog juice into your fog machine and watch as the mist hovers just above the ground, sending shivers down your spine.

Advertisement

But before using the fog juice, it’s important to follow some best practices and safety precautions. First, make sure to read the instructions on your fog machine and use only the recommended amount of fog juice. Using too much can cause the fog to linger in the air longer than intended, potentially causing breathing difficulties for you and your guests.

Second, always use the fog machine in a well-ventilated area to avoid inhaling too much of the fog and to prevent any potential fire hazards. With these precautions in mind, you can safely use the low lying fog juice to create a spooky and memorable atmosphere for your next party or event.

When it comes to storing the fog juice, it’s important to keep it in a cool and dry place, away from any heat sources or direct sunlight. This will help to prevent the fog juice from degrading or evaporating before you have a chance to use it.

Storing the Fog Juice

Ensure your fog machine fluid remains in optimal condition by storing it in a cool, dry place away from heat and direct sunlight. Extreme temperatures can affect the shelf life and the quality of the low lying fog juice. Exposure to direct sunlight can also cause the liquid to break down and lose its effectiveness.

Therefore, it’s essential to store the fog juice in a well-ventilated area with a consistent temperature range of 40-100°F. Storing techniques can affect the longevity of the fog juice. For instance, it’s crucial to keep the container sealed tightly to prevent air and moisture from entering. Additionally, it’s advisable to store the fog juice away from any chemicals, cleaning agents, or pesticides.

Advertisement

Proper storage techniques can maximize the shelf life of the low lying fog juice, ensuring optimal performance every time it’s used. Now, let’s move on to troubleshooting common issues that may arise from using the low lying fog juice.

Troubleshooting Common Issues

Encountering complications with creating low lying fog can be challenging, but there are several common issues that can be resolved with a few simple fixes. Here are some common solutions and troubleshooting techniques:

  • Check the temperature: The fog machine and the fog juice work best in cooler temperatures, so make sure you’re not using them in hot or humid environments. If the temperature’s too warm, you may need to cool down the room or switch to a different type of fog juice that’s designed for warmer temperatures.

  • Check the machine: Make sure the fog machine’s clean and free of clogs. If the machine’s not producing enough fog, it may be because the nozzle’s clogged or the heating element’s not working properly. You may need to clean the nozzle or replace the heating element.

  • Check the fog juice: Make sure the fog juice’s the right type for your machine and that it’s not expired. If the juice is too old, it may not produce as much fog or may produce a strange smell. You may need to replace the juice or switch to a different brand.

  • Adjust the settings: If the fog machine’s producing too much or too little fog, you may need to adjust the settings. Most machines have a control knob that allows you to adjust the output of the fog. Try turning it up or down to see if that helps.

  • Experiment with different techniques: If none of the above solutions work, try experimenting with different techniques. For example, you may need to use a different type of fog juice or a different type of machine. You may also need to try different techniques for creating the fog, such as using dry ice or a fog chiller.

By following these common solutions and troubleshooting techniques, you should be able to create chilling clouds without any complications. Remember to always read the instructions carefully and follow all safety precautions when working with fog machines and fog juice.

Frequently Asked Questions

Can I use any type of glycerin for making low lying fog juice?

Yes, not all glycerin types are equally effective for making low lying fog juice. Some may produce less fog and pose safety concerns for respiratory health. It’s important to choose a high-quality, food-grade glycerin.

How long does the fog juice last in the fog machine before it needs to be refilled?

The frequency of fog juice refills depends on the size of the fog machine and the duration of use. Regular maintenance, such as cleaning the machine and using the appropriate glycerin types for low lying fog juice, can prolong the life of the juice.

Advertisement

Is it safe to breathe in the low lying fog produced by the juice?

While low lying fog is visually stunning, health concerns and environmental impact must be considered. Inhalation of fog juice should be avoided, as it contains glycols and other chemicals. Proper ventilation is necessary to ensure safety.

Can I use the fog juice outdoors or only indoors?

I can use the fog juice both indoors and outdoors, but the weather conditions may affect the quality of the fog. Humidity and wind can disperse the fog, while colder temperatures can make it linger. It’s important to test the juice in different conditions before use.

Can I use food coloring to tint the low lying fog produced by the juice?

I experimented with food coloring to enhance the visibility of low lying fog produced by fog juice. Results were mixed, as the coloring diluted the juice and affected its composition. Further testing is required before a conclusive answer can be given.

Conclusion

In conclusion, making low lying fog juice is a complex process that requires careful attention to detail. However, the end result is a mesmerizing display of mist that can add a touch of mystery and magic to any event or performance.

As with any chemical mixture, it’s crucial to understand the science behind it, gather the necessary equipment and ingredients, and follow the steps precisely. So, practice makes perfect, and this holds true for making low lying fog juice.

Advertisement

It may take a few tries to get the formula just right, but once you do, the results are well worth the effort. And with a little troubleshooting, any issues that may arise can be easily resolved.

So, go ahead, gather your materials, and let the fog roll in for a captivating and unforgettable experience.

Continue Reading

Juice

How To Make Lychee Juice

Published

on

By

I’m totally obsessed with lychees, and I never miss a chance to pick up a bag when I visit an Asian supermarket. However, there are times when I fancy a change and prefer to savor my lychees in an alternative form rather than just consuming them raw. This is when I turn to lychee juice!

It’s a refreshing, fruity drink that’s perfect for summertime sipping. In this article, I’ll be sharing my favorite recipe for making lychee juice at home, step by step.

To make lychee juice, you’ll need just a few simple ingredients and some basic kitchen equipment. Don’t worry if you’ve never made juice before – it’s really easy, and I’ll walk you through each step.

Whether you’re craving a sweet and tangy drink to cool off on a hot day or just want to try something new with your favorite fruit, my lychee juice recipe is sure to hit the spot. So let’s get started!

Key Takeaways

  • Precision in measuring is crucial for a well-balanced lychee juice.
  • Strain the blended mixture with a fine mesh sieve for a smoother texture.
  • Pair lychee juice with complementary foods to enhance its taste.
  • Refrigeration is the best way to store and preserve lychee juice, while freezing is a simple method for most home cooks.

Gather Your Ingredients

Gather all the ingredients you’ll need for making lychee juice, including fresh lychee fruit, water, sugar, and ice. Make sure to choose fresh lychees that are plump, firm, and have a bright color. You can find them at your local grocery store or Asian market.

Lychee is a tropical fruit that is sweet and juicy, and it’s packed with health benefits that make it a great choice for juicing. When it comes to juicing techniques, you can either use a juicer or a blender. Using a juicer will result in a smoother juice, while using a blender will create a more pulpy texture.

Advertisement

Regardless of the method you choose, make sure to remove the seeds and peel from the lychees before juicing them. Now that you have all the ingredients ready, it’s time to prepare your lychees for juicing.

Prepare Your Lychees

First, peel the rough, pinkish-red skin off of each lychee using your fingernails or a small knife, being careful not to damage the fruit. A helpful tip is to crack the skin open with your fingernail and then gently peel it away from the fruit. If you’re having trouble peeling the lychees, try soaking them in warm water for a few minutes to soften the skin.

It’s important to select the perfect lychee for your juice by choosing ones that are ripe and have a vibrant red color with no blemishes or bruises. After peeling the lychees, discard the skin and remove the seed from each fruit. You can do this by gently squeezing the fruit with your fingers until the seed pops out, or you can use a small knife to cut around the seed and remove it.

Once all of the lychees are peeled and seeded, you can move on to the next step of measuring your ingredients for the perfect lychee juice.

Measure Your Ingredients

Once you’ve peeled and seeded your lychees, it’s time to measure out your ingredients. Measuring techniques play a crucial role in the success of your lychee juice. Precision in measuring ensures that you get the right balance of flavors and sweetness in your juice. Here are some tips to help you measure your ingredients accurately and adjust the sweetness of your juice to your liking:

Advertisement

  • Use measuring cups and spoons instead of eyeballing the ingredients. This will help you get consistent results every time you make lychee juice.

  • Start by measuring out the lychee flesh. You’ll need about 2 cups of lychee flesh for 4 servings of juice.

  • Next, measure out the water. You’ll need 2 cups of water for every 2 cups of lychee flesh.

  • Add sugar to taste. Start with 1/4 cup of sugar and adjust to your liking. You can also use honey or agave syrup as a healthier alternative.

  • Finally, add a squeeze of lime juice to brighten up the flavors.

Now that you’ve measured out your ingredients and adjusted the sweetness to your liking, it’s time to blend your ingredients and turn them into a refreshing lychee juice.

Blend Your Ingredients

Now it’s time to toss all your measured ingredients into the blender and watch the magic happen! But before you do, let’s talk about blending techniques and flavor combinations.

To start, make sure to add the ice and lychee fruit to the blender first. This will help break down the fruit and create a smoother consistency. Then, pour in the coconut water and honey and blend on high for about 2-3 minutes. If you want a thicker consistency, add more ice. If you prefer a sweeter taste, add more honey.

Ingredients Measurements
Lychee fruit 1 cup
Coconut water 1/2 cup
Honey 2 tbsp
Ice 1 cup

Blending techniques can differ depending on the blender you use. Some blenders may not be as powerful and require you to blend for a longer period of time. Experiment with different blending techniques to find the consistency you prefer. As for flavor combinations, you can add other fruits such as pineapple or mango to enhance the tropical taste of the lychee juice.

Now that you have blended all your ingredients, the next step is to strain your juice.

Advertisement

Strain Your Juice

After blending all the ingredients, it’s important to strain the mixture to achieve a smoother texture and remove any unwanted bits. Straining techniques can vary depending on personal preference, but I find that using a fine mesh sieve works best.

Simply pour the blended mixture through the sieve and use a spatula to press down on the solids to extract as much juice as possible. Repeat this process until all the solids have been strained out.

If you want to add some extra flavor to your lychee juice, this is the perfect time to do so. You can mix in a small amount of sugar or honey to sweeten it up, or even add a splash of lime juice for a tangy kick.

Once you’re happy with the flavor, transfer the juice to a pitcher and chill it in the refrigerator for at least an hour before serving.

Next, we’ll move on to the final step of making delicious lychee juice – chilling it to perfection.

Advertisement

Chill Your Juice

Now that I’ve strained my lychee juice, it’s time to chill it.

I usually like to refrigerate my juice for a couple of hours before drinking it to enhance its flavor and make it more refreshing.

If you want to enjoy your juice immediately, you can add some ice to cool it down quickly.

Either way, chilling your juice is a crucial step to make it more enjoyable.

Refrigerating Your Juice

To keep your lychee juice fresh and tasty, you’ll want to pop it in the fridge as soon as possible after making it. Refrigeration is the best way to slow down the natural process of spoilage and prevent the growth of harmful bacteria. The benefits of refrigeration are numerous, including longer shelf life, preservation of nutrients and flavors, and reduction of waste. Plus, a cold and refreshing glass of lychee juice is the perfect way to beat the heat on a hot summer day.

Advertisement

Alternative cooling methods may include adding ice cubes or placing the juice in the freezer for a short period of time. However, these methods may dilute the flavor of the juice or alter its texture. That’s why refrigeration is the preferred method for keeping your lychee juice fresh and delicious. In the next section, we’ll explore the best ways to add ice to your drink without compromising its taste.

Adding Ice to Cool Your Drink

If you want to enjoy a refreshing summer drink, nothing beats the feeling of adding ice cubes to your glass. Here are some tips to make sure you get the most out of this classic drink addition:

  1. Use filtered water: The quality of your ice cubes will affect the taste of your drink, so make sure to use filtered water when making them.

  2. Freeze fruits: For an extra burst of flavor, try freezing fruits like strawberries or blueberries to use as ice cubes.

  3. Use ice alternatives: If you don’t want to dilute your drink with water, try using alternatives like frozen coconut water or coffee ice cubes.

  4. Serve in a chilled glass: To keep your drink cool for longer, serve it in a chilled glass or mason jar.

When it comes to serving suggestions, consider adding a sprig of mint or a slice of lime to your glass. These simple additions can elevate the flavor of your drink and make it feel even more refreshing.

Now that your juice is chilled and ready to go, it’s time to move on to the next step: serving.

Serve Your Juice

Ready to indulge? Nothing beats sipping on a refreshing glass of lychee juice, especially when it’s served over ice on a hot summer day. Once you’ve poured your juice into a glass, it’s time to think about how you want to serve it.

Advertisement

One way to make your lychee juice stand out is by adding creative garnishes. You can add a slice of fresh lime or mint leaves to enhance its flavor and aroma. Additionally, consider pairing your lychee juice with foods that complement its taste, such as spicy dishes or light salads.

By pairing your juice with the right food and adding a touch of creativity, you can elevate your drink to the next level. And with that, it’s time to store your juice for later.

Store Your Juice

Now that I’ve made my delicious lychee juice, I need to properly store it. The best way to do this is by refrigerating it in an airtight container.

This will ensure that the juice stays fresh and tasty for up to 3-4 days. If I want to keep the juice for longer, I can freeze it in ice cube trays and then transfer the cubes to a freezer-safe bag.

This way, I can enjoy my homemade lychee juice anytime I want, even if I don’t have fresh lychees on hand.

Advertisement

Refrigerating Your Juice

Once you’ve bottled your delicious lychee juice, don’t forget to pop it in the fridge to keep it fresh and cool for later.

There are a few storing options for your lychee juice, but refrigerating it is the most common.

When you’re storing your juice, make sure to keep it in an airtight container to prevent any air from getting in and spoiling the juice. You can also add a squeeze of lemon to your juice before bottling it to help preserve it for a few extra days.

The shelf life of your lychee juice will depend on a few factors, such as the freshness of the fruit, the temperature of your fridge, and how well you’ve stored it. Generally, fresh lychee juice can last up to 4-5 days in the fridge. However, it’s always best to check for any signs of spoilage, such as a sour smell or a change in color, before consuming.

Now that your lychee juice is safely stored in the fridge, let’s talk about how you can freeze it for later use.

Advertisement

Freezing Your Juice for Later

To preserve your delicious lychee juice for future use, you’ll want to freeze it in an appropriate container. Freezing is an excellent way to keep your beverage fresh for up to six months.

Start by pouring your lychee juice into a freezer-safe container, leaving about an inch of space at the top to allow for expansion. You can use a plastic container, glass jar, or even an ice cube tray, depending on how you plan to use the juice later. If you’re using an ice cube tray, freeze the juice until solid, then transfer the cubes to a larger container or freezer bag.

Another way to preserve your lychee juice is by canning it. Follow a canning recipe and process to ensure that your juice is safe to store at room temperature. However, keep in mind that canning requires specific equipment, and there is a risk of spoilage if not done correctly. Freezing is a simpler and more accessible method for most home cooks.

In the next section, I’ll discuss how to experiment with variations to add even more flavor to your lychee juice.

Experiment with Variations

Try mixing in some fresh mint leaves for a refreshing twist that’ll make your taste buds sing with delight. Variations experimentation is key to finding the perfect recipe that suits your taste. Flavor customization is easy with lychee juice, as it pairs well with a variety of fruits and herbs.

Advertisement

Here are three variations to try with your lychee juice:

  1. Lychee and Strawberry: Add a handful of fresh strawberries to the blender with your lychee juice for a sweet and tangy flavor combination.

  2. Lychee and Basil: Add a few fresh basil leaves to your lychee juice for a subtle, herbaceous flavor that pairs well with savory dishes.

  3. Lychee and Lime: Squeeze in some fresh lime juice to your lychee juice for a zesty twist that adds a burst of citrus flavor.

With these variations, you can create a unique blend that suits your taste buds perfectly.

Now that you’ve experimented with different flavors, it’s time to enjoy your lychee juice!

Enjoy Your Lychee Juice!

Now it’s time to savor your delicious lychee concoction and bask in the refreshing flavors. But before you take a sip, let’s talk about some ways you can enjoy your lychee juice. Of course, you can always drink it straight up, but why not get a little creative with it?

One idea is to mix it with some sparkling water and a splash of lime juice for a refreshing and bubbly lychee spritzer. Another option is to add a shot of vodka for a lychee martini. And if you’re feeling really adventurous, try blending the juice with some coconut milk and ice for a tropical lychee smoothie. The possibilities are endless, so experiment and find your favorite way to enjoy this delicious fruit juice.

Advertisement

Creative Cocktail Ideas for Lychee Juice Ingredients Instructions
Lychee Martini 2 oz lychee juice, 1.5 oz vodka, 1 oz triple sec, 1/2 oz lime juice Shake all ingredients with ice and strain into a martini glass. Garnish with a lychee fruit on a skewer.
Lychee Spritzer 1/2 cup lychee juice, 1/2 cup sparkling water, 1/4 lime juice Combine all ingredients in a glass filled with ice. Stir gently and garnish with a lime wedge.
Lychee Smoothie 1 cup lychee juice, 1 banana, 1/2 cup coconut milk, 1 cup ice Combine all ingredients in a blender and blend until smooth. Pour into a glass and enjoy.

So go ahead and try these creative cocktail ideas for lychee juice or come up with your own. With its sweet and delicate flavor, lychee juice is a great addition to any beverage. Enjoy!

Frequently Asked Questions

What are the health benefits of drinking lychee juice?

Sipping on lychee juice is like a burst of energy for my body. The nutritional value is impressive, containing high levels of vitamin C, potassium, and antioxidants. Some benefits include improved digestion, skin health, and immunity.

Can I use canned lychees instead of fresh ones?

Yes, canned lychees can be used instead of fresh ones in juice recipe variations. However, it’s important to check for added sugars or preservatives. Fresh lychees may provide a better flavor and more nutrients.

How long does lychee juice last in the refrigerator?

Hey there! Wondering how long your lychee juice will last in the fridge? Well, it all depends on how it’s stored. Generally, freshly made juice lasts 3-4 days, while store-bought can last up to a month. Keep it refrigerated and enjoy!

Can I add sugar or other sweeteners to the juice?

Yes, I can add sugar alternatives like honey, agave or Stevia to lychee juice. However, lychee itself has natural sweetness, so it may not require extra sweeteners. Experiment to find the perfect balance of sweetness to suit your taste.

Advertisement

Are there any potential side effects of drinking lychee juice?

Drinking lychee juice may have potential risks, such as allergies. It’s important to be aware of any reactions and consume in moderation. Always consult with a healthcare professional if you have concerns.

Conclusion

Well, folks, there you have it – your very own homemade lychee juice! As I take a sip of this sweet and refreshing concoction, I can’t help but feel a sense of pride and accomplishment.

It’s amazing how just a few simple steps can yield such a delicious result. As the juice slides down my throat, I’m transported to a tropical paradise – the sun beating down on my face, the sound of crashing waves in the distance, and the sweet aroma of lychees filling my nostrils.

It’s a sensory experience that I look forward to every time I make this juice. So go ahead and give it a try – experiment with different variations, adjust the sweetness to your liking, and enjoy the fruits of your labor.

Trust me, there’s nothing quite like a glass of homemade lychee juice to brighten up your day.

Advertisement

Continue Reading

Trending