Connect with us

Juice

How To Make Dmt Vape Juice

Published

on

I’ve always had a keen interest in the psychedelic effects of DMT and have tried numerous ways of consuming it throughout the years. Recently, my exploration has led me to the realm of DMT vape juice, providing a practical and effective method for ingesting this potent substance.

In this article, I’ll share my step-by-step process for making DMT vape juice, so you can experience the mind-expanding effects of this substance for yourself.

Before we dive into the details, let’s take a moment to understand what DMT is and how it works. DMT, or dimethyltryptamine, is a naturally occurring psychedelic substance that is found in certain plants and animals.

When ingested, DMT produces intense visual and auditory hallucinations, as well as a profound sense of connectivity with the universe. While the effects of DMT are relatively short-lived (typically lasting around 15-30 minutes), many users report profound life-changing experiences that can have lasting effects on their outlook and perspective.

With that in mind, let’s get started on making our own DMT vape juice.

Advertisement

Key Takeaways

  • Making DMT vape juice requires specific materials, equipment, and safety precautions
  • Vape juice choice is crucial for a pleasant experience, with low nicotine content or no nicotine recommended
  • Loading DMT vape juice into a vape pen involves careful technique for even distribution
  • Trip preparation involves creating a comfortable and safe environment, setting intentions, and having a trusted friend or sitter present.

Understanding DMT and Its Effects

So, you’re probably wondering what exactly DMT is and how it affects you. DMT, or dimethyltryptamine, is a powerful psychedelic substance that is found in various plants, animals, and even in humans.

It is a naturally occurring compound that produces intense and immersive hallucinations, often described as a ‘breakthrough experience’ where one feels like they have transcended reality and entered into a mystical realm.

DMT is known for its spiritual uses and has been used by indigenous people in South America for centuries in shamanic rituals. The substance is believed to allow the user to connect with a higher consciousness and receive messages from the spirit world.

While the effects of DMT can be intense and overwhelming, many users report feeling a sense of profound peace, love, and unity with the universe.

With this understanding of DMT and its effects, let’s move on to gathering the necessary materials for making DMT vape juice.

Gathering the Necessary Materials

To get started, I sourced all the necessary materials and equipment for making DMT vape juice. Here’s what you’ll need:

Advertisement
  • DMT powder
  • Propylene glycol (PG)
  • Vegetable glycerin (VG)
  • Glass dropper bottles
  • Glass mixing beaker
  • Glass stirring rod
  • Measuring cups and spoons
  • Funnel
  • Scale

It’s important to get high-quality ingredients to ensure the purity and potency of the final product.

Once you have all the materials, the next step is to set up the equipment for the extraction process.

In order to extract the DMT from the plant material, you’ll need to follow a specific set of steps. It’s important to have a clean and organized workspace, as well as a good understanding of the extraction process.

With the right materials and equipment, you can create a potent and high-quality DMT vape juice that’ll deliver a powerful and transformative experience.

Extracting DMT

First, you’ll need to carefully grind your chosen plant material into a fine powder before beginning the DMT extraction process. There are several DMT extraction methods to choose from, such as the acid-base extraction, the straight-to-base extraction, or the A/B extraction. Each method has its own set of advantages and disadvantages, so it’s important to do your research and choose the one that suits your needs. Once you have chosen your preferred method, it’s crucial to follow all safety precautions to avoid any potential harm. This includes wearing gloves and a mask, working in a well-ventilated area, and using eye protection.

To make the extraction process easier, it’s helpful to create a table outlining the required materials, their quantities, and their purpose. Here’s an example:

Advertisement
Material Quantity Purpose
Plant material 50g Source of DMT
NaOH (lye) 50g Base reagent
Naphtha 500ml Solvent
Distilled water 500ml Neutralizing agent

By following the DMT extraction method and safety precautions, you can extract the desired amount of DMT from your chosen plant material. Once you have successfully extracted the DMT, the next step is to mix it with vape juice to create DMT vape juice.

Mixing DMT with Vape Juice

When it comes to mixing DMT with vape juice, there are a few key points to keep in mind. First, it’s important to calculate the right dosage based on your individual needs and tolerance level.

Secondly, choosing the right vape juice is crucial to ensure the best possible experience.

Lastly, mixing the ingredients together requires precision and careful attention to detail to ensure a smooth and effective blend.

Calculating the Right Dosage

Before you start vaping your DMT juice, you’ll want to make sure you’ve calculated the right dosage to ensure a safe and enjoyable experience. Calculating dosage is crucial because DMT is a powerful psychedelic substance that can have intense effects on the mind and body.

Advertisement

The recommended dose for vaporizing DMT is between 20-50 mg, but the exact amount will depend on factors such as your body weight, tolerance, and experience with psychedelics. To calculate the right dosage, you’ll need an accurate scale that can measure in milligrams.

Start by weighing out a small amount of DMT, and then gradually increase the dose until you find the right amount for your individual needs. It’s important to be precise when measuring the DMT because even a slight miscalculation can result in an unpleasant or overwhelming experience.

Once you’ve determined the right dosage, you can mix the DMT with your chosen vape juice and start enjoying the experience.

Transitioning to the next section, it’s important to choose the right vape juice to mix with your DMT.

Choosing the Right Vape Juice

Now that we’ve calculated the right dosage for our DMT vape juice, it’s time to choose the right vape juice.

Advertisement

There are a few things to consider when selecting the vape juice, such as flavor preferences and nicotine content.

Firstly, the flavor of the vape juice is crucial to a pleasant experience. While some may prefer a fruity flavor, others may opt for a more neutral taste. It’s important to note that the flavor of the vape juice should not be overpowering, as it may detract from the DMT’s effects.

Additionally, some vape juices come with a high nicotine content, which may not be suitable for those who are sensitive to it. Therefore, I recommend selecting a vape juice with a low nicotine content or, ideally, no nicotine at all.

Moving on to the next step, we can now mix the ingredients to create our DMT vape juice.

Mixing the Ingredients

To successfully create the desired blend, it’s necessary to combine the selected vape juice with the calculated amount of DMT powder. Mixing techniques vary depending on the vape juice and DMT powder used.

Advertisement

Generally, it’s recommended to heat the vape juice to make it more viscous. This can be done by placing the vape juice in a microwave-safe container and heating it in the microwave for 10-15 seconds, or by heating it on a stove using a double boiler method, where the container is placed in a pot of boiling water.

Once the vape juice is heated, the DMT powder can be added slowly while continuously stirring the mixture. It’s important to ensure that the powder is completely dissolved in the vape juice to avoid any clumps or uneven distribution. Flavor options can also be added at this point, such as natural extracts or essential oils.

Mixing the ingredients thoroughly will result in a smooth and consistent blend that is ready to be loaded into the vape pen. To prepare your vape pen, make sure it’s fully charged and the tank is empty. Fill the tank with the DMT vape juice blend and allow it to soak into the wick for a few minutes.

Then, turn on the device and set it to the desired temperature. Now, you’re ready to enjoy the effects of DMT in a discreet and convenient way.

Preparing Your Vape Pen

First, I’ll need to charge and assemble my vape pen. This involves attaching the battery to the heating element and making sure it’s fully charged.

Advertisement

Next, I’ll need to load my DMT vape juice into the pen’s tank or cartridge. This requires carefully measuring out the correct dosage of the DMT and combining it with the vape juice before filling the tank.

Charging and Assembling Your Vape Pen

Although some may find it tedious, charging and assembling your vape pen is crucial for a successful and safe DMT vaping experience. Before charging, it’s important to properly clean your vape pen to prevent any residue from affecting the taste of your DMT. Troubleshooting any issues with your vape pen before charging can also save you time and frustration later on.

To charge your vape pen, refer to the manufacturer’s instructions for the specific model you have. Most vape pens come with a USB charging cable that can be plugged into a laptop or wall adapter. Connect the charging cable to the vape pen and the power source and wait for the indicator light to turn green, signaling that the battery is fully charged. Assembling your vape pen typically involves screwing the battery onto the cartridge or tank, attaching the mouthpiece, and turning the device on. Refer to your vape pen’s instructions for the exact steps to follow. With your vape pen charged and assembled, you’re ready to move onto loading your DMT vape juice.

Step Action
1. Clean your vape pen to prevent residue affecting taste
2. Troubleshoot any issues before charging
3. Refer to manufacturer’s instructions for charging
4. Connect charging cable to vape pen and power source
5. Wait for indicator light to turn green, signaling full charge
6. Assemble vape pen according to instructions

With your vape pen charged and properly assembled, you’re one step closer to enjoying your DMT vape juice. But before you load your vape pen with the juice, there are a few more steps to follow.

Loading Your DMT Vape Juice

Once your vape pen is charged and assembled, it’s time to get ready to savor the flavor of your DMT-infused vapor.

Advertisement

Before loading your DMT vape juice, make sure to shake the bottle well to ensure that the DMT is properly mixed with the vape juice.

Then, remove the mouthpiece from the vape pen cartridge and unscrew the cartridge from the battery.

Next, use a dropper or syringe to carefully load the DMT vape juice into the cartridge.

Be sure not to overfill the cartridge, as this can cause leakage or clogging issues.

When loading your DMT vape juice, it’s important to use a technique that ensures an even distribution of the juice throughout the cartridge.

Advertisement

One effective technique is to start at the center of the cartridge and fill in a circular motion.

If you encounter any issues while loading, such as clogging or leakage, try cleaning the cartridge and ensuring that the DMT vape juice is properly mixed before reloading.

With your DMT vape juice loaded and ready to go, it’s time to move on to the next step: vaping DMT.
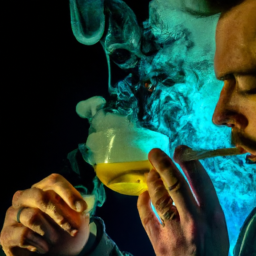
Vaping DMT

To vape DMT, you’ll need a vaporizer and a liquid solution containing at least 1 gram of DMT per 1 milliliter of liquid, which is a concentration of 10%.

Once you have your solution loaded into your vaporizer, it’s time to start vaping. When it comes to vaping techniques, it’s important to take slow, steady draws to ensure that the DMT vapor is fully absorbed into your lungs. This will help you achieve a more intense and longer lasting trip.

Advertisement

While vaping DMT can be an incredible experience, it’s important to take safety precautions to ensure that you have a safe and enjoyable trip. Make sure to have a sitter present, someone who can watch over you and keep you safe in case things get intense.

And always start with a low dose to test your tolerance before diving into a full-blown trip. With these safety measures in place, you can fully immerse yourself in the experience and gain a deeper understanding of the psychedelic world.

Understanding the Trip

You’re about to embark on an incredible journey of self-discovery as you gain a deeper understanding of the psychedelic experience during your DMT trip. Before you begin, it is essential to prepare yourself mentally and physically. DMT trip preparation involves creating a comfortable and safe environment, setting intentions, and having a trusted friend or sitter present. It is crucial to take the necessary precautions to avoid any potential harms or risks during the experience.

During the trip, you may encounter intense and surreal visuals, out-of-body experiences, and encounters with entities. It is essential to manage anxiety and surrender to the experience, allowing yourself to fully immerse in the journey. As you navigate the DMT trip, remember to remain open-minded, stay grounded, and trust the process. The following table provides a breakdown of the typical effects and duration of a DMT trip:

Effect Duration
onset 30-45 seconds
peak 1-5 minutes
plateau 10-20 minutes
after-effects 20-60 minutes

Integrating the experience into your daily life can be a transformative and enlightening process. By reflecting on the insights gained during your DMT trip, you can gain a deeper understanding of yourself and the world around you. Understanding the trip is the first step towards unlocking the potential for personal growth and spiritual development.

Advertisement

Integrating the Experience

When it comes to integrating the experience of using DMT, there are two key practices that I find particularly helpful:

  • Reflection involves taking time to process and make sense of the experience, whether through journaling, meditation, or talking with a trusted friend.
  • Seeking support and guidance can also be crucial, whether from a therapist, spiritual teacher, or community of like-minded individuals.

By engaging in these practices, I’m able to more fully integrate the insights and lessons gained from my DMT experiences into my daily life.

Reflection and Integration Practices

Hey, one way to really deepen your DMT experiences is by taking the time to reflect and integrate afterwards. It’s important to have a clear and focused mind when reflecting on your experience, so I recommend taking some time to meditate before beginning any reflection exercises.

Here are some reflective and integration practices that have helped me:

  • Journaling practice: Writing down your experience in a journal can help you process your thoughts and emotions. Try to be as descriptive as possible and include any insights or revelations you may have had during your trip.

  • Meditation techniques: Practicing meditation can help you stay focused and centered when reflecting on your experience. Try to meditate for at least 10 minutes a day, focusing on your breath and letting any thoughts or emotions pass by without judgment.

  • Integration exercises: After reflecting on your experience, try to integrate any insights or lessons into your daily life. This can be as simple as making a positive change in your behavior or mindset, or seeking out further knowledge and understanding about the experience.

Reflecting and integrating your DMT experiences can be a powerful tool for personal growth and understanding. However, it’s important to remember that these experiences can be intense and overwhelming, and seeking support and guidance from a trusted friend or therapist can also be beneficial in the integration process.

Seeking Support and Guidance

If you’re feeling overwhelmed after a DMT experience, it’s okay to seek support and guidance from a trusted source. It’s common for individuals to feel anxious or confused after a DMT trip, especially if the experience was intense or unexpected. Finding community and talking to others who have also experimented with DMT can also be helpful in processing the experience.

Advertisement

Managing anxiety is important when seeking support and guidance. It’s important to find a safe and comfortable space to share your experience and feelings. It’s also important to remember that seeking support and guidance is a sign of strength, not weakness. As you navigate through the aftermath of a DMT experience, it’s important to keep in mind that everyone’s experience is unique and there’s no right or wrong way to feel.

Moving onto the next section, it’s important to consider the risks and precautions of experimenting with DMT. While the experience can be transformative, it’s important to be aware of potential risks and to approach the substance with caution.

Risks and Precautions

To ensure your safety and minimize potential risks, it’s important to take necessary precautions when making DMT vape juice. DMT is a powerful psychedelic substance that can have serious effects on the body and mind if not handled correctly. Before embarking on the process of making DMT vape juice, it’s important to understand the potential risks involved and take steps to ensure your safety.

One way to minimize risks is to wear protective gear such as gloves, goggles, and a face mask. DMT can be toxic if it comes into contact with skin or eyes, so it’s important to protect yourself from exposure. Additionally, be sure to work in a well-ventilated area to avoid inhaling fumes. It’s also important to use high-quality materials and equipment, as subpar products can increase the risk of accidents or mishaps. The table below outlines some additional precautions that can be taken to ensure safe production of DMT vape juice.

Precaution Description Reason
Wear protective gear Gloves, goggles, face mask Protects from exposure
Work in well-ventilated area Avoid inhaling fumes Protects respiratory system
Use quality materials and equipment Avoid mishaps and accidents Ensures proper production
Have a safety plan Know what to do in case of emergency Minimizes harm … and promotes a safe working environment for all individuals involved in the production process.

Frequently Asked Questions

What is the legal status of DMT and DMT vape juice?

I’m not sure about the legal implications of DMT vape juice, but DMT itself is a Schedule I controlled substance in the United States. However, there is growing interest in its therapeutic potential and research is ongoing.

Advertisement

Can DMT be safely mixed with other substances in the vape juice?

Mixing concerns should be taken seriously when using DMT in vape juice. It’s important to research the effects of potential substances. Dosage recommendations should be followed closely to ensure a safe experience.

How long does the DMT trip typically last?

The DMT trip usually lasts 15-45 minutes, depending on the dosage and individual sensitivity. The effects include intense visuals, altered perception of time and space, and profound mystical experiences. My DMT trip report was transformative and awe-inspiring.

Can DMT be detected in drug tests?

From my experience, drug tests for DMT are not common. However, they can be accurate if specifically testing for DMT. False positives are possible due to similarities with other substances.

Are there any long-term effects of using DMT vape juice?

As the saying goes, "there’s no such thing as a free lunch."Long term health effects of using DMT vape juice are not yet fully understood, but some users report psychological effects such as anxiety and flashbacks. It’s important to proceed with caution and consider the potential risks.

Conclusion

Well, that was quite a journey. Making DMT vape juice requires a lot of patience and attention to detail, but the end result is well worth it.

Advertisement

As I sit here reflecting on my experience, I can feel the warmth of the memories washing over me like a gentle wave. The trip itself is indescribable – a kaleidoscope of colors and shapes that dance across the mind’s eye. It’s like being transported to another dimension, where time and space are fluid and anything is possible.

But it’s not just about the visuals – there’s a deep sense of introspection and connection that comes with the DMT experience. It’s a reminder that we’re all interconnected, and that there’s more to this world than meets the eye.

So if you’re ready to take the plunge, I highly recommend giving DMT vape juice a try – just make sure you do your research and take all the necessary precautions. Happy vaping!

Continue Reading
Advertisement

Vegan

How to Make Orange Juice

Published

on

By

Explore three techniques to make your own fresh-squeezed orange juice at home. This single-ingredient, sugar-free option for orange juice can be made either with or without pulp. Rich in vital nutrients, it’s delicious on its own or as part of a mixed juice blend!

How to Make Orange Juice

Making newly squeezed orange juice may take more effort than grabbing a juice box from a shop. However, the difference in the top quality of flavor, as well as freshness, is matchless. Fresh orange juice is fruity and excellent– so much sweeter than any kind of ‘from concentrate’ Orange Juice in stores and with no sugarcoated or anything ‘awful.’.

More than that, when making orange juice in your home, you can pick if you desire orange juice with pulp or without. In addition, it is full of vitamins and health and wellness advantages. Sugar-free orange juice has never tasted so great as when it’s straight from the fruit!

Is Orange Juice Helpful for You?

There are several primary health advantages of oranges. Most people know that this spicy fruit supplies tons of Vitamin C. One tool cup of orange juice provides nearly 100% of your daily recommended Vit C. However, it additionally consists of various other nutrients, including Vitamin A, calcium, folate, and iron.

Is Orange Juice Helpful for You?

Vitamin C helps to support our immune systems and aid with gum health, wound recovery, and bone development. At the same time, Potassium aids in decreasing the threat of cardiovascular disease, strokes, and bone loss. It additionally assists manage blood pressure and also decreases the risk of kidney rocks.

Folate is crucial for pregnant women and decreases the risk of abnormality, and OJ is just one of the most effective all-natural resources. Even much better, orange juice is high in antioxidants, which are fantastic for fighting dangerous complimentary radicals as well as shielding versus numerous persistent conditions and containing anti-inflammatory homes.

Advertisement

Among the only drawbacks of alcohol consumption of orange juice (or significant quantities of fruit juice) is the amount of all-natural sugars in the juice. Therefore, I drink homemade orange juice once or twice a week, freezing leftovers to stand out right into smoothie mixes in smaller-sized dosages or thaw them later.

How to Make Orange Juice (3 techniques)

Just how to make fresh-squeezed orange juice at home by using one of 3 methods. This sugar-free orange juice (with pulp or without) utilizes just one component, is packed with healthy vitamins and is fantastic alone or as part of a juice blend!

Making freshly squeezed orange juice might take much more initiative than getting a juice box from a store, yet the difference in the high quality of taste and the quality is matchless. Fresh orange juice is fruity and pleasant– so much sweeter than any kind of ‘from concentrate’ OJ in stores and without any added sugars or anything ‘unpleasant.’.

More than that, when making orange juice in your home, you can choose if you want orange juice with pulp or without. In addition to that, it contains vitamins and also health advantages. Sugar-free orange juice has never tasted so excellent as when it’s straight from the fruit!

Fresh orange juice

Is Orange Juice Great for You?

There are several main health and wellness advantages of oranges. Most people realize that this vibrant fruit offers tons of Vitamin C. One medium mug of orange juice supplies practically 100% of your everyday advised Vit C. Nonetheless, it also contains several other nutrients, including Vitamin A, calcium, folate, and iron.

Vitamin C supports our body’s immune systems and aids with gum health, wound healing, and bone development (Resource). Meanwhile, Potassium assists in reducing the danger of heart disease, strokes, and bone loss. It likewise helps manage blood pressure and lower the threat of kidney rocks.

Advertisement

Folate is necessary for pregnant females and lowers the danger of abnormality, as well as Orange Juice, is one of the best natural resources (source). Even better, orange juice is high in antioxidants, which are terrific for fighting damaging complimentary radicals, protecting against numerous chronic problems, and including anti-inflammatory properties.

One of the only drawbacks of alcohol consumption of orange juice (or huge amounts of fruit juice) is the number of natural sugars in the juice. Therefore, I tend to consume self-made orange juice one or two times a week and cold leftovers to stand out right into shakes in smaller-sized doses or thaw later.

How to Make Orange Juice with A Juicer

Prepare the oranges by initial peeling them. Then, slice them into smaller-sized parts to fit your juicer chute. Feed a few into your juicer chute at once– voila.

Orange juicer with electric juicer

With a Blender

Peel the oranges and, optionally, get rid of and discard the seeds (if you’re going to strain the juice, then this isn’t required).

Oranges in Blender

Add the orange sectors to a blender. You can add a little water to help them mix if needed (1/4 mug ought to be ample not to water it down too much).

Blend into a juicy, mushy consistency. After that, sieve the resulting pulpy juice via a sieve or nut milk bag or conversely, if you like orange juice with pulp (for even more nutrients), leave it as is.

With a Handheld Juicer

This possibly does not require much of an explanation. If you have a citrus juicer in your home, just slice the fruit in half, area it over it, push down, and squeeze while turning back and forth to get as much juice out as feasible.
For orange juice with pulp, simply spoon some straight off the staying orange (after pressing the juice out) and also include it in your glass.

Advertisement
Handheld Juicer

How to Store Orange Juice

Fresh pressed orange juice is best taken in quickly for the optimum quantity of nutrients. Nevertheless, any leftovers can be stored in a closed glass container in the refrigerator for approximately 3 days.

What to Perform with Any Extra Pulp

Orange pulp can be iced up right into an ice-cube tray for later usage– within smoothie mixes, broths, or baked items. Conversely, the pulp can be composted, which I do a lot in my yard.

What to Do with The Remaining Peel

You can zest some of the skin to include in meals or to flavor teas, lemonades, and even sugar. Alternatively, make some candied orange peel or, if the halves remain in good condition, use them to make orange candle lights.

Continue Reading

Juice

How To Make Low Lying Fog Juice

Published

on

By

I’ve always been captivated by the impact that ground-level mist has at concerts, gatherings, and haunted attractions. Being a person who enjoys diving into DIY activities, I set out to learn how to produce low lying fog juice myself. Following numerous experiments and a bit of trial and error, I’ve now honed the perfect formula, and I’m thrilled to share it with you.

Before we dive into the steps of making low lying fog juice, it is important to understand the chemistry behind fog. Fog is formed when water vapor in the air condenses into tiny droplets that float close to the ground.

To create low lying fog, we need to cool the water vapor and turn it into fog that stays close to the ground. This is where the ingredients and equipment come into play.

Let’s get started!

Key Takeaways

  • Glycerin is the main ingredient in low lying fog juice, with an optimal ratio of 20-30%.
  • Dry ice can be added for a thick, white fog effect.
  • Proper preparation and storage techniques, including the use of pure glycerin and straining the mixture, are crucial for maximizing shelf life.
  • When using a fog machine, follow safety precautions and adjust temperature and fan speed for optimal fog dispersion.

Understanding the Chemistry of Fog

If you want to make low-lying fog juice, you need to understand the chemistry behind how fog is created in the first place.

Fog formation occurs when warm, moist air comes into contact with cooler surfaces, causing the water vapor in the air to condense into tiny droplets.

Advertisement

Atmospheric conditions such as humidity, temperature, and wind speed all play a role in the formation of fog.

Chemical reactions and heat transfer are also involved in the creation of fog. When water vapor in the air condenses into droplets, it releases heat.

This heat is then absorbed by the surrounding air, causing it to rise and mix with cooler air above.

This creates a layer of fog that hovers close to the ground, hence the term ‘low-lying fog’.

Understanding these chemical processes is crucial to creating your own low-lying fog juice.

Advertisement

Now that we have a basic understanding of the science behind fog formation, let’s move on to gathering the necessary equipment and ingredients.

Gathering Equipment and Ingredients

First, you’ll need to round up all the necessary gear and components to whip up this chilling mixture. Choosing the right containers is crucial to ensure that the mixture is safe to handle and won’t react with any other chemicals. I recommend using glass or plastic containers with secure lids to prevent any spills or leaks.

It’s also important to source glycerin that’s at least 99% pure, as impurities can affect the quality of the fog. You can find glycerin at most chemical supply stores or online retailers.

Once you have your containers and glycerin, it’s time to measure out the rest of the ingredients. You’ll need distilled water, propylene glycol, and dry ice. It’s important to measure the ingredients precisely to ensure that the fog juice is safe to use.

Safety precautions are also necessary when handling dry ice, as it can cause burns if it comes into direct contact with skin. With all the necessary ingredients in hand, you’re ready to move on to preparing the glycerin mixture that’ll create the low lying fog effect.

Advertisement

Preparing the Glycerin Mixture

Now that I’ve got my equipment and ingredients, it’s time to mix the glycerin with distilled water and propylene glycol to create the base of my fog solution.

Glycerin is the main ingredient in low lying fog juice because it’s non-toxic and produces a thick and dense fog. However, there are glycerin alternatives, such as triethylene glycol and dipropylene glycol, that can be used instead. These alternatives may adjust the viscosity and density of the fog solution, so it’s important to experiment and find the best mixture that works for your specific needs.

To prepare the glycerin mixture, I’ll need to measure out the correct ratios of glycerin, distilled water, and propylene glycol. Typically, a mixture of 1 part glycerin to 3 parts distilled water and 1 part propylene glycol is a good starting point.

I’ll mix these ingredients together thoroughly until they’re fully combined. Once the mixture is complete, I can move on to the next step of adding the optional additives to enhance the fog solution.

Adding the Optional Additives

Now that I’ve got my glycerin mixture ready, I can move on to adding optional additives to enhance the fog effect.

Advertisement

Choosing the right additives is crucial, as they can affect the thickness, color, and durability of the fog.

I’ll carefully measure and mix the chosen additives into the glycerin mixture, making sure they’re well blended before use.

Choosing Additives

To create a low-lying fog, it’s essential to choose the right additives to mix with your fog juice. One popular additive is glycerin. This viscous liquid helps to create a denser fog that hangs low to the ground, giving off a haunting effect. It also helps to extend the life of the fog by slowing down the evaporation process.

The optimal ratio for glycerin in your fog juice is around 20-30%, but this can vary depending on the desired effect and the type of fog machine you’re using. Another popular additive is dry ice. This creates a thick, white fog that hugs the ground and has a spooky, eerie effect.

The key to using dry ice is to ensure that it’s handled safely, as it can cause burns if it comes into direct contact with the skin. You’ll need to place the dry ice in a container with warm water, and then place the container in the fog machine. The mixing ratio for dry ice is generally 1-2 pounds per gallon of fog juice.

Advertisement

With the right additives, you can create a low-lying fog that will add a spooky, eerie effect to your next event. In the next section, I’ll discuss how to mix these additives for the optimal effect.

Mixing the Additives

Get ready to enhance the haunting effect of your fog machine by mixing the right amount of glycerin and dry ice additives for a thick, white fog that hugs the ground.

To mix the additives, first make sure you have the correct ratio of glycerin to water. Mix one part glycerin to three parts water in a large container.

Next, slowly add small pieces of dry ice to the mixture. Be cautious when handling dry ice, as it can cause frostbite on contact with skin. As you add the dry ice, the mixture will begin to bubble and release carbon dioxide gas.

The glycerin will create a thick and dense fog when it reacts with the carbon dioxide gas. It’s essential to stir the mixture continuously to ensure that the dry ice is evenly distributed and to prevent the mixture from getting too hot.

Advertisement

Once the dry ice has completely dissolved, the fog juice is ready to use. With the right mixing techniques and understanding of chemical reactions, you can create a low lying fog that will add an eerie atmosphere to any event.

Now that the additives are mixed, the next step is to filter the mixture to remove any impurities before using it in your fog machine.

Filtering the Mixture

First, you’ll need to strain the mixture to ensure that no impurities clog up your fog machine. Filtering techniques are crucial to making the perfect low lying fog juice, as any impurities can result in a malfunctioning machine or poor fog output. To do this, you can use a cheesecloth or coffee filter to strain the mixture into a separate container.

This will remove any remaining chunks or particles that may have been missed during the mixing process. After straining, check the mixture’s consistency to ensure that it has an optimal viscosity. The fog juice should be thick enough to create a low-lying fog, but not too thick that it clogs up the machine.

If the mixture is too thick, you can add distilled water in small increments until it reaches the desired consistency. Once you’ve achieved the optimal viscosity, you’re now ready to fill your fog machine with the low lying fog juice.

Advertisement

Filling the Fog Machine

Before using my fog machine, I always make sure to prepare it properly. This involves checking for any damage or leaks and ensuring that the heating element is clean and functioning correctly. Once the machine is ready, I fill the tank with the appropriate amount of fog juice, making sure not to overfill it.

Proper preparation and filling of the fog machine is essential to ensure a consistent and reliable output of fog.

Preparing the Fog Machine

Now, you’ll need to make sure your fog machine is clean and ready to use. Before you begin, it’s important to follow the cleaning instructions and maintenance tips provided by the manufacturer. The last thing you want is for leftover residue or debris to affect the quality of your low lying fog.

Start by unplugging the machine and removing the fill cap. Use a soft cloth and mild soap to clean the exterior of the machine, being careful not to get any liquid inside.

Next, remove the heating element and clean it thoroughly with a cloth dampened with rubbing alcohol. Once everything is clean and dry, reassemble the machine and plug it back in.

Advertisement

With your fog machine now prepped and ready to go, you can move on to filling the tank with your homemade low lying fog juice.

Filling the Tank

Now that the fog machine is prepared, it’s time to fill the tank with the low lying fog juice. Before doing so, make sure that the tank capacity is appropriate for the amount of fog juice needed. This information can be found in the fog machine’s manual or by consulting with a professional.

To properly fill the tank, first make sure the machine is turned off and unplugged. Then, open the tank lid and carefully pour the low lying fog juice into the tank, using a funnel if necessary to avoid spillage. It’s important to take note of the proper filling technique to prevent any leaks or damage to the machine.

Once the tank is filled, securely close the lid and plug the machine back in.

Transitioning into the next section about testing the fog juice, it’s important to note that before using the fog machine, it’s necessary to check if the fog juice is working properly.

Advertisement

Testing the Fog Juice

Before using the fog juice, it’s important to conduct a test run to ensure that it produces the desired effect and doesn’t harm any equipment or surfaces.

I typically pour a small amount of the fog juice into the fog machine and run it for a few minutes to observe the results. If adjustments need to be made, I’ll refer back to the recipe and make changes accordingly.

It’s crucial to test and adjust the fog juice before using it in a performance or event to avoid any potential issues.

Conducting a Test Run

Let’s jump right into it and see the fog machine in action with a test run! Before conducting the test run, I made sure to set the fog machine to its optimal settings.

I adjusted the temperature knob and the fan speed to ensure that the fog was not too thick or too thin, and that it would disperse evenly. Additionally, I took all necessary safety precautions, such as making sure the machine was properly grounded and not placed near any flammable objects.

Advertisement

Once I felt confident that the machine was set up correctly, I poured the low lying fog juice into the reservoir and turned on the machine. I waited a few minutes for the fog to start flowing and then observed how it interacted with the room.

I noticed that the fog was too thick and not spreading evenly, so I decided to adjust the recipe by adding more distilled water to dilute the juice. With this simple adjustment, the fog began to disperse more evenly, creating a stunning low lying effect.

Adjusting the Recipe

You’re probably thinking that adjusting the recipe for your fog machine is as easy as adding more of the fog juice, but let me tell you, it’s not that simple. Adjusting the concentration of the fog juice can be a delicate process that requires careful experimentation and attention to detail. It’s important to keep in mind that adding too much fog juice can cause the fog to be too thick and heavy, while adding too little can result in a lackluster effect.

One way to adjust the concentration of your fog juice is to experiment with additives. For example, adding a small amount of glycerin or distilled water can help to thin out the fog and create a more subtle effect. On the other hand, adding a small amount of dry ice can create a thicker, more intense fog. By carefully adjusting the concentration of your fog juice and experimenting with different additives, you can create a customized effect that is perfect for your event or production. Once you’ve perfected your recipe, it’s time to move on to using the low lying fog juice to create a stunning and memorable visual display.

Using the Low Lying Fog Juice

To create an eerie atmosphere, simply pour the low lying fog juice into your fog machine and watch as the mist hovers just above the ground, sending shivers down your spine.

Advertisement

But before using the fog juice, it’s important to follow some best practices and safety precautions. First, make sure to read the instructions on your fog machine and use only the recommended amount of fog juice. Using too much can cause the fog to linger in the air longer than intended, potentially causing breathing difficulties for you and your guests.

Second, always use the fog machine in a well-ventilated area to avoid inhaling too much of the fog and to prevent any potential fire hazards. With these precautions in mind, you can safely use the low lying fog juice to create a spooky and memorable atmosphere for your next party or event.

When it comes to storing the fog juice, it’s important to keep it in a cool and dry place, away from any heat sources or direct sunlight. This will help to prevent the fog juice from degrading or evaporating before you have a chance to use it.

Storing the Fog Juice

Ensure your fog machine fluid remains in optimal condition by storing it in a cool, dry place away from heat and direct sunlight. Extreme temperatures can affect the shelf life and the quality of the low lying fog juice. Exposure to direct sunlight can also cause the liquid to break down and lose its effectiveness.

Therefore, it’s essential to store the fog juice in a well-ventilated area with a consistent temperature range of 40-100°F. Storing techniques can affect the longevity of the fog juice. For instance, it’s crucial to keep the container sealed tightly to prevent air and moisture from entering. Additionally, it’s advisable to store the fog juice away from any chemicals, cleaning agents, or pesticides.

Advertisement

Proper storage techniques can maximize the shelf life of the low lying fog juice, ensuring optimal performance every time it’s used. Now, let’s move on to troubleshooting common issues that may arise from using the low lying fog juice.

Troubleshooting Common Issues

Encountering complications with creating low lying fog can be challenging, but there are several common issues that can be resolved with a few simple fixes. Here are some common solutions and troubleshooting techniques:

  • Check the temperature: The fog machine and the fog juice work best in cooler temperatures, so make sure you’re not using them in hot or humid environments. If the temperature’s too warm, you may need to cool down the room or switch to a different type of fog juice that’s designed for warmer temperatures.

  • Check the machine: Make sure the fog machine’s clean and free of clogs. If the machine’s not producing enough fog, it may be because the nozzle’s clogged or the heating element’s not working properly. You may need to clean the nozzle or replace the heating element.

  • Check the fog juice: Make sure the fog juice’s the right type for your machine and that it’s not expired. If the juice is too old, it may not produce as much fog or may produce a strange smell. You may need to replace the juice or switch to a different brand.

  • Adjust the settings: If the fog machine’s producing too much or too little fog, you may need to adjust the settings. Most machines have a control knob that allows you to adjust the output of the fog. Try turning it up or down to see if that helps.

  • Experiment with different techniques: If none of the above solutions work, try experimenting with different techniques. For example, you may need to use a different type of fog juice or a different type of machine. You may also need to try different techniques for creating the fog, such as using dry ice or a fog chiller.

By following these common solutions and troubleshooting techniques, you should be able to create chilling clouds without any complications. Remember to always read the instructions carefully and follow all safety precautions when working with fog machines and fog juice.

Frequently Asked Questions

Can I use any type of glycerin for making low lying fog juice?

Yes, not all glycerin types are equally effective for making low lying fog juice. Some may produce less fog and pose safety concerns for respiratory health. It’s important to choose a high-quality, food-grade glycerin.

How long does the fog juice last in the fog machine before it needs to be refilled?

The frequency of fog juice refills depends on the size of the fog machine and the duration of use. Regular maintenance, such as cleaning the machine and using the appropriate glycerin types for low lying fog juice, can prolong the life of the juice.

Advertisement

Is it safe to breathe in the low lying fog produced by the juice?

While low lying fog is visually stunning, health concerns and environmental impact must be considered. Inhalation of fog juice should be avoided, as it contains glycols and other chemicals. Proper ventilation is necessary to ensure safety.

Can I use the fog juice outdoors or only indoors?

I can use the fog juice both indoors and outdoors, but the weather conditions may affect the quality of the fog. Humidity and wind can disperse the fog, while colder temperatures can make it linger. It’s important to test the juice in different conditions before use.

Can I use food coloring to tint the low lying fog produced by the juice?

I experimented with food coloring to enhance the visibility of low lying fog produced by fog juice. Results were mixed, as the coloring diluted the juice and affected its composition. Further testing is required before a conclusive answer can be given.

Conclusion

In conclusion, making low lying fog juice is a complex process that requires careful attention to detail. However, the end result is a mesmerizing display of mist that can add a touch of mystery and magic to any event or performance.

As with any chemical mixture, it’s crucial to understand the science behind it, gather the necessary equipment and ingredients, and follow the steps precisely. So, practice makes perfect, and this holds true for making low lying fog juice.

Advertisement

It may take a few tries to get the formula just right, but once you do, the results are well worth the effort. And with a little troubleshooting, any issues that may arise can be easily resolved.

So, go ahead, gather your materials, and let the fog roll in for a captivating and unforgettable experience.

Continue Reading

Juice

How To Make Lychee Juice

Published

on

By

I’m totally obsessed with lychees, and I never miss a chance to pick up a bag when I visit an Asian supermarket. However, there are times when I fancy a change and prefer to savor my lychees in an alternative form rather than just consuming them raw. This is when I turn to lychee juice!

It’s a refreshing, fruity drink that’s perfect for summertime sipping. In this article, I’ll be sharing my favorite recipe for making lychee juice at home, step by step.

To make lychee juice, you’ll need just a few simple ingredients and some basic kitchen equipment. Don’t worry if you’ve never made juice before – it’s really easy, and I’ll walk you through each step.

Whether you’re craving a sweet and tangy drink to cool off on a hot day or just want to try something new with your favorite fruit, my lychee juice recipe is sure to hit the spot. So let’s get started!

Key Takeaways

  • Precision in measuring is crucial for a well-balanced lychee juice.
  • Strain the blended mixture with a fine mesh sieve for a smoother texture.
  • Pair lychee juice with complementary foods to enhance its taste.
  • Refrigeration is the best way to store and preserve lychee juice, while freezing is a simple method for most home cooks.

Gather Your Ingredients

Gather all the ingredients you’ll need for making lychee juice, including fresh lychee fruit, water, sugar, and ice. Make sure to choose fresh lychees that are plump, firm, and have a bright color. You can find them at your local grocery store or Asian market.

Lychee is a tropical fruit that is sweet and juicy, and it’s packed with health benefits that make it a great choice for juicing. When it comes to juicing techniques, you can either use a juicer or a blender. Using a juicer will result in a smoother juice, while using a blender will create a more pulpy texture.

Advertisement

Regardless of the method you choose, make sure to remove the seeds and peel from the lychees before juicing them. Now that you have all the ingredients ready, it’s time to prepare your lychees for juicing.

Prepare Your Lychees

First, peel the rough, pinkish-red skin off of each lychee using your fingernails or a small knife, being careful not to damage the fruit. A helpful tip is to crack the skin open with your fingernail and then gently peel it away from the fruit. If you’re having trouble peeling the lychees, try soaking them in warm water for a few minutes to soften the skin.

It’s important to select the perfect lychee for your juice by choosing ones that are ripe and have a vibrant red color with no blemishes or bruises. After peeling the lychees, discard the skin and remove the seed from each fruit. You can do this by gently squeezing the fruit with your fingers until the seed pops out, or you can use a small knife to cut around the seed and remove it.

Once all of the lychees are peeled and seeded, you can move on to the next step of measuring your ingredients for the perfect lychee juice.

Measure Your Ingredients

Once you’ve peeled and seeded your lychees, it’s time to measure out your ingredients. Measuring techniques play a crucial role in the success of your lychee juice. Precision in measuring ensures that you get the right balance of flavors and sweetness in your juice. Here are some tips to help you measure your ingredients accurately and adjust the sweetness of your juice to your liking:

Advertisement

  • Use measuring cups and spoons instead of eyeballing the ingredients. This will help you get consistent results every time you make lychee juice.

  • Start by measuring out the lychee flesh. You’ll need about 2 cups of lychee flesh for 4 servings of juice.

  • Next, measure out the water. You’ll need 2 cups of water for every 2 cups of lychee flesh.

  • Add sugar to taste. Start with 1/4 cup of sugar and adjust to your liking. You can also use honey or agave syrup as a healthier alternative.

  • Finally, add a squeeze of lime juice to brighten up the flavors.

Now that you’ve measured out your ingredients and adjusted the sweetness to your liking, it’s time to blend your ingredients and turn them into a refreshing lychee juice.

Blend Your Ingredients

Now it’s time to toss all your measured ingredients into the blender and watch the magic happen! But before you do, let’s talk about blending techniques and flavor combinations.

To start, make sure to add the ice and lychee fruit to the blender first. This will help break down the fruit and create a smoother consistency. Then, pour in the coconut water and honey and blend on high for about 2-3 minutes. If you want a thicker consistency, add more ice. If you prefer a sweeter taste, add more honey.

Ingredients Measurements
Lychee fruit 1 cup
Coconut water 1/2 cup
Honey 2 tbsp
Ice 1 cup

Blending techniques can differ depending on the blender you use. Some blenders may not be as powerful and require you to blend for a longer period of time. Experiment with different blending techniques to find the consistency you prefer. As for flavor combinations, you can add other fruits such as pineapple or mango to enhance the tropical taste of the lychee juice.

Now that you have blended all your ingredients, the next step is to strain your juice.

Advertisement

Strain Your Juice

After blending all the ingredients, it’s important to strain the mixture to achieve a smoother texture and remove any unwanted bits. Straining techniques can vary depending on personal preference, but I find that using a fine mesh sieve works best.

Simply pour the blended mixture through the sieve and use a spatula to press down on the solids to extract as much juice as possible. Repeat this process until all the solids have been strained out.

If you want to add some extra flavor to your lychee juice, this is the perfect time to do so. You can mix in a small amount of sugar or honey to sweeten it up, or even add a splash of lime juice for a tangy kick.

Once you’re happy with the flavor, transfer the juice to a pitcher and chill it in the refrigerator for at least an hour before serving.

Next, we’ll move on to the final step of making delicious lychee juice – chilling it to perfection.

Advertisement

Chill Your Juice

Now that I’ve strained my lychee juice, it’s time to chill it.

I usually like to refrigerate my juice for a couple of hours before drinking it to enhance its flavor and make it more refreshing.

If you want to enjoy your juice immediately, you can add some ice to cool it down quickly.

Either way, chilling your juice is a crucial step to make it more enjoyable.

Refrigerating Your Juice

To keep your lychee juice fresh and tasty, you’ll want to pop it in the fridge as soon as possible after making it. Refrigeration is the best way to slow down the natural process of spoilage and prevent the growth of harmful bacteria. The benefits of refrigeration are numerous, including longer shelf life, preservation of nutrients and flavors, and reduction of waste. Plus, a cold and refreshing glass of lychee juice is the perfect way to beat the heat on a hot summer day.

Advertisement

Alternative cooling methods may include adding ice cubes or placing the juice in the freezer for a short period of time. However, these methods may dilute the flavor of the juice or alter its texture. That’s why refrigeration is the preferred method for keeping your lychee juice fresh and delicious. In the next section, we’ll explore the best ways to add ice to your drink without compromising its taste.

Adding Ice to Cool Your Drink

If you want to enjoy a refreshing summer drink, nothing beats the feeling of adding ice cubes to your glass. Here are some tips to make sure you get the most out of this classic drink addition:

  1. Use filtered water: The quality of your ice cubes will affect the taste of your drink, so make sure to use filtered water when making them.

  2. Freeze fruits: For an extra burst of flavor, try freezing fruits like strawberries or blueberries to use as ice cubes.

  3. Use ice alternatives: If you don’t want to dilute your drink with water, try using alternatives like frozen coconut water or coffee ice cubes.

  4. Serve in a chilled glass: To keep your drink cool for longer, serve it in a chilled glass or mason jar.

When it comes to serving suggestions, consider adding a sprig of mint or a slice of lime to your glass. These simple additions can elevate the flavor of your drink and make it feel even more refreshing.

Now that your juice is chilled and ready to go, it’s time to move on to the next step: serving.

Serve Your Juice

Ready to indulge? Nothing beats sipping on a refreshing glass of lychee juice, especially when it’s served over ice on a hot summer day. Once you’ve poured your juice into a glass, it’s time to think about how you want to serve it.

Advertisement

One way to make your lychee juice stand out is by adding creative garnishes. You can add a slice of fresh lime or mint leaves to enhance its flavor and aroma. Additionally, consider pairing your lychee juice with foods that complement its taste, such as spicy dishes or light salads.

By pairing your juice with the right food and adding a touch of creativity, you can elevate your drink to the next level. And with that, it’s time to store your juice for later.

Store Your Juice

Now that I’ve made my delicious lychee juice, I need to properly store it. The best way to do this is by refrigerating it in an airtight container.

This will ensure that the juice stays fresh and tasty for up to 3-4 days. If I want to keep the juice for longer, I can freeze it in ice cube trays and then transfer the cubes to a freezer-safe bag.

This way, I can enjoy my homemade lychee juice anytime I want, even if I don’t have fresh lychees on hand.

Advertisement

Refrigerating Your Juice

Once you’ve bottled your delicious lychee juice, don’t forget to pop it in the fridge to keep it fresh and cool for later.

There are a few storing options for your lychee juice, but refrigerating it is the most common.

When you’re storing your juice, make sure to keep it in an airtight container to prevent any air from getting in and spoiling the juice. You can also add a squeeze of lemon to your juice before bottling it to help preserve it for a few extra days.

The shelf life of your lychee juice will depend on a few factors, such as the freshness of the fruit, the temperature of your fridge, and how well you’ve stored it. Generally, fresh lychee juice can last up to 4-5 days in the fridge. However, it’s always best to check for any signs of spoilage, such as a sour smell or a change in color, before consuming.

Now that your lychee juice is safely stored in the fridge, let’s talk about how you can freeze it for later use.

Advertisement

Freezing Your Juice for Later

To preserve your delicious lychee juice for future use, you’ll want to freeze it in an appropriate container. Freezing is an excellent way to keep your beverage fresh for up to six months.

Start by pouring your lychee juice into a freezer-safe container, leaving about an inch of space at the top to allow for expansion. You can use a plastic container, glass jar, or even an ice cube tray, depending on how you plan to use the juice later. If you’re using an ice cube tray, freeze the juice until solid, then transfer the cubes to a larger container or freezer bag.

Another way to preserve your lychee juice is by canning it. Follow a canning recipe and process to ensure that your juice is safe to store at room temperature. However, keep in mind that canning requires specific equipment, and there is a risk of spoilage if not done correctly. Freezing is a simpler and more accessible method for most home cooks.

In the next section, I’ll discuss how to experiment with variations to add even more flavor to your lychee juice.

Experiment with Variations

Try mixing in some fresh mint leaves for a refreshing twist that’ll make your taste buds sing with delight. Variations experimentation is key to finding the perfect recipe that suits your taste. Flavor customization is easy with lychee juice, as it pairs well with a variety of fruits and herbs.

Advertisement

Here are three variations to try with your lychee juice:

  1. Lychee and Strawberry: Add a handful of fresh strawberries to the blender with your lychee juice for a sweet and tangy flavor combination.

  2. Lychee and Basil: Add a few fresh basil leaves to your lychee juice for a subtle, herbaceous flavor that pairs well with savory dishes.

  3. Lychee and Lime: Squeeze in some fresh lime juice to your lychee juice for a zesty twist that adds a burst of citrus flavor.

With these variations, you can create a unique blend that suits your taste buds perfectly.

Now that you’ve experimented with different flavors, it’s time to enjoy your lychee juice!

Enjoy Your Lychee Juice!

Now it’s time to savor your delicious lychee concoction and bask in the refreshing flavors. But before you take a sip, let’s talk about some ways you can enjoy your lychee juice. Of course, you can always drink it straight up, but why not get a little creative with it?

One idea is to mix it with some sparkling water and a splash of lime juice for a refreshing and bubbly lychee spritzer. Another option is to add a shot of vodka for a lychee martini. And if you’re feeling really adventurous, try blending the juice with some coconut milk and ice for a tropical lychee smoothie. The possibilities are endless, so experiment and find your favorite way to enjoy this delicious fruit juice.

Advertisement

Creative Cocktail Ideas for Lychee Juice Ingredients Instructions
Lychee Martini 2 oz lychee juice, 1.5 oz vodka, 1 oz triple sec, 1/2 oz lime juice Shake all ingredients with ice and strain into a martini glass. Garnish with a lychee fruit on a skewer.
Lychee Spritzer 1/2 cup lychee juice, 1/2 cup sparkling water, 1/4 lime juice Combine all ingredients in a glass filled with ice. Stir gently and garnish with a lime wedge.
Lychee Smoothie 1 cup lychee juice, 1 banana, 1/2 cup coconut milk, 1 cup ice Combine all ingredients in a blender and blend until smooth. Pour into a glass and enjoy.

So go ahead and try these creative cocktail ideas for lychee juice or come up with your own. With its sweet and delicate flavor, lychee juice is a great addition to any beverage. Enjoy!

Frequently Asked Questions

What are the health benefits of drinking lychee juice?

Sipping on lychee juice is like a burst of energy for my body. The nutritional value is impressive, containing high levels of vitamin C, potassium, and antioxidants. Some benefits include improved digestion, skin health, and immunity.

Can I use canned lychees instead of fresh ones?

Yes, canned lychees can be used instead of fresh ones in juice recipe variations. However, it’s important to check for added sugars or preservatives. Fresh lychees may provide a better flavor and more nutrients.

How long does lychee juice last in the refrigerator?

Hey there! Wondering how long your lychee juice will last in the fridge? Well, it all depends on how it’s stored. Generally, freshly made juice lasts 3-4 days, while store-bought can last up to a month. Keep it refrigerated and enjoy!

Can I add sugar or other sweeteners to the juice?

Yes, I can add sugar alternatives like honey, agave or Stevia to lychee juice. However, lychee itself has natural sweetness, so it may not require extra sweeteners. Experiment to find the perfect balance of sweetness to suit your taste.

Advertisement

Are there any potential side effects of drinking lychee juice?

Drinking lychee juice may have potential risks, such as allergies. It’s important to be aware of any reactions and consume in moderation. Always consult with a healthcare professional if you have concerns.

Conclusion

Well, folks, there you have it – your very own homemade lychee juice! As I take a sip of this sweet and refreshing concoction, I can’t help but feel a sense of pride and accomplishment.

It’s amazing how just a few simple steps can yield such a delicious result. As the juice slides down my throat, I’m transported to a tropical paradise – the sun beating down on my face, the sound of crashing waves in the distance, and the sweet aroma of lychees filling my nostrils.

It’s a sensory experience that I look forward to every time I make this juice. So go ahead and give it a try – experiment with different variations, adjust the sweetness to your liking, and enjoy the fruits of your labor.

Trust me, there’s nothing quite like a glass of homemade lychee juice to brighten up your day.

Advertisement

Continue Reading

Trending