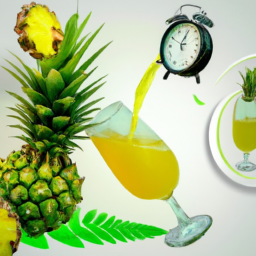
Connect with us

Juice

How To Make Juice With A Vitamix

Published

on

I love a good glass of fresh juice. There’s something about the vibrant colors and flavors that make it feel like a treat for my body and my taste buds.

And when it comes to making juice at home, there’s no better tool than a Vitamix blender. With its powerful motor and high-quality blades, the Vitamix makes quick work of even tough fruits and vegetables, leaving you with a smooth and delicious juice every time.

But making juice with a Vitamix can be a little intimidating if you’ve never done it before. What ingredients should you use? How do you prepare them? And how do you get that perfect texture without any pulp or chunks?

In this article, I’ll walk you through everything you need to know to make amazing juice with your Vitamix, from selecting the right ingredients to cleaning up afterwards. So grab some fruits and veggies, and let’s get started!

Key Takeaways

  • Select high-quality fruits and vegetables that are in season and at their peak ripeness to achieve the best flavor and nutritional value.
  • Straining juice using a fine mesh strainer or cheesecloth can result in a smoother texture, but it also removes some nutrients and fiber.
  • Cleaning and maintaining the Vitamix blender after each use is important for its longevity and proper functioning.
  • Experimenting with different combinations of fruits and vegetables, adding superfoods or supplements, and sharing experiences over a glass of fresh juice can enhance the enjoyment and nutritional value of homemade juice.

Select the Right Ingredients

Before you start blending, make sure you’ve got the right ingredients – it’ll make a world of difference in the taste and nutrition of your juice!

When selecting fresh produce, it’s important to choose high-quality fruits and vegetables that are in season and at their peak ripeness. This will ensure that your juice has the best possible flavor and nutritional value.

Advertisement

When choosing your ingredients, it’s also important to think about balancing flavors. For example, if you’re using very sweet fruits like oranges or pineapples, you may want to balance them out with some tart fruits like lemons or limes. Similarly, if you’re using bitter greens like kale or spinach, you may want to add sweeter fruits like apples or pears to counteract their bitterness.

By selecting the right ingredients and balancing flavors, you can ensure that your juice is not only delicious, but also packed with nutrients.

Now that you’ve selected your ingredients, it’s time to move on to preparing them for blending.

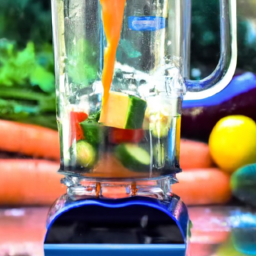
Prepare Your Ingredients

First, you’ll need to gather all your ingredients for blending. For my go-to green juice recipe, I typically use kale, spinach, cucumber, celery, green apple, lemon, and ginger. However, feel free to experiment with different combinations of fruits and vegetables to find what you like best. You can also substitute ingredients based on what you have on hand or what’s in season. For example, if you don’t have kale, you could use Swiss chard or collard greens instead. If you don’t have green apple, try using a pear or pineapple.

When preparing your ingredients, make sure to wash them thoroughly to remove any dirt or debris. It’s also important to chop them into small pieces to ensure they blend smoothly in the Vitamix. For leafy greens like kale and spinach, remove the tough stems before chopping. Once everything is prepped, you’re ready to start blending! In the next section, I’ll explain how to set up your Vitamix for optimal blending.

Advertisement

Juice recipe ideas Ingredient substitutions

Kale Swiss chard or collard greens
Spinach Arugula or watercress
Cucumber Zucchini or bell pepper
Celery Carrots or fennel
Green apple Pear or pineapple
Lemon Lime or grapefruit
Ginger Turmeric or mint

Now that you’ve prepared your ingredients, it’s time to set up your Vitamix for maximum blending efficiency.

Set Up Your Vitamix

Now that we’ve got our ingredients ready, it’s time to set up our Vitamix blender. The first step is to assemble the blender by placing the pitcher onto the motor base and securing it in place.

Next, we need to choose the right speed for our juice, depending on the ingredients we’re using. Finally, we can add our prepared ingredients to the container, making sure not to overfill it beyond the recommended maximum capacity.

Advertisement

Following these steps will ensure a smooth and efficient blending process, resulting in a delicious and nutritious juice.

Assemble the Blender

To start making juice in your Vitamix, simply attach the blending container to the base and plug it in, then you’re ready to go! Before assembling the blender, it’s important to ensure that the machine is properly maintained to avoid any potential issues during use. Regular cleaning of the blades and container, as well as checking for any signs of wear and tear, can prevent any damage to the blender and ensure that it continues to work properly.

Once the blender is assembled, it’s time to start making juice! Here are some tips to troubleshoot any issues you may encounter during the blending process:

  • Make sure all ingredients are cut into small pieces to avoid jamming the blades.
  • Add liquid slowly to prevent the mixture from becoming too thick.
  • Pause the blender occasionally to scrape down the sides of the container.

With these tips in mind, you can confidently move on to the next step of choosing the right speed for your juice.

Choose the Right Speed

As you begin blending your juice with a Vitamix, it’s important to choose the right speed to achieve the texture and consistency you desire. The speed of the blender greatly affects the size and shape of the particles in your mixture.

For instance, a lower speed will create larger particles while a higher speed will produce smaller, more evenly distributed particles. Adjusting the speed of your Vitamix can help you achieve a smooth and velvety texture for your juice.

Advertisement

High speed is recommended for fibrous fruits and vegetables, while low speed is ideal for soft and juicy produce. Experimenting with blending techniques and adjusting the speed can help you achieve the perfect texture for your juice.

Once you have decided on the right speed, it’s time to move on to the next step of adding ingredients to the container.

Add Ingredients to the Container

When adding ingredients to your container, you may be tempted to overfill it, but be careful not to do so as it can affect the blending process and result in a less desirable texture. It’s important to follow the recommended ingredient ratios for your recipe to achieve the desired flavor and consistency.

For example, if you’re making a green juice, a good ratio to follow is 3:1:1, meaning three parts leafy greens, one part fruit, and one part water. Another important consideration when adding ingredients is flavor combinations. While it may be tempting to throw in every fruit and vegetable you have on hand, not all combinations will taste good together.

It’s important to experiment and find what works for your taste buds. Some popular flavor combinations include pineapple and ginger, apple and kale, and carrot and orange. Once you have added your ingredients to the container, it’s time to blend them into a delicious juice.

Advertisement

Transitioning into the next section, the blending process is where the magic happens. With your ingredients in the container, it’s time to blend them to the right consistency.

Blend Your Ingredients

Now it’s time to blend everything together in your Vitamix. The key to making delicious juice is to blend your ingredients properly. Whether you’re making a green juice or a fruit smoothie, there are some key blending techniques that you should keep in mind.

First, start by blending your leafy greens and liquid together. This will help break down the greens and create a smooth base for your juice. Next, add in your fruits and any other ingredients, such as nuts or seeds. Be sure to blend everything until it’s smooth and creamy, with no chunks or bits left behind.

Finally, taste your juice and adjust the flavors as needed. If it’s too thick, you can add more liquid, and if it’s too sweet, you can add more greens. With these simple blending techniques, you can create a wide variety of smoothie variations that are both healthy and delicious.

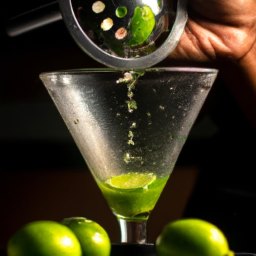
Now that your juice is blended to perfection, it’s time to strain it. This will help remove any pulp or seeds that may be left behind, giving you a smooth and silky juice. To strain your juice, simply pour it through a fine-mesh strainer or nut milk bag into a clean container. You can also use a cheesecloth or coffee filter if you don’t have a strainer.

Advertisement

Once your juice is strained, you can enjoy it immediately or store it in the fridge for later.

Strain Your Juice

Now that I’ve blended my ingredients, it’s time to strain the juice.

To do this, I’ll need a fine mesh strainer or cheesecloth to remove any remaining pulp and fibers.

I’ll carefully pour the juice through the strainer or cheesecloth into a bowl to collect the pure juice.

This step ensures a smooth and consistent texture, and removes any unwanted bits that may affect the taste or quality of the juice.

Advertisement

Use a Fine Mesh Strainer or Cheesecloth

To strain the juice, simply place a fine mesh strainer or cheesecloth over a bowl and pour the mixture through it. This is one of the most common and effective methods for removing pulp and fibers from your juice. As the juice passes through the strainer or cheesecloth, it separates from the pulp and fibers, leaving you with a smooth liquid that you can enjoy.

Using a fine mesh strainer or cheesecloth has several benefits. Firstly, it’s an easy and quick method that requires minimal effort – all you need to do is pour the juice through the strainer and let gravity do the work. Secondly, it’s a very effective method that removes most of the pulp and fibers, resulting in a smoother and more enjoyable juice. Lastly, it’s a versatile method that can be used for a variety of fruits and vegetables, making it a great alternative to other straining methods.

If you’re looking to remove even more pulp and fibers from your juice, the next step is to remove the remaining bits from the strainer or cheesecloth. This can be done by gently pressing the pulp with a spoon or spatula to extract all the juice. Alternatively, you can use a nut milk bag for an even smoother texture.

Remove Pulp and Fibers

Removing the pulp and fibers from your juice is crucial to achieving a smoother and more enjoyable texture. While using a fine mesh strainer or cheesecloth is the most common method, there are other alternative straining methods available. However, it’s important to note that removing the pulp also means removing some of the nutrients and fiber that come with it.

Consuming pulp has many benefits, including aiding in digestion and keeping you feeling full for longer periods of time. If you prefer to keep the pulp in your juice, consider using a blender with a high-powered motor, like a Vitamix, to break down the fibers and achieve a smoother consistency.

Advertisement

Regardless of whether you choose to keep or remove the pulp, straining your juice is a necessary step in the process.

To collect the juice in a bowl, place the strainer or cheesecloth over the bowl and pour the mixture from the blender into it. Gently press the pulp with a spoon or spatula to extract as much juice as possible.

Once the juice has been collected, it can be consumed as is or stored in the refrigerator for later use.

Collect Juice in a Bowl

You’ll need a bowl to gather the gleaming gold goodness of your freshly squeezed fruit. Using a bowl to collect the juice has several benefits. Firstly, it makes it easier to pour the juice into a glass or container. Secondly, it prevents any accidental spillage or mess on your countertop. Additionally, it allows you to easily measure the amount of juice you have made for recipes or serving sizes.

If you don’t have a bowl, you can still collect the juice without one. A common way is to use a pitcher or large measuring cup. However, keep in mind that these alternatives may not be as accurate for measuring the amount of juice made. Another option is to place the Vitamix container directly over a glass or container and pour the juice out of the spout. However, this may result in some pulp or fiber ending up in the juice.

Advertisement

Now that you’ve collected your freshly squeezed juice, it’s time to serve and enjoy!

Serve and Enjoy

Now it’s time to savor the fruits of your labor and enjoy a refreshing glass of homemade juice straight from your Vitamix. Here are three tips to help you enjoy your juice even more:

  1. Get creative with garnish ideas: Add a slice of fruit or vegetable to the rim of your glass, or sprinkle some herbs or spices on top of your juice for an extra burst of flavor.

  2. Pair your juice with a meal: Different juices can complement different foods. For example, a green juice pairs well with a light salad, while a citrusy juice is a great accompaniment to seafood.

  3. Serve your juice immediately: Freshly made juice is at its best when consumed right away, as it can lose some of its nutritional value over time.

To store any leftover juice, transfer it to an airtight container and refrigerate it as soon as possible. This will help preserve its freshness and nutritional value for up to 24 hours.

Store Leftover Juice

To keep your leftover juice fresh and nutritious, simply transfer it to an airtight container and refrigerate it immediately. This will help to slow down the oxidation process and preserve the vitamins and nutrients in the juice. It is important to note that fresh juice is best consumed immediately after it is made, but if you need to store it, follow these tips for extending the shelf life of fresh juice:

Tips for Extending the Shelf Life of Fresh Juice
Store juice in an airtight container Keep juice refrigerated at all times Consume juice within 24-48 hours Avoid exposure to light and air Shake well before drinking

By following these tips, you can enjoy your fresh juice for a longer period of time without compromising its nutritional value. Now that you know how to store your leftover juice, it’s time to move on to the next step – cleaning your Vitamix.

Advertisement

Cleaning your Vitamix is an important part of the juicing process as it helps to ensure that your machine remains in good working condition and that your juice is free from any leftover residue or bacteria.

Clean Your Vitamix

When it comes to cleaning my Vitamix, I always start by rinsing the blender under running water to remove any remaining residue.

Next, I add a little bit of soap and water to the container and blend on high for 30 seconds to ensure that every nook and cranny is thoroughly cleaned.

This method not only removes any leftover juice or smoothie, but also helps prevent any bacterial growth that may occur if the blender is not cleaned properly.

Rinse Blender Under Running Water

Simply hold the blender under the faucet and let the cool water wash away any leftover pulp and seeds. Rinsing your blender before using it is important because it removes any residue left from previous uses and ensures that your juice is fresh and free from any unwanted flavors.

Advertisement

Additionally, rinsing your blender with cold water is beneficial because it helps to preserve the nutrients in your fruits and vegetables. It’s important to note the temperature of the water when rinsing your blender. Using hot water can damage the blades and reduce the lifespan of your vitamix. Therefore, it’s best to stick with cool or lukewarm water when rinsing your blender before and after use.

Once your blender is thoroughly rinsed, you can move on to the next step of adding soap and water to the container.

Add Soap and Water to Container

Ah, the satisfying sound of soap and water mixing together in the blender container, a symphony of cleanliness. Adding soap to the container is an important step in the cleaning process as it helps remove any remaining residue from previous blends and eliminates any bacteria that may be present.

Here are four benefits of using soap for cleaning:

  1. Soap is a surfactant, which means it can break down oils and fats that are often left behind in the blender container after blending.
  2. Soap is effective in removing bacteria and germs that can accumulate on the blender container over time.
  3. Soap is a cost-effective cleaning agent that is readily available in most households.
  4. Soap is a gentle cleaner, making it safe to use on the blender container without causing damage to the surface.

While there are alternatives to soap for cleaning, such as vinegar or lemon juice, these may not be as effective in removing all types of residue and bacteria. It’s important to note that using harsh chemicals or abrasive materials on the blender container can cause damage to the surface and affect the taste of future blends.

Now that the soap and water have been added to the container, it’s time to blend on high for 30 seconds to fully clean the blender.

Advertisement

Blend on High for 30 Seconds

Now it’s time to blend on high for 30 seconds and let the soap and water work their magic. As I press the button on my Vitamix, I can hear the powerful motor whirring to life. Blending is a great way to extract juice from fruits and vegetables because it breaks down the fiber and makes the nutrients more easily absorbable. Unlike juicing, which separates the juice from the pulp, blending keeps all the good stuff intact, resulting in a thicker, more nutritious drink.

To achieve a smooth texture, there are a few tips to keep in mind. First, make sure to chop your fruits and vegetables into small pieces before adding them to the blender. This will help prevent any large chunks from getting stuck in the blades and ensure a uniform blend. Second, start with a small amount of liquid and gradually add more as needed. Too much liquid can result in a watery consistency, while too little can make it difficult to blend. Lastly, blend for at least 30 seconds to ensure everything is well incorporated.

As important as it is to know how to make juice with a Vitamix, it’s also crucial to learn how to properly maintain and care for your machine.

Maintenance and Care

When it comes to maintaining and caring for my Vitamix, there are a few key points that I always keep in mind.

Firstly, I make sure to clean the blades and container thoroughly after every use to prevent any buildup of residue or bacteria.

Advertisement

Secondly, I avoid overfilling the blender to ensure that it operates smoothly and efficiently.

Finally, I always replace any worn or damaged parts as needed to keep my Vitamix in top working condition.

By following these simple steps, I can ensure that my Vitamix will continue to deliver high-quality performance for years to come.

Clean Blades and Container After Use

Don’t forget to rinse the blades and container of your Vitamix thoroughly after each use to ensure they’re clean for the next time you make juice. Effective cleaning techniques are essential to maintaining your Vitamix and ensuring its longevity. Leaving residue on the blades can cause the buildup of bacteria, which can be harmful to your health. Therefore, it’s essential to wash the blades and container with warm soapy water immediately after use.

The importance of routine maintenance cannot be overlooked, as it helps to keep your Vitamix in good working condition. If you use your Vitamix regularly, it’s essential to clean it daily, but if you use it less often, cleaning it after each use might suffice.

Advertisement

It’s also crucial to check your Vitamix regularly for any signs of wear and tear, such as cracks or leaks, and to replace any worn-out parts immediately. Keeping your Vitamix clean and well-maintained will ensure that it continues to provide you with delicious and healthy juices for years to come.

When you’re done cleaning the blades and container, it’s time to move on to the next step, which is avoiding overfilling the blender.

Avoid Overfilling the Blender

To prevent damaging your blender, be mindful of the amount of ingredients you add and avoid filling it past the recommended capacity. Overfilling the blender can cause spills and accidents, which can damage the machine and even cause injuries.

Here are three things to keep in mind to avoid overfilling the blender:

  1. Check the recommended capacity of your blender. This information can usually be found in the user manual or on the manufacturer’s website. Knowing the maximum capacity of your blender will help you avoid overfilling it and prevent spills and accidents.

  2. Measure your ingredients carefully. Using measuring cups and spoons will help you ensure that you are adding the right amount of each ingredient. This will not only help you avoid overfilling the blender, but it will also help you achieve the right texture and consistency for your juice.

  3. Start with a small amount of liquid. If you are making a juice that requires a lot of ingredients, it can be tempting to add all of them at once. However, this can easily cause the blender to become overfilled. Instead, start with a small amount of liquid and gradually add more as you blend. This will help you avoid spills and accidents while ensuring that your juice is blended to perfection.

To prevent spills and accidents, it’s important to be mindful of the amount of ingredients you add to your blender. However, even with careful use, parts of your blender may eventually wear out and need to be replaced. In the next section, we’ll discuss how to replace parts when needed.

Advertisement

Replace Parts When Needed

If your blender parts start to wear out, it’s important to replace them promptly to ensure safe and efficient blending. Over time, the blades, container, lid, and tamper may become damaged or worn, which can affect the quality and consistency of your juice. Here are some troubleshooting tips to help you identify when it’s time to replace your blender parts:

PART SIGNS OF WEAR
Blades Dullness, chipping, or rust
Container Cracks, leaks, or cloudiness
Lid Loose or cracked seal, difficulty removing or securing
Tamper Bent or broken handle, cracks in the shaft

Replacing these parts is relatively easy and can be done through the manufacturer’s website or authorized dealers. It’s important to use genuine replacement parts to maintain the quality and safety of your blender. By replacing worn parts, you can ensure that your blender continues to produce high-quality and consistent juice for years to come.

As you experiment with new recipes, it’s important to keep in mind the state of your blender parts. By regularly checking and replacing worn parts, you can ensure that your juices are of the highest quality and consistency possible. With a well-maintained blender, you can continue to create and enjoy a wide variety of juices and smoothies.

Experiment with New Recipes

I love experimenting with new recipes when making juice with my Vitamix. One of my favorite things to do is try different combinations of fruits and vegetables to create unique and delicious flavor profiles.

Additionally, I like to add superfoods or supplements to boost the nutritional value of my juice. Finally, I always share my creations with friends and family to get feedback and inspire them to try new things in their own kitchens.

Advertisement

It’s amazing how much fun and creativity can be found in making juice with a Vitamix!

Try Different Combinations of Fruits and Vegetables

Experimenting with various fruit and vegetable combinations can elevate the flavor profile of your homemade juice, thanks to the versatility of the Vitamix. Here are some juice pairing suggestions to get you started:

  1. Sweet and Tart: Combine oranges and cranberries for a juice that’s both refreshing and tangy. This combination is also high in vitamin C and antioxidants, which can boost your immune system.

  2. Green Powerhouse: Mix kale, spinach, cucumber, and apple for a juice that’s packed with nutrients like iron, calcium, and vitamin K. This combination is also great for detoxifying the body.

  3. Tropical Twist: Blend together pineapple, mango, and coconut water for a juice that’s sweet and tropical. This combination is high in vitamin C and can help with digestion.

  4. Spicy Kick: Add ginger and lemon to your juice for a spicy kick. This combination is great for reducing inflammation and boosting digestion.

By trying out different combinations of fruits and vegetables, you can not only enhance the taste of your juice but also reap the benefits of juicing different fruits and vegetables.

In the next section, we’ll explore how to add superfoods or supplements to further boost the nutritional value of your juice.

Add Superfoods or Supplements

As I mentioned earlier, trying different combinations of fruits and vegetables is a great way to make delicious and nutritious juice with your Vitamix. However, to take your juice to the next level, consider adding some superfoods or supplements to the mix.

Advertisement

Superfoods are nutrient-dense foods that offer a range of health benefits. Some examples of superfoods that can be added to your juice include chia seeds, spirulina, acai berries, and maca powder. These ingredients are packed with vitamins, minerals, and antioxidants that can help boost your immune system, improve digestion, and even prevent chronic diseases.

Choosing the right supplements can also enhance the nutritional value of your juice. For example, adding a scoop of protein powder can help you meet your daily protein needs, while a probiotic supplement can improve gut health and digestion.

By adding superfoods and supplements to your juice, you can create a personalized blend that meets your specific health goals and tastes great. However, it’s important to do your research and choose high-quality ingredients that are safe and effective.

With the right ingredients, you can create a powerhouse of a juice that’ll leave you feeling energized and nourished. Now, let’s move on to the next section and talk about how to share your delicious creations with friends and family.

Share Your Creations with Friends and Family

When sharing your delicious blends with loved ones, don’t forget to snap a pic and post it on social media! It’s a great way to show off your creativity and inspire others to try new healthy recipes.

Advertisement

Sharing experiences is an excellent way to bond with friends and family, and what better way to do it than over a glass of fresh juice? Whether you’re experimenting with new fruits and vegetables or adding some superfoods to your blend, sharing your creations can be a fun and rewarding experience.

Trying new flavors is also a great way to expand your palate and discover new favorites. With a Vitamix, the possibilities are endless, and you can create blends that are both delicious and nutritious. Whether you prefer sweet or savory, there’s a blend out there that’s perfect for you.

So, next time you whip up a batch of your favorite juice, don’t be afraid to share it with others and try new flavors together. Who knows, you might just discover your new favorite blend!

Frequently Asked Questions

Can you use frozen fruits or vegetables in the recipe?

Yes, frozen fruits and vegetables can be used in Vitamix juice, but using fresh produce is recommended for optimal taste and nutrition. To blend frozen produce, thaw slightly or use the Vitamix tamper tool to ensure smooth blending. Tips for blending frozen produce include adding liquid and blending in stages.

How long can you store freshly made juice in the fridge?

Freshly made juice can be stored in the fridge for up to 72 hours. However, for maximum benefits of drinking freshly made juice, it is recommended to consume it immediately. Juice cleanse can help improve digestion, boost immunity and aid in weight loss.

Advertisement

Can you add sweeteners like honey or sugar to the juice?

Did you know that adding sweeteners to juice can significantly increase its caloric value? When exploring sweetness, consider natural options like stevia or monk fruit instead of honey or sugar, which can alter the texture.

What is the best type of container to store leftover juice?

The best container to store leftover juice is glass, airtight and non-reactive to prevent oxidation. Keep it refrigerated at 35-40°F and consume within 24-48 hours. Adding lemon juice or vacuum sealing can help prolong freshness.

Is it possible to make juice with a Vitamix without using a strainer?

Oh sure, it’s totally possible to make juice with a Vitamix without using a strainer. Who needs all those juicing benefits anyway? Just blend up your fruits and veggies and call it a day. But if you want a smoother drink, try alternative juicing methods.

Conclusion

So, there you have it! Making juice with a Vitamix is a simple and easy process that anyone can do at home. With the right ingredients and a few simple steps, you can enjoy fresh, healthy juice that’s packed with nutrients and flavor.

Did you know that, according to a study published in the Journal of Agricultural and Food Chemistry, blending fruits and vegetables in a high-powered blender like the Vitamix can actually increase the bioavailability of certain nutrients? This means that your body’s better able to absorb and utilize the vitamins and minerals found in your juice. So not only is making juice with a Vitamix a convenient and delicious way to get your daily dose of fruits and veggies, it may also be more beneficial for your overall health.

Advertisement

Remember to experiment with different recipes and ingredients to find what works best for you. With a little practice and creativity, you can become a juice-making pro in no time!

Continue Reading
Advertisement

Juice

How To Get Rust Out Of Hair With Lemon Juice

Published

on

By

As an individual with a passion for being outside, I’ve come across numerous rust stains on both my garments and in my hair. Rust poses an annoying and unattractive issue, particularly when it affects your hair.

Fortunately, there is a simple and effective solution to this problem: lemon juice.

In this article, I’ll guide you through the process of using lemon juice to remove rust from your hair. With just a few simple steps and some basic supplies, you can say goodbye to those stubborn rust stains and restore your hair to its natural shine and beauty.

So, let’s get started on this easy and affordable rust removal method.

Key Takeaways

  • Lemon juice contains citric acid which can break down rust particles in hair
  • To use lemon juice for rust removal, mix equal parts lemon juice and water, apply to hair, and let sit for at least 30 minutes before rinsing and conditioning
  • Prevention techniques such as avoiding metal combs, prolonged exposure to hard water, and keeping hair dry can help prevent rust buildup in hair
  • Lemon juice can also promote hair growth, treat dandruff, and add shine to dull hair. However, it should be used with caution and in moderation to avoid potential damage to hair.

Identify the Rust in Your Hair

Before you dive into the lemon juice remedy, you’ll need to identify the pesky rust particles that have decided to take up residence in your hair.

Rust buildup in hair can be caused by a number of factors, including exposure to hard water, iron-rich soil, or rusty metal objects. The rust particles can easily latch onto the hair shaft, causing discoloration and damage.

Advertisement

To prevent rust buildup in hair, it’s important to take preventative measures. Avoid using metal combs or brushes on your hair, and try to avoid prolonged exposure to hard water. If you live in an area where hard water is common, consider using a water softener or installing a filter on your showerhead.

By taking these steps, you can help to prevent rust buildup in your hair and keep it looking healthy and vibrant.

Now that you’ve identified the rust in your hair and taken steps to prevent it in the future, it’s time to gather the necessary supplies to get rid of it.

Gather the Necessary Supplies

To get started, I need to gather the necessary supplies for removing rust from my hair with lemon juice. First, I’ll need a bottle of lemon juice, which contains citric acid that helps to break down the rust.

Next, I’ll grab a bowl to mix the lemon juice with water. Finally, I’ll need a towel to wrap around my hair and help absorb the lemon juice mixture.

Advertisement

With these three items in hand, I’m ready to tackle the rust in my hair.

Lemon Juice

If you’re struggling with rust in your hair, try using lemon juice as a natural remedy – it’s like a refreshing burst of sunshine for your locks! Lemon juice is a natural astringent that can help remove rust stains from your hair.

Here are some benefits of using lemon juice for hair:

  • It’s an excellent natural alternative to harsh chemical products that can damage your hair.
  • It can help improve scalp health, as it contains vitamin C and antioxidants that can help reduce inflammation and promote circulation.

Additionally, you can create lemon juice hair masks for different hair types. For example:

  • For oily hair: Mix lemon juice with apple cider vinegar and water to create a clarifying rinse that can help remove excess oil and buildup.
  • For dry hair: Mix lemon juice with honey and olive oil to create a hydrating mask that can help nourish and moisturize your hair.

Now that we’ve covered the benefits of using lemon juice for hair, let’s move on to the next step – preparing a bowl to hold the lemon juice mixture.

Bowl

You’ll need a clean bowl for mixing the natural remedy that will rejuvenate your hair and scalp. Lemon juice is a powerful ingredient that can help get rid of rust in your hair. But it’s important to use a clean bowl to mix the lemon juice with other ingredients that can boost its effectiveness.

Aside from being a useful tool in your hair care routine, a bowl can also have decorative uses. You can use it to hold potpourri or fill it with water and floating candles to create a soothing ambiance in your home. When it comes to cleaning tips, a bowl can also be used to hold cleaning solutions or act as a container for soaking small items like jewelry or toys. With its versatility and functionality, a clean bowl is an essential item in any household. As you move on to the next step of the rust removal process, grab a clean towel to dry off your hair.

Advertisement

Towel

Grab a soft towel to gently pat your hair dry after using the natural remedy, ensuring your locks remain smooth and shiny. Using a microfiber towel is highly recommended as it has many benefits for your hair. Microfiber towels are ultra-soft, lightweight, and specifically designed to dry hair quickly without causing any damage. Moreover, they absorb more water than regular cotton towels, which means your hair will dry faster and with less frizz.

However, it’s important to properly wash and maintain your towels to ensure they remain effective. Avoid using fabric softeners or dryer sheets when washing your microfiber towels as they can clog the fibers and reduce their absorbency. Instead, wash them in cold water with a mild detergent and air dry them or use a low heat setting in the dryer.

By taking care of your towels, you’ll be able to enjoy the benefits of using a microfiber towel for a long time. Now, let’s move on to the next step and prepare the lemon juice solution.

Prepare the Lemon Juice Solution

Mixing lemon juice with water creates a potent solution that’ll help remove stubborn rust stains from your hair. Lemon juice has been used for centuries as a natural remedy for hair care. Its acidic properties are particularly effective in removing impurities and restoring shine to dull hair. Lemon juice hair masks have been found to be particularly beneficial for different hair types, including oily hair and dry scalp.

To prepare the lemon juice solution, start by mixing equal parts of lemon juice and water in a bowl. Stir the mixture well until the lemon juice is completely dissolved in the water. You can adjust the concentration of the solution depending on the severity of the rust stains in your hair.

Advertisement

Once the solution is ready, it’s time to move on to the next step and apply it to your hair.

Apply the Lemon Juice Solution

As you slather the tangy solution onto your tresses, imagine the rust stains dissolving away like butter on a hot skillet. Lemon juice is a powerful natural remedy for rust stains in hair, and it also has numerous benefits for hair health. Lemon juice contains citric acid, which can help remove rust stains and other impurities from hair. Additionally, lemon juice is a natural hair lightener, which can help brighten your locks and give them a healthy, shiny look.

To apply the lemon juice solution, start by pouring the juice into a spray bottle or bowl. Then, use a comb or your fingers to work the solution into your hair, making sure to focus on any areas with rust stains. Allow the juice to sit for at least 30 minutes, or longer if you have particularly stubborn stains. During this time, you can wrap your hair in a towel or shower cap to keep the solution from dripping. Once the time is up, rinse your hair thoroughly with cool water and follow up with a moisturizing conditioner. Letting the solution sit is a crucial step in the rust removal process, as it gives the citric acid in the lemon juice time to break down the rust and other impurities in your hair.

Let the Solution Sit

After applying the tangy solution, it’s important to allow it to sit for at least 30 minutes to give the citric acid time to break down any impurities in your locks. This step is crucial in ensuring that the lemon juice fully penetrates the hair shaft and effectively removes any rust buildup. While waiting, it’s best to cover your hair with a shower cap or towel to avoid any mess.

Here are some tips to consider while waiting for the lemon juice solution to work its magic:

Advertisement
  • Benefits of using natural remedies for hair care: Lemon juice is a natural remedy that can help remove rust from your hair without causing damage. Unlike commercial hair products that contain harsh chemicals, using natural remedies like lemon juice can be gentle on your hair and scalp.

  • Tips for preventing rust buildup in hair: To avoid rust buildup in the future, it’s important to keep your hair dry and avoid contact with metal objects that can cause rust. Additionally, using a clarifying shampoo once a week can help remove any impurities that may have accumulated in your hair.

Once the 30-minute wait time is up, it’s time to rinse your hair thoroughly with warm water and check if the rust has been fully removed. If not, repeat the process until the rust has been eliminated.

Repeat if Necessary

If the rust remains, it may be necessary to repeat the treatment to ensure complete removal. Lemon juice is a natural and effective way to get rid of rust in hair. Not only does it work well, but it also has several benefits for hair care.

One of the main benefits of using lemon juice for hair care is its ability to act as a natural hair lightener. This means that using lemon juice on your hair can help to lighten and brighten your hair color. Additionally, lemon juice is a great way to remove buildup from hair, which can help to keep it healthy and shiny. If you find that the rust is still present after the first treatment, simply repeat the process to ensure that all traces of rust are removed.

Now that you have successfully removed the rust from your hair using lemon juice, it is important to condition your hair. Conditioning your hair after any treatment is essential to keep it healthy and strong. In the next section, we will discuss how to condition your hair properly to ensure that it stays soft and silky.

Condition Your Hair

So now that I’ve successfully removed the rust from my hair using lemon juice, it’s time to condition and nourish my hair.

Advertisement

The first step is to apply a good quality conditioner to the hair, making sure to evenly distribute it from root to tip.

After leaving it on for a few minutes, rinse thoroughly with water and towel dry gently.

Conditioning your hair after a treatment like this is essential to restore its natural moisture and prevent further damage.

Apply Conditioner

To apply conditioner, you’ll want to gently massage it into your hair, focusing on the rust-stained areas. Using a natural conditioner can provide many benefits, such as avoiding harsh chemicals and nourishing your hair with natural ingredients like essential oils. It’s best to apply conditioner after shampooing, as this ensures that the product can penetrate your hair and provide optimal results. Additionally, leaving the conditioner in your hair for a few minutes before rinsing can also increase its effectiveness.

To help you understand the benefits of using natural conditioners and the best times to apply it, check out the table below:

Advertisement
Benefits of Using Natural Conditioners Best Times to Apply Conditioner for Optimal Results
Avoid harsh chemicals After shampooing
Nourish hair with natural ingredients Leave in for a few minutes before rinsing
Provide additional moisture Use once or twice a week for maintenance

Now that you know the benefits of using a natural conditioner and the best times to apply it, it’s time to move on to the next step: rinsing with water.

Rinse with Water

Now it’s time for you to rinse your hair with water, making sure to thoroughly wash out the conditioner. It’s important to rinse your hair with water after using lemon juice as it helps to restore the pH balance of your hair.

The acid in lemon juice can be harsh on hair if left for too long, so it’s essential to rinse it out with cool water to prevent any damage. When it comes to hair care, using natural remedies like lemon juice can be beneficial. Lemon juice is a natural astringent that can help to remove rust from hair without causing any harm.

Rinsing your hair with water after using lemon juice can also help to keep your hair soft and shiny. Now that you’ve rinsed out the conditioner and lemon juice, it’s time to towel dry your hair gently.

Towel Dry

You’re ready to gently blot your damp locks with a towel to remove excess water and prepare for styling. Towel drying is an essential step in preventing hair rust since it reduces the amount of moisture that can lead to rust buildup.

Advertisement

Here are some benefits of towel drying and tips for preventing hair rust:

  • Reduces Frizz: Towel drying helps to reduce frizz and promote a smoother hair texture.
  • Saves Time: Towel drying is a quick and efficient way to dry your hair after washing.
  • Prevents Hair Damage: Excessive heat from hair dryers can damage hair, but towel drying eliminates the need for heat styling tools.
  • Promotes Hair Health: Regular towel drying can improve the overall health of your hair by reducing the amount of moisture that can cause rust buildup.

To prevent rust buildup, it’s important to towel dry your hair thoroughly after washing. Make sure to avoid rubbing your hair vigorously with the towel, as this can cause damage and increase the risk of rust. Instead, gently blot your hair until it’s damp.

This will help to remove excess water without damaging your hair. With your hair now towel-dried, let’s move on to the next step and learn how to avoid future rust buildup.

Avoid Future Rust Buildup

If you’re planning on spending time near rust-prone areas, remember to bring a lemon and use it to rinse your hair afterwards. This will not only help remove any existing rust, but also prevent rust accumulation in the long term. Lemon juice contains citric acid, which helps break down and dissolve rust particles.

To further avoid future rust buildup, it’s important to take preventative measures. One way to do this is to wear a hat or headscarf to protect your hair from direct contact with rust-prone surfaces. Additionally, regularly washing your hair with a clarifying shampoo can help remove any leftover rust particles and other buildup from your hair. Below is a table that summarizes some tips for preventing rust accumulation:

Tips for Preventing Rust Accumulation
Rinse hair with lemon juice after exposure
Wear a hat or headscarf
Use clarifying shampoo regularly
Avoid direct contact with rust-prone surfaces
Keep hair dry and clean

Now that you know how to prevent rust buildup, it’s time to focus on removing any existing rust. In the next section, we’ll explore some other rust removal methods you can try.

Advertisement

Try Other Rust Removal Methods

As you delve into other methods of removing rust, you’ll find that patience and persistence will be key in achieving rust-free locks. Lemon juice may be the most effective remedy for removing rust from hair, but there are alternative remedies that may work for you.

Here are some other methods to try:

  • Baking soda and vinegar: Mix equal parts baking soda and vinegar to create a paste. Apply the paste to the rusted area and let it sit for 30 minutes before rinsing out with warm water.

  • Coca-Cola: Pour Coca-Cola onto the rusted area and let it sit for 10-15 minutes before rinsing out with warm water.

  • Salt and lemon: Mix 1 tablespoon of salt and the juice of half a lemon to make a paste. Apply the paste to the rusted area and let it sit for 30 minutes before rinsing out with warm water.

  • Cream of tartar and hydrogen peroxide: Mix 2 tablespoons of cream of tartar and 2 tablespoons of hydrogen peroxide to create a paste. Apply the paste to the rusted area and let it sit for 30 minutes before rinsing out with warm water.

  • Tomato ketchup: Apply a generous amount of tomato ketchup to the rusted area and let it sit for 30 minutes before rinsing out with warm water.

In addition to trying these alternative remedies, it’s important to use prevention techniques to avoid future rust buildup. Regularly washing and conditioning your hair, avoiding exposure to metal and hard water, and using a leave-in conditioner can all help prevent rust buildup.

With patience and persistence, you can find the right method to remove rust from your hair and keep it rust-free in the future.

As we wrap up this guide on removing rust from hair, it’s important to remember that prevention is key. While there are many remedies to remove rust from hair, it’s much easier to prevent rust buildup in the first place. By following the prevention techniques we’ve discussed, you can keep your hair looking and feeling healthy without worrying about rust buildup.

Advertisement

Final Thoughts

Now that you’ve got a variety of rust removal methods to try, it’s important to remember that prevention techniques can save you from the hassle of dealing with rust in the first place.

One way to prevent rust from forming in your hair is to avoid exposing it to water that contains high amounts of iron.

You can also use a clarifying shampoo once a week to remove any buildup in your hair that may lead to rust formation.

While lemon juice can be effective in removing rust from hair, it’s important to weigh the pros and cons before using it as a hair care remedy.

Lemon juice is acidic, which means it can potentially damage your hair if used frequently or in large amounts.

Advertisement

Additionally, lemon juice may not be effective for all types of rust stains.

It’s always a good idea to do a patch test first and consult a hair care professional before trying any at-home remedies.

On the other hand, lemon juice has many other home remedies for hair issues, such as promoting hair growth, treating dandruff, and adding shine to dull hair.

Overall, while lemon juice can be a useful tool in your hair care routine, it’s important to use it wisely and with caution.

Frequently Asked Questions

Can I use any type of lemon juice for this rust removal method?

Yes, the type of lemon juice used can affect the effectiveness of the rust removal method. For best results, use freshly squeezed lemon juice or bottled lemon juice without added sugars or preservatives. Alternatively, try using vinegar or baking soda.

Advertisement

How often should I repeat this rust removal treatment?

Based on my research, repeating the rust removal treatment with lemon juice should be done no more than once a week. It’s important to rinse hair thoroughly and use a moisturizing shampoo for maintenance.

What should I do if the rust stain doesn’t completely disappear after the first treatment?

If the rust stain doesn’t completely disappear after the first treatment, I recommend trying alternative methods such as using vinegar or baking soda. If that doesn’t work, seek professional solutions such as visiting a hair salon or consulting with a dermatologist.

Are there any potential side effects or risks associated with using lemon juice on my hair?

Using lemon juice on hair can have benefits such as adding shine and reducing dandruff. However, it is important to note that lemon juice can also cause dryness and damage to hair. Alternatives to lemon juice for rust removal include vinegar or a commercial rust remover.

How can I prevent rust buildup in my hair in the future?

To prevent rust buildup in my hair, I can take preventive measures such as avoiding exposure to rusty water sources and using a shower filter. I can also incorporate hair care tips such as regular deep conditioning and avoiding overuse of heating tools.

Conclusion

In conclusion, getting rust out of your hair with lemon juice can be a simple and effective solution. By taking the time to identify the rust, gather the necessary supplies, and prepare the lemon juice solution, you can easily remove the rust from your hair.

Advertisement

Applying the solution and letting it sit for a few minutes before rinsing it off and conditioning your hair can help to restore your hair to its natural state. However, it’s important to note that lemon juice may not be the only solution to rust removal. There are other methods you can try, such as using baking soda or vinegar, depending on the severity of the rust buildup.

Ultimately, the key to avoiding future rust buildup is to take preventative measures, such as covering your hair when working with metal or using a rust-resistant showerhead. As the saying goes, an ounce of prevention is worth a pound of cure.

In this article, we’ve provided you with a step-by-step guide on how to get rust out of your hair with lemon juice. With these tips and tricks, you can restore your hair to its natural beauty and avoid the frustration of dealing with rust buildup in the future.

So, go ahead and try it out – your hair’ll thank you!

Advertisement

Continue Reading

Juice

How Much Lemon Juice For Half A Lemon

Published

on

By

I adore incorporating lemon juice into both my culinary and baking endeavors, yet frequently, I end up with a half-used lemon post-recipe. It’s aggravating to discard an ingredient as adaptable as this, especially since I’m always uncertain about the amount of juice the leftover half lemon will yield.

That’s why I decided to do some research and figure out exactly how much lemon juice I can get from half a lemon. After some experimenting, I found that the amount of juice you can get from half a lemon can vary based on several factors, including the ripeness of the lemon, the temperature of the lemon, and the juicing method you use.

In this article, I’ll share my findings and offer tips on how to get the most juice out of your half lemon, as well as how to convert recipes that call for a specific amount of lemon juice. So, let’s get juicing!

Key Takeaways

  • The amount of lemon juice yielded from a lemon is affected by factors such as ripeness, temperature, and juicing method.
  • Efficient ways to extract lemon juice include using a juicer or citrus press.
  • Rolling the lemon on a hard surface before cutting can help in manually squeezing lemon juice.
  • Accurate measurement of lemon juice can be done using measuring cups, measuring spoons, and kitchen scales, and it is important to refer to recipe instructions for correct lemon juice measurement.

Understanding the Variables

You might be wondering, "How much lemon juice do I need for half a lemon?"Well, it depends on the size of the lemon and how much juice you want to extract.

Factors affecting lemon juice yield include the ripeness of the fruit and the juicing method used. A ripe lemon will have more juice than an unripe one, and using a juicer will extract more juice than squeezing the lemon by hand.

To extract the most juice from a lemon, it’s best to use a juicer or a citrus press. These methods apply pressure directly to the fruit and will extract the maximum amount of juice.

Advertisement

However, if you don’t have a juicer or press, you can still extract juice by manually squeezing the lemon. Just make sure to roll the lemon on a hard surface before cutting it in half to break down the membranes and release more juice.

With these tips, you’ll be able to extract the most juice from your half lemon.

Manual Juicing

When juicing by hand, it’s easy to gauge the right amount of lemon juice for half a lemon. Squeezing techniques play a big role in determining how much juice you’ll get out of a lemon.

It’s best to start with a firm, unblemished lemon and roll it on a hard surface with the palm of your hand to loosen the juice. Cut the lemon in half crosswise, and then cut a small slice off the bottom of each half so that it sits flat on your juicing surface.

Next, use a fork or a citrus juicer to press the lemon half firmly down onto the surface while twisting it back and forth a bit to break up the pulp. Apply steady pressure to extract as much juice as possible. Be careful not to let your hand fatigue too quickly, as this can affect the amount of juice you get from the lemon.

Advertisement

Once you’ve squeezed both halves, you should have just the right amount of juice for your recipe.

Juicing with tools can be even easier and more efficient than juicing by hand. But before we delve into that, let’s first take a look at another important variable in juicing: the ripeness of the lemon.

Juicing with Tools

Using a citrus juicer can save time and energy while still ensuring you get the most out of your lemons, making it a great option for those who don’t want to waste any precious juice. There are several juicing techniques to choose from, but using a tool like a manual citrus juicer or an electric juicer can make the process a breeze. With a manual juicer, you simply cut the lemon in half, place it face down in the juicer, and twist the tool to extract the juice. An electric juicer takes things a step further by doing the work for you with the push of a button.

If you’re looking for citrus fruit alternatives, consider trying out limes or oranges. Lime juice can add a zesty kick to any dish or drink, while orange juice is a sweet and refreshing option. However, keep in mind that the amount of juice you get from each fruit may vary, so it’s important to measure the juice accurately to ensure the perfect balance of flavors in your recipe. Speaking of which, let’s move on to the next section and discuss how much lemon juice you actually need for half a lemon.

Measuring Lemon Juice

When it comes to measuring lemon juice, I find it helpful to use different tools depending on the recipe. For measuring larger quantities, a measuring cup is the way to go.

Advertisement

For more precise measurements, a measuring spoon can be used. And for those who prefer to weigh ingredients, a kitchen scale is a great option.

By using these tools, you can ensure that you’re adding the correct amount of lemon juice to your dish.

Using a Measuring Cup

To accurately measure the amount of lemon juice needed for a recipe, it’s best to use a measuring cup. While there are alternative methods such as squeezing the juice directly into the recipe, using a measuring cup ensures the most accurate measurement.

It’s important to note that different recipes may call for different amounts of lemon juice, so always refer to the recipe instructions for the correct measurement.

When using a measuring cup, start by selecting the correct size for the amount of juice needed. For example, if a recipe calls for half a lemon’s worth of juice, a 1/4 cup measuring cup would be appropriate.

Advertisement

Cut the lemon in half and hold it over the measuring cup, squeezing the juice out into the cup. Use a spoon or spatula to scrape any remaining juice from the lemon into the cup.

With the accurate measurement of lemon juice in hand, you can confidently move on to the next step of your recipe, like using a measuring spoon to add other ingredients.

Using a Measuring Spoon

Get ready to add a tiny but powerful burst of flavor to your recipe with the help of a measuring spoon. If you don’t have a measuring cup or you just want to be more precise, using a measuring spoon is a great alternative method for measuring lemon juice.

A tablespoon or teaspoon measuring spoon can help you measure the exact amount of lemon juice you need for your recipe. One benefit of using a measuring spoon is that it allows for more accuracy while measuring small amounts of liquid. However, there are also some drawbacks. Measuring spoons can be harder to use for larger amounts of liquid, and it may take longer to measure out the proper amount of lemon juice.

Despite this, using a measuring spoon can be a quick and easy way to ensure that your recipe turns out just right.

Advertisement

Transitioning into the subsequent section about using a scale, it’s important to note that while measuring spoons are great for small amounts of liquid, a kitchen scale can be even more precise for larger quantities.

Using a Scale

Using a scale can add a new level of precision to your cooking, allowing you to measure the exact weight of ingredients for your recipe. This method of measuring accuracy is especially useful when you need to know how much lemon juice for half a lemon.

By using a scale, you can measure the weight of the lemon before and after you squeeze out the juice, and then calculate the exact amount you need for your recipe. This eliminates the guesswork and ensures that your dish turns out perfectly every time.

Weight conversions are also simplified with the use of a scale. Instead of guessing how many cups or teaspoons of an ingredient you need, you can simply weigh it and convert the weight to the appropriate measurement for your recipe. This is particularly helpful when using recipes from other countries that use different measurement systems.

With a scale, you can easily convert the weight from grams to ounces or vice versa. Converting recipes can seem daunting, but with the help of a scale, it can be a breeze.

Advertisement

Converting Recipes

Converting recipes can be tricky, but it’s worth it to make your favorite dishes in the right proportions. Measuring conversions is essential when adjusting a recipe to fit your needs.

Here are three tips to make the process easier:

  1. Use a conversion chart: Many websites offer conversion charts that allow you to convert measurements easily. Simply enter the ingredient and the measurement you have, and the chart will provide the equivalent in the measurement you need.

  2. Understand the ratios: Recipes are all about ratios, so understanding the ratio of ingredients can help you adjust a recipe. For instance, if a recipe calls for one cup of flour and two eggs, the ratio of flour to eggs is 1:2. If you need to adjust the recipe to make less, you can use this ratio to determine how much of each ingredient you need.

  3. Adjust to taste: Recipes are not set in stone, so feel free to adjust them to your liking. If you prefer more or less of an ingredient, adjust the recipe accordingly. Just remember to write down your adjustments so you can replicate them in the future.

Now that you know how to convert a recipe, let’s talk about storing lemon juice.

Storing Lemon Juice

To keep your citrusy flavors fresh, all you need is a resealable glass jar with a lid, a strainer, and a funnel. When storing lemon juice, it’s important to follow proper techniques to ensure the longest shelf life possible.

First, strain the juice to remove any pulp or seeds. Then, use the funnel to pour the juice into the glass jar, leaving a little bit of space at the top for expansion. Seal the lid tightly and store the jar in the refrigerator.

Advertisement

It’s important to note that fresh lemon juice has a relatively short shelf life, typically lasting only 2-3 days in the refrigerator. However, you can extend the shelf life by freezing the juice in ice cube trays or by making lemon juice concentrate.

To make concentrate, simply simmer the juice in a saucepan until it has reduced by half, then allow it to cool and store it in a sealed container in the refrigerator or freezer.

Making Lemon Juice Concentrate

When you need to stretch your citrus supply further, a tart and tangy lemon juice concentrate is a golden ticket, like a secret weapon in your culinary arsenal. Making lemon juice concentrate is a simple process that involves simmering lemon juice on low heat until it reduces by half.

Here are three reasons why making lemon juice concentrate is a smart choice:

  • Lemon juice concentrate can save you time and money by allowing you to use less juice while still getting the same tangy flavor.
  • Lemon juice concentrate is a great way to preserve the nutrients and health benefits of fresh lemon juice, which is a good source of vitamin C, antioxidants, and other essential nutrients.
  • Lemon juice concentrate can be used as a substitute for fresh lemon juice in many recipes, making it a versatile ingredient to have on hand in the kitchen.

In addition to making lemon juice concentrate, there are many ways to use fresh lemon juice in your cooking and baking. From adding a splash of lemon juice to salad dressings and marinades to using it as a natural cleaning agent, lemon juice has a wide range of uses beyond just adding flavor to your food.

So, whether you’re looking to make lemonade, add some zing to your chicken, or clean your kitchen, lemon juice is a versatile and valuable ingredient to have in your pantry.

Advertisement

Using Lemon Juice

Using lemon juice in your cooking and baking is a flavorful and healthy way to add a tangy kick to your favorite dishes. Lemon juice is an excellent source of vitamin C, which helps boost your immune system and fight off infections. It also contains antioxidants that help protect your cells from damage caused by free radicals.

Moreover, lemon juice is low in calories, making it a great addition to your diet if you’re watching your weight. Incorporating lemon juice into your recipes is easy and versatile. You can use it to add a refreshing zing to your salad dressings, marinades, sauces, and dips.

Additionally, lemon juice is a common ingredient in many sweet treats such as lemon bars, lemon meringue pie, and lemon cookies. The sourness of lemon juice pairs well with the sweetness of sugar, making it a perfect combination for desserts. Whether you’re making a savory or sweet dish, lemon juice is a must-have ingredient in your pantry.

When it comes to using lemon juice, there are a few tips and tricks to keep in mind. For example, if you’re using fresh lemon juice, make sure to roll the lemon on a hard surface before juicing it to extract more juice. You can also warm the lemon in the microwave for a few seconds to make it easier to juice.

Additionally, if you’re substituting bottled lemon juice for fresh lemon juice in a recipe, keep in mind that bottled juice is more concentrated, so you’ll need to adjust the amount accordingly. With these tips in mind, you’ll be able to incorporate lemon juice into your recipes like a pro.

Advertisement

Tips and Tricks

When it comes to using lemon juice in my cooking, I always want to get as much juice as possible from the fruit. To maximize the amount of lemon juice I get, I’ve found that rolling the lemon back and forth on the counter before cutting it open helps to release more juice.

Additionally, I always strain the juice through a fine-mesh sieve to avoid any pesky seeds getting into my dish. And of course, cleaning up is a breeze when I use a juicer or a citrus squeezer to extract the juice.

Getting More Juice from Lemons

To get the most juice out of a lemon, it’s best to roll it on the counter before cutting it in half, even if you think you only need half a lemon’s worth of juice. This helps break down the lemon’s cell walls, making the juice easier to extract.

Once you’ve rolled the lemon, cut it in half and use a juicing technique that works best for you. Some people prefer to squeeze the lemon with their hands, while others prefer to use a lemon squeezer. Either way, applying firm pressure and twisting the lemon back and forth can help release more juice.

If you’re using your hands to squeeze the lemon, be sure to hold your hand over a strainer to catch any seeds that may escape. Alternatively, if you’re using a lemon squeezer, make sure the strainer is attached to the squeezer to catch any seeds.

Advertisement

Avoiding seeds in your juice is important because they can add an unpleasant bitter taste. With these techniques, you can get the most juice out of your lemons and avoid any unwanted seeds in your drink.

Avoiding Seeds

Don’t let pesky seeds ruin the refreshing taste of your lemonade or cocktail – make sure to strain them out before enjoying your drink! Here are some tips to avoid seeds in your lemon juice:

  • Cut the lemon in half and hold it over a small bowl or glass.
  • Use a small handheld juicer to extract the juice, catching the seeds with the bowl or glass.
  • For a larger quantity of juice, use an electric juicer with a strainer attachment to catch the seeds.
  • If you don’t have a juicer, use a fork or citrus reamer to extract the juice, and strain it through a fine mesh sieve.

In addition to avoiding seeds, it’s also important to avoid splatters when squeezing your lemon. To prevent this, use a slow and steady pressure when squeezing, and angle the lemon slightly downwards. If you’re in a pinch and don’t have any lemons on hand, you can substitute with other citrus fruits like limes or oranges. Just keep in mind that the flavor may be slightly different.

As you finish squeezing your lemons, it’s time to move on to cleaning up any messes and getting ready to enjoy your delicious lemon juice.

Cleaning Up

Cleaning up after making your citrus drink can be a hassle, but it’s important to do so to avoid any sticky messes later on. One way to make cleaning up easier is to use organic cleaning solutions.

Instead of using harsh chemicals that can be harmful to both you and the environment, opt for natural cleaning agents such as vinegar, baking soda, and lemon juice. These ingredients can effectively remove any stains and odors in your kitchen without leaving any residues.

Advertisement

You can also make your own DIY cleaning solutions with these organic ingredients. For example, mix equal parts of vinegar and water in a spray bottle to create an all-purpose cleaner that can be used to wipe down countertops, appliances, and even floors.

You can also sprinkle baking soda on any stubborn stains, let it sit for a few minutes, then scrub it off with a damp cloth. And if you have leftover lemon juice from making your citrus drink, you can use it to remove any grease or grime on your stovetop or oven.

These simple and natural cleaning solutions can make cleaning up after making your citrus drink a breeze.

Frequently Asked Questions

How long does lemon juice last in the fridge?

As someone who loves to add a squeeze of lemon to my meals, I always make sure to store my leftover lemon juice properly. Lemon juice storage should be in the fridge and has a shelf life of about 2-3 days. But don’t let it go to waste! Leftover lemon juice can be used in marinades, dressings, and even cocktails.

Can I freeze lemon juice to use later?

Yes, you can freeze lemon juice to use later. Freezing benefits include preserving the flavor and nutritional value for up to six months. Alternative preservation methods include canning or refrigeration, but freezing is the most convenient.

Advertisement

Is it better to use fresh or bottled lemon juice?

As a lemon juice enthusiast, I’ve found that using fresh lemons always provides a more vibrant flavor. While bottled juice may be more convenient, it often lacks the complexity and freshness of the real thing. However, there are advantages to using bottled juice, such as longer shelf life and consistent flavor. Ultimately, it depends on personal preference and the recipe being used.

How can I prevent lemon juice from splattering everywhere while juicing?

When juicing lemons, there are a few techniques to prevent splattering. Use a hand-held citrus juicer or place a mesh strainer over a bowl to catch any splatters. Avoid over-squeezing the lemon. Lemon squeezer alternatives include using a fork or reamer.

Does the acidity of lemon juice vary based on the ripeness of the lemon?

I investigated the Ripeness effect on the Citric acid concentration of lemon juice. Evidence shows that while the acid content may vary slightly with ripeness, the difference is not significant enough to impact the overall acidity of the juice.

Conclusion

In conclusion, lemon juice is a versatile ingredient that can be used in a variety of ways. Whether you’re manually juicing a half lemon or using tools to extract the juice, it’s important to understand the variables that can affect the amount of juice you get. Measuring and converting recipes can also help ensure that you’re using the right amount of lemon juice in your dishes.

But lemon juice isn’t just for cooking and baking – it can also be used for cleaning, health benefits, and more. So, next time you’re squeezing out some lemon juice, remember all the amazing things this little fruit can do. It’s a symbol of freshness, cleanliness, and health – and it’s just waiting to be added to your next recipe or cleaning routine.

Advertisement

Continue Reading

Juice

How Much Lemon Juice In Half A Lemon

Published

on

By

As an enthusiast of both cooking and baking, I recognize the significance of precise ingredient measurements in any recipe. Lemon juice stands as a crucial element that can completely transform a dish. It has the power to infuse both savory meals and sweet treats with a vibrant and invigorating taste.

But how much juice can you expect to get from half a lemon? The amount of juice in a half lemon can vary depending on several factors, such as the type of lemon, its ripeness, and how you extract the juice. It’s important to know the average amount of juice you can expect from a half lemon, as well as some tips for measuring and extracting the juice efficiently.

In this article, we’ll explore these factors and more, so you can confidently use lemon juice in your recipes and get the most out of this versatile ingredient.

Key Takeaways

  • The amount of juice in half a lemon varies based on ripeness, type, and extraction method.
  • On average, half a lemon yields 1.5 to 2 tablespoons of juice.
  • Tips for maximizing extraction include using ripe lemons, rolling or microwaving, and using zest.
  • Lemon juice can be accurately measured using spoons or juicer tools.

Factors that Affect the Amount of Juice in a Half Lemon

Did you know that how you prepare your half lemon can affect the amount of juice you get out of it? There are several factors that can affect the amount of lemon juice extraction.

Firstly, the ripeness of the lemon can affect the amount of juice that can be extracted. Ripe lemons tend to be softer and juicier compared to unripe ones. Therefore, if you want to extract more juice from your half lemon, it’s best to choose a ripe one.

Secondly, the lemon juice extraction techniques that you use can also affect the amount of juice you get from your half lemon. One common technique is to roll the lemon on a hard surface before cutting it in half. This process helps to break down the juice sacs inside the lemon and allows for more juice to be extracted. Another technique is to microwave the lemon for a few seconds before cutting it in half. This process can also help to loosen the juice sacs and make it easier to extract more juice.

Advertisement

Having an understanding of these factors affecting lemon juice extraction and techniques to maximize juice extraction can help you to get the most out of your half lemon.

Now, let’s explore how much juice you can expect to get from a half lemon on average.

Average Amount of Juice in a Half Lemon

You might be surprised to learn that a single hemisphere of this zesty fruit can pack a punch of tangy liquid gold. On average, a half lemon yields about 1.5 to 2 tablespoons of juice, depending on the size and ripeness of the lemon. However, the amount of juice extracted from a half lemon can vary depending on a few factors.

Firstly, the variety of lemon used can affect the amount of juice extracted. Some popular lemon varieties, such as Eureka and Lisbon, have thicker peels and less juice compared to other varieties.

Secondly, the extraction method used can also influence the amount of juice obtained. Squeezing the lemon with your hands may yield less juice compared to using a citrus juicer or reamer.

Advertisement

Lastly, the temperature of the lemon can also play a role in the amount of juice extracted. Room temperature lemons tend to produce more juice compared to those that are cold.

When it comes to measuring lemon juice, it’s important to have an accurate measurement to ensure the right balance of flavors in your recipe.

Measuring Lemon Juice

To accurately measure the tangy elixir, simply squeeze the citrus into a measuring spoon, watching as the yellow liquid fills the metal scoop. This ensures measuring accuracy, especially when following a recipe that requires precise amounts of lemon juice.

It’s also important to note that the amount of juice in a half lemon may vary depending on the size and ripeness of the fruit. To make measuring lemon juice even easier, there are specialized lemon juicer tools available on the market. These tools can help extract the maximum amount of juice from the fruit, making it easier to measure and adding more tangy flavor to your dishes.

With precise measurements and the right tools, you can ensure that your recipes will have just the right amount of lemon juice to make them pop with flavor. When it comes to cooking and baking, lemon juice is a key ingredient that can add a bright, tangy flavor to any dish. Its acidity can help balance out rich or heavy flavors, and it can also be used as a natural preservative.

Advertisement

With the right amount of lemon juice in your recipes, you can take your dishes to the next level and impress your family and friends with your culinary skills.

Importance of Lemon Juice in Recipes

When adding lemon juice to your recipes, it’s crucial to understand its importance in enhancing flavors and preserving ingredients. Lemon juice is a versatile ingredient that can be used in various dishes, from savory to sweet.

Here are some benefits of consuming lemon juice and using it for skin care:

  • Lemon juice is a good source of vitamin C, an antioxidant that helps boost the immune system and promote healthy skin.
  • Applying lemon juice on the skin can help reduce acne and blemishes, thanks to its antibacterial properties.
  • Lemon juice can also reduce dark spots and brighten the skin, making it a popular ingredient in skin care products.
  • Consuming lemon juice can aid in digestion and detoxification, as it helps stimulate the liver and flush out toxins from the body.

Knowing the benefits of lemon juice can help you make the most out of this ingredient in your recipes and daily routine. However, if you don’t have lemon juice on hand, there are substitutes you can use.

Substitutes for Lemon Juice

If you’re in a bind and don’t have any fresh lemons on hand, there are a few substitutes you can use in your recipes. One common substitute is bottled lemon juice, which can be found in most grocery stores. While it may not have the same fresh taste as fresh lemon juice, it can still provide the necessary acidity and flavor to your dish. Another option is to use other citrus fruits such as lime or orange juice. These fruits have a similar acidity to lemons and can add a unique flavor to your dish.

Using substitutes for lemon juice can be beneficial in recipes, especially if you’re trying to cut down on costs or don’t have easy access to fresh lemons. However, it’s important to note that the flavor and acidity may not be exactly the same. When using substitutes, it’s important to taste test your dish and adjust the amounts accordingly. In the table below, I’ve outlined some common lemon juice substitutes and their recommended uses to help guide you in your recipe substitutions. Now, let’s move on to some tips for getting the most juice out of a lemon.

Advertisement
Substitute Recommended Use
Bottled Lemon Juice Baking, marinades, dressings
Lime Juice Cocktails, marinades, dressings
Orange Juice Sauces, marinades, dressings

By using these substitutes, you can still achieve a similar flavor profile in your dishes without having to go to the store or break the bank. However, it’s important to keep in mind that fresh lemon juice is always the preferred choice when possible. Now, let’s move on to some tips for getting the most juice out of a lemon.

Tips for Getting the Most Juice Out of a Lemon

Get ready to squeeze every last drop of juicy goodness out of your lemons with these simple and effective tips. One way to maximize the flavor of your lemon juice is to use the zest. Before cutting the lemon in half, use a zester or a vegetable peeler to remove the thin layer of yellow skin. The zest contains essential oils that are packed with powerful lemon flavor, but be sure to avoid the bitter white pith underneath.

Different ways to extract lemon juice include using a citrus juicer, a reamer, or simply squeezing the lemon by hand. When using a juicer or reamer, apply gentle pressure to extract the juice without crushing the bitter white pith. If squeezing by hand, roll the lemon on a hard surface to break up the pulp and make it easier to extract the juice.

Once you have all the juice you need, don’t forget to store it properly to keep it fresh and flavorful. Next, let’s talk about the best way to store your freshly squeezed lemon juice.

Storing Lemon Juice

When it comes to storing lemon juice, there are a few key factors to consider: refrigeration, freezing, and preservatives.

Advertisement

Personally, I prefer to keep my lemon juice in the refrigerator, as it helps to extend its shelf life and maintain its freshness. Freezing is also an option, but it can alter the flavor and texture of the juice.

Lastly, there are preservatives available on the market that can help to keep lemon juice fresh for longer periods of time, but it’s important to read the labels and understand what you’re adding to your juice.

Refrigeration

To keep your lemons fresh and extend their shelf life, it’s important to refrigerate them properly. The ideal way to store lemons in the fridge is to place them in a plastic bag or container.

Here are some tips to help you with refrigerating your lemons:

  • Wrap each lemon individually in a paper towel to absorb any excess moisture and prevent them from spoiling.
  • Make sure to store the lemons in the coldest part of the fridge, which is usually the bottom shelf.
  • Avoid storing lemons near other fruits and vegetables as they can release ethylene gas, which can cause the lemons to spoil faster.

Now that you know how to properly refrigerate your lemons, let’s move on to the next step of preserving them, which is freezing.

Freezing

Now that we’ve discussed the benefits of refrigerating and freezing lemon juice, let’s talk about the latter. Utilizing frozen lemon juice is a great way to preserve the fruit’s flavor and nutritional value. It’s also a convenient option for those who want to have lemon juice on hand without constantly buying fresh lemons.

Advertisement

When freezing lemon juice, it’s important to use an airtight container to prevent freezer burn. It’s also helpful to freeze the juice in small portions, such as ice cube trays, so you can easily thaw and use only what you need. Freezing lemon juice can extend the shelf life of the fruit, making it a cost-effective way to enjoy the benefits of lemon juice year-round.

It’s important to note that freezing can be a natural and effective way to preserve citrus fruits. However, there are also other methods of preservation commonly used in the food industry. Let’s move on to discussing preservatives.

Preservatives

Preservatives are commonly added to food products to increase their shelf life and prevent spoilage, with nearly 60% of processed foods containing some form of preservative. There are various varieties of preservatives, each with its unique function and chemical composition.

Here are four types of preservatives and their primary functions:

  1. Antimicrobials – These preservatives prevent the growth of bacteria, fungi, and other microorganisms that can cause food spoilage. They’re commonly used in meat products and dairy items to extend their shelf life.

  2. Antioxidants – These preservatives prevent the oxidation of fats, oils, and other components in food that can lead to rancidity and off-flavors. They’re commonly used in processed snacks, fried foods, and baked goods.

  3. Acidulants – These preservatives lower the pH levels in food products, making them harder for microorganisms to grow and thrive. They’re commonly used in beverages, sauces, and dressings.

  4. Chelating agents – These preservatives prevent the discoloration and off-flavors caused by metal ions in food. They’re commonly used in canned foods and soft drinks.

Preservatives play a vital role in extending the shelf life of processed foods, allowing them to be distributed and consumed over long distances. However, excessive consumption of these chemicals can have adverse health effects.

Advertisement

In the next section, I’ll discuss some recipes that use half a lemon, providing a healthy and natural alternative to processed foods.

Recipes that Use Half a Lemon

You can use half a lemon in your favorite recipes, adding just the right amount of tangy flavor to your dishes. But did you know that there are other benefits to using lemon juice beyond just cooking?

Lemon juice is commonly used in skincare as a natural exfoliant and brightening agent. It can help to reduce acne and dark spots, while also providing a fresh scent to your beauty routine.

If you find yourself with leftover lemon halves after using them in a recipe, there are plenty of creative ways to use them up. You can squeeze the juice into a glass of water for a refreshing drink, or use it to make a homemade salad dressing. Lemon halves can also be used to clean and deodorize your kitchen or bathroom. Simply rub the cut side on surfaces like cutting boards or sinks to remove stains and odors.

As for other uses for lemon juice, there are plenty of options. One of my favorites is using it as a natural bleach for clothes. Just add a cup of lemon juice to the rinse cycle of your washing machine to brighten whites and remove stains. Lemon juice can also be used as a natural insect repellent or to soothe a sore throat.

Advertisement

The possibilities are endless when it comes to this versatile fruit!

Other Uses for Lemon Juice

Did you know that lemon juice isn’t just for cooking? It also has many benefits for your skin. Lemon juice can help lighten dark spots, reduce acne, and even out skin tone. Mix lemon juice with honey and apply it to your face to enjoy these benefits.

When it comes to cooking, there are different types of lemon juice to choose from. Freshly squeezed lemon juice is the most common type, but you can also find bottled lemon juice, which is convenient and has a longer shelf life. Lemon juice concentrate is another option, which is more concentrated and can be diluted with water.

No matter which type you use, adding lemon juice to your dishes can add a refreshing tang and bring out the flavors of other ingredients. So, don’t hesitate to add some lemon juice to your next recipe.

Frequently Asked Questions

Can I use bottled lemon juice instead of fresh lemon juice?

I prefer using fresh lemon juice over bottled because of the taste difference. Bottled lemon juice has a longer shelf life, but it does expire. It’s important to check the expiration date and use within the recommended timeframe for best results.

Advertisement

How long can I store a cut lemon before the juice goes bad?

To preserve the freshness of lemon juice, store cut lemons in an airtight container in the fridge for up to 3-4 days. Avoid leaving them out at room temperature, as this can cause bacterial growth and spoilage.

Can I freeze lemon juice for future use?

Yes, I freeze lemon juice for preserving it. It’s best to use an ice cube tray to freeze the juice. Once frozen, transfer the cubes to a freezer bag for future use in recipes or drinks.

How do I know if a lemon is ripe and juicy enough to use?

When choosing ripe lemons, look for a vibrant yellow color and a slightly soft texture. To extract the most juice, roll the lemon on the counter before slicing and use a citrus juicer or hand-held reamer for best results.

Are there any health benefits to drinking lemon juice?

I’ve learned that there are several health benefits to drinking lemon juice, including aiding in weight loss and boosting the immune system. The high levels of vitamin C and antioxidants in lemon juice make it a great addition to any diet.

Conclusion

So there you have it, the answer to the question of how much lemon juice is in half a lemon. While there are factors that can affect the amount of juice, on average, a half lemon yields around 1-2 tablespoons of juice.

Advertisement

It’s important to measure lemon juice accurately in recipes as it can greatly affect the taste and acidity level. In my own experience, I once made a lemon vinaigrette for a salad using the juice of half a lemon without measuring. The dressing turned out much too sour and ruined the balance of the salad.

It’s always better to err on the side of caution and measure your lemon juice. With the tips for getting the most juice out of a lemon and storing it properly, you’ll be able to make the most of this versatile ingredient in your cooking and beyond.

Continue Reading

Trending