
Hello! Should you be in pursuit of preparing wholesome, nutrient-rich juice right from the convenience of your home, search no more beyond your reliable Vitamix blender. Thanks to its robust engine and flexible construction, the Vitamix stands as the ideal appliance for concocting tasty and nourishing juices that will undoubtedly satisfy even the most discerning taste buds.
Before we get started, it’s important to note that making juice in a Vitamix is a bit different than using a traditional juicer. Instead of extracting the juice from fruits and vegetables, a Vitamix blends everything together into a smooth, drinkable consistency. This means that you’ll be getting all the fiber and nutrients from your ingredients, making for a more filling and satisfying drink.
So, let’s get started on our journey to juicing success!
Key Takeaways
- Choosing fresh, ripe fruits and vegetables is crucial for making healthy juice in a Vitamix
- Properly cleaning and maintaining the Vitamix after each use is important for optimal performance and longevity
- Experimenting with different ingredient combinations and adjusting the consistency can help create the perfect juice
- Storing and consuming fresh juice within a few days and garnishing with fresh herbs and fruits can enhance the flavor and nutritional value.
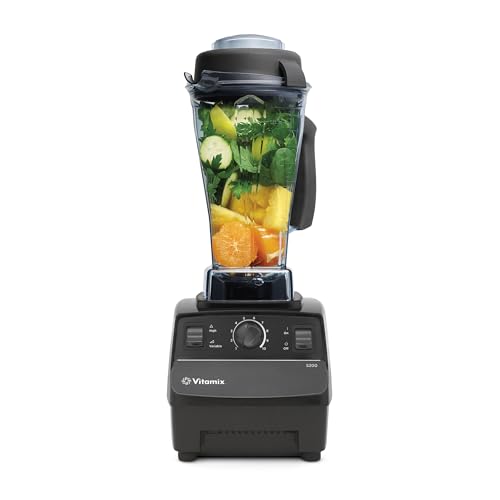
Vitamix 5200 Blender, Professional-Grade Blender for Smoothies, Soups, Ice Cream and More, Stainless-Steel Blades, Self-Cleaning Kitchen Appliance, 64 Oz Container, Black
- Includes Blender Base and Accessories: Motor base, 64 oz container, tamper
- Powerful 2 HP Motor: Effortless blending of smoothies and more
- Durable Stainless-Steel Blades: Cuts through fibrous produce and ice
As an affiliate, we earn on qualifying purchases.
As an affiliate, we earn on qualifying purchases.
Select the Right Ingredients
You’ll want to choose fresh, ripe fruit and vegetables that are rich in color and flavor for your Vitamix juice. This can include any combination of fruits and vegetables that you enjoy, such as apples, carrots, oranges, and spinach.
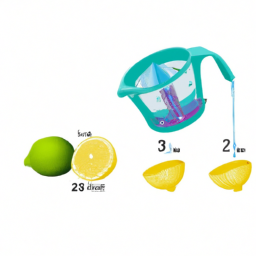
One popular juice combination is a green juice, which typically includes kale, cucumber, celery, and lemon. This combination is packed with healthy benefits, including vitamins A and C, iron, and potassium.
When selecting your ingredients, make sure to wash them thoroughly and remove any stems or seeds. You can also peel fruits and vegetables if desired, although leaving the skin on can add additional nutrients and fiber to your juice.
Once your ingredients are prepped, you’re ready to move on to preparing your Vitamix for juicing.
Prepare Your Ingredients
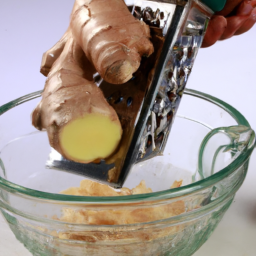
First, gather all your fresh, ripe fruits and vegetables and wash them thoroughly under cool running water. This is an essential step in preparing your ingredients as it helps to remove dirt, bacteria, and pesticides from the skin. Once done, cut them into small pieces to fit into your blender easily.
Juicing benefits are numerous, and it is a great way to increase your fruit and vegetable intake. Different ingredient combinations provide varying health benefits such as improved digestion, increased energy, and glowing skin. For instance, combining carrots, apples, and ginger gives a vitamin A and C boost, while cucumber and spinach provide a refreshing and detoxifying effect. Experiment with different combinations to find what works for you and your taste buds.
To choose your Vitamix blender, consider its size, power, and features.
Choose Your Vitamix Blender
When it comes to creating healthy and delicious blends, selecting the right appliance can make all the difference in achieving optimal results. Choosing the right Vitamix blender is crucial to making the best juice possible.
It’s important to compare models and consider features before making a purchase. Vitamix blenders come in a variety of models with different features, such as variable speed control, pulse functionality, and pre-programmed settings.
The Vitamix 5200, for example, is a classic model that is versatile and durable, while the Vitamix Ascent Series offers more advanced features such as wireless connectivity and automatic blending programs. Depending on your needs and budget, it’s important to compare and choose the right model for you.
With the right Vitamix blender, making delicious and nutritious juice is just a few steps away. Let’s move on to assembling your blender.
Assemble Your Blender
Once all the parts are laid out in front of you, it’s time to put together your new Vitamix blender and start enjoying all its benefits. Assembling your blender is a quick and easy process that can be done in just a few simple steps. First, make sure that all the parts are clean and free of any debris from packaging materials.
Next, refer to the owner’s manual for specific instructions on how to assemble your particular model. Most Vitamix blenders require you to simply align the container with the base, twist it into place, and secure the lid. It’s important to properly clean your Vitamix after each use to ensure that it continues to function properly. To do so, rinse the container with warm water and a drop of dish soap, and then blend on high for about 30 seconds. Additionally, here are some tips for maintaining your blender:
| Maintenance Tips | How Often to Do It |
|---|---|
| Replace blades | Every 3-5 years |
| Clean container | After each use |
| Replace drive socket | As needed |
| Check gasket seal | Every 6 months |
Now that your Vitamix blender is assembled and properly maintained, it’s time to start blending your favorite ingredients to make delicious juices, smoothies, and more.
Blend Your Ingredients
Okay, it’s time to start blending! I always begin on a low speed and gradually increase it as needed. This helps to ensure that everything gets blended evenly and smoothly.
Once everything is in the blender, I blend until it’s completely smooth and there are no chunks left. This usually takes a few minutes. By starting on low and gradually increasing the speed, I find that my smoothies and juices come out perfectly blended every time!
Start on Low Speed
First, you’ll want to begin by placing your ingredients into the Vitamix and starting on a low speed to ensure a smooth blend. Starting on a low speed has many benefits, such as preventing the ingredients from flying out of the container, reducing the risk of overheating the motor, and allowing for a more controlled blending process. It’s also easier to adjust the speed during blending when starting on a low speed.
To adjust the speed during blending, simply turn the dial up or down to increase or decrease the speed. If you notice that the blend is too thick or not blending evenly, you can increase the speed gradually until you reach the desired consistency.
It’s important to remember to gradually increase the speed to avoid overworking the motor and to allow the ingredients to properly mix. By starting on a low speed and gradually increasing it, you can ensure a perfectly blended juice every time.
Gradually Increase Speed
To achieve a perfectly smooth blend, it’s important to gradually increase the speed while blending, allowing the ingredients to properly mix and avoiding overworking the motor. Starting on a low speed gives the ingredients time to incorporate without getting stuck or clumping together, while gradually increasing the speed exposes more surface area of the ingredients to the blades, resulting in a smoother blend.
By gradually increasing the speed, you also give the blender time to properly distribute the ingredients throughout the container, ensuring that each part of the mixture is evenly blended. This slow and steady approach may take a bit longer, but the benefits of slow blending are worth it.
Not only does it result in a smoother, more consistent blend, but it also prevents overworking the motor, which can lead to overheating and damage to the blender. With the speed gradually increased, it’s time to blend until smooth.
Blend Until Smooth
Now it’s time for you to blend until your mixture is perfectly smooth. Blending techniques are crucial at this stage to ensure that all the ingredients are thoroughly combined.
One trick is to start on low speed and gradually increase to high speed, allowing the blades to break down the ingredients gradually. This prevents air pockets from forming and ensures that the mixture is smooth and consistent.
Another important consideration is flavor combinations. Experiment with different fruits and vegetables and find the perfect balance of flavors. Add sweeteners like honey or agave nectar, or spices like ginger or cinnamon, to enhance the taste.
Once you have blended your mixture to perfection, you can strain your juice to remove any remaining pulp or fibers. This will result in a smoother drink that is easier to digest.
Strain Your Juice
Wow, you won’t believe how much smoother and pulp-free your juice will be once you strain it through a fine mesh sieve or cheesecloth!
There are several ways to strain juice, but my go-to is a fine mesh sieve. This method not only removes any remaining chunks or pulp, but also separates any foam or froth that may have formed during blending.
If you prefer a completely smooth and silky juice, you can use a cheesecloth to strain it multiple times until you achieve the desired consistency. The benefits of straining juice go beyond just aesthetics.
Removing the pulp and foam can make the juice easier to digest, especially for those with sensitive stomachs. Additionally, the separation of pulp can help to preserve the juice’s flavor and nutrients, as the pulp can sometimes cause oxidation and spoilage.
Once you’ve strained your juice, it’s time to adjust the consistency to your desired thickness.
Adjust the Consistency
Get ready to perfect the texture of your juice by adjusting its consistency to your liking. Once you’ve strained your juice, it’s time to take a look at its thickness.
If you want a thicker consistency, add some ice cubes, frozen fruit, or avocado to the mix. These ingredients not only add thickness, but also provide additional health benefits. For instance, avocados are rich in healthy fats and frozen fruit is a great source of antioxidants.
On the other hand, if you prefer a thinner juice, you can add some water, coconut water, or almond milk to the mix. These liquids will not only thin the consistency, but also add some extra flavor and nutrients. Just be careful not to add too much liquid, as it may dilute the taste and nutritional value of your juice.
Once you’ve achieved your desired consistency, it’s time to serve and enjoy your delicious and nutritious creation.
Serve and Enjoy
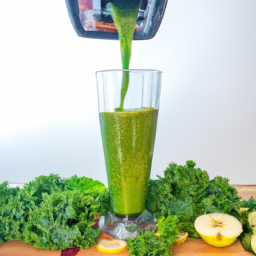
Okay, now that my juice is perfectly blended and consistent, it’s time to serve and enjoy it!
I pour the juice into glasses, leaving some space at the top for garnishing. Then, I grab some fresh herbs or fruits and add a decorative touch to each glass.
It’s the perfect finishing touch to a delicious and healthy juice!
Pour into Glasses
Now that the juice is blended, it’s time to pour it into glasses. But, have you ever wondered how to achieve that perfect pour without making a mess? Well, it’s quite simple.
First, make sure your glasses are clean and dry. Next, hold the blender jar over the glasses and slowly pour the juice in. Be sure to leave a bit of space at the top of the glass for garnish or ice.
If you want to add some extra flair to your juice, try garnishing it with fresh herbs or fruits. A sprig of mint or a slice of cucumber can add a refreshing touch to a green juice, while a slice of citrus or a few berries can brighten up a fruit-based juice.
You can also serve your juice with a fun straw or place it on a tray with a few snacks for a colorful and refreshing presentation. With these simple serving suggestions, you can turn your homemade juice into a delicious and visually appealing treat.
Garnish with Fresh Herbs or Fruits
To add some extra flavor and color to your drink, why not try garnishing it with fresh herbs or fruits? Not only does it make your homemade juice look more appetizing, but it also adds a delicious twist to your usual drink.
Here are some presentation ideas to consider:
-
Mint leaves: Mint leaves are a classic garnish for drinks. They add a refreshing taste and a pop of green color to your juice. Just add a sprig of fresh mint leaves on top of your juice and enjoy the aroma as you sip.
-
Berries: Berries are not only packed with antioxidants but also delicious to add to your drink. You can either add a few fresh berries on top of your juice or blend them in with your juice for added flavor and texture.
-
Citrus slices: Adding a slice of lemon or lime to your juice not only makes it look fancy but also adds a tangy kick to your drink. Just slice a fresh citrus fruit and add it to the side of your glass or on top of your juice.
Adding flavor and garnishing your homemade juice is a simple way to elevate your drink.
Now that your juice’s ready, let’s talk about how to store it for later use.
Store Your Juice
When storing juice made in my Vitamix, I always make sure to transfer it to air-tight containers before refrigerating. This helps to preserve the freshness and flavor of the juice for a longer period of time.
However, it’s important to consume the juice within a few days to ensure that it doesn’t spoil or lose its nutritional value.
Refrigerate in Air-Tight Containers
Once you’ve blended your juice in the Vitamix, seal it in airtight containers to keep it as fresh as a daisy in the refrigerator. There are many benefits of refrigerating your juice, such as preserving its nutrients and flavor.
To ensure that your juice stays fresh, here are some tips for using air-tight containers:
- Choose containers made of glass or BPA-free plastic to avoid any leaching of chemicals into your juice.
- Fill the container to the top to minimize air exposure and oxidation.
- Label the container with the date and type of juice to keep track of freshness.
- Store the containers in the back of the refrigerator where it is the coldest.
- Clean the containers thoroughly before each use to avoid any bacterial growth.
Remember to consume your juice within a few days to enjoy its full benefits.
Consume Within a Few Days
After refrigerating your freshly-made juice in air-tight containers, it’s important to consume it within a few days to fully reap the benefits of fresh juice. There are ways to preserve your juice for a longer period of time, such as freezing it in ice cube trays or vacuum sealing it, but these methods may compromise some of the nutrients and flavors.
Drinking fresh juice is a great way to nourish your body with vitamins and minerals, as well as hydrate and energize you. However, if you don’t consume it within a few days, the juice may start to spoil and lose some of its nutritional value. So, it’s best to make enough juice for a few days at a time and store it properly in the refrigerator.
Remember, the fresher the juice, the better it is for your body.
To ensure your Vitamix stays in top condition, it’s important to clean it thoroughly after each use.
Clean Your Vitamix
When it comes to maintaining my Vitamix blender, I always make sure to clean the container and blade after every use. This involves a quick rinse with warm water to remove any leftover juice or food particles.
For a deeper clean, I use soap and water to thoroughly scrub the container and blade to ensure it’s ready for the next use. By keeping my Vitamix clean, I can ensure it’ll last longer and continue to produce high-quality juice and smoothies.
Rinse the Container and Blade
Before blending, give the container and blade a quick rinse to ensure your juice is free from any unwanted residue. This step is essential in making juice in a Vitamix because it removes any leftover particles from previous use and helps prevent potential cross-contamination that could affect the taste and quality of your juice.
Rinsing with cold water is recommended because it helps preserve the nutrients and enzymes in your ingredients, which can be lost with hot water. Also, it’s crucial to rinse the blade thoroughly to prevent any buildup that could affect the blade’s performance. By taking the time to rinse the container and blade before blending, you’re ensuring that your juice is fresh and pure.
Once you’ve completed this step, you can move on to the next step of deep cleaning with soap and water.
Use Soap and Water for Deep Cleaning
Now that we’ve rinsed the container and blade, it’s time to give it a deep clean. I always use soap and water to make sure my Vitamix is thoroughly cleaned. It’s important to note that using harsh chemicals can damage the blender, so I always opt for natural cleaning products. Not only is it better for the environment, but it’s also healthier for my family.
Using soap and water is simple. I begin by putting a few drops of dish soap into the container and filling it up halfway with warm water. Then, I blend it for about 30 seconds on high speed.
After that, I rinse the container and blade with warm water and let it air dry. With these simple tips for maintaining my Vitamix blender, I know it’ll last for many years to come.
- Natural cleaning products are better for the environment and my family’s health.
- Using dish soap and warm water is an easy and effective way to deep clean my Vitamix.
- Allowing the container and blade to air dry helps prevent damage and prolongs the life of my blender.
Frequently Asked Questions
How can I make my juice last longer without losing its nutritional value?
To retain nutritional value, store juice in an airtight container in the fridge for up to 72 hours. Avoid exposure to light and air. Choose fruits and vegetables with high antioxidant content. Drink immediately after making for maximum nutrient retention.
Can I use frozen fruits and vegetables in my juice?
Using frozen fruits and veggies in juice can be convenient, but fresh produce offers more nutritional benefits. To create a balanced frozen mix, I recommend including a variety of colors and textures, such as berries, spinach, and cucumbers.
Is it necessary to peel fruits and vegetables before blending them in a Vitamix?
As the saying goes, "an apple a day keeps the doctor away."However, in the Peeling Debate, the question arises whether to peel or not. Research shows that leaving the skin on fruits and vegetables can retain more nutrients.
Can I add supplements like protein powder or collagen to my juice?
Adding supplements like protein powder or collagen to juice can provide benefits such as added protein and nutrients. The best types of protein powder for blending are whey and plant-based options like pea or hemp protein.
Can I use a different type of blender besides Vitamix to make juice?
Different blenders can affect juice quality. While some may work well, others may leave chunks or pulp in the mixture. It’s important to consider the type of blender and its capabilities before using it to make juice.
Conclusion
In conclusion, making juice in a Vitamix is a delightful and healthy way to start your day. With the right ingredients, preparation, and blender, you can easily create a delicious and energizing juice in no time.
Remember to choose fresh and organic produce, prepare them accordingly, and select the right Vitamix blender for your needs. Once you’ve assembled and blended your ingredients, adjust the consistency to your liking and serve it up!
Don’t forget to store any leftovers properly and clean your Vitamix thoroughly after each use. So go ahead, sip on that sweet and savory juice, and savor the satisfying taste of a homemade, refreshing drink.
Juicing in a Vitamix is a joyful journey that will bring a boost to your body and a smile to your soul.