Connect with us

Juice

How To Make Bean Juice Thicker

Published

on

Being vegan, I often swap out eggs for **bean juice** in my cooking adventures. Yet, I sometimes hit a snag because that bean juice can be kinda runny, which really doesn’t cut it for some recipes.

After doing some research and experimenting in the kitchen, I have discovered several methods for making bean juice thicker.

Understanding the consistency of bean juice is crucial in determining how to make it thicker. Bean juice is typically thin and watery, similar to the consistency of egg whites. In order to use it as a substitute for eggs, the bean juice needs to be thick and viscous, similar to the consistency of egg yolks.

By using the following methods, you can achieve a thicker bean juice that is perfect for use in your favorite recipes.

Key Takeaways

  • The consistency of bean juice can be influenced by the type of beans used, the amount of water, and the cooking time.
  • Black beans and chickpeas are better options for producing thicker juice than kidney beans or lentils.
  • Pureeing the beans and adding thickening agents such as cornstarch, xanthan gum, and arrowroot powder can help achieve the desired consistency.
  • Straining the juice with a cheesecloth or fine mesh strainer, using a heavy-bottomed pot, and stirring occasionally can prevent burning and achieve the desired thickness.

Understanding Bean Juice Consistency

If you’re wondering how to make your bean juice thicker, understanding its consistency is key! Bean juice consistency is influenced by several factors, including the type of beans used, the amount of water added during the cooking process, and the length of time the beans are cooked.

For example, black beans and chickpeas tend to produce thicker juice than kidney beans or lentils. Additionally, reducing the amount of water used or cooking the beans for a longer period of time can result in a thicker consistency.

Advertisement

Fortunately, there are techniques for achieving the desired thickness of bean juice. One method is to puree the cooked beans and their liquid in a blender or food processor until smooth. This will help break down the beans and create a smoother, thicker consistency.

Another option is to add a thickening agent such as cornstarch or arrowroot powder to the bean juice and cook it until it thickens. These techniques can help you achieve a thicker and more satisfying bean juice.

Now, let’s move on to the next section about straining bean juice.

Straining Bean Juice

When straining bean juice, there are two main methods to achieve a smooth consistency: using cheesecloth or a fine mesh strainer. Personally, I prefer using a fine mesh strainer as it allows me to strain the juice directly into a bowl without the need for additional equipment.

However, if you prefer a thicker consistency, cheesecloth can be used to strain the juice multiple times until the desired thickness is achieved.

Advertisement

Using Cheesecloth

To make your bean juice thicker with cheesecloth, simply wrap the cooked beans in cheesecloth and squeeze out the excess liquid. Cheesecloth is a popular choice for straining bean juice because it allows for a more thorough extraction of the liquid while still keeping the solids intact. Unlike other cheesecloth alternatives like paper towels or coffee filters, cheesecloth can retain the flavor and aroma of the beans, making your bean juice more flavorful.

One of the benefits of using cheesecloth for bean juice is that it’s reusable and easy to clean. You can simply rinse it with water after use and hang it up to dry. Additionally, cheesecloth is widely available and affordable, so anyone can make their bean juice thicker.

It’s important to note, however, that while cheesecloth is effective in removing excess liquid, it may not be able to catch smaller particles. In this case, using a fine mesh strainer can help further refine the bean juice to achieve the desired consistency.

Using a Fine Mesh Strainer

You probably think that you’ve extracted all the liquid from your cooked beans, but using a fine mesh strainer can take it to the next level and leave you with an incredibly smooth and velvety bean juice. Here are some alternative methods to using a cheesecloth and the benefits and drawbacks of using a fine mesh strainer:

  1. Method: Using a ladle to scoop out the bean juice and pour it through the strainer.
    Benefit: This method is quick and easy, and you can strain a large quantity of bean juice at once.
    Drawback: The strainer may become clogged with bean pulp, and you’ll need to clean it frequently.

  2. Method: Pouring the bean juice through the strainer using a funnel.
    Benefit: The funnel helps to guide the bean juice into the strainer, reducing spills and mess.
    Drawback: This method may take more time than other methods, as you’ll need to pour the bean juice slowly to prevent the strainer from becoming clogged.

  3. Method: Using a handheld strainer to strain small quantities of bean juice at a time.
    Benefit: This method allows for more precision and control over the straining process.
    Drawback: It may take longer to strain a large quantity of bean juice using this method.

  4. Method: Using a chinois or conical strainer, which has a finer mesh than a regular strainer.
    Benefit: This method can produce an even smoother bean juice, as it removes even more pulp and solids.
    Drawback: A chinois or conical strainer can be more expensive than a regular strainer.

Using a fine mesh strainer is a great way to make your bean juice thicker and smoother, but once you’ve strained it, you may want to reduce it further to intensify its flavor and thickness.

Advertisement

Reducing Bean Juice

When it comes to reducing bean juice, there are two primary methods I’ve found to be effective:

  • Simmering on the stove involves bringing the bean juice to a boil, then reducing the heat and letting it simmer until the desired thickness is achieved.

  • Using a slow cooker involves adding the bean juice to the slow cooker and cooking on low heat for several hours, stirring occasionally, until the desired thickness is reached.

Simmering on the Stove

While simmering the bean juice on the stove, it’s important to keep an eye on it to prevent burning and to allow the liquid to reduce and thicken. Simmering is a great way to thicken bean juice because it allows the liquid to evaporate slowly, resulting in a thicker consistency.

Here are some benefits of simmering and tips for avoiding burnt bean juice:

  • Benefits of Simmering:

  • Simmering allows the liquid to reduce slowly, resulting in a thicker consistency.

  • It helps to concentrate the flavors and enhances the taste of the bean juice.

  • Tips for Avoiding Burnt Bean Juice:

  • Use a heavy-bottomed pot to distribute heat evenly and prevent burning.

  • Stir the bean juice occasionally to prevent sticking and burning.

When the bean juice has thickened to your desired consistency, you can transfer it to a slow cooker to keep it warm and ready to serve. By using a slow cooker, you can also infuse additional flavors into the bean juice by adding herbs and spices.

Using a Slow Cooker

If you’re looking to infuse additional flavors into your simmered bean liquid, using a slow cooker is a great way to achieve this. Slow cooking allows the beans to cook gradually and absorb the flavor of any added ingredients like herbs, spices, or vegetables, resulting in a richer and more complex taste.

Advertisement

Additionally, slow cooking can also help break down tough fibers in the beans, resulting in a creamier texture. When it comes to selecting beans for slow cooking, it’s important to choose varieties that can withstand long cooking times without turning mushy.

Some of the best beans for slow cooking include black beans, navy beans, pinto beans, and cannellini beans. These beans have a firm texture and can hold their shape during the slow cooking process. By using a slow cooker and selecting the right type of beans, you can create a flavorful and thick bean juice that is perfect for soups, stews, or chili.

To further thicken the bean juice, there are several thickening agents that can be added.

Adding Thickening Agents

So, I’ve been experimenting with different ways to thicken bean juice and I’ve found that adding thickening agents can be really effective.

Three popular options are cornstarch, xanthan gum, and arrowroot powder. Cornstarch is a common choice because it’s easy to find and use, but it can sometimes give a starchy taste to the liquid.

Advertisement

Xanthan gum is a great alternative because it’s tasteless and a little goes a long way, but it can be expensive.

Arrowroot powder is another option that’s tasteless and affordable, but it can break down if exposed to acidic ingredients.

Overall, these thickening agents can be a game-changer for anyone looking to make their bean juice thicker and more versatile.

Cornstarch

Ironically, adding cornstarch to bean juice won’t just thicken it, but it’ll also give it a smooth and velvety texture. Cornstarch is a popular thickening agent in many recipes because it’s cheap, easy to find, and simple to use.

However, if you’re looking for substitutes for cornstarch, you could try arrowroot powder, potato starch, or tapioca starch. These alternatives work similarly to cornstarch and can be used in the same amount.

Advertisement

To use cornstarch as a thickening agent for your bean juice, you’ll first need to mix it with a small amount of cold water to create a slurry. This will prevent the cornstarch from clumping and ensure that it’s evenly distributed in the bean juice. Once the slurry is formed, you can add it to the bean juice and stir until it thickens. Just be careful not to add too much cornstarch or it’ll make the bean juice too thick and gloppy.

If you’re looking for other thickening agents, you could try using xanthan gum. Xanthan gum is a polysaccharide that’s commonly used to thicken and stabilize foods. It’s particularly useful for those who are gluten-free as it’s derived from a fermentation process using corn, soy, or wheat.

To use xanthan gum, you’ll first need to dissolve it in a small amount of cold water before adding it to the bean juice. This will prevent clumping and ensure that the xanthan gum is evenly distributed in the bean juice.

Xanthan Gum

Using xanthan gum as a thickening agent for your recipes can provide a gluten-free alternative that also adds stability and texture to your dishes. Here are some benefits of using xanthan gum:

  • Unlike cornstarch, xanthan gum works well in acidic liquids, such as lemon juice or vinegar, without breaking down.
  • Xanthan gum only requires a small amount to thicken liquids, making it a cost-effective solution.
  • It also has a neutral taste, so it won’t alter the flavor of your dish.
  • Xanthan gum is also a great choice for those with food allergies, as it’s derived from fermented sugars and doesn’t contain any common allergens.
  • It can also be used in cold liquids, unlike cornstarch, which needs heat to thicken.

While xanthan gum has many benefits, there are some alternatives you can consider, such as arrowroot powder. But before we explore that option, let’s first dive deeper into how to use xanthan gum in your recipes.

Arrowroot Powder

Let’s explore arrowroot powder as a thickening agent that can add a velvety texture to your recipes, like a soft blanket covering a warm pie. Arrowroot powder is a gluten-free, corn-free, and soy-free alternative to other thickening agents, making it a popular choice in the culinary world.

Advertisement

It is extracted from the rhizome of the arrowroot plant and is known for its ability to thicken at a lower temperature compared to other starches. Arrowroot powder has many benefits when used as a thickening agent for bean juice.

It doesn’t have a strong flavor, which makes it perfect for dishes where the taste of the thickener should not overpower the other ingredients. Additionally, arrowroot powder is suitable for individuals with dietary restrictions, such as those who follow a paleo or low-FODMAP diet.

If you don’t have arrowroot powder on hand, you can use cornstarch or tapioca flour as substitutes. Now that we’ve explored arrowroot powder as a thickening agent, let’s move on to the next step of whipping bean juice to create a frothy and creamy texture.

Whipping Bean Juice

Whipping bean juice is a simple and effective way to add thickness to your favorite recipes. Here are some tips to help you get started:

  • Start with chilled bean juice to make whipping easier.
  • Use a hand mixer or immersion blender to whip the juice until it becomes frothy and thick.
  • Add a pinch of salt to enhance the flavor of the juice.
  • Experiment with flavored variations by adding vanilla extract, cocoa powder, or other spices.

By using these techniques, you can achieve a thicker consistency that is perfect for adding to soups, stews, and sauces. Adding cream or milk can also help to further thicken the juice, creating a velvety texture that’s sure to impress.

Adding Cream or Milk

For a creamy and velvety texture, simply pour in some cream or milk and watch as it transforms into a rich and indulgent addition to your favorite recipes. This method works well for those who prefer a dairy-based thickener, but there are also alternative thickeners available for those who are lactose intolerant or vegan.

Advertisement

One alternative option is to use coconut milk, which is a dairy-free and vegan-friendly option. Simply pour in a small amount and mix well until the desired consistency is achieved. Another option is to use cornstarch or potato starch as a thickening agent. Mix a small amount with water and add it to the bean juice while heating it up. As it heats up, it will thicken and become more velvety. With these alternative thickeners, you can achieve the same creamy texture without using dairy products.

Now, let’s move on to the next step of chilling the bean juice.
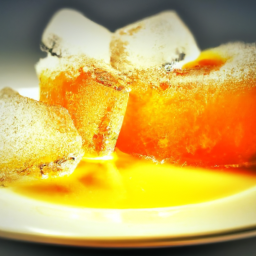
Chilling Bean Juice

To cool down your bean juice, you can simply pop it into the fridge for a few hours, but did you know that chilling your bean juice has its benefits?

Not only does it thicken the juice, but it also enhances its flavor.

Chilling bean juice allows the starch to settle at the bottom of the container, making it easier to separate the thicker liquid from the starch.

Advertisement

This also results in a smoother and creamier texture.

Here are the best chilling methods to keep in mind when thickening your bean juice:

  1. Divide the bean juice into smaller portions and place them in shallow containers before chilling. This will speed up the cooling process and prevent the juice from spoiling.

  2. Place the container of bean juice in a bowl of ice water. This method is ideal for those who want to cool down their bean juice quickly.

  3. Freeze the bean juice in an ice cube tray. Once frozen, blend the cubes until you achieve a smooth consistency.

  4. Chill the bean juice overnight for best results. This method allows the flavors to fully develop and the starch to settle at the bottom of the container.

By utilizing these chilling methods, you can achieve a thicker and creamier bean juice without the use of additives. However, if you’re looking for an even more concentrated flavor, consider using bean juice concentrate.

Using Bean Juice Concentrate

Did you know that using bean juice concentrate can add an extra punch of flavor to your dishes? Not only that, but it can also help thicken your bean juice to create a more satisfying texture.

Bean juice concentrate is made by boiling down the liquid from cooked beans, resulting in a concentrated form of the bean juice. This concentrate can be used in a variety of recipes, from soups and stews to dips and dressings.

Advertisement

One of the benefits of using bean juice concentrate is the added flavor it brings to your dishes. Depending on the type of bean used, the concentrate can have a rich, earthy flavor or a slightly sweet taste. It can also be used as a natural thickener, helping to create a velvety texture in your bean juice.

There are different types of bean juice concentrate available, such as black bean, chickpea, and cannellini bean concentrate. Each type has its own unique flavor profile and works best in specific recipes. Experiment with different types of bean juice concentrate to find the one that works best for your dish.

Now that we know about the benefits of bean juice concentrate and how to use it in recipes, let’s move on to the next section about experimenting with different beans.

Experimenting with Different Beans

You can try out new flavors and textures by using a variety of beans in your cooking. Different types of beans have unique taste differences that can add depth to your recipes.

For example, black beans have a slightly sweet taste and a creamy texture, while navy beans have a mild flavor and a starchy texture. Experimenting with different bean varieties can also help you achieve a thicker bean juice.

Advertisement

When selecting beans for your recipe, consider the texture and starch content of the bean. Some beans, like black beans and pinto beans, have a higher starch content and can lend themselves better to thicker sauces and juices. Other beans, like garbanzo beans and kidney beans, have a firmer texture and may not break down as easily.

By playing around with different bean varieties, you can find the right combination to create a thicker bean juice for your recipe.

Moving on to the next section, here are some tips and tricks for using thicker bean juice in your recipes.

Tips and Tricks for Using Thicker Bean Juice in Recipes

Now that you’ve experimented with different types of beans, try incorporating the velvety puree into your savory dishes for added depth of flavor and creaminess.

To make the bean juice thicker, try using agar agar, a natural thickener derived from seaweed. Agar agar is a great substitute for gelatin, making it perfect for those who follow a vegetarian or vegan diet.

Advertisement

To use agar agar, first dissolve it in a small amount of water or liquid from your recipe. Then, bring the mixture to a boil and let it simmer for a few minutes until the agar agar is fully dissolved.

Once it has cooled down, mix it with the bean puree and blend until smooth. You can also experiment with different spices to enhance the flavor of your bean puree, such as cumin, paprika, or turmeric.

With the right spices and the perfect consistency, your bean puree can be a versatile addition to your culinary repertoire.

Frequently Asked Questions

What are the best beans to use for making thick bean juice?

When it comes to thickening bean juice, black beans are better than kidney beans due to their higher starch content. To maximize thickness, soak beans for at least 8 hours before cooking to allow the starches to fully expand.

Can I use a blender to make my bean juice thicker?

When it comes to thickening bean juice, the blender vs. stovetop debate is a common one. While both methods can work, I find that using a blender is more efficient. The thickness of the bean juice can greatly affect its flavor, so it’s important to find the right method for your desired consistency.

Advertisement

How long should I let my bean juice simmer to reduce it?

I recommend simmering bean juice for at least 20 minutes to reduce it and achieve a thicker consistency. However, there are alternatives to simmering, like using a quick thickening method such as adding cornstarch or arrowroot powder. Experiment to find your desired thickness level.

Can I use cornstarch as a thickening agent for my bean juice?

I researched using cornstarch as a thickening agent for bean juice. Pros: it’s tasteless, inexpensive, and easily accessible. Cons: it can cause clumping and may alter the color. Alternatives include arrowroot, tapioca, or potato starch.

How can I store leftover thickened bean juice?

Leftover thickened bean juice can be frozen for up to 3 months in an airtight container. Creative recipes to use it include adding it to soups, stews, or casseroles for added flavor and texture.

Conclusion

In conclusion, achieving the perfect consistency for bean juice can be daunting, but don’t worry! There are several methods to make it thicker. You can strain and reduce the juice, add thickening agents, or even whip it. Experiment with these techniques until you find the perfect solution.

Additionally, using different types of beans can also make a significant difference in the thickness of the juice. With a little patience and trial and error, you can create a delicious, thick bean juice that will elevate your dishes. So, don’t be afraid to get creative and try different methods until you find what works best for you.

Advertisement

Continue Reading
Advertisement

Juice

How Does Shrimp Cook In Lime Juice

Published

on

By

Cooking shrimp with lime juice is like watching an intriguing chemical reaction unfold right in front of you. The lime juice interacts with the proteins in the shrimp, altering their texture and flavor, ultimately creating a mouthwatering dish that is both tangy and rich in taste.

In this article, I will dive deep into the science behind the process, exploring the chemical reactions that occur when shrimp is marinated in lime juice and examining the benefits of this cooking technique. As a food enthusiast, I have always been fascinated by the different ways in which ingredients can be combined to create delicious dishes. However, the idea of cooking shrimp in lime juice was relatively new to me until I tried it myself.

The results were nothing short of spectacular, and I was eager to learn more about the science behind the process. Through my research, I discovered that the acidity in lime juice breaks down the proteins in the shrimp, effectively cooking them without the need for heat. This not only results in a tender and flavorful dish, but also provides several health benefits.

In this article, I will share my findings on the topic, exploring the regional variations, choosing the right shrimp, and safety precautions to take when cooking with lime juice.

Key Takeaways

  • Lime juice breaks down proteins in shrimp, resulting in a similar effect to cooking with heat but without added fat.
  • Regional variations of shrimp cooked in lime juice exist, such as ceviche in Latin America, and lime-marinated shrimp is versatile and pairs well with complementary ingredients.
  • Choosing fresh, sustainably harvested shrimp and properly cleaning and preparing them is crucial for taste and texture.
  • Safety precautions, such as washing hands and using separate cutting boards and utensils for raw seafood, should be taken when handling and preparing shrimp cooked in lime juice.

Understanding the Chemical Reaction

You’re gonna love how the lime juice reacts with the shrimp, making it tender and flavorful. There’s actually a scientific explanation for this.

When lime juice comes in contact with shrimp, it triggers a chemical reaction that causes the proteins in the shrimp to break down. This is due to the chemical properties of the lime juice, which is high in citric acid.

Advertisement

The enzymatic breakdown of the proteins in the shrimp results in a change of texture and flavor. The shrimp becomes more tender and easier to chew, while the lime juice imparts a tangy and slightly sweet taste.

This process is commonly known as ‘cooking’the shrimp in lime juice, although technically it’s not the same as applying heat to the shrimp. Instead, the lime juice breaks down the proteins in a way that mimics the effects of cooking.

This is just one of the many benefits of using lime juice as a marinade for shrimp.

Benefits of Lime Juice Marination

I want to talk about the benefits of marinating shrimp in lime juice.

Firstly, there’s no need for heat when marinating with lime juice, making it a simple and easy method for cooking shrimp.

Advertisement

Secondly, the bright and tangy flavor of the lime juice adds a refreshing taste to the shrimp.

Lastly, lime juice pairs well with a variety of other ingredients, making it a versatile ingredient in many different dishes.

No Need for Heat

Surprisingly, shrimp can be transformed into a mouthwatering dish without ever touching a stove or oven when marinated in lime juice. The raw shrimp texture is altered by the acidic marinade, which ‘cooks’ the shrimp by denaturing the proteins.

The shrimp becomes opaque and firm, with a slightly chewy texture that is similar to cooked shrimp. Not only is this method of cooking shrimp incredibly easy, it’s also healthier than traditional cooking methods because it doesn’t require any added oil or fat.

Plus, the bright and tangy flavor of the lime juice complements the natural sweetness of the shrimp, making for a delicious and refreshing dish. So next time you’re craving shrimp, try marinating it in lime juice for a quick, easy, and delicious meal.

Advertisement

Bright and Tangy Flavor

Indulge in the bright and tangy flavors of a lime juice marinade for a shrimp dish that’s both refreshing and delicious.

When shrimp is marinated in lime juice, the acid in the juice gently cooks the shrimp, giving it a unique texture and flavor profile. The tangy lime flavor pairs perfectly with the sweetness of the shrimp, creating a flavor explosion in your mouth.

To make a lime juice marinade, simply combine freshly squeezed lime juice, garlic, salt, and pepper in a bowl. Add the shrimp and let it sit in the marinade for at least 15 minutes.

Once the shrimp has been marinated, it can be cooked in a variety of ways, including grilling or sautéing. This versatile marinade can also be used with other seafood or even chicken for a delicious and healthy meal.

Moving on to the next section, pairing the shrimp with other ingredients can take this dish to the next level.

Advertisement

Pairing with Other Ingredients

Enhance the flavor of your lime-marinated shrimp dish by pairing it with complementary ingredients such as avocado, cilantro, and cherry tomatoes. These flavor combinations will elevate the taste of your dish and give it a unique twist.

Avocado adds creaminess and richness, cilantro brings a fresh and herbaceous flavor, and cherry tomatoes provide a burst of sweetness. These ingredients not only complement the bright and tangy flavor of the lime-marinated shrimp but also create a well-balanced dish that will satisfy your taste buds.

Apart from flavor combinations, cooking techniques also play a crucial role in enhancing the taste of your dish. Grilling or sautéing the shrimp with a little bit of olive oil and seasoning will add depth and complexity to the dish. The caramelization from grilling or sautéing will intensify the flavors and create a mouth-watering experience.

These techniques also make the shrimp tender and juicy, making it the perfect protein for your lime-marinated shrimp dish. With the right pairing of ingredients and cooking techniques, your shrimp dish will be a crowd-pleaser.

As we explore regional variations of this dish, we’ll discover new ways to cook and pair ingredients that will take your lime-marinated shrimp dish to the next level.

Advertisement

Regional Variations

Although there are regional variations, the classic method of cooking shrimp in lime juice is popular throughout Latin America. In Mexico, for example, ceviche is often made with serrano or habanero peppers for a spicy kick. In Peru, the dish is typically served with sweet potato and corn, while in Ecuador, it may include tomato and cilantro.

The cultural significance of ceviche cannot be overstated, as it’s often served as a symbol of national pride and identity.

When cooking shrimp in lime juice, it’s important to choose the right type of shrimp. Look for fresh, high-quality shrimp that have been sustainably harvested. Avoid shrimp that has been previously frozen or treated with preservatives.

Additionally, make sure to remove the shrimp’s digestive tract (the dark vein) before cooking, as it can affect the taste and texture of the dish.

With the right ingredients and technique, cooking shrimp in lime juice can be a delicious and satisfying culinary experience.

Advertisement

Choosing the Right Shrimp

As we’ve seen in the previous subtopic, the way shrimp ceviche is prepared varies greatly depending on the region. However, something that remains constant is the importance of choosing the right shrimp. When it comes to making shrimp ceviche, freshness and quality are key.

To ensure you’re getting the best shrimp for your ceviche, here are a few things to keep in mind:

  • Look for wild-caught shrimp instead of farmed shrimp, as this can help with sustainability concerns.
  • Choose shrimp that are firm and have a slight sheen to them, avoiding any shrimp that smell fishy or have a slimy texture.
  • Consider the size of the shrimp you’re buying, as larger shrimp may take longer to cook.
  • If possible, buy shrimp that are already deveined to save time during preparation.
  • Finally, consider the price – while you don’t necessarily need to buy the most expensive shrimp, you don’t want to skimp either.

Once you have the perfect shrimp for your ceviche, it’s time to move on to the cooking methods.

To prepare shrimp ceviche, there are a few different methods you can use. Some people prefer to simply marinate the shrimp in lime juice until they turn opaque, while others prefer to boil the shrimp briefly before marinating them. Regardless of the method you choose, it’s important to make sure the shrimp are fully cooked before serving.

With the right preparation and cooking, you can create a delicious and refreshing shrimp ceviche that’s sure to be a hit.

Preparing the Shrimp

To get started on preparing your shrimp for ceviche, it’s important to choose fresh, high-quality wild-caught shrimp that are firm and have a slight sheen.

Advertisement

Once you have your shrimp, you’ll need to clean them and remove the shell. To do this, start by holding the shrimp by the tail and gently pulling off the shell. You can also use a paring knife to slit the back of the shrimp and remove the vein. Rinse the shrimp under cold water to remove any remaining debris.

When it comes to choosing the right size of shrimp for ceviche, it’s really a matter of personal preference. Some people prefer small, bite-sized shrimp, while others like the texture and flavor of jumbo shrimp.

Keep in mind that smaller shrimp will cook faster in the lime juice, but larger shrimp will be more substantial in the finished dish.

Once your shrimp are cleaned and ready to go, it’s time to move on to marinating them in lime juice.

Marinating the Shrimp

Now that the shrimp’s prepared, it’s time to marinate them in lime juice. This step is crucial as it infuses the shrimp with tangy flavor while tenderizing the meat.

Advertisement

To marinate the shrimp, I prefer using a large plastic ziplock bag. I add shrimp and enough lime juice to coat all pieces. Then, I seal the bag and leave it in the fridge for at least 30 minutes.

When it comes to grilling the shrimp, there are a few techniques to keep in mind. Firstly, make sure to oil the grill grates to prevent sticking. Secondly, preheat the grill to high heat before adding the shrimp. Finally, grill the shrimp for about 2-3 minutes on each side until they turn pink and slightly charred. If you don’t have access to a grill, you can also cook the shrimp in a hot skillet with some oil.

For those who may not enjoy the taste of lime or want to try something new, there are alternative citrus options. Lemon and orange juice can also be used to marinate the shrimp, providing a slightly different flavor profile. Additionally, adding some chopped garlic or cilantro to the marinade can add a delicious twist to the dish.

As the shrimp finishes cooking, it’s time to start thinking about serving suggestions.

Serving Suggestions

If you’re looking to add a pop of color to your plate, consider garnishing your grilled shrimp with a sprinkle of chopped fresh herbs, like confetti on a party dress. Not only does it add visual interest, but it also enhances the flavor of the dish.

Advertisement

Here are some flavor combinations and presentation ideas to take your shrimp to the next level:

  • Flavor combinations:

  • Lemon and dill

  • Lime and cilantro

  • Garlic and parsley

  • Presentation ideas:

  • Serve on a bed of mixed greens for a salad

  • Skewer with pineapple and bell pepper for a tropical twist

  • Arrange on a platter with sliced avocado and cherry tomatoes for a colorful appetizer

By incorporating these ideas, you can elevate your shrimp dish and impress your guests.

Now, let’s move on to the important topic of safety precautions.

Safety Precautions

Before you start cooking shrimp in lime juice, it’s essential to take note of some safety precautions to ensure that you don’t encounter any unwanted accidents.

Firstly, when handling raw shrimp, it’s crucial to wash your hands thoroughly with soap and water. This step is especially important as raw shrimp may contain bacteria that can cause food poisoning.

Advertisement

Additionally, it’s recommended to use separate cutting boards and utensils for raw seafood and other food items to prevent cross-contamination.

When it comes to storing shrimp, it’s best to keep them refrigerated until ready to use. Raw shrimp can be stored in the refrigerator for up to two days, while cooked shrimp can last for up to four days.

It’s also essential to keep shrimp at a temperature of 40°F or below to prevent the growth of harmful bacteria. If you plan on freezing shrimp, make sure to place them in an airtight container and label it with the date of freezing.

Frozen shrimp can last for up to six months in the freezer. By following these handling tips and storage guidelines, you can ensure that your shrimp dish is not only delicious but also safe to eat.

Frequently Asked Questions

Can I use lemon juice instead of lime juice to cook shrimp?

I wouldn’t recommend using lemon juice instead of lime juice to cook shrimp. Lime juice offers many benefits, such as a higher acidity level and unique flavor profile, which enhances the taste and texture of the shrimp.

Advertisement

How long should I marinate the shrimp in lime juice?

I marinate shrimp in lime juice for 30 minutes before cooking. Longer marinating times will increase flavor intensity but may result in a tougher texture. It’s important to not over-marinate.

Can I use frozen shrimp for this recipe?

Frozen shrimp can be used for this recipe, but it’s important to thaw them properly first. The cooking time may be slightly longer than with fresh shrimp, and the texture may be slightly different, but still delicious.

What other dishes can I make with lime-marinated shrimp?

I love making Grilled Shrimp Skewers and Shrimp Ceviche with lime-marinated shrimp. The tangy citrus flavor pairs perfectly with the shrimp’s sweetness. Both dishes are easy to prepare and perfect for summer gatherings.

How do I know when the shrimp is fully cooked?

To know when shrimp is fully cooked, I look for a change in texture from translucent to opaque and a slight curling. I prevent overcooking by timing it carefully and removing it from heat immediately.

Conclusion

In conclusion, I’ve discovered that cooking shrimp in lime juice isn’t just a delicious way to prepare this seafood favorite. It also has a fascinating chemical reaction that transforms the texture and flavor.

Advertisement

By marinating the shrimp in lime juice, the citric acid breaks down the proteins. This causes the shrimp to become opaque and firm, with a tangy, citrusy taste.

Furthermore, the benefits of lime juice marination aren’t limited to taste alone. Lime juice is also a rich source of vitamin C. This has antioxidant properties that can boost the immune system and protect against disease.

Whether you prefer your shrimp cooked in lime juice with a Caribbean or Latin American twist, or simply enjoy the zesty, refreshing taste, this dish is sure to be a hit at any seafood feast.

So next time you’re in the mood for some delicious shrimp, remember to reach for the lime juice and let the magic happen!

Advertisement

Continue Reading

Juice

How Long Can Fresh Lime Juice Last In The Fridge

Published

on

By

As a fan of using fresh lime juice in my cooking and cocktails, I often think about how long it will last when kept in the fridge. The shelf life can vary depending on factors like the freshness of the lime, how it’s stored, and the temperature of the refrigerator.

In this article, I will explore the shelf life of fresh lime juice and provide tips on how to make it last longer. The shelf life of fresh lime juice can be affected by several factors, including its acidity, exposure to air, and the presence of bacteria. It is important to know how long lime juice can last in the fridge to avoid consuming spoiled juice, which can lead to foodborne illness or an unpleasant taste.

In this article, I will provide information on the factors that affect the shelf life of lime juice, how to store it properly, and signs of spoilage to watch out for.

Key Takeaways

  • Freshly squeezed lime juice can last up to a week in the fridge if stored in a clean, airtight container at 40°F or below.
  • Exposure to air and bacteria can affect the shelf life of lime juice, so it’s recommended to use a juicer or press to minimize bacteria and store in an airtight container.
  • Signs of spoilage include sour smell, discoloration, cloudiness, and unpleasant taste.
  • Preservatives like ascorbic acid, citric acid, and potassium sorbate can extend the shelf life of lime juice, and freezing can preserve freshness for up to 6 months.

Factors Affecting the Shelf Life of Lime Juice

You’ll want to keep in mind that several factors can impact how long your lime juice will last in the fridge. Factors influencing lime juice spoilage include the quality of the limes used, the method of extraction, and the storage conditions.

The fresher the limes, the longer the juice will last. If the limes are old or damaged, the juice will spoil more quickly. The method of extraction can also affect the shelf life of lime juice. Hand squeezing limes can introduce more bacteria into the juice, which can cause it to spoil faster. Using a juicer or a press can help minimize the introduction of bacteria and extend the shelf life of the juice.

To ensure the best practices for preserving lime juice freshness, it’s essential to store it in a clean container with an airtight lid. Exposure to oxygen can cause the juice to oxidize and spoil more quickly. Keep the juice in the fridge at a temperature of 40°F or below, as higher temperatures can allow bacteria to grow and cause the juice to go bad.

Advertisement

Additionally, it’s best to use freshly squeezed lime juice within a week of extraction for optimal taste and quality. By following these guidelines, you can extend the shelf life of your lime juice and enjoy its freshness for longer periods of time.

Now, let’s move on to the next section and discuss how long fresh lime juice can last in the fridge.

How Long Can Fresh Lime Juice Last in the Fridge?

Feeling thirsty and in the mood for a zesty kick in your drink? Check the fridge for that tangy liquid waiting to be squeezed into your glass. Freshly squeezed lime juice can last up to a week when stored properly in the fridge. It is important to note that the shelf life of lime juice can vary depending on various factors, such as the method of extraction and storage.

To maximize the shelf life of your lime juice, store it in an airtight container and keep it refrigerated. If you have leftover lime juice, there are many ways to use it! You can use it as a marinade for meats, add it to your water for a refreshing drink, or mix it with honey for a sore throat remedy. Drinking lime water daily can also have numerous benefits, such as boosting your immune system and aiding in digestion. However, it is important to always check for signs of spoilage before consuming.

Without a doubt, it is crucial to identify the signs of spoilage before consuming lime juice. In the next section, we will discuss the telltale signs that your lime juice is no longer safe to consume.

Advertisement

Signs of Spoilage

If your lime juice has been left out at room temperature for too long, it may start to develop a sour and off-putting smell, indicating spoilage. Common contaminants such as bacteria and mold can grow in the juice, leading to discoloration, cloudiness, and an unpleasant taste.

To avoid spoiling your lime juice, it’s important to store it properly in the fridge at a temperature below 40°F. Proper storage can help extend the shelf life of your lime juice. Store it in an airtight container and keep it away from other foods that may contaminate it.

If you notice any signs of spoilage, discard the juice immediately.

In the next section, we’ll discuss some useful tips for storing lime juice to ensure it stays fresh for as long as possible.

Tips for Storing Lime Juice

When it comes to storing lime juice, I’ve found that using airtight containers is crucial to preserving its freshness. Additionally, adding preservatives like citric acid or vitamin C can help extend its shelf life.

Advertisement

If you want to keep lime juice on hand for an even longer period of time, freezing it in ice cube trays is a great option.

Using Airtight Containers

To keep your fresh lime juice fresh for a longer period of time, you should store it in airtight containers. Airtight containers provide a number of benefits that other storage options might not.

Here are four reasons that using airtight containers is the best way to store lime juice:

  1. Prevents oxidation: Lime juice can quickly lose its flavor and nutritional value due to oxidation. Airtight containers prevent exposure to air, which slows down the oxidation process.

  2. Blocks light: Lime juice stored in clear containers can be exposed to light, which can cause the breakdown of nutrients and flavor. Airtight containers are typically opaque, which blocks out harmful light.

  3. Keeps out moisture: Moisture can cause lime juice to spoil quickly. Airtight containers create a dry environment that keeps the juice fresh for a longer time.

  4. Easy to transport: Airtight containers are perfect for transporting lime juice. They’re leak-proof and can be safely transported without spilling.

By using airtight containers, you can keep your fresh lime juice fresh for a longer period of time. However, if you want to store it for an even longer period, you may need to add preservatives to the juice.

Adding Preservatives

Now that we know that using airtight containers can help preserve the freshness of lime juice in the fridge, let’s explore another option: adding preservatives.

Advertisement

Preservative options include ascorbic acid (vitamin C), citric acid, and potassium sorbate. These preservatives can help extend the shelf life of lime juice by inhibiting the growth of bacteria, yeast, and molds. However, it’s important to note that the effectiveness of preservatives may vary depending on the type and concentration used, as well as the storage conditions.

It’s also important to follow instructions carefully when adding preservatives to avoid overuse or underuse, which can affect the taste and safety of the juice. With the right preservative and proper storage, lime juice can last even longer in the fridge, giving you more time to enjoy its fresh flavor.

As we’ve discussed, both airtight containers and preservatives can help prolong the shelf life of fresh lime juice. But what if you need to store it for even longer? In the next section, we’ll explore the option of freezing lime juice for extended storage.

Freezing Lime Juice

If you’re craving the zesty taste of lime in your drinks or dishes all year round, have you considered freezing your excess lime juice for future use? Freezing lime juice is a great way to preserve its freshness and extend its shelf life.

Simply pour your fresh lime juice into an airtight container, leaving some space at the top to allow for expansion as it freezes. Then, label the container with the date and freeze it for up to six months.

Advertisement

Frozen lime juice can be used in many creative ways, from adding a citrusy kick to cocktails and smoothies to enhancing the flavor of marinades and dressings. You can also use it in recipes that call for lime juice, such as salsa or ceviche.

Alternatively, if you don’t want to freeze your lime juice, you can try other alternatives such as adding preservatives or using a vacuum sealer to remove air from the container. These methods can also help to extend the shelf life of your lime juice and keep it fresh for longer.

Freezing lime juice is a simple and effective way to make sure you always have fresh lime juice on hand. However, if you’re looking for more ways to make your lime juice last longer, there are other steps you can take. Stay tuned to learn about some handy tips and tricks for extending the shelf life of your lime juice.

How to Make Lime Juice Last Longer

In my experience, using vinegar and blanching limes are effective ways to make lime juice last longer. By adding a small amount of vinegar to the lime juice, you can help prevent the growth of bacteria and mold.

Blanching the limes before juicing them can also help extend the juice’s shelf life by killing off any bacteria on the surface of the fruit.

Advertisement

Using Vinegar

Adding a dash of vinegar to your fresh lime juice can help extend its shelf life in the fridge, keeping it fresh and tangy for longer. Vinegar has antimicrobial properties that make it an effective natural preservative for food. Just mix a teaspoon of vinegar into a cup of lime juice before storing it in the fridge.

You can use any type of vinegar, but white vinegar is the most commonly used for preserving lime juice. Apart from being used for cleaning, vinegar is also a great ingredient for preserving lime juice. This is because it helps to inhibit the growth of bacteria and fungi that can cause spoilage.

So, if you want to make your fresh lime juice last longer in the fridge, adding vinegar is a simple and effective method. Now, let’s move on to the next topic of blanching limes to keep them fresh.

Blanching Limes

To keep your fresh lime juice from spoiling quickly, you should try blanching the limes before juicing them. Blanching benefits the limes by killing any bacteria on the surface and softening them, making it easier to extract the juice. This technique involves briefly dipping the limes in boiling water for a few seconds, then immediately transferring them to an ice bath to stop the cooking process.

Blanching your limes before juicing them not only helps to preserve the freshness of the juice, but it also enhances the flavor and aroma. The heat breaks down the enzymes in the lime, allowing the natural oils to be released and intensifying the citrusy scent. To better understand the benefits of blanching, consider the table below, which shows a comparison between freshly squeezed lime juice from blanched and unblanched limes.

Advertisement
Unblanched Lime Juice Blanched Lime Juice
Color Slightly yellowish Bright green
Aroma Mild Strong
Flavor Tart and bitter Sweet and tangy
Freshness Lasts up to 3 days Lasts up to 5 days

Now that you know the benefits of blanching limes before juicing, you can experiment with this technique to see how it affects the freshness and taste of your lime juice. However, if blanching is not your preferred method, there are alternative storage methods that you can try to extend the shelf life of your lime juice.

Alternative Storage Methods

Storing fresh lime juice in an airtight container with a squeeze of lemon or lime can help prolong its shelf life. Another method to keep lime juice fresh for a longer period is vacuum sealing. This technique removes air from the container, which reduces the amount of oxygen that can cause the juice to spoil. Citrus preservatives, such as ascorbic acid or citric acid, can also be added to the juice to extend its shelf life.

It’s important to note that even with these methods, lime juice will eventually lose its freshness and flavor. Therefore, it’s best to use it within a week or two of storage.

In the next section, we’ll discuss how to incorporate fresh lime juice into various recipes.

Using Lime Juice in Recipes

When I use lime juice in my recipes, I find that it adds a zesty and refreshing flavor. Lime juice can be used in various beverages, such as margaritas or limeade, to give them a tangy twist.

Advertisement

It’s also a great ingredient for marinades and dressings, as it helps tenderize meats and adds a citrusy kick to salads. Additionally, lime juice can be used in baking, particularly for desserts like key lime pie or lime-flavored cakes.

Beverages

You’ll want to keep your cold beverages stocked with fresh lime juice that adds a zesty punch to your drinks like a squeeze of sunshine. Beverage recipes can benefit from the tartness and acidity of lime juice, which can balance out sweetness and add complexity to flavors.

Here are a few ways to incorporate lime juice into your beverages:

  • Add a splash to sparkling water for a refreshing and healthy alternative to soda.
  • Use lime juice to make a classic mojito or margarita for a tropical and festive cocktail.
  • Mix lime juice with honey and hot water for a soothing and immune-boosting drink.
  • Combine lime juice with coconut water for a hydrating and electrolyte-packed beverage.

While lime juice can add a lot of flavor to your drinks, it’s important to remember that it can also spoil quickly. It’s best to use fresh lime juice within a few days of squeezing to ensure its quality and safety.

In the next section, we’ll explore how lime juice can also be used in marinades and dressings to elevate your meals.

Marinades and Dressings

Enhance the flavor of your meals with tangy and zesty marinades and dressings that incorporate the vibrant taste of lime. Lime juice is a versatile ingredient that can add a burst of acidity to any dish, making it a popular choice for marinating meats and creating salad dressings. However, it is important to know how long you can store fresh lime juice in the fridge before it loses its potency.

Advertisement

To make the most out of your lime juice, it is recommended to use it within a week of squeezing. When storing lime juice, make sure to keep it in an airtight container in the fridge to prevent oxidation and bacterial growth. Here’s a table to help you determine how long your lime juice can last in the fridge:

Type of Lime Juice Refrigerator Shelf Life
Freshly squeezed 1 week
Store-bought 2-3 months

By using fresh lime juice, you can elevate the flavor of your marinades and dressings. If you want to make sure that your lime juice lasts longer, consider freezing it in an ice cube tray for future use. Now that you know how to keep your lime juice fresh, let’s move on to the next section about baked goods.

Baked Goods

Baked goods are a staple in many households, with Americans consuming an average of 19.5 pounds of cookies per year according to a study by the USDA. While lime juice may not immediately come to mind when thinking about baked goods, it can be a creative addition to many recipes.

The acidic tang of lime juice can add a burst of flavor to sweet treats like cupcakes and muffins, while also balancing out the richness of butter and sugar. When incorporating lime juice into baked goods, it’s important to consider flavor pairings. Lime pairs well with other citrus fruits like lemon and orange, as well as tropical flavors like coconut and pineapple.

It can also complement spicy flavors like ginger and chili, adding a refreshing contrast to the heat. Whether used in a glaze, frosting, or directly in the batter, lime juice can bring a unique twist to traditional baked goods. As we move into discussing the health benefits of lime juice, it’s important to note that incorporating it into baked goods may not offer the same benefits as consuming it fresh.

Advertisement

However, using lime juice in moderation can still provide a burst of flavor without adding excess sugar or calories.

Health Benefits of Lime Juice

Did you know that consuming lime juice regularly can provide numerous health benefits? Here are five benefits of regularly consuming lime juice:

  • Lime juice has natural detoxifying properties that can help cleanse the liver and flush out toxins from the body. This makes it a great choice for detoxing.
  • Lime juice is rich in vitamin C, which is essential for healthy skin. It can help reduce acne, wrinkles, and other skin blemishes, making it perfect for improving skin health.
  • Lime juice is loaded with antioxidants that can help strengthen the immune system and protect the body against infections and diseases. This makes it a great choice for boosting the immune system.
  • Lime juice can help stimulate the digestive system and alleviate digestive issues such as constipation and bloating. This makes it a great choice for improving digestive health.
  • Lime juice can help boost metabolism and aid in weight loss. This makes it a great choice for weight loss.

When it comes to using lime juice in recipes, it’s important to note the difference between lime juice and lime concentrate. Lime juice is freshly squeezed and contains no added sugars or preservatives, while lime concentrate is a more concentrated form of lime juice that often contains added sugars and preservatives. It’s always best to opt for fresh lime juice when possible to reap the most health benefits.

Lime Juice vs. Lime Concentrate

When it comes to making lime juice-based recipes, there are two main options: fresh lime juice and lime concentrate. As someone who enjoys cooking and experimenting in the kitchen, I’ve explored the nutritional and flavor differences between the two.

In this discussion, I’ll share my findings on the unique qualities of each and how they can impact the taste and health benefits of your dishes.

Nutritional Differences

You might be surprised to know that fresh lime juice actually loses up to 25% of its vitamin C content within the first 24 hours of being refrigerated. This is due to the natural oxidation process that occurs when the juice is exposed to air.

Advertisement

Lime juice processing and preservation methods can help to slow down this process, but it’s important to note that the longer the juice is stored, the more nutrients it will lose. When it comes to nutritional differences between fresh lime juice and lime concentrate, it’s important to note that lime concentrate often contains added sugars and preservatives, which can decrease its nutritional value. Additionally, the processing methods used to create lime concentrate can also result in a loss of nutrients.

Overall, while both fresh lime juice and lime concentrate can provide some nutritional benefits, fresh juice is generally considered to be the healthier option. Moving on to flavor differences, it’s important to note that fresh lime juice has a brighter, more complex flavor profile than lime concentrate, which can often taste flat or overly sweet.

Flavor Differences

Experience the full, vibrant flavor of freshly squeezed lime juice, which can’t be replicated by lime concentrate. Lime juice can add a zesty, tangy kick to a variety of dishes, from marinades and dressings to cocktails and desserts.

When it comes to flavor preferences, some people may prefer the sweeter taste of bottled lime juice, while others crave the tartness of freshly squeezed. If you’re looking to impress your taste buds and elevate your culinary creations, opt for fresh lime juice.

Here are some culinary uses for fresh lime juice that showcase its flavor and versatility:

Advertisement
  1. Use it as a base for marinades and sauces for meats and seafood.
  2. Squeeze it over grilled vegetables or fruits to add a bright, citrusy flavor.
  3. Add it to salad dressings and dips for a tangy twist.
  4. Mix it with honey or agave nectar to create a refreshing and healthy drink.

Whether you’re a professional chef or a home cook, fresh lime juice can take your dishes to the next level. So, the next time you’re at the grocery store, grab a bag of limes and experiment with new flavor combinations.

Frequently Asked Questions

Can you freeze fresh lime juice?

Yes, you can freeze fresh lime juice. I recommend freezing it in ice cube trays for easy portioning. Another option is to make a lime concentrate by reducing the juice over low heat until it thickens, then freezing it.

How long can lime juice last outside of the fridge?

Leaving lime juice at room temperature is like a ticking time bomb. To avoid disaster, store in the fridge for up to a week. For longer preservation, canning or vacuum sealing is recommended.

Can you mix lime juice with other citrus juices for longer shelf life?

Combining lime juice with other citrus juices can extend lime juice preservation. However, the resulting mixture’s shelf life depends on the other citrus juice’s acidity, freshness, and storage conditions. It’s best to refrigerate the mixture and consume within a few days.

What are some common recipes that use lime juice?

Hey there! If you’re looking for some lime juice recipes, I’ve got you covered. Try adding it to guacamole for a zesty kick or using it as a substitute for lemon juice in ceviche. Cheers!

Are there any negative health effects associated with consuming too much lime juice?

Consuming excessive amounts of lime juice can lead to negative health effects such as tooth erosion and stomach upset. However, moderate consumption can have benefits such as aiding in weight loss and improving skin health due to its high vitamin C content.

Advertisement

Conclusion

In conclusion, the shelf life of fresh lime juice in the fridge is affected by various factors such as the storage temperature, container, and air exposure. Generally, it can last for up to a week, but it’s important to check for signs of spoilage before using it.

To prolong its freshness, you can store lime juice in an airtight container, add a layer of oil on top, or freeze it in ice cube trays.

While lime juice may seem like a simple ingredient, it offers numerous health benefits and can add a burst of flavor to your dishes. Whether you’re making a refreshing drink or adding it to a marinade, knowing how to store and use lime juice properly can make a big difference in the taste and quality of your food.

So, next time you have some fresh limes on hand, give lime juice a try and enjoy its zesty goodness.

Advertisement

Continue Reading

Juice

How To Flavor Vape Juice

Published

on

By

At first, I thought vaping was all about creating big clouds and looking cool. But as I delved deeper into the vaping world, I realized it involves so much more. It includes experimenting with different flavors and creating unique blends. This is where the real fun begins.

If you’re like me and you’re tired of the same old boring flavors, then it’s time to learn how to flavor vape juice. Sure, you could buy pre-made flavors, but where’s the fun in that? It’s like eating at a fast food chain instead of cooking your own meal.

With a little bit of knowledge and some experimentation, you can create delicious and unique flavors that will leave your taste buds begging for more. So, let’s dive in and learn how to flavor vape juice like a pro.

Key Takeaways

  • Choosing high-quality flavorings and understanding concentration levels is crucial for achieving desired flavor intensity.
  • Testing flavor concoctions through dripping, steeping, and smelling is essential for achieving the desired taste.
  • Proper storage conditions such as cool temperatures and avoiding exposure to light can help extend the shelf life of vape juice.
  • Experimenting with advanced techniques such as steeping and adding sweeteners can enhance flavor intensity.

Understanding the Basics of Vape Juice

So, you wanna know the basics of vape juice? Well, let me tell you, the first thing you need to understand is that it’s the liquid that gets vaporized in your device to create those delicious clouds.

But before you start mixing your own flavors, it’s important to think about vaping safety. Make sure you’re using high-quality ingredients and clean equipment to avoid any potential health hazards.

Choosing the right base is also crucial when it comes to making vape juice. The two most common bases are propylene glycol (PG) and vegetable glycerin (VG). PG is thinner and produces less vapor but provides a better throat hit, while VG is thicker and produces more vapor but has a sweeter taste. You can also choose a mix of both to get the best of both worlds.

Advertisement

Now that you understand the basics, let’s move on to choosing the right flavorings.

Choosing the Right Flavorings

When it comes to choosing the right flavorings for your vape juice, there are a few key points to keep in mind.

First and foremost, it’s important to experiment with different flavors to find the perfect combination for your taste buds.

Additionally, it’s important to find reliable sources for your flavorings to ensure quality and safety.

Finally, understanding concentration levels is crucial in order to achieve the desired flavor intensity.

Advertisement

As someone who’s experimented with many different flavorings, I can attest to the importance of these factors in creating a delicious and satisfying vape juice.

Experimenting with Different Flavors

To really explore the different flavors available, I highly recommend experimenting with different vape juice flavors. One way to do this is by trying out different flavor combination ideas. You can mix and match different flavors to create unique and delicious e-juice blends.

For example, you can try combining fruity flavors like strawberry and mango, or mix dessert flavors like vanilla and chocolate. When experimenting with flavor combinations, taste testing is key. Start by mixing small batches of e-juice and adjust the flavorings as needed.

Don’t be afraid to try out new combinations and take notes on what works and what doesn’t. Remember, taste is subjective, so what may work for one person may not work for another. By testing and experimenting different flavors, you can create a blend that perfectly suits your taste buds.

In order to continue creating unique vape juice flavors, it’s important to find reliable sources for flavorings. There are many options available, from online retailers to brick-and-mortar stores. I’ll discuss this further in the next section.

Advertisement

Finding Reliable Sources for Flavorings

You can easily find trustworthy sources for the ingredients needed to create unique e-juice blends by researching reviews and ratings from other DIY mixologists. Choosing quality ingredients is crucial in achieving a well-balanced and flavorful e-juice.

When searching for flavorings, it is essential to compare different brands and their offerings. Some brands may use artificial flavorings, while others use natural ingredients. It’s important to determine which type of flavorings you prefer and which ones work best for your recipe.

When comparing different flavor brands, it’s also important to consider the concentration levels of each flavoring. Some brands may have a higher concentration level than others, which can affect the overall taste of your e-juice. Understanding concentration levels is crucial in creating a balanced and flavorful e-juice.

In the next section, we’ll discuss how to measure and adjust concentration levels to achieve the desired taste.

Understanding Concentration Levels

Understanding concentration levels is crucial for achieving a perfectly balanced and delicious e-liquid blend, ensuring that every puff is a satisfying and enjoyable experience. To fully comprehend concentration levels, it’s important to understand dilution ratios. Dilution ratios tell us how much flavoring to add to our base liquid.

Advertisement

Typically, the dilution ratio for flavorings ranges from 5% to 20%, depending on the manufacturer’s recommendation. However, it’s always best to start with a lower concentration level and gradually increase it until you find the perfect balance for your taste buds.

Measuring flavoring accurately is also essential for creating a consistent and flavorful e-liquid blend. When measuring flavoring, it’s crucial to use precise and accurate tools such as syringes or droppers. Using a scale can also be helpful, especially when dealing with smaller quantities.

Additionally, it’s important to take note of the flavoring’s specific gravity, which is the ratio of its density to the density of water. Understanding concentration levels and measuring flavoring accurately are just some of the crucial steps in creating a delicious vape juice blend.

Next, we’ll dive into the process of mixing your own vape juice.

Mixing Your Own Vape Juice

Mixing your own vape juice is like being a mad scientist in a laboratory, concocting the perfect flavor combination. With DIY vape juice, you have the freedom to customize flavors to your liking and create unique blends that cannot be found in stores. However, before you start mixing, it is important to have a basic understanding of the ingredients and tools you will need.

Advertisement

To create your own vape juice, you will need four main components: a base liquid, flavor concentrates, nicotine (if desired), and bottles for mixing and storing. The base liquid is typically a mixture of propylene glycol (PG) and vegetable glycerin (VG), which serve as the foundation for your flavor and vapor production. Flavor concentrates are the key to creating unique flavors, and there are countless options available on the market. When selecting flavors, it is important to consider the concentration level and how it will affect the final product. To help you get started, here is a table of some popular flavor combinations:

Flavor Concentration (in %) Recommended Pairings Notes
Blueberry 5-7 Lemon, Cream, Vanilla Can be overpowering, start with a small amount and adjust as needed
Watermelon 8-10 Strawberry, Kiwi, Mint Can be sweet, balance with a tart flavor
Caramel 10-12 Hazelnut, Coffee, Tobacco Can be used as a base for dessert flavors
Menthol 1-3 Fruit, Mint, Vanilla Can be overpowering, start with a small amount and adjust as needed

Once you have your ingredients and tools, it is time to start mixing and experimenting with flavors. But before you do, it is important to test your flavor and make adjustments as needed.

Testing Your Flavor

Before diving into the world of DIY vape juice, it’s crucial to ensure your flavor concoctions are up to par by conducting a taste test and making necessary adjustments.

Here are three flavor testing methods that can help you achieve your desired taste:

  1. Dripping Test – This method involves dripping a small amount of your flavored vape juice onto your atomizer and inhaling to test the flavor. This is an effective way to get a quick taste of your flavor, but it can be wasteful and time-consuming.

  2. Steeping Test – Steeping your vape juice involves letting it sit for a few days or weeks to allow the flavors to blend and mature. This method is ideal for achieving a more complex flavor profile and can help enhance the overall taste of your juice.

  3. Smell Test – Your sense of smell plays a crucial role in your ability to taste flavors. Before testing your vape juice, take a moment to smell it and note any aromas or scents. This can help you identify any off-notes or flavors that need to be adjusted.

Once you’ve tested and adjusted your flavor, it’s time to move on to storing your flavored vape juice.

Advertisement

Storing Your Flavored Vape Juice

When it comes to storing your flavored vape juice, there are a few key points to keep in mind. First and foremost, choosing the right storage container is crucial. Glass or plastic bottles with tight-fitting caps are ideal for keeping your juice fresh and free from contaminants.

Additionally, proper storage conditions such as cool temperatures and avoiding exposure to light can help extend the shelf life of your juice. As someone who’s experimented with many different flavors, I’ve found that taking care in how I store my juice can make a significant difference in its quality and taste.

Choosing the Right Storage Container

Properly storing your vape juice is crucial to maintain its quality and flavor, so it’s important to select the appropriate container. When it comes to choosing the right material for storage container, it’s important to consider the following:

  1. Glass: This is a great option for storage containers as it doesn’t react with the vape juice, ensuring the flavor isn’t affected. Glass containers are also easy to clean and can be reused multiple times.

  2. Plastic: If you prefer plastic containers, make sure to choose one that’s made from food-grade plastic. It’s important to note that some plastic containers can interact with certain ingredients in the vape juice, potentially altering the flavor.

  3. Metal: Metal containers are not recommended for storing vape juice as they can react with the liquid, leading to a metallic taste. However, if you must use a metal container, make sure it’s made from stainless steel to prevent any chemical reactions.

Proper sealing of storage container is also important to prevent air and sunlight from affecting the flavor of your vape juice.

In the next section, we’ll discuss the proper storage conditions to ensure your vape juice remains fresh and flavorful.

Advertisement

Proper Storage Conditions

Maintaining the quality of your liquid requires a suitable environment that shields it from light and air. Proper storage conditions are essential to ensuring your flavored vape juice doesn’t lose its taste or potency.

Temperature control is crucial in preserving the quality of your juice. Heat can degrade the flavors and nicotine in your vape juice, which can lead to a less enjoyable vaping experience. Therefore, it’s best to store your e-liquid in a cool, dry place away from direct sunlight.

Air exposure is another factor that can cause your vape juice to lose its taste and quality. When exposed to air, the flavors in your e-liquid can break down and become less potent. To prevent air exposure, make sure that your storage container is tightly sealed. You can also consider storing your vape juice in smaller bottles to minimize the amount of air that comes in contact with the liquid.

By following these proper storage conditions, you can ensure that your flavored vape juice stays fresh and delicious for longer. This leads us to the next section about the shelf life of flavored vape juice.

Shelf Life of Flavored Vape Juice

To keep your e-liquid fresh, you should be aware that its shelf life can vary depending on the ingredients used. Flavored vape juice ingredients, such as fruit concentrates or natural extracts, can cause the liquid to degrade faster and shorten its shelf life. On the other hand, synthetic flavorings tend to be more stable and can last longer.

Advertisement

Another factor that affects the shelf life of flavored vape juice is temperature. Exposure to high heat can cause the ingredients to break down and lose their potency, resulting in a change in flavor and color. For example, if you leave your e-liquid bottle in a hot car or near a heater, it can go bad much quicker than if you store it in a cool, dark place. To ensure the longevity of your flavored vape juice, it is recommended to store it in a cool, dry place away from direct sunlight and heat sources.

By taking proper storage precautions, you can extend the shelf life of your flavored vape juice and enjoy its full flavor and potency for longer. Now that you know how to properly store your e-liquid, let’s move on to the next section and learn how to use it.

Using Your Flavored Vape Juice

As I prepare to use my newly flavored vape juice, there are a few key points to keep in mind. Firstly, I’ll need to fill my tank or cartridge with the desired amount of liquid.

Secondly, I may need to adjust my device settings to ensure optimal performance.

And finally, I can sit back and enjoy the unique flavor that I’ve created, savoring every puff.

Advertisement

With these steps in mind, I’m ready to fully experience the delicious taste of my homemade vape juice.

Filling Your Tank or Cartridge

First, make sure you have properly filled your tank or cartridge with your desired flavor of vape juice. The process of filling your tank or cartridge can vary depending on the type of device you have. For example, some tanks have a top-fill design, while others require you to unscrew the bottom to fill. Regardless of the design, it’s important to follow the manufacturer’s instructions and ensure that the tank or cartridge is not overfilled.

To help you get started with filling your tank or cartridge, here is a table outlining some common cleaning techniques and troubleshooting tips for your device:

Cleaning Techniques Troubleshooting Tips
Use a cotton swab and rubbing alcohol to clean the contacts and threading of your device If your device is not producing vapor, check the battery to make sure it is charged and turned on
Disassemble your tank or cartridge and wash all components in warm, soapy water If you are experiencing a burnt taste, check the coil to make sure it is properly installed and not worn out
Use a specialized cleaning solution to remove stubborn residue from your tank or cartridge If you are having difficulty drawing air through your device, check the airflow control to make sure it is open

Now that you have properly filled your tank or cartridge and have some cleaning and troubleshooting techniques under your belt, it’s time to adjust your device settings to enhance your vaping experience.

Adjusting Your Device Settings

Once you’ve filled your tank or cartridge and cleaned your device, it’s time to adjust your device settings to customize your vaping experience.

Advertisement

One of the key ways to do this is by adjusting the wattage. This determines how much power is sent to the coil, which affects the temperature of the coil and the vapor produced. Higher wattages produce hotter vapor and more clouds, while lower wattages produce cooler vapor and less clouds. It’s important to find the right wattage for your vape juice and preferences.

Another way to customize your vaping experience is through temperature control. This allows you to set a specific temperature for the coil, which can affect the flavor and vapor production. Temperature control is especially helpful for those who use certain types of coils, such as nickel or titanium, which can be sensitive to high temperatures. By adjusting the temperature, you can avoid burning your coil and enjoy a smoother vaping experience.

Once you’ve adjusted your device settings, it’s time to enjoy your unique flavor and vaping experience.

Enjoying Your Unique Flavor

To truly savor the unique taste of your e-liquid, you should take slow and deliberate draws from your device. This allows the flavors to fully develop on your taste buds.

Pairing flavors can enhance your vaping experience even more. For example, if you have a fruity flavor, consider adding a hint of menthol for a refreshing twist. Or, mix a dessert flavor with a coffee flavor for a delicious treat.

Advertisement

Another way to enhance your vaping experience is to experiment with different wattage and temperature settings on your device. Higher wattage and temperature can bring out bolder flavors, while lower settings can bring out more subtle nuances. Just be sure to start with lower settings and gradually increase to avoid burning your coil.

Now that you know how to enjoy your unique flavor, it’s important to keep your equipment clean to maintain optimal performance.

Cleaning Your Equipment

Don’t let your equipment become a neglected garden; regularly tending to it will ensure your vape juice flavors bloom to their fullest potential.

Cleaning your equipment is crucial to maintaining the quality of your vape juice. Here are some cleaning methods you can use and how often you should clean your equipment:

  • Use warm water and soap to clean your tank and drip tip after each use.
  • Soak your tank and coils in vodka or distilled water once a week to remove any buildup.
  • Clean your battery contacts once a month with rubbing alcohol to prevent corrosion.
  • Disassemble your equipment and deep clean it every three months to remove any stubborn residue.

By following these cleaning methods and frequency of cleaning, not only will your vape juice taste better, but your equipment will also last longer.

Now that your equipment is clean and ready to go, it’s time to experiment with advanced techniques to take your vape juice flavors to the next level.

Advertisement

Experimenting with Advanced Techniques

Now that you’ve tended to your equipment, it’s time to push the boundaries and elevate your taste experience with some advanced techniques that’ll leave you feeling satisfied and fulfilled.

One way to enhance the flavor of your vape juice is by experimenting with different flavoring methods. For instance, steeping your e-liquid over time can help to intensify its flavor. This involves leaving your vape juice in a cool, dark place for a few days or even weeks, allowing the flavors to meld and develop.

Another way to boost flavor intensity is by adding sweeteners to your e-liquid. However, it’s important to choose the right sweetener to avoid ruining the taste of your juice. Steer clear of sugar-based sweeteners, as they can clog your atomizer and damage your coils. Instead, opt for natural sweeteners like stevia or sucralose, which won’t affect your juice’s viscosity.

By experimenting with these advanced flavoring techniques, you can create a truly mouth-watering vape juice that’ll satisfy your cravings.

When troubleshooting common issues, it’s important to approach the problem systematically and methodically.

Advertisement

Troubleshooting Common Issues

First, if you encounter any frustrating faults with your vaping, fear not as there are several simple solutions. One of the most common issues is a clogged atomizer, which can be fixed by cleaning or replacing the coil. If you notice a burnt taste or reduced vapor production, it may be time to switch out the coil or clean the atomizer. Another issue may be with the nicotine level, which can be adjusted to better suit your preferences. If you find that your vape juice is too strong or too weak, try adding or subtracting nicotine to find the perfect balance.

To help you troubleshoot common issues, refer to the table below for quick solutions:

Issue Solution
Clogged atomizer Clean or replace coil
Burnt taste or reduced vapor production Replace coil or clean atomizer
Too strong or too weak nicotine Adjust nicotine levels

By following these simple solutions and adjusting your nicotine levels, you can customize your vaping experience to your liking and avoid any frustrating issues. Remember to always stay informed and experiment with different techniques to find what works best for you.

Frequently Asked Questions

Can you use essential oils in vape juice?

I don’t recommend using essential oils in vape juice. They are not intended for inhalation and can be harmful. Instead, consider using essential oil alternatives specifically designed for vaping and follow proper dilution guidelines to ensure a safe and enjoyable experience.

What are the best flavor combinations for vape juice?

As a seasoned vape enthusiast, I recommend experimenting with fruit and menthol combinations like strawberry and mint or blueberry and menthol. For sweet and savory pairings, try vanilla and caramel or cinnamon and apple.

Advertisement

How long does it take for a new flavor to fully develop in the vape juice?

Flavor maturation is the process of allowing the ingredients in vape juice to fully develop and meld together. This can take anywhere from a few days to several weeks, depending on the recipe and steeping process used.

Is it safe to vape homemade flavorings?

As an AI language model, I cannot provide personal opinions or advice. However, it is important to note that vaping risks can increase when using DIY flavorings, as these may contain unknown ingredients that could be harmful when heated and inhaled. It is recommended to use reputable, tested flavorings.

Are there any health risks associated with vaping flavored juice?

Research findings suggest that flavored vape juice can potentially harm the lungs, although more studies are needed. Alternative options include using flavor extracts, which are safer but require more skill to mix accurately.

Conclusion

In conclusion, flavoring vape juice is a fun and exciting process that allows you to customize your vaping experience. With the right knowledge and tools, anyone can create a delicious and unique vape juice flavor.

As I’ve learned through my own experience, understanding the basics of vape juice and choosing the right flavorings are essential steps in creating a well-balanced flavor. It’s important to remember to properly store your flavored vape juice and regularly clean your equipment to maintain the quality and taste.

Advertisement

As the saying goes, "practice makes perfect,"and experimenting with advanced techniques can lead to even more flavor possibilities. Don’t be afraid to get creative and try out new flavor combinations. Who knows, you may even discover your own signature vape juice flavor.

Happy vaping!

Continue Reading

Trending

Copyright © 2024 The Graceful Kitchen Affiliate disclaimer As an affiliate, we may earn a commission from qualifying purchases. We get commissions for purchases made through links on this website from Amazon and other third parties.