I have always loved apple juice, but it wasn’t until I started using a blender that I realized how easy it is to make it myself. Now, it’s a must-have kitchen tool for me, and I can’t wait to teach you how to make perfect apple juice with a blender.
All you need are some fresh apples, a blender, and a few extra tools to customize the flavor to your liking. There’s something special about making your own juice from scratch, and it’s a great way to use up any excess apples you may have lying around.
So let’s get started and make some delicious homemade apple juice!
Key Takeaways
- Use a variety of apples and proper blending techniques for a unique and smooth consistency.
- Strain the juice through a fine mesh sieve to remove pulp and seeds, and refrigerate to maintain nutritional value and prevent spoilage.
- Customize the juice by adding sweeteners, spices, fruits, or vegetables according to personal taste.
- Homemade apple juice is fresher, healthier, and more nutritious than store-bought juice, and provides health benefits such as boosting immune system and improving digestion.

Canfanni 4 Pcs Bento Snack Box Containers, 4 Compartment Divided Stackable Food Storage Containers with Lids, Meal Prep Lunch Container with Sauce Cups
- Large Capacity with Multiple Compartments: 1100ml capacity with 3+1 compartments
- Food Grade and Reusable Material: Made from BPA-free, durable PP
- Dishwasher, Freezer, Microwave Safe: Versatile for various storage needs
As an affiliate, we earn on qualifying purchases.
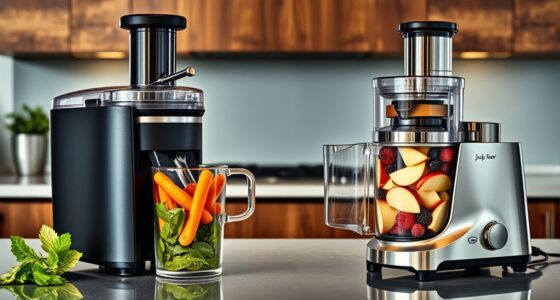
Gather Your Ingredients
Gonna need some apples, water, and a blender to get this apple juice party started! The first step to making apple juice is to gather your ingredients.
When it comes to apple selection, choose the type of apple that you prefer the taste of. Some common types of apples used for juicing are Granny Smith, Honeycrisp, and Fuji. You can also mix different types of apples to create a unique flavor.
Once you have your apples, it’s time to prepare them for juicing. Make sure to wash and cut your apples into smaller pieces so they can fit into the blender. There are different juicing techniques you can use, such as blending the whole apple or removing the seeds and core before blending. Experiment with different techniques to find the one that works best for you.
Wash and Cut Your Apples
First, take your fresh, crunchy apples and give them a good rinse under cold water to remove any dirt or debris. It’s best to use organic apples, as they’re free from harmful pesticides and chemicals. You can also choose a specific type of apple based on your taste preference. Some popular varieties for apple juice include Granny Smith, Honeycrisp, and Fuji.
After washing your apples, use a sharp knife to cut them into small, manageable pieces that’ll fit easily into your blender. Be sure to remove any stems or seeds, as they can affect the taste and texture of your juice. It’s also a good idea to cut off any bruised or damaged areas of the apple to ensure the best flavor.
Once your apples are sliced, you’re ready to move on to blending them into a delicious juice.
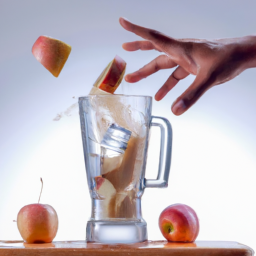
Blend the Apples
Now it’s time to blend the apples! I like to add a little bit of water to help the blending process, but this step is optional. If you prefer a sweeter juice, you can also add some honey or sugar at this point.
Once you’ve added any desired sweeteners, blend the apples until they’re completely smooth.
Add Water or Sweeteners (Optional)
To enhance the flavor, I like to add a little bit of honey or maple syrup to sweeten the apple juice. However, if you prefer a less sweet juice, you can skip this step.
Additionally, if you don’t want to dilute the apple flavor, you can use flavored water alternatives like coconut water or sparkling water instead of plain water. Here are some options to consider:
- Honey: A natural sweetener that also has antibacterial properties and can help soothe a sore throat.
- Maple syrup: Another natural sweetener that contains antioxidants and minerals like calcium, iron, and zinc.
- Coconut water: A hydrating alternative that is low in calories and rich in potassium and electrolytes.
- Sparkling water: A bubbly option that can add some fizz to your juice without adding any sugar or calories.
After adding your preferred sweetener or water alternative, blend the mixture until smooth.
Blend Until Smooth
Achieving a smooth consistency is crucial for a delicious and satisfying juice experience. To ensure that the apple juice is smooth and free of chunks, blending techniques are important.
When blending the mixture, make sure to start on a low speed to break down the larger pieces of fruit, then gradually increase the speed to a high setting. This will help to create a smooth and even consistency.
Blender maintenance is also important in achieving a smooth apple juice. Before blending, make sure that the blender is clean and free of any debris or residue. Also, check the blades to ensure they’re sharp and properly aligned. If the blades are dull or misaligned, this can result in a chunky and inconsistent juice.
By following these simple blending techniques and maintaining your blender, you’ll be able to create a smooth and delicious apple juice that’s sure to please. Now, it’s time to strain the mixture to remove any pulp or seeds.
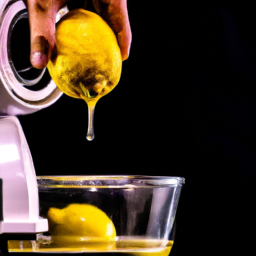
Strain the Mixture
Once the mixture has blended thoroughly, it’s time to strain it through a fine mesh sieve to remove any pulp or chunks of apple. This process is crucial in achieving a smooth and clear apple juice.
When straining, make sure to use a bowl or container underneath the sieve to catch the juice. Slowly pour the mixture into the sieve and use a spoon to stir and push the pulp through the mesh. This will help extract as much juice as possible.
To properly strain apple juice in a blender, it’s important to use a fine mesh sieve that can effectively separate the pulp from the juice. If you don’t have a fine mesh sieve, you can also use a cheesecloth or nut milk bag.
Additionally, to avoid too much pulp in your homemade apple juice, make sure to blend the mixture thoroughly and not overfill the blender. Straining the mixture will give you a clear and smooth apple juice that’s perfect for drinking.
Now, it’s time to chill the juice and enjoy its refreshing taste!
Chill the Juice
Now that I’ve strained my apple juice, it’s time to chill it.
I like to refrigerate my juice for a few hours before serving so that it’s nice and cold. If you’re in a hurry, you can also add some ice cubes to the juice to quickly cool it down.
Personally, I prefer to let it chill in the fridge because it gives the flavors a chance to meld together and creates a more refreshing drink.
Refrigerate for a Few Hours
After blending the apples, let the juice refrigerate for a few hours to enhance its flavor and freshness. Refrigeration is an important step in the process of making apple juice because it helps to preserve the nutritional value of the juice, prevents spoilage, and allows the flavors to blend together. Additionally, refrigeration can help to remove any unwanted foam or bubbles that may have formed during the blending process.
When refrigerating apple juice, it is important to use the best containers for storing juice. Glass bottles or jars with airtight lids are ideal because they do not react with the juice and can keep it fresh for up to a week. Plastic containers can also be used, but they should be made of food-grade material and have a tight-fitting lid. It is also important to refrigerate the juice as soon as possible after blending to prevent any bacteria growth. Overall, refrigeration is a crucial step in making apple juice that will be both nutritious and delicious.
To add an extra refreshing touch to your apple juice, consider adding some ice cubes (optional).
Add Ice Cubes (Optional)
For an extra chilly sip, feel free to toss in some ice cubes to your freshly blended apple juice. Did you know that adding just one ice cube can decrease the temperature of your juice by 20 degrees Fahrenheit?
Here are some ice cube alternatives to consider if you don’t have any on hand:
- Frozen fruit: Instead of ice cubes, use frozen fruit such as grapes or berries to add a natural sweetness and chill to your juice.
- Coconut water ice cubes: Freeze coconut water in an ice cube tray for a refreshing twist on your apple juice.
- Herbal ice cubes: Infuse water with mint, basil, or rosemary and freeze it into ice cubes for a burst of flavor in your juice.
When it comes to serving suggestions, consider adding a cinnamon stick or a slice of fresh ginger to your apple juice for added warmth and flavor. You can also garnish with a sprig of mint or a slice of apple to add a pop of color to your drink.
Now that your juice is chilled and ready to go, let’s move on to customizing your flavor.
Customize Your Flavor
You can really make the apple juice your own by adding in your favorite fruits or spices, like cinnamon or ginger, to give it an extra kick of flavor! Experiment with spices to find the perfect combination that suits your taste buds.
Try different apple varieties as well, such as Granny Smith, Honeycrisp, or Golden Delicious, to add a unique twist to your juice.
If you prefer a sweeter juice, add in some fresh strawberries or raspberries. For a tangy twist, throw in some lemon or lime juice. You can even add a handful of spinach or kale for a healthier option.
The possibilities are endless, so don’t be afraid to get creative and try new things. Once you’ve customized your apple juice to your liking, it’s time to store it properly to keep it fresh and delicious.
Store Your Juice
When it comes to storing your freshly made apple juice, there are a few key points to keep in mind. First and foremost, it’s important to keep your juice in a sealed container to prevent any air from getting in and oxidizing the juice.
Secondly, it’s best to consume your juice within a few days to ensure maximum freshness and nutritional value. Personally, I like to store my apple juice in a glass jar with a tight-fitting lid to keep it as fresh as possible.
Keep in a Sealed Container
To ensure the freshness of your apple juice, store it in a sealed container. Storing methods are crucial in preserving the quality of your juice. The right preservation techniques will help retain its nutrients and flavor for a longer period.
A tightly sealed container is the best way to store your apple juice. It prevents air from getting inside, which can cause oxidation and spoilage. Did you know that a sealed container can keep your apple juice fresh for up to three days in the refrigerator? That’s plenty of time to enjoy all the flavors and nutrients that your juice has to offer.
Remember to consume your juice within a few days to ensure its freshness and quality. In the next section, we’ll discuss the importance of consuming your juice within a few days and how to tell if it has gone bad.
Consume Within a Few Days
Once you have your fresh apple juice, it’s important to enjoy it within a few days to fully savor its crisp and refreshing flavor. While it may be tempting to store it for later, the longer you wait, the more the flavor and nutrients will deteriorate. To ensure that you’re able to consume your apple juice at its best, it’s important to keep it refrigerated and consume it within 3-4 days of making it.
If you find yourself with leftover apple juice, there are a variety of ways to use it up before it goes bad. You can use it as a base for smoothies or cocktails, mix it with sparkling water for a refreshing drink, or even freeze it into ice cubes to add to your water for a burst of flavor. Additionally, consuming homemade juice has numerous health benefits, such as providing a concentrated source of vitamins and minerals, aiding in digestion, and supporting immune function. So, not only will you be able to enjoy the delicious taste of your fresh apple juice, but you’ll also be doing your body a favor by consuming a nutrient-rich beverage. As we move onto the next section, we’ll explore some of the additional benefits of making your own juice at home.
Benefits of Homemade Juice
I absolutely love making my own juice at home! One of the biggest benefits of homemade juice is that it doesn’t contain any preservatives or additives, which means the juice is fresher and healthier for you than store-bought juice.
Additionally, homemade juice is typically more nutritious because it’s made with fresh fruits and vegetables that are rich in vitamins and minerals.
No Preservatives or Additives
Avoiding preservatives and additives is crucial in making a healthy and natural apple juice that bursts with flavor. As I mentioned earlier, homemade juice has many benefits, and one of them is that you can avoid unhealthy additives that are commonly found in store-bought juice.
These additives are used to extend the shelf life of the product, but they can have negative effects on your health in the long run. By making your own apple juice in a blender, you can ensure that you’re using only fresh and natural ingredients.
This not only makes for a healthier alternative but also enhances the taste of the juice. The sweetness of the apples is highlighted, and the natural flavors are more pronounced. With a homemade apple juice, you can enjoy the goodness of nature in every sip.
And as we move on to the next section, you’ll see how making your own juice isn’t only healthier but also more nutritious than store-bought juice.
More Nutritious Than Store-Bought Juice
Making apple juice without any preservatives or additives is already a healthy choice, but did you know that making your own apple juice in a blender can provide more nutritional benefits and health advantages than store-bought juice?
When you make apple juice from scratch, you can control the quality of the ingredients and ensure that only the freshest and healthiest apples are used. This means that your juice will be packed with nutrients such as vitamins, minerals, and antioxidants that can help boost your immune system, improve digestion, and lower the risk of chronic diseases.
Moreover, since you’re not adding any sugar or artificial flavorings, your homemade apple juice will be a much healthier option than the commercial brands that are often loaded with added sugars and artificial ingredients.
Homemade apple juice is richer in nutrients than store-bought juice, making your own juice allows you to control the quality of the ingredients, and you can avoid added sugars and artificial flavorings. Drinking homemade apple juice can provide health benefits.
With the added health benefits of homemade apple juice, it’s definitely worth a try. But how do you ensure that your juice is perfect? Let me share with you some tips for making the perfect apple juice in a blender.
Tips for Making Perfect Apple Juice
To get the perfect apple juice, don’t forget to add a touch of cinnamon for a warm and cozy flavor.
But before that, make sure to choose the right apple variety for your juice. Some of the best apple varieties for juicing are Honeycrisp, Gala, Jonathan, and Granny Smith. These apples have a good balance of sweetness and tartness, and they produce a good amount of juice.
When it comes to juicing techniques, it’s important to use a blender that can handle the task. Make sure to remove the stems and seeds from the apples before blending them. You can also add some water to help the blending process and dilute the juice if it’s too thick.
Once the apples are blended, strain the juice through a fine mesh sieve or cheesecloth to remove any solids.
With these tips, you can make the perfect apple juice every time!
Frequently Asked Questions
Can I use any type of apple to make apple juice?
Yes, you can use different types of apples to make apple juice. Some apple varieties suitable for making juice are Honeycrisp, Fuji, and Granny Smith. Using different types of apples can add complexity and depth of flavor to the juice.
How long can I store homemade apple juice in the refrigerator?
Did you know that homemade apple juice can last up to 7-10 days in the fridge? Storing tips include using airtight containers, avoiding exposure to sunlight and heat, and shaking before drinking. Shelf life may vary based on the freshness of the apples used.
Can I add sugar or other sweeteners to the juice?
Yes, I can add alternative sweeteners such as honey or maple syrup to my homemade apple juice. However, I prefer to enjoy the natural sweetness and nutritional benefits of the apples without any additional sweeteners.
Is it necessary to peel the apples before blending them?
Leaving the apple peel on while juicing adds fiber and nutrients to the juice. To remove bitterness, add lemon juice or ginger. Peeling the apples is not necessary, but wash them thoroughly.
Can I use a regular blender or do I need a specific type of blender to make apple juice?
To achieve the desired apple juice consistency, a high-powered blender is recommended. A regular blender may not blend the apples completely, resulting in a chunky texture. Blender requirements are crucial for a smooth and delicious apple juice.
Conclusion
So there you have it, folks. Making apple juice in a blender is incredibly easy and rewarding. Not only is it a healthier alternative to store-bought juice, but it also gives you the ability to customize the flavor to your liking.
Plus, making your own juice at home can save you money in the long run. Did you know that the average American consumes about 19.5 gallons of apple juice each year? That’s a lot of juice! By making your own juice at home, you can control the quality of the ingredients and eliminate any added sugars or preservatives.
Plus, it’s a fun activity to do with family or friends. Remember to wash and cut your apples, blend them up, strain the mixture, and chill your juice before enjoying. And don’t be afraid to experiment with different flavors and ingredients to create your perfect blend.
Happy juicing!