Connect with us

Juice

Amazing Health Benefits Of Drinking Ginger Turmeric Shots

Published

on

person holding a drawstring bag

Searching for a simple method to enhance your well-being and vitality? Search no more because ginger turmeric shots are here! These remarkable, tasty beverages provide numerous amazing advantages that can significantly impact your overall feel. Whether it’s aiding in digestion or offering anti-inflammatory benefits, these shots are an unparalleled choice for improving health and maintaining energy levels.

We all know that feeling sluggish or run down due to poor diet or lack of exercise isn’t fun. But why not turn things around by adding something delicious and beneficial into your daily routine? Ginger turmeric shots have been gaining popularity as people discover their many advantages over traditional supplements such as vitamins and minerals. They’re natural, tasty, and packed full of nutrients essential for good health.

ginger on gray surface
Photo by Joris Neyt on Pexels.com

This article will explore the wonderful benefits of ginger turmeric shots—from boosting brain power to improving immunity—and explain why they should be part of everyone’s wellness plan. Ready to learn more about this miracle drink? Read on!

Did you know that ginger and turmeric are two of the most powerful natural healing ingredients on the planet? With its amazing health benefits, it’s no wonder why consuming a ginger-turmeric shot has become so popular. Let’s take a look at what this superfood is all about.

Ginger and turmeric have been used for centuries in Eastern cultures as spices, medicines, and tonics to treat a variety of ailments. Its roots can be traced back over 4,000 years ago when ancient civilizations first discovered its medicinal properties. Ginger is known to help with digestion while turmeric contains anti-inflammatory compounds that may reduce muscle pain.

These powerful ingredients come together to make an incredibly nutritious beverage that helps support your body’s immune system and overall health. Not only do they both contain antioxidants but they also provide essential vitamins and minerals like potassium, magnesium, iron and vitamin B6. The combination of these two plant-based sources makes them even more beneficial than either one alone! Now let’s explore their nutritional content…

Advertisement

Nutritional Content

Ginger and turmeric are both packed with essential vitamins, minerals, and antioxidants. Here’s just a few of the amazing benefits to be found in these two superfoods:

  • Ginger contains high levels of Vitamin C which is an antioxidant that helps fight inflammation while boosting immunity. It also has manganese, iron, magnesium, phosphorus and zinc as well as many other nutrients.
  • Turmeric is rich in iron and calcium as well as containing numerous vitamins including A, B6 and K1. It provides tremendous anti-inflammatory properties due to its powerful curcumin content and is known for its strong antioxidant effect on human health.
  • Both ginger and turmeric offer incredible amounts of antioxidants such as cryptoxanthin, lutein, zeaxanthin and beta-carotene. These compounds help protect cells from damage caused by free radicals which can lead to chronic diseases like cancer or heart disease.

The combination of the nutritional value found in these two spices makes drinking ginger turmeric shots one of the most beneficial forms of prevention you can do for your overall health!

Antioxidant Benefits

It’s no surprise that ginger turmeric shots have high antioxidant content. Studies show that these shots contain up to 20% of the recommended daily intake of antioxidants. Antioxidants are essential for our bodies as they help protect us from free radicals and oxidative stress, which can lead to cell damage and disease. By drinking ginger turmeric shots, you can increase your body’s natural defense against such ailments.

Ginger turmeric benefits also include an increased ability to fight inflammation in the body. Turmeric contains curcumin, a powerful anti-inflammatory compound with strong antioxidant properties. Curcumin has been shown to reduce inflammation associated with arthritis, autoimmune diseases, and other chronic conditions. Additionally, it may even help lower blood sugar levels and cholesterol levels when consumed regularly.

The combination of ginger and turmeric present in a single shot provides numerous health benefits beyond just their antioxidant content. When taken together, these two spices create synergistic effects – meaning that both compounds are more effective when combined than if taken alone. This makes them an ideal choice for those looking to boost their overall health and wellbeing through diet and lifestyle changes.

By consuming regular ginger turmeric shots, you can reap all the amazing antioxidant benefits while helping your body fight off potential illnesses or diseases down the line. Plus, the delicious taste makes it easy to incorporate into any routine! The anti-inflammatory properties of this dynamic duo make it perfect for supporting your health goals over time – without having to worry about side effects or adverse reactions.

Advertisement

Anti-Inflammatory Properties

Ginger and turmeric are known for their anti-inflammatory properties, making them a powerful combination to help reduce inflammation throughout the body. I often encourage my clients to start incorporating ginger and turmeric into their diet in order to reap the amazing health benefits.

BenefitsGingerTurmeric
Anti-Inflammatory✔️✔️
Immune System Support 💪🏼✔️✔️ 
Digestive Health 🤢✔️✔️ 
Skin Care 🧖‍♀️✔️  

From reducing joint pain to improving digestion, there’s no denying that drinking ginger and turmeric shots can be beneficial for your overall wellbeing. These two superfoods have been used for centuries in traditional medicine due its natural healing powers.

One of the most notable health benefits from consuming ginger and turmeric is that it supports our immune system – helping us stay healthy during cold and flu season. Additionally, these two ingredients are also great for digestive health as they contain a range of essential vitamins and minerals which aid in proper digestion. Lastly, if you’re looking for an all-natural skin care solution then look no further! Both ginger and turmeric can help improve complexion by naturally detoxifying the skin.

Overall, adding some ginger and turmeric shots into your daily routine will provide numerous health benefits ranging from anti-inflammation to better digestive health. Let’s now explore how this power duo can help support digestion…

Digestion Support

Tired of spending your days with a digestive system that’s out of whack? If so, you’re in luck – we’ve got the perfect remedy! Ginger-turmeric shots are here to save the day! These handy little drinks offer digestion support like no other. Not only do they provide stomach relief, but they also aid in promoting better overall digestive health.

Advertisement

Ginger and turmeric have long been utilized for their many health benefits, including being incredibly effective at relieving gastrointestinal issues such as indigestion and bloating.

When taken together in a shot form, these two ingredients work synergistically to create an even more potent effect on the body. For example, ginger is known to reduce inflammation while turmeric helps stimulate bile production which aids in breaking down food. This combination of powerful compounds can be highly beneficial in creating balance within the gut flora and improving nutrient absorption.

Plus, drinking one or two of these shots per day can help maintain intestinal regularity by keeping things running smoothly throughout the day.

From reducing gas and discomfort to aiding in proper waste elimination, this tasty duo should not be overlooked when it comes to digestive health maintenance.

So take some time today to sip on a few delicious ginger-turmeric shots – your tummy will thank you later! With all these amazing benefits, there’s no reason not to give them a try and see what kind of difference they make for yourself.

Advertisement

Immune System Boost

The immune system is the body’s first line of defense against disease and illness. Consuming ginger turmeric shots on a regular basis can help to strengthen and support your immune system in many ways. Here are some amazing health benefits it provides:

  • Immune System Boost
  • Strengthens immunity by providing protection from bacteria, viruses, fungi, and parasites.
  • Increases production of white blood cells which helps fight infections more effectively.
  • Enhances antibody response for improved overall immune health.

Ginger turmeric shots also have anti-inflammatory properties that can help reduce inflammation throughout the body. This makes it an ideal choice for those who suffer from chronic conditions such as asthma or arthritis where inflammation plays a major role in symptom flares. Additionally, this drink has antioxidant compounds that scavenge free radicals from the body and protect cells from damage due to oxidative stress.

By consuming ginger turmeric shots regularly you’re taking proactive steps towards bettering your overall health and strengthening your immune system – giving yourself increased protection against illnesses like colds and flu season! With these wonderful benefits, it’s easy to see why so many people are incorporating this natural remedy into their daily routine. Moving forward with heart health benefits…

Heart Health Benefits

Did you know that over 600,000 people die of heart disease in the United States each year? That’s one out of every four deaths. Consuming ginger turmeric shots on a regular basis can help reduce your risk of developing cardiovascular problems and promote optimal heart health. Here is a look at how these shots specifically benefit our hearts:

BenefitDescriptionExamples
Heart Disease PreventionGinger turmeric shots contain anti-inflammatory agents which protect against coronary artery diseases and atherosclerosis, reducing your overall risk for stroke or heart attack.Lower cholesterol levels, improved blood pressure control, reduced risk of heart attack/stroke
Cholesterol BalanceThe powerful antioxidants present in these shots help to balance cholesterol levels and prevent plaque build up along arterial walls.Improved HDL (good) cholesterol levels, lowered LDL (bad) cholesterol levels
Blood Pressure Control & Heart Attack Risk ReductionGinger turmeric shots also have natural diuretic properties that help lower blood pressure by increasing urine production and eliminating excess fluid from the body; this will ultimately decrease your chances of having a heart attack or stroke.Reduced hypertension, decreased risk of arrhythmia or cardiac arrest.

The combination of active ingredients found in ginger turmeric shots has been proven to be beneficial for our cardiovascular health. Not only do they provide protection against coronary artery diseases but they also help maintain healthy cholesterol levels as well as improve blood pressure control – significantly lowering our risks for serious medical issues such as stroke or heart attacks. Therefore, it is important to incorporate ginger turmeric shots into your diet to ensure optimal heart health and longevity!

Skin Care Benefits

I’m sure you know that taking care of your skin is essential for maintaining a healthy lifestyle. So, let’s talk about the skin care benefits associated with drinking ginger turmeric shots! These antioxidant-rich ingredients have been known to help hydrate and heal the skin while nourishing it from within.

Advertisement

When we drink these shots, our bodies are flooded with antioxidants which helps protect the cells in our body from free radical damage. This helps keep our skin looking vibrant and youthful because it aids in repairing damaged cells caused by environmental factors like UV radiation and air pollution. Additionally, ginger turmeric shots can help improve elasticity in the skin due to its anti-inflammatory properties.

The high levels of vitamin C found in both ginger and turmeric also play an important role when it comes to keeping our skins glowing and radiant. Vitamin C encourages collagen production, which leads to tighter pores and firmer skin texture overall. It also has powerful antibacterial effects that can prevent breakouts as well as reduce redness or inflammation in existing blemishes.

Now that we’ve discussed all the wonderful health benefits of consuming ginger turmeric shots, let’s look at how you can start incorporating them into your diet!

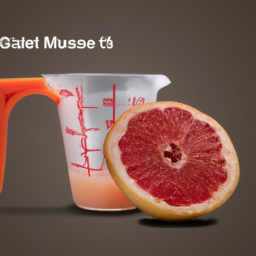
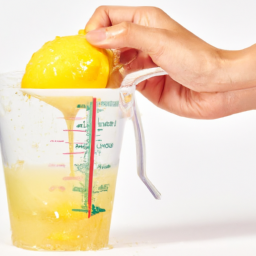
Preparation Tips And Recipes

Ah yes, the time-honored tradition of drinking ginger turmeric shots for health and wellness benefits. With just a few simple steps, you can be on your way to unlocking all of their potential goodness! Let’s take a look at some preparation tips and recipes that will help make this ancient practice easy and enjoyable.

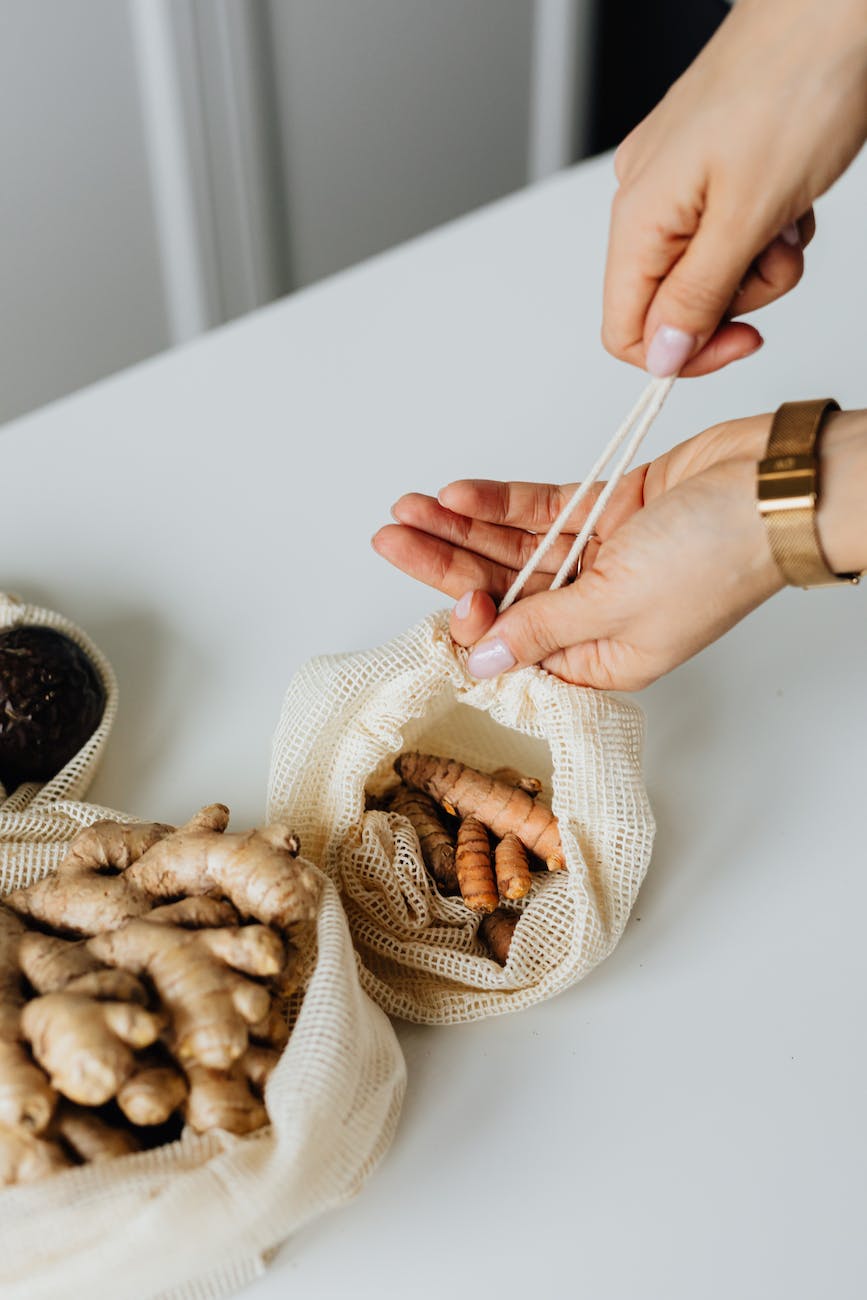
  • Get a high-quality dried ginger root or fresh turmeric root from your local store
  • Make sure to grate it finely before adding it to any recipe
  • Consider using organic honey or coconut milk as mixers

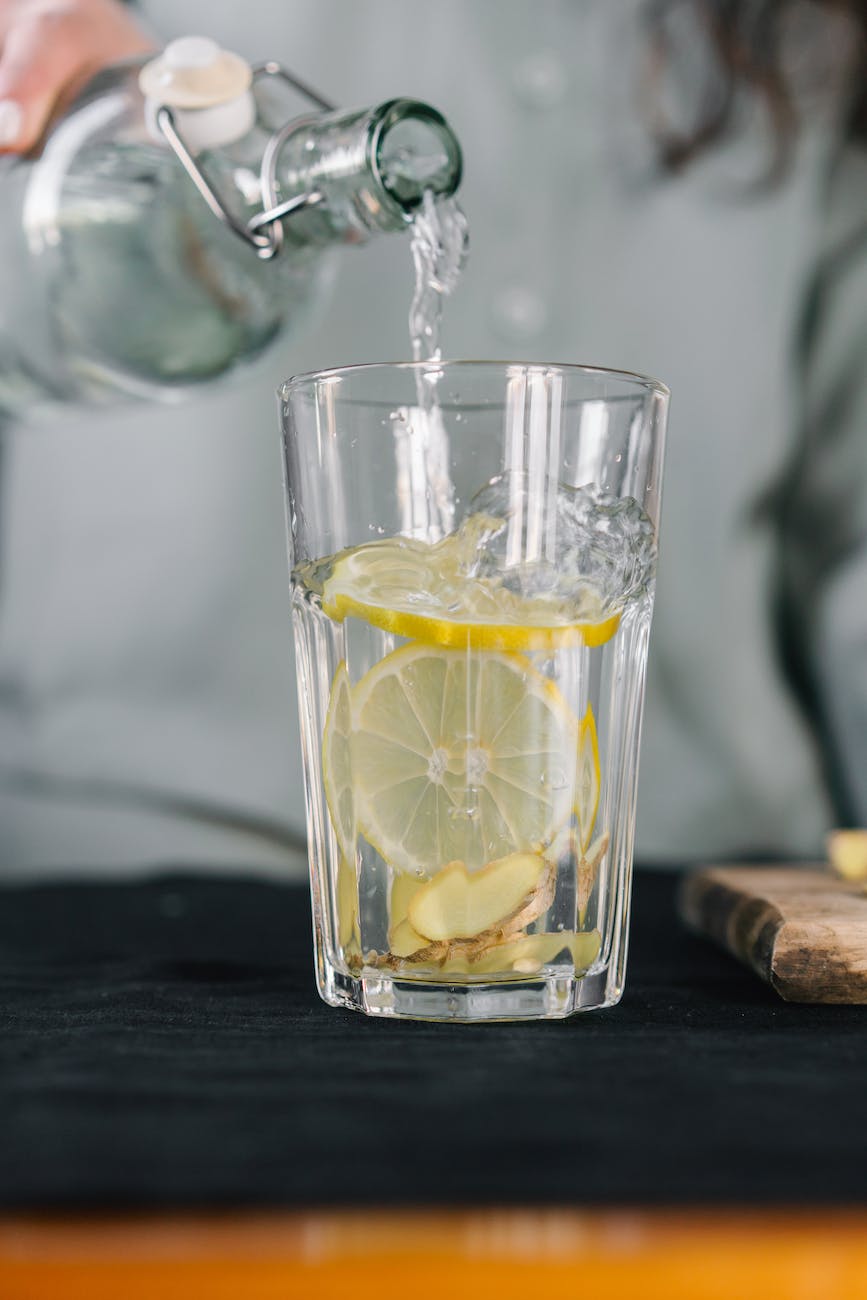
With these basics in place, let’s get started with the actual recipes! The simplest combination is one part freshly grated ginger and two parts freshly grated turmeric mixed together in warm water. If you want an extra flavor boost, add a teaspoon of honey or coconut milk. Some people like to add lemon juice (or even apple cider vinegar) for an added zing. Another popular option is mixing equal parts of each ingredient in cold water with a splash of lime juice – perfect for hot summer days!

If you’re looking for something more unique, try combining equal amounts of fresh ginger and turmeric with some orange juice or pineapple juice for a delicious tropical twist.

Advertisement

You can also experiment by adding different spices such as cinnamon or cardamom for an exotic flair. No matter what recipe you choose, always remember that the key is quality ingredients and consistency when making your own ginger Turmeric shot. By following these tips, you’ll be able to enjoy all the amazing health benefits that come with drinking this powerful concoction!

Possible Side Effects

Although the health benefits of drinking ginger turmeric shots are abundant, it’s important to note that they can cause some side effects. Allergies are one potential side effect when consuming either ingredient. If you’re allergic to ginger or turmeric, you should avoid these shots and talk to your doctor about possible alternatives.

In addition to allergies, there may be other adverse reactions associated with both ingredients. For example, while rare, some people experience stomach discomfort after ingesting ginger. Turmeric has been known to cause nausea if taken in large doses over an extended period of time. It is advised that if you feel any unusual symptoms after drinking a shot, stop taking them immediately and contact a medical professional for advice.

It’s also recommended that pregnant women check with their healthcare provider before partaking in any form of medicinal herbals such as ginger or turmeric-based drinks because certain compounds could potentially lead to complications during pregnancy or breastfeeding. Ultimately, practice caution and moderation when incorporating these drinks into your daily routine and listen to your body for signs of distress.

Frequently Asked Questions

What Are The Recommended Daily Servings Of Ginger Turmeric Shots?

When it comes to the recommended daily servings of ginger turmeric shots, there are a few factors to consider. Knowing what the right dosage advice is can help you reap all the amazing health benefits this nutritious drink has to offer.

Advertisement

First and foremost, it’s important to understand that individual needs vary when it comes to shot amounts. The amount of ginger turmeric shots recommended for each person will depend on various factors such as age, activity level, weight, and overall health goals. As a general rule of thumb, one serving size per day is likely enough for most people. However, if you have any underlying conditions or want additional support from your beverage then two servings may be more beneficial.

Whichever way you choose to go about consuming ginger turmeric shots, it’s always best practice to consult with your doctor first before making any changes in order to ensure safety and effectiveness. After determining the right daily dosage based on your specific needs and lifestyle habits, make sure you’re consistent with taking them so that you get maximum benefit over time. And don’t forget—it takes around 3-4 weeks for the body to adjust itself after beginning a new regimen!

With these tips in mind, adding ginger turmeric shots into your routine could potentially give your health an added boost of nutrition and energy while also providing long-term relief from aches and pains. So why not start today?

Is Ginger Turmeric Safe For Pregnant Women?

Ginger and turmeric, two of nature’s most powerful healers, have been used for centuries to promote health. But is it safe for pregnant women to drink ginger turmeric shots? As a health and wellness writer, I want to provide an answer that will help guide pregnant women in making informed decisions about their own health.

The safety of consuming ginger and turmeric during pregnancy has not been fully studied. However, some research suggests that these spices can be beneficial when consumed in moderation. Research also shows that both ginger and turmeric contain compounds that may reduce inflammation, nausea, and other symptoms common during pregnancy. Studies have also found that the antioxidants present in these ingredients may improve fetal development and overall maternal health.

Advertisement

When considering whether or not to consume ginger turmeric shots while pregnant, it is important to consult with your doctor first before deciding on anything. Your doctor should be able to advise you on how much is safe to consume as well as any potential risks associated with drinking them while pregnant. It’s also important to note that if you’re feeling nauseous or experiencing indigestion during your pregnancy, it might be best to avoid drinking shots altogether until after giving birth.

At the end of the day, only you know what’s best for your body when it comes to consuming ginger or turmeric while pregnant – so do your research and trust yourself! Taking into account all available evidence, talking with your doctor, and being mindful of any individual sensitivities are key steps towards making an informed decision regarding this topic.

Does Ginger Turmeric Interact With Any Medications?

When it comes to ginger-turmeric and medication interactions, it’s important to understand the potential risks of combining natural supplements with prescription medications. While there have been no known reports of adverse effects from mixing ginger-turmeric shots with over-the-counter drugs or prescriptions, you should always consult your doctor before adding any new supplement into your daily routine.

It’s critical to be aware that certain medications may interact negatively with ginger-turmeric when taken in large doses. In some cases, these drug interactions can reduce the effectiveness of a particular medicine or increase the risk of side effects.

For example, if someone is taking an antiplatelet or anticoagulant drug like warfarin, consuming large amounts of ginger could theoretically increase their chances for bruising or bleeding due to its blood thinning properties. Similarly, high doses of turmeric might interfere with diabetes medicines as well as nonsteroidal anti-inflammatory drugs (NSAIDs).

Advertisement

Given the potential for drug interactions between ginger-turmeric and various medications, health and wellness experts recommend speaking with a healthcare provider prior to introducing these herbs into one’s diet. When done safely and under medical supervision, incorporating these powerful ingredients into a balanced lifestyle can help support overall wellbeing without increasing the risk associated with other treatments.

Are There Any Long-Term Effects Of Consuming Ginger Turmeric Shots?

If you’ve been enjoying the amazing health benefits of drinking ginger turmeric shots, then it’s natural to wonder what long-term effects this could have on your wellbeing. Turmeric and ginger are powerful ingredients that can certainly provide a wealth of wellness advantages, but is there anything else that we should be aware of when it comes to consuming them regularly? Let’s take a closer look at the potential implications of ingesting these potent spices over an extended period.

When considering the long-term effects of taking in ginger or turmeric through drinking shots, one must consider both the positives and negatives associated with such consumption. The most obvious advantage is undoubtedly the numerous healing qualities found within these two popular spices. From anti-inflammatory properties to improved digestion, regular use of turmeric and ginger shots has been linked to positive outcomes for many people in terms of their overall health and well-being.

However, despite all its beneficial properties, some research does suggest that excessive intake of either spice may also lead to adverse reactions for certain individuals.

This could range from mild abdominal discomfort to more serious issues like kidney stones or allergies; so care needs to be taken if opting for prolonged consumption of ginger or turmeric drinks. It’s always wise to consult with your doctor first before incorporating any new supplement into your routine – especially if you’re already taking medication prescribed by a medical professional.

Advertisement

Although they offer incredible therapeutic value, it pays off to remain mindful when adding these powerhouse ingredients into our diets – as too much of even something good can still cause harm! At the end of the day, moderation is key no matter how great a food item might taste or how beneficial it appears on paper – only you know what works best for your body so trust in yourself and listen closely whenever possible.

Are There Any Special Storage Requirements For Ginger Turmeric Shots?

Storing ginger turmeric shots correctly is an important factor in ensuring that you get the most out of your health and wellness drinks. It’s essential to take proper care when storing these shots, as improper storage can lead to a loss of flavor or nutrient content. In this article, we’ll discuss the special requirements for storing ginger turmeric shots so that you can enjoy their amazing benefits for longer.

The best place to store ginger turmeric shots is in a cool, dry location away from direct light. Temperature fluctuations should also be avoided – if stored too close to a heat source such as an oven, fridge, or heater, the ingredients will spoil faster and lose nutritional value over time. Keeping them in a sealed container in the refrigerator is ideal but not necessary; just make sure they’re kept at room temperature and out of direct sunlight. Additionally, it’s important to use up any opened bottles within 2-3 days after opening – otherwise they may start to lose their potency due to oxidation.

For those who make their own ginger turmeric shot recipes at home, it’s especially important to pay attention to how long it has been sitting outside before consuming it. If left unrefrigerated for more than 4 hours, discard the drink immediately as bacteria growth could have started occurring during that time period. Similarly, don’t consume any homemade mixtures past 3 days even if refrigerated – its nutrient levels will degrade quickly beyond then.

Ginger turmeric shots are great sources of natural nutrients with many potential health benefits – following these guidelines on storage helps ensure that you get all these advantages without compromising on quality!

Advertisement

Conclusion

It is clear that Ginger Turmeric shots offer a variety of amazing health benefits. In just one small shot, you can get an abundance of vitamins and minerals to help boost your immune system and protect your body against disease. With the recommended daily servings being three per day, it has never been easier to stay healthy!

Even if you are pregnant or taking medications, consuming ginger turmeric shots should be safe for you. While there may be some interactions with certain medications, consulting with your doctor beforehand will ensure that you do not experience any unpleasant side effects. Furthermore, drinking these shots on a regular basis does not appear to have any long-term negative impacts on overall health.

The best part about this superfood? It requires minimal storage space as long as it’s kept in a cool dry place away from direct sunlight or heat sources. Plus, studies show that just one cup of ginger turmeric tea every morning could reduce inflammation by up to 10%. Now how’s that for imagery?

Ginger Turmeric shots provide exceptional wellness benefits without having to make drastic lifestyle changes. Whether you decide to drink them alone or mix them into other beverages, adding this powerful elixir into your diet is sure to bring positive results!

Advertisement

Continue Reading
Advertisement

Vegan

How to Make Orange Juice

Published

on

By

Explore three techniques to make your own fresh-squeezed orange juice at home. This single-ingredient, sugar-free option for orange juice can be made either with or without pulp. Rich in vital nutrients, it’s delicious on its own or as part of a mixed juice blend!

How to Make Orange Juice

Making newly squeezed orange juice may take more effort than grabbing a juice box from a shop. However, the difference in the top quality of flavor, as well as freshness, is matchless. Fresh orange juice is fruity and excellent– so much sweeter than any kind of ‘from concentrate’ Orange Juice in stores and with no sugarcoated or anything ‘awful.’.

More than that, when making orange juice in your home, you can pick if you desire orange juice with pulp or without. In addition, it is full of vitamins and health and wellness advantages. Sugar-free orange juice has never tasted so great as when it’s straight from the fruit!

Is Orange Juice Helpful for You?

There are several primary health advantages of oranges. Most people know that this spicy fruit supplies tons of Vitamin C. One tool cup of orange juice provides nearly 100% of your daily recommended Vit C. However, it additionally consists of various other nutrients, including Vitamin A, calcium, folate, and iron.

Is Orange Juice Helpful for You?

Vitamin C helps to support our immune systems and aid with gum health, wound recovery, and bone development. At the same time, Potassium aids in decreasing the threat of cardiovascular disease, strokes, and bone loss. It additionally assists manage blood pressure and also decreases the risk of kidney rocks.

Folate is crucial for pregnant women and decreases the risk of abnormality, and OJ is just one of the most effective all-natural resources. Even much better, orange juice is high in antioxidants, which are fantastic for fighting dangerous complimentary radicals as well as shielding versus numerous persistent conditions and containing anti-inflammatory homes.

Advertisement

Among the only drawbacks of alcohol consumption of orange juice (or significant quantities of fruit juice) is the amount of all-natural sugars in the juice. Therefore, I drink homemade orange juice once or twice a week, freezing leftovers to stand out right into smoothie mixes in smaller-sized dosages or thaw them later.

How to Make Orange Juice (3 techniques)

Just how to make fresh-squeezed orange juice at home by using one of 3 methods. This sugar-free orange juice (with pulp or without) utilizes just one component, is packed with healthy vitamins and is fantastic alone or as part of a juice blend!

Making freshly squeezed orange juice might take much more initiative than getting a juice box from a store, yet the difference in the high quality of taste and the quality is matchless. Fresh orange juice is fruity and pleasant– so much sweeter than any kind of ‘from concentrate’ OJ in stores and without any added sugars or anything ‘unpleasant.’.

More than that, when making orange juice in your home, you can choose if you want orange juice with pulp or without. In addition to that, it contains vitamins and also health advantages. Sugar-free orange juice has never tasted so excellent as when it’s straight from the fruit!

Fresh orange juice

Is Orange Juice Great for You?

There are several main health and wellness advantages of oranges. Most people realize that this vibrant fruit offers tons of Vitamin C. One medium mug of orange juice supplies practically 100% of your everyday advised Vit C. Nonetheless, it also contains several other nutrients, including Vitamin A, calcium, folate, and iron.

Vitamin C supports our body’s immune systems and aids with gum health, wound healing, and bone development (Resource). Meanwhile, Potassium assists in reducing the danger of heart disease, strokes, and bone loss. It likewise helps manage blood pressure and lower the threat of kidney rocks.

Advertisement

Folate is necessary for pregnant females and lowers the danger of abnormality, as well as Orange Juice, is one of the best natural resources (source). Even better, orange juice is high in antioxidants, which are terrific for fighting damaging complimentary radicals, protecting against numerous chronic problems, and including anti-inflammatory properties.

One of the only drawbacks of alcohol consumption of orange juice (or huge amounts of fruit juice) is the number of natural sugars in the juice. Therefore, I tend to consume self-made orange juice one or two times a week and cold leftovers to stand out right into shakes in smaller-sized doses or thaw later.

How to Make Orange Juice with A Juicer

Prepare the oranges by initial peeling them. Then, slice them into smaller-sized parts to fit your juicer chute. Feed a few into your juicer chute at once– voila.

Orange juicer with electric juicer

With a Blender

Peel the oranges and, optionally, get rid of and discard the seeds (if you’re going to strain the juice, then this isn’t required).

Oranges in Blender

Add the orange sectors to a blender. You can add a little water to help them mix if needed (1/4 mug ought to be ample not to water it down too much).

Blend into a juicy, mushy consistency. After that, sieve the resulting pulpy juice via a sieve or nut milk bag or conversely, if you like orange juice with pulp (for even more nutrients), leave it as is.

With a Handheld Juicer

This possibly does not require much of an explanation. If you have a citrus juicer in your home, just slice the fruit in half, area it over it, push down, and squeeze while turning back and forth to get as much juice out as feasible.
For orange juice with pulp, simply spoon some straight off the staying orange (after pressing the juice out) and also include it in your glass.

Advertisement
Handheld Juicer

How to Store Orange Juice

Fresh pressed orange juice is best taken in quickly for the optimum quantity of nutrients. Nevertheless, any leftovers can be stored in a closed glass container in the refrigerator for approximately 3 days.

What to Perform with Any Extra Pulp

Orange pulp can be iced up right into an ice-cube tray for later usage– within smoothie mixes, broths, or baked items. Conversely, the pulp can be composted, which I do a lot in my yard.

What to Do with The Remaining Peel

You can zest some of the skin to include in meals or to flavor teas, lemonades, and even sugar. Alternatively, make some candied orange peel or, if the halves remain in good condition, use them to make orange candle lights.

Continue Reading

Juice

How To Make Low Lying Fog Juice

Published

on

By

I’ve always been captivated by the impact that ground-level mist has at concerts, gatherings, and haunted attractions. Being a person who enjoys diving into DIY activities, I set out to learn how to produce low lying fog juice myself. Following numerous experiments and a bit of trial and error, I’ve now honed the perfect formula, and I’m thrilled to share it with you.

Before we dive into the steps of making low lying fog juice, it is important to understand the chemistry behind fog. Fog is formed when water vapor in the air condenses into tiny droplets that float close to the ground.

To create low lying fog, we need to cool the water vapor and turn it into fog that stays close to the ground. This is where the ingredients and equipment come into play.

Let’s get started!

Key Takeaways

  • Glycerin is the main ingredient in low lying fog juice, with an optimal ratio of 20-30%.
  • Dry ice can be added for a thick, white fog effect.
  • Proper preparation and storage techniques, including the use of pure glycerin and straining the mixture, are crucial for maximizing shelf life.
  • When using a fog machine, follow safety precautions and adjust temperature and fan speed for optimal fog dispersion.

Understanding the Chemistry of Fog

If you want to make low-lying fog juice, you need to understand the chemistry behind how fog is created in the first place.

Fog formation occurs when warm, moist air comes into contact with cooler surfaces, causing the water vapor in the air to condense into tiny droplets.

Advertisement

Atmospheric conditions such as humidity, temperature, and wind speed all play a role in the formation of fog.

Chemical reactions and heat transfer are also involved in the creation of fog. When water vapor in the air condenses into droplets, it releases heat.

This heat is then absorbed by the surrounding air, causing it to rise and mix with cooler air above.

This creates a layer of fog that hovers close to the ground, hence the term ‘low-lying fog’.

Understanding these chemical processes is crucial to creating your own low-lying fog juice.

Advertisement

Now that we have a basic understanding of the science behind fog formation, let’s move on to gathering the necessary equipment and ingredients.

Gathering Equipment and Ingredients

First, you’ll need to round up all the necessary gear and components to whip up this chilling mixture. Choosing the right containers is crucial to ensure that the mixture is safe to handle and won’t react with any other chemicals. I recommend using glass or plastic containers with secure lids to prevent any spills or leaks.

It’s also important to source glycerin that’s at least 99% pure, as impurities can affect the quality of the fog. You can find glycerin at most chemical supply stores or online retailers.

Once you have your containers and glycerin, it’s time to measure out the rest of the ingredients. You’ll need distilled water, propylene glycol, and dry ice. It’s important to measure the ingredients precisely to ensure that the fog juice is safe to use.

Safety precautions are also necessary when handling dry ice, as it can cause burns if it comes into direct contact with skin. With all the necessary ingredients in hand, you’re ready to move on to preparing the glycerin mixture that’ll create the low lying fog effect.

Advertisement

Preparing the Glycerin Mixture

Now that I’ve got my equipment and ingredients, it’s time to mix the glycerin with distilled water and propylene glycol to create the base of my fog solution.

Glycerin is the main ingredient in low lying fog juice because it’s non-toxic and produces a thick and dense fog. However, there are glycerin alternatives, such as triethylene glycol and dipropylene glycol, that can be used instead. These alternatives may adjust the viscosity and density of the fog solution, so it’s important to experiment and find the best mixture that works for your specific needs.

To prepare the glycerin mixture, I’ll need to measure out the correct ratios of glycerin, distilled water, and propylene glycol. Typically, a mixture of 1 part glycerin to 3 parts distilled water and 1 part propylene glycol is a good starting point.

I’ll mix these ingredients together thoroughly until they’re fully combined. Once the mixture is complete, I can move on to the next step of adding the optional additives to enhance the fog solution.

Adding the Optional Additives

Now that I’ve got my glycerin mixture ready, I can move on to adding optional additives to enhance the fog effect.

Advertisement

Choosing the right additives is crucial, as they can affect the thickness, color, and durability of the fog.

I’ll carefully measure and mix the chosen additives into the glycerin mixture, making sure they’re well blended before use.

Choosing Additives

To create a low-lying fog, it’s essential to choose the right additives to mix with your fog juice. One popular additive is glycerin. This viscous liquid helps to create a denser fog that hangs low to the ground, giving off a haunting effect. It also helps to extend the life of the fog by slowing down the evaporation process.

The optimal ratio for glycerin in your fog juice is around 20-30%, but this can vary depending on the desired effect and the type of fog machine you’re using. Another popular additive is dry ice. This creates a thick, white fog that hugs the ground and has a spooky, eerie effect.

The key to using dry ice is to ensure that it’s handled safely, as it can cause burns if it comes into direct contact with the skin. You’ll need to place the dry ice in a container with warm water, and then place the container in the fog machine. The mixing ratio for dry ice is generally 1-2 pounds per gallon of fog juice.

Advertisement

With the right additives, you can create a low-lying fog that will add a spooky, eerie effect to your next event. In the next section, I’ll discuss how to mix these additives for the optimal effect.

Mixing the Additives

Get ready to enhance the haunting effect of your fog machine by mixing the right amount of glycerin and dry ice additives for a thick, white fog that hugs the ground.

To mix the additives, first make sure you have the correct ratio of glycerin to water. Mix one part glycerin to three parts water in a large container.

Next, slowly add small pieces of dry ice to the mixture. Be cautious when handling dry ice, as it can cause frostbite on contact with skin. As you add the dry ice, the mixture will begin to bubble and release carbon dioxide gas.

The glycerin will create a thick and dense fog when it reacts with the carbon dioxide gas. It’s essential to stir the mixture continuously to ensure that the dry ice is evenly distributed and to prevent the mixture from getting too hot.

Advertisement

Once the dry ice has completely dissolved, the fog juice is ready to use. With the right mixing techniques and understanding of chemical reactions, you can create a low lying fog that will add an eerie atmosphere to any event.

Now that the additives are mixed, the next step is to filter the mixture to remove any impurities before using it in your fog machine.

Filtering the Mixture

First, you’ll need to strain the mixture to ensure that no impurities clog up your fog machine. Filtering techniques are crucial to making the perfect low lying fog juice, as any impurities can result in a malfunctioning machine or poor fog output. To do this, you can use a cheesecloth or coffee filter to strain the mixture into a separate container.

This will remove any remaining chunks or particles that may have been missed during the mixing process. After straining, check the mixture’s consistency to ensure that it has an optimal viscosity. The fog juice should be thick enough to create a low-lying fog, but not too thick that it clogs up the machine.

If the mixture is too thick, you can add distilled water in small increments until it reaches the desired consistency. Once you’ve achieved the optimal viscosity, you’re now ready to fill your fog machine with the low lying fog juice.

Advertisement

Filling the Fog Machine

Before using my fog machine, I always make sure to prepare it properly. This involves checking for any damage or leaks and ensuring that the heating element is clean and functioning correctly. Once the machine is ready, I fill the tank with the appropriate amount of fog juice, making sure not to overfill it.

Proper preparation and filling of the fog machine is essential to ensure a consistent and reliable output of fog.

Preparing the Fog Machine

Now, you’ll need to make sure your fog machine is clean and ready to use. Before you begin, it’s important to follow the cleaning instructions and maintenance tips provided by the manufacturer. The last thing you want is for leftover residue or debris to affect the quality of your low lying fog.

Start by unplugging the machine and removing the fill cap. Use a soft cloth and mild soap to clean the exterior of the machine, being careful not to get any liquid inside.

Next, remove the heating element and clean it thoroughly with a cloth dampened with rubbing alcohol. Once everything is clean and dry, reassemble the machine and plug it back in.

Advertisement

With your fog machine now prepped and ready to go, you can move on to filling the tank with your homemade low lying fog juice.

Filling the Tank

Now that the fog machine is prepared, it’s time to fill the tank with the low lying fog juice. Before doing so, make sure that the tank capacity is appropriate for the amount of fog juice needed. This information can be found in the fog machine’s manual or by consulting with a professional.

To properly fill the tank, first make sure the machine is turned off and unplugged. Then, open the tank lid and carefully pour the low lying fog juice into the tank, using a funnel if necessary to avoid spillage. It’s important to take note of the proper filling technique to prevent any leaks or damage to the machine.

Once the tank is filled, securely close the lid and plug the machine back in.

Transitioning into the next section about testing the fog juice, it’s important to note that before using the fog machine, it’s necessary to check if the fog juice is working properly.

Advertisement

Testing the Fog Juice

Before using the fog juice, it’s important to conduct a test run to ensure that it produces the desired effect and doesn’t harm any equipment or surfaces.

I typically pour a small amount of the fog juice into the fog machine and run it for a few minutes to observe the results. If adjustments need to be made, I’ll refer back to the recipe and make changes accordingly.

It’s crucial to test and adjust the fog juice before using it in a performance or event to avoid any potential issues.

Conducting a Test Run

Let’s jump right into it and see the fog machine in action with a test run! Before conducting the test run, I made sure to set the fog machine to its optimal settings.

I adjusted the temperature knob and the fan speed to ensure that the fog was not too thick or too thin, and that it would disperse evenly. Additionally, I took all necessary safety precautions, such as making sure the machine was properly grounded and not placed near any flammable objects.

Advertisement

Once I felt confident that the machine was set up correctly, I poured the low lying fog juice into the reservoir and turned on the machine. I waited a few minutes for the fog to start flowing and then observed how it interacted with the room.

I noticed that the fog was too thick and not spreading evenly, so I decided to adjust the recipe by adding more distilled water to dilute the juice. With this simple adjustment, the fog began to disperse more evenly, creating a stunning low lying effect.

Adjusting the Recipe

You’re probably thinking that adjusting the recipe for your fog machine is as easy as adding more of the fog juice, but let me tell you, it’s not that simple. Adjusting the concentration of the fog juice can be a delicate process that requires careful experimentation and attention to detail. It’s important to keep in mind that adding too much fog juice can cause the fog to be too thick and heavy, while adding too little can result in a lackluster effect.

One way to adjust the concentration of your fog juice is to experiment with additives. For example, adding a small amount of glycerin or distilled water can help to thin out the fog and create a more subtle effect. On the other hand, adding a small amount of dry ice can create a thicker, more intense fog. By carefully adjusting the concentration of your fog juice and experimenting with different additives, you can create a customized effect that is perfect for your event or production. Once you’ve perfected your recipe, it’s time to move on to using the low lying fog juice to create a stunning and memorable visual display.

Using the Low Lying Fog Juice

To create an eerie atmosphere, simply pour the low lying fog juice into your fog machine and watch as the mist hovers just above the ground, sending shivers down your spine.

Advertisement

But before using the fog juice, it’s important to follow some best practices and safety precautions. First, make sure to read the instructions on your fog machine and use only the recommended amount of fog juice. Using too much can cause the fog to linger in the air longer than intended, potentially causing breathing difficulties for you and your guests.

Second, always use the fog machine in a well-ventilated area to avoid inhaling too much of the fog and to prevent any potential fire hazards. With these precautions in mind, you can safely use the low lying fog juice to create a spooky and memorable atmosphere for your next party or event.

When it comes to storing the fog juice, it’s important to keep it in a cool and dry place, away from any heat sources or direct sunlight. This will help to prevent the fog juice from degrading or evaporating before you have a chance to use it.

Storing the Fog Juice

Ensure your fog machine fluid remains in optimal condition by storing it in a cool, dry place away from heat and direct sunlight. Extreme temperatures can affect the shelf life and the quality of the low lying fog juice. Exposure to direct sunlight can also cause the liquid to break down and lose its effectiveness.

Therefore, it’s essential to store the fog juice in a well-ventilated area with a consistent temperature range of 40-100°F. Storing techniques can affect the longevity of the fog juice. For instance, it’s crucial to keep the container sealed tightly to prevent air and moisture from entering. Additionally, it’s advisable to store the fog juice away from any chemicals, cleaning agents, or pesticides.

Advertisement

Proper storage techniques can maximize the shelf life of the low lying fog juice, ensuring optimal performance every time it’s used. Now, let’s move on to troubleshooting common issues that may arise from using the low lying fog juice.

Troubleshooting Common Issues

Encountering complications with creating low lying fog can be challenging, but there are several common issues that can be resolved with a few simple fixes. Here are some common solutions and troubleshooting techniques:

  • Check the temperature: The fog machine and the fog juice work best in cooler temperatures, so make sure you’re not using them in hot or humid environments. If the temperature’s too warm, you may need to cool down the room or switch to a different type of fog juice that’s designed for warmer temperatures.

  • Check the machine: Make sure the fog machine’s clean and free of clogs. If the machine’s not producing enough fog, it may be because the nozzle’s clogged or the heating element’s not working properly. You may need to clean the nozzle or replace the heating element.

  • Check the fog juice: Make sure the fog juice’s the right type for your machine and that it’s not expired. If the juice is too old, it may not produce as much fog or may produce a strange smell. You may need to replace the juice or switch to a different brand.

  • Adjust the settings: If the fog machine’s producing too much or too little fog, you may need to adjust the settings. Most machines have a control knob that allows you to adjust the output of the fog. Try turning it up or down to see if that helps.

  • Experiment with different techniques: If none of the above solutions work, try experimenting with different techniques. For example, you may need to use a different type of fog juice or a different type of machine. You may also need to try different techniques for creating the fog, such as using dry ice or a fog chiller.

By following these common solutions and troubleshooting techniques, you should be able to create chilling clouds without any complications. Remember to always read the instructions carefully and follow all safety precautions when working with fog machines and fog juice.

Frequently Asked Questions

Can I use any type of glycerin for making low lying fog juice?

Yes, not all glycerin types are equally effective for making low lying fog juice. Some may produce less fog and pose safety concerns for respiratory health. It’s important to choose a high-quality, food-grade glycerin.

How long does the fog juice last in the fog machine before it needs to be refilled?

The frequency of fog juice refills depends on the size of the fog machine and the duration of use. Regular maintenance, such as cleaning the machine and using the appropriate glycerin types for low lying fog juice, can prolong the life of the juice.

Advertisement

Is it safe to breathe in the low lying fog produced by the juice?

While low lying fog is visually stunning, health concerns and environmental impact must be considered. Inhalation of fog juice should be avoided, as it contains glycols and other chemicals. Proper ventilation is necessary to ensure safety.

Can I use the fog juice outdoors or only indoors?

I can use the fog juice both indoors and outdoors, but the weather conditions may affect the quality of the fog. Humidity and wind can disperse the fog, while colder temperatures can make it linger. It’s important to test the juice in different conditions before use.

Can I use food coloring to tint the low lying fog produced by the juice?

I experimented with food coloring to enhance the visibility of low lying fog produced by fog juice. Results were mixed, as the coloring diluted the juice and affected its composition. Further testing is required before a conclusive answer can be given.

Conclusion

In conclusion, making low lying fog juice is a complex process that requires careful attention to detail. However, the end result is a mesmerizing display of mist that can add a touch of mystery and magic to any event or performance.

As with any chemical mixture, it’s crucial to understand the science behind it, gather the necessary equipment and ingredients, and follow the steps precisely. So, practice makes perfect, and this holds true for making low lying fog juice.

Advertisement

It may take a few tries to get the formula just right, but once you do, the results are well worth the effort. And with a little troubleshooting, any issues that may arise can be easily resolved.

So, go ahead, gather your materials, and let the fog roll in for a captivating and unforgettable experience.

Continue Reading

Juice

How To Make Lychee Juice

Published

on

By

I’m totally obsessed with lychees, and I never miss a chance to pick up a bag when I visit an Asian supermarket. However, there are times when I fancy a change and prefer to savor my lychees in an alternative form rather than just consuming them raw. This is when I turn to lychee juice!

It’s a refreshing, fruity drink that’s perfect for summertime sipping. In this article, I’ll be sharing my favorite recipe for making lychee juice at home, step by step.

To make lychee juice, you’ll need just a few simple ingredients and some basic kitchen equipment. Don’t worry if you’ve never made juice before – it’s really easy, and I’ll walk you through each step.

Whether you’re craving a sweet and tangy drink to cool off on a hot day or just want to try something new with your favorite fruit, my lychee juice recipe is sure to hit the spot. So let’s get started!

Key Takeaways

  • Precision in measuring is crucial for a well-balanced lychee juice.
  • Strain the blended mixture with a fine mesh sieve for a smoother texture.
  • Pair lychee juice with complementary foods to enhance its taste.
  • Refrigeration is the best way to store and preserve lychee juice, while freezing is a simple method for most home cooks.

Gather Your Ingredients

Gather all the ingredients you’ll need for making lychee juice, including fresh lychee fruit, water, sugar, and ice. Make sure to choose fresh lychees that are plump, firm, and have a bright color. You can find them at your local grocery store or Asian market.

Lychee is a tropical fruit that is sweet and juicy, and it’s packed with health benefits that make it a great choice for juicing. When it comes to juicing techniques, you can either use a juicer or a blender. Using a juicer will result in a smoother juice, while using a blender will create a more pulpy texture.

Advertisement

Regardless of the method you choose, make sure to remove the seeds and peel from the lychees before juicing them. Now that you have all the ingredients ready, it’s time to prepare your lychees for juicing.

Prepare Your Lychees

First, peel the rough, pinkish-red skin off of each lychee using your fingernails or a small knife, being careful not to damage the fruit. A helpful tip is to crack the skin open with your fingernail and then gently peel it away from the fruit. If you’re having trouble peeling the lychees, try soaking them in warm water for a few minutes to soften the skin.

It’s important to select the perfect lychee for your juice by choosing ones that are ripe and have a vibrant red color with no blemishes or bruises. After peeling the lychees, discard the skin and remove the seed from each fruit. You can do this by gently squeezing the fruit with your fingers until the seed pops out, or you can use a small knife to cut around the seed and remove it.

Once all of the lychees are peeled and seeded, you can move on to the next step of measuring your ingredients for the perfect lychee juice.

Measure Your Ingredients

Once you’ve peeled and seeded your lychees, it’s time to measure out your ingredients. Measuring techniques play a crucial role in the success of your lychee juice. Precision in measuring ensures that you get the right balance of flavors and sweetness in your juice. Here are some tips to help you measure your ingredients accurately and adjust the sweetness of your juice to your liking:

Advertisement

  • Use measuring cups and spoons instead of eyeballing the ingredients. This will help you get consistent results every time you make lychee juice.

  • Start by measuring out the lychee flesh. You’ll need about 2 cups of lychee flesh for 4 servings of juice.

  • Next, measure out the water. You’ll need 2 cups of water for every 2 cups of lychee flesh.

  • Add sugar to taste. Start with 1/4 cup of sugar and adjust to your liking. You can also use honey or agave syrup as a healthier alternative.

  • Finally, add a squeeze of lime juice to brighten up the flavors.

Now that you’ve measured out your ingredients and adjusted the sweetness to your liking, it’s time to blend your ingredients and turn them into a refreshing lychee juice.

Blend Your Ingredients

Now it’s time to toss all your measured ingredients into the blender and watch the magic happen! But before you do, let’s talk about blending techniques and flavor combinations.

To start, make sure to add the ice and lychee fruit to the blender first. This will help break down the fruit and create a smoother consistency. Then, pour in the coconut water and honey and blend on high for about 2-3 minutes. If you want a thicker consistency, add more ice. If you prefer a sweeter taste, add more honey.

Ingredients Measurements
Lychee fruit 1 cup
Coconut water 1/2 cup
Honey 2 tbsp
Ice 1 cup

Blending techniques can differ depending on the blender you use. Some blenders may not be as powerful and require you to blend for a longer period of time. Experiment with different blending techniques to find the consistency you prefer. As for flavor combinations, you can add other fruits such as pineapple or mango to enhance the tropical taste of the lychee juice.

Now that you have blended all your ingredients, the next step is to strain your juice.

Advertisement

Strain Your Juice

After blending all the ingredients, it’s important to strain the mixture to achieve a smoother texture and remove any unwanted bits. Straining techniques can vary depending on personal preference, but I find that using a fine mesh sieve works best.

Simply pour the blended mixture through the sieve and use a spatula to press down on the solids to extract as much juice as possible. Repeat this process until all the solids have been strained out.

If you want to add some extra flavor to your lychee juice, this is the perfect time to do so. You can mix in a small amount of sugar or honey to sweeten it up, or even add a splash of lime juice for a tangy kick.

Once you’re happy with the flavor, transfer the juice to a pitcher and chill it in the refrigerator for at least an hour before serving.

Next, we’ll move on to the final step of making delicious lychee juice – chilling it to perfection.

Advertisement

Chill Your Juice

Now that I’ve strained my lychee juice, it’s time to chill it.

I usually like to refrigerate my juice for a couple of hours before drinking it to enhance its flavor and make it more refreshing.

If you want to enjoy your juice immediately, you can add some ice to cool it down quickly.

Either way, chilling your juice is a crucial step to make it more enjoyable.

Refrigerating Your Juice

To keep your lychee juice fresh and tasty, you’ll want to pop it in the fridge as soon as possible after making it. Refrigeration is the best way to slow down the natural process of spoilage and prevent the growth of harmful bacteria. The benefits of refrigeration are numerous, including longer shelf life, preservation of nutrients and flavors, and reduction of waste. Plus, a cold and refreshing glass of lychee juice is the perfect way to beat the heat on a hot summer day.

Advertisement

Alternative cooling methods may include adding ice cubes or placing the juice in the freezer for a short period of time. However, these methods may dilute the flavor of the juice or alter its texture. That’s why refrigeration is the preferred method for keeping your lychee juice fresh and delicious. In the next section, we’ll explore the best ways to add ice to your drink without compromising its taste.

Adding Ice to Cool Your Drink

If you want to enjoy a refreshing summer drink, nothing beats the feeling of adding ice cubes to your glass. Here are some tips to make sure you get the most out of this classic drink addition:

  1. Use filtered water: The quality of your ice cubes will affect the taste of your drink, so make sure to use filtered water when making them.

  2. Freeze fruits: For an extra burst of flavor, try freezing fruits like strawberries or blueberries to use as ice cubes.

  3. Use ice alternatives: If you don’t want to dilute your drink with water, try using alternatives like frozen coconut water or coffee ice cubes.

  4. Serve in a chilled glass: To keep your drink cool for longer, serve it in a chilled glass or mason jar.

When it comes to serving suggestions, consider adding a sprig of mint or a slice of lime to your glass. These simple additions can elevate the flavor of your drink and make it feel even more refreshing.

Now that your juice is chilled and ready to go, it’s time to move on to the next step: serving.

Serve Your Juice

Ready to indulge? Nothing beats sipping on a refreshing glass of lychee juice, especially when it’s served over ice on a hot summer day. Once you’ve poured your juice into a glass, it’s time to think about how you want to serve it.

Advertisement

One way to make your lychee juice stand out is by adding creative garnishes. You can add a slice of fresh lime or mint leaves to enhance its flavor and aroma. Additionally, consider pairing your lychee juice with foods that complement its taste, such as spicy dishes or light salads.

By pairing your juice with the right food and adding a touch of creativity, you can elevate your drink to the next level. And with that, it’s time to store your juice for later.

Store Your Juice

Now that I’ve made my delicious lychee juice, I need to properly store it. The best way to do this is by refrigerating it in an airtight container.

This will ensure that the juice stays fresh and tasty for up to 3-4 days. If I want to keep the juice for longer, I can freeze it in ice cube trays and then transfer the cubes to a freezer-safe bag.

This way, I can enjoy my homemade lychee juice anytime I want, even if I don’t have fresh lychees on hand.

Advertisement

Refrigerating Your Juice

Once you’ve bottled your delicious lychee juice, don’t forget to pop it in the fridge to keep it fresh and cool for later.

There are a few storing options for your lychee juice, but refrigerating it is the most common.

When you’re storing your juice, make sure to keep it in an airtight container to prevent any air from getting in and spoiling the juice. You can also add a squeeze of lemon to your juice before bottling it to help preserve it for a few extra days.

The shelf life of your lychee juice will depend on a few factors, such as the freshness of the fruit, the temperature of your fridge, and how well you’ve stored it. Generally, fresh lychee juice can last up to 4-5 days in the fridge. However, it’s always best to check for any signs of spoilage, such as a sour smell or a change in color, before consuming.

Now that your lychee juice is safely stored in the fridge, let’s talk about how you can freeze it for later use.

Advertisement

Freezing Your Juice for Later

To preserve your delicious lychee juice for future use, you’ll want to freeze it in an appropriate container. Freezing is an excellent way to keep your beverage fresh for up to six months.

Start by pouring your lychee juice into a freezer-safe container, leaving about an inch of space at the top to allow for expansion. You can use a plastic container, glass jar, or even an ice cube tray, depending on how you plan to use the juice later. If you’re using an ice cube tray, freeze the juice until solid, then transfer the cubes to a larger container or freezer bag.

Another way to preserve your lychee juice is by canning it. Follow a canning recipe and process to ensure that your juice is safe to store at room temperature. However, keep in mind that canning requires specific equipment, and there is a risk of spoilage if not done correctly. Freezing is a simpler and more accessible method for most home cooks.

In the next section, I’ll discuss how to experiment with variations to add even more flavor to your lychee juice.

Experiment with Variations

Try mixing in some fresh mint leaves for a refreshing twist that’ll make your taste buds sing with delight. Variations experimentation is key to finding the perfect recipe that suits your taste. Flavor customization is easy with lychee juice, as it pairs well with a variety of fruits and herbs.

Advertisement

Here are three variations to try with your lychee juice:

  1. Lychee and Strawberry: Add a handful of fresh strawberries to the blender with your lychee juice for a sweet and tangy flavor combination.

  2. Lychee and Basil: Add a few fresh basil leaves to your lychee juice for a subtle, herbaceous flavor that pairs well with savory dishes.

  3. Lychee and Lime: Squeeze in some fresh lime juice to your lychee juice for a zesty twist that adds a burst of citrus flavor.

With these variations, you can create a unique blend that suits your taste buds perfectly.

Now that you’ve experimented with different flavors, it’s time to enjoy your lychee juice!

Enjoy Your Lychee Juice!

Now it’s time to savor your delicious lychee concoction and bask in the refreshing flavors. But before you take a sip, let’s talk about some ways you can enjoy your lychee juice. Of course, you can always drink it straight up, but why not get a little creative with it?

One idea is to mix it with some sparkling water and a splash of lime juice for a refreshing and bubbly lychee spritzer. Another option is to add a shot of vodka for a lychee martini. And if you’re feeling really adventurous, try blending the juice with some coconut milk and ice for a tropical lychee smoothie. The possibilities are endless, so experiment and find your favorite way to enjoy this delicious fruit juice.

Advertisement

Creative Cocktail Ideas for Lychee Juice Ingredients Instructions
Lychee Martini 2 oz lychee juice, 1.5 oz vodka, 1 oz triple sec, 1/2 oz lime juice Shake all ingredients with ice and strain into a martini glass. Garnish with a lychee fruit on a skewer.
Lychee Spritzer 1/2 cup lychee juice, 1/2 cup sparkling water, 1/4 lime juice Combine all ingredients in a glass filled with ice. Stir gently and garnish with a lime wedge.
Lychee Smoothie 1 cup lychee juice, 1 banana, 1/2 cup coconut milk, 1 cup ice Combine all ingredients in a blender and blend until smooth. Pour into a glass and enjoy.

So go ahead and try these creative cocktail ideas for lychee juice or come up with your own. With its sweet and delicate flavor, lychee juice is a great addition to any beverage. Enjoy!

Frequently Asked Questions

What are the health benefits of drinking lychee juice?

Sipping on lychee juice is like a burst of energy for my body. The nutritional value is impressive, containing high levels of vitamin C, potassium, and antioxidants. Some benefits include improved digestion, skin health, and immunity.

Can I use canned lychees instead of fresh ones?

Yes, canned lychees can be used instead of fresh ones in juice recipe variations. However, it’s important to check for added sugars or preservatives. Fresh lychees may provide a better flavor and more nutrients.

How long does lychee juice last in the refrigerator?

Hey there! Wondering how long your lychee juice will last in the fridge? Well, it all depends on how it’s stored. Generally, freshly made juice lasts 3-4 days, while store-bought can last up to a month. Keep it refrigerated and enjoy!

Can I add sugar or other sweeteners to the juice?

Yes, I can add sugar alternatives like honey, agave or Stevia to lychee juice. However, lychee itself has natural sweetness, so it may not require extra sweeteners. Experiment to find the perfect balance of sweetness to suit your taste.

Advertisement

Are there any potential side effects of drinking lychee juice?

Drinking lychee juice may have potential risks, such as allergies. It’s important to be aware of any reactions and consume in moderation. Always consult with a healthcare professional if you have concerns.

Conclusion

Well, folks, there you have it – your very own homemade lychee juice! As I take a sip of this sweet and refreshing concoction, I can’t help but feel a sense of pride and accomplishment.

It’s amazing how just a few simple steps can yield such a delicious result. As the juice slides down my throat, I’m transported to a tropical paradise – the sun beating down on my face, the sound of crashing waves in the distance, and the sweet aroma of lychees filling my nostrils.

It’s a sensory experience that I look forward to every time I make this juice. So go ahead and give it a try – experiment with different variations, adjust the sweetness to your liking, and enjoy the fruits of your labor.

Trust me, there’s nothing quite like a glass of homemade lychee juice to brighten up your day.

Advertisement

Continue Reading

Trending