Connect with us

Juice

How Much Juice Does A Lime Produce

Published

on

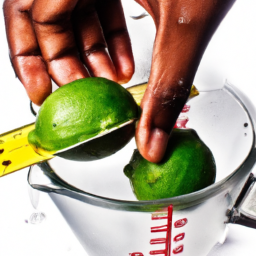
I have always been intrigued by how much juice can be squeezed from a lime as an individual who loves to cook and bake. This essential ingredient plays a crucial role in numerous recipes, from guacamole to key lime pie, and having a clear grasp of the amount of juice it produces can greatly impact the final result.

After conducting some experiments in my kitchen, I’ve discovered some interesting findings about lime juice yield and how to maximize it. Factors such as the ripeness of the lime, the temperature of the fruit, and the method of extraction can all impact lime juice yield. Through careful measurement and analysis, I’ve found that the average lime can produce anywhere from 1 to 2 tablespoons of juice.

However, by following some simple tips and alternative extraction methods, you can increase the amount of juice you get from each lime and make the most out of this versatile citrus fruit. So, let’s dive into the science behind lime juice production and explore some delicious recipes that call for it.

Key Takeaways

  • Key limes produce less juice than Persian limes.
  • Heating and rolling the lime can increase juice extraction.
  • Electric juicers are more efficient in extracting juice than hand-squeezing.
  • On average, a lime produces 1-2 tablespoons of juice.
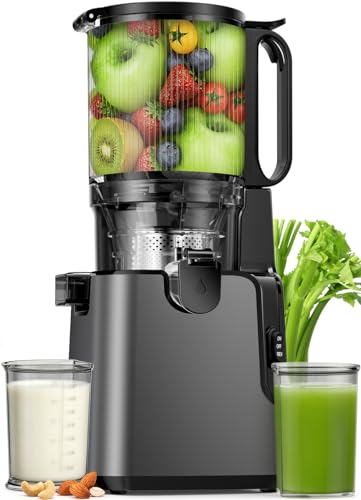
Factors that Affect Lime Juice Yield

Wanna know the secret to getting the most juice out of your lime? It all comes down to the factors that affect lime juice yield.

One of the most important factors is the cooking technique used. Heating up the lime can help break down the cellular structure of the fruit, releasing more juice. A popular method is to microwave the lime for about 10 seconds, or to roll it on a hard surface with the palm of your hand to soften it up.

Another important factor is the citrus acidity of the lime. The higher the acidity, the more juice the lime will produce. This is because the acid helps to break down the cell walls, making it easier to extract the juice. So, when selecting limes, it’s best to choose ones that are firm to the touch and feel heavy for their size, as they tend to be more acidic.

Advertisement

With these factors in mind, you can maximize your lime juice yield and get the most out of your citrus. Speaking of which, let’s take a look at the average lime juice yield.

Average Lime Juice Yield

In my experiments, I’ve found that the average lime juice yield varies depending on the type of lime and juicer used.

Comparing key limes to Persian limes, I’ve found that key limes yield a slightly lower amount of juice on average.

Additionally, when comparing hand-squeezed and electric juicers, I’ve found that electric juicers tend to yield a higher amount of juice.

Comparison of Key Lime and Persian Lime

Did you know that when it comes to juicing, the Key Lime produces less juice than the Persian Lime? In fact, studies have shown that the Key Lime has a lower juice yield compared to the Persian Lime. This can be attributed to the fact that Key Limes are smaller and have a thinner skin, resulting in less flesh and juice.

Advertisement

Additionally, Key Limes have a higher acidity level compared to the sweeter Persian Limes, making them less ideal for juicing. To further understand the difference between the two lime varieties, it’s important to consider their taste and acidity levels. Key Limes have a distinct tart and acidic flavor, which makes them popular in certain dishes such as Key Lime pie. On the other hand, Persian Limes have a milder and sweeter taste, which makes them a preferred choice for juicing.

It’s important to keep in mind these differences when deciding which lime to use for juicing. When it comes to juicing, there are various methods one can use, including hand-squeezing and electric juicers. Let’s explore the differences between the two methods in the next section.

Comparison of Hand-Squeezed and Electric Juicers

You’re about to discover the difference between hand-squeezing and using an electric juicer, like two different paths leading to the same destination, but with different experiences along the way. Let’s take a look at the pros and cons of each method and compare the cost difference.

Hand-squeezing lime juice is a traditional and simple way to get the job done. It requires a bit of elbow grease, but it’s a great way to make sure you’re getting every last drop of juice out of your lime. On the other hand, electric juicers are quick and efficient, but they can be expensive and take up a lot of counter space. Here’s a table to help you weigh the pros and cons and compare the cost difference:

Hand-squeezing Electric Juicer
Pros Inexpensive Quick and efficient
Easy to clean Consistent results
Portable Less elbow grease
Cons Time-consuming Expensive
Inconsistent results Takes up counter space
Requires more effort Difficult to clean

Now that you have a better idea of the pros and cons of each method and their cost comparison, let’s move on to some tips for maximizing your lime juice yield.

Advertisement

Tips for Maximizing Lime Juice Yield

Get the most out of your lime by giving it a good roll on the countertop before slicing it open and squeezing the juice into your recipe. This technique helps to break down the membranes inside the lime, which allows for easier juice extraction.

You can also try microwaving the lime for a few seconds before juicing it, which can help to soften it and increase the amount of juice you can get out of it.

It’s also important to choose the right lime variety for juicing. Key limes are smaller and have thinner skins than Persian limes, which means they have less juice but a stronger flavor. Persian limes, on the other hand, have more juice but a milder flavor.

By understanding the differences between lime varieties and using the right juicing technique, you can maximize the amount of juice you can extract from your limes.

As we move on to alternative lime juice extraction methods, keep in mind that these tips can also be applied to other citrus fruits.

Advertisement

Alternative Lime Juice Extraction Methods

If you’re looking for a quicker and more efficient way to extract lime juice, try using a citrus juicer. DIY lime presses may work for occasional lime juicing, but a citrus juicer is a better investment for frequent use.

There are different types of citrus juicers available in the market, but the most common ones are the electric and manual juicers. Electric juicers are more expensive but they’re faster and easier to use. Manual juicers, on the other hand, are cheaper and can be used anywhere without the need for electricity.

Another alternative method for extracting lime juice is by using a blender. Cut the limes into small pieces and blend them in a blender until smooth. Pour the blended mixture into a strainer to remove the pulp and seeds. The result is a smooth and pulp-free lime juice. However, this method may not be as efficient as using a citrus juicer, and some people may not like the texture of the juice.

Nonetheless, it is a good option if you don’t have a citrus juicer or if you need to extract a large amount of lime juice quickly. With these alternative methods, you can make the most out of your limes and get the most juice possible for your recipes that call for lime juice.

Recipes that Call for Lime Juice

Adding lime juice to your favorite recipes can enhance their flavor and give them a refreshing citrus twist. Lime juice is a versatile ingredient that can be used in a variety of recipes, from savory dishes to sweet desserts.

Advertisement

If you’re looking for a creative way to use lime juice, try making lime-based cocktails like margaritas or mojitos. Lime juice can also be substituted for lemon juice in many recipes, giving them a unique twist.

When using lime juice in recipes, it’s important to note that the acidity of the lime can affect the overall flavor of the dish. To balance out the acidity, consider adding a pinch of sugar or using less lime juice than the recipe calls for.

If you’re looking for a dessert recipe that uses lime juice, try making key lime pie. This creamy and tangy dessert is a classic American favorite and is perfect for any occasion.

Other uses for lime juice include cleaning, skin care, and even as a natural insect repellent. By incorporating lime juice into your daily routine, you can benefit from its many uses and enjoy its refreshing flavor in all aspects of your life.

Other Uses for Lime Juice

Incorporating lime juice into your daily routine can add a refreshing twist to your skincare routine. Lime juice has natural antibacterial properties, making it a great addition to your skincare routine. It can help prevent acne and blemishes while also brightening and evening out your skin tone. Lime juice can also be used as a natural exfoliant, helping to remove dead skin cells and leave you with a radiant glow. Additionally, the citrus scent of lime juice can leave you feeling energized and invigorated.

Advertisement

Aside from its skincare benefits, lime juice can also be used in a variety of other ways. Lime zest, for example, can be used to add flavor to dishes such as salads, soups, and marinades. Lime juice can also be incorporated into creative cocktails, such as margaritas or mojitos. Its tart flavor pairs well with sweet ingredients like agave or honey.

Whether you’re using it to enhance your beauty routine or to add flavor to your food and drinks, lime juice is a versatile ingredient with many uses.

Transitioning into the subsequent section about the history and origins of limes, it’s interesting to note that limes were originally grown in Southeast Asia and were brought to the Americas by Spanish explorers. Today, limes are grown in many parts of the world and are used in a wide variety of cuisines and beverages. From its humble beginnings, lime juice has become a beloved ingredient with a rich history and cultural significance.

History and Origins of Limes

After learning about other uses for lime juice, I became curious about the history and origins of limes. As I researched, I discovered that lime cultivation dates back to ancient times, with evidence of its use in India and Southeast Asia as early as 1000 BC.

Limes were brought to the Mediterranean by Arab traders and eventually made their way to the Americas during the colonial period. Limes have played a significant role in many cultures and have been used for medicinal purposes, as well as culinary applications.

Advertisement

In many countries, limes are a symbol of hospitality and are often used to welcome guests. Additionally, limes have been used in traditional medicine to treat a variety of ailments, such as scurvy and indigestion. Learning about the cultural significance of limes has given me a deeper appreciation for this versatile fruit and its impact on history and culture.

As I delve further into the world of limes, I’m excited to explore their nutritional benefits. With high levels of vitamin C and other beneficial nutrients, limes have the potential to provide numerous health benefits.

Nutritional Benefits of Limes

I find it fascinating to explore the nutritional benefits of limes. Firstly, limes are a great source of Vitamin C, which is essential for maintaining a healthy immune system.

Additionally, limes contain other nutrients such as potassium and folate, which have numerous health benefits.

Lastly, research suggests that consuming limes may aid in digestion, lower blood sugar levels, and promote heart health.

Advertisement

Vitamin C Content

Surprisingly, a lime contains about 30% of the recommended daily intake of vitamin C, making it a great source of this essential nutrient. As someone who’s health-conscious, I’m always on the lookout for foods that are rich in vitamins and minerals.

Here are a few reasons why the vitamin C content in limes is so beneficial:

  • Boosts immune function: Vitamin C is known to enhance the production of white blood cells, which are responsible for fighting off infections.

  • Helps prevent scurvy: Scurvy is a disease caused by a deficiency in vitamin C. Consuming limes, which are high in vitamin C, can help prevent this condition.

  • Promotes healthy skin: Vitamin C is essential for the production of collagen, which is a protein that keeps the skin firm and elastic.

Moving on to other nutrients, limes also contain small amounts of vitamins A and E, as well as minerals like calcium, potassium, and magnesium. These nutrients, along with the vitamin C content, make limes a great addition to any healthy diet.

Other Nutrients

Additionally, limes are a good source of vitamins A and E, as well as minerals such as calcium, potassium, and magnesium. These nutrients are essential for the proper functioning of our body.

Lime juice not only adds flavor to your food, but it also helps in preserving the nutrients present in the food. Maximizing the flavor of lime juice is important, and it can be achieved by squeezing fresh limes rather than using bottled juice.

Advertisement

When it comes to preserving nutrients, it’s important to handle the limes properly. Store them in a cool, dark place and avoid exposing them to sunlight for long periods of time.

When juicing limes, it’s best to use a hand-held juicer instead of an electric one, as the heat generated by the latter can destroy some of the nutrients.

By taking these steps, you can ensure that you’re getting the maximum amount of nutrients from your lime juice.

Limes not only add flavor to your food, but they’re also packed with essential nutrients. By maximizing the flavor of lime juice and preserving its nutrients, you can reap the many health benefits that limes have to offer.

Health Benefits

Limes are a fantastic source of vitamins and minerals that can provide numerous health benefits. Lime juice is loaded with Vitamin C, which is essential for boosting immune function, reducing inflammation, and promoting wound healing.

Advertisement

Moreover, lime juice is rich in flavonoids that possess antioxidant properties. This can help prevent cellular damage and reduce the risk of chronic diseases like cancer and heart disease.

In addition to these health benefits, lime juice can be used in a variety of recipes. It’s a popular ingredient in many cuisines around the world, adding a tangy and refreshing flavor to dishes like guacamole, ceviche, and salsa.

If you don’t have fresh limes on hand, you can use lime juice substitutes like lemon juice, white vinegar, or apple cider vinegar.

Now that we know about the health benefits of limes, let’s take a closer look at how to select and store them properly.

How to Select and Store Limes

When I’m selecting limes, I always look for ones that are heavy for their size and have smooth skin with no blemishes.

Advertisement

To ensure they stay fresh, I store them in a cool, dry place, away from direct sunlight.

Limes can last up to two weeks if stored properly, but it’s always best to use them as soon as possible for the most flavor and nutritional benefits.

Choosing Ripe Limes

To make sure you get the most juice out of your lime, make sure it feels heavy for its size and has a slightly soft exterior. When selecting ripe limes, color isn’t a reliable indicator of ripeness as limes can be green, yellow, or even orange when fully ripe.

Instead, gently press the lime with your thumb to feel for a slight give. This indicates that the lime is juicy and ready to use. When testing lime ripeness, it’s important to note that limes don’t ripen further once they’re picked.

Therefore, it’s crucial to select ripe limes at the store or farmers market. By choosing ripe limes, you’ll be able to extract more juice and get the most flavor out of your citrus. Proper storage methods are also important in maintaining the freshness of your limes.

Advertisement

Proper Storage Methods

Preserve the tangy flavor of your freshly picked citrus by storing them in a cool, dry place with good air circulation. Proper storage is essential in preserving the quality of your limes.

Optimal conditions for storing limes are between 45 to 50 degrees Fahrenheit with a humidity level of 85 to 90 percent. Keep in mind that storing limes at higher temperatures could cause them to dry out faster and lose their flavor.

To maintain the freshness of your limes, you need to store them in a container that can provide protection from the environment. Some good container options include a plastic bag with small holes for ventilation, a perforated plastic container, or a mesh bag. Avoid using sealed plastic bags or containers as they can trap moisture and promote mold growth.

Proper storage is just the first step in keeping your limes fresh. The next section will cover the shelf life of limes and how to tell if they’re still good to use.

Shelf Life

After learning about the proper storage methods for limes, it’s important to understand their shelf life. Limes have a limited lifespan and will expire if left unattended, so it’s crucial to consume or preserve lime juice before it goes bad.

Advertisement

The shelf life of limes largely depends on their ripeness at the time of purchase. Ripe limes typically have a shorter shelf life than unripe ones. On average, limes can last up to two weeks when stored at room temperature and up to a month when refrigerated.

However, as limes begin to age, their skin may start to shrivel and the juice may become less flavorful. To prevent expiring limes, it’s best to store them in a cool, dry place and consume them as soon as possible.

Alternatively, you can preserve lime juice by freezing it in an airtight container or by using it in recipes that call for lime juice, such as marinades or sauces. By doing so, you can extend the shelf life of your limes and ensure that they don’t go to waste.

Frequently Asked Questions

What are some common lime varieties used for juicing?

I prefer using Persian limes for juicing as they produce more juice than Key limes. I recommend using a lime squeezer for maximum extraction efficiency, as hand juicing can result in lower yields.

How does the ripeness of a lime affect its juice yield?

Ripeness impact on lime juice yield is significant. Through my juicing techniques, I found that ripe limes produce more juice than unripe ones. This was confirmed by data-driven analysis using a refractometer and pH meter.

Advertisement

Are there any tools or gadgets that can help extract more juice from a lime?

I’ve found that using a manual citrus press or an electric juicer can increase lime juice yield. Additionally, zesting the lime before juicing can release more oils and enhance flavor. Experimenting with different techniques and tools can lead to optimal results.

Can lime juice be frozen for later use?

I freeze lime juice in ice cube trays for later use. Benefits include saving time and money, and having fresh juice available year-round. Freezing methods vary, but I prefer to add a pinch of salt to enhance flavor.

What are some common substitutes for lime juice in recipes?

When substituting lime juice, consider using lemon juice, vinegar, or citric acid. Each has its own pros and cons. To make homemade lime juice concentrate, juice limes and reduce the liquid in a pot.

Conclusion

In conclusion, I’ve discovered that the average lime produces approximately 1-2 tablespoons of juice. However, this yield can vary greatly depending on factors such as ripeness, temperature, and juicing method. It’s important to keep these factors in mind when preparing recipes that call for lime juice.

One particularly interesting statistic that I came across is that lime juice has been found to contain high levels of citric acid, which can help to prevent the growth of bacteria and viruses. This means that incorporating lime juice into your diet can potentially boost your immune system and protect against illnesses.

Advertisement

So, the next time you reach for a lime, remember the potential health benefits that come along with it.

Continue Reading
Advertisement

Juice

Lemon = How Much Juice

Published

on

By

As someone who loves cooking and baking, I know the importance of accurate measurements when it comes to preparing food. This is especially crucial when using lemon juice in recipes, as it’s important to know the exact amount of juice needed.

Whether youre making lemonade, salad dressing, or a lemon tart, understanding the yield of a lemon will ensure that your recipe turns out perfectly.

There are a few factors that can affect the amount of juice a lemon produces, such as its ripeness and size. Additionally, the juicing method you use can also impact the yield.

In this article, I will provide a step-by-step guide for juicing lemons and share tips for getting the most juice out of your fruit. Plus, I will answer the burning question: how much juice does one lemon yield?

So, lets get started and master the art of juicing lemons!

Advertisement

Key Takeaways

  • Accurate measurements are crucial when cooking and baking with lemons, as factors like ripeness, size, and juicing method can affect lemon juice yield.
  • Knowing how much juice a lemon produces can help save money by buying the right amount of lemons needed, and using the right tool for juicing lemons can make a big difference in juice yield.
  • Lemon juice has health benefits, including aiding in digestion, boosting immune function, and being high in vitamin C and antioxidants, making it beneficial for skincare.
  • Lemon juice can be stored in the refrigerator, freezer, or canned, and can be used in a variety of recipes, including cocktails, salad dressings, and marinades for meats or fish.

The Importance of Knowing How Much Juice a Lemon Produces

You gotta know how much juice a lemon gives, it’s kinda important if you wanna impress your guests with a killer cocktail.

But beyond the realm of mixology, lemon juice has numerous benefits in the realm of health. Rich in vitamin C, potassium, and antioxidants, lemon juice has been shown to aid in digestion, boost immune function, and even prevent kidney stones.

So not only is it important to know how much juice a lemon produces for culinary purposes, but for health reasons as well.

However, the amount of juice a lemon produces can vary depending on a variety of factors, including the ripeness of the fruit, its size, and its temperature. Understanding these factors and how they affect lemon juice yield is crucial in ensuring consistent and accurate measurements in cooking and mixology.

Factors That Affect Lemon Juice Yield

Factors affecting the yield of lemon juice include the ripeness of the fruit and the method of extraction.

When it comes to ripeness, the amount of juice a lemon produces is directly related to how ripe it is. The more mature the fruit, the more juice it will contain. On the other hand, an under-ripe fruit will yield less juice.

Advertisement

Another factor that affects juice yield is the variety of lemon. Some varieties are naturally juicier than others, so it’s important to choose the right variety if you’re looking for maximum juice.

In addition to these factors, the method of extraction also plays a role in how much juice you can get from a lemon. Lemon juice extraction techniques vary, but some methods are more efficient than others. For example, using a hand juicer or a citrus press can yield more juice than simply squeezing the lemon with your hands.

By understanding these factors and choosing the right extraction method, you can maximize your lemon juice yield and get the most out of your fruit.

As we move on to the next section, it’s important to note that having the right tools for juicing lemons can make a big difference in the amount of juice you’re able to extract.

Tools You Will Need for Juicing Lemons

To get the most out of your citrus, you’ll need the right tools. When it comes to juicing lemons, there are two common options: hand-held lemon squeezers and electronic juicers.

Advertisement

Hand-held lemon squeezers are a low-cost and easy-to-use option. They come in a variety of sizes and shapes, but all function in a similar way. Simply cut the lemon in half, place it in the squeezer, and press down on the handles to extract the juice.

Electronic juicers can be a more expensive investment, but they can save time and effort. These machines can handle larger quantities of lemons and often have adjustable settings to customize the level of pulp in your juice.

No matter which tool you choose, having the right equipment can make the process of juicing lemons much easier and more efficient.

Now that you have the appropriate tools, it’s time to learn how to use them effectively. In the next section, we’ll provide a step-by-step guide for juicing lemons to help you maximize your lemon juice yield.

Step-by-Step Guide for Juicing Lemons

Once I’ve got my chosen juicing tool at hand, such as a citrus reamer or a handheld juicer, I begin the process of extracting lemon juice.

Advertisement

First, I cut the lemon in half and place one half onto the juicing tool, with the cut side facing down. Then, I firmly press and twist the juicing tool, extracting the juice from the lemon.

I repeat this process with the other half of the lemon, until all the juice has been extracted.

There are several lemon juicer alternatives available, but the most important thing is to choose a tool that allows for efficient extraction of the juice.

Additionally, lemon juice has many benefits for skin care, as it’s high in vitamin C and antioxidants. Incorporating lemon juice into a daily skincare routine can help brighten and even out skin tone, while also helping to reduce the appearance of fine lines and wrinkles.

With that being said, let’s move on to some tips for getting the most juice out of your lemons.

Advertisement

Tips for Getting the Most Juice Out of Your Lemons

If you want to make the most out of your citrus, it’s important to know a few tricks for maximizing the amount of tangy goodness you can squeeze out of each fruit. Here are three tips for getting the most juice out of your lemons:

  • Use a lemon zester to break up the membranes inside the lemon before juicing. This will help release more juice and make juicing easier.

  • Roll the lemon on a hard surface to break down the pulp before juicing. This will also help release more juice.

  • Consider alternative juicing methods, such as using a garlic press or a citrus squeezer, to get even more juice out of your lemons.

By following these tips, you can ensure that you’re getting the most juice out of each lemon.

But how much juice does one lemon yield? Let’s explore that in the next section.

How Much Juice Does One Lemon Yield?

Did you know that squeezing a single lemon can yield up to a quarter cup of tart and zesty liquid? As someone who loves to cook and bake, knowing how much juice one lemon yields is essential. Not only does it help me plan my recipes better, but it also helps me save money by buying just the right amount of lemons I need.

To give you an idea of just how much juice you can get from a lemon, take a look at this table:

Advertisement
Size of Lemon Amount of Juice
Small 1-2 tablespoons
Medium 2-3 tablespoons
Large 4-5 tablespoons

Aside from adding flavor to your dishes, lemon juice also has numerous health benefits. It’s rich in Vitamin C, which is known to boost the immune system and improve skin health. It also aids in digestion and can help prevent kidney stones. And if you ever find yourself without a fresh lemon on hand, you can always use substitutes such as vinegar or lime juice in a pinch.

Transitioning to the next subtopic, understanding how much juice one lemon yields is essential when it comes to recipe conversion. Knowing how to calculate the amount of lemon juice needed for a recipe can make or break the final outcome.

Recipe Conversion: How to Calculate Lemon Juice Needed

Understanding the recipe conversion process can be complex, especially when it comes to calculating the necessary amount of lemon juice needed. However, having the right amount of this tart and zesty liquid can make all the difference in the final product.

Here are some tips on how to calculate the right amount of lemon juice for your recipe:

  1. Start by determining how much juice you need. This can be done by looking at the recipe and identifying the amount of lemon juice required in the ingredient list.

  2. The next step is to figure out how much juice is in each lemon. On average, a medium-sized lemon yields about 2-3 tablespoons of juice. However, this can vary based on the size and ripeness of the fruit.

  3. Once you know how much juice is in each lemon, you can calculate how many lemons you need for your recipe. Simply divide the required amount of juice by the amount of juice in each lemon to get the number of lemons needed.

By following these simple steps, you can ensure that you have the right amount of lemon juice for your recipe.

Advertisement

In the next section, we’ll discuss how to store any excess juice for future use.

Storing Lemon Juice

Now that we know how to calculate the amount of lemon juice needed for a recipe conversion, it’s important to discuss proper storing techniques and shelf life.

Lemon juice can be stored in a variety of ways, including in the refrigerator, freezer, or even canned. When storing in the refrigerator, it’s important to keep the juice in an airtight container to prevent oxidation and maintain freshness. The juice can also be frozen in ice cube trays and then transferred to a freezer-safe container for later use. Canning is another option, but requires proper equipment and techniques to ensure safety.

The shelf life of lemon juice varies depending on the storage method. Freshly squeezed lemon juice stored in the refrigerator can last up to 2-3 days, while frozen juice can last up to 6 months. Canned lemon juice can last even longer, up to a year or more. It’s important to always check for signs of spoilage, such as a sour smell or mold, before using any stored lemon juice.

Moving on to other uses for lemon juice, it can be used for more than just cooking.

Advertisement

Other Uses for Lemon Juice

If you’ve ever struggled with removing stubborn stains or rust, a little bit of this versatile citrus liquid can work wonders. Lemon juice is not only a great ingredient for adding a tangy flavor to your dishes, but it also has some impressive uses in skincare and home cleaning. Here are three benefits of using lemon juice for skincare:

  1. Lemon juice is rich in citric acid, which can help exfoliate dead skin cells and brighten your complexion.

  2. It contains vitamin C, an antioxidant that helps protect your skin from damage caused by free radicals and UV rays.

  3. Lemon juice can also help reduce the appearance of dark spots and acne scars due to its natural bleaching properties.

When it comes to cooking, there are different types of lemon juice you can use depending on your recipe. Freshly squeezed lemon juice is ideal for adding a bright, citrusy flavor to your dishes, while bottled lemon juice can be used for convenience and consistency. Here are a few more ways you can incorporate lemon juice into your cooking:

  1. Use lemon juice as a marinade for meats or fish to add flavor and tenderize the protein.

  2. Add lemon juice to your salad dressings for a tangy kick.

  3. Mix lemon juice with olive oil and herbs to create a flavorful dipping sauce for bread or vegetables.

Overall, lemon juice is a versatile ingredient that can be used in a variety of ways to enhance your skincare routine and cooking skills.

Frequently Asked Questions

What are the health benefits of lemon juice?

As a nutritionist, I can attest to the numerous health benefits of lemon juice. It’s packed with vitamin C, antioxidants, and has anti-inflammatory properties. Lemon juice can also aid digestion, boost immunity, and improve skin health. Check out the nutrition facts for more details.

How long does it take for a lemon to produce juice?

To extract lemon juice, the fruit must first be cut and squeezed. The production timeline depends on the method used, but typically takes only a few minutes. Other factors, such as the ripeness of the lemon, can also impact the amount of juice produced.

Advertisement

Can you juice a lemon without a juicer?

Yes, you can juice a lemon without a juicer using alternative methods such as hand-squeezing, using a fork, or rolling the lemon to release the juice. Different lemon squeezing techniques can also affect the amount of juice extracted.

What is the best way to remove seeds from lemon juice?

The best way to remove seeds from lemon juice is to use a fine mesh strainer or cheesecloth. Simply pour the juice through the strainer or wrap the cheesecloth around the seeds and squeeze. This technique ensures a smooth, seedless juice.

How do you know if a lemon is ripe enough to juice?

To determine if a lemon is ripe enough for juicing, I check for a bright yellow color and a slight give when squeezed. I use lemon juice extraction techniques such as rolling the lemon to release more juice.

Conclusion

In conclusion, knowing how much juice a lemon produces is essential for any cook or bartender. It can mean the difference between a mediocre dish and an exceptional one. By understanding the factors that affect lemon juice yield and using the right tools and techniques, you can maximize the amount of juice you extract from each lemon.

Whether you’re making a lemon vinaigrette or a lemon drop martini, having the right amount of juice is crucial. In short, the power of a lemon shouldn’t be underestimated. This small fruit can pack a punch, and its juice has a wide range of uses. From enhancing the flavor of dishes to providing health benefits, lemon juice is a versatile ingredient that should be a staple in every kitchen.

Advertisement

So grab your juicer and some lemons, and start exploring the endless possibilities of this zesty citrus fruit. Trust me, your taste buds will thank you.

Continue Reading

Juice

How To Make Papaya Juice

Published

on

By

As a health enthusiast, I am always on the lookout for creative and delicious ways to incorporate nutrient-rich foods into my diet. Lately, I have been intrigued by the papaya. Its vibrant orange flesh, sweet taste, and numerous health benefits make it a perfect addition to any smoothie.

Making your own papaya juice is not only easy but also incredibly rewarding. It’s like a burst of sunshine in a glass, delivering a refreshing and invigorating dose of vitamins and minerals straight to your body.

In this article, I will guide you through the step-by-step process of creating your own homemade papaya juice, so you too can enjoy the many health benefits and delicious taste of this tropical fruit.

Key Takeaways

  • The ripeness of the papaya is important when making juice, so look for a mostly yellow fruit with some green spots.
  • Water should be added in the blender to help the ingredients blend smoothly, and a proper water to fruit ratio should be maintained.
  • Blender maintenance is important and blending should be done at a low speed and gradually increased to avoid overblending and creating a foamy texture.
  • Honey or agave syrup can be added as a sweetener for taste and health benefits, but adding too much will increase the calorie and sugar content of the juice, so consume in moderation.

Gather Your Ingredients

Don’t forget to grab that juicy papaya and get ready for a refreshing experience that will quench your thirst like never before! Before we can start making the juice, we need to gather our ingredients.

Apart from the papaya, you’ll need some water, lime juice, and sugar or honey for sweetening. Papaya is an excellent source of vitamins A and C, potassium, and fiber. It’s also rich in antioxidants that help boost your immune system and protect against chronic diseases.

To make the juice more interesting, you can add other fruits like strawberries, pineapple, or mangoes. These flavor variations not only add taste but also enhance the health benefits of the juice.

Advertisement

Now that we have gathered our ingredients, let’s move on to preparing our papaya.

Prepare Your Papaya

Once you’ve got your hands on a ripe papaya, it’s as easy as slicing it open like a smile to reveal the juicy goodness inside. But before you get started, it’s important to know that there are several varieties of papaya, and each one has a different level of ripeness that’s optimal for juice-making.

Here are three things to keep in mind regarding papaya ripeness:

  1. Look for a papaya that is mostly yellow with some green spots. This indicates that the fruit is ripe and ready to be used for juice.

  2. If the papaya is fully green, it’s not yet ripe enough to use. You’ll need to wait a few more days until the papaya turns yellow.

  3. If the papaya is mostly yellow with brown spots, it’s overripe and may not taste as good in juice.

Now that you know how to choose the perfect papaya, it’s time to cut it into pieces and get ready to make some delicious juice.

Cut the Papaya into Pieces

To start, simply grab a sharp knife and slice the ripe papaya in half lengthwise, revealing the bright orange flesh and black seeds inside. Next, scoop out the seeds with a spoon and then proceed to cut the papaya into pieces. I like to cut the papaya into cubes, but you can cut them into any size you prefer.

Advertisement

When selecting a papaya for juice, it’s important to choose a ripe one. A ripe papaya should have a yellowish-orange skin and should yield slightly to pressure. Papayas are a great source of vitamins A and C, and they contain an enzyme called papain that aids in digestion. By adding papaya juice to your diet, you can reap all of these health benefits and more.

Now that the papaya is cut into pieces, it’s time to add it to the blender. But before we do that, we need to add water to the blender to help the blending process.

Add Water to the Blender

Now we’re ready to blend everything together, so let’s go ahead and add some water to the blender. It’ll help the ingredients blend smoothly and create a refreshing and hydrating drink that’ll leave you feeling energized. When adding water to the blender, it’s important to maintain a proper water to fruit ratio to ensure that the juice isn’t too thick or too watery. As a general rule of thumb, I like to add about 1/2 cup of water for every 1 cup of fruit. This ratio can be adjusted based on personal preference, but be careful not to add too much water as it can dilute the flavor of the papaya.

Proper blender maintenance is also important when making papaya juice. Before adding the water, make sure the blender is clean and free of any residue from previous use. After blending, take the time to thoroughly clean the blender to prevent any lingering flavors or bacteria. Now that we’ve added the water to the blender, it’s time to move onto the next step and add the papaya to create a delicious and nutrient-packed juice.

Add the Papaya to the Blender

With the blender prepped and water added, it’s time to blend in the juicy papaya chunks for a tropical burst of flavor. Before adding the papaya, make sure to remove the skin and seeds. Papaya is rich in vitamins A and C, and adding it to your diet can help improve digestion and boost your immune system.

Advertisement

When blending the papaya, it’s important to start at a low speed and gradually increase it to avoid overblending and creating a foamy texture. Depending on your preference, you can add other fruits such as pineapple or banana to create different variations of papaya juice.

Once the papaya is fully blended, we can move on to the next step of the process: blending the mixture until smooth.

Blend the Mixture

You’re ready to blend the mixture and create a delicious papaya juice. Before we start, let’s talk about blender maintenance. It’s important to keep your blender clean and free from any remnants of past use. Make sure to wash the blender thoroughly with soap and water before using it.

Now, let’s blend the mixture. Start by placing the lid on the blender and turning it on. Blend on high speed until the mixture is smooth and creamy. If you don’t have a blender, you can use a food processor or immersion blender as an alternative blending method. Once you’ve achieved the desired consistency, you can move on to the next step: strain the mixture (optional).

Strain the Mixture (optional)

If you wanna go the extra mile, strain out any unwanted bits and bobs from your blended concoction with a sieve or cheesecloth. This step is optional, but it can make a huge difference in the texture and taste of your papaya juice.

Advertisement

By removing the fibrous pieces and seeds, you’ll get a smoother and more pleasant drink that is easier to digest. The benefits of straining go beyond aesthetics and taste.

Papaya seeds, for instance, have a bitter flavor and can cause digestive discomfort if ingested in large amounts. While they’re edible and have some health benefits, such as being anti-inflammatory and antibacterial, they’re not suitable for everyone.

Straining also allows you to remove any dirt, debris, or pesticides that may be present in the fruit. If you don’t have a sieve or cheesecloth, you can skip this step or use a fine-mesh strainer, but keep in mind that you may end up with a chunkier juice.

Now that you have your pulp-free papaya juice, you can proceed to the next step: adding sweetener (optional).

Add Sweetener (optional)

To enhance the flavor and add a touch of sweetness, consider mixing in honey or agave syrup to create a tropical paradise in your mouth. Not only do these alternative sweeteners provide a delicious taste, but they also come with health benefits.

Advertisement

Honey contains antioxidants and has antibacterial properties, while agave syrup has a lower glycemic index compared to traditional sugar. When adding the sweetener, start with a small amount and adjust to your preference. Here are some tips to keep in mind:

  • Use raw, unprocessed honey or organic agave syrup for maximum health benefits.
  • Consider using a honey or agave syrup that is locally sourced to support small businesses and reduce your carbon footprint.
  • If you prefer a sweeter juice, add more sweetener gradually to avoid overpowering the natural flavor of the papaya.
  • Keep in mind that adding sweetener will increase the calorie and sugar content of the juice, so consume in moderation.

Now that the juice is sweetened to your liking, it’s time to chill and serve.

Chill and Serve

Once the mixture is chilled and ready, simply grab a glass and pour in the deliciously tropical juice. Savor every sip, as papaya juice is not only refreshing but also packed with numerous health benefits. It’s rich in antioxidants, vitamins A and C, and enzymes that aid digestion. Regular consumption of papaya juice can improve skin health, boost immunity, and reduce inflammation.

To switch things up, try different serving suggestions for your homemade papaya juice. Add a slice of lime or a sprig of mint for an extra kick of flavor. You can also mix it with other juices like pineapple or orange for a tropical fruit medley. However, it’s important to note that papaya juice should be consumed in moderation as it contains high amounts of natural sugars.

Enjoy your homemade papaya juice and reap the benefits of this delicious and nutritious beverage!

Enjoy Your Homemade Papaya Juice!

You can savor the delicious and nutritious homemade tropical beverage by pouring it into a glass and adding a slice of lime or a sprig of mint for an extra kick of flavor. The best part about making papaya juice at home is that you can customize it according to your preferences and health needs. Here are some health benefits and recipe variations that you can try:

Advertisement
Health Benefits Recipe Variations
High in Vitamin C and antioxidants Add ginger or turmeric for additional anti-inflammatory properties
Supports digestion and gut health Mix with coconut water or kefir for probiotic benefits
Lowers blood sugar levels Blend with spinach or kale for an extra boost of vitamins and minerals

By incorporating these recipe variations, you can enhance the taste and nutritional value of your homemade papaya juice. Enjoy this refreshing beverage as a healthy breakfast drink or a post-workout thirst quencher. Cheers to good health and delicious taste!

Frequently Asked Questions

What are the health benefits of drinking papaya juice?

After researching, I found that papaya juice is high in vitamin C, antioxidants, and fiber. It may aid in digestion and boost immunity. However, it may also cause allergic reactions or interact with certain medications.

Can I use frozen papaya instead of fresh papaya?

Yes, frozen papaya can be used as a substitute for fresh papaya in smoothie options. It still retains its nutritional benefits and can be a convenient option for those who don’t have access to fresh papaya.

How long does homemade papaya juice last in the refrigerator?

To preserve the freshness of homemade papaya juice, store it in an airtight container in the refrigerator. This will extend the juice’s shelf life for up to three days. Keeping the juice fresh is key to maximizing its health benefits.

Can I add other fruits or vegetables to my papaya juice?

Oh, the possibilities! I love getting creative with my papaya juice variations. Mixing papaya with other fruits like mango or pineapple can add a tropical twist, while adding spinach or kale can boost the health benefits. The options are endless!

Advertisement

Is it possible to make papaya juice without a blender?

Yes, it is possible to make papaya juice without a blender. You can use blender alternatives such as a food processor or manual extraction methods like squeezing the juice out of the fruit by hand or using a juicer.

Conclusion

Well, that’s how I make my delicious papaya juice! It’s so easy and refreshing, and it’s a great way to get some extra vitamins and nutrients into your diet.

Did you know that papaya is high in vitamin C, folate, and potassium? In fact, one medium papaya contains about 224% of your daily recommended intake of vitamin C! That’s pretty impressive.

But beyond just being a healthy choice, papaya juice is also a delicious one. It’s naturally sweet and has a tropical flavor that’s perfect for sipping on a hot summer day.

Plus, by making it at home, you can control the sweetness and add in any other ingredients you like. So if you’re looking for a tasty and healthy drink option, give papaya juice a try!

Advertisement

Continue Reading

Juice

How To Make My Own Vape Juice

Published

on

By

As a passionate vaping enthusiast, I have always been fascinated by the art of creating my own e-liquid. The process of blending different flavors to create a unique taste that suits my preferences has been an exciting adventure. However, making your own vape juice can be daunting, especially for beginners.

In this guide, I will share with you the steps I took to make my own vape juice, including the basic ingredients and equipment needed, how to determine the PG/VG ratio, and how to calculate the recipe.

Before we delve into the process of making your own vape juice, it is crucial to understand the basic ingredients and equipment needed. The main ingredients of vape juice include vegetable glycerin (VG), propylene glycol (PG), nicotine, and flavorings. VG and PG are the base liquids used to create the vapor, while nicotine and flavorings are added to enhance the taste and nicotine content.

The equipment needed includes a mixing container, a scale, syringes, gloves, and bottles for storage. With these basic ingredients and equipment, you can start making your own vape juice and customize it to your liking.

Key Takeaways

  • Prioritize ingredient safety and equipment maintenance to ensure purity and consistency.
  • Experiment with flavor combinations and adjust ratios for desired flavor and nicotine strength.
  • Use a mixing calculator and measure ingredients accurately for consistency and safety.
  • Properly store ingredients and finished e-liquids to maintain flavor and potency.

Understand the Basic Ingredients and Equipment Needed

To make your own vape juice, you’ll need some basic ingredients and equipment, like VG (vegetable glycerin), PG (propylene glycol), nicotine, flavorings, syringes, and bottles. These are all readily available online or at your local vape shop.

When it comes to equipment options, you can use either a scale or syringes to measure out your ingredients. A scale is more precise and efficient, while syringes are easier to find and use.

Advertisement

It’s important to note that some flavorings may contain oils or other additives that can be harmful if vaporized, so be sure to research and choose safe options.

Ingredient substitutions are also possible, but may affect the overall flavor and vaping experience. For example, you can swap VG and PG ratios to adjust the thickness and throat hit of your juice. You can also choose different types of nicotine, such as freebase or salt nicotine, depending on your preference.

Flavorings can be substituted or combined to create unique blends, but make sure to use ones that are specifically made for vaping. With all these options, it’s important to experiment and find what works best for you.

Now that you understand the basic ingredients and equipment needed, let’s move on to gathering everything necessary to start making your own vape juice.

Gather the Necessary Ingredients and Equipment

First, you’ll need to gather all the essential ingredients and equipment needed for crafting your own custom e-liquid. When it comes to ingredients, it’s important to prioritize ingredient safety. Make sure to purchase pharmaceutical-grade ingredients from reputable suppliers to ensure the purity of your e-liquid. Some of the key ingredients you’ll need include propylene glycol (PG), vegetable glycerin (VG), nicotine (if desired), and flavor concentrates. It’s also important to properly store your ingredients in a cool, dry place to maintain their quality.

Advertisement

In addition to the necessary ingredients, you’ll need to have the proper equipment for mixing and storing your e-liquid. This includes a scale for accurate measurements, syringes for precise dispensing, mixing containers, and bottles for storing your finished product. It’s also important to prioritize equipment maintenance to ensure the longevity and accuracy of your tools. Regularly clean your equipment and replace any worn or damaged components. By gathering the necessary ingredients and equipment and prioritizing ingredient safety and equipment maintenance, you’ll be well on your way to crafting your own custom e-liquid with confidence.

As you gather your ingredients and equipment, it’s important to keep in mind the flavor profile you want to achieve in your e-liquid. In the next section, we’ll discuss how to choose your flavor profile and create a unique and satisfying vaping experience.

Choose Your Flavor Profile

When it comes to choosing a flavor profile for my vape juice, I like to consider whether I want a single flavor or a combination of flavors. Experimenting with different combinations can lead to unique and interesting results.

Additionally, adjusting the intensity of the flavors can greatly affect the overall taste of the vape juice. It’s important to keep in mind that finding the perfect flavor profile may take some trial and error, but the end result is worth it.

Single Flavor vs. Combination

Deciding between using a single flavor or combining flavors can be a tough choice, but it ultimately depends on personal preference and taste.

Advertisement

There are pros and cons to both options. Using a single flavor can be simple and straightforward, making it easier to control the taste and nicotine strength. However, it can also be limiting in terms of variety and complexity.

On the other hand, combining flavors can open up a whole new world of possibilities, allowing you to create unique and complex blends. The downside is that it can be tricky to get the ratios right and achieve a balanced flavor.

When it comes to popular combinations, there are endless options to choose from. Some common pairings include fruit and menthol, dessert and cream, and tobacco and caramel. However, don’t be afraid to get creative and experiment with different flavors to find the perfect mix for you.

Remember, taste is subjective, so what works for one person may not work for another. The key is to start with small batches and adjust the ratios until you find the right balance of flavor and nicotine strength. With a bit of trial and error, you’ll be able to create your own unique vape juice that perfectly suits your taste buds.

Experimenting with Flavors

Combining different flavor profiles can lead to a multitude of unique and unexpected tastes, allowing for an exciting exploration of the vast world of vaping. However, it’s important to be mindful of certain flavor combinations to avoid.

Advertisement

For example, mixing mint and cinnamon can create an overpowering taste that can be unpleasant to some. Similarly, combining citrus and dairy flavors can result in a curdled and unappetizing vape juice.

On the other hand, finding inspiration for unique flavors can lead to great success. Experimenting with combining fruits like strawberry and kiwi, or mixing dessert flavors like caramel and vanilla can create a delicious and complex vape juice.

It’s also helpful to try out pre-made flavor concentrates from reputable brands to get a sense of different flavor profiles and how they can be mixed together. With a bit of creativity and caution, the possibilities for creating your own unique vape juice flavors are endless.

Now, let’s move on to adjusting flavor intensity.

Adjusting Flavor Intensity

To add an extra kick to your flavor, try using a drop or two of flavor enhancers like EM or AP, which are available at most vape shops. These flavor enhancers are meant to balance out the overall flavor profile of your vape juice.

Advertisement

For example, if you feel like your fruit flavor is lacking some sweetness, you can add a drop of EM, which is ethyl maltol, to enhance the sweetness. On the other hand, if you feel like your bakery flavor is too overpowering, you can add a drop of AP, which is acetyl pyrazine, to tone down the bakery notes.

It’s important to note that when adjusting the flavor intensity, you should always taste your vape juice after adding the enhancer to avoid overdoing it. Additionally, steeping techniques can also affect the overall strength of the flavor.

Steeping is the process of letting your vape juice sit in a cool, dark place for a period of time, allowing the flavors to meld together and become more pronounced. Depending on the flavor and the recipe, some vape juices may need to steep for a few days or even a few weeks.

Once you’ve adjusted the flavor intensity and determined the steeping time, it’s time to move on to determining the pg/vg ratio.

Determine the PG/VG Ratio

Finding the perfect PG/VG ratio can truly make or break the flavor and overall vaping experience. PG and VG are the two main components of vape juice, and they each have their own properties that affect the final product.

Advertisement

PG is thinner and has a stronger throat hit, which is great for those who want a stronger sensation when vaping. On the other hand, VG is thicker and produces more vapor, making it ideal for cloud chasers.

When deciding on the PG/VG ratio for your vape juice, it’s important to consider your personal preferences and vaping style. If you want a stronger throat hit, a higher PG ratio may be better for you. However, if you prefer bigger clouds and a smoother vaping experience, a higher VG ratio may be the way to go. Additionally, you can adjust the throat hit in your vape juice by adding more or less PG, depending on your desired effect.

Moving on to the next step, calculating the recipe for your vape juice involves taking into account the flavorings, nicotine, and PG/VG ratio.

Calculate the Recipe

To calculate the recipe for my DIY vape juice, I need to use a mixing calculator. This tool will help me determine the exact measurements of each ingredient based on my desired nicotine strength, flavor intensity, and PG/VG ratio.

It’s important to measure the ingredients accurately to ensure consistency and safety, and to adjust the recipe for different batch sizes.

Advertisement

Using a Mixing Calculator

Using a mixing calculator can be a game-changer for DIY vape juice makers. It simplifies the process and ensures accurate measurements, making it a piece of cake.

One of the benefits of DIY vape juice is the ability to customize the flavor to your liking. However, this can be challenging without the right tools. Using a mixing calculator eliminates the guesswork and ensures that you have the right amount of each ingredient.

Common mixing mistakes can lead to an unpleasant vaping experience, such as too much flavoring or not enough nicotine. A mixing calculator takes into account the specific gravity and concentration of each ingredient to ensure that you have the perfect balance.

It also allows you to adjust the recipe based on the size of the batch you want to make. With a mixing calculator, you can confidently create your own unique vape juice flavors without worrying about making mistakes that could ruin the final product.

Accurately measuring ingredients is crucial for creating a successful vape juice recipe. In the next section, I’ll discuss the importance of using precise measurements and how to do it correctly.

Advertisement

Measuring Ingredients Accurately

Now that we’ve got the hang of using a mixing calculator, let’s talk about the importance of precision in measuring the ingredients for our vape juice.

Measuring ingredients accurately is crucial to the success of our mix. Even the slightest variation in measurements can greatly affect the flavor and consistency of our final product. That’s why it’s important to use the appropriate tools, such as a graduated cylinder or a scale, for measuring each ingredient.

Common measuring mistakes include eyeballing measurements, using the wrong measuring tools, and not properly leveling off dry ingredients. These mistakes can lead to an imbalanced flavor profile, harsh throat hits, or even a ruined batch.

To avoid these issues, it’s essential to follow the recipe and measure each ingredient carefully. Remember, precision is key when it comes to making your own vape juice.

Now that we understand the importance of accurate measurements, let’s move on to the next step: adjusting for batch size.

Advertisement

Adjusting for Batch Size

When we want to mix up a bigger or smaller batch of our delicious e-liquid, we need to adjust the ingredients accordingly to ensure the perfect balance of flavors. Here are some tips and tricks for adjusting for batch size:

  1. Use a calculator to scale the recipe: This is the easiest and most accurate way to adjust for batch size. Simply multiply the ingredients by the desired batch size and divide by the original batch size. For example, if the original recipe is for a 100ml batch and you want to make a 50ml batch, you would multiply all the ingredients by 0.5.

  2. Be mindful of flavor concentration: Some flavorings can be very potent, and a little goes a long way. When adjusting for batch size, make sure to adjust the flavoring accordingly. For example, if the original recipe calls for 10% flavoring in a 100ml batch, you may only need 5% in a 50ml batch.

  3. Keep track of your adjustments: It’s important to keep a record of the adjustments you make to the recipe. This will help you replicate the recipe in the future and make adjustments as needed.

Now that we’ve discussed adjusting for batch size, it’s time to mix the ingredients.

Mix the Ingredients

As I mix the ingredients for my own vape juice, I need to be aware of the different mixing techniques to achieve the desired result. One common mistake that beginners make is not mixing the ingredients thoroughly, resulting in an uneven distribution of flavors. To prevent this, I need to use a magnetic stirrer or a handheld mixer to ensure that the ingredients are well-blended.

Another important factor to consider is the order in which the ingredients are mixed. I usually start by adding the base liquid, followed by the flavorings, and then the nicotine (if desired). This ensures that the flavors are evenly distributed and that the nicotine is evenly dispersed throughout the mixture.

As I mix the ingredients, I can already start to imagine the flavor profile of my vape juice. But before I can enjoy it, I need to steep the e-liquid to allow the flavors to fully develop.

Advertisement

Once the ingredients are mixed, it’s time to let the e-liquid steep and mature, enhancing the flavors and improving the overall vaping experience.

Steep the E-Liquid

To fully develop the flavors of your e-liquid, steeping is essential. Steeping is the process of letting the e-liquid mixture sit for a certain period of time to allow the flavors to blend together. This process is necessary because some of the ingredients used in the mixture may not be fully incorporated at first, resulting in a harsh or unpleasant taste if vaped immediately.

Steeping techniques vary depending on the recipe and the desired outcome, but the general rule is to store the e-liquid in a cool, dark place and shake it regularly. The importance of patience in steeping can’t be overstated. Some e-liquids may require a few days to a few weeks of steeping before they’re ready to vape. It can be tempting to try the e-liquid right away, but the flavors won’t be as developed as they could be.

Patience is key to achieving the best possible flavor from your homemade e-liquid. Once the steeping process is complete, it’s time to move on to the next step: testing and adjusting the e-liquid to your preference.

Test and Adjust

Now that I’ve steeped my e-liquid, it’s time to test and adjust the flavor and nicotine levels to my liking.

Advertisement

I’ll begin by testing the e-liquid by dripping a small amount onto my atomizer and taking a few puffs.

From there, I can adjust the flavor or nicotine levels accordingly and make notes for future batches.

By taking the time to test and adjust my e-liquid, I can ensure a satisfying experience every time I vape.

Testing the E-Liquid

Before you start vaping your homemade juice, make sure you test it first to ensure the flavor and nicotine levels are to your liking. To test the e-liquid, you can use various flavor testing techniques such as dripper testing or tank testing.

Dripper testing involves adding a small amount of the e-liquid onto a dripper and vaping it without any previous juice in the tank.

Advertisement

Tank testing involves filling your vape tank with the e-liquid and vaping it. This method is best for evaluating how the e-liquid tastes when it is heated.

It’s also important to keep in mind the steeping time for e-liquids. Steeping is the process of letting e-liquids age to improve their flavor. It’s recommended that you let your e-liquid steep for at least a week before testing it. You can steep your e-liquid by letting it sit in a cool, dark place and shaking it every day.

Once you’ve tested your e-liquid and determined the flavor and nicotine levels, you can move on to adjusting flavor or nicotine to your liking.

Adjusting Flavor or Nicotine

Once you’ve tested your e-liquid and determined the flavor and nicotine levels, it’s time to personalize your vaping experience by customizing the nicotine strength and balancing the flavor profile.

To adjust nicotine levels, you’ll need to add more or less nicotine concentrate to your e-liquid base. It’s important to measure the nicotine concentrate accurately to avoid ending up with a nicotine level that’s too strong or too weak. You can use an online calculator to determine the amount of nicotine concentrate to add, based on the strength of your base and the desired nicotine level.

Advertisement

When it comes to balancing the flavor profile, you can adjust the amount of flavoring used to make it stronger or weaker. Be careful not to add too much flavoring, as this can overpower the other flavors and make the e-liquid taste artificial.

It’s a good idea to start with small adjustments and test the e-liquid again before making any major changes. Once you’ve achieved the perfect balance of nicotine and flavor, you can make notes for future batches to ensure consistency.

Making Notes for Future Batches

To ensure consistency in your e-liquid batches, it’s crucial to jot down notes like a baker writing down a recipe for their signature dish. By keeping track of your flavor notes and recipe adjustments, you can easily replicate your favorite e-juice flavors that suit your taste buds.

Here are a few tips on how to make notes for future batches:

  • Start with the basics: Write down the name of the recipe, the date it was made, the nicotine level, and the VG/PG ratio. This will help you keep track of the different batches you make.

  • Flavor notes: Write down the flavors you used, their brand, and the percentage used. This will help you remember which flavors work well together and which ones need to be adjusted.

  • Recipe adjustments: If you made any adjustments to the recipe, like increasing or decreasing the percentage of a flavor, write it down. This will help you achieve the desired taste in future batches.

  • Personal preferences: If you made a recipe that you loved, write down any personal preferences you have, like increasing the sweetness or adding menthol. This will help you customize the recipe to suit your taste buds.

By taking notes, you can easily replicate your favorite e-juice flavors and make any necessary adjustments. Now that you’ve got your notes, it’s time to store the e-liquid properly to ensure it stays fresh and flavorful.

Advertisement

Store the E-Liquid

Storing your homemade e-liquid properly is crucial to maintaining its flavor and nicotine potency. Proper storage ensures that your e-liquid lasts longer and maintains its quality. The shelf life of e-liquid depends on various factors such as nicotine strength, flavoring, and the base used.

To store your e-liquid, you’ll need to keep it away from heat and direct sunlight. Heat and sunlight can cause the nicotine to degrade and alter the flavor. It’s best to store your e-liquid in a cool, dark place, such as a cabinet or drawer. Additionally, make sure to keep your e-liquid away from children and pets, as nicotine is poisonous if ingested. The table below summarizes the proper ways to store your e-liquid.

Factor to Consider Proper Storage
Temperature Cool and dark place
Sunlight Keep away from direct sunlight
Children and pets Keep out of reach

Now that you’ve learned about proper storage for your e-liquid, you can enjoy your custom vape juice!

Enjoy Your Custom Vape Juice!

After properly storing your homemade e-liquid, savoring its flavor and potency is like taking a sip of a fine wine. The customized flavor combinations and tailored nicotine strengths are just some of the benefits of making your own vape juice.

Compared to store-bought options, DIY e-liquids offer more control over the ingredients, allowing you to adjust the flavor and nicotine levels to your liking. To enjoy your custom vape juice, it’s important to use the right equipment and technique.

Advertisement

First, ensure that your vape device is compatible with the e-liquid you made. Then, prime your coil to prevent dry hits and burnt flavors. Finally, start with a low wattage setting and gradually increase it until you find the sweet spot for your desired flavor and vapor production.

With practice, you’ll be able to create a perfect blend that suits your taste and vaping preferences. Enjoy your custom vape juice!

Frequently Asked Questions

Is it safe to make my own vape juice at home?

When making vape juice at home, home safety and ingredients quality are key factors to consider. Ensure proper storage, handling, and labeling of ingredients. Purchase high-quality ingredients from reputable sources.

How much money can I save by making my own vape juice compared to buying it pre-made?

I saved a ton of money by making my own vape juice compared to buying pre-made. DIY vape juice cost comparison showed a 75% reduction in cost. Homemade e liquid quality analysis is crucial for safe and satisfying vaping.

Can I make vape juice without nicotine?

Yes, it is possible to make vape juice without nicotine. There are nicotine-free options available, and flavor customization is still possible without nicotine. It’s important to carefully measure ingredients and follow safety precautions when making your own vape juice.

Advertisement

How long does it take to steep the e-liquid, and why is this step necessary?

Like aging wine, steeping e-liquid is a crucial process that allows flavors to develop fully. The steeping process can take anywhere from a few days to several weeks, depending on the recipe. It’s necessary to achieve optimal taste and quality.

Are there any special precautions I need to take when mixing the ingredients or handling nicotine?

When mixing vape juice, it’s crucial to take mixing precautions and handle nicotine safely. Nicotine is a toxic substance that can cause harm if ingested or absorbed through the skin, so gloves and eye protection should be worn.

Conclusion

Well, after all that effort, I’ve finally made my own vape juice.

I followed all the steps, gathered all the ingredients and equipment, and calculated the perfect recipe for my desired flavor profile.

I steeped the e-liquid, tested and adjusted it to my liking, and stored it in a cool, dark place.

Advertisement

It’s ironic that after all that work, I’m left wondering if it was worth it.

Sure, I have a unique blend of vape juice that no one else has, but was the time and effort worth the end result?

Maybe it’s just me, but I think I’ll stick to buying pre-made vape juice from now on.

At least I know exactly what I’m getting and can save myself the hassle of making it myself.

Advertisement

Continue Reading
Advertisement

Affiliate disclaimer
As an affiliate, we may earn a commission from qualifying purchases. We get commissions for purchases made through links on this website from Amazon and other third parties.

Advertisement

Trending

Copyright © 2024 The Graceful Kitchen Affiliate disclaimer As an affiliate, we may earn a commission from qualifying purchases. We get commissions for purchases made through links on this website from Amazon and other third parties.