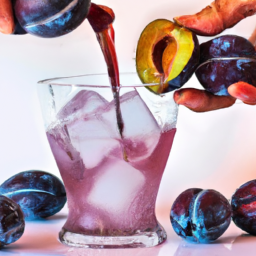
Summer is here, which signals the perfect time to enjoy cool and tasty fruit juices. Among the myriad of fruit juice options available, plum juice frequently goes unnoticed. This beverage offers a delightful mix of sweetness and tartness, making it ideal for the warm summer weather.
So, if you’re looking to switch up your usual juice routine and try something new, I have just the recipe for you!
Before we get started, let me just say that making plum juice is easier than you might think. All you need are a few simple ingredients, some basic cooking supplies, and a little bit of time. Plus, the end result is a delicious and healthy beverage that you can enjoy all summer long.
So, grab your apron and let’s get started on making some homemade plum juice!
Key Takeaways
- Choose firm, plump plums without bruises or soft spots for the best results.
- Cook plums with water and sugar until soft and then blend until smooth and creamy.
- Add flavor additives like cinnamon sticks or lemon juice to enhance the taste.
- Serve chilled with ice cubes, mint, or plum slices and pair with light appetizers or substantial meals.
Gather Your Ingredients
Before you can get started with making plum juice, you’ll need to gather all of your ingredients. The ingredients you’ll need are fresh plums, water, sugar, and lemon juice.
Fresh plums are the key ingredient, so make sure to choose the right ones. I’ll discuss how to choose the right plums in the next section.
Plum juice is a refreshing and healthy drink that can provide many benefits to your body. It’s a great source of vitamins, minerals, and antioxidants that can boost your immune system and promote overall well-being.
To incorporate plum juice into your daily diet, you can drink it as a standalone beverage or mix it with other juices to create a delicious and nutritious blend.
Now, let’s move on to the next step and learn how to choose the right plums for making plum juice.
Choose the Right Plums
First things first, you gotta pick the juiciest, most mouth-watering plums you can find if you want your juice to be out-of-this-world delicious!
There are countless plum varieties out there, but not all are ideal for juicing. Some of the best plum types for making juice include Santa Rosa, Elephant Heart, and Friar.
When choosing your plums, make sure to look for ones that are plump, firm, and free from any bruises or soft spots. Additionally, it’s important to consider the ripeness levels of the plums.
Overripe plums can make the juice too sweet and overly fragrant, while underripe ones can create a tart and astringent taste. The ideal plum for juicing is one that falls in the middle, with a slight give when pressed but not too soft.
Once you have picked out the perfect plums, it’s time to move on to the next step of cleaning and prepping them for juicing.
Without further ado, let’s get into how to clean and prep the plums for making the perfect plum juice.
Clean and Prep the Plums
I always start by washing my plums thoroughly under running water to remove any dirt or debris. Then, I cut them in half and remove the pits with a sharp knife. It’s important to be careful when removing the pits, as they can be slippery and difficult to handle.
Adjust the paragraph structure in the Input to logically group complete sentences on their own lines, with a double new line after. Use contractions.
Washing
To ensure the purity of your plum juice, give those plums a good wash! The importance of rinsing can’t be overstated, especially if you’re using non-organic plums. Pesticides and other chemicals can stick to the skin and could end up in your juice if not thoroughly washed off.
Even if you’re using organic plums, it’s still important to wash them to get rid of any dirt or debris that may have accumulated during transport. When washing your plums, use clean running water and gently rub each one to remove any dirt or residue.
I like to use a colander for convenience, but you can also wash them one by one in a bowl of water. Once the plums are clean, you’re ready to move on to the next step of removing the pits.
Removing Pits
Now that you’ve washed your plums, it’s time to easily remove their pits by using some pit removal techniques.
One way to do this is to use a sharp knife and slice the plums in half, then twist the halves to separate them and remove the pits. Alternatively, you can use a cherry pitter or a small spoon to scoop out the pits. Whichever method you choose, make sure to discard the pits and set the plum halves aside for juicing.
Once you’ve removed all the pits, you can start to think about how to use your plum juice.
One fun idea is to incorporate it into cocktails for a sweet and tangy twist. Try mixing plum juice with vodka, ginger beer, and lime juice for a refreshing summer drink. Or add a splash of plum juice to a classic margarita for a fruity twist.
But before we can start mixing drinks, we need to cook the plums to extract the juice.
Cook the Plums
After washing and cutting the plums, they should be cooked in a pot with water and sugar until they become soft and tender. This process is essential in releasing the juices from the plums which will be used to create the juice.
Here are some tips to make sure your plums are cooked to perfection:
-
Use the simmering technique: This method allows the plums to cook evenly without burning. Start by bringing the mixture to a boil, then reduce the heat to low and let it simmer for about 20-30 minutes.
-
Add flavor additives: Enhance the flavor of your plum juice by adding cinnamon sticks, cloves, or even a splash of lemon juice to the mixture. These additives will bring out the natural sweetness of the plums and add depth to the overall flavor.
-
Monitor the consistency: Keep an eye on the mixture to make sure it doesn’t become too thick or too thin. The goal is to create a smooth, velvety texture that is perfect for sipping on a hot summer day.
Once the plums are cooked, it’s time to blend the plum mixture. This step will help create a smooth and even consistency, making it easier to strain and extract the juice.
Blend the Plum Mixture
Once the plums have been cooked to perfection, it’s time to blend them until they are smooth and creamy, creating a velvety mixture that is ready to be strained and transformed into a refreshing beverage. There are a few blender options to choose from, depending on your preference and what you have on hand. For a quick and easy option, a regular countertop blender will do the job just fine. However, if you want a smoother consistency, a high-powered blender such as a Vitamix or Ninja blender may be a better choice.
As you blend the plum mixture, consider adding other fruits or flavors to enhance the taste. Some popular flavor combinations include adding ginger for a spicy kick, or even blending in some fresh mint leaves for a refreshing twist. The possibilities are endless, so feel free to get creative and experiment with different flavors. Once the mixture is smooth and creamy, it’s time to move on to the next step of adding water to achieve the perfect balance of sweetness and tartness.
Add Water
Let’s dive into the next step and add some water to our velvety plum mixture. Adding water benefits the texture and taste of the juice, creating the perfect balance of sweetness and tartness for a refreshing summer beverage.
As we add water to the mixture, we can adjust the amount to our preference. If we prefer a sweeter juice, we can add less water, or if we want a lighter juice, we can add more water. The key is to find the perfect balance that suits our taste.
While water is the most common option for diluting the plum juice, there are other alternatives to consider. For example, we can use coconut water or sparkling water to add a unique flavor and texture to the juice. Alternatively, we can add a splash of lemon juice to add more tartness and freshness to the juice.
Experimenting with different options can lead to new and exciting flavors. Now that we’ve added water or another option to the plum mixture, let’s move on to the next step and chill the plum juice.
Chill the Plum Juice
Ah, the moment we’ve all been waiting for – time to pop that deliciously chilled plum elixir and bask in the sweet, tangy goodness. But wait, how do we properly chill plum juice?
Here are some tips to make sure your plum juice is perfectly chilled:
-
Place the juice in the refrigerator for at least 1 hour before serving.
-
Pour the juice into a glass and add ice cubes for an extra chill.
-
Freeze the plum juice into ice cubes and use as a tasty addition to cocktails.
-
Chill the juice in a bucket of ice to keep it cold for longer periods of time.
Once your plum juice is chilled to perfection, it’s time to get creative with how you use it in cocktails. Mix it with some sparkling water for a refreshing non-alcoholic beverage, or add a splash to your favorite gin or vodka cocktail for a unique twist. The possibilities are endless with this versatile and delicious juice.
Now that we have our perfectly chilled and versatile plum juice, let’s move on to the final step of serving and enjoying it.
Serve and Enjoy
Now that you’ve got your chilled plum elixir ready, it’s time to savor the sweet, tangy taste and enjoy the fruits of your labor.
There are many presentation ideas that you can use to elevate the drinking experience. You can add some ice cubes and a sprig of mint to the glass to give it a refreshing twist, or pour the juice into a fancy glass and garnish it with a slice of plum and a sprinkle of cinnamon. The possibilities are endless, and you can let your creativity run wild.
If you want to take it a step further, you can also pair the plum juice with some snacks or dishes. The sweet and sour flavor of the juice goes well with light appetizers such as crackers and cheese or with a fruit salad. For a more substantial meal, you can serve it with roasted chicken or grilled fish. Whatever your preference, the plum juice will add a burst of flavor to any dish.
Now, let’s talk about how to store the plum juice to ensure its freshness.
Storing the Plum Juice
To keep the plum elixir fresh, it’s best to store it in an airtight container in the fridge, so it stays as fresh as a daisy. The cool temperature of the fridge will help preserve the juice for a longer period.
It’s essential to use a container that is airtight, so the flavor and aroma of the juice don’t escape, altering its taste. If you want to store the plum juice for an extended period, freezing is an excellent option.
Pour the juice into ice cube trays and freeze them. Once the cubes are frozen, remove them from the tray and store them in a freezer-safe container. Frozen plum juice cubes can last for up to three months.
When you’re ready to use the juice, thaw the cubes in the fridge or at room temperature. Transitioning into tips and variations, there are numerous ways to enjoy the plum juice.
Adding a sprig of mint or a slice of lemon to the drink can give it a refreshing twist. Alternatively, you can mix the juice with other fruits to create a unique blend. The possibilities are endless, so don’t be afraid to experiment!
Tips and Variations
There are countless ways to jazz up your homemade plum elixir, making it a versatile and customizable drink for any occasion.
One of my favorite ways to experiment with plum juice is by mixing it with other fruits, such as strawberries or raspberries, to create a refreshing and fruity blend.
Adding a sprig of mint or a slice of lemon can also add a refreshing twist to the drink, making it perfect for a hot summer day.
When it comes to flavor combinations, the possibilities are endless.
For a more tropical feel, adding pineapple or coconut can give the drink a fruity and exotic taste.
For a more savory option, adding ginger or cinnamon can add a warm and spicy kick to the drink.
When serving the plum juice, consider adding ice cubes or freezing the juice into popsicles for a fun and refreshing treat.
With so many options, you can never go wrong with experimenting with different flavors and serving suggestions to create your perfect plum juice.
Frequently Asked Questions
How many plums should I use to make a single serving of plum juice?
For a single serving of plum juice, I typically use about 4-5 plums. Of course, this can vary depending on personal preference and the size of the plums. There are many variations of plum juice recipes to try!
Can I use frozen plums instead of fresh ones?
As they say, "when life gives you frozen plums, make plum juice."While fresh plums are ideal, frozen plums can be a great alternative. Pros include longer shelf life and convenience, but cons may be texture and taste differences.
How long will the plum juice last if I store it in the fridge?
The shelf life of plum juice depends on how it’s stored. If refrigerated in an airtight container, it can last up to a week. To prolong its freshness, add lemon juice or freeze in ice cube trays.
Is it necessary to add water to the plum mixture before blending?
Blending techniques for plum juice vary, but adding water can enhance the texture. Plum juice benefits include promoting digestion and offering a rich source of vitamins and minerals.
Can I add sweeteners like sugar or honey to the plum juice?
Yes, I can add sweeteners like sugar or honey to the plum juice. However, I prefer to keep it natural and enjoy the health benefits of the fruit’s natural sweetness. Plum juice is rich in antioxidants and may aid in digestion.
Conclusion
Well, that’s it! You now know how to make delicious and refreshing plum juice at home. I hope you enjoy making and drinking it as much as I do.
But before you go, there’s one important thing I want to mention. As you may have noticed, making plum juice is not a difficult process, but it does require some time and effort. So, if you’re planning on making plum juice for a special occasion or as a gift for someone, I recommend giving yourself plenty of time to prepare and perfect your recipe.
Remember, the key to a great plum juice is using ripe, juicy plums and giving them enough time to cook and blend properly. So, don’t rush the process and be patient. Trust me, the end result is worth it!


