I love cottage cheese, but I always thought I had to buy it from the store. I was pleasantly surprised to learn that I can actually make it at home with just a few simple ingredients, including lemon juice!
Making cottage cheese with lemon juice is easy and fun, and it’s a great way to impress your friends and family with your culinary skills. To make cottage cheese with lemon juice, you only need milk, lemon juice, and salt.
The process is simple and takes only a few hours from start to finish. And the best part? You can customize the flavor to your liking by adding spices or herbs. So why not give it a try and make your own batch of homemade cottage cheese?
It’s healthier, more delicious, and more satisfying than the store-bought kind!
Key Takeaways
- Homemade cottage cheese is free from preservatives and added sugars, making it a healthier option.
- Making cottage cheese at home is cost-effective and requires only a few simple ingredients – milk, lemon juice, and salt.
- Measuring accuracy is crucial during the curdling process, which takes around 10-15 minutes.
- Homemade cottage cheese can be customized in terms of flavor and used in a variety of recipes, allowing for endless possibilities for experimentation.

Zulay Kitchen Powerful Milk Frother Wand With Duracell Batteries – Ultra Fast Handheld Drink Mixer – Electric Whisk Foam Maker for Coffee, Lattes, Cappuccino & Matcha – Z1 Motor – Black
MAKE RICH, CREAMY FROTH IN SECONDS: We coffee lovers are serious when it comes to our coffee. The…
As an affiliate, we earn on qualifying purchases.
As an affiliate, we earn on qualifying purchases.
Gather Your Ingredients
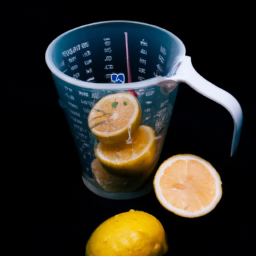
You’ll need to grab all of your ingredients before getting started, so make sure you have everything on hand to create the perfect homemade cottage cheese. For this recipe, you’ll need 1 gallon of whole milk, 1/4 cup of freshly squeezed lemon juice, and a pinch of salt. Don’t have lemons on hand? No problem! You can substitute it with distilled vinegar instead.
Not only is making your own cottage cheese a fun and rewarding process, but it also comes with some great health benefits. Homemade cottage cheese is free from any preservatives or added sugars, and it’s a great source of protein, calcium, and healthy fats.
With your ingredients ready, it’s time to move on to the next step of heating the milk.

IMUSA Lemon or Lime Manual Squeezer, Citrus Juicer for Max Extraction, Green
DURABLE ALUMINUM: This squeezer is made of durable long-lasting aluminum that will not rust over time and is…
As an affiliate, we earn on qualifying purchases.
As an affiliate, we earn on qualifying purchases.
Heat the Milk
Gosh, it’s getting hot in here! Better keep stirring that creamy liquid on the stove, or else it might boil over. Heating the milk is an essential step in making homemade cottage cheese. Not only does it help to sterilize the milk, but it also breaks down the proteins and makes them more accessible for the acid to curdle.
There are different methods to heat the milk for cottage cheese, including direct heat, double boiler, or microwave. Personally, I prefer direct heat because it’s the most straightforward and efficient way to heat the milk.
One of the benefits of making homemade cottage cheese is that you have control over the ingredients and the process. You can choose to use organic milk or add different seasonings to customize the flavor. Heating the milk is the first step towards creating a delicious and healthy snack.
Now that the milk is hot enough, it’s time to add the lemon juice and watch the magic happen.

The Big Cheese Ultimate Cheese Making Kit – Makes 10 Cheeses (Mozzarella, Mascarpone, Feta, Ricotta + 6 More) – 40 Batches with Rennet & Recipe Book
THE ULTIMATE CHEESE MAKING KIT — The cheese kit that makes you say, “Well, that was easy!” In…
As an affiliate, we earn on qualifying purchases.
As an affiliate, we earn on qualifying purchases.
Add the Lemon Juice
So, now that I’ve got the milk heating up, it’s time to add the lemon juice. I’ll need to measure out just the right amount of lemon juice to make sure my cottage cheese turns out just right.
Once I have the juice measured out, I’ll slowly add it to the milk while stirring gently.
Measure the Lemon Juice
First, grab a measuring cup and pour in a half cup of freshly squeezed lemon juice. It’s important to measure the lemon juice accurately to ensure that the cottage cheese sets properly. Measuring accuracy is crucial when making cottage cheese with lemon juice because using too little or too much can affect the curdling process and lead to a less than desirable texture.
If you don’t have fresh lemons on hand, you can also use alternative acid sources such as white vinegar or apple cider vinegar. However, keep in mind that the amount needed may vary slightly depending on the acidity level of the vinegar. Once you have measured out the lemon juice, you are ready to move on to the next step and add it to the milk.
Add the Lemon Juice to the Milk
Now it’s time for you to add the tangy liquid to the warm milk, stirring gently until the magic begins and the milk starts to curdle.
Lemon juice is a popular choice for curdling milk because it’s easily available, inexpensive, and adds a subtle citrus flavor to the cheese. The acidity in lemon juice reacts with the proteins in the milk, causing them to coagulate and form curds. This is what separates the liquid whey from the solid curds, which are then drained and pressed to form cottage cheese.
Using lemon juice as a curdling agent has a few benefits over other alternatives. For example, vinegar is another popular choice, but it can sometimes impart a harsh flavor to the cheese. Lemon juice is also high in vitamin C, which can help to boost the immune system and support overall health.
If you don’t have lemon juice on hand, you can substitute it with other acidic liquids such as white vinegar or apple cider vinegar. However, the amount needed may vary depending on the type of acid used, so be sure to do some research beforehand.
Once you’ve added the lemon juice, it’s time to stir and wait for the curdling process to begin.

IMEEA 10oz / 300ml Butter Warmer Single-Serve Milk & Sauce Heating Pan 18/10 Tri-Ply Stainless Steel Mini Pot
Single-Serve Capacity: Holds up to 10oz / 300ml of liquid, designed specifically for single-serve use such as warming…
As an affiliate, we earn on qualifying purchases.
As an affiliate, we earn on qualifying purchases.
Stir and Wait
So, I’ve just added the lemon juice to the milk and now it’s time to stir and wait. I gently mix the two ingredients together until they’re well combined.
Then, I let the mixture sit for 10-15 minutes to allow the acid from the lemon juice to curdle the milk.
Mix the Milk and Lemon Juice
Once you’ve heated the milk, mix in some lemon juice to start the curdling process. I usually use about 1/4 cup of lemon juice for every 4 cups of milk. The acidity in the lemon juice causes the milk to curdle, separating the curds from the whey. This is the first step in making cottage cheese.
If you don’t have lemon juice on hand, you can use vinegar instead. Apple cider vinegar or white vinegar both work well as substitutes for lemon juice in a cottage cheese recipe. Additionally, if you have leftover lemon juice, you can use it for a variety of things such as salad dressings, marinades, or even as a natural cleaning solution. Once you’ve mixed the milk and lemon juice, it’s time to let the mixture sit for a bit to allow the curds to fully form.
Let the Mixture Sit
As the milk and acidic liquid mingle, they commence their dance of separation, creating a lumpy, bumpy mixture that needs time to fully form into a delectable treat. Depending on how long you let the mixture sit, the curds can range from small and tender to large and firm. Personally, I prefer to let the mixture sit for at least 30 minutes to ensure a creamier consistency.
However, if you’re in a rush, you can speed up the process by heating the mixture on low heat for a few minutes. Alternatively, you can use rennet or vinegar instead of lemon juice to separate the curds and whey. Each method yields slightly different results, so it’s worth experimenting to find the one that suits your taste preferences.
With the curds fully formed, it’s time to strain the mixture and get ready to enjoy your freshly made cottage cheese.
Strain the Mixture
Now that the mixture has rested, it’s time to strain out the liquid and reveal the creamy goodness that awaits – get ready for a mouthwatering treat!
To do this, you’ll need a cheesecloth or a fine-mesh sieve. If you’re using a cheesecloth, drape it over a large bowl. If you’re using a sieve, place it over a bowl or a saucepan. Slowly pour the mixture into the cheesecloth or the sieve, making sure to catch the curds and let the liquid drain out. You may need to use a spoon or a spatula to help the curds separate from the liquid.
Once you’ve strained the mixture, you’ll be left with a bowl of fresh, creamy cottage cheese. Congratulations! You can now use this cheese in a variety of creative ways, from spreading it on toast to adding it to your favorite recipes.
Not only is homemade cottage cheese delicious and versatile, but it also has many nutritional benefits. Cottage cheese is a great source of protein, calcium, and other essential nutrients, making it a healthy addition to your diet.
Now, it’s time to rinse the curds to remove any remaining lemon juice and to give the cheese a milder flavor.
Rinse the Curds
To get the perfect texture for your homemade cottage cheese, you’ll need to rinse the curds under cold water, gently squeezing them until the water runs clear and the cheese takes on a milder flavor. This is an important step in the cheese-making process as it removes any residual acid and impurities that may affect the final taste and texture of the cheese.
Here are some tips for achieving the perfect texture of cottage cheese through proper curd rinsing:
-
Use cold water: Cold water helps to solidify the curds and prevent them from breaking apart during rinsing. Avoid using hot water as it can cause the curds to melt and lose their shape.
-
Rinse gently: Be gentle when rinsing the curds to avoid breaking them apart. Use your hands to gently squeeze the curds to release any remaining acid and impurities.
-
Repeat the process: Rinse the curds several times until the water runs clear and the cheese takes on a milder flavor.
-
Drain well: After rinsing, drain the curds well to remove any excess water. This will help to achieve the desired texture of cottage cheese.
Now that the curds are rinsed, it’s time to add salt to your homemade cottage cheese.
Add Salt
Don’t forget to sprinkle some salt onto your rinsed curds, as this will enhance the flavor and bring out the natural taste of the cheese. Salt is an important ingredient when making cottage cheese, as it not only adds flavor but also helps to preserve the cheese. You can use any type of salt, such as sea salt or kosher salt, but make sure to add it in moderation.
To help you decide how much salt to add, here’s a helpful table:
| Amount of Curds | Amount of Salt |
|---|---|
| 1 cup | 1/2 teaspoon |
| 2 cups | 1 teaspoon |
| 4 cups | 2 teaspoons |
| 6 cups | 3 teaspoons |
| 8 cups | 4 teaspoons |
Adding salt is just one way to customize the flavor of your cottage cheese. There are many flavor options to choose from, such as adding herbs like dill or parsley, or adding spices like paprika or cumin. Not only can you make your cottage cheese taste great, but it also has many health benefits.
Customize Your Flavor
Get creative with your flavor choices by adding herbs, spices, or even fruit for a personalized twist on your homemade cottage cheese. The flavor combination is entirely up to you, and there are endless recipe variations to experiment with.
One of my favorite combinations is adding chopped chives and garlic powder for a savory kick. For a sweet option, try mixing in some diced strawberries or blueberries. You can also add a bit of honey or maple syrup to sweeten things up even more.
Don’t be afraid to try new flavor combinations and make this recipe your own. Get inspired by your favorite dishes and ingredients to create something unique.
Remember to taste as you go to ensure you’re getting the flavor you’re looking for. Now that you’ve added your desired flavors, it’s time to move onto the next step: storing your cottage cheese.
Store Your Cottage Cheese
When it comes to storing my homemade cottage cheese, I always make sure to choose the right storage container. A glass jar with a tight-fitting lid works well for me, but you can also use a plastic container.
The key is to keep your cottage cheese refrigerated to maintain its freshness and prevent spoilage. Trust me, a little extra care goes a long way in preserving the flavor and texture of your cottage cheese.
Choose a Storage Container
To keep your homemade cottage cheese fresh and delicious, grab a clean, airtight container like a mason jar or Tupperware. When choosing the right container, it’s important to consider the material, size, and reusability.
Plastic and glass are the two most common types of containers used for storing cottage cheese. Plastic containers are lightweight and shatterproof, making them a good option for on-the-go snacking. However, they also have a shorter lifespan and may retain odors and flavors. Glass containers are more durable and won’t absorb any unwanted smells or tastes. They are also a more eco-friendly option as they can be reused multiple times. When it comes to size, choose a container that fits your needs and leave some space at the top for air circulation. Lastly, opt for a container that can be reused to reduce waste and save money. Remember to always use an airtight container to prevent air and moisture from getting in and causing spoilage.
Keep Your Cottage Cheese Refrigerated
Don’t risk spoilage and always keep your homemade cottage cheese refrigerated. Refrigeration is crucial to maintaining the quality of your cottage cheese. Here are three reasons why refrigeration is important:
-
Benefits of refrigerating cottage cheese: Refrigeration slows down the growth of bacteria and other microorganisms that can cause spoilage. It also helps to preserve the texture and flavor of the cottage cheese. By keeping it at a consistent temperature, you can ensure that your homemade cottage cheese stays fresh and delicious for longer.
-
Tips for maintaining proper refrigeration temperature for cottage cheese: The ideal temperature for storing cottage cheese is between 35-40°F (1.6-4.4°C). To maintain this temperature, make sure your refrigerator is set to the proper temperature and that the cottage cheese is stored in the coldest part of the refrigerator. Also, be sure to keep the container tightly sealed to prevent air from getting in and causing the cheese to dry out or absorb unwanted flavors.
By following these tips and keeping your cottage cheese refrigerated, you can enjoy your homemade creation for days to come.
Enjoy Your Homemade Cottage Cheese
Now that you’ve made your own cottage cheese with lemon juice, take a moment to savor the creamy, tangy goodness and feel proud of your homemade creation! Homemade cottage cheese has numerous benefits, including being able to control the ingredients and avoiding any unwanted preservatives or additives. Plus, it’s a cost-effective option for those who love cottage cheese and want to save some money.
One of the great things about making your own cottage cheese is that it can be used in a variety of recipes. Try spreading it on toast with some fresh fruit for a healthy breakfast or mix it with herbs and spices for a tasty dip. It can also be used in baked goods or as a substitute for ricotta cheese in lasagna.
The possibilities are endless and it’s exciting to experiment with new recipes and flavor combinations. So go ahead, enjoy your homemade cottage cheese and get creative in the kitchen!
Frequently Asked Questions
Is it possible to use other citrus juices instead of lemon juice to make cottage cheese?
Choosing citrus juice substitutes for cottage cheese yields different taste comparisons. Lime juice produces a tangy kick, while orange juice adds a sweet twist. Homemade cottage cheese can be used in many alternative ways, like in pancakes or lasagna.
How long does the milk need to be heated before adding the lemon juice?
To achieve the right texture and acidity for cottage cheese, I heat the milk over medium heat for around 20 minutes. Then, I slowly add lemon juice until the curd separates from the whey. The heating duration and lemon acidity are crucial for the cheese-making process.
Can I use a different type of milk, such as almond or soy milk, to make cottage cheese?
As a dairy-free alternative, almond or soy milk can be used to make cottage cheese. However, nutritional differences between dairy and non-dairy options should be considered. Let’s explore the benefits and drawbacks of alternative milk options.
How long does it take for the mixture to strain and for the curds to form?
Straining time and curd formation speed depend on factors like the type of milk used and the temperature. Generally, it takes 1-2 hours for the mixture to strain and for the curds to form.
Can I use a cheesecloth or other type of strainer instead of a colander to strain the mixture?
Using a cheesecloth for straining cottage cheese can be a good alternative to a colander. The pros are that it can result in a smoother texture, but the cons are that it may take longer. Other citrus juices besides lemon can be used for flavor variations, but be mindful of their acidity levels.
Conclusion
Well, there you have it! Making homemade cottage cheese using lemon juice is surprisingly simple and satisfying.
I never thought I could create something so delicious and nutritious right in my own kitchen. It’s like a little piece of heaven in every bite.
As I sit here enjoying my freshly made cottage cheese, I can’t help but think about the famous line from Shakespeare’s Macbeth, ‘Out, damned spot!’
But instead of a spot of blood, I’m thinking about the spot on my grocery list where cottage cheese used to be. I no longer have to worry about running out because I can make it myself anytime I want.
And you can too! So go ahead, give it a try and impress your friends and family with your new culinary skills.