Connect with us

Juice

How Long Can Orange Juice Be Unrefrigerated

Published

on

As someone who enjoys the delicious flavor of orange juice, I often wonder how long it can be consumed without refrigeration before spoiling. The answer to this question is not simple, as there are several factors that can impact the freshness of orange juice.

In this article, I will delve into the science behind orange juice spoilage, the risks of consuming spoiled juice, and provide tips on how to store orange juice properly to maximize its shelf life.

Refrigeration is a crucial factor in maintaining the freshness and quality of food products, and orange juice is no exception. However, there may be situations where refrigeration is not readily available, such as during outdoor activities or power outages.

In these cases, it is important to understand how long orange juice can be safely left unrefrigerated before it becomes unfit for consumption. By understanding the factors that affect orange juice spoilage and taking proper storage measures, you can ensure that your orange juice stays fresh and safe to drink for as long as possible.

Key Takeaways

  • Lack of refrigeration can cause bacterial growth and foodborne illnesses in orange juice.
  • Proper storage and handling of orange juice can extend its shelf life and prevent spoilage, including sealing and refrigerating, using airtight glass containers, and avoiding exposure to direct sunlight and light.
  • Signs of spoiled orange juice include a sour smell or change in color, and consuming expired juice can lead to health problems such as food poisoning, allergic reactions, vomiting, diarrhea, and dehydration.
  • Processing methods such as heat treatment and high pressure processing can extend the shelf life of orange juice, while pectinase treatment increases juice yield but not shelf life.

The Importance of Refrigeration

Refrigeration is crucial in keeping orange juice fresh and safe to drink, so it’s important to chill it as soon as possible. The importance of refrigeration cannot be overstated because it has a significant impact on food safety.

When orange juice is left unrefrigerated for an extended period, it becomes a breeding ground for bacteria. These bacteria can cause foodborne illnesses, which can be severe or sometimes even fatal. The impact of lack of refrigeration on food safety is not limited to bacteria alone.

Advertisement

Other factors, such as heat and light, can also affect the freshness and quality of orange juice. Heat can cause the juice to ferment, which makes it taste sour and unpalatable. Light, on the other hand, can cause the juice to lose its color and nutrients. These factors, combined with the growth of bacteria, can lead to spoilage of the juice.

The subsequent section will discuss the various factors that affect the spoilage of orange juice.

Factors That Affect Orange Juice Spoilage

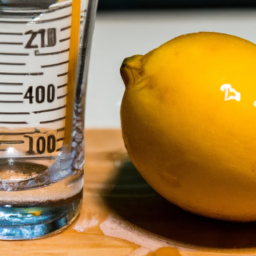
When it comes to orange juice spoilage, there are three main factors that come into play: exposure to air, temperature, and exposure to light. As someone who works in the food industry, I know how crucial it is to control these variables to ensure the freshness and safety of our products.

Let’s dive into each of these factors and how they can affect the shelf life of orange juice.
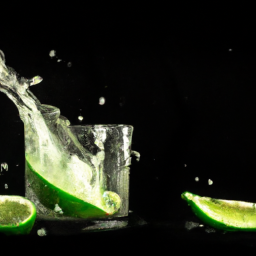
Exposure to Air

If you leave orange juice out in the open, you’ll notice that exposure to air can start to affect its taste and quality fairly quickly. This is because oxygen in the air reacts with the juice’s natural sugars, causing it to lose its flavor and freshness. The effects of oxygen on orange juice can be seen in the form of discoloration and a change in aroma.

Advertisement

As the juice becomes exposed to more air, its shelf life decreases, and it becomes more susceptible to spoilage. To better illustrate the effects of oxygen on orange juice, imagine a freshly squeezed glass of orange juice. At first, the juice is vibrant, sweet, and refreshing. However, as time passes and the juice is left out in the open, the effects of oxygen become more apparent.

The once bright orange color of the juice starts to fade, and the juice becomes cloudy. The aroma also changes, becoming less sweet and more acidic. It’s essential to keep in mind that the longer the juice is exposed to air, the more significant its effects will be.

With this in mind, let’s explore how temperature can also impact the shelf life of orange juice.

Temperature

Maintaining a consistent temperature is crucial in preserving the quality and freshness of freshly squeezed orange juice. The temperature at which you store orange juice can greatly affect its taste and nutritional value.

If the juice is kept at room temperature for too long, it can become sour and develop an off-taste. On the other hand, if the juice is stored in a refrigerator that’s too cold, it can lose its natural sweetness and become watery.

Advertisement

To ensure that your orange juice remains fresh and flavorful, it’s important to choose the right temperature for storage. The ideal temperature for storing freshly squeezed orange juice is between 32°F and 40°F. At this temperature range, the juice can retain its nutritional value and flavor for up to five days.

If you want to store the juice for a longer period, you can freeze it for up to six months. However, keep in mind that freezing can affect the texture and taste of the juice, so it’s best to consume it within a few weeks of freezing.

As temperature plays a significant role in preserving the quality of orange juice, it’s important to also consider the effects of light exposure.

Exposure to Light

To keep the sunshine in your glass, be mindful of the light exposure your freshly squeezed orange juice receives. Light can have a significant impact on the quality of your juice, especially when it comes to vitamin C content and flavor.

When exposed to light, vitamin C in orange juice can degrade quickly, resulting in a loss of nutritional value. Additionally, light can cause the juice to develop an off-flavor, leading to an unpleasant drinking experience.

Advertisement

The best ways to protect your juice from light exposure are to store it in a dark, cool place, such as a pantry or refrigerator. It’s also important to use opaque containers to prevent any light from penetrating the juice. If you’re using a clear container, it’s advisable to wrap it in aluminum foil or place it in a paper bag.

By taking these precautions, you can extend the lifespan of your orange juice and ensure that it remains fresh and delicious for as long as possible.

Now, let’s move on to the next topic of discussion: how long can orange juice be left unrefrigerated?

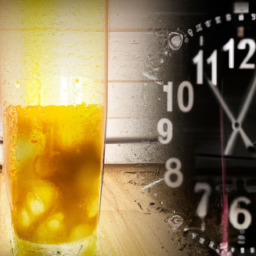
How Long Can Orange Juice Be Left Unrefrigerated?

Orange juice can only be left unrefrigerated for a short period of time before it loses its freshness and quality. This is because orange juice is a perishable product that’s prone to spoilage. When left unrefrigerated, the juice can quickly become a breeding ground for bacteria, which can lead to potential health risks.

To ensure the shelf stability of orange juice, it’s important to store it in the refrigerator at all times. If you need to transport orange juice, make sure to keep it in a cooler with ice packs to maintain its temperature. Remember that once orange juice has been opened, it should be consumed within a few days, even if it has been refrigerated.

Advertisement

By following these guidelines, you can enjoy fresh and safe orange juice every time. If you notice any signs that orange juice has gone bad, such as a sour smell or a change in color, it’s best to discard it immediately. These signs indicate that the juice has been contaminated and is no longer safe to consume.

To avoid potential health risks, always check the expiration date and store orange juice properly.

Signs That Orange Juice Has Gone Bad

You thought that glass of tangy goodness was safe to drink, didn’t you? But now you’re wondering if that pungent odor and strange color means your precious orange nectar has gone bad. Don’t worry, you’re not alone.

Orange juice that has gone bad can be a real disappointment, but there are ways to use expired juice rather than throwing it away. Here are some ideas to help you turn that spoiled orange juice into something useful:

  • Use it as a natural cleaner: Orange juice is acidic and can be used to clean surfaces like kitchen counters, floors, and even bathroom tiles.

  • Make a marinade or salad dressing: Add some herbs and spices to the juice and use it as a marinade for chicken or fish, or mix it with olive oil and vinegar for a flavorful salad dressing.

Another alternative use for spoiled orange juice is to use it as a fertilizer for plants. The acid in the juice can help to break down organic matter in the soil and provide nutrients for your plants.

Advertisement

But before you get too excited, it’s important to note the risks of consuming spoiled orange juice.

Risks of Consuming Spoiled Orange Juice

If you’re not careful, consuming expired orange juice can lead to serious health risks. Spoiled orange juice can cause food poisoning, which can lead to vomiting, diarrhea, and dehydration.

The most common spoilage causes are exposure to air, light, and heat. Bacteria thrive in warm temperatures and can grow rapidly in orange juice that’s been left unrefrigerated for too long.

Aside from food poisoning, consuming spoiled orange juice can also lead to other health risks such as allergic reactions. This is because the bacteria that grow in spoiled orange juice can produce toxins that can cause allergic reactions in some people.

It’s important to always check the expiration date of your orange juice, and to properly store it in the refrigerator to prevent spoilage. When it comes to storing orange juice properly, there are a few key things to keep in mind.

Advertisement

By properly sealing the container and storing it in the refrigerator, you can extend the shelf life of your orange juice and prevent it from spoiling too quickly. It’s also important to avoid exposing the juice to direct sunlight, as this can cause the juice to spoil faster.

How to Store Orange Juice Properly

Properly storing your OJ is key to keeping it fresh and safe to drink. If you have freshly squeezed orange juice, it’s best to store it in a glass container with an airtight lid. This will prevent any air from getting in and spoiling the juice. Plastic containers can also be used, but make sure they’re BPA-free and designed for food storage.

When storing orange juice, it’s important to keep it refrigerated at all times. If left unrefrigerated, bacteria can grow and cause the juice to spoil. Additionally, exposure to light can cause the juice to break down and lose its nutritional value.

To avoid this, store your orange juice in a dark, cool place away from direct sunlight. By properly storing your orange juice, you can ensure that it stays fresh and safe to consume for longer periods of time.

With these tips in mind, you can now prolong the shelf life of your orange juice. By taking the necessary precautions to store your juice properly, you can enjoy a refreshing glass of OJ any time you want without worrying about the risks of consuming spoiled juice.

Advertisement

Tips for Prolonging the Shelf Life of Orange Juice

When it comes to extending the shelf life of orange juice, there are a few tricks that I’ve picked up over time.

First and foremost, I always aim to buy fresh juice that hasn’t been sitting on the shelf for too long.

If you’re planning on storing juice for an extended period of time, using preservatives can be helpful.

Another option is to add citric acid to the juice, which can help to slow down the growth of bacteria and extend the shelf life.

Buying Fresh Juice

Freshly squeezed orange juice is a great way to start your day, and as the saying goes, "you can’t squeeze blood from a turnip,"so make sure to buy it fresh.

Advertisement

When it comes to buying fresh orange juice, there are two main options: juice bar options and juicing at home. Juice bars offer the convenience of having fresh juice prepared for you, but can be more expensive than juicing at home. However, juicing at home requires a juicer and the time to prepare the juice.

If you choose to buy fresh orange juice, make sure to check the expiration date and purchase it as close to the date it was made as possible. Freshly squeezed orange juice can typically last up to 3-5 days if stored in the refrigerator, but if left unrefrigerated, it can spoil much quicker.

In the next section, we will discuss using preservatives to prolong the shelf life of orange juice.

Using Preservatives

Preservatives may be necessary to keep your juice safe and healthy, but it’s important to understand the impact they can have on your body.

There are two types of preservatives: natural and synthetic. Natural preservatives, such as citric acid and vitamin C, are derived from plants and are generally safe to consume. Synthetic preservatives, on the other hand, are chemically created and may have negative effects on your health if consumed in large amounts.

Advertisement

When choosing a preservative for your orange juice, it’s important to consider the potential risks and benefits. Natural preservatives may be a safer option, but they may not be as effective as synthetic preservatives in preventing spoilage. Ultimately, the choice of preservative will depend on your personal preferences and the length of time you plan to keep the juice unrefrigerated.

To further extend the shelf life of your orange juice, you may consider adding citric acid. Citric acid is a natural preservative that can be found in citrus fruits, and it can help prevent the growth of bacteria and mold. However, it’s important to use citric acid in moderation, as consuming too much can lead to stomach upset and other digestive issues.

Adding Citric Acid

To really kick up the tanginess of your homemade OJ, consider adding a touch of citric acid. This natural preservative is found in citrus fruits and can help prolong the shelf life of your orange juice. Not only that, but it can also enhance the flavor and provide numerous health benefits.

One of the main benefits of adding citric acid to orange juice is its ability to boost the immune system. It’s packed with antioxidants that can help fight off harmful bacteria and viruses. Additionally, citric acid can aid in digestion by breaking down food more efficiently and supporting the production of enzymes in the body.

If you’re looking for recipes that use citric acid in orange juice, try adding a teaspoon to your morning smoothie or mixing it into a refreshing summer drink.

Advertisement

As beneficial as citric acid may be, it’s important to note that adding it to unrefrigerated orange juice will not necessarily make it safe to drink for an extended period of time. Other factors, such as how long the juice has been sitting out and the temperature it’s been exposed to, can also affect its safety and quality.

Other Factors to Consider

When it comes to the shelf life of orange juice, there are several other factors to consider beyond refrigeration. The type of orange juice, packaging, and processing methods can all impact its shelf life.

Additionally, it’s important to know whether it’s safe to consume expired orange juice and whether drinking spoiled orange juice can make you sick.

Type of Orange Juice

Nothing compares to a freshly squeezed glass of orange juice, but even pasteurized varieties can spoil quickly if left unrefrigerated. The type of orange juice you have can also affect how long it can last outside of the fridge.

Here are some things to consider:

Advertisement
  • Fresh vs. Concentrated: Fresh orange juice has a shorter shelf life than concentrated orange juice. This is because fresh juice hasn’t been pasteurized, which means it can spoil faster. Concentrated juice has been pasteurized, which gives it a longer shelf life.

  • Organic vs. Conventional: Organic orange juice may not have as long of a shelf life as conventional orange juice. This is because organic juice doesn’t contain any preservatives, which can extend the shelf life of conventional juice.

  • Added Ingredients: Orange juice that contains added ingredients, such as sugar or other fruit juices, may not last as long outside of the fridge. This is because these ingredients can promote the growth of bacteria and other microorganisms.

Considering these factors can help you determine how long your orange juice can last unrefrigerated. However, it’s important to note that these are just general guidelines, and the specific shelf life of your orange juice can depend on a variety of factors.

Now, let’s move on to the next section about packaging and how that can affect the shelf life of orange juice.

Packaging

As you reach for that carton of orange juice, you may not realize that the packaging it comes in can actually make a big difference in how fresh it stays.

Different types of packaging can have varying effects on the juice’s shelf life. For example, glass bottles are great for keeping the juice fresh and flavorful for a longer period of time, but they may not be the best option for long term storage due to their weight and fragility.

On the other hand, plastic bottles are lighter and more convenient to handle, making them a good choice for storage, but they may not be as effective at preserving freshness as glass bottles.

Advertisement

When it comes to the best packaging for long term storage, airtight containers are the way to go. These containers prevent air and moisture from getting in, which can cause the juice to spoil quickly.

One option is vacuum-sealed pouches that remove all the air from the container, but they may not be as readily available in grocery stores. Another option is Tetra Pak cartons, which are made of several layers of material to protect the juice from light and air. These cartons are also lightweight and easy to handle, making them a popular choice for long term storage.

Now, let’s move on to the next section about processing methods and how they can affect the shelf life of orange juice.

Processing Methods

One factor that significantly impacts the shelf life of packaged juice is the processing method used during production. Juice preservation is a critical aspect of fruit processing techniques.

Here are three sub-lists that highlight different processing methods and their effect on juice preservation:

Advertisement
  • Heat Treatment: This method involves heating juice to high temperatures to kill bacteria and enzymes that can cause spoilage. The heat treatment can extend the shelf life of juice by several months.

  • High Pressure Processing: This method involves applying high pressure to the juice, which inactivates microorganisms that cause spoilage. This method can preserve the juice for a few weeks to a few months.

  • Pectinase Treatment: This method involves adding pectinase to the juice, which breaks down the pectin in the fruit to release more juice. This method can increase the yield of juice, but it does not significantly impact the shelf life of the juice.

Understanding the impact of processing methods on juice preservation is crucial for ensuring the freshness and safety of packaged juice. Moving forward, it’s important to consider how these methods influence the quality of juice over time and how consumers can make informed decisions about drinking expired juice.

Can You Drink Expired Orange Juice?

Yes, you can still drink expired OJ, but it’s important to know the risks and signs of spoilage before taking a sip.

When orange juice is past its expiration date, it may not taste as fresh as it did when it was first bottled, but it isn’t necessarily harmful to drink. However, if the juice has been sitting unrefrigerated for too long, it can ferment and develop harmful bacteria that can cause illness.

It’s important to check the expiration date before drinking OJ and to store it in the refrigerator to prevent bacterial growth.

If you have expired orange juice that you’re not comfortable drinking, there are alternative uses for it. You can use it as a marinade for meat or as an ingredient in baked goods to add a citrusy flavor. Orange juice can also be used in homemade cleaning solutions as a natural degreaser or to remove stains from fabrics.

Advertisement

However, if you do decide to drink expired orange juice, be aware of the potential health risks and always check for signs of spoilage before taking a sip.

Have you ever wondered if drinking spoiled orange juice can make you sick?

Can You Get Sick from Drinking Spoiled Orange Juice?

Drinking spoiled OJ can lead to stomach discomfort and even food poisoning, so it’s crucial to be cautious when consuming expired beverages. Spoiled orange juice can contain harmful bacteria that can make you sick. Symptoms of consuming spoiled juice include diarrhea, vomiting, stomach cramps, and fever. In severe cases, it can even lead to hospitalization.

There are a few ways to detect spoiled juice. First, check for any visible signs of mold or discoloration. Spoiled juice may also have a sour or off taste and smell. If the juice has been unrefrigerated for an extended period, it’s best to err on the side of caution and throw it out.

It’s essential to consume only fresh, high-quality orange juice for optimal health benefits. How can you tell if orange juice has gone bad? One way is to check the expiration date and consume it before the expiration date. Another way is to check for any visible signs of mold or discoloration. Lastly, if the juice has an off taste and smell, it’s best to discard it.

Advertisement

It’s essential to practice safe food handling and prioritize your health when consuming any food or beverage.

How Can You Tell If Orange Juice Has Gone Bad?

Worried about whether your OJ is still good? Here’s a quick tip: check for signs of mold or discoloration, and trust your senses- if it smells or tastes off, it’s best to toss it.

But what if you accidentally left your orange juice out on the counter for too long? How can you tell if it’s still safe to drink? Here are four things to look out for:

  1. Check the expiration date: If your orange juice has passed its expiration date, it’s best to err on the side of caution and throw it out.

  2. Look for signs of spoilage: Mold, discoloration, and a sour smell are all indications that your juice may have gone bad.

  3. Consider the container: If your juice has been sitting in an open container for an extended period of time, it’s more likely to spoil.

  4. Use your senses: When in doubt, trust your sense of smell and taste. If your orange juice smells or tastes off, it’s best to dispose of it.

If you do find that your orange juice has gone bad, don’t worry- there are still ways to put it to good use. You can use it as a marinade for meat or vegetables, add it to smoothies or cocktails, or even use it as a natural cleaning solution.

And if you’re looking for an alternative to orange juice, try mixing up your morning routine with grapefruit juice, cranberry juice, or even a refreshing glass of water with lemon.

Advertisement

Frequently Asked Questions

What are the benefits of drinking orange juice?

It’s no coincidence that orange juice is packed with nutritional content. As for the best time to consume, it’s before a meal to aid in digestion. Trust me, the benefits of drinking orange juice are worth it.

How many oranges are typically used to make one serving of orange juice?

Typically, one serving of orange juice requires about three to four medium-sized oranges. The juicing process efficiency can vary based on the type of juicer used, but it’s important to consider the size of the oranges when determining the amount needed.

Can orange juice be frozen to prolong its shelf life?

Yes, orange juice can be frozen to extend its shelf life. It’s important to transfer the juice to a freezer-safe container, leaving some room for expansion. Thaw in the refrigerator and consume within a few days. Other storage options include refrigeration and pasteurization.

Is it safe to consume orange juice past its expiration date if it has been refrigerated?

I cannot recommend consuming refrigerated orange juice past its expiration date. While refrigeration can slow down the spoilage process, it does not guarantee safety. Extension of the expiration date is not advisable for safety reasons.

How does the packaging of orange juice affect its shelf life?

The packaging impact on orange juice shelf life is significant. Oxygen exposure can lead to oxidation and spoilage. Proper packaging, such as airtight containers, can extend the shelf life of orange juice.

Advertisement

Conclusion

In conclusion, it’s crucial to refrigerate orange juice to prevent it from going bad. Leaving orange juice unrefrigerated for too long can lead to spoilage, affecting its taste, aroma, and nutritional value.

The duration of unrefrigerated orange juice depends on various factors, such as the temperature and the presence of bacteria. Consuming spoiled orange juice can lead to health risks, such as vomiting, diarrhea, and stomach cramps.

Therefore, it’s essential to know the signs of spoilage and discard any orange juice that exhibits them. Proper storage and handling of orange juice can help prolong its shelf life and maintain its quality.

Remember to always keep orange juice refrigerated and consume it within its expiration date. With these tips, you can enjoy a refreshing glass of orange juice without worrying about its safety.

It’s as easy as squeezing juice out of an orange!

Advertisement

Continue Reading
Advertisement

Juice

How To Freeze Peaches Without Lemon Juice

Published

on

By

As a lover of all things fruity and sweet, I eagerly look forward to peach season every year. There’s nothing quite like biting into a juicy, ripe peach on a hot summer day. However, sometimes I end up with more peaches than I can eat before they go bad. That’s when freezing them comes in handy, preserving the taste of summer for months to come.

However, many recipes for freezing peaches call for lemon juice, which can alter the natural flavor of the fruit. As someone who wants to enjoy the pure taste of peaches, I’ve developed a method for freezing them without using lemon juice.

In this article, I’ll share my step-by-step process for freezing peaches without any added ingredients, so you can enjoy the full, sweet flavor of summer peaches all year round.

Key Takeaways

  • Peeling and slicing peaches makes them easier to use
  • Blanching peaches can make peeling easier
  • Too much sugar syrup can affect the texture and taste of peaches
  • Frozen peaches can last up to 6 months

Choosing the Right Peaches

You’ll want to make sure you pick the juiciest, most flavorful peaches – they’ll make all the difference in your frozen treats!

When it comes to peach ripeness, you’ll want to choose peaches that are fully ripe, but not overripe. Look for peaches that are slightly soft to the touch, with a sweet aroma. Avoid peaches that are hard or have green patches, as these aren’t yet ripe enough to use.

Another important factor to consider is the flavor profile of the peach. Different varieties of peaches have varying levels of sweetness and tartness, so choose a variety that suits your taste buds.

Advertisement

For example, if you like your peaches on the sweeter side, look for varieties like the Elberta or O’Henry. If you prefer a more tart flavor, the Red Haven or Loring may be better options.

Once you’ve chosen your perfect peaches, it’s time to move on to preparing them for freezing.

Preparing Your Peaches

Before freezing your peaches, it’s important to prepare them properly.

First, I like to wash and dry the peaches thoroughly to remove any dirt or debris.

Then, I use a peeler to remove the skin and slice the peaches into pieces that are the perfect size for my recipes.

Advertisement

These steps ensure that my frozen peaches are clean, easy to use, and ready to be enjoyed whenever I want.

Washing and Drying

After picking fresh peaches, it’s important to gently wash and pat them dry before beginning the freezing process. This step is crucial in ensuring that the peaches remain fresh and free from any dirt or debris.

Here are some tips for washing and drying your peaches:

  1. Importance of ripeness: Make sure your peaches are fully ripe before washing them. This will ensure that they have the best flavor and texture when you freeze them.

  2. Drying techniques: To dry your peaches, gently wipe them with a clean cloth or paper towel. Avoid using a harsh scrubbing motion as this can damage the delicate skin of the peaches.

  3. Air drying: Alternatively, you can also air dry your peaches by placing them on a clean towel or rack and leaving them to dry naturally. This method may take longer but it’s a great way to avoid any damage to the peaches.

Once your peaches are washed and dried, you’re ready to move on to peeling and slicing them for freezing.

Peeling and Slicing

As you sink your teeth into a juicy peach, imagine how satisfying it would be to slice and peel them for freezing. Before you start slicing, it’s important to peel your peaches. You can use a vegetable peeler or a knife to remove the skin. If the peach is ripe, the skin should come off easily. If you’re struggling, try blanching the peaches to loosen the skin.

Advertisement

Blanching is a technique that involves boiling the peaches for a short period of time and then immediately transferring them to an ice bath to stop the cooking process. This will cause the skin to loosen, making peeling much easier.

Once you have peeled your peaches, it’s time to slice them. You can slice them into wedges or cubes, whatever works best for you. It’s important to note that frozen peaches tend to be a bit softer than fresh ones, so you may want to slice them a bit thicker than you normally would.

If you don’t want to use the blanching technique, there are other freezing alternatives. You can simply slice and freeze the peaches as they are, or you can add a bit of sugar or ascorbic acid to help preserve their color and texture.

With your peaches sliced and ready to go, it’s time to move on to treating them before freezing.

Treating Your Peaches

First, you’ll need to wash your peaches thoroughly to remove any dirt or debris. Once your peaches are clean, you can start treating them.

Advertisement

Blanching peaches is a great way to remove the skin without losing any of the fruit’s flavor. To do this, bring a large pot of water to a boil and drop in your peaches for about 30 seconds. Use a slotted spoon to remove the peaches, and immediately transfer them to a bowl of ice water. This will stop the cooking process and make it easier to remove the skin. Once the peaches are cool enough to handle, you can easily peel off the skin with a knife or your fingers.

After blanching and peeling your peaches, it’s time to treat them with a sugar syrup. This will help preserve the peaches and keep them from browning. To make the syrup, combine equal parts sugar and water in a saucepan and heat until the sugar dissolves. Allow the syrup to cool completely.

Once the syrup is cool, you can add your peaches and let them soak for about 10 minutes. This will give them a nice sweet flavor and help keep them fresh. Now that your peaches are blanched, peeled, and treated with sugar syrup, you’re ready to freeze them.

Note: Avoid using too much sugar syrup as it can affect the texture and taste of the peaches.

Freezing Your Peaches

Now that we have prepared our peaches, it’s time to freeze them without using lemon juice. To achieve this, we will be using a sugar substitute and blanching the fruit. The sugar substitute will help preserve the color and flavor of the peaches, while blanching will help remove the skin easily.

Advertisement

To start, let’s prepare the sugar substitute. In a mixing bowl, combine 1 cup of sugar substitute with 1 cup of water and stir until the sugar substitute is dissolved. Next, we will blanch the peaches. Bring a large pot of water to a boil and carefully place the peaches in the boiling water for 30 seconds to 1 minute. Remove the peaches from the boiling water and immediately transfer them to a bowl of ice water to stop the cooking process. Once the peaches have cooled, remove the skin and pit them. Finally, slice the peaches into desired sizes and place them in a freezer-safe container. Pour the sugar substitute solution over the peaches until they are completely covered and freeze them for up to 6 months.

With our peaches now frozen, it’s time to move on to the final step of storing them properly.

Storing Your Frozen Peaches

When it comes to storing your frozen peaches, there are a couple of key points to consider. First, it’s important to choose the right container to store your peaches in. I like to use freezer-safe bags or containers with tight-fitting lids to keep my peaches fresh and prevent freezer burn.

Second, labeling your containers is crucial to avoid confusing your peaches with other frozen fruits or vegetables. I always make sure to write the date and contents on each container so I can easily identify what’s inside and when I froze it.

Containers

To ensure your frozen peaches stay fresh, it’s important to choose the right container. Mason jars are a great option because they’re sturdy, airtight, and reusable. They won’t leak, which helps keep your freezer clean. Make sure to leave some headspace at the top of the jar to allow for expansion during freezing. This will prevent your jars from cracking or breaking in the freezer.

Advertisement

Another option for freezing peaches is to use plastic bags. Make sure to choose freezer-safe bags that are thick and durable. These bags will protect your peaches from freezer burn and prevent any leaks. When filling the bags, try to remove as much air as possible before sealing. This will help prevent ice crystals from forming and keep your peaches fresh for longer.

Now that you have chosen the right container for your frozen peaches, it’s important to label them with the date and contents. This will help you keep track of how long they’ve been in the freezer and make it easier to find them when you need them.

In the next section, we’ll discuss the importance of labeling your frozen peaches in more detail.

Labeling

Labeling your frozen peaches is essential to ensure that you don’t end up with a bunch of anonymous fruits in your freezer. When it comes to labeling tips, use a permanent marker to write the date of freezing, the quantity, and any other relevant information. This way, you’ll know how long the peaches have been in your freezer and when they’ll expire.

It’s also helpful to include the type of peaches you have frozen, especially if you have multiple varieties. The importance of storage date cannot be overstated. Not only does it help you keep track of how long the peaches have been frozen, but it also helps you plan your meals accordingly.

Advertisement

You can easily determine which bags or containers of peaches need to be used up first based on the date of freezing. And when it comes to thawing your peaches, you’ll have a better idea of how long they’ve been frozen and whether they’re still good to eat. Speaking of thawing, let’s discuss the next step in the process.

Thawing Your Peaches

When thawing my frozen peaches, I usually have two options: refrigeration or room temperature. If I plan ahead, I prefer to thaw my peaches in the refrigerator overnight. This method allows for a slow, even thaw and results in firmer peaches with less juice.

I’ve found that when I thaw peaches at room temperature, they tend to become mushy and lose their texture. So, I always opt for refrigeration when possible. Plus, it’s a hands-off approach that requires minimal effort on my part.

Refrigeration

If you’re short on time, the quickest way to preserve your peaches is by refrigerating them. This method is perfect if you plan to use the peaches within a few days. Storing peaches in the fridge will slow down the ripening process, which means they’ll stay fresh for longer. Here’s a table to help you better understand the different storing options and the shelf life of peaches:

Storing Option Shelf Life
Room Temperature 1-2 Days
Refrigeration 3-5 Days
Freezing 8-12 Months

As you can see, refrigeration can extend the shelf life of your peaches by a few more days. However, if you plan to keep your peaches for an extended period, it’s better to freeze them. In the next section, I’ll explain how to freeze peaches without lemon juice.

Advertisement

Room Temperature

Sometimes, you just can’t resist the sweet scent of a fresh peach sitting on your kitchen counter at room temperature. And the good news is, room temperature storage can actually benefit your peaches!

When kept at room temperature, peaches continue to ripen and become softer and juicier. Plus, they’ll retain more of their natural flavor and nutrients.

But there are some best practices for handling room temperature peaches. First, make sure to keep them out of direct sunlight or heat sources, which can cause them to spoil more quickly. Second, inspect them regularly for any signs of bruising or mold, and remove any damaged fruit immediately. And finally, consume them within a few days of purchase for the best taste and texture.

Now that you’ve enjoyed your fresh peaches at room temperature, it’s time to freeze the rest for later use.

Using Your Frozen Peaches

Now that I’ve got my peaches frozen, I can’t wait to start using them in my baking, smoothies, and sauces.

Advertisement

When it comes to baking, frozen peaches are a great addition to pies, cobblers, and muffins.

For smoothies, I like to blend them with some yogurt and honey for a delicious and healthy treat.

Lastly, frozen peaches can also be used to make a sweet and tangy sauce that goes well with pork or chicken dishes.

Baking

You can easily add frozen peaches to your favorite baking recipes, giving your treats a sweet burst of flavor that will knock your socks off. Whether you’re making peach cobbler, peach pie, or peach muffins, frozen peaches are a great way to infuse your baked goods with the taste of summer all year round.

To help you get started, here are some recipe variations you can try with your frozen peaches:

Advertisement
Recipe Variation
Peach cobbler Add crumbled graham crackers to the topping for a crunchy texture
Peach pie Mix in some cinnamon and nutmeg for a warm, spicy flavor
Peach muffins Top with a streusel made from brown sugar, flour, and butter

When it comes to storage hacks, you can freeze your peaches in portioned sizes so that you can easily grab what you need for your recipe. Simply place sliced peaches on a baking sheet and freeze until solid, then transfer them to a freezer-safe bag. This way, you won’t have to worry about thawing more than you need.

Now that you know how to incorporate frozen peaches into your baking, let’s move on to the next section and learn how to make delicious peach smoothies.

Smoothies

Indulge in the sweet, creamy goodness of a peach smoothie, bursting with the taste of summer. Smoothies are a great way to use up the abundance of peaches you have on hand, and they make for a healthy and refreshing snack or breakfast option.

Here are three smoothie recipes you can try:

  • Peach and banana smoothie: Blend together one ripe banana, one peeled and sliced peach, one cup of almond milk, and a handful of ice cubes until smooth.
  • Peach and yogurt smoothie: In a blender, combine one cup of plain Greek yogurt, one sliced peach, one tablespoon of honey, and a splash of vanilla extract. Blend until smooth and creamy.
  • Peach and green smoothie: This smoothie is packed with nutritional benefits! Blend together one sliced peach, one cup of spinach, one banana, one cup of almond milk, and a handful of ice until smooth.

Smoothies are a delicious and easy way to enjoy the sweet taste of peaches while also getting a dose of vitamins and nutrients. But if you’re looking for something a little more savory, let’s move on to the next section about sauces and how you can use frozen peaches to make them.

Sauces

If you’re a fan of adding a little zing to your meals, a peach sauce is a must-try. It’s as versatile as ketchup and as tangy as mustard. Creating a delicious peach sauce is all about exploring flavor combinations and utilizing different cooking techniques.

Advertisement

For a sweet and savory flavor combo, try combining peaches with garlic, ginger, and soy sauce. Or, for a spicier kick, add in some red pepper flakes or jalapenos. When cooking the sauce, start by sautéing onions and garlic in a bit of oil before adding in your peaches and other desired ingredients. Let the sauce simmer until it thickens and the flavors meld together.

Now, if you’re looking for alternative methods of preserving peaches, there are a few options to consider. One such method is freezing, which can be done without the use of lemon juice.

Alternative Methods of Preserving Peaches

There are other ways to preserve peaches without using lemon juice, so let’s explore some alternative methods!

When it comes to preserving peaches, there are two main methods: canning and freezing. Canning involves boiling the peaches in a sugar syrup and storing them in airtight jars, while freezing simply requires washing, slicing, and freezing the peaches in a single layer on a baking sheet before transferring them to a freezer-safe bag. Both methods can preserve peaches for months, but freezing is a simpler and more convenient option for those who don’t have the time or equipment for canning.

If you’re looking for a more natural way to preserve your peaches, there are a few options that don’t involve adding any sugar or artificial preservatives. One method is to dehydrate the peach slices in a dehydrator or oven until they are completely dry and brittle. Another option is to ferment the peaches by submerging them in a saltwater brine for several days, which encourages the growth of beneficial bacteria that can help preserve the fruit. Finally, you can also store the peaches in a cool, dark place with good airflow, such as a root cellar or pantry, where they can slowly ripen and develop a sweeter flavor over time.

Advertisement

Now that we’ve explored some alternative methods for preserving peaches, let’s move on to common mistakes to avoid when freezing or canning them.

Common Mistakes to Avoid

Preserving peaches can be a tricky endeavor, as one wrong move can turn your sweet, juicy fruit into a mushy mess. When it comes to freezing peaches without lemon juice, there are a few common mistakes to avoid.

Firstly, make sure to avoid discoloration by blanching the peaches before freezing. This involves boiling the peaches for about 30 seconds, then immediately placing them in an ice bath to stop the cooking process. This will help maintain the bright color of your peaches.

Another important factor to consider is proper sealing techniques. If your peaches are not sealed tightly, they may become freezer burnt and lose their flavor. Make sure to use air-tight containers or freezer bags, and remove as much air as possible before sealing.

Label the containers with the date and contents, and store them in the freezer right away. By avoiding these common mistakes, you can enjoy your frozen peaches all year round without any problems.

Advertisement

Frequently Asked Questions

Can I freeze peaches that are not fully ripe?

I wouldn’t recommend freezing unripe peaches as they won’t have the same freezing quality as ripe ones. The peach ripeness is crucial for the freezing process to work well, ensuring the best texture and taste.

How long can I store frozen peaches?

To properly store frozen peaches, freeze them in batches and keep them in an airtight container. They can last up to 8-12 months in the freezer.

Can I use a vacuum sealer to freeze my peaches?

Yes, I can use a vacuum sealer to freeze my peaches. The advantages of vacuum sealing include extending the freezer life of the peaches and preventing freezer burn. However, the disadvantages include the cost of the vacuum sealer and the need for extra equipment.

Can I add sugar to the peaches before freezing them?

Adding sugar to peaches before freezing is a sweet way to preserve their flavor. While lemon juice has benefits for freezing, alternatives like sugar can give peaches a delicious taste.

Can I freeze peach slices instead of whole peaches?

Yes, I prefer freezing peach slices instead of whole peaches. It allows for more versatile use in recipes and quicker thawing. However, texture comparison between the two freezing methods may vary.

Advertisement

Conclusion

Well, there you have it, folks! The ultimate guide to freezing peaches without lemon juice.

I hope you found this article helpful and informative. Now that you know how to properly freeze your peaches, you can enjoy them all year round.

But wait, there’s more! Did you know that there are other methods of preserving peaches besides freezing? Canning and dehydrating are also great options. So, if you’re feeling adventurous, give those a try too!

Just remember to always choose the best quality peaches and follow the proper techniques for preserving them.

In conclusion, with a little bit of effort and know-how, you can enjoy the sweet taste of peaches no matter the season. So, go ahead and stock up on those peaches and get to preserving! Your taste buds will thank you.

Advertisement

Continue Reading

Juice

How To Get Beet Juice Out Of Carpet

Published

on

By

Have you ever had the experience of spilling beet juice on your carpet by accident, thinking it was the worst thing that could happen? Trust me, I know the feeling. The deep red stain it creates is famously tough to get rid of and can seem like an impossible task.

But fear not! With a bit of quick thinking and the right tools, you can successfully remove beet juice from your carpet and restore it to its former glory.

Picture this: you’re cooking up a storm in the kitchen, whipping up a delicious beet salad. As you’re slicing the beets, one slips out of your hand and lands on the carpet. Your heart drops as you watch the deep red juice seep into the fibers.

But don’t panic! In this article, I will guide you through the steps to effectively remove beet juice from your carpet, so you can get back to enjoying your delicious meal without any added stress.

So, let’s get started!

Advertisement

Key Takeaways

  • Act quickly to prevent the stain from setting in.
  • Use a vinegar solution to break down the stain and lift it from the carpet fibers.
  • Persistence and patience are key in fully removing stubborn stains.
  • Consider professional cleaning if the stain persists after multiple attempts.

Act Quickly

Don’t panic, but you need to act fast if you want to save your carpet from the stain of beet juice. The longer you wait, the harder it’ll be to remove the stain.

Start by using a clean cloth or paper towel to blot up as much of the juice as you can. Don’t rub the stain, as this’ll only make it worse. Instead, use a blotting technique, pressing down firmly on the stain to absorb as much of the liquid as possible.

Next, mix a vinegar solution by combining equal parts white vinegar and water. Apply the solution to the stained area using a clean cloth or sponge, and blot the area again. The vinegar solution will help to break down the stain and lift it from the carpet fibers.

Once you have blotted the area thoroughly, move on to the next step of gathering your cleaning supplies.

Gather Your Cleaning Supplies

Before embarking on the cleaning process, it’s important to prepare by gathering all the necessary supplies. To effectively remove beet juice stains from your carpet, you’ll need a few cleaning techniques and DIY options.

Firstly, you’ll need a clean white cloth or paper towel to blot the stain. Avoid using colored towels or sponges as they may transfer dye onto the carpet. You’ll also need a solution of warm water and mild dish soap, or a commercial carpet cleaner. Additionally, having a spray bottle filled with vinegar and water can also be helpful.

Advertisement

Once you’ve gathered all your cleaning supplies, it’s time to tackle the beet juice stain. Start by blotting the stain with a clean white cloth or paper towel to remove as much of the juice as possible. Avoid rubbing the stain as this can cause it to spread and become more difficult to remove.

After you’ve blotted as much as you can, apply your cleaning solution to the stain and allow it to sit for a few minutes. But before doing that, it’s important to test the cleaning solution in a small, inconspicuous area of the carpet to ensure it doesn’t cause any damage or discoloration.

Test the Cleaning Solution

Congratulations, you’ve decided to play a game of Russian roulette with your carpet by testing the cleaning solution in a small, inconspicuous area. This is an effectiveness test to see if the cleaning solution is suitable for your carpet.

To do this, you need to follow these steps:

  • Choose a small area of the carpet that isn’t visible, like a corner or under a piece of furniture.
  • Apply a small amount of the cleaning solution to the area.
  • Let it sit for a few minutes, then blot it with a clean cloth.

If the carpet doesn’t show any signs of discoloration or damage, then the cleaning solution is safe to use. However, if there are any adverse effects, it’s best to look for alternative solutions.

Now that you’ve tested the cleaning solution, it’s time to apply it to the affected area.

Advertisement

Apply the Cleaning Solution

Now it’s time to apply the cleaning solution to the affected area and restore your carpet’s appearance. Before starting the application process, it’s important to note that different carpets will have different cleaning requirements. Therefore, it’s crucial to follow the manufacturer’s instructions and test the cleaning solution on a small, inconspicuous area of the carpet before applying it to the stain.

Once you’ve determined that the cleaning solution is safe to use, you can begin the application process. There are several application techniques that can be used, including spraying, blotting, or dabbing the cleaning solution onto the stain. It’s important to ensure that the cleaning solution is evenly distributed over the affected area and that it penetrates deep into the carpet fibers.

With the right application techniques and a little bit of elbow grease, you should be able to remove the beet juice stain completely and restore your carpet to its original condition.

To ensure complete stain removal, it may be necessary to repeat the process a few times. However, it’s important to avoid over-saturating the carpet, as this can cause damage to the fibers and lead to further staining.

In the next section, we’ll discuss the steps required to repeat the process and achieve optimal results.

Advertisement

Repeat the Process

For optimal results, it’s crucial to repeat the cleaning process a few times and ensure that every last bit of the stubborn stain is removed from your beautiful carpet.

Don’t be discouraged if you don’t see results right away, as it may take some time and persistence to fully remove the beet juice stain. Repeat effectiveness is key in ensuring that the cleaning solution seeps deep into the fibers of your carpet and lifts the stain from every angle.

Time management is also important when repeating the cleaning process. Allow enough time for the cleaning solution to work its magic before blotting it up with a clean cloth or paper towel.

Don’t rush the process, as this could lead to a half-hearted cleaning job that leaves behind remnants of the stain. Once you’re satisfied that the stain has been completely removed, move on to the next step of using a carpet cleaner to deep clean your carpet and prevent future stains.

Use a Carpet Cleaner

Using a carpet cleaner is a great way to ensure that your carpet stays fresh and clean for a long time. When dealing with carpet stain removal, using a carpet cleaner can be one of the most effective DIY cleaning methods.

Advertisement

Carpet cleaners are designed to remove dirt, stains, and odors from carpets, leaving them looking and smelling great. To use a carpet cleaner, start by vacuuming the area to remove any loose dirt or debris. Then, mix the cleaning solution according to the instructions on the carpet cleaner.

Apply the solution to the stained area and use the carpet cleaner to scrub the area thoroughly. Finally, rinse the area with water and use a clean cloth to blot up any excess moisture. Let the carpet dry completely before walking on it again.

Using a carpet cleaner is an effective and efficient way to remove beet juice stains from your carpet. By following these simple steps, you can ensure that your carpet stays clean and fresh for a long time. Now, let the carpet dry completely before moving on to the next step of carpet stain removal.

Let the Carpet Dry

Allow your rug to completely dry before resuming regular use, as this will prevent any remaining moisture from causing further damage. To ensure that the carpet is completely dry, you can use preventive measures such as opening windows or turning on fans to increase air circulation. This will also help to remove any lingering odors that may be present.

Additionally, there are various drying techniques that you can use to expedite the carpet drying process. One effective technique is to use a clean, absorbent towel to blot the area where the beet juice stain was located. Repeat this process until the towel no longer absorbs any moisture. Another technique is to use a hair dryer on the cool setting to blow air over the affected area. However, be sure to keep the hair dryer a safe distance away from the carpet to avoid any heat damage.

Advertisement

With these preventive measures and drying techniques, your carpet should be dry and ready for inspection.

Inspect the Carpet

Before moving on from the previous step, I always make sure to inspect the carpet thoroughly. This involves checking for any remaining stains or discoloration. Even the slightest bit of beet juice residue can cause further damage if left unattended. If there are still visible stains, I repeat the cleaning process until the carpet is clean and free of any beet juice residue. It’s important to be thorough in this step to ensure a successful outcome.

Check for Remaining Stains

Now that you’ve blotted up as much of the beet juice as possible, take a closer look at the carpet to see if there are any remaining stains. Check for discoloration or any other signs of the juice that might have been left behind.

If you find any, don’t worry, there are still ways to get rid of them. One effective method is to use vinegar and baking soda. Mix equal parts of white vinegar and water and pour it onto the stained area.

Let it sit for a few minutes to soak in and then sprinkle baking soda over the top. The mixture will start to fizz and lift the stain to the surface. Scrub the area gently with a brush and then blot it up with a clean towel.

Advertisement

Repeat the process until the stain is completely gone. With these steps, you can ensure that your carpet looks as good as new.

Repeat the Process

To truly ensure your carpet is stain-free, it’s important to repeat the vinegar and baking soda process until the stain is completely gone. Sometimes, the stain may not completely disappear after the first attempt. In such cases, don’t be discouraged. Instead, repeat the process until the stain is gone.

If the stain still persists even after multiple attempts, you may need to resort to alternative methods. There are many different carpet cleaning solutions available in the market that you could try. However, it’s important to first test any new cleaning solution on a small, inconspicuous area of the carpet to ensure it won’t damage or discolor it.

Prevention techniques, such as quickly blotting up any spills and not allowing them to sit on the carpet for too long, can also help reduce the likelihood of future stains.

Consider professional cleaning if the stain still persists even after trying multiple cleaning solutions. A professional carpet cleaning service will have specialized equipment and cleaning products that can effectively remove even the toughest of stains.

Advertisement

Consider Professional Cleaning

Hiring a professional cleaner might be the best solution if the beet juice stain on your carpet is so stubborn that it seems like it has taken on a life of its own. While DIY cleaning methods can be effective, professional cleaning offers a range of benefits that make it a worthwhile investment.

For one, professional cleaners have access to specialized equipment and cleaning solutions that can effectively remove even the toughest of stains. Additionally, they have the expertise and experience necessary to properly clean carpets without causing damage or discoloration.

It’s important to note that while professional cleaning may seem more expensive than DIY methods, the cost comparison is not always straightforward. DIY methods may require multiple attempts and the purchase of various cleaning products, which can add up over time. In contrast, professional cleaning services typically offer a one-time fee that includes all necessary materials and labor. Ultimately, the decision to hire a professional cleaner will depend on the severity of the stain and your budget.

To prevent future stains, there are a few simple tips you can follow. First, avoid eating and drinking on the carpeted areas of your home. If spills do occur, clean them up immediately using a clean cloth and mild cleaning solution. Additionally, consider investing in a stain-resistant carpet or applying a protective sealant to your existing carpet to make future clean-up easier.

By taking these steps, you can minimize the risk of future stains and keep your carpets looking clean and fresh for years to come.

Advertisement

Prevention Tips

If you want to keep your carpets looking clean and fresh, you should follow some simple prevention tips.

One of the easiest ways to prevent beet juice stains on your carpet is to avoid consuming beet juice in areas with carpeting. You could also take steps to minimize the risk of accidents by drinking beet juice in a contained area, such as in the kitchen, and avoiding spilling or dropping the juice.

Another important prevention tip is to regularly maintain your carpets. Vacuuming your carpets at least once a week will help remove any dirt or debris that could lead to stains. Additionally, it’s important to immediately clean up any spills or stains to prevent them from setting into the carpet fibers.

By following these beet juice stain prevention and carpet maintenance tips, you can help keep your carpets looking clean and fresh for years to come.

Frequently Asked Questions

What are some common causes for beet juice stains on carpets?

As a carpet cleaning expert, I’ve found that common causes of beet juice stains on carpets include spills, accidents, and improper handling. Preventative measures include prompt cleaning, blotting, and avoiding eating or drinking near the carpet.

Advertisement

Can beet juice stains be removed from all types of carpets or are some types more difficult to clean?

Certain types of carpet may be more difficult to remove beet juice stains from due to their dyeing properties. It’s important to identify the type of carpet before attempting to remove the stain to avoid causing further damage.

Are there any natural cleaning solutions that can be used to remove beet juice stains from carpets?

Natural remedies for removing beet juice stains from carpets include DIY solutions using eco-friendly alternatives and non-toxic options. These options are effective for most types of carpet and can save money on professional cleaning services.

How long should I wait before using a carpet cleaner on a beet juice stain?

As a general rule, it’s best to wait at least 24 hours before using a carpet cleaner on any stain. This allows the stain to set and makes it more difficult to remove. However, the effectiveness of the carpet cleaner will depend on the severity of the stain.

What are some steps I can take to prevent future beet juice stains on my carpet?

To prevent future beet juice stains on my carpet, I can take preventive measures such as avoiding the consumption of beet juice near the carpeted area and using stain resistant treatments. These measures will help keep my carpet clean and stain-free.

Conclusion

So there you have it, my experience with getting beet juice out of carpet. It can definitely be a frustrating and challenging task, but with the right tools and technique, it’s possible to successfully remove the stain.

Advertisement

Remember to act quickly, gather your cleaning supplies, test the cleaning solution, apply it, and repeat the process if necessary. Let the carpet dry and inspect it before considering professional cleaning.

Now, some may argue that prevention is the key to avoiding this situation altogether. While this is certainly true, accidents happen and it’s important to know how to handle them when they do.

By following the steps outlined in this article, you’ll be equipped to tackle any beet juice stain that comes your way. So don’t panic the next time you spill some beet juice on your carpet – you’ve got this!

Continue Reading

Juice

How To Get Cherry Juice Out Of Clothing

Published

on

By

Did you know that 80% of stains on clothes are caused by spills of food and drinks? This suggests that there is a high chance you have unknowingly spilled something on your clothing at some point, leading to a stubborn stain.

One of the most difficult stains to remove is cherry juice. Its deep red color can leave a lasting mark on clothing, but don’t worry, I’m here to help. In this article, I’ll provide step-by-step instructions on how to get cherry juice out of clothing, so you don’t have to throw away your favorite shirt or dress.

First things first, it’s important to act quickly when dealing with a cherry juice stain. The longer it sits, the harder it will be to remove. So, if you spill cherry juice on your clothing, don’t wait until the end of the day to deal with it.

Take a few minutes to treat the stain as soon as possible. With the right tools and techniques, you can get rid of the stain and save your clothing. Let’s get started!

Key Takeaways

  • Act quickly when dealing with a cherry juice stain
  • Different fabrics require different cleaning methods, so identify the fabric before treating the stain
  • Use a mixture of white vinegar and cold water, or baking soda and water, to soak the stained area
  • Enzyme-based detergents are effective on protein-based stains and safe for colors, but avoid using bleach on cherry juice stains

Act Quickly

You gotta act fast if you want to get that cherry juice stain out of your clothes! The longer you wait, the harder it will be to remove.

Start by blotting the stain with a clean cloth or paper towel to remove as much of the excess juice as possible. Then, rinse the stain with cold water. Be sure to use cold water, as hot water will set the stain and make it more difficult to remove.

Advertisement

Next, mix a solution of equal parts white vinegar and cold water. Soak the stained area in the solution for about 10 minutes. After 10 minutes, remove the clothing and rinse it thoroughly with cold water.

If the stain is still visible, mix some baking soda with water to form a paste. Apply the paste to the stain and let it sit for about 10 minutes. Rinse the clothing again with cold water.

Identifying the fabric of your clothing is important because different fabrics require different cleaning methods.

Identify the Fabric

Identifying the type of fabric that the stain is on is key to effectively removing it. To do this, there are several fabric identification techniques that you can use.

The first thing to do is to look at the care label on the clothing. This will give you a good idea of what type of fabric it is. If there’s no care label or it’s been removed, you can try performing a burn test. Take a small piece of the fabric and burn it with a match or lighter. The way that the fabric burns and smells can help you identify it.

Advertisement

Common fabrics to find in clothing include cotton, polyester, silk, wool, and rayon. Once you have identified the fabric, you’ll be able to choose the best method for removing the cherry juice stain.

For example, if the fabric is cotton, you can use a combination of detergent and vinegar to remove the stain. If the fabric is silk, you’ll need to be more gentle with it so as not to damage the delicate fibers. In this case, you can try using a mixture of water and gentle dish soap to remove the stain.

Now that you have identified the fabric, it’s time to move on to the next step of the stain removal process: rinsing with cold water.

Rinse with Cold Water

When dealing with a cherry juice stain on clothing, it’s important to start by rinsing the area with cold water. However, it’s crucial to avoid using hot water, as this can actually set the stain deeper into the fabric. Keeping the stain wet is also key, as this will prevent it from drying and becoming even more difficult to remove later on.

Avoid Hot Water

To prevent setting the stain, it’s best to steer clear of hot water. Can’t you use cold water instead? Hot water can cause the cherry juice to set into the fabric, making it much harder to remove.

Advertisement

Instead, run the stained area under cold water as soon as possible to help remove as much of the juice as you can.

When trying to remove cherry juice stains from delicate fabrics, it’s especially important to avoid hot water. Delicate fabrics like silk or wool can be damaged by hot water, making it even harder to remove the stain.

Instead, use cold water and gently rub the stained area with a mild detergent to help lift the stain. Once you’ve rinsed the area thoroughly, move onto the next step and keep the stain wet.

Keep the Stain Wet

One way you can help remove the cherry juice stain is by keeping it wet. As soon as you notice the stain, soak the clothing in cold water for at least 30 minutes. Don’t let the clothing dry out during this time.

You can also continuously dampen the stain with a clean cloth or sponge. Keeping the stain wet helps prevent it from setting into the fabric. The longer the stain sets, the harder it will be to remove.

Advertisement

So, the next step after keeping the stain wet is to pre-treat it with a stain remover.

Pre-treat with Stain Remover

So, after rinsing the cherry juice stain with cold water, it’s time to pre-treat the area with a stain remover.

There are two options here: using a commercial stain remover or trying homemade solutions. Personally, I’ve had success with both, so let me walk you through the steps for each option.

Use a Commercial Stain Remover

If you’re in a bind to get cherry juice out of your favorite shirt, a commercial stain remover can be a lifesaver, leaving you feeling relieved and grateful.

There are various types of commercial stain removers available in the market, such as sprays, sticks, and powders. These products contain enzymes and other chemicals that break down the stain molecules, making them easier to lift off the fabric.

Advertisement

When selecting a commercial stain remover, make sure to read the label carefully and follow the instructions for use. Some products may be specifically designed for certain types of fabrics, while others may not be suitable for use with certain colors.

While commercial stain removers can be effective, they can also be expensive. If you want to save some money, you can try homemade solutions, but more on that later.

Transitioning into the subsequent section, it’s always good to have a backup plan in case the commercial stain remover doesn’t work. That’s why it’s worth trying some homemade solutions as well.

Try Homemade Solutions

You can save money and try making your own stain remover solution at home. There are several benefits of using natural remedies, including the fact that they’re often less harsh on fabrics and are environmentally friendly. However, there are also some common mistakes to avoid when using homemade solutions, such as using too much solution or not testing it on a small, inconspicuous area first.

Here are some homemade solutions to try for getting cherry juice out of clothing:

Advertisement
  • Mix together equal parts white vinegar and water and apply it directly to the stain.

  • Create a paste by mixing baking soda and water and applying it to the stain. Let it sit for 30 minutes before washing.

  • Apply lemon juice directly to the stain and let it sit for a few minutes before washing.

  • Mix together dish soap and hydrogen peroxide and apply it to the stain before washing.

After trying one of these homemade solutions, wash the clothing with laundry detergent as usual.

Wash with Laundry Detergent

So, now that I’ve pre-treated the cherry juice stain on my clothing, it’s time to wash it off. I’m going to use a laundry detergent that contains stain-fighting enzymes to ensure that the stain is completely removed. These enzymes break down the proteins in the stain and make it easier to wash away. However, I’ll make sure to avoid using bleach as it can damage the fabric and make the stain worse.

(Note: The output may vary as there are different ways to group the sentences into paragraphs.)

Use a Detergent with Stain-Fighting Enzymes

Using a detergent with stain-fighting enzymes can be a game-changer when it comes to removing cherry juice from clothing, even if the stain has set in. Enzyme-based detergents work by breaking down the proteins in the stain, making it easier to lift off the fabric. This is a much gentler approach compared to using harsh chemicals that can damage the fabric or cause discoloration.

To illustrate the benefits of using enzyme-based detergents, consider the following table:

Advertisement
Benefits of using enzyme-based detergents Alternatives to commercial stain removers
Gentle on fabric Vinegar and baking soda
Effective on protein-based stains Hydrogen peroxide
Safe for colors Lemon juice and salt

As you can see, enzyme-based detergents offer several advantages over alternative stain removers. They are gentle on fabric, effective on protein-based stains like cherry juice, and safe for colors. If you’re dealing with a stubborn cherry juice stain, try using an enzyme-based detergent for the best results.

However, it’s important to note that you should avoid using bleach on cherry juice stains as it can actually set the stain further into the fabric. Instead, opt for a gentle, enzyme-based detergent to effectively remove the stain without causing any damage.

Avoid Bleach

It’s crucial to steer clear of bleach when attempting to remove stains from fabric. Although bleach is an effective stain remover, it can also damage the fabric and cause discoloration. Instead, opt for alternative solutions or natural remedies that are gentle on the fabric but still effective in removing cherry juice stains.

One natural remedy you can try is mixing equal parts of white vinegar and water and applying it to the stain. Let it sit for a few minutes before blotting it with a clean cloth.

Another option is to use a mixture of baking soda and water to create a paste, which you can apply to the stain and let sit for a few hours before rinsing it off. These alternative solutions are not only effective, but also safe for your clothes.

Advertisement

Once you’ve applied one of these remedies, move on to the next step and check for remaining stains.

Check for Remaining Stains

You’ve made it this far, but don’t get ahead of yourself. Like a game of hide and seek, those stubborn stains might still be lurking in the fibers of your clothing. To make sure you’ve gotten all of the cherry juice out of your clothes, follow these simple steps:

  1. Check for remaining stains by holding the clothing item up to a bright light source. This will help you identify any areas where the stain may still be visible.

  2. If you do spot any remaining stains, use a cherry juice stain removal product to treat the area. Be sure to follow the instructions on the product carefully.

  3. If you prefer to use natural remedies for cherry juice stains, try using a mixture of vinegar and baking soda. Apply the mixture to the stain and let it sit for 10-15 minutes before rinsing with cold water.

  4. After treating any remaining stains, wash the clothing item as usual and check for any signs of the stain. If the stain is still visible, try alternative methods to remove it.

Now that you’ve checked for any remaining stains and treated them accordingly, it’s time to try alternative methods to remove any stubborn stains that may still be present.

Try Alternative Methods

Now is the time to explore other methods that could potentially remove any stubborn stains left on your clothes. If traditional stain removers have failed you, try some alternative methods.

One natural stain removal solution is to mix one part vinegar and three parts water and apply it to the stain. Let it sit for a few minutes before rubbing the area with a cloth. Rinse the area with cold water and repeat the process until the stain disappears.

Advertisement

Another effective method is using baking soda. Mix a small amount of baking soda with water to create a paste. Apply the paste to the stain, let it sit for 30 minutes, and then rinse with cold water. If the stain remains, you can try rubbing the area with a small amount of dish soap before rinsing again.

By using these alternative methods, you can prevent future cherry juice stains and save your clothing from permanent damage. Now that you’ve tried alternative methods to remove the cherry juice stains, it’s time to dry the clothing.

Dry the Clothing

When trying to get cherry juice out of clothing, it’s important to dry the clothing properly to prevent any remaining stains from setting in.

If possible, air drying is the best option as it is gentle on the fabric and doesn’t involve any heat that can further set the stain.

However, if you must use a dryer, make sure to use a low heat setting to avoid any damage to the fabric and to prevent the stain from becoming permanent.

Advertisement

Air Dry if Possible

If you’re lucky enough to have a sunny day, hang up your cherry-stained clothing outside to air dry and let the sun work its magic. Air drying has many benefits.

It’s a gentle way to dry clothing that won’t damage the fabric or shrink it like a dryer might. Plus, it’s energy efficient and environmentally friendly.

Here are a few air drying tips to keep in mind. Hang the clothing up on a clothesline or drying rack, making sure to smooth out any wrinkles or bunches. If you’re concerned about fading, hang the item inside out to protect the color.

And finally, make sure the clothing is completely dry before wearing or storing it. Once it’s air dried, you can move on to the next step: use low heat if you must use a dryer.

Use Low Heat if You Must Use a Dryer

Using low heat in the dryer is a great way to prevent any potential damage to your clothes. While air drying is the best option for removing cherry juice stains, it’s not always possible. If you must use a dryer, make sure to set it on a low heat setting. This will prevent the stain from setting further into the fabric and making it even harder to remove.

Advertisement

However, using low heat in the dryer does have its pros and cons. On the one hand, it can prevent any additional damage to your clothes. On the other hand, it can take longer for your clothes to dry.

To prevent cherry juice stains on clothing, it’s always best to take preventative measures by placing a napkin or towel over the affected area before eating or drinking. With these precautions, you can minimize the risk of stains and keep your clothes looking great.

Now, let’s move on to the next step and check the stain again.

Check the Stain Again

Now that I’ve dried my clothing and removed the excess cherry juice stain, it’s time to check if the stain is still there. If it’s still visible, I’ll need to repeat the process of applying the stain remover and washing the clothing again.

However, if the stain is gone, I can finally enjoy my clean clothing without any worries.

Advertisement

If It’s Still There, Repeat the Process

Hey, don’t worry if the cherry juice stain is still there after your first attempt, just repeat the process and it should come out in no time! Here are some repeat process tips that can help you get rid of the stain for good:

  • Blot the stain again with a clean cloth or paper towel to remove any excess juice.
  • Apply the cherry juice stain remover solution to the affected area again, making sure to saturate the stain completely.
  • Let the solution sit for another 5-10 minutes before rinsing it off with cold water.
  • Check the stain again and repeat the process if necessary.

Remember, prevention is key when it comes to cherry juice stains. Always try to treat the stain as soon as possible and avoid rubbing it in, as this can make it harder to remove. If the stain is gone, enjoy your clean clothing!

If It’s Gone, Enjoy Your Clean Clothing

Congratulations, you now have stain-free clothes and can wear them confidently! However, to avoid future cherry stains, here are some tips you can follow.

First, be cautious when eating cherries and try to avoid getting the juice on your clothes in the first place. You can also wear an apron or bib to protect your clothing while eating cherries.

If you do happen to get cherry juice on your clothes again, remember that the method for cherry stain removal will vary depending on the type of fabric. For cotton or polyester fabrics, try using a mixture of dish soap and hydrogen peroxide. For silk or wool fabrics, use a mixture of white vinegar and water. Always test the solution on a small, inconspicuous area first before applying it to the stain.

To prevent future stains, it’s important to act fast when you notice a stain and to avoid rubbing the stain, as this can make it worse. Instead, blot the stain gently with a clean cloth or paper towel to remove as much of the stain as possible before applying any stain remover.

Advertisement

With these tips, you can keep your clothing looking clean and fresh, even when faced with stubborn cherry stains. If it’s gone, enjoy your clean clothing!

Prevent Future Stains

To make sure you never have to deal with cherry juice stains again, you’ll want to take some preventative measures. Here are some tips to help you avoid future stains:

  • Choose stain-resistant fabrics: When shopping for clothing, look for fabrics that are less likely to stain. Synthetic materials like polyester, nylon, and spandex are great options, as they tend to repel liquids and are easier to clean.

  • Be cautious when consuming cherry products: If you know you’re prone to spills, it’s best to avoid cherry products altogether. However, if you can’t resist that cherry pie or cherry soda, be sure to take extra precautions, like using a straw or eating over a table.

By following these tips, you can help prevent future stains and keep your clothing looking its best. Remember, it’s always better to be safe than sorry!

Frequently Asked Questions

Can cherry juice stains be removed from all types of fabrics?

I’ve found that cherry juice stains can usually be removed from most fabrics, but it’s important to check fabric compatibility before using any stain removers. If traditional methods don’t work, try alternative stain removers.

Is it safe to use bleach on cherry juice stains?

Although it may seem like a quick fix, using bleach on cherry juice stains can actually make the stain worse and damage the fabric. Alternative solutions include using vinegar or a stain remover. Precautions to take include testing the solution on a small, inconspicuous area first.

Advertisement

What is the best type of stain remover to use on cherry juice stains?

When it comes to removing cherry juice stains, I recommend using a stain remover comparison to find the best product for your specific fabric. Alternatively, natural alternatives like vinegar or baking soda can also be effective.

Can cherry juice stains be removed from colored clothing without fading the color?

Did you know that cherry juice stains are one of the toughest to remove from clothing? However, with the right cherry juice stain removal techniques and some preventative measures, you can get rid of the stain without fading the color. Here’s how.

How long should the cherry juice stain be pre-treated before washing with laundry detergent?

When dealing with tough stains like cherry juice, effective pre treatment methods are key. I recommend using a stain remover or a mixture of vinegar and water. If the stain persists, try alternative stain removal techniques before washing with laundry detergent.

Conclusion

In the end, getting cherry juice out of clothing isn’t an impossible task. It requires quick action and identifying the fabric. Rinse with cold water and pre-treat with stain remover. Then, wash with laundry detergent, try alternative methods, and dry the clothing.

However, the most important step is prevention. Avoid spills by being mindful and cautious. Keep stain remover on hand for emergencies.

Advertisement

Remember, stains are like scars. They remind us of the past. But with a little effort and attention, we can remove them and move forward with clean and unblemished clothing.

So, don’t let a cherry juice stain ruin your day. Take action, follow these steps, and keep your clothes looking their best.

Continue Reading

Trending

Copyright © 2024 The Graceful Kitchen Affiliate disclaimer As an affiliate, we may earn a commission from qualifying purchases. We get commissions for purchases made through links on this website from Amazon and other third parties.