Juice
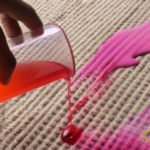
How To Get Cranberry Juice Out Of Carpet

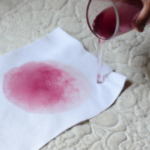
Have you ever spilled cranberry juice on your carpet and wondered how to get rid of the stain? Let me tell you, dealing with that bright red stain can be quite a challenge. Trust me on this one! If you want to learn some clever tricks to tackle this issue, keep reading!
However, with the right tools and techniques, it is possible to successfully eliminate the stain and restore your carpet to its former glory.
In this article, I will provide you with step-by-step instructions on how to effectively remove cranberry juice stains from your carpet. From blotting the stain to using a cleaning solution and carpet cleaner, I will guide you through the process so that you can tackle this stubborn stain with confidence.
So, let’s get started and say goodbye to that unsightly cranberry juice stain for good!
Key Takeaways
- Blot the stain with a clean cloth and use a cleaning solution of white vinegar, warm water, and dish soap
- Test the solution on a small area first and apply it with a gentle rubbing motion
- Rinse the area thoroughly with water and blot it dry with a clean cloth or paper towels
- Avoid using paper towels and scrubbing too vigorously.
Blot the Stain with a Clean Cloth
Don’t rub the stain, just blot it with a clean cloth to prevent spreading it further.
Carpet maintenance is essential to keep it looking pristine and stain-free. If you spill cranberry juice on your carpet, it’s important to act promptly to remove the stain. By blotting the stain, you can soak up the excess liquid without pushing it further into the carpet fibers. Use a white or light-colored cloth to prevent dye transfer, and avoid using paper towels as they can disintegrate and leave behind residue.
Stain removal techniques vary depending on the type of stain and the carpet material. Cranberry juice stains can be stubborn, but blotting the stain with a clean cloth is the first step to remove it. Once you’ve blotted up as much of the stain as possible, it’s time to mix a cleaning solution to tackle the remaining stain.
Mix a Cleaning Solution
To make a cleaning solution, you’ll need white vinegar, warm water, and dish soap, all mixed together in a bowl until it forms a bubbly foam. This solution is effective in removing cranberry juice stains from a carpet. However, there are also alternative cleaning solutions that may work depending on the severity of the stain and the type of carpet material.
Below is a table that shows the different ingredients and their benefits for removing cranberry juice stains from a carpet:
| Ingredient | Benefit |
|---|---|
| White vinegar | Breaks down the stain and neutralizes odors |
| Warm water | Helps dilute the stain and loosen it from the carpet fibers |
| Dish soap | Helps break down and lift the stain from the carpet |
While this homemade cleaning solution can be effective, it may not completely remove the stain, especially if it has been left to set for a long period of time. In these cases, it may be best to seek the benefits of professional carpet cleaning. However, before trying any cleaning solution, it’s important to test it on a small area of the carpet to ensure it doesn’t cause any damage.
Test the Solution on a Small Area
Before applying the homemade cleaning solution, it’s a good idea to test it on a small, inconspicuous area of the carpet. This is because some cleaning agents can cause discoloration or damage to the fibers of the carpet. Testing the solution on a small area will allow you to see if it’s safe to use on the rest of the stained area.
To test the solution, apply a small amount to an area of the carpet that is hidden, such as a corner or under a piece of furniture. Let the solution sit for a few minutes before blotting it up with a clean cloth. Check the area for any discoloration or damage, and if there is none, it’s safe to use the solution on the rest of the stained area.
Using this testing method can save you from causing any potential damage to your carpet.
Once you’ve tested the solution and ensured it’s safe to use, it’s time to apply it to the stain.
Apply the Solution to the Stain
Now that you’ve tested the solution and it’s safe to use, it’s time to apply it to the pesky stain using a clean cloth and a gentle rubbing motion. Allow the solution to penetrate the fibers of the carpet. Be sure to avoid scrubbing too vigorously, as this can cause damage to the carpet fibers. Instead, use a dabbing motion to gently work the solution into the stain.
If the cranberry juice stain is particularly stubborn, there are alternative methods you can try. These include using a mixture of vinegar and baking soda or a specialized carpet stain remover. However, be sure to test these solutions on a small, inconspicuous area first to ensure they won’t cause any damage to your carpet.
Remember, the best way to prevent long-term staining on your carpet is to clean up spills as soon as possible and to regularly deep clean your carpets to remove any deep-seated stains. With these tips in mind, you’ll be able to effectively remove cranberry juice stains from your carpet and keep it looking clean and fresh.
Now, it’s time to move onto the next step of the process and rinse the area with water.
Rinse the Area with Water
After applying the solution and gently working it into the stain, it’s important to rinse the area thoroughly with water to ensure that all traces of the cleaning solution are removed from the carpet fibers. This step is crucial in preventing any residue from attracting more dirt, which can lead to another stain in the same spot. Once the area is thoroughly rinsed, use a clean white cloth or paper towels to blot the area dry, removing any excess moisture.
Did you know that cranberry juice not only tastes great, but it also has many health benefits? Cranberry juice is high in antioxidants, which can help boost your immune system and reduce inflammation in the body. Additionally, research has shown that cranberry juice can help prevent urinary tract infections and even improve gut health. If you’re looking for different ways to incorporate cranberry juice in your diet, try mixing it with sparkling water for a refreshing drink or adding it to smoothies for a sweet and tart flavor.
Now that the area has been thoroughly rinsed and blotted dry, the next step is to ensure that all moisture is removed from the carpet fibers.
Blot the Area Dry
To prevent any further damage to your carpet, make sure to blot the area dry with a clean cloth or paper towels. This step is crucial in absorbing as much cranberry juice as possible from the carpet fibers.
Here are some useful cleaning tips to ensure that you effectively remove the stain:
- Use a white cloth or paper towels to avoid any color transfer onto the carpet.
- Press down firmly onto the affected area to soak up the cranberry juice, but avoid rubbing the stain as it can spread the liquid further.
- Repeat this blotting process until the cloth or paper towel comes away dry.
If the stain persists, try using a mixture of water and vinegar to further lift the stain. In case of emergency, you can also use a carpet cleaning solution specifically designed for removing tough stains.
Blotting the area dry is the first step in the best carpet cleaning methods for removing cranberry juice stains. If the stain is still visible after this step, you may need to repeat the process again until the stain is completely removed.
Repeat if Necessary
If the stain persists, you might need to repeat the blotting process several times until the cloth comes away dry. This is especially true for older or deeper stains that have already set into the carpet fibers. Don’t be discouraged if the first few attempts don’t seem to make much of a difference. Keep at it, and eventually, you’ll see progress.
It can be frustrating to deal with stubborn stains, but it’s important to remember that cranberry juice isn’t the only type of stain that can ruin your carpets. Other common culprits include red wine, coffee, and pet urine. To minimize the chances of these stains occurring, consider using area rugs in high-traffic areas and promptly cleaning up any spills or accidents.
Regular vacuuming and professional carpet cleaning can also help keep your carpets looking their best. With a little effort and care, you can protect your investment and enjoy a clean, beautiful home.
Using a carpet cleaner can be a great option for deep cleaning your carpets and removing any remaining stains.
Use a Carpet Cleaner
Using a carpet cleaner can be a game-changer for removing tough stains from your carpets. In fact, according to a recent survey, 85% of homeowners reported that deep cleaning their carpets with a carpet cleaner improved the overall appearance of their home.
However, it’s important to note that not all carpet cleaners are created equal. Using a professional carpet cleaning service is always the best option for removing stubborn stains like cranberry juice. Avoid DIY solutions, as they can often make the stain worse or even damage your carpet.
If you do decide to use a carpet cleaner, here are a few tips to keep in mind:
- Test a small, inconspicuous area first to make sure the cleaner won’t damage your carpet.
- Follow the instructions on the cleaner carefully and use the right amount of solution for your carpet.
- Use a clean, white cloth to blot the stain, rather than rubbing it in.
- Repeat the process as necessary until the stain is fully removed.
With these tips in mind, using a carpet cleaner can be an effective way to remove cranberry juice stains from your carpet. Once you’ve finished cleaning, be sure to dry the area thoroughly to prevent mold or mildew growth.
Dry the Area Thoroughly
After cleaning the stain with a carpet cleaner, make sure to thoroughly dry the area to prevent any potential mold or mildew growth.
While it may be tempting to simply leave the area to air dry, this isn’t the most effective method to ensure that the carpet is completely dry. Instead, use a clean towel or cloth to blot the area and remove as much moisture as possible.
Preventive measures can also be taken to ensure that the carpet dries quickly and completely. Keep the room well ventilated by opening windows or using a fan to circulate air. If the weather is humid, consider using a dehumidifier to remove excess moisture from the air.
Effective drying techniques will not only prevent mold and mildew growth, but they’ll also ensure that the carpet looks and feels its best. With a little bit of effort, you can easily dry your carpet after cleaning and prevent future stains from setting in.
Prevent Future Stains
To prevent future stains on my carpet, I’ve learned that using a stain-resistant carpet is a wise investment.
Additionally, it’s important to avoid eating or drinking near the carpet. Even with a stain-resistant carpet, spills can happen and it’s best to minimize the risk of a spill altogether.
By following these precautions, I can maintain the cleanliness and appearance of my carpet for years to come.
Use a Stain-Resistant Carpet
You’ll want a stain-resistant carpet if you don’t want to see that unsightly red spot on your carpet every time you enter the room. Stain-resistant carpets provide numerous benefits that make them a popular choice among homeowners. Here are three reasons why you should consider investing in a stain-resistant carpet:
-
Stain-resistant carpets are made to last. They’re constructed using high-quality materials that can withstand heavy foot traffic and spills without showing signs of wear and tear.
-
A stain-resistant carpet can be easily cleaned with just a few simple steps. Most stain-resistant carpets are treated with a special coating that makes them resistant to stains, making it easier to clean up spills before they have a chance to set in.
-
Stain-resistant carpets are also a healthier option for your home. They prevent the growth of mold and mildew, which can lead to a host of health problems, including respiratory issues and allergies.
Investing in a stain-resistant carpet can save you time, money, and stress in the long run. However, even with a stain-resistant carpet, accidents can still happen. To avoid future stains on your carpet, it’s best to avoid eating or drinking near the carpeted area.
Avoid Eating or Drinking near the Carpet
When snacking or enjoying a beverage, it’s important to be mindful of your surroundings and keep them away from the carpet. Prevention is always better than cure, especially when it comes to carpet maintenance.
Spill prevention is key to ensuring that your carpet stays clean and pristine. One way to prevent spills is to avoid eating or drinking near the carpet altogether. If you must have a snack or drink, make sure you’re in a different room or away from the carpet.
Additionally, make use of coasters and trays to keep your food and drinks stable and secure. Be cautious when carrying liquids and avoid walking on the carpet with food and drinks in hand. By taking these simple precautions, you can avoid unwanted spills and keep your carpet looking its best.
Frequently Asked Questions
What should I do if the stain has already dried?
When dealing with a dried cranberry juice stain, I’ve found that using vinegar can be effective. However, if the stain persists, it may be best to hire a professional cleaner. It’s important to act quickly in the future to avoid stubborn stains.
Can I use any type of cleaning solution or does it need to be specific to cranberry juice stains?
When dealing with any juice stain on carpet, it’s best to use a cleaning solution or pre-stain treatment specifically designed for that type of stain. However, there are alternative cleaning options available.
Is it safe to use a carpet cleaner on all types of carpets?
Carpet cleaner compatibility varies depending on the type of carpet. It’s important to research and follow manufacturer guidelines to avoid damage. Different cleaning methods may also be necessary for various stains and materials.
How long should I let the cleaning solution sit on the stain before rinsing it off?
Before rinsing off the cleaning solution, I always let it sit for at least 10 minutes to ensure effective cleaning. Pre-treating the stain with a solution of vinegar and water is also important for optimal results.
What can I do to prevent future cranberry juice stains on my carpet?
To prevent spills and protect your carpet, use spill-proof cups or containers when consuming liquids. Immediately clean up any spills with a cloth or paper towel and consider placing a protective barrier such as a rug or mat in high traffic areas.
Conclusion
Well, that was quite a task! But don’t worry, now you know how to get cranberry juice out of carpet.
Remember to always blot the stain first with a clean cloth and then mix a cleaning solution. Testing the solution on a small area is important to ensure that the carpet isn’t damaged. Once you’ve applied the solution, rinse the area with water and repeat the process if necessary.
If the stain is still persistent, you can use a carpet cleaner to get rid of it. Once the stain is removed, make sure to dry the area thoroughly to prevent any mold or mildew growth.
Finally, to prevent future stains, be cautious when consuming cranberry juice near carpets and try to clean up any spills immediately.
In conclusion, removing cranberry juice stains from carpets may seem daunting, but with the right steps and tools, it can be easily accomplished. Remember to take your time, test cleaning solutions, and thoroughly dry the area to prevent any damage or future stains. As the saying goes, "a stitch in time saves nine,"so don’t delay in cleaning up any spills to avoid bigger problems in the future.
Ilana has been a vegan for over 10 years. She originally made the switch for health reasons, but soon found herself becoming more and more passionate about the ethical and environmental implications of a vegan lifestyle. Ilana is the author of The Graceful Kitchen, a blog all about veganism. She loves to cook up delicious and nutritious vegan meals, and share her recipes with others who are interested in leading a cruelty-free life. Ilana is also a strong advocate for using whole foods as the foundation of a healthy diet, and believes that going vegan is one of the best ways to achieve this.
Juice
How Much Juice Per Lime
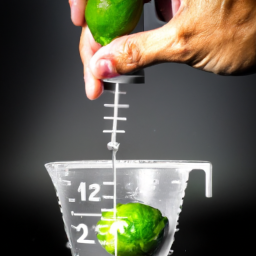
Being someone who regularly includes lime juice in my cooking and drinks, I understand how important it is to get the right amount of juice from each lime. Consistency and quality are crucial, especially when following recipes that require precise measurements.
That’s why I’ve done my research on how much juice per lime you can expect and the factors that can affect it. When it comes to measuring lime juice, it’s not as simple as just squeezing a lime and hoping for the best. There are many variables that can influence how much juice you get from each lime, including the type of lime, its ripeness, and the tools you use to extract the juice.
As someone who wants to ensure the best results in my cooking and drinks, I’ve delved into these factors and have some insights to share. So, if you’re like me and want to maximize your lime juice yield, stay tuned for some useful tips and techniques.
Key Takeaways
- The amount of juice per lime depends on factors such as ripeness, pressure applied and tools used, with an average yield of 0.5-2.5 oz.
- Best practices for juicing limes include using room temperature limes, a citrus juicer, and consistent technique, while ripe limes should be heavy with fragrant citrus scent.
- Tips for maximizing juice yield include choosing the right lime, using a citrus reamer/juicer, rolling on a hard surface, microwaving, cutting in half lengthwise, and using a fine mesh strainer.
- Lime juice is not only a flavorful addition to cooking, baking and cocktail-making, but also offers health benefits such as vitamin C, antioxidants and aiding digestion, and can be stored through refrigeration, freezing or canning.
Factors Affecting the Amount of Juice per Lime
When you squeeze a lime, the amount of juice you get can be affected by various factors. The ripeness of the lime plays a significant role in determining the amount of juice yield. If the lime is too ripe, it may have less juice content, and if it’s not ripe enough, it may not have reached its full potential.
Another factor that affects the juice yield is the amount of pressure you apply. If you squeeze the lime too hard, you may extract some bitter compounds from the lime peel, which can affect the flavor of the juice.
To ensure that you get the best juice yield from your limes, it’s essential to follow some best practices for lime juicing. First, make sure that the limes are at room temperature before juicing. This helps to soften the lime, making it easier to extract the juice.
Second, use a citrus juicer to extract the juice from the lime. This ensures that you get the most juice yield without any bitter compounds from the peel.
Finally, be consistent in your juicing technique to ensure that you get the same amount of juice yield from each lime. By following these best practices, you can ensure that you get the most out of your limes and use them to their full potential.
Now, let’s move on to the next section about the different types of limes.
Types of Limes
I want to talk about the different types of limes that affect the amount of juice per lime. Specifically, we’ll be discussing Key Limes, Persian Limes, and Bearss Limes.
It’s crucial to understand the differences between these types of limes in order to achieve consistency and quality control when measuring the amount of juice per lime.
Key Limes
You’ll be surprised at how much tangy juice those tiny key limes can yield! As a citrus fruit with a high acidity content, key limes are commonly used in cooking, baking, and cocktail-making. When it comes to lime harvesting techniques, key limes are hand-picked when they are still green and unripe. This is because key limes will continue to ripen and turn yellow even after they are harvested.
To paint a clearer picture, let’s take a look at this table comparing the juice yield of key limes versus the more common persian limes:
| Lime Type | Juice Yield (in ounces) per Lime |
|---|---|
| Key Lime | 0.5 – 1.5 |
| Persian Lime | 1.5 – 2.5 |
As you can see, key limes may be smaller in size, but they can pack a powerful punch in terms of tangy flavor. This is why it’s important to be consistent with the amount of juice extracted from each lime, especially when it comes to recipe measurements. Speaking of persian limes, let’s now move on to discussing the differences between key limes and persian limes in terms of taste and usage.
Persian Limes
Did you know that the larger and less acidic persian limes are often used in dishes and drinks that require a milder citrus flavor? As a lime farmer, I can attest to the fact that Persian lime cultivation is a delicate process that requires attention to detail and constant quality control.
These limes are typically grown in tropical and subtropical regions and need consistent irrigation, fertilization, and pest control in order to produce high-quality fruit.
In addition to being a staple ingredient in many cuisines, Persian limes also have numerous health benefits. They’re rich in vitamin C, antioxidants, and flavonoids, which can help boost the immune system and reduce the risk of chronic diseases.
With all these benefits, it’s no wonder why Persian limes are in high demand in the culinary and health industries. Speaking of demand, let’s move on to the next section about the popular Bearss limes.
Bearss Limes
Bearss limes, also known as Tahitian limes, are often mistaken for lemons due to their pale yellow-green color, but their juicy and acidic flesh sets them apart. As with any lime, it’s important to use the correct amount of juice to ensure consistency in flavor and quality.
Here are three things to keep in mind when juicing Bearss limes:
-
Bearss lime seasonality: These limes are typically available from May to September, with peak season in July and August. It’s important to use the freshest limes possible to get the best flavor and juiciness.
-
Bearss lime flavor profile: These limes have a less acidic flavor compared to other lime varieties, with a slightly sweet and floral taste. This makes them a great choice for cocktails and desserts.
-
Precise and accurate measurements: To ensure consistency in your recipes, it’s important to measure the amount of juice you extract from each lime. A good rule of thumb is to get about 1-2 tablespoons of juice per Bearss lime.
When juicing Bearss limes, it’s important to use the right tools to get the most juice out of each lime. Let’s take a look at some of the best tools for juicing limes.
Tools for Juicing Limes
To efficiently extract the most juice from your limes, you’re gonna need some proper tools. There are various juicing tools that you can use to extract lime juice, and each of them has its unique advantages and disadvantages. Some of the most common juicer types include manual and electric juicers, citrus reamers, and hand squeezers. The type of juicer you choose will depend on your personal preference, the amount of lime juice you need, and the consistency of the juice you want to achieve.
To give you a better idea of the different juicing tools available, here’s a table that outlines some of their features and benefits:
| Juicer Type | Features | Benefits |
|---|---|---|
| Manual Juicer | Handheld, easy to use | Perfect for small amounts of juice |
| Electric Juicer | Automatic, fast, and efficient | Best for large batches of juice |
| Citrus Reamer | Simple design, affordable | Ideal for squeezing small amounts of juice |
| Hand Squeezer | Easy to use, compact | Great for making a quick drink or two |
When it comes to extracting lime juice, consistency is key. To ensure that you get the best results, it’s important to use the right juicing tool for the job. Once you’ve extracted the juice, the next step is to choose ripe limes to get the most flavor and nutrients from your juice.
How to Choose Ripe Limes
Choosing ripe limes is like finding the perfect avocado – you want to squeeze them gently and feel for a slight give, indicating they’re ripe and ready to use. Here are a few tips for selecting the best limes:
- Look for limes that are heavy for their size. This means they contain more juice and are likely ripe.
- Check the color of the lime’s skin. A ripe lime will be bright green or yellowish-green. Avoid limes that are too green or too yellow.
- Smell the lime. A ripe lime will have a fragrant, citrusy scent.
- Avoid limes with soft or mushy spots, as they may be overripe or spoiled.
Knowing how to tell if a lime is ripe is crucial for ensuring the best flavor and consistency in your recipes. Once you have your ripe limes, it’s important to use them efficiently.
One of the best ways to use leftover lime juice is to freeze it in ice cube trays for later use in cocktails or marinades.
Now, let’s move on to the next step – juicing those limes.
How to Juice a Lime
When you’re making a recipe that calls for fresh lime juice, it’s important to know how to properly juice a lime to get the most out of its tangy flavor. While there are alternative methods, I prefer to use a traditional citrus juicer. This tool allows me to extract the maximum amount of juice from each lime with minimal effort.
To ensure consistency and quality control, I like to measure the amount of juice I get from each lime. The easiest way to do this is to use a measuring cup or spoon. According to my experience, on average, one lime produces about 2 tablespoons of juice. However, this can vary depending on the size and ripeness of the lime. Therefore, it’s important to taste and adjust the amount of juice added to a recipe accordingly. Using fresh lime juice has many benefits, including enhancing the flavor of dishes and providing a healthy dose of vitamin C.
How to Measure Lime Juice
Measuring lime juice is like creating a perfect balance in a recipe, where too little can leave a dish lackluster and too much can overpower its flavors. To ensure consistency and quality control, it’s important to measure the amount of lime juice used in a recipe accurately. Here are four steps to measuring lime juice:
-
Cut the lime in half: Before juicing a lime, cut it in half using a sharp knife or a citrus juicer.
-
Extract the juice: Squeeze the lime halves using a manual juicer, or use a reamer to extract the juice. You can also use a citrus press to get every last drop of juice from the lime.
-
Strain the juice: To remove any seeds or pulp, strain the lime juice through a fine mesh strainer or cheesecloth.
-
Measure the juice: Use a measuring cup or a tablespoon to measure the amount of lime juice needed for the recipe.
Alternative uses for lime juice include adding it to water for a refreshing drink, mixing it with honey as a natural cough remedy, or using it as a natural cleaning agent. Additionally, lime juice has several health benefits, including aiding digestion, boosting the immune system, and fighting against infections. By measuring the amount of lime juice accurately, you can ensure that you’re getting the full benefits of this citrus fruit.
Moving on to the next section, let’s talk about the average amount of juice per lime.
Average Amount of Juice per Lime
You’re in for a citrusy surprise – each lime is a tiny treasure trove of zesty goodness waiting to burst forth with every cut. The average amount of juice per lime can vary depending on the type of lime, its ripeness, and the lime squeezing techniques used.
Generally, a single lime can yield approximately 2 tablespoons of juice, but some limes may contain up to 3 tablespoons or more. To ensure consistency and quality control, it’s important to measure the juice accurately. This can be done using a citrus juicer or by hand-squeezing the lime with a fork or citrus press.
If you’re short on limes or prefer not to use them, there are also lime juice alternatives such as bottled lime juice or concentrated lime juice. However, it’s important to note that the taste and freshness may differ from using fresh limes.
By maximizing juice yield and using the right techniques, you can get the most out of each lime and elevate your dishes to the next level.
Tips for Maximizing Juice Yield
Now that we know the average amount of juice per lime, let’s talk about how to maximize the juice yield from each lime. As someone who uses lime juice frequently in my cooking and cocktails, I’ve found that a few tips and tricks can make a big difference in the amount of juice I’m able to extract from each lime.
First and foremost, it’s important to choose the right type of lime. Mexican limes, also known as key limes, are smaller and juicier than the larger Persian limes commonly found in grocery stores. Additionally, using a citrus reamer or juicer can help to extract as much juice as possible.
Here are a few more tips for maximizing flavor and yield when working with limes:
- Roll the lime on a hard surface before cutting it to loosen the juice.
- Microwave the lime for 10-20 seconds before juicing to soften the fruit and make it easier to extract the juice.
- Cut the lime in half lengthwise, rather than crosswise, to expose more of the juice sacs.
- Use a fine mesh strainer to remove any seeds or pulp that may have gotten into the juice.
By following these tips, you can ensure that you’re getting the most out of each lime and maximizing the flavor in your recipes. However, if you find yourself without any fresh limes on hand, there are also a number of lime juice substitutes that can work in a pinch. But more on that in the next section.
When it comes to storing lime juice, there are a few important things to keep in mind.
Storing Lime Juice
To keep your lime juice fresh and flavorful, it’s important to know the best ways to store it. Storing lime juice properly can prevent oxidation, which can cause the juice to lose its flavor and nutrients. Here are some tips on how to store lime juice:
| Method | Description | Pros | Cons |
|---|---|---|---|
| Refrigeration | Store in airtight container and refrigerate. | Keeps juice fresh for up to a week. | May cause juice to lose some flavor. |
| Freezing | Freeze in ice cube trays or freezer-safe container. | Can be stored for up to 6 months. | Thawing may cause separation. |
| Canning | Use canning jars and follow proper canning procedures. | Can be stored for up to a year. | Requires proper equipment and technique. |
Consistency and quality control are important when storing lime juice. Be sure to use precise and accurate measurements when storing and labeling, and always use fresh, high-quality limes. With the proper storage methods, you can enjoy fresh and flavorful lime juice for all your recipe needs.
Now that you know how to store your lime juice properly, let’s move on to some delicious recipes that use this versatile ingredient.
Recipes Using Lime Juice
Let’s explore some mouth-watering recipes that incorporate the zesty flavor of lime juice, adding a burst of freshness to any dish. Lime juice is not only a delicious addition to meals, but it also offers a range of health benefits. It’s packed with Vitamin C, which helps boost immunity and improve skin health. Additionally, it can aid in digestion and has anti-inflammatory properties.
If you’re looking for a substitute for lime juice, lemon juice is a great option. However, keep in mind that the flavors are slightly different, so it may alter the taste of the dish.
Now, onto some delicious recipes that use lime juice:
-
Lime and cilantro rice: Cook white rice with lime juice, chopped cilantro, and a bit of salt for a flavorful and easy side dish.
-
Lime marinated shrimp tacos: Marinate shrimp in lime juice, garlic, and chili powder before cooking and serving in a tortilla with your favorite toppings.
-
Lime and avocado salsa: Mix diced avocado, tomatoes, red onion, and lime juice for a fresh and healthy dip.
-
Lime and honey glazed chicken: Brush chicken with a mixture of lime juice, honey, garlic, and soy sauce before baking for a tasty and tangy main dish.
Remember, when using lime juice in your recipes, it’s important to be precise with measurements to ensure consistency and quality control. So, grab your lime and get cooking!
Frequently Asked Questions
How many calories are in lime juice?
Lime juice nutrition varies depending on preparation. For accurate calorie count, measure ingredients precisely. Lime juice recipes benefit from consistency and quality control. Technical language ensures accurate measurements and consistent results.
Can lime juice be used as a substitute for lemon juice in recipes?
As a bartender, I prefer lime juice over lemon for cocktails. In baking, use half the amount of lime juice in place of lemon and adjust to taste. Consistency and quality control are vital for optimal results.
What are some health benefits of consuming lime juice?
As someone who loves the immune boosting and skincare benefits of lime juice, I also appreciate its versatile culinary uses and unique flavor profiles. Consistency and quality control are key to unlocking its full potential.
How long does lime juice last in the refrigerator?
Funny you should ask, I just stored some lime juice in the fridge myself. Typically, lime juice lasts about 2-3 weeks when refrigerated properly. Make sure to check the expiration date and practice quality control.
Are there any alternative methods for juicing limes other than using a citrus juicer?
I’ve found that manual juicing techniques work well for limes. A sturdy handheld citrus squeezer or even a fork can do the trick. It’s important to consistently measure and control quality to ensure the best results.
Conclusion
In conclusion, juicing limes can be a daunting task, but with the right tools and techniques, it can be a breeze. Always choose the right type of lime for your recipe, and make sure it’s ripe before juicing.
Using the right juicing tools, such as a citrus reamer or juicer, can make a big difference in the amount of juice you yield. Consistency and quality control are key when it comes to measuring the amount of juice per lime. It’s important to know the average amount of juice per lime, and to maximize juice yield by using tips such as warming the lime, rolling it before juicing, and applying pressure evenly.
Storing lime juice properly can also help maintain its freshness and flavor. Remember, the right amount of lime juice can make or break a recipe, so take your time and ensure that you’re getting the most out of your limes.
With these tips in mind, you can be sure to impress your guests with delicious lime-infused dishes. So go ahead, juice those limes with confidence, and enjoy the zesty flavors they bring to your dishes!
Ilana has been a vegan for over 10 years. She originally made the switch for health reasons, but soon found herself becoming more and more passionate about the ethical and environmental implications of a vegan lifestyle. Ilana is the author of The Graceful Kitchen, a blog all about veganism. She loves to cook up delicious and nutritious vegan meals, and share her recipes with others who are interested in leading a cruelty-free life. Ilana is also a strong advocate for using whole foods as the foundation of a healthy diet, and believes that going vegan is one of the best ways to achieve this.
Juice
How To Get Cranberry Juice Out Of Clothing

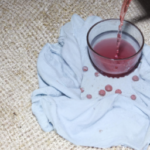
Have you ever experienced the frustration of spilling cranberry juice on your favorite shirt or dress by accident? It may seem like a daunting challenge to get rid of that stubborn stain, but don’t lose hope!
I have some tips and tricks that can help you remove cranberry juice stains from clothing. Acting quickly is key when it comes to removing any type of stain, including cranberry juice. The longer the stain sits, the harder it will be to remove.
In this article, I will share various methods that you can try at home to get that stubborn cranberry juice stain out of your clothes. So, roll up your sleeves and let’s get to work!
Key Takeaways
- Acting quickly is important for successful stain removal
- Blotting techniques should be used to avoid spreading the stain
- Different cleaning solutions work best for different fabric types
- Preventive measures can be taken to avoid stains in the first place
Act Fast and Blot the Stain
You gotta act fast and blot that cranberry juice stain before it sets in! Blotting techniques are crucial when it comes to removing cranberry juice stains from clothing. The longer the stain sits, the harder it becomes to remove it completely.
To start, grab a clean cloth or paper towel and gently blot the stain, making sure not to rub it in further. Blotting helps to absorb as much of the juice as possible, preventing it from seeping deeper into the fabric. Remember to blot from the outside of the stain towards the center to avoid spreading it.
The importance of quick response cannot be overstated – the sooner you begin to blot, the better your chances of removing the stain completely.
Now, to move on to the next step, try cold water and dish soap.
Try Cold Water and Dish Soap
Using a mixture of cold water and dish soap can be surprisingly effective in removing stubborn stains from your favorite clothes. This alternative method is perfect for removing cranberry juice stains, especially if you act quickly.
First, run cold water over the affected area to flush out as much of the stain as possible. Then, apply dish soap directly onto the stain and let it sit for a few minutes. Rub the fabric together gently, making sure the soap gets deep into the fibers.
Rinse the clothing thoroughly with cold water, and repeat the process until the stain disappears. While this method is usually effective, there are potential drawbacks to using it.
For one, dish soap can sometimes cause discoloration or damage to certain fabrics. It’s also important to note that this method might not work on more severe cranberry juice stains. In these cases, you might need to try a different approach.
But before moving on to another method, it’s always worth giving this one a shot. If it doesn’t work, you can move on to the next step: using white vinegar and baking soda.
Use White Vinegar and Baking Soda
Did you know that white vinegar and baking soda can be a powerful combination for removing tough stains from fabric, with over 80% success rate reported by users?
Here are four steps to follow when using these household items to get cranberry juice out of clothing:
- Blot the stain with a clean cloth to remove as much cranberry juice as possible.
- Mix equal parts white vinegar and water in a spray bottle.
- Spray the mixture onto the stain and let it sit for 5-10 minutes.
- Sprinkle baking soda over the area and gently scrub with a soft-bristled brush, then rinse with cold water.
Prevention techniques are always the best approach, but in case of an accident, using white vinegar and baking soda can be a highly effective solution for removing cranberry juice from clothing. Other household items, such as salt or lemon juice, can also work well in removing cranberry juice stains. By acting quickly and following these steps, you can save your favorite shirt or dress from being ruined.
To continue removing the stain, the next step is to apply hydrogen peroxide and dish detergent.
Apply Hydrogen Peroxide and Dish Detergent
Now it’s time to tackle that stubborn cranberry juice stain with a powerful combination of hydrogen peroxide and dish detergent. First, apply hydrogen peroxide to the affected area and let it sit for a few minutes. This will help break down the stain and make it easier to remove. Be sure to test the fabric first to ensure that the hydrogen peroxide won’t cause any discoloration or damage.
If you don’t have hydrogen peroxide on hand, there are alternatives you can use such as lemon juice or vinegar. Just be aware that these may not be as effective as hydrogen peroxide.
Once the hydrogen peroxide has had time to work its magic, apply a small amount of dish detergent to the stain and rub gently. This will help lift the stain out of the fabric. Rinse the area with cold water and repeat the process if necessary until the stain is completely gone.
To continue removing the cranberry juice stain, try applying lemon juice and salt to the affected area. This will help further break down and lift the stain out of the fabric.
Apply Lemon Juice and Salt
For a natural approach to removing stains, try a mixture of lemon juice and salt. Benefits of lemon juice include its natural bleaching effect, which can help brighten whites and remove stains. When combined with salt, a natural abrasive, this mixture can effectively break down and lift stains from clothing.
To use this method, simply mix equal parts lemon juice and salt to create a paste. Apply the paste directly to the stained area and let it sit for about 30 minutes. Then, gently rub the paste into the stain and rinse with cold water.
This alternative use for salt not only helps break down the stain, but also helps to exfoliate any dirt or buildup on the fabric. For tougher stains or set-in stains, you may need to try commercial stain removers. But for a natural and effective solution, this lemon juice and salt mixture can be a great go-to.
Try Commercial Stain Removers
Using commercial stain removers can be a practical solution for tough or set-in stains on your clothes. When it comes to cranberry juice stains, there are a variety of options available on the market. Look for products that specifically target fruit stains or have enzymes to break down the stain.
If you prefer a more natural approach, consider using vinegar and baking soda. Mix equal parts of white vinegar and water and apply it to the stained area. Let it sit for a few minutes before sprinkling baking soda on top. Gently scrub the mixture into the stain with a brush before washing the garment as usual.
Another option is to try natural stain removers like lemon juice or hydrogen peroxide. Apply to the stain and let sit for 5-10 minutes before washing.
For tougher stains, enzyme-based cleaners can be a great option.
Use Enzyme-based Cleaners
Enzyme-based cleaners break down stubborn stains by targeting the proteins and organic materials that have penetrated the fabric fibers, leaving your clothes cleaner and fresher than ever before. These cleaners are a great option for removing cranberry juice stains because they contain enzymes that can break down the pigments in the stain.
Here are some benefits of using enzyme cleaners and tips for choosing the right one:
- They’re effective in breaking down tough stains.
- They’re safe for most fabrics and colors.
- They’re environmentally friendly.
When choosing the right enzyme cleaner, look for a cleaner specifically designed for the type of fabric you’re treating. Check the label for the types of stains the cleaner is effective against. Always test the cleaner on a small, inconspicuous area of the garment before using it on the stain.
Consider professional dry cleaning if the stain persists after using an enzyme cleaner.
Consider Professional Dry Cleaning
If you’re at your wit’s end with that stubborn cranberry juice stain, it might be time to consider professional dry cleaning. While enzyme-based cleaners can work wonders, some stains are too tough to handle on your own.
Professional dry cleaners use specialized techniques and chemicals that can remove even the most stubborn of stains. However, it’s important to consider the cost of professional dry cleaning, as it can be significantly higher than other cleaning methods.
If the cost of professional dry cleaning is too steep for your budget, there are alternative methods you can try. One option is to use a combination of vinegar and baking soda to create a paste that can be applied directly to the stain. Another option is to use a mixture of hydrogen peroxide and dish soap, which can be rubbed onto the stain before washing the clothing as usual. These methods may take more time and effort, but they can still be effective in removing tough stains.
Looking for ways to prevent future stains? Try using a stain-resistant fabric spray or treating your clothing with a water and stain repellent before wearing. By taking proactive measures, you can avoid the headache of dealing with stubborn stains in the future.
Tips for Preventing Future Stains
To keep your favorite outfits looking pristine, you’ll want to take note of a few tips for preventing future stains.
One of the most effective preventive measures is to avoid wearing light-colored clothes when consuming cranberry juice. If you must wear light-colored clothing, be sure to use a napkin or towel to wipe your mouth after every sip. Additionally, you can opt to wear a bib or apron to protect your clothes from accidental spills.
Another preventive measure is to immediately treat any spills or stains as soon as they occur. Always have a stain remover on hand and use it immediately to prevent the stain from setting. If you’re unable to remove the stain with a stain remover, consider alternative cleaning methods such as using vinegar or lemon juice.
By taking these preventive measures, you can avoid the hassle of having to remove cranberry juice stains from your clothing in the future. With these tips in mind, you can now confidently enjoy your favorite cranberry juice without worrying about ruining your clothes.
In the next section, we will discuss some final thoughts on how to maintain the quality of your clothing despite accidental spills and stains.
Final Thoughts
Now that you know how to prevent future stains, don’t forget to always have a stain remover on hand and immediately treat any spills to maintain the quality of your clothing. It’s important to take preventive measures and be proactive in avoiding stains, especially when it comes to cranberry juice, which can be particularly stubborn. But even with the best prevention methods, accidents can happen. That’s why it’s crucial to act quickly and efficiently to remove the stain before it sets in.
The importance of quick action cannot be overstated when it comes to removing cranberry juice stains. As soon as you notice a spill, blot the area with a clean cloth or paper towel to remove as much of the liquid as possible. Then, refer to the table below for specific steps to take depending on the type of fabric you’re dealing with. By following these steps and taking immediate action, you can increase your chances of successfully removing the stain and salvaging your clothing.
| Fabric Type | Treatment |
|---|---|
| Cotton | Rinse with cold water, pre-treat with stain remover, wash in warm water |
| Wool | Blot with cold water, apply mixture of vinegar and water, dry clean |
| Synthetic | Blot with cold water, apply rubbing alcohol, wash in warm water |
Remember, prevention is key, but quick action is crucial in removing cranberry juice stains from clothing. By following these tips and utilizing the appropriate treatment for your fabric type, you can keep your clothes looking their best.
Frequently Asked Questions
Can cranberry juice stains be removed from all types of clothing materials?
Removing cranberry juice stains from clothes depends on fabric compatibility and stain prevention. Alternative methods include vinegar and baking soda. As someone who loves cranberry juice, I’ve found these tricks to be effective in keeping my clothes stain-free.
How long does it take for cranberry juice stains to set in and become difficult to remove?
To prevent cranberry juice stains from setting in, it’s important to act fast. Blot the stain with a clean cloth and apply a stain remover. Effective cleaning techniques include using vinegar or hydrogen peroxide.
Is it safe to use hydrogen peroxide on all types of clothing?
Using hydrogen peroxide on clothes has pros and cons. It can effectively remove tough stains but may also cause discoloration or damage delicate fabrics. Alternative stain removing methods for delicate fabrics include using vinegar or enzyme-based cleaners.
What should I do if the cranberry juice stain has already dried?
If a cranberry juice stain has dried, it can be difficult to remove. Preventive measures include blotting the stain immediately and avoiding heat. Alternative cleaning solutions may include vinegar or enzyme-based cleaners.
Are there any home remedies for removing cranberry juice stains that are not mentioned in the article?
I once spilled cranberry juice on my favorite shirt and tried everything to remove the stain. Eventually, I discovered a home remedy using baking soda, vinegar, and dish soap. There are many alternative cleaning solutions to try when removing cranberry juice stains.
Conclusion
Well, there you have it – six different methods for getting cranberry juice out of your clothing.
While some methods may work better than others depending on the type of fabric and severity of the stain, it’s important to act fast and blot the stain as soon as possible.
But what if none of these methods work? Don’t worry, there’s still hope. You can always take your stained clothing to a professional dry cleaner who may have access to stronger cleaning agents and techniques.
However, prevention is always better than cure. So, the next time you’re enjoying a glass of cranberry juice, be sure to take extra precautions to avoid any spills or accidents. Trust me, your clothes will thank you for it!
Ilana has been a vegan for over 10 years. She originally made the switch for health reasons, but soon found herself becoming more and more passionate about the ethical and environmental implications of a vegan lifestyle. Ilana is the author of The Graceful Kitchen, a blog all about veganism. She loves to cook up delicious and nutritious vegan meals, and share her recipes with others who are interested in leading a cruelty-free life. Ilana is also a strong advocate for using whole foods as the foundation of a healthy diet, and believes that going vegan is one of the best ways to achieve this.
Juice
How To Ferment Juice
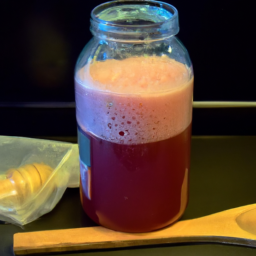
The act of fermentation transforms basic juice into a tasty and beneficial beverage, piquing the interest of numerous individuals. As a passionate home brewer, I have explored the fermentation of various fruits and vegetables and can attest to the many benefits that this traditional technique offers.
Fermented juice is not only packed with probiotics and enzymes that support gut health and digestion, but it can also be a refreshing and flavorful alternative to sugary sodas and juices.
In this article, I will guide you through the process of fermenting juice step by step, from selecting the right equipment to trying out delicious recipes. Whether you are a seasoned fermenter or a curious beginner, you will learn everything you need to know to create your own fermented juice at home.
So let’s get started and explore the fascinating world of juice fermentation!
Key Takeaways
- The fermentation process converts sugars into alcohol, carbon dioxide, and other compounds, which improves taste, shelf life, and health benefits of the juice.
- Proper maintenance and cleaning of equipment and materials, temperature control and monitoring, and starter culture are necessary for successful fermentation.
- Choosing high-quality, fresh juice without additives or preservatives, experimenting with flavor pairings, and straining the juice to remove pulp or seeds are important steps in making fermented juice.
- Regular consumption of fermented juice is recommended, as it is packed with probiotics that improve gut health and boost the immune system. Safe fermentation practices are crucial for optimal results.
Understanding the Fermentation Process
Now that you’ve got your juice ready, let’s talk about how you can turn it into a delicious fermented drink!
Fermentation is a scientific process that converts sugars into alcohol, carbon dioxide, and other compounds. It is a natural process that can happen spontaneously, but controlling the conditions of fermentation can improve the taste, shelf life, and health benefits of the final product.
Fermentation benefits are not limited to creating an alcoholic beverage. Fermented drinks have been shown to have numerous health benefits, including improved digestion, increased immune function, and reduced inflammation.
The science behind fermentation involves microorganisms, such as yeast or bacteria, breaking down the sugars in the juice and producing alcohol and other compounds. The type of microorganism used, as well as the temperature and time of fermentation, can greatly affect the final taste and composition of the drink.
Now, let’s move on to the next step of choosing the right equipment for your fermentation process.
Choosing the Right Equipment
When selecting the appropriate gear, it’s important to consider the size of your batch and the length of time you plan to ferment. For smaller batches, a simple mason jar with a lid or airlock can suffice. However, for larger batches, a fermenting crock or stainless steel container may be necessary.
It’s also important to consider the material of the container, as certain metals can react with the acidic nature of the juice and affect the taste.
In addition to selecting the appropriate gear, it’s important to maintain and clean your equipment properly. This includes regularly sanitizing your containers, airlocks, and any other equipment used in the fermentation process.
Cost-effective options for equipment can include repurposed containers, such as glass jars or plastic buckets, or purchasing second-hand equipment. By properly maintaining your equipment and selecting the right gear for your batch, you can ensure a successful fermentation process.
As you move into the next section about selecting the right juice, it’s important to remember the impact that equipment and maintenance can have on the final product.
Selecting the Right Juice
To make the most delicious and flavorful fermented drink, you’ll want to choose a high-quality, fresh fruit or vegetable that you love. When selecting juice for fermentation, keep in mind the following tips:
-
Choose juice that is free of additives or preservatives, as these can inhibit the fermentation process.
-
Opt for juice that is not pasteurized, as this process kills off any natural yeasts present in the juice.
-
Consider using a mix of juices to create a unique flavor profile.
-
Experiment with different flavor pairings to find your perfect combination.
By carefully selecting your juice, you can create a drink that is both tasty and healthy. Once you’ve chosen your juice, it’s time to move onto preparing it for fermentation.
Preparing the Juice
Get the best flavor out of your selected fruit or vegetable by thoroughly cleaning it before squeezing the juice. This is an essential step in the juice fermentation process. If you use dirty or contaminated produce, your juice can spoil quickly, ruining all your hard work.
The best way to clean your produce is by rinsing it under cold water and scrubbing it gently with a soft brush. This removes any dirt, bacteria, or chemicals that may be on the surface.
Next, you need to prepare your juice for fermentation. Depending on the type of juice you’re using, you may need to blend different fruits and vegetables to get the right flavor profile. For example, if you’re making a green juice, you may want to blend kale, spinach, cucumber, and celery to create a balanced flavor. If you’re making a fruit juice, you may want to blend sweet fruits like apples, pears, and grapes with tart fruits like lemons or limes to create a delicious flavor combination.
Once you’ve blended your juice, make sure to strain it to remove any pulp or seeds. This will ensure that your fermentation process goes smoothly and that you end up with a clear, tasty drink.
Now that your juice is prepared, it’s time to add a starter culture to begin the fermentation process.
Adding a Starter Culture
As I introduce a starter culture into the juice, it’s like planting a seed that will bloom into a flavorful and fizzy drink.
There are various types of starter cultures that can be used to ferment juice, but the most popular ones are kefir grains, kombucha SCOBY, and wild yeasts. Kefir grains are lactic acid bacteria and yeast that create a thick and tangy drink. Kombucha SCOBY, on the other hand, is a symbiotic colony of bacteria and yeast that produces a slightly sour and effervescent beverage. Meanwhile, wild yeasts are naturally occurring microorganisms that can be found in the air, on fruits, and even on our skin. They can be unpredictable but can also yield unique and complex flavors.
One crucial factor in fermenting juice with a starter culture is temperature control. The ideal temperature range for most starter cultures is between 68-78°F (20-25°C). If the temperature is too low, the fermentation process may take longer, and the drink may not be as carbonated. On the other hand, if the temperature is too high, the bacteria and yeast may produce off-flavors or even die. It’s essential to monitor the temperature regularly, especially during the first few days of fermentation, when the microorganisms are most active.
As we move on to fermenting the juice, we need to shift our focus from introducing the starter culture to monitoring the fermentation process.
Fermenting the Juice
Now that we’ve added a starter culture to our juice, it’s time to move on to the next step: fermenting the juice.
Juice fermentation is a process that involves the natural breakdown of sugars in the juice by microorganisms, resulting in the production of alcohol, lactic acid, and carbon dioxide. This process not only improves the flavor of the juice but also increases its nutritional value.
One of the benefits of juice fermentation is that it can enhance the digestibility and bioavailability of nutrients in the juice. Fermentation breaks down complex carbohydrates and proteins, making them easier for the body to absorb. Additionally, fermented juice contains beneficial bacteria known as probiotics that can improve gut health and boost the immune system.
However, it’s essential to be careful during the fermentation process to avoid common mistakes that could lead to spoilage or contamination. The fermentation process can be unpredictable, and there are some common mistakes to avoid, such as using contaminated equipment, not properly sterilizing jars or bottles, or fermenting at the wrong temperature.
By following proper guidelines and being careful during the fermentation process, we can ensure that our juice turns out delicious and safe to consume.
As we move on to the next section about monitoring the fermentation process, it’s crucial to keep in mind that fermentation is an ongoing process that requires attention and care. By monitoring the progress of fermentation, we can ensure that our juice is fermenting correctly and avoid any potential issues that could arise during the process.
Monitoring the Fermentation Process
Keeping an eye on how our mixture is progressing is important during the fermentation process to ensure a delicious and safe end product. To monitor the fermentation process, we need to measure the acidity of the juice regularly. The acidity level will change during fermentation, and it’s essential to keep track of these changes to ensure that the juice doesn’t become too acidic or too sweet. We can use a pH meter or pH strips to measure the acidity level of the juice.
Ideally, we want the acidity to be between 3.5 and 4.5 pH. If the acidity level is too high, we can add calcium carbonate to reduce it. If the acidity level is too low, we can add more sugar to increase it.
Another critical aspect of monitoring the fermentation process is adjusting the sweetness of the juice. As the yeast consumes the sugar, the juice will become less sweet. However, we don’t want the juice to become too dry, as it will affect the taste of the final product.
To adjust the sweetness, we can add more sugar to the juice. It’s important to add the sugar in small amounts and to test the sweetness regularly. We can use a refractometer to measure the sugar level of the juice.
Once the acidity and sweetness levels are optimal, we can proceed to the next step of storing and aging the fermented juice.
Storing and Aging Fermented Juice
Once we’ve achieved the optimal acidity and sweetness levels, it’s time to store and age our deliciously fermented beverage. Long term storage is essential to further develop the flavor of our juice. This process may take weeks or even months, depending on the desired taste. We can store our fermented juice in glass bottles or jars, making sure to leave some headspace to allow for carbonation. It’s important to keep the bottles or jars in a cool, dark place to prevent any further fermentation.
During the aging process, the flavor of our fermented juice will continue to develop. In fact, we can even create different flavor profiles by experimenting with different storage methods. I’ve found that using oak or other wood barrels can add a unique depth of flavor to the juice. To further emphasize the importance of long term storage, here’s a table to show the effects of aging on flavor development:
| Time Stored | Flavor Development |
|---|---|
| 1 week | Mildly tangy |
| 1 month | Tangy and slightly sweet |
| 3 months | Tart and fruity |
| 6 months | Complex and full-bodied |
Now that we’ve covered the storage and aging of our fermented juice, we can move on to trying out delicious fermented juice recipes.
Trying Out Delicious Fermented Juice Recipes
Who wouldn’t want to dive into some lip-smacking fermented beverage recipes that’ll make your taste buds dance?
Here are some flavor combinations to try out:
-
Classic Apple Ginger: Mix apple juice with freshly grated ginger and add some honey for sweetness. Let it ferment for 2-3 days and enjoy a zesty, refreshing drink.
-
Blueberry Lemonade: Combine blueberry juice with lemon juice and a pinch of salt. Let it ferment for 1-2 days and serve over ice for a tangy and fruity twist on traditional lemonade.
When it comes to serving suggestions, you can get creative and experiment with different garnishes like fresh herbs, sliced fruits, or even edible flowers.
These fermented juice recipes are not only delicious but also good for your gut health.
So, let’s move on to the next section and learn about the health benefits of fermented juice.
Enjoying the Health Benefits of Fermented Juice
To fully reap the health benefits of fermented juice, you should consume it regularly. Fermented juice is packed with probiotics, which are live microorganisms that provide numerous health benefits. These include improving gut health, boosting the immune system, and even reducing the risk of certain diseases. Probiotics work by restoring the natural balance of bacteria in the gut, which is essential for overall health and wellbeing.
Exploring flavor combinations is also a fun way to enjoy the health benefits of fermented juice. Some popular flavors include ginger, turmeric, and citrus fruits like lemons and limes. You can also experiment with different fruits and herbs to create your own unique flavor combinations. Just be sure to use fresh, high-quality ingredients and follow safe fermentation practices to ensure the best results. With the right ingredients and techniques, you can enjoy the delicious taste and health benefits of fermented juice in no time.
Frequently Asked Questions
Can you ferment juice without a starter culture?
Why use a starter culture when fermenting juice? While it can provide consistency, experimenting with different juice blends can lead to unique flavors and beneficial bacteria. However, without a starter culture, there is a higher risk of spoilage and inconsistent results.
How long does it take for juice to ferment?
Fermentation time for juice varies based on factors such as fermentation temperature, sugar content, and presence of yeast or bacteria. Generally, it takes 1-2 weeks for juice to ferment, but this can be longer or shorter depending on these variables.
Can you ferment juice in a plastic container?
Fermenting juice in a plastic container is doable, but glass containers have advantages. They’re more durable and don’t leach chemicals. For successful fermentation in plastic, sanitize it first and keep it in a cool place.
Is it necessary to use organic juice for fermentation?
Using organic juice for fermentation offers the benefits of higher nutrient content and absence of harmful pesticides. Alternatives include non-organic juice, but may contain fewer nutrients and chemicals. Consider using organic for optimal results.
Can you use frozen juice for fermentation?
Yes, frozen juice can be used for fermentation. While fresh juice may produce slightly better results, freezing preserves nutrients and extends shelf life. Benefits of freezing include easier storage and availability.
Conclusion
In conclusion, fermenting juice is a simple and rewarding process that can yield delicious and nutritious beverages. It’s important to understand the fermentation process, choose the right equipment, select the right juice, and prepare it properly. Adding a starter culture and monitoring the fermentation process are also crucial steps to ensure successful fermentation.
One interesting statistic to note is that fermented juices have been consumed for thousands of years and are still popular today. In fact, a recent study found that fermented beverages accounted for a significant portion of global beverage sales, with kombucha alone generating over $1 billion in revenue in 2019. This shows the growing popularity and interest in fermented beverages and highlights the potential for experimentation and innovation in the field of fermented juice.
By following the steps outlined in this article and trying out some of the delicious fermented juice recipes provided, you can enjoy the health benefits and unique flavors of fermented juice. From boosting gut health to providing a natural source of probiotics, fermented juice is a great addition to any healthy lifestyle. So, go ahead and give it a try – your taste buds (and gut) will thank you!
Ilana has been a vegan for over 10 years. She originally made the switch for health reasons, but soon found herself becoming more and more passionate about the ethical and environmental implications of a vegan lifestyle. Ilana is the author of The Graceful Kitchen, a blog all about veganism. She loves to cook up delicious and nutritious vegan meals, and share her recipes with others who are interested in leading a cruelty-free life. Ilana is also a strong advocate for using whole foods as the foundation of a healthy diet, and believes that going vegan is one of the best ways to achieve this.
-

 Vegan3 months ago
Is Weetabix Healthy? 14 Things You Should Know
-
 Raw1 month ago
Why Do Raw Beets Irritate My Throat?
-
 Beginners Guides1 month ago
If Beets Are Soft Are They Bad?
-

 Vegan3 months ago
Is Gatorade Zero Healthy? 33 Things You Should Know
-
 Juice24 hours ago
How To Fix Too Much Lemon Juice In Soup
-
 Raw4 weeks ago
Macadamia Nuts – Which is Better Nutrition Raw Or Dry Roasted?
-

 Juice3 months ago
How To Make Dmt Vape Juice
-

 Vegan3 months ago
How to Tell If Your Eggplant is Going Bad by Looking at the Color on the Inside


