Connect with us

Juice

How Long Is Cranberry Juice Good For

Published

on

Did you know that cranberry juice can be stored for a long time? Research has demonstrated that cranberry juice can last longer than expected. In fact, if left unopened, cranberry juice can still be consumed up to nine months after its expiration date.

As a virtual assistant, I am often asked about the shelf life of various food and beverage items. Cranberry juice is a popular choice among my clients due to its numerous health benefits and versatile uses. In this article, I will delve into the topic of how long cranberry juice can last, as well as provide information on proper storage techniques, different types of cranberry juice, and creative ways to use it in your daily routine.

So, whether you are a fan of cranberry juice or simply curious about its shelf life, read on to learn more!

Key Takeaways

  • Proper storage techniques can extend the shelf life of cranberry juice.
  • Changes in color, texture, and taste are indicators of spoilage.
  • The type of cranberry juice and added sugar may affect its health benefits.
  • Unopened cranberry juice can last up to 9 months beyond the expiration date, while opened juice lasts for 10-14 days in the refrigerator.

Understanding the Shelf Life of Cranberry Juice

Cranberry juice’s shelf life can vary depending on factors like storage and packaging. One of the most common ways to determine how long cranberry juice is good for is by looking at the expiration date printed on the packaging. This date indicates the last day that the juice is guaranteed to be at its peak freshness and quality. However, it’s important to note that this is just a general guideline and doesn’t necessarily mean the juice will spoil immediately after this date.

Spoilage indicators are another way to determine if cranberry juice is still good to drink. These include changes in color, texture, and taste. If the juice starts to look cloudy or has a strange odor, it’s likely that it has gone bad. Additionally, if the taste is off or the juice has a sour flavor, it’s best to avoid drinking it.

By paying attention to these indicators, you can ensure that you’re only consuming fresh, high-quality cranberry juice. With that said, proper storage techniques can also play a big role in preserving the shelf life of your juice.

Advertisement

Proper Storage Techniques

Storing cranberry juice requires following proper storage techniques to ensure it remains fresh. A key factor to consider is the expiration date. Before storing any cranberry juice, it’s important to check its expiration date. This helps in determining how long the juice can be stored before it goes bad.

Typically, cranberry juice can last for 10 to 14 days in the refrigerator after it’s been opened, but this is dependent on the specific brand and expiration date. In addition to checking the expiration date, proper storage techniques are important to maintain the freshness of cranberry juice.

It’s recommended to store cranberry juice in the refrigerator at a temperature of 40°F or below. This ensures that the juice remains at a safe temperature and slows down the growth of bacteria. Lastly, it’s important to keep the juice in the original container or transfer it to an airtight container, away from direct sunlight or heat sources.

Following these proper storage techniques ensures that cranberry juice remains fresh for a longer period of time. As we move on to discussing different types of cranberry juice, it’s important to note that proper storage techniques vary depending on the specific type of juice.

Different Types of Cranberry Juice

When you’re looking for variety in your drink choices, you’ll be happy to know that there are different types of cranberry juice available to try. Here are some of the most common cranberry juice varieties:

Advertisement
  • 100% pure cranberry juice: This type of juice is made from only cranberries and water, with no added sugars or other juices. It has a tart taste and is often used in cooking or as a mixer in cocktails.

  • Cranberry juice cocktail: This type of juice is a blend of cranberry juice and other juices, such as apple or grape juice. It’s typically sweeter than pure cranberry juice and has a milder taste.

  • Cranberry juice blends: These juices are a combination of cranberry juice and other fruit juices, such as blueberry, raspberry, or pomegranate. They’re often marketed as having added health benefits due to the combination of fruits.

  • Cranberry juice with added sugar: Some cranberry juice products contain added sugar to sweeten the tart taste of the cranberries. However, these products may not be as healthy as pure cranberry juice or cranberry juice blends.

Knowing the different types of cranberry juice can help you choose a product that best fits your taste preferences and health needs. Speaking of health benefits, let’s explore how cranberry juice blends can be beneficial for your body.

Health Benefits of Cranberry Juice

When it comes to the health benefits of cranberry juice, there are three key points that I find particularly interesting.

Firstly, cranberry juice is known to promote urinary tract health by preventing the adhesion of harmful bacteria to the urinary tract lining.

Secondly, it’s rich in antioxidants, which can help protect the body against damage from free radicals.

Lastly, cranberry juice has been shown to have a positive impact on digestive health, potentially reducing the risk of gastrointestinal diseases.

Advertisement

Urinary Tract Health

Just like a knight in shining armor, cranberry juice can be a hero in maintaining urinary tract health. UTI prevention is one of the most well-known benefits of drinking cranberry juice. Its high concentration of proanthocyanidins (PACs) prevents UTI-causing bacteria from sticking to the walls of the urinary tract, flushing them out of the body.

While cranberry supplements are available, drinking the juice itself is more effective due to the presence of other compounds that enhance its antibacterial properties.

In addition to preventing UTIs, cranberry juice also helps alleviate the symptoms of an existing infection. The anti-inflammatory properties of the juice soothe the inflamed urinary tract, reducing pain and discomfort. Moreover, regular consumption of cranberry juice can help prevent the recurrence of UTIs in those who are prone to them.

So, if you want to keep your urinary tract healthy, reach for a glass of cranberry juice! As we move on to the next section about antioxidants, it’s important to note that cranberry juice is not only beneficial for urinary tract health but also for overall wellness.

Antioxidants

By incorporating foods high in antioxidants into my diet, like berries and leafy greens, I’m able to reap the benefits of their properties.

Advertisement

Antioxidants are molecules that help protect the body from damage caused by free radicals, which are unstable atoms that can cause harm to cells and lead to diseases like cancer and heart disease.

Cranberry juice is a great source of antioxidants and has been shown to have a high ORAC (oxygen radical absorbance capacity) value, which measures the antioxidant capacity of foods.

In addition to its antioxidant properties, cranberry juice has been found to have other health benefits such as promoting urinary tract health and reducing inflammation. It’s also a good source of vitamin C and other nutrients.

However, it’s important to note that not all cranberry juice is created equal. Many commercial brands contain added sugars and are heavily processed, which can diminish the health benefits. When choosing cranberry juice, it’s best to opt for organic and unsweetened varieties to maximize its potential health benefits.

Transitioning into the subsequent section about digestive health, I’ve found that incorporating cranberry juice into my diet has not only benefited my urinary tract health but has also aided in my digestion.

Advertisement

Digestive Health

Improving your digestive health can greatly improve your overall well-being, and there are various ways to do so. Here are four ways you can promote a healthy digestive system:

  1. Incorporate probiotic supplements into your daily routine. Probiotics are live bacteria and yeasts that are good for your gut health. They can improve digestive function and boost your immune system.

  2. Consume fermented foods like kimchi, sauerkraut, and yogurt. Fermented foods are rich in probiotics and can help improve digestion and reduce inflammation in the gut.

  3. Drink plenty of water to keep your digestive system hydrated. Water helps your body break down food and move waste through your intestines.

  4. Eat a diet rich in fiber. Fiber helps promote bowel regularity and keeps your digestive system functioning properly.

By following these tips, you can promote a healthier digestive system and improve your overall well-being.

Now, let’s explore some creative ways to use cranberry juice!

Creative Ways to Use Cranberry Juice

I’m excited to share some creative ways to use cranberry juice beyond just drinking it straight up! Here are a few ideas:

  • Cocktails and mocktails: Cranberry juice is a staple ingredient in many popular drinks like the Cosmopolitan and the Cape Codder. You can also use it to make refreshing non-alcoholic options like a Cranberry Spritzer.

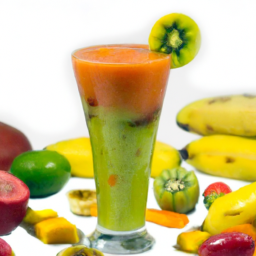
  • Smoothies: Add some cranberry juice to your favorite fruit and veggie blend for an extra antioxidant boost.

  • Marinades and sauces: The tartness of cranberry juice makes it a great addition to marinades for chicken or pork, and it can also be used to make a delicious sauce for meat or veggies.

Remember to double space between each group of complete sentences!

Advertisement

Cocktails and Mocktails

You’ll be pleasantly surprised by the variety of cocktails and mocktails you can make with cranberry juice, especially when it’s fresh and within its expiration date. Here are some flavor pairings and garnishes for cocktails and mocktails that will make your taste buds dance:

  • Vodka cranberry with a lime wedge
  • Cranberry margarita with a salt and sugar rim
  • Cranberry sangria with oranges and apples
  • Cranberry mocktail with ginger ale and mint leaves

These are just a few examples of how you can use cranberry juice to create delicious and refreshing drinks. When making cocktails, it’s important to balance the flavors and not overpower the cranberry juice. Adding a splash of citrus or a hint of sweetness can enhance the taste and create a perfect blend. Don’t forget to garnish with fresh fruits or herbs to give your drink a fancy touch.

Moving on to the next section about smoothies, there are also many ways to incorporate cranberry juice into your healthy drinks.

Smoothies

Get ready to blend your way to a healthier you with these delicious smoothie recipes featuring the versatile cranberry. Not only do these smoothies taste great, but they are also packed with nutritional value. Cranberries are high in antioxidants, vitamin C, and fiber, making them a great addition to any diet.

Here are three smoothie recipes that are sure to please your taste buds and your body:

Recipe Ingredients Instructions
Cranberry Banana Smoothie 1 cup frozen cranberries, 1 banana, 1 cup almond milk, 1 tbsp honey Blend all ingredients until smooth.
Cranberry Orange Smoothie 1 cup frozen cranberries, 1 orange, 1 cup Greek yogurt, 1 tbsp honey Blend all ingredients until smooth.
Green Cranberry Smoothie 1 cup frozen cranberries, 1 cup spinach, 1 banana, 1 cup coconut water Blend all ingredients until smooth.

Incorporating these smoothie recipes into your diet is a great way to reap the nutritional benefits of cranberries. Plus, they make for a quick and easy breakfast or snack on-the-go. Now, let’s move onto the next section about marinades and sauces.

Advertisement

Marinades and Sauces

Let’s spice up your meals with these flavorful marinades and sauces that’ll take your cooking to the next level. The right marinade or sauce can transform a plain cut of meat or vegetables into a culinary masterpiece.

When it comes to creating these flavor-packed additions to your meals, it’s important to consider the flavor combinations and marinating techniques that’ll bring out the best in your ingredients.

Here are five ideas to get you started:

  • Soy and ginger marinade for chicken or beef
  • Balsamic glaze for roasted vegetables
  • Chimichurri sauce for grilled steak or fish
  • Lemon and herb marinade for chicken or pork
  • Honey mustard sauce for dipping chicken fingers or drizzling over roasted vegetables

Now that we’ve explored some tasty options for marinades and sauces, let’s move on to incorporating cranberry juice into your cooking with these delicious recipes.

Recipes Using Cranberry Juice

If you’re a fan of tart flavors, incorporating cranberry juice into recipes can add a zing to your dishes that’s hard to resist. One way to use cranberry juice is to make cranberry juice cocktails. You can mix it with vodka, gin, or rum, and add a splash of lime juice for a refreshing and tangy drink.

Another way to use cranberry juice is to make cranberry juice marinades. The acidity of the juice can help tenderize meat and add flavor to any grilled or roasted dish. Simply mix together some cranberry juice, olive oil, garlic, and your favorite herbs and spices, and use it to marinate chicken, beef, or pork.

Advertisement

As a versatile ingredient, cranberry juice can be used in a variety of recipes, from sweet to savory. It can be used in baking, as a substitute for other liquids like milk or water, to add a fruity twist to muffins, pancakes, or cakes. It can also be used in savory dishes like cranberry-glazed pork chops or cranberry-stuffed chicken breasts. The possibilities are endless!

But before we dive into more recipes, let’s debunk some common myths about cranberry juice.

Common Myths About Cranberry Juice

I hope you enjoyed learning about some delicious recipes using cranberry juice in the previous subtopic. Now, let’s talk about some common myths surrounding cranberry juice.

First and foremost, one of the most common misconceptions is that cranberry juice can cure a urinary tract infection (UTI). While cranberry juice does have some benefits for UTIs, it’s not a cure-all. It can help prevent bacteria from sticking to the bladder wall, but it can’t treat an existing infection.

Another myth is that cranberry juice is high in sugar. In reality, many brands offer low-sugar or unsweetened options. Additionally, some people believe that cranberry juice can cause kidney stones, but this is not entirely true. While it is high in oxalate, which can contribute to kidney stones, the amount in cranberry juice is relatively low.

Advertisement

To add, there are several benefits to drinking cranberry juice. It’s high in vitamin C and antioxidants, which can help boost your immune system and fight off infections. Additionally, it has been shown to improve heart health and reduce inflammation in the body. Despite these benefits, there are still many misconceptions about cranberry juice that can deter people from drinking it. It’s important to do your own research and consult with a healthcare professional to determine what’s best for you.

Now, let’s move on to the next section where we’ll talk about alternative uses for cranberry juice.

Alternative Uses for Cranberry Juice

As someone who loves cranberry juice, I was pleasantly surprised to learn that it has alternative uses beyond just being a delicious beverage.

Some of these alternative uses include using cranberry juice as a cleaning solution, a natural dye, and a hair rinse.

By exploring these three alternative uses, I hope to share some insight into the versatility of cranberry juice and how it can be used beyond just drinking it.

Advertisement

Cleaning Solutions

To keep your cleaning solutions effective, you should regularly check the expiration dates and dispose of any that are past their prime. However, if you’re looking for a more eco-friendly option, you can make your own DIY cleaning solutions using cranberry juice. Not only is this a sustainable option, but it’s also a great way to utilize leftover cranberry juice that may be nearing its expiration date.

Here’s a table to show you how to make a few different cleaning solutions using cranberry juice:

Solution Ingredients Steps
All-purpose cleaner Cranberry juice, water, vinegar 1. Mix equal parts cranberry juice, water, and vinegar in a spray bottle. 2. Shake well before use.
Toilet bowl cleaner Cranberry juice, baking soda 1. Pour 1 cup of cranberry juice into the toilet bowl. 2. Add 1 cup of baking soda. 3. Let sit for 10 minutes before scrubbing with a toilet brush.
Carpet stain remover Cranberry juice, salt 1. Blot the stain with a cloth to remove any excess liquid. 2. Pour cranberry juice over the stain and sprinkle with salt. 3. Let sit for 10 minutes before blotting with a clean cloth.

Using cranberry juice as a cleaning solution not only helps you reduce your carbon footprint, but it can also save you money on expensive cleaning products. But if cleaning isn’t your thing, did you know that cranberry juice can also be used as a natural dye? Let’s explore this option in the next section.

Natural Dye

Did you know that using natural dyes has become increasingly popular in recent years, with sales of natural dyes on Etsy increasing by 20% in the last year alone? People are turning to natural dyes for their DIY projects and fashion inspiration.

Here are five reasons why natural dyes are the way to go:

Advertisement
  • They’re better for the environment. Unlike synthetic dyes, natural dyes don’t contain harmful chemicals that can pollute waterways and harm wildlife.
  • They’re better for your health. Synthetic dyes have been linked to health problems like allergies and even cancer, whereas natural dyes are safe to handle and wear.
  • They produce unique and beautiful colors. Natural dyes come from sources like plants, insects, and minerals, each with their own unique hues and tones.
  • They’re more sustainable. Natural dyes can be made from renewable resources like plants and can be reused multiple times.
  • They’re a fun and creative challenge. Experimenting with natural dyes can be a fun way to explore your creativity and try something new.

As you can see, natural dyes are a great option for anyone looking to add some eco-friendly and unique flair to their DIY projects or fashion inspiration.

Speaking of natural options, have you ever considered using a natural hair rinse?

Hair Rinse

Using a natural hair rinse, such as apple cider vinegar, not only adds shine to your hair but can also help balance its pH levels. This is important because when your hair becomes too alkaline or acidic, it can lead to dryness, breakage, and other hair problems.

Using a natural hair rinse is an easy, affordable, and effective way to maintain healthy hair. There are many hair benefits to using a natural hair rinse. For example, apple cider vinegar can help to remove buildup from styling products, condition the hair, and even combat dandruff.

To make a DIY hair rinse, mix one part apple cider vinegar with two parts water, and apply it to your hair after shampooing. Leave it on for a few minutes before rinsing it out with cool water. This simple recipe is a great way to take care of your hair naturally.

Transitioning to the subsequent section about sustainable cranberry juice production, it’s important to not only care for our hair but also for the environment. One way to do this is by choosing products that are sustainably produced, such as cranberry juice. So, let’s explore how cranberry juice can be produced in a sustainable way.

Advertisement

Sustainable Cranberry Juice Production

You can support sustainable cranberry juice production by choosing brands that prioritize eco-friendly practices. Sustainable harvesting is a crucial aspect of this, as it ensures that the cranberry plants remain healthy and productive for years to come. Some companies use techniques like crop rotation and natural pest control methods to achieve this, minimizing the use of harmful chemicals and safeguarding the surrounding ecosystem.

Another important consideration is the environmental impact of the production process itself. Many cranberry juice brands have implemented measures to reduce their carbon footprint, such as using renewable energy sources like solar and wind power, and minimizing waste by recycling or repurposing byproducts. By supporting these eco-conscious brands, you can help to promote a more sustainable and responsible approach to cranberry juice production. This, in turn, contributes to a healthier planet for future generations.

Frequently Asked Questions

Is it safe to drink expired cranberry juice?

I do not recommend drinking expired cranberry juice due to potential health risks. It is best to dispose of it and consider alternatives such as purchasing a new bottle or making fresh cranberry juice.

Can cranberry juice go bad even if it is properly stored?

Like any perishable item, cranberry juice can go bad even with proper storage. Prolonged storage can lead to spoilage, which can be identified through signs such as a foul odor, mold growth or a change in color.

How often should I consume cranberry juice to receive its health benefits?

I recommend consuming cranberry juice twice a day to receive its health benefits. The optimal dosage is 8-16 ounces per day. Regular intake can prevent urinary tract infections, improve gut health, and lower the risk of cardiovascular diseases.

Advertisement

Can cranberry juice help prevent or treat urinary tract infections?

Hey, did you know that UTIs are a bummer? But fear not, cranberry juice can help prevent and treat them. Effectiveness studies have shown positive results, and it’s a great alternative to antibiotics.

Does the type of cranberry juice affect its shelf life or health benefits?

Different types of cranberry juice may vary in nutritional value and health benefits. For example, 100% pure cranberry juice has more health benefits than cranberry juice cocktail. The shelf life of cranberry juice is affected by storage conditions, such as refrigeration.

Conclusion

In conclusion, understanding the shelf life of cranberry juice is crucial for ensuring its safety and efficacy. Proper storage techniques, such as refrigeration and sealing the container tightly, can help extend the juice’s lifespan. It’s important to note that different types of cranberry juice may have varying expiration dates, so it’s always best to check the label.

One interesting statistic to note is that cranberry juice production in the United States alone has increased by over 60% in the past decade, according to the USDA. This highlights the growing popularity and demand for this tart and healthy drink.

From its numerous health benefits to its versatility in recipes and alternative uses, there are many reasons to incorporate cranberry juice into your daily routine. With sustainable production methods, we can continue to enjoy this delicious and nutritious beverage for years to come.

Advertisement

Continue Reading
Advertisement

Juice

Lemon = How Much Juice

Published

on

By

As someone who loves cooking and baking, I know the importance of accurate measurements when it comes to preparing food. This is especially crucial when using lemon juice in recipes, as it’s important to know the exact amount of juice needed.

Whether youre making lemonade, salad dressing, or a lemon tart, understanding the yield of a lemon will ensure that your recipe turns out perfectly.

There are a few factors that can affect the amount of juice a lemon produces, such as its ripeness and size. Additionally, the juicing method you use can also impact the yield.

In this article, I will provide a step-by-step guide for juicing lemons and share tips for getting the most juice out of your fruit. Plus, I will answer the burning question: how much juice does one lemon yield?

So, lets get started and master the art of juicing lemons!

Advertisement

Key Takeaways

  • Accurate measurements are crucial when cooking and baking with lemons, as factors like ripeness, size, and juicing method can affect lemon juice yield.
  • Knowing how much juice a lemon produces can help save money by buying the right amount of lemons needed, and using the right tool for juicing lemons can make a big difference in juice yield.
  • Lemon juice has health benefits, including aiding in digestion, boosting immune function, and being high in vitamin C and antioxidants, making it beneficial for skincare.
  • Lemon juice can be stored in the refrigerator, freezer, or canned, and can be used in a variety of recipes, including cocktails, salad dressings, and marinades for meats or fish.

The Importance of Knowing How Much Juice a Lemon Produces

You gotta know how much juice a lemon gives, it’s kinda important if you wanna impress your guests with a killer cocktail.

But beyond the realm of mixology, lemon juice has numerous benefits in the realm of health. Rich in vitamin C, potassium, and antioxidants, lemon juice has been shown to aid in digestion, boost immune function, and even prevent kidney stones.

So not only is it important to know how much juice a lemon produces for culinary purposes, but for health reasons as well.

However, the amount of juice a lemon produces can vary depending on a variety of factors, including the ripeness of the fruit, its size, and its temperature. Understanding these factors and how they affect lemon juice yield is crucial in ensuring consistent and accurate measurements in cooking and mixology.

Factors That Affect Lemon Juice Yield

Factors affecting the yield of lemon juice include the ripeness of the fruit and the method of extraction.

When it comes to ripeness, the amount of juice a lemon produces is directly related to how ripe it is. The more mature the fruit, the more juice it will contain. On the other hand, an under-ripe fruit will yield less juice.

Advertisement

Another factor that affects juice yield is the variety of lemon. Some varieties are naturally juicier than others, so it’s important to choose the right variety if you’re looking for maximum juice.

In addition to these factors, the method of extraction also plays a role in how much juice you can get from a lemon. Lemon juice extraction techniques vary, but some methods are more efficient than others. For example, using a hand juicer or a citrus press can yield more juice than simply squeezing the lemon with your hands.

By understanding these factors and choosing the right extraction method, you can maximize your lemon juice yield and get the most out of your fruit.

As we move on to the next section, it’s important to note that having the right tools for juicing lemons can make a big difference in the amount of juice you’re able to extract.

Tools You Will Need for Juicing Lemons

To get the most out of your citrus, you’ll need the right tools. When it comes to juicing lemons, there are two common options: hand-held lemon squeezers and electronic juicers.

Advertisement

Hand-held lemon squeezers are a low-cost and easy-to-use option. They come in a variety of sizes and shapes, but all function in a similar way. Simply cut the lemon in half, place it in the squeezer, and press down on the handles to extract the juice.

Electronic juicers can be a more expensive investment, but they can save time and effort. These machines can handle larger quantities of lemons and often have adjustable settings to customize the level of pulp in your juice.

No matter which tool you choose, having the right equipment can make the process of juicing lemons much easier and more efficient.

Now that you have the appropriate tools, it’s time to learn how to use them effectively. In the next section, we’ll provide a step-by-step guide for juicing lemons to help you maximize your lemon juice yield.

Step-by-Step Guide for Juicing Lemons

Once I’ve got my chosen juicing tool at hand, such as a citrus reamer or a handheld juicer, I begin the process of extracting lemon juice.

Advertisement

First, I cut the lemon in half and place one half onto the juicing tool, with the cut side facing down. Then, I firmly press and twist the juicing tool, extracting the juice from the lemon.

I repeat this process with the other half of the lemon, until all the juice has been extracted.

There are several lemon juicer alternatives available, but the most important thing is to choose a tool that allows for efficient extraction of the juice.

Additionally, lemon juice has many benefits for skin care, as it’s high in vitamin C and antioxidants. Incorporating lemon juice into a daily skincare routine can help brighten and even out skin tone, while also helping to reduce the appearance of fine lines and wrinkles.

With that being said, let’s move on to some tips for getting the most juice out of your lemons.

Advertisement

Tips for Getting the Most Juice Out of Your Lemons

If you want to make the most out of your citrus, it’s important to know a few tricks for maximizing the amount of tangy goodness you can squeeze out of each fruit. Here are three tips for getting the most juice out of your lemons:

  • Use a lemon zester to break up the membranes inside the lemon before juicing. This will help release more juice and make juicing easier.

  • Roll the lemon on a hard surface to break down the pulp before juicing. This will also help release more juice.

  • Consider alternative juicing methods, such as using a garlic press or a citrus squeezer, to get even more juice out of your lemons.

By following these tips, you can ensure that you’re getting the most juice out of each lemon.

But how much juice does one lemon yield? Let’s explore that in the next section.

How Much Juice Does One Lemon Yield?

Did you know that squeezing a single lemon can yield up to a quarter cup of tart and zesty liquid? As someone who loves to cook and bake, knowing how much juice one lemon yields is essential. Not only does it help me plan my recipes better, but it also helps me save money by buying just the right amount of lemons I need.

To give you an idea of just how much juice you can get from a lemon, take a look at this table:

Advertisement
Size of Lemon Amount of Juice
Small 1-2 tablespoons
Medium 2-3 tablespoons
Large 4-5 tablespoons

Aside from adding flavor to your dishes, lemon juice also has numerous health benefits. It’s rich in Vitamin C, which is known to boost the immune system and improve skin health. It also aids in digestion and can help prevent kidney stones. And if you ever find yourself without a fresh lemon on hand, you can always use substitutes such as vinegar or lime juice in a pinch.

Transitioning to the next subtopic, understanding how much juice one lemon yields is essential when it comes to recipe conversion. Knowing how to calculate the amount of lemon juice needed for a recipe can make or break the final outcome.

Recipe Conversion: How to Calculate Lemon Juice Needed

Understanding the recipe conversion process can be complex, especially when it comes to calculating the necessary amount of lemon juice needed. However, having the right amount of this tart and zesty liquid can make all the difference in the final product.

Here are some tips on how to calculate the right amount of lemon juice for your recipe:

  1. Start by determining how much juice you need. This can be done by looking at the recipe and identifying the amount of lemon juice required in the ingredient list.

  2. The next step is to figure out how much juice is in each lemon. On average, a medium-sized lemon yields about 2-3 tablespoons of juice. However, this can vary based on the size and ripeness of the fruit.

  3. Once you know how much juice is in each lemon, you can calculate how many lemons you need for your recipe. Simply divide the required amount of juice by the amount of juice in each lemon to get the number of lemons needed.

By following these simple steps, you can ensure that you have the right amount of lemon juice for your recipe.

Advertisement

In the next section, we’ll discuss how to store any excess juice for future use.

Storing Lemon Juice

Now that we know how to calculate the amount of lemon juice needed for a recipe conversion, it’s important to discuss proper storing techniques and shelf life.

Lemon juice can be stored in a variety of ways, including in the refrigerator, freezer, or even canned. When storing in the refrigerator, it’s important to keep the juice in an airtight container to prevent oxidation and maintain freshness. The juice can also be frozen in ice cube trays and then transferred to a freezer-safe container for later use. Canning is another option, but requires proper equipment and techniques to ensure safety.

The shelf life of lemon juice varies depending on the storage method. Freshly squeezed lemon juice stored in the refrigerator can last up to 2-3 days, while frozen juice can last up to 6 months. Canned lemon juice can last even longer, up to a year or more. It’s important to always check for signs of spoilage, such as a sour smell or mold, before using any stored lemon juice.

Moving on to other uses for lemon juice, it can be used for more than just cooking.

Advertisement

Other Uses for Lemon Juice

If you’ve ever struggled with removing stubborn stains or rust, a little bit of this versatile citrus liquid can work wonders. Lemon juice is not only a great ingredient for adding a tangy flavor to your dishes, but it also has some impressive uses in skincare and home cleaning. Here are three benefits of using lemon juice for skincare:

  1. Lemon juice is rich in citric acid, which can help exfoliate dead skin cells and brighten your complexion.

  2. It contains vitamin C, an antioxidant that helps protect your skin from damage caused by free radicals and UV rays.

  3. Lemon juice can also help reduce the appearance of dark spots and acne scars due to its natural bleaching properties.

When it comes to cooking, there are different types of lemon juice you can use depending on your recipe. Freshly squeezed lemon juice is ideal for adding a bright, citrusy flavor to your dishes, while bottled lemon juice can be used for convenience and consistency. Here are a few more ways you can incorporate lemon juice into your cooking:

  1. Use lemon juice as a marinade for meats or fish to add flavor and tenderize the protein.

  2. Add lemon juice to your salad dressings for a tangy kick.

  3. Mix lemon juice with olive oil and herbs to create a flavorful dipping sauce for bread or vegetables.

Overall, lemon juice is a versatile ingredient that can be used in a variety of ways to enhance your skincare routine and cooking skills.

Frequently Asked Questions

What are the health benefits of lemon juice?

As a nutritionist, I can attest to the numerous health benefits of lemon juice. It’s packed with vitamin C, antioxidants, and has anti-inflammatory properties. Lemon juice can also aid digestion, boost immunity, and improve skin health. Check out the nutrition facts for more details.

How long does it take for a lemon to produce juice?

To extract lemon juice, the fruit must first be cut and squeezed. The production timeline depends on the method used, but typically takes only a few minutes. Other factors, such as the ripeness of the lemon, can also impact the amount of juice produced.

Advertisement

Can you juice a lemon without a juicer?

Yes, you can juice a lemon without a juicer using alternative methods such as hand-squeezing, using a fork, or rolling the lemon to release the juice. Different lemon squeezing techniques can also affect the amount of juice extracted.

What is the best way to remove seeds from lemon juice?

The best way to remove seeds from lemon juice is to use a fine mesh strainer or cheesecloth. Simply pour the juice through the strainer or wrap the cheesecloth around the seeds and squeeze. This technique ensures a smooth, seedless juice.

How do you know if a lemon is ripe enough to juice?

To determine if a lemon is ripe enough for juicing, I check for a bright yellow color and a slight give when squeezed. I use lemon juice extraction techniques such as rolling the lemon to release more juice.

Conclusion

In conclusion, knowing how much juice a lemon produces is essential for any cook or bartender. It can mean the difference between a mediocre dish and an exceptional one. By understanding the factors that affect lemon juice yield and using the right tools and techniques, you can maximize the amount of juice you extract from each lemon.

Whether you’re making a lemon vinaigrette or a lemon drop martini, having the right amount of juice is crucial. In short, the power of a lemon shouldn’t be underestimated. This small fruit can pack a punch, and its juice has a wide range of uses. From enhancing the flavor of dishes to providing health benefits, lemon juice is a versatile ingredient that should be a staple in every kitchen.

Advertisement

So grab your juicer and some lemons, and start exploring the endless possibilities of this zesty citrus fruit. Trust me, your taste buds will thank you.

Continue Reading

Juice

How To Make Papaya Juice

Published

on

By

As a health enthusiast, I am always on the lookout for creative and delicious ways to incorporate nutrient-rich foods into my diet. Lately, I have been intrigued by the papaya. Its vibrant orange flesh, sweet taste, and numerous health benefits make it a perfect addition to any smoothie.

Making your own papaya juice is not only easy but also incredibly rewarding. It’s like a burst of sunshine in a glass, delivering a refreshing and invigorating dose of vitamins and minerals straight to your body.

In this article, I will guide you through the step-by-step process of creating your own homemade papaya juice, so you too can enjoy the many health benefits and delicious taste of this tropical fruit.

Key Takeaways

  • The ripeness of the papaya is important when making juice, so look for a mostly yellow fruit with some green spots.
  • Water should be added in the blender to help the ingredients blend smoothly, and a proper water to fruit ratio should be maintained.
  • Blender maintenance is important and blending should be done at a low speed and gradually increased to avoid overblending and creating a foamy texture.
  • Honey or agave syrup can be added as a sweetener for taste and health benefits, but adding too much will increase the calorie and sugar content of the juice, so consume in moderation.

Gather Your Ingredients

Don’t forget to grab that juicy papaya and get ready for a refreshing experience that will quench your thirst like never before! Before we can start making the juice, we need to gather our ingredients.

Apart from the papaya, you’ll need some water, lime juice, and sugar or honey for sweetening. Papaya is an excellent source of vitamins A and C, potassium, and fiber. It’s also rich in antioxidants that help boost your immune system and protect against chronic diseases.

To make the juice more interesting, you can add other fruits like strawberries, pineapple, or mangoes. These flavor variations not only add taste but also enhance the health benefits of the juice.

Advertisement

Now that we have gathered our ingredients, let’s move on to preparing our papaya.

Prepare Your Papaya

Once you’ve got your hands on a ripe papaya, it’s as easy as slicing it open like a smile to reveal the juicy goodness inside. But before you get started, it’s important to know that there are several varieties of papaya, and each one has a different level of ripeness that’s optimal for juice-making.

Here are three things to keep in mind regarding papaya ripeness:

  1. Look for a papaya that is mostly yellow with some green spots. This indicates that the fruit is ripe and ready to be used for juice.

  2. If the papaya is fully green, it’s not yet ripe enough to use. You’ll need to wait a few more days until the papaya turns yellow.

  3. If the papaya is mostly yellow with brown spots, it’s overripe and may not taste as good in juice.

Now that you know how to choose the perfect papaya, it’s time to cut it into pieces and get ready to make some delicious juice.

Cut the Papaya into Pieces

To start, simply grab a sharp knife and slice the ripe papaya in half lengthwise, revealing the bright orange flesh and black seeds inside. Next, scoop out the seeds with a spoon and then proceed to cut the papaya into pieces. I like to cut the papaya into cubes, but you can cut them into any size you prefer.

Advertisement

When selecting a papaya for juice, it’s important to choose a ripe one. A ripe papaya should have a yellowish-orange skin and should yield slightly to pressure. Papayas are a great source of vitamins A and C, and they contain an enzyme called papain that aids in digestion. By adding papaya juice to your diet, you can reap all of these health benefits and more.

Now that the papaya is cut into pieces, it’s time to add it to the blender. But before we do that, we need to add water to the blender to help the blending process.

Add Water to the Blender

Now we’re ready to blend everything together, so let’s go ahead and add some water to the blender. It’ll help the ingredients blend smoothly and create a refreshing and hydrating drink that’ll leave you feeling energized. When adding water to the blender, it’s important to maintain a proper water to fruit ratio to ensure that the juice isn’t too thick or too watery. As a general rule of thumb, I like to add about 1/2 cup of water for every 1 cup of fruit. This ratio can be adjusted based on personal preference, but be careful not to add too much water as it can dilute the flavor of the papaya.

Proper blender maintenance is also important when making papaya juice. Before adding the water, make sure the blender is clean and free of any residue from previous use. After blending, take the time to thoroughly clean the blender to prevent any lingering flavors or bacteria. Now that we’ve added the water to the blender, it’s time to move onto the next step and add the papaya to create a delicious and nutrient-packed juice.

Add the Papaya to the Blender

With the blender prepped and water added, it’s time to blend in the juicy papaya chunks for a tropical burst of flavor. Before adding the papaya, make sure to remove the skin and seeds. Papaya is rich in vitamins A and C, and adding it to your diet can help improve digestion and boost your immune system.

Advertisement

When blending the papaya, it’s important to start at a low speed and gradually increase it to avoid overblending and creating a foamy texture. Depending on your preference, you can add other fruits such as pineapple or banana to create different variations of papaya juice.

Once the papaya is fully blended, we can move on to the next step of the process: blending the mixture until smooth.

Blend the Mixture

You’re ready to blend the mixture and create a delicious papaya juice. Before we start, let’s talk about blender maintenance. It’s important to keep your blender clean and free from any remnants of past use. Make sure to wash the blender thoroughly with soap and water before using it.

Now, let’s blend the mixture. Start by placing the lid on the blender and turning it on. Blend on high speed until the mixture is smooth and creamy. If you don’t have a blender, you can use a food processor or immersion blender as an alternative blending method. Once you’ve achieved the desired consistency, you can move on to the next step: strain the mixture (optional).

Strain the Mixture (optional)

If you wanna go the extra mile, strain out any unwanted bits and bobs from your blended concoction with a sieve or cheesecloth. This step is optional, but it can make a huge difference in the texture and taste of your papaya juice.

Advertisement

By removing the fibrous pieces and seeds, you’ll get a smoother and more pleasant drink that is easier to digest. The benefits of straining go beyond aesthetics and taste.

Papaya seeds, for instance, have a bitter flavor and can cause digestive discomfort if ingested in large amounts. While they’re edible and have some health benefits, such as being anti-inflammatory and antibacterial, they’re not suitable for everyone.

Straining also allows you to remove any dirt, debris, or pesticides that may be present in the fruit. If you don’t have a sieve or cheesecloth, you can skip this step or use a fine-mesh strainer, but keep in mind that you may end up with a chunkier juice.

Now that you have your pulp-free papaya juice, you can proceed to the next step: adding sweetener (optional).

Add Sweetener (optional)

To enhance the flavor and add a touch of sweetness, consider mixing in honey or agave syrup to create a tropical paradise in your mouth. Not only do these alternative sweeteners provide a delicious taste, but they also come with health benefits.

Advertisement

Honey contains antioxidants and has antibacterial properties, while agave syrup has a lower glycemic index compared to traditional sugar. When adding the sweetener, start with a small amount and adjust to your preference. Here are some tips to keep in mind:

  • Use raw, unprocessed honey or organic agave syrup for maximum health benefits.
  • Consider using a honey or agave syrup that is locally sourced to support small businesses and reduce your carbon footprint.
  • If you prefer a sweeter juice, add more sweetener gradually to avoid overpowering the natural flavor of the papaya.
  • Keep in mind that adding sweetener will increase the calorie and sugar content of the juice, so consume in moderation.

Now that the juice is sweetened to your liking, it’s time to chill and serve.

Chill and Serve

Once the mixture is chilled and ready, simply grab a glass and pour in the deliciously tropical juice. Savor every sip, as papaya juice is not only refreshing but also packed with numerous health benefits. It’s rich in antioxidants, vitamins A and C, and enzymes that aid digestion. Regular consumption of papaya juice can improve skin health, boost immunity, and reduce inflammation.

To switch things up, try different serving suggestions for your homemade papaya juice. Add a slice of lime or a sprig of mint for an extra kick of flavor. You can also mix it with other juices like pineapple or orange for a tropical fruit medley. However, it’s important to note that papaya juice should be consumed in moderation as it contains high amounts of natural sugars.

Enjoy your homemade papaya juice and reap the benefits of this delicious and nutritious beverage!

Enjoy Your Homemade Papaya Juice!

You can savor the delicious and nutritious homemade tropical beverage by pouring it into a glass and adding a slice of lime or a sprig of mint for an extra kick of flavor. The best part about making papaya juice at home is that you can customize it according to your preferences and health needs. Here are some health benefits and recipe variations that you can try:

Advertisement
Health Benefits Recipe Variations
High in Vitamin C and antioxidants Add ginger or turmeric for additional anti-inflammatory properties
Supports digestion and gut health Mix with coconut water or kefir for probiotic benefits
Lowers blood sugar levels Blend with spinach or kale for an extra boost of vitamins and minerals

By incorporating these recipe variations, you can enhance the taste and nutritional value of your homemade papaya juice. Enjoy this refreshing beverage as a healthy breakfast drink or a post-workout thirst quencher. Cheers to good health and delicious taste!

Frequently Asked Questions

What are the health benefits of drinking papaya juice?

After researching, I found that papaya juice is high in vitamin C, antioxidants, and fiber. It may aid in digestion and boost immunity. However, it may also cause allergic reactions or interact with certain medications.

Can I use frozen papaya instead of fresh papaya?

Yes, frozen papaya can be used as a substitute for fresh papaya in smoothie options. It still retains its nutritional benefits and can be a convenient option for those who don’t have access to fresh papaya.

How long does homemade papaya juice last in the refrigerator?

To preserve the freshness of homemade papaya juice, store it in an airtight container in the refrigerator. This will extend the juice’s shelf life for up to three days. Keeping the juice fresh is key to maximizing its health benefits.

Can I add other fruits or vegetables to my papaya juice?

Oh, the possibilities! I love getting creative with my papaya juice variations. Mixing papaya with other fruits like mango or pineapple can add a tropical twist, while adding spinach or kale can boost the health benefits. The options are endless!

Advertisement

Is it possible to make papaya juice without a blender?

Yes, it is possible to make papaya juice without a blender. You can use blender alternatives such as a food processor or manual extraction methods like squeezing the juice out of the fruit by hand or using a juicer.

Conclusion

Well, that’s how I make my delicious papaya juice! It’s so easy and refreshing, and it’s a great way to get some extra vitamins and nutrients into your diet.

Did you know that papaya is high in vitamin C, folate, and potassium? In fact, one medium papaya contains about 224% of your daily recommended intake of vitamin C! That’s pretty impressive.

But beyond just being a healthy choice, papaya juice is also a delicious one. It’s naturally sweet and has a tropical flavor that’s perfect for sipping on a hot summer day.

Plus, by making it at home, you can control the sweetness and add in any other ingredients you like. So if you’re looking for a tasty and healthy drink option, give papaya juice a try!

Advertisement

Continue Reading

Juice

How To Make My Own Vape Juice

Published

on

By

As a passionate vaping enthusiast, I have always been fascinated by the art of creating my own e-liquid. The process of blending different flavors to create a unique taste that suits my preferences has been an exciting adventure. However, making your own vape juice can be daunting, especially for beginners.

In this guide, I will share with you the steps I took to make my own vape juice, including the basic ingredients and equipment needed, how to determine the PG/VG ratio, and how to calculate the recipe.

Before we delve into the process of making your own vape juice, it is crucial to understand the basic ingredients and equipment needed. The main ingredients of vape juice include vegetable glycerin (VG), propylene glycol (PG), nicotine, and flavorings. VG and PG are the base liquids used to create the vapor, while nicotine and flavorings are added to enhance the taste and nicotine content.

The equipment needed includes a mixing container, a scale, syringes, gloves, and bottles for storage. With these basic ingredients and equipment, you can start making your own vape juice and customize it to your liking.

Key Takeaways

  • Prioritize ingredient safety and equipment maintenance to ensure purity and consistency.
  • Experiment with flavor combinations and adjust ratios for desired flavor and nicotine strength.
  • Use a mixing calculator and measure ingredients accurately for consistency and safety.
  • Properly store ingredients and finished e-liquids to maintain flavor and potency.

Understand the Basic Ingredients and Equipment Needed

To make your own vape juice, you’ll need some basic ingredients and equipment, like VG (vegetable glycerin), PG (propylene glycol), nicotine, flavorings, syringes, and bottles. These are all readily available online or at your local vape shop.

When it comes to equipment options, you can use either a scale or syringes to measure out your ingredients. A scale is more precise and efficient, while syringes are easier to find and use.

Advertisement

It’s important to note that some flavorings may contain oils or other additives that can be harmful if vaporized, so be sure to research and choose safe options.

Ingredient substitutions are also possible, but may affect the overall flavor and vaping experience. For example, you can swap VG and PG ratios to adjust the thickness and throat hit of your juice. You can also choose different types of nicotine, such as freebase or salt nicotine, depending on your preference.

Flavorings can be substituted or combined to create unique blends, but make sure to use ones that are specifically made for vaping. With all these options, it’s important to experiment and find what works best for you.

Now that you understand the basic ingredients and equipment needed, let’s move on to gathering everything necessary to start making your own vape juice.

Gather the Necessary Ingredients and Equipment

First, you’ll need to gather all the essential ingredients and equipment needed for crafting your own custom e-liquid. When it comes to ingredients, it’s important to prioritize ingredient safety. Make sure to purchase pharmaceutical-grade ingredients from reputable suppliers to ensure the purity of your e-liquid. Some of the key ingredients you’ll need include propylene glycol (PG), vegetable glycerin (VG), nicotine (if desired), and flavor concentrates. It’s also important to properly store your ingredients in a cool, dry place to maintain their quality.

Advertisement

In addition to the necessary ingredients, you’ll need to have the proper equipment for mixing and storing your e-liquid. This includes a scale for accurate measurements, syringes for precise dispensing, mixing containers, and bottles for storing your finished product. It’s also important to prioritize equipment maintenance to ensure the longevity and accuracy of your tools. Regularly clean your equipment and replace any worn or damaged components. By gathering the necessary ingredients and equipment and prioritizing ingredient safety and equipment maintenance, you’ll be well on your way to crafting your own custom e-liquid with confidence.

As you gather your ingredients and equipment, it’s important to keep in mind the flavor profile you want to achieve in your e-liquid. In the next section, we’ll discuss how to choose your flavor profile and create a unique and satisfying vaping experience.

Choose Your Flavor Profile

When it comes to choosing a flavor profile for my vape juice, I like to consider whether I want a single flavor or a combination of flavors. Experimenting with different combinations can lead to unique and interesting results.

Additionally, adjusting the intensity of the flavors can greatly affect the overall taste of the vape juice. It’s important to keep in mind that finding the perfect flavor profile may take some trial and error, but the end result is worth it.

Single Flavor vs. Combination

Deciding between using a single flavor or combining flavors can be a tough choice, but it ultimately depends on personal preference and taste.

Advertisement

There are pros and cons to both options. Using a single flavor can be simple and straightforward, making it easier to control the taste and nicotine strength. However, it can also be limiting in terms of variety and complexity.

On the other hand, combining flavors can open up a whole new world of possibilities, allowing you to create unique and complex blends. The downside is that it can be tricky to get the ratios right and achieve a balanced flavor.

When it comes to popular combinations, there are endless options to choose from. Some common pairings include fruit and menthol, dessert and cream, and tobacco and caramel. However, don’t be afraid to get creative and experiment with different flavors to find the perfect mix for you.

Remember, taste is subjective, so what works for one person may not work for another. The key is to start with small batches and adjust the ratios until you find the right balance of flavor and nicotine strength. With a bit of trial and error, you’ll be able to create your own unique vape juice that perfectly suits your taste buds.

Experimenting with Flavors

Combining different flavor profiles can lead to a multitude of unique and unexpected tastes, allowing for an exciting exploration of the vast world of vaping. However, it’s important to be mindful of certain flavor combinations to avoid.

Advertisement

For example, mixing mint and cinnamon can create an overpowering taste that can be unpleasant to some. Similarly, combining citrus and dairy flavors can result in a curdled and unappetizing vape juice.

On the other hand, finding inspiration for unique flavors can lead to great success. Experimenting with combining fruits like strawberry and kiwi, or mixing dessert flavors like caramel and vanilla can create a delicious and complex vape juice.

It’s also helpful to try out pre-made flavor concentrates from reputable brands to get a sense of different flavor profiles and how they can be mixed together. With a bit of creativity and caution, the possibilities for creating your own unique vape juice flavors are endless.

Now, let’s move on to adjusting flavor intensity.

Adjusting Flavor Intensity

To add an extra kick to your flavor, try using a drop or two of flavor enhancers like EM or AP, which are available at most vape shops. These flavor enhancers are meant to balance out the overall flavor profile of your vape juice.

Advertisement

For example, if you feel like your fruit flavor is lacking some sweetness, you can add a drop of EM, which is ethyl maltol, to enhance the sweetness. On the other hand, if you feel like your bakery flavor is too overpowering, you can add a drop of AP, which is acetyl pyrazine, to tone down the bakery notes.

It’s important to note that when adjusting the flavor intensity, you should always taste your vape juice after adding the enhancer to avoid overdoing it. Additionally, steeping techniques can also affect the overall strength of the flavor.

Steeping is the process of letting your vape juice sit in a cool, dark place for a period of time, allowing the flavors to meld together and become more pronounced. Depending on the flavor and the recipe, some vape juices may need to steep for a few days or even a few weeks.

Once you’ve adjusted the flavor intensity and determined the steeping time, it’s time to move on to determining the pg/vg ratio.

Determine the PG/VG Ratio

Finding the perfect PG/VG ratio can truly make or break the flavor and overall vaping experience. PG and VG are the two main components of vape juice, and they each have their own properties that affect the final product.

Advertisement

PG is thinner and has a stronger throat hit, which is great for those who want a stronger sensation when vaping. On the other hand, VG is thicker and produces more vapor, making it ideal for cloud chasers.

When deciding on the PG/VG ratio for your vape juice, it’s important to consider your personal preferences and vaping style. If you want a stronger throat hit, a higher PG ratio may be better for you. However, if you prefer bigger clouds and a smoother vaping experience, a higher VG ratio may be the way to go. Additionally, you can adjust the throat hit in your vape juice by adding more or less PG, depending on your desired effect.

Moving on to the next step, calculating the recipe for your vape juice involves taking into account the flavorings, nicotine, and PG/VG ratio.

Calculate the Recipe

To calculate the recipe for my DIY vape juice, I need to use a mixing calculator. This tool will help me determine the exact measurements of each ingredient based on my desired nicotine strength, flavor intensity, and PG/VG ratio.

It’s important to measure the ingredients accurately to ensure consistency and safety, and to adjust the recipe for different batch sizes.

Advertisement

Using a Mixing Calculator

Using a mixing calculator can be a game-changer for DIY vape juice makers. It simplifies the process and ensures accurate measurements, making it a piece of cake.

One of the benefits of DIY vape juice is the ability to customize the flavor to your liking. However, this can be challenging without the right tools. Using a mixing calculator eliminates the guesswork and ensures that you have the right amount of each ingredient.

Common mixing mistakes can lead to an unpleasant vaping experience, such as too much flavoring or not enough nicotine. A mixing calculator takes into account the specific gravity and concentration of each ingredient to ensure that you have the perfect balance.

It also allows you to adjust the recipe based on the size of the batch you want to make. With a mixing calculator, you can confidently create your own unique vape juice flavors without worrying about making mistakes that could ruin the final product.

Accurately measuring ingredients is crucial for creating a successful vape juice recipe. In the next section, I’ll discuss the importance of using precise measurements and how to do it correctly.

Advertisement

Measuring Ingredients Accurately

Now that we’ve got the hang of using a mixing calculator, let’s talk about the importance of precision in measuring the ingredients for our vape juice.

Measuring ingredients accurately is crucial to the success of our mix. Even the slightest variation in measurements can greatly affect the flavor and consistency of our final product. That’s why it’s important to use the appropriate tools, such as a graduated cylinder or a scale, for measuring each ingredient.

Common measuring mistakes include eyeballing measurements, using the wrong measuring tools, and not properly leveling off dry ingredients. These mistakes can lead to an imbalanced flavor profile, harsh throat hits, or even a ruined batch.

To avoid these issues, it’s essential to follow the recipe and measure each ingredient carefully. Remember, precision is key when it comes to making your own vape juice.

Now that we understand the importance of accurate measurements, let’s move on to the next step: adjusting for batch size.

Advertisement

Adjusting for Batch Size

When we want to mix up a bigger or smaller batch of our delicious e-liquid, we need to adjust the ingredients accordingly to ensure the perfect balance of flavors. Here are some tips and tricks for adjusting for batch size:

  1. Use a calculator to scale the recipe: This is the easiest and most accurate way to adjust for batch size. Simply multiply the ingredients by the desired batch size and divide by the original batch size. For example, if the original recipe is for a 100ml batch and you want to make a 50ml batch, you would multiply all the ingredients by 0.5.

  2. Be mindful of flavor concentration: Some flavorings can be very potent, and a little goes a long way. When adjusting for batch size, make sure to adjust the flavoring accordingly. For example, if the original recipe calls for 10% flavoring in a 100ml batch, you may only need 5% in a 50ml batch.

  3. Keep track of your adjustments: It’s important to keep a record of the adjustments you make to the recipe. This will help you replicate the recipe in the future and make adjustments as needed.

Now that we’ve discussed adjusting for batch size, it’s time to mix the ingredients.

Mix the Ingredients

As I mix the ingredients for my own vape juice, I need to be aware of the different mixing techniques to achieve the desired result. One common mistake that beginners make is not mixing the ingredients thoroughly, resulting in an uneven distribution of flavors. To prevent this, I need to use a magnetic stirrer or a handheld mixer to ensure that the ingredients are well-blended.

Another important factor to consider is the order in which the ingredients are mixed. I usually start by adding the base liquid, followed by the flavorings, and then the nicotine (if desired). This ensures that the flavors are evenly distributed and that the nicotine is evenly dispersed throughout the mixture.

As I mix the ingredients, I can already start to imagine the flavor profile of my vape juice. But before I can enjoy it, I need to steep the e-liquid to allow the flavors to fully develop.

Advertisement

Once the ingredients are mixed, it’s time to let the e-liquid steep and mature, enhancing the flavors and improving the overall vaping experience.

Steep the E-Liquid

To fully develop the flavors of your e-liquid, steeping is essential. Steeping is the process of letting the e-liquid mixture sit for a certain period of time to allow the flavors to blend together. This process is necessary because some of the ingredients used in the mixture may not be fully incorporated at first, resulting in a harsh or unpleasant taste if vaped immediately.

Steeping techniques vary depending on the recipe and the desired outcome, but the general rule is to store the e-liquid in a cool, dark place and shake it regularly. The importance of patience in steeping can’t be overstated. Some e-liquids may require a few days to a few weeks of steeping before they’re ready to vape. It can be tempting to try the e-liquid right away, but the flavors won’t be as developed as they could be.

Patience is key to achieving the best possible flavor from your homemade e-liquid. Once the steeping process is complete, it’s time to move on to the next step: testing and adjusting the e-liquid to your preference.

Test and Adjust

Now that I’ve steeped my e-liquid, it’s time to test and adjust the flavor and nicotine levels to my liking.

Advertisement

I’ll begin by testing the e-liquid by dripping a small amount onto my atomizer and taking a few puffs.

From there, I can adjust the flavor or nicotine levels accordingly and make notes for future batches.

By taking the time to test and adjust my e-liquid, I can ensure a satisfying experience every time I vape.

Testing the E-Liquid

Before you start vaping your homemade juice, make sure you test it first to ensure the flavor and nicotine levels are to your liking. To test the e-liquid, you can use various flavor testing techniques such as dripper testing or tank testing.

Dripper testing involves adding a small amount of the e-liquid onto a dripper and vaping it without any previous juice in the tank.

Advertisement

Tank testing involves filling your vape tank with the e-liquid and vaping it. This method is best for evaluating how the e-liquid tastes when it is heated.

It’s also important to keep in mind the steeping time for e-liquids. Steeping is the process of letting e-liquids age to improve their flavor. It’s recommended that you let your e-liquid steep for at least a week before testing it. You can steep your e-liquid by letting it sit in a cool, dark place and shaking it every day.

Once you’ve tested your e-liquid and determined the flavor and nicotine levels, you can move on to adjusting flavor or nicotine to your liking.

Adjusting Flavor or Nicotine

Once you’ve tested your e-liquid and determined the flavor and nicotine levels, it’s time to personalize your vaping experience by customizing the nicotine strength and balancing the flavor profile.

To adjust nicotine levels, you’ll need to add more or less nicotine concentrate to your e-liquid base. It’s important to measure the nicotine concentrate accurately to avoid ending up with a nicotine level that’s too strong or too weak. You can use an online calculator to determine the amount of nicotine concentrate to add, based on the strength of your base and the desired nicotine level.

Advertisement

When it comes to balancing the flavor profile, you can adjust the amount of flavoring used to make it stronger or weaker. Be careful not to add too much flavoring, as this can overpower the other flavors and make the e-liquid taste artificial.

It’s a good idea to start with small adjustments and test the e-liquid again before making any major changes. Once you’ve achieved the perfect balance of nicotine and flavor, you can make notes for future batches to ensure consistency.

Making Notes for Future Batches

To ensure consistency in your e-liquid batches, it’s crucial to jot down notes like a baker writing down a recipe for their signature dish. By keeping track of your flavor notes and recipe adjustments, you can easily replicate your favorite e-juice flavors that suit your taste buds.

Here are a few tips on how to make notes for future batches:

  • Start with the basics: Write down the name of the recipe, the date it was made, the nicotine level, and the VG/PG ratio. This will help you keep track of the different batches you make.

  • Flavor notes: Write down the flavors you used, their brand, and the percentage used. This will help you remember which flavors work well together and which ones need to be adjusted.

  • Recipe adjustments: If you made any adjustments to the recipe, like increasing or decreasing the percentage of a flavor, write it down. This will help you achieve the desired taste in future batches.

  • Personal preferences: If you made a recipe that you loved, write down any personal preferences you have, like increasing the sweetness or adding menthol. This will help you customize the recipe to suit your taste buds.

By taking notes, you can easily replicate your favorite e-juice flavors and make any necessary adjustments. Now that you’ve got your notes, it’s time to store the e-liquid properly to ensure it stays fresh and flavorful.

Advertisement

Store the E-Liquid

Storing your homemade e-liquid properly is crucial to maintaining its flavor and nicotine potency. Proper storage ensures that your e-liquid lasts longer and maintains its quality. The shelf life of e-liquid depends on various factors such as nicotine strength, flavoring, and the base used.

To store your e-liquid, you’ll need to keep it away from heat and direct sunlight. Heat and sunlight can cause the nicotine to degrade and alter the flavor. It’s best to store your e-liquid in a cool, dark place, such as a cabinet or drawer. Additionally, make sure to keep your e-liquid away from children and pets, as nicotine is poisonous if ingested. The table below summarizes the proper ways to store your e-liquid.

Factor to Consider Proper Storage
Temperature Cool and dark place
Sunlight Keep away from direct sunlight
Children and pets Keep out of reach

Now that you’ve learned about proper storage for your e-liquid, you can enjoy your custom vape juice!

Enjoy Your Custom Vape Juice!

After properly storing your homemade e-liquid, savoring its flavor and potency is like taking a sip of a fine wine. The customized flavor combinations and tailored nicotine strengths are just some of the benefits of making your own vape juice.

Compared to store-bought options, DIY e-liquids offer more control over the ingredients, allowing you to adjust the flavor and nicotine levels to your liking. To enjoy your custom vape juice, it’s important to use the right equipment and technique.

Advertisement

First, ensure that your vape device is compatible with the e-liquid you made. Then, prime your coil to prevent dry hits and burnt flavors. Finally, start with a low wattage setting and gradually increase it until you find the sweet spot for your desired flavor and vapor production.

With practice, you’ll be able to create a perfect blend that suits your taste and vaping preferences. Enjoy your custom vape juice!

Frequently Asked Questions

Is it safe to make my own vape juice at home?

When making vape juice at home, home safety and ingredients quality are key factors to consider. Ensure proper storage, handling, and labeling of ingredients. Purchase high-quality ingredients from reputable sources.

How much money can I save by making my own vape juice compared to buying it pre-made?

I saved a ton of money by making my own vape juice compared to buying pre-made. DIY vape juice cost comparison showed a 75% reduction in cost. Homemade e liquid quality analysis is crucial for safe and satisfying vaping.

Can I make vape juice without nicotine?

Yes, it is possible to make vape juice without nicotine. There are nicotine-free options available, and flavor customization is still possible without nicotine. It’s important to carefully measure ingredients and follow safety precautions when making your own vape juice.

Advertisement

How long does it take to steep the e-liquid, and why is this step necessary?

Like aging wine, steeping e-liquid is a crucial process that allows flavors to develop fully. The steeping process can take anywhere from a few days to several weeks, depending on the recipe. It’s necessary to achieve optimal taste and quality.

Are there any special precautions I need to take when mixing the ingredients or handling nicotine?

When mixing vape juice, it’s crucial to take mixing precautions and handle nicotine safely. Nicotine is a toxic substance that can cause harm if ingested or absorbed through the skin, so gloves and eye protection should be worn.

Conclusion

Well, after all that effort, I’ve finally made my own vape juice.

I followed all the steps, gathered all the ingredients and equipment, and calculated the perfect recipe for my desired flavor profile.

I steeped the e-liquid, tested and adjusted it to my liking, and stored it in a cool, dark place.

Advertisement

It’s ironic that after all that work, I’m left wondering if it was worth it.

Sure, I have a unique blend of vape juice that no one else has, but was the time and effort worth the end result?

Maybe it’s just me, but I think I’ll stick to buying pre-made vape juice from now on.

At least I know exactly what I’m getting and can save myself the hassle of making it myself.

Advertisement

Continue Reading
Advertisement

Affiliate disclaimer
As an affiliate, we may earn a commission from qualifying purchases. We get commissions for purchases made through links on this website from Amazon and other third parties.

Advertisement

Trending

Copyright © 2024 The Graceful Kitchen Affiliate disclaimer As an affiliate, we may earn a commission from qualifying purchases. We get commissions for purchases made through links on this website from Amazon and other third parties.