Connect with us

Juice

How To Make Celery Juice For High Blood Pressure

Published

on

I have struggled with high blood pressure for years, trying different medications and lifestyle changes to keep it under control. Recently, I found out about the benefits of celery juice for managing high blood pressure and decided to give it a try.

I was pleasantly surprised by the results, and now I want to share my experience and knowledge with others who may be struggling with this condition.

High blood pressure, also known as hypertension, is a common condition that affects millions of people worldwide. It occurs when the force of blood against the walls of your arteries is consistently too high, which can lead to serious health problems such as heart disease, stroke, and kidney failure.

While there are many medications available to manage high blood pressure, lifestyle changes such as diet and exercise can also be effective. In this article, I will be sharing how to make celery juice for high blood pressure, as well as other lifestyle changes that can help manage this condition.

Key Takeaways

  • Celery contains unique compounds called phthalides that can help regulate blood pressure by relaxing the muscles in the walls of blood vessels.
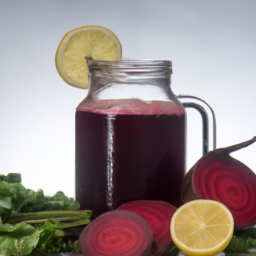
  • To make celery juice for high blood pressure, select firm, bright green stalks with leaves that are not wilted, rinse thoroughly, and cut into smaller pieces that will fit in a high-quality juicer.
  • Experiment with flavor variations by adding lemon, ginger, or other fruits and vegetables to celery juice for additional health benefits such as boosting immunity and aiding digestion.
  • Celery juice may interact with certain medications, so it’s important to speak with a healthcare provider before adding it to the diet.

Understanding High Blood Pressure

You may be wondering why high blood pressure is a concern and how it affects your body. High blood pressure, or hypertension, is a condition where the force of blood against the walls of your arteries is consistently too high. Over time, this can damage your arteries, leading to serious health problems such as heart disease, stroke, and kidney failure.

Unfortunately, hypertension often has no symptoms, which is why it’s sometimes called the ‘silent killer’. There are several causes of high blood pressure, including genetics, age, and lifestyle factors such as being overweight, not getting enough exercise, and eating a diet high in salt and processed foods.

Advertisement

Fortunately, there are also many lifestyle changes you can make to help manage your blood pressure. These include eating a healthy diet rich in fruits, vegetables, and whole grains, maintaining a healthy weight, staying physically active, reducing stress, and limiting alcohol and tobacco use. By making these changes, you can help lower your blood pressure and reduce your risk of developing serious health problems.

As we transition into discussing the benefits of celery juice for high blood pressure, it’s important to note that incorporating natural remedies into your lifestyle changes can also be helpful in managing hypertension.

The Benefits of Celery Juice for High Blood Pressure

I’m excited to dive into the benefits of celery juice for high blood pressure!

Did you know that celery is packed with important nutrients like vitamin K, vitamin C, and potassium?

But what really sets celery apart is its unique phthalides, which have been shown to help regulate blood pressure.

Advertisement

Let’s explore how this humble vegetable can help us achieve better heart health.

Nutritional Content of Celery

The nutritional content of celery is impressive, as it contains high amounts of vitamin K, vitamin C, and potassium, which have all been linked to lower blood pressure levels. The health benefits of consuming celery extend beyond blood pressure regulation, as it’s also a great source of fiber, antioxidants, and other essential vitamins and minerals.

Here are some nutritional facts about celery that you should know:

  • One cup of chopped celery contains only 16 calories, making it a great low-calorie snack option.
  • Celery is 95% water, which means it can help keep you hydrated throughout the day.
  • The high fiber content in celery can help improve digestion and prevent constipation.
  • Celery is also a good source of folate, which is essential for healthy fetal development during pregnancy.

All of these nutritional benefits make celery a great addition to any diet, especially for those looking to improve their blood pressure levels. But how exactly does celery help regulate blood pressure? Let’s explore the role of phthalides in the next section.

Phthalides and Blood Pressure Regulation

By consuming celery, you can benefit from its phthalides, which have been shown to aid in the regulation of cardiovascular health. Phthalides are compounds found in celery that relax the muscles in the walls of our blood vessels, allowing for increased blood flow and reduced blood pressure.

According to a study published in the Journal of Medicinal Food, participants who consumed celery extract experienced a significant decrease in both systolic and diastolic blood pressure levels. This is great news for those seeking natural remedies for hypertension.

Advertisement

Incorporating celery juice into your diet can provide you with these phthalides and their blood pressure regulating benefits. But before you start juicing, it’s important to select and prepare your celery correctly.

How to Select and Prepare Celery for Juicing

To ensure maximum health benefits, it’s important to carefully select and prepare your celery before juicing. When selecting celery, look for firm, bright green stalks with leaves that are not wilted. Avoid celery that appears yellow or brown, as it may be past its prime.

Organic celery is preferable, as conventionally grown celery may contain high levels of pesticides. Before juicing, rinse the celery thoroughly under cool running water and remove any dirt or debris. If desired, trim the root end and any brown or wilted portions of the stalks.

Cut the celery into smaller pieces that will fit easily into your juicer. By taking these steps to select and prepare your celery, you can ensure that your celery juice is not only delicious, but also highly nutritious. Now, let’s move on to how to make celery juice at home.
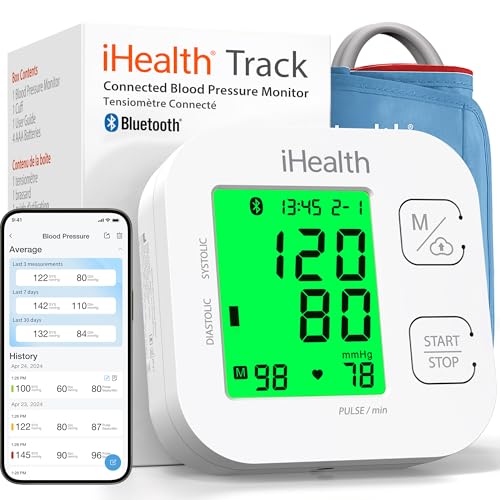
How to Make Celery Juice at Home

If you want to reap the full benefits of celery, it’s essential to know how to prepare and juice it properly.

Advertisement

Juicing celery is a straightforward process that requires a few simple steps. First, rinse the celery thoroughly to remove any dirt or debris. Then, cut the celery into smaller pieces that can fit into your juicer. For best results, use a high-quality juicer that can extract as much juice as possible.

When juicing celery, there are a few techniques you can use to enhance the flavor and texture. Some people prefer to juice celery with other fruits and vegetables, such as apples, cucumbers, or ginger. This can add extra nutrients and flavor to your juice. Others prefer to add a squeeze of lemon or lime to their celery juice to give it a tangy kick. Experiment with different flavor variations to find the one that works best for you.

To incorporate celery juice into your daily routine, there are many ways to enjoy it. You can drink it in the morning as a healthy start to your day or sip it throughout the day as a refreshing beverage. Some people prefer to mix their celery juice with other juices or smoothies to create a more complex flavor profile. Whatever your preference, drinking celery juice regularly can help lower your blood pressure and improve your overall health.

Incorporating Celery Juice into Your Daily Routine

Incorporating celery juice into your daily routine is like adding a burst of freshness and vitality to your day. I suggest starting with a morning routine where you drink a glass of celery juice before eating or drinking anything else. This helps your body absorb the nutrients more efficiently and jumpstarts your digestion for the day.

To keep things interesting, try experimenting with flavor variations. You can add a slice of lemon or ginger for a citrusy kick or a pinch of turmeric for its anti-inflammatory properties. You can also mix in other fruits and vegetables like apples, carrots, or cucumbers for added flavor and nutrition. With these simple additions, you can turn your plain celery juice into a delicious and healthy drink.

Advertisement

As you begin to incorporate celery juice into your daily routine, it’s important to keep in mind some tips and tricks for making the best celery juice.

Tips and Tricks for Making the Best Celery Juice

Hey, buddy! Want to know the secrets to whipping up the tastiest and healthiest celery juice ever? Look no further because I’ve got some tips and tricks for making the best celery juice. But before we get started, let’s talk about juicer maintenance. It’s essential to clean your juicer after each use to prevent bacteria buildup and ensure optimal performance. Refer to the manufacturer’s instructions for cleaning and maintenance tips.

Now, let’s dive into the fun part – celery juice variations. While plain celery juice is excellent for high blood pressure, you can spice things up by adding other ingredients like lemon, ginger, or cucumber. Not only do they add flavor, but they also bring additional health benefits. Check out the table below for some celery juice variations that you can try.

Celery Juice Variation Ingredients Health Benefits
Celery-Lemon Celery, Lemon Boosts immunity, aids digestion
Celery-Ginger Celery, Ginger Reduces inflammation, improves circulation
Celery-Cucumber Celery, Cucumber Hydrates, promotes healthy skin

Incorporate these variations into your daily routine to keep things exciting. And with a little juicer maintenance, you’ll be on your way to making the best celery juice ever. Now, let’s transition into the next section about other lifestyle changes for managing high blood pressure.

Other Lifestyle Changes for Managing High Blood Pressure

When it comes to managing high blood pressure, making lifestyle changes is crucial. I’ve found that incorporating regular exercise and physical activity into my routine has been helpful. Stress reduction and relaxation techniques, such as deep breathing and meditation, have also been effective in managing my blood pressure. These lifestyle changes may require some effort, but the benefits are worth it for a healthier life.

Advertisement

In addition to drinking celery juice, adjusting my diet has also been important. I’ve reduced my intake of sodium and processed foods, while increasing my consumption of fruits, vegetables, and whole grains. It’s important to work with a healthcare provider to develop a personalized plan for managing high blood pressure. With a combination of lifestyle changes and medication, it is possible to keep blood pressure under control and reduce the risk of complications.

Exercise and Physical Activity

You can easily improve your overall health by simply adding more physical activity to your daily routine, which will greatly benefit your high blood pressure. Whether it’s indoor or outdoor exercise, regular physical activity can help control your blood pressure.

Engaging in group fitness activities can also be a great way to stay motivated and accountable, while also providing an opportunity to socialize and make new friends.

In addition to its positive effects on blood pressure, exercise has numerous other benefits for your health. It can help you maintain a healthy weight, improve your mood, and reduce your risk of chronic diseases such as heart disease and diabetes.

So, make sure to prioritize physical activity in your daily routine to reap all of its health benefits.

Advertisement

Now, let’s explore some stress reduction and relaxation techniques.

Stress Reduction and Relaxation Techniques

To effectively manage stress levels and promote relaxation, it’s important to incorporate techniques such as mindfulness meditation and deep breathing exercises into your daily routine. These methods can have a profound impact on your overall well-being and health.

Mindfulness meditation involves focusing your attention on the present moment, accepting your thoughts and feelings without judgment, and allowing yourself to become more aware of your physical sensations. Deep breathing exercises, on the other hand, involve taking slow, deep breaths that fill your lungs and release tension from your body.

Here are four techniques to help you get started:

  1. Mindful Breathing: Find a quiet place where you can sit comfortably. Close your eyes and focus your attention on your breath. As you inhale, feel your stomach expand, and as you exhale, feel your stomach contract. Continue to do this for several minutes, allowing your mind to become calm and focused.

  2. Body Scan: Lay down on your back and close your eyes. Focus your attention on each part of your body, starting at your toes and moving up to the top of your head. As you focus on each part, tense and then relax the muscles. This exercise can help release tension from your body.

  3. Gratitude Practice: Take a few minutes each day to reflect on what you’re grateful for. This can help shift your focus from negative thoughts to positive ones, and help you develop a more positive outlook on life.

  4. Progressive Muscle Relaxation: This technique involves tensing and then relaxing your muscles. Start at your toes and work your way up to your head, tensing each muscle group for a few seconds before releasing the tension. This exercise can help reduce muscle tension and promote relaxation.

Incorporating these techniques into your daily routine can help reduce stress and promote relaxation. However, it’s important to remember that these techniques aren’t a substitute for professional medical advice. In the next section, we’ll discuss precautions and possible side effects to be aware of when managing high blood pressure.

Advertisement

Precautions and Possible Side Effects

Before trying any new treatment, it’s important to understand the potential risks involved. When it comes to celery juice for high blood pressure, there are a few precautions to keep in mind.

Firstly, celery juice may interact with certain medications, so it’s important to speak with a healthcare provider before adding it to your routine.

Additionally, some people may experience allergic reactions or digestive issues when consuming celery juice.

Interactions with Medications

Although celery juice is generally considered safe, it’s important to note that it can potentially interact with certain medications, such as blood thinners and diuretics. If you’re taking any prescription medication, it’s best to consult with your healthcare provider before adding celery juice to your diet.

Some of the medication reactions that may occur with celery juice include:

Advertisement
  • Increased risk of bleeding: Celery juice contains compounds that may have blood-thinning effects, which could increase the risk of bleeding when taken with blood-thinning medications.
  • Excessive diuresis: Celery juice is a natural diuretic, which means it can increase urine production and lead to a loss of fluids and electrolytes. This effect may be amplified when taken with diuretic medications, leading to dehydration and electrolyte imbalances.
  • Decreased blood pressure: Celery juice may lower blood pressure, which can be beneficial for people with hypertension. However, taking it with medications that also lower blood pressure could lead to an excessive drop in blood pressure, causing dizziness, lightheadedness, or fainting.

It’s important to take these medication reactions and dosage concerns into account when incorporating celery juice into your diet for high blood pressure.

In the next section, I’ll discuss some of the possible allergic reactions and digestive issues that may arise from consuming celery juice.

Allergic Reactions and Digestive Issues

Allergic reactions and digestive issues can occur when consuming celery juice, so it’s important to be aware of the potential risks. Common triggers for allergic reactions include itching, hives, and swelling, while digestive issues can range from bloating to diarrhea. If you experience any of these symptoms after consuming celery juice, it’s important to stop drinking it and seek medical attention.

Management strategies for allergic reactions and digestive issues include avoiding celery juice altogether or slowly introducing it into your diet to assess your tolerance. Additionally, you can try cooking celery instead of consuming it raw, as this may reduce the likelihood of a reaction. It’s also important to read labels carefully and avoid products that contain celery if you have a known allergy.

It’s important to monitor your blood pressure regularly, especially if you have high blood pressure. By making celery juice a part of your daily routine, you can potentially lower your blood pressure and improve your overall health. However, it’s crucial to be aware of the potential risks and address any allergic reactions or digestive issues promptly.

Monitoring Your Blood Pressure

Keep an eye on your blood pressure readings regularly to take control of your health and prevent potential health risks. Blood pressure tracking is crucial to monitor the effectiveness of lifestyle modifications aimed at lowering high blood pressure.

Advertisement

You can easily track your blood pressure at home using a blood pressure monitor or by visiting your healthcare provider regularly. Lifestyle modifications such as maintaining a healthy diet, regular exercise, and stress management can significantly lower your blood pressure.

However, it’s essential to monitor your blood pressure regularly to ensure that these modifications are working for you. By tracking your blood pressure, you can identify any potential issues early on and take action to prevent further health risks.

Now that we’ve discussed the importance of monitoring your blood pressure, let’s move on to the final thoughts and resources section.

Final Thoughts and Resources

Don’t forget to check out the additional resources provided below to learn more about maintaining a healthy lifestyle and reducing the risk of cardiovascular disease. These resources can provide you with more information on managing high blood pressure, including tips on exercise, diet, and stress management.

It’s important to remember that managing high blood pressure is not just about taking medication, but also about making lifestyle changes. In my personal experience, making small changes to my daily routine, such as incorporating more physical activity and eating a balanced diet, has greatly improved my overall health and lowered my blood pressure.

Advertisement

Remember to always consult with your healthcare provider before making any significant changes to your lifestyle or starting a new exercise or diet plan. With the right support and resources, managing high blood pressure is possible and can greatly improve your quality of life.

Frequently Asked Questions

Can celery juice completely cure high blood pressure?

While celery juice has been shown to lower blood pressure, it is not a guaranteed cure. Incorporating celery juice into a balanced diet offers various benefits for overall health, but consuming too much can lead to potential side effects.

Is it necessary to use a juicer for making celery juice or can it be made with a blender?

I suggest using a juicer for celery juice, as it yields a smoother consistency and is more efficient. However, a blender can work if you strain the juice afterwards. Here are some celery juice recipes for high blood pressure.

Can celery juice interact with any medications used for treating high blood pressure?

Hey there! Did you know that celery juice can interact with certain medications used for treating high blood pressure? It’s important to always check with your doctor and follow their recommended dosage to avoid any potential drug interactions.

How long does it take for celery juice to start showing positive effects on high blood pressure?

Based on scientific evidence, celery juice can lower high blood pressure within a week. Beyond hypertension, it also offers benefits for digestion, skin, and inflammation. Incorporate it into your diet for overall health.

Advertisement

Are there any specific types of celery that are better for making juice for high blood pressure?

When it comes to lowering blood pressure, some celery varieties are better than others due to their higher nutritional benefits. However, there are also alternative options to celery that can aid in reducing hypertension.

Conclusion

So, there you have it – everything you need to know about making celery juice for high blood pressure. It’s a simple process that can have a profound impact on your health.

Celery juice is a natural way to lower blood pressure, thanks to its high potassium content and ability to reduce inflammation. Plus, it’s easy to incorporate into your daily routine and can be a refreshing addition to your diet.

As you start to make celery juice a regular part of your routine, it’s important to also make other lifestyle changes to manage high blood pressure. One interesting statistic to keep in mind is that nearly half of all adults in the United States have high blood pressure, according to the American Heart Association.

By making simple changes like juicing celery, eating a healthy diet, and exercising regularly, you can reduce your risk of developing this common condition and improve your overall health.

Advertisement

Remember to monitor your blood pressure regularly and work with your healthcare provider to develop a plan that’s right for you. And if you experience any side effects or have concerns about incorporating celery juice into your diet, be sure to speak with your doctor.

With the right information and a commitment to making healthy choices, you can take control of your health and enjoy a better quality of life.

Continue Reading
Advertisement

Juice

Lemon = How Much Juice

Published

on

By

As someone who loves cooking and baking, I know the importance of accurate measurements when it comes to preparing food. This is especially crucial when using lemon juice in recipes, as it’s important to know the exact amount of juice needed.

Whether youre making lemonade, salad dressing, or a lemon tart, understanding the yield of a lemon will ensure that your recipe turns out perfectly.

There are a few factors that can affect the amount of juice a lemon produces, such as its ripeness and size. Additionally, the juicing method you use can also impact the yield.

In this article, I will provide a step-by-step guide for juicing lemons and share tips for getting the most juice out of your fruit. Plus, I will answer the burning question: how much juice does one lemon yield?

So, lets get started and master the art of juicing lemons!

Advertisement

Key Takeaways

  • Accurate measurements are crucial when cooking and baking with lemons, as factors like ripeness, size, and juicing method can affect lemon juice yield.
  • Knowing how much juice a lemon produces can help save money by buying the right amount of lemons needed, and using the right tool for juicing lemons can make a big difference in juice yield.
  • Lemon juice has health benefits, including aiding in digestion, boosting immune function, and being high in vitamin C and antioxidants, making it beneficial for skincare.
  • Lemon juice can be stored in the refrigerator, freezer, or canned, and can be used in a variety of recipes, including cocktails, salad dressings, and marinades for meats or fish.

The Importance of Knowing How Much Juice a Lemon Produces

You gotta know how much juice a lemon gives, it’s kinda important if you wanna impress your guests with a killer cocktail.

But beyond the realm of mixology, lemon juice has numerous benefits in the realm of health. Rich in vitamin C, potassium, and antioxidants, lemon juice has been shown to aid in digestion, boost immune function, and even prevent kidney stones.

So not only is it important to know how much juice a lemon produces for culinary purposes, but for health reasons as well.

However, the amount of juice a lemon produces can vary depending on a variety of factors, including the ripeness of the fruit, its size, and its temperature. Understanding these factors and how they affect lemon juice yield is crucial in ensuring consistent and accurate measurements in cooking and mixology.

Factors That Affect Lemon Juice Yield

Factors affecting the yield of lemon juice include the ripeness of the fruit and the method of extraction.

When it comes to ripeness, the amount of juice a lemon produces is directly related to how ripe it is. The more mature the fruit, the more juice it will contain. On the other hand, an under-ripe fruit will yield less juice.

Advertisement

Another factor that affects juice yield is the variety of lemon. Some varieties are naturally juicier than others, so it’s important to choose the right variety if you’re looking for maximum juice.

In addition to these factors, the method of extraction also plays a role in how much juice you can get from a lemon. Lemon juice extraction techniques vary, but some methods are more efficient than others. For example, using a hand juicer or a citrus press can yield more juice than simply squeezing the lemon with your hands.

By understanding these factors and choosing the right extraction method, you can maximize your lemon juice yield and get the most out of your fruit.

As we move on to the next section, it’s important to note that having the right tools for juicing lemons can make a big difference in the amount of juice you’re able to extract.

Tools You Will Need for Juicing Lemons

To get the most out of your citrus, you’ll need the right tools. When it comes to juicing lemons, there are two common options: hand-held lemon squeezers and electronic juicers.

Advertisement

Hand-held lemon squeezers are a low-cost and easy-to-use option. They come in a variety of sizes and shapes, but all function in a similar way. Simply cut the lemon in half, place it in the squeezer, and press down on the handles to extract the juice.

Electronic juicers can be a more expensive investment, but they can save time and effort. These machines can handle larger quantities of lemons and often have adjustable settings to customize the level of pulp in your juice.

No matter which tool you choose, having the right equipment can make the process of juicing lemons much easier and more efficient.

Now that you have the appropriate tools, it’s time to learn how to use them effectively. In the next section, we’ll provide a step-by-step guide for juicing lemons to help you maximize your lemon juice yield.

Step-by-Step Guide for Juicing Lemons

Once I’ve got my chosen juicing tool at hand, such as a citrus reamer or a handheld juicer, I begin the process of extracting lemon juice.

Advertisement

First, I cut the lemon in half and place one half onto the juicing tool, with the cut side facing down. Then, I firmly press and twist the juicing tool, extracting the juice from the lemon.

I repeat this process with the other half of the lemon, until all the juice has been extracted.

There are several lemon juicer alternatives available, but the most important thing is to choose a tool that allows for efficient extraction of the juice.

Additionally, lemon juice has many benefits for skin care, as it’s high in vitamin C and antioxidants. Incorporating lemon juice into a daily skincare routine can help brighten and even out skin tone, while also helping to reduce the appearance of fine lines and wrinkles.

With that being said, let’s move on to some tips for getting the most juice out of your lemons.

Advertisement

Tips for Getting the Most Juice Out of Your Lemons

If you want to make the most out of your citrus, it’s important to know a few tricks for maximizing the amount of tangy goodness you can squeeze out of each fruit. Here are three tips for getting the most juice out of your lemons:

  • Use a lemon zester to break up the membranes inside the lemon before juicing. This will help release more juice and make juicing easier.

  • Roll the lemon on a hard surface to break down the pulp before juicing. This will also help release more juice.

  • Consider alternative juicing methods, such as using a garlic press or a citrus squeezer, to get even more juice out of your lemons.

By following these tips, you can ensure that you’re getting the most juice out of each lemon.

But how much juice does one lemon yield? Let’s explore that in the next section.

How Much Juice Does One Lemon Yield?

Did you know that squeezing a single lemon can yield up to a quarter cup of tart and zesty liquid? As someone who loves to cook and bake, knowing how much juice one lemon yields is essential. Not only does it help me plan my recipes better, but it also helps me save money by buying just the right amount of lemons I need.

To give you an idea of just how much juice you can get from a lemon, take a look at this table:

Advertisement
Size of Lemon Amount of Juice
Small 1-2 tablespoons
Medium 2-3 tablespoons
Large 4-5 tablespoons

Aside from adding flavor to your dishes, lemon juice also has numerous health benefits. It’s rich in Vitamin C, which is known to boost the immune system and improve skin health. It also aids in digestion and can help prevent kidney stones. And if you ever find yourself without a fresh lemon on hand, you can always use substitutes such as vinegar or lime juice in a pinch.

Transitioning to the next subtopic, understanding how much juice one lemon yields is essential when it comes to recipe conversion. Knowing how to calculate the amount of lemon juice needed for a recipe can make or break the final outcome.

Recipe Conversion: How to Calculate Lemon Juice Needed

Understanding the recipe conversion process can be complex, especially when it comes to calculating the necessary amount of lemon juice needed. However, having the right amount of this tart and zesty liquid can make all the difference in the final product.

Here are some tips on how to calculate the right amount of lemon juice for your recipe:

  1. Start by determining how much juice you need. This can be done by looking at the recipe and identifying the amount of lemon juice required in the ingredient list.

  2. The next step is to figure out how much juice is in each lemon. On average, a medium-sized lemon yields about 2-3 tablespoons of juice. However, this can vary based on the size and ripeness of the fruit.

  3. Once you know how much juice is in each lemon, you can calculate how many lemons you need for your recipe. Simply divide the required amount of juice by the amount of juice in each lemon to get the number of lemons needed.

By following these simple steps, you can ensure that you have the right amount of lemon juice for your recipe.

Advertisement

In the next section, we’ll discuss how to store any excess juice for future use.

Storing Lemon Juice

Now that we know how to calculate the amount of lemon juice needed for a recipe conversion, it’s important to discuss proper storing techniques and shelf life.

Lemon juice can be stored in a variety of ways, including in the refrigerator, freezer, or even canned. When storing in the refrigerator, it’s important to keep the juice in an airtight container to prevent oxidation and maintain freshness. The juice can also be frozen in ice cube trays and then transferred to a freezer-safe container for later use. Canning is another option, but requires proper equipment and techniques to ensure safety.

The shelf life of lemon juice varies depending on the storage method. Freshly squeezed lemon juice stored in the refrigerator can last up to 2-3 days, while frozen juice can last up to 6 months. Canned lemon juice can last even longer, up to a year or more. It’s important to always check for signs of spoilage, such as a sour smell or mold, before using any stored lemon juice.

Moving on to other uses for lemon juice, it can be used for more than just cooking.

Advertisement

Other Uses for Lemon Juice

If you’ve ever struggled with removing stubborn stains or rust, a little bit of this versatile citrus liquid can work wonders. Lemon juice is not only a great ingredient for adding a tangy flavor to your dishes, but it also has some impressive uses in skincare and home cleaning. Here are three benefits of using lemon juice for skincare:

  1. Lemon juice is rich in citric acid, which can help exfoliate dead skin cells and brighten your complexion.

  2. It contains vitamin C, an antioxidant that helps protect your skin from damage caused by free radicals and UV rays.

  3. Lemon juice can also help reduce the appearance of dark spots and acne scars due to its natural bleaching properties.

When it comes to cooking, there are different types of lemon juice you can use depending on your recipe. Freshly squeezed lemon juice is ideal for adding a bright, citrusy flavor to your dishes, while bottled lemon juice can be used for convenience and consistency. Here are a few more ways you can incorporate lemon juice into your cooking:

  1. Use lemon juice as a marinade for meats or fish to add flavor and tenderize the protein.

  2. Add lemon juice to your salad dressings for a tangy kick.

  3. Mix lemon juice with olive oil and herbs to create a flavorful dipping sauce for bread or vegetables.

Overall, lemon juice is a versatile ingredient that can be used in a variety of ways to enhance your skincare routine and cooking skills.

Frequently Asked Questions

What are the health benefits of lemon juice?

As a nutritionist, I can attest to the numerous health benefits of lemon juice. It’s packed with vitamin C, antioxidants, and has anti-inflammatory properties. Lemon juice can also aid digestion, boost immunity, and improve skin health. Check out the nutrition facts for more details.

How long does it take for a lemon to produce juice?

To extract lemon juice, the fruit must first be cut and squeezed. The production timeline depends on the method used, but typically takes only a few minutes. Other factors, such as the ripeness of the lemon, can also impact the amount of juice produced.

Advertisement

Can you juice a lemon without a juicer?

Yes, you can juice a lemon without a juicer using alternative methods such as hand-squeezing, using a fork, or rolling the lemon to release the juice. Different lemon squeezing techniques can also affect the amount of juice extracted.

What is the best way to remove seeds from lemon juice?

The best way to remove seeds from lemon juice is to use a fine mesh strainer or cheesecloth. Simply pour the juice through the strainer or wrap the cheesecloth around the seeds and squeeze. This technique ensures a smooth, seedless juice.

How do you know if a lemon is ripe enough to juice?

To determine if a lemon is ripe enough for juicing, I check for a bright yellow color and a slight give when squeezed. I use lemon juice extraction techniques such as rolling the lemon to release more juice.

Conclusion

In conclusion, knowing how much juice a lemon produces is essential for any cook or bartender. It can mean the difference between a mediocre dish and an exceptional one. By understanding the factors that affect lemon juice yield and using the right tools and techniques, you can maximize the amount of juice you extract from each lemon.

Whether you’re making a lemon vinaigrette or a lemon drop martini, having the right amount of juice is crucial. In short, the power of a lemon shouldn’t be underestimated. This small fruit can pack a punch, and its juice has a wide range of uses. From enhancing the flavor of dishes to providing health benefits, lemon juice is a versatile ingredient that should be a staple in every kitchen.

Advertisement

So grab your juicer and some lemons, and start exploring the endless possibilities of this zesty citrus fruit. Trust me, your taste buds will thank you.

Continue Reading

Juice

How To Make Papaya Juice

Published

on

By

As a health enthusiast, I am always on the lookout for creative and delicious ways to incorporate nutrient-rich foods into my diet. Lately, I have been intrigued by the papaya. Its vibrant orange flesh, sweet taste, and numerous health benefits make it a perfect addition to any smoothie.

Making your own papaya juice is not only easy but also incredibly rewarding. It’s like a burst of sunshine in a glass, delivering a refreshing and invigorating dose of vitamins and minerals straight to your body.

In this article, I will guide you through the step-by-step process of creating your own homemade papaya juice, so you too can enjoy the many health benefits and delicious taste of this tropical fruit.

Key Takeaways

  • The ripeness of the papaya is important when making juice, so look for a mostly yellow fruit with some green spots.
  • Water should be added in the blender to help the ingredients blend smoothly, and a proper water to fruit ratio should be maintained.
  • Blender maintenance is important and blending should be done at a low speed and gradually increased to avoid overblending and creating a foamy texture.
  • Honey or agave syrup can be added as a sweetener for taste and health benefits, but adding too much will increase the calorie and sugar content of the juice, so consume in moderation.

Gather Your Ingredients

Don’t forget to grab that juicy papaya and get ready for a refreshing experience that will quench your thirst like never before! Before we can start making the juice, we need to gather our ingredients.

Apart from the papaya, you’ll need some water, lime juice, and sugar or honey for sweetening. Papaya is an excellent source of vitamins A and C, potassium, and fiber. It’s also rich in antioxidants that help boost your immune system and protect against chronic diseases.

To make the juice more interesting, you can add other fruits like strawberries, pineapple, or mangoes. These flavor variations not only add taste but also enhance the health benefits of the juice.

Advertisement

Now that we have gathered our ingredients, let’s move on to preparing our papaya.

Prepare Your Papaya

Once you’ve got your hands on a ripe papaya, it’s as easy as slicing it open like a smile to reveal the juicy goodness inside. But before you get started, it’s important to know that there are several varieties of papaya, and each one has a different level of ripeness that’s optimal for juice-making.

Here are three things to keep in mind regarding papaya ripeness:

  1. Look for a papaya that is mostly yellow with some green spots. This indicates that the fruit is ripe and ready to be used for juice.

  2. If the papaya is fully green, it’s not yet ripe enough to use. You’ll need to wait a few more days until the papaya turns yellow.

  3. If the papaya is mostly yellow with brown spots, it’s overripe and may not taste as good in juice.

Now that you know how to choose the perfect papaya, it’s time to cut it into pieces and get ready to make some delicious juice.

Cut the Papaya into Pieces

To start, simply grab a sharp knife and slice the ripe papaya in half lengthwise, revealing the bright orange flesh and black seeds inside. Next, scoop out the seeds with a spoon and then proceed to cut the papaya into pieces. I like to cut the papaya into cubes, but you can cut them into any size you prefer.

Advertisement

When selecting a papaya for juice, it’s important to choose a ripe one. A ripe papaya should have a yellowish-orange skin and should yield slightly to pressure. Papayas are a great source of vitamins A and C, and they contain an enzyme called papain that aids in digestion. By adding papaya juice to your diet, you can reap all of these health benefits and more.

Now that the papaya is cut into pieces, it’s time to add it to the blender. But before we do that, we need to add water to the blender to help the blending process.

Add Water to the Blender

Now we’re ready to blend everything together, so let’s go ahead and add some water to the blender. It’ll help the ingredients blend smoothly and create a refreshing and hydrating drink that’ll leave you feeling energized. When adding water to the blender, it’s important to maintain a proper water to fruit ratio to ensure that the juice isn’t too thick or too watery. As a general rule of thumb, I like to add about 1/2 cup of water for every 1 cup of fruit. This ratio can be adjusted based on personal preference, but be careful not to add too much water as it can dilute the flavor of the papaya.

Proper blender maintenance is also important when making papaya juice. Before adding the water, make sure the blender is clean and free of any residue from previous use. After blending, take the time to thoroughly clean the blender to prevent any lingering flavors or bacteria. Now that we’ve added the water to the blender, it’s time to move onto the next step and add the papaya to create a delicious and nutrient-packed juice.

Add the Papaya to the Blender

With the blender prepped and water added, it’s time to blend in the juicy papaya chunks for a tropical burst of flavor. Before adding the papaya, make sure to remove the skin and seeds. Papaya is rich in vitamins A and C, and adding it to your diet can help improve digestion and boost your immune system.

Advertisement

When blending the papaya, it’s important to start at a low speed and gradually increase it to avoid overblending and creating a foamy texture. Depending on your preference, you can add other fruits such as pineapple or banana to create different variations of papaya juice.

Once the papaya is fully blended, we can move on to the next step of the process: blending the mixture until smooth.

Blend the Mixture

You’re ready to blend the mixture and create a delicious papaya juice. Before we start, let’s talk about blender maintenance. It’s important to keep your blender clean and free from any remnants of past use. Make sure to wash the blender thoroughly with soap and water before using it.

Now, let’s blend the mixture. Start by placing the lid on the blender and turning it on. Blend on high speed until the mixture is smooth and creamy. If you don’t have a blender, you can use a food processor or immersion blender as an alternative blending method. Once you’ve achieved the desired consistency, you can move on to the next step: strain the mixture (optional).

Strain the Mixture (optional)

If you wanna go the extra mile, strain out any unwanted bits and bobs from your blended concoction with a sieve or cheesecloth. This step is optional, but it can make a huge difference in the texture and taste of your papaya juice.

Advertisement

By removing the fibrous pieces and seeds, you’ll get a smoother and more pleasant drink that is easier to digest. The benefits of straining go beyond aesthetics and taste.

Papaya seeds, for instance, have a bitter flavor and can cause digestive discomfort if ingested in large amounts. While they’re edible and have some health benefits, such as being anti-inflammatory and antibacterial, they’re not suitable for everyone.

Straining also allows you to remove any dirt, debris, or pesticides that may be present in the fruit. If you don’t have a sieve or cheesecloth, you can skip this step or use a fine-mesh strainer, but keep in mind that you may end up with a chunkier juice.

Now that you have your pulp-free papaya juice, you can proceed to the next step: adding sweetener (optional).

Add Sweetener (optional)

To enhance the flavor and add a touch of sweetness, consider mixing in honey or agave syrup to create a tropical paradise in your mouth. Not only do these alternative sweeteners provide a delicious taste, but they also come with health benefits.

Advertisement

Honey contains antioxidants and has antibacterial properties, while agave syrup has a lower glycemic index compared to traditional sugar. When adding the sweetener, start with a small amount and adjust to your preference. Here are some tips to keep in mind:

  • Use raw, unprocessed honey or organic agave syrup for maximum health benefits.
  • Consider using a honey or agave syrup that is locally sourced to support small businesses and reduce your carbon footprint.
  • If you prefer a sweeter juice, add more sweetener gradually to avoid overpowering the natural flavor of the papaya.
  • Keep in mind that adding sweetener will increase the calorie and sugar content of the juice, so consume in moderation.

Now that the juice is sweetened to your liking, it’s time to chill and serve.

Chill and Serve

Once the mixture is chilled and ready, simply grab a glass and pour in the deliciously tropical juice. Savor every sip, as papaya juice is not only refreshing but also packed with numerous health benefits. It’s rich in antioxidants, vitamins A and C, and enzymes that aid digestion. Regular consumption of papaya juice can improve skin health, boost immunity, and reduce inflammation.

To switch things up, try different serving suggestions for your homemade papaya juice. Add a slice of lime or a sprig of mint for an extra kick of flavor. You can also mix it with other juices like pineapple or orange for a tropical fruit medley. However, it’s important to note that papaya juice should be consumed in moderation as it contains high amounts of natural sugars.

Enjoy your homemade papaya juice and reap the benefits of this delicious and nutritious beverage!

Enjoy Your Homemade Papaya Juice!

You can savor the delicious and nutritious homemade tropical beverage by pouring it into a glass and adding a slice of lime or a sprig of mint for an extra kick of flavor. The best part about making papaya juice at home is that you can customize it according to your preferences and health needs. Here are some health benefits and recipe variations that you can try:

Advertisement
Health Benefits Recipe Variations
High in Vitamin C and antioxidants Add ginger or turmeric for additional anti-inflammatory properties
Supports digestion and gut health Mix with coconut water or kefir for probiotic benefits
Lowers blood sugar levels Blend with spinach or kale for an extra boost of vitamins and minerals

By incorporating these recipe variations, you can enhance the taste and nutritional value of your homemade papaya juice. Enjoy this refreshing beverage as a healthy breakfast drink or a post-workout thirst quencher. Cheers to good health and delicious taste!

Frequently Asked Questions

What are the health benefits of drinking papaya juice?

After researching, I found that papaya juice is high in vitamin C, antioxidants, and fiber. It may aid in digestion and boost immunity. However, it may also cause allergic reactions or interact with certain medications.

Can I use frozen papaya instead of fresh papaya?

Yes, frozen papaya can be used as a substitute for fresh papaya in smoothie options. It still retains its nutritional benefits and can be a convenient option for those who don’t have access to fresh papaya.

How long does homemade papaya juice last in the refrigerator?

To preserve the freshness of homemade papaya juice, store it in an airtight container in the refrigerator. This will extend the juice’s shelf life for up to three days. Keeping the juice fresh is key to maximizing its health benefits.

Can I add other fruits or vegetables to my papaya juice?

Oh, the possibilities! I love getting creative with my papaya juice variations. Mixing papaya with other fruits like mango or pineapple can add a tropical twist, while adding spinach or kale can boost the health benefits. The options are endless!

Advertisement

Is it possible to make papaya juice without a blender?

Yes, it is possible to make papaya juice without a blender. You can use blender alternatives such as a food processor or manual extraction methods like squeezing the juice out of the fruit by hand or using a juicer.

Conclusion

Well, that’s how I make my delicious papaya juice! It’s so easy and refreshing, and it’s a great way to get some extra vitamins and nutrients into your diet.

Did you know that papaya is high in vitamin C, folate, and potassium? In fact, one medium papaya contains about 224% of your daily recommended intake of vitamin C! That’s pretty impressive.

But beyond just being a healthy choice, papaya juice is also a delicious one. It’s naturally sweet and has a tropical flavor that’s perfect for sipping on a hot summer day.

Plus, by making it at home, you can control the sweetness and add in any other ingredients you like. So if you’re looking for a tasty and healthy drink option, give papaya juice a try!

Advertisement

Continue Reading

Juice

How To Make My Own Vape Juice

Published

on

By

As a passionate vaping enthusiast, I have always been fascinated by the art of creating my own e-liquid. The process of blending different flavors to create a unique taste that suits my preferences has been an exciting adventure. However, making your own vape juice can be daunting, especially for beginners.

In this guide, I will share with you the steps I took to make my own vape juice, including the basic ingredients and equipment needed, how to determine the PG/VG ratio, and how to calculate the recipe.

Before we delve into the process of making your own vape juice, it is crucial to understand the basic ingredients and equipment needed. The main ingredients of vape juice include vegetable glycerin (VG), propylene glycol (PG), nicotine, and flavorings. VG and PG are the base liquids used to create the vapor, while nicotine and flavorings are added to enhance the taste and nicotine content.

The equipment needed includes a mixing container, a scale, syringes, gloves, and bottles for storage. With these basic ingredients and equipment, you can start making your own vape juice and customize it to your liking.

Key Takeaways

  • Prioritize ingredient safety and equipment maintenance to ensure purity and consistency.
  • Experiment with flavor combinations and adjust ratios for desired flavor and nicotine strength.
  • Use a mixing calculator and measure ingredients accurately for consistency and safety.
  • Properly store ingredients and finished e-liquids to maintain flavor and potency.

Understand the Basic Ingredients and Equipment Needed

To make your own vape juice, you’ll need some basic ingredients and equipment, like VG (vegetable glycerin), PG (propylene glycol), nicotine, flavorings, syringes, and bottles. These are all readily available online or at your local vape shop.

When it comes to equipment options, you can use either a scale or syringes to measure out your ingredients. A scale is more precise and efficient, while syringes are easier to find and use.

Advertisement

It’s important to note that some flavorings may contain oils or other additives that can be harmful if vaporized, so be sure to research and choose safe options.

Ingredient substitutions are also possible, but may affect the overall flavor and vaping experience. For example, you can swap VG and PG ratios to adjust the thickness and throat hit of your juice. You can also choose different types of nicotine, such as freebase or salt nicotine, depending on your preference.

Flavorings can be substituted or combined to create unique blends, but make sure to use ones that are specifically made for vaping. With all these options, it’s important to experiment and find what works best for you.

Now that you understand the basic ingredients and equipment needed, let’s move on to gathering everything necessary to start making your own vape juice.

Gather the Necessary Ingredients and Equipment

First, you’ll need to gather all the essential ingredients and equipment needed for crafting your own custom e-liquid. When it comes to ingredients, it’s important to prioritize ingredient safety. Make sure to purchase pharmaceutical-grade ingredients from reputable suppliers to ensure the purity of your e-liquid. Some of the key ingredients you’ll need include propylene glycol (PG), vegetable glycerin (VG), nicotine (if desired), and flavor concentrates. It’s also important to properly store your ingredients in a cool, dry place to maintain their quality.

Advertisement

In addition to the necessary ingredients, you’ll need to have the proper equipment for mixing and storing your e-liquid. This includes a scale for accurate measurements, syringes for precise dispensing, mixing containers, and bottles for storing your finished product. It’s also important to prioritize equipment maintenance to ensure the longevity and accuracy of your tools. Regularly clean your equipment and replace any worn or damaged components. By gathering the necessary ingredients and equipment and prioritizing ingredient safety and equipment maintenance, you’ll be well on your way to crafting your own custom e-liquid with confidence.

As you gather your ingredients and equipment, it’s important to keep in mind the flavor profile you want to achieve in your e-liquid. In the next section, we’ll discuss how to choose your flavor profile and create a unique and satisfying vaping experience.

Choose Your Flavor Profile

When it comes to choosing a flavor profile for my vape juice, I like to consider whether I want a single flavor or a combination of flavors. Experimenting with different combinations can lead to unique and interesting results.

Additionally, adjusting the intensity of the flavors can greatly affect the overall taste of the vape juice. It’s important to keep in mind that finding the perfect flavor profile may take some trial and error, but the end result is worth it.

Single Flavor vs. Combination

Deciding between using a single flavor or combining flavors can be a tough choice, but it ultimately depends on personal preference and taste.

Advertisement

There are pros and cons to both options. Using a single flavor can be simple and straightforward, making it easier to control the taste and nicotine strength. However, it can also be limiting in terms of variety and complexity.

On the other hand, combining flavors can open up a whole new world of possibilities, allowing you to create unique and complex blends. The downside is that it can be tricky to get the ratios right and achieve a balanced flavor.

When it comes to popular combinations, there are endless options to choose from. Some common pairings include fruit and menthol, dessert and cream, and tobacco and caramel. However, don’t be afraid to get creative and experiment with different flavors to find the perfect mix for you.

Remember, taste is subjective, so what works for one person may not work for another. The key is to start with small batches and adjust the ratios until you find the right balance of flavor and nicotine strength. With a bit of trial and error, you’ll be able to create your own unique vape juice that perfectly suits your taste buds.

Experimenting with Flavors

Combining different flavor profiles can lead to a multitude of unique and unexpected tastes, allowing for an exciting exploration of the vast world of vaping. However, it’s important to be mindful of certain flavor combinations to avoid.

Advertisement

For example, mixing mint and cinnamon can create an overpowering taste that can be unpleasant to some. Similarly, combining citrus and dairy flavors can result in a curdled and unappetizing vape juice.

On the other hand, finding inspiration for unique flavors can lead to great success. Experimenting with combining fruits like strawberry and kiwi, or mixing dessert flavors like caramel and vanilla can create a delicious and complex vape juice.

It’s also helpful to try out pre-made flavor concentrates from reputable brands to get a sense of different flavor profiles and how they can be mixed together. With a bit of creativity and caution, the possibilities for creating your own unique vape juice flavors are endless.

Now, let’s move on to adjusting flavor intensity.

Adjusting Flavor Intensity

To add an extra kick to your flavor, try using a drop or two of flavor enhancers like EM or AP, which are available at most vape shops. These flavor enhancers are meant to balance out the overall flavor profile of your vape juice.

Advertisement

For example, if you feel like your fruit flavor is lacking some sweetness, you can add a drop of EM, which is ethyl maltol, to enhance the sweetness. On the other hand, if you feel like your bakery flavor is too overpowering, you can add a drop of AP, which is acetyl pyrazine, to tone down the bakery notes.

It’s important to note that when adjusting the flavor intensity, you should always taste your vape juice after adding the enhancer to avoid overdoing it. Additionally, steeping techniques can also affect the overall strength of the flavor.

Steeping is the process of letting your vape juice sit in a cool, dark place for a period of time, allowing the flavors to meld together and become more pronounced. Depending on the flavor and the recipe, some vape juices may need to steep for a few days or even a few weeks.

Once you’ve adjusted the flavor intensity and determined the steeping time, it’s time to move on to determining the pg/vg ratio.

Determine the PG/VG Ratio

Finding the perfect PG/VG ratio can truly make or break the flavor and overall vaping experience. PG and VG are the two main components of vape juice, and they each have their own properties that affect the final product.

Advertisement

PG is thinner and has a stronger throat hit, which is great for those who want a stronger sensation when vaping. On the other hand, VG is thicker and produces more vapor, making it ideal for cloud chasers.

When deciding on the PG/VG ratio for your vape juice, it’s important to consider your personal preferences and vaping style. If you want a stronger throat hit, a higher PG ratio may be better for you. However, if you prefer bigger clouds and a smoother vaping experience, a higher VG ratio may be the way to go. Additionally, you can adjust the throat hit in your vape juice by adding more or less PG, depending on your desired effect.

Moving on to the next step, calculating the recipe for your vape juice involves taking into account the flavorings, nicotine, and PG/VG ratio.

Calculate the Recipe

To calculate the recipe for my DIY vape juice, I need to use a mixing calculator. This tool will help me determine the exact measurements of each ingredient based on my desired nicotine strength, flavor intensity, and PG/VG ratio.

It’s important to measure the ingredients accurately to ensure consistency and safety, and to adjust the recipe for different batch sizes.

Advertisement

Using a Mixing Calculator

Using a mixing calculator can be a game-changer for DIY vape juice makers. It simplifies the process and ensures accurate measurements, making it a piece of cake.

One of the benefits of DIY vape juice is the ability to customize the flavor to your liking. However, this can be challenging without the right tools. Using a mixing calculator eliminates the guesswork and ensures that you have the right amount of each ingredient.

Common mixing mistakes can lead to an unpleasant vaping experience, such as too much flavoring or not enough nicotine. A mixing calculator takes into account the specific gravity and concentration of each ingredient to ensure that you have the perfect balance.

It also allows you to adjust the recipe based on the size of the batch you want to make. With a mixing calculator, you can confidently create your own unique vape juice flavors without worrying about making mistakes that could ruin the final product.

Accurately measuring ingredients is crucial for creating a successful vape juice recipe. In the next section, I’ll discuss the importance of using precise measurements and how to do it correctly.

Advertisement

Measuring Ingredients Accurately

Now that we’ve got the hang of using a mixing calculator, let’s talk about the importance of precision in measuring the ingredients for our vape juice.

Measuring ingredients accurately is crucial to the success of our mix. Even the slightest variation in measurements can greatly affect the flavor and consistency of our final product. That’s why it’s important to use the appropriate tools, such as a graduated cylinder or a scale, for measuring each ingredient.

Common measuring mistakes include eyeballing measurements, using the wrong measuring tools, and not properly leveling off dry ingredients. These mistakes can lead to an imbalanced flavor profile, harsh throat hits, or even a ruined batch.

To avoid these issues, it’s essential to follow the recipe and measure each ingredient carefully. Remember, precision is key when it comes to making your own vape juice.

Now that we understand the importance of accurate measurements, let’s move on to the next step: adjusting for batch size.

Advertisement

Adjusting for Batch Size

When we want to mix up a bigger or smaller batch of our delicious e-liquid, we need to adjust the ingredients accordingly to ensure the perfect balance of flavors. Here are some tips and tricks for adjusting for batch size:

  1. Use a calculator to scale the recipe: This is the easiest and most accurate way to adjust for batch size. Simply multiply the ingredients by the desired batch size and divide by the original batch size. For example, if the original recipe is for a 100ml batch and you want to make a 50ml batch, you would multiply all the ingredients by 0.5.

  2. Be mindful of flavor concentration: Some flavorings can be very potent, and a little goes a long way. When adjusting for batch size, make sure to adjust the flavoring accordingly. For example, if the original recipe calls for 10% flavoring in a 100ml batch, you may only need 5% in a 50ml batch.

  3. Keep track of your adjustments: It’s important to keep a record of the adjustments you make to the recipe. This will help you replicate the recipe in the future and make adjustments as needed.

Now that we’ve discussed adjusting for batch size, it’s time to mix the ingredients.

Mix the Ingredients

As I mix the ingredients for my own vape juice, I need to be aware of the different mixing techniques to achieve the desired result. One common mistake that beginners make is not mixing the ingredients thoroughly, resulting in an uneven distribution of flavors. To prevent this, I need to use a magnetic stirrer or a handheld mixer to ensure that the ingredients are well-blended.

Another important factor to consider is the order in which the ingredients are mixed. I usually start by adding the base liquid, followed by the flavorings, and then the nicotine (if desired). This ensures that the flavors are evenly distributed and that the nicotine is evenly dispersed throughout the mixture.

As I mix the ingredients, I can already start to imagine the flavor profile of my vape juice. But before I can enjoy it, I need to steep the e-liquid to allow the flavors to fully develop.

Advertisement

Once the ingredients are mixed, it’s time to let the e-liquid steep and mature, enhancing the flavors and improving the overall vaping experience.

Steep the E-Liquid

To fully develop the flavors of your e-liquid, steeping is essential. Steeping is the process of letting the e-liquid mixture sit for a certain period of time to allow the flavors to blend together. This process is necessary because some of the ingredients used in the mixture may not be fully incorporated at first, resulting in a harsh or unpleasant taste if vaped immediately.

Steeping techniques vary depending on the recipe and the desired outcome, but the general rule is to store the e-liquid in a cool, dark place and shake it regularly. The importance of patience in steeping can’t be overstated. Some e-liquids may require a few days to a few weeks of steeping before they’re ready to vape. It can be tempting to try the e-liquid right away, but the flavors won’t be as developed as they could be.

Patience is key to achieving the best possible flavor from your homemade e-liquid. Once the steeping process is complete, it’s time to move on to the next step: testing and adjusting the e-liquid to your preference.

Test and Adjust

Now that I’ve steeped my e-liquid, it’s time to test and adjust the flavor and nicotine levels to my liking.

Advertisement

I’ll begin by testing the e-liquid by dripping a small amount onto my atomizer and taking a few puffs.

From there, I can adjust the flavor or nicotine levels accordingly and make notes for future batches.

By taking the time to test and adjust my e-liquid, I can ensure a satisfying experience every time I vape.

Testing the E-Liquid

Before you start vaping your homemade juice, make sure you test it first to ensure the flavor and nicotine levels are to your liking. To test the e-liquid, you can use various flavor testing techniques such as dripper testing or tank testing.

Dripper testing involves adding a small amount of the e-liquid onto a dripper and vaping it without any previous juice in the tank.

Advertisement

Tank testing involves filling your vape tank with the e-liquid and vaping it. This method is best for evaluating how the e-liquid tastes when it is heated.

It’s also important to keep in mind the steeping time for e-liquids. Steeping is the process of letting e-liquids age to improve their flavor. It’s recommended that you let your e-liquid steep for at least a week before testing it. You can steep your e-liquid by letting it sit in a cool, dark place and shaking it every day.

Once you’ve tested your e-liquid and determined the flavor and nicotine levels, you can move on to adjusting flavor or nicotine to your liking.

Adjusting Flavor or Nicotine

Once you’ve tested your e-liquid and determined the flavor and nicotine levels, it’s time to personalize your vaping experience by customizing the nicotine strength and balancing the flavor profile.

To adjust nicotine levels, you’ll need to add more or less nicotine concentrate to your e-liquid base. It’s important to measure the nicotine concentrate accurately to avoid ending up with a nicotine level that’s too strong or too weak. You can use an online calculator to determine the amount of nicotine concentrate to add, based on the strength of your base and the desired nicotine level.

Advertisement

When it comes to balancing the flavor profile, you can adjust the amount of flavoring used to make it stronger or weaker. Be careful not to add too much flavoring, as this can overpower the other flavors and make the e-liquid taste artificial.

It’s a good idea to start with small adjustments and test the e-liquid again before making any major changes. Once you’ve achieved the perfect balance of nicotine and flavor, you can make notes for future batches to ensure consistency.

Making Notes for Future Batches

To ensure consistency in your e-liquid batches, it’s crucial to jot down notes like a baker writing down a recipe for their signature dish. By keeping track of your flavor notes and recipe adjustments, you can easily replicate your favorite e-juice flavors that suit your taste buds.

Here are a few tips on how to make notes for future batches:

  • Start with the basics: Write down the name of the recipe, the date it was made, the nicotine level, and the VG/PG ratio. This will help you keep track of the different batches you make.

  • Flavor notes: Write down the flavors you used, their brand, and the percentage used. This will help you remember which flavors work well together and which ones need to be adjusted.

  • Recipe adjustments: If you made any adjustments to the recipe, like increasing or decreasing the percentage of a flavor, write it down. This will help you achieve the desired taste in future batches.

  • Personal preferences: If you made a recipe that you loved, write down any personal preferences you have, like increasing the sweetness or adding menthol. This will help you customize the recipe to suit your taste buds.

By taking notes, you can easily replicate your favorite e-juice flavors and make any necessary adjustments. Now that you’ve got your notes, it’s time to store the e-liquid properly to ensure it stays fresh and flavorful.

Advertisement

Store the E-Liquid

Storing your homemade e-liquid properly is crucial to maintaining its flavor and nicotine potency. Proper storage ensures that your e-liquid lasts longer and maintains its quality. The shelf life of e-liquid depends on various factors such as nicotine strength, flavoring, and the base used.

To store your e-liquid, you’ll need to keep it away from heat and direct sunlight. Heat and sunlight can cause the nicotine to degrade and alter the flavor. It’s best to store your e-liquid in a cool, dark place, such as a cabinet or drawer. Additionally, make sure to keep your e-liquid away from children and pets, as nicotine is poisonous if ingested. The table below summarizes the proper ways to store your e-liquid.

Factor to Consider Proper Storage
Temperature Cool and dark place
Sunlight Keep away from direct sunlight
Children and pets Keep out of reach

Now that you’ve learned about proper storage for your e-liquid, you can enjoy your custom vape juice!

Enjoy Your Custom Vape Juice!

After properly storing your homemade e-liquid, savoring its flavor and potency is like taking a sip of a fine wine. The customized flavor combinations and tailored nicotine strengths are just some of the benefits of making your own vape juice.

Compared to store-bought options, DIY e-liquids offer more control over the ingredients, allowing you to adjust the flavor and nicotine levels to your liking. To enjoy your custom vape juice, it’s important to use the right equipment and technique.

Advertisement

First, ensure that your vape device is compatible with the e-liquid you made. Then, prime your coil to prevent dry hits and burnt flavors. Finally, start with a low wattage setting and gradually increase it until you find the sweet spot for your desired flavor and vapor production.

With practice, you’ll be able to create a perfect blend that suits your taste and vaping preferences. Enjoy your custom vape juice!

Frequently Asked Questions

Is it safe to make my own vape juice at home?

When making vape juice at home, home safety and ingredients quality are key factors to consider. Ensure proper storage, handling, and labeling of ingredients. Purchase high-quality ingredients from reputable sources.

How much money can I save by making my own vape juice compared to buying it pre-made?

I saved a ton of money by making my own vape juice compared to buying pre-made. DIY vape juice cost comparison showed a 75% reduction in cost. Homemade e liquid quality analysis is crucial for safe and satisfying vaping.

Can I make vape juice without nicotine?

Yes, it is possible to make vape juice without nicotine. There are nicotine-free options available, and flavor customization is still possible without nicotine. It’s important to carefully measure ingredients and follow safety precautions when making your own vape juice.

Advertisement

How long does it take to steep the e-liquid, and why is this step necessary?

Like aging wine, steeping e-liquid is a crucial process that allows flavors to develop fully. The steeping process can take anywhere from a few days to several weeks, depending on the recipe. It’s necessary to achieve optimal taste and quality.

Are there any special precautions I need to take when mixing the ingredients or handling nicotine?

When mixing vape juice, it’s crucial to take mixing precautions and handle nicotine safely. Nicotine is a toxic substance that can cause harm if ingested or absorbed through the skin, so gloves and eye protection should be worn.

Conclusion

Well, after all that effort, I’ve finally made my own vape juice.

I followed all the steps, gathered all the ingredients and equipment, and calculated the perfect recipe for my desired flavor profile.

I steeped the e-liquid, tested and adjusted it to my liking, and stored it in a cool, dark place.

Advertisement

It’s ironic that after all that work, I’m left wondering if it was worth it.

Sure, I have a unique blend of vape juice that no one else has, but was the time and effort worth the end result?

Maybe it’s just me, but I think I’ll stick to buying pre-made vape juice from now on.

At least I know exactly what I’m getting and can save myself the hassle of making it myself.

Advertisement

Continue Reading
Advertisement

Affiliate disclaimer
As an affiliate, we may earn a commission from qualifying purchases. We get commissions for purchases made through links on this website from Amazon and other third parties.

Advertisement

Trending

Copyright © 2024 The Graceful Kitchen Affiliate disclaimer As an affiliate, we may earn a commission from qualifying purchases. We get commissions for purchases made through links on this website from Amazon and other third parties.