Did you know that apples are one of the most widely grown fruit crops globally? According to data from the Food and Agriculture Organization of the United Nations, global apple production surpassed 84 million tons in 2019 alone!
With so many apples available, it’s no wonder that apple juice is a popular beverage enjoyed by many. If you’re looking to make your own apple juice at home, a blender can be a handy tool to have.
Not only is it quick and easy, but it also allows you to customize the flavor to your liking. In this article, I’ll guide you through the steps of making apple juice with a blender, from gathering your ingredients to serving and enjoying your delicious creation.
So let’s get started!
Key Takeaways
- Select fresh and ripe apples, wash them, remove stems and seeds, and cut them into small pieces for blending.
- Blend small batches thoroughly to avoid chunks in the juice, and strain the juice using a cheesecloth or fine mesh strainer.
- Store the apple juice in a glass container with an airtight lid at a temperature between 32°F and 40°F, and consume within 3-5 days to maintain its freshness.
- Customize the flavor of the apple juice by adding sweeteners, spices, or herbs, and serve with ice cubes or sparkling water for a refreshing twist.
Gather Your Ingredients and Equipment
Gather your ingredients and equipment.
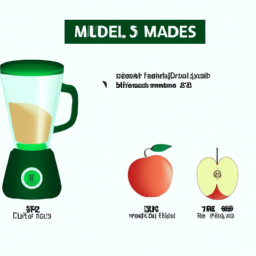
You’re gonna need some fresh apples, a blender, a knife, a cutting board, and a strainer to make some delicious apple juice.
When it comes to choosing the right blender for making apple juice, there are a few things to consider. There are different types of blenders, such as immersion blenders, personal blenders, and countertop blenders. Immersion blenders are great for small batches of apple juice, while personal blenders are perfect for making individual servings. Countertop blenders are ideal for making large quantities of apple juice, but they can be a bit more expensive.
When it comes to selecting the right apples for making juice, there are many varieties to choose from. Some popular choices include Granny Smith, Fuji, Honeycrisp, and Gala apples. Each variety has its own unique flavor profile, so it’s a good idea to experiment with different types to find the one that you like best.
When selecting your apples, it’s important to choose ones that are fresh and ripe. Look for apples that are firm and have a bright color. To wash and prepare your apples, start by rinsing them thoroughly with cool water. Then, use a sharp knife to cut the apples into small pieces, removing the stems and seeds.
Once you have your apples prepared, you’re ready to start making your delicious apple juice.
Wash and Prepare Your Apples
Before beginning the preparation process, it’s essential to thoroughly wash and slice the apples into small pieces to ensure a smooth blending process. Washing the apples under running water is crucial to remove any dirt, pesticides, or residue from the skin. Once the apples are clean, cut them into small pieces, removing the core and seeds.
When making apple juice, there are various recipe variations to choose from, such as adding cinnamon, ginger, or honey to the blend. These ingredients not only enhance the flavor but also provide additional health benefits.
Apples are rich in antioxidants, fiber, and vitamins, making them an excellent addition to any diet. By preparing your apple juice at home, you can ensure the ingredients are fresh and free from preservatives.
With the apples washed and sliced, it’s time to move on to the next step of the process: blending the ingredients.
Cut the Apples into Small Pieces
Now that you’ve got the apples washed and ready, it’s time to start cutting them into small pieces.
Different apple varieties may require different cutting techniques. For instance, if you’re using crisp apples such as Honeycrisp or Granny Smith, it’s best to remove the core first and then slice them into thin wedges. On the other hand, if you’re using softer apples like Red Delicious or Gala, you can simply chop them into small chunks, leaving the core intact.
The size of your apple pieces will determine the juicing outcome. Smaller pieces will produce a smoother juice, while larger pieces may result in a thicker juice with more pulp.
Once you’ve cut the apples into the desired size, you’re ready to move on to the next step – blending the apples.
Blend the Apples
Get ready to create a deliciously smooth concoction by blending those perfectly cut apple pieces. Blending techniques can vary depending on the type of apple and the desired texture of the juice.
For a thicker consistency, blend the apples on high for a longer period of time. For a thinner juice, blend on low for a shorter amount of time. Experiment with different apple varieties to determine which ones produce the best flavor and texture.
When blending, it’s important to make sure all the pieces are evenly chopped to avoid chunks in the juice. I recommend blending in small batches to ensure that each batch is blended thoroughly.
Once all the batches are blended, combine them in a large container and mix well. Next, it’s time to strain the juice to remove any leftover pulp or seeds.
Strain the Juice
Now that I’ve blended the apples, the next step is to strain the juice. To do this, I’ll be using either a cheesecloth or a fine mesh strainer.
The purpose of straining is to remove any pulp or solids from the juice, resulting in a smooth and clear liquid.
Using a Cheesecloth
Using a cheesecloth is a great way to filter the apple juice and remove any pulp or particles. Here’s what you need to know to get the most out of this method:
-
Choosing the right cheesecloth: Make sure to use a fine, tightly-woven cheesecloth that won’t let any pulp or particles through. Look for cheesecloth that’s labeled as ‘grade 90’ or higher for the best results.
-
Prepare the cheesecloth: Cut a piece of cheesecloth that’s large enough to cover the opening of your container or pitcher. Fold the cheesecloth in half twice to create four layers.
-
Strain the juice: Pour the apple juice slowly through the cheesecloth into the container or pitcher. Use a spoon or spatula to press the juice through the cheesecloth and into the container.
-
Alternatives to using a cheesecloth: If you don’t have cheesecloth on hand, you can use a clean dish towel or coffee filter instead. Just make sure to choose a material that’s fine enough to filter out any pulp or particles.
Using a cheesecloth is a simple and effective method for filtering apple juice. However, if you want to get an even smoother and clearer juice, you may want to consider using a fine mesh strainer.
Using a Fine Mesh Strainer
For an even smoother and clearer juice, consider opting for a fine mesh strainer instead of a cheesecloth. Fine mesh strainers come in various sizes and shapes, but the most common ones are conical and bowl-shaped. They’re usually made of stainless steel, which makes them durable and easy to clean.
Compared to cheesecloth, a fine mesh strainer is more effective in capturing small bits of pulp and seeds that may have escaped the blender blades. It also allows the juice to flow through faster, saving you time and effort.
Alternatives to strainers include using a nut milk bag, which is also made of fine mesh material and designed for filtering liquids. However, nut milk bags are smaller and may not be able to hold as much pulp as a strainer can. Another option is using a coffee filter, which is great for removing sediment and impurities from the juice. However, it may take longer for the juice to pass through the filter, and it may not be as effective in removing larger bits of pulp.
Ultimately, the choice of strainer depends on personal preference and the desired texture of the juice.
Benefits of homemade juice are numerous and include having control over the quality and quantity of ingredients, avoiding added sugars and preservatives, and enjoying the full flavor and nutrients of fresh fruits. You can sweeten the juice (optional) by adding honey, maple syrup, or agave nectar to taste.
Sweeten the Juice (Optional)
If you’re feeling like something a little sweeter, a great way to add some natural sweetness to your apple juice is to throw in a few pitted dates or a tablespoon of honey before blending. Dates are great because they contain fiber, potassium, and magnesium, which help to regulate blood sugar levels and promote healthy digestion. Honey, on the other hand, is rich in antioxidants, can boost your immune system, and has antibacterial properties.
Adding honey or using alternative sweeteners is entirely optional, but it can add a new dimension of flavor to your apple juice. Keep in mind that honey is sweeter than sugar, so you may want to start with a small amount and adjust to taste.
Once you’ve sweetened your juice to your liking, you can move on to the next step and customize the flavor even further.
Customize the Flavor
Now it’s time to make your apple juice unique by adding your favorite spices or herbs to enhance the flavor. There are many flavor variations that you can try out to make your apple juice more interesting.
Here are some apple juice recipes that you can experiment with:
-
Cinnamon Apple Juice – Add a teaspoon of ground cinnamon to your apple juice and blend well. This’ll give your juice a warm and spicy flavor that’s perfect for colder weather.
-
Ginger Apple Juice – Add a small piece of fresh ginger to your apple juice and blend well. This’ll give your juice a zesty and refreshing flavor that’s perfect for hot summer days.
-
Mint Apple Juice – Add a few fresh mint leaves to your apple juice and blend well. This’ll give your juice a cool and refreshing flavor that’s perfect for any time of the year.
-
Vanilla Apple Juice – Add a few drops of vanilla extract to your apple juice and blend well. This’ll give your juice a sweet and creamy flavor that’s perfect for dessert.
Now that you’ve customized the flavor of your apple juice, it’s time to chill the juice before serving.
Chill the Juice
Now that I’ve made my own apple juice with a blender and customized the flavor to my liking, it’s time to chill it.
Refrigerating the juice is the easiest and most common way to do this. I usually transfer the juice to a pitcher or airtight container and place it in the fridge for a few hours before serving.
If I want to keep the juice for longer, freezing it in ice cube trays is a good option.
Refrigerating
Chilling the blended apple juice is like letting a refreshing breeze envelope your taste buds. It’s a crucial step in the process of making apple juice as it helps to preserve the freshness and flavor of the juice.
Proper storing techniques and shelf life should always be considered when refrigerating apple juice. Here are some tips to maximize the quality of your juice:
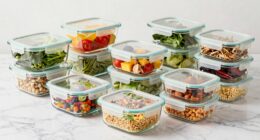
- Use a glass container with an airtight lid to prevent air from entering the container and oxidizing the juice.
- Store the juice at a temperature between 32°F and 40°F to slow down the growth of bacteria and yeast.
- Keep the apple juice away from foods with strong odors as it can absorb the smell and affect the taste of the juice.
- Shake the container gently before serving the juice to mix any settled pulp or sediment.
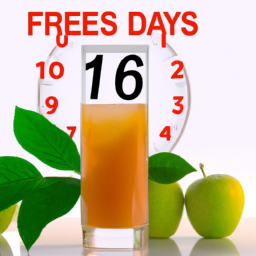
- Consume the apple juice within 3-5 days of refrigerating to avoid spoilage and maintain its freshness.
Freezing the apple juice is another option to prolong its shelf life and enjoy it later.
Freezing
To keep your refreshing apple juice from going bad, you could always freeze it and have it ready to enjoy whenever you want.
Start by using frozen apples, which will help preserve the freshness of the juice. Simply peel and core the apples, then chop them into small pieces and place them in a freezer-safe bag. Make sure to label the bag with the date so that you know how long it has been frozen.
When you’re ready to make apple juice, take out the frozen apples and let them thaw for a few minutes. Then, blend them in a blender until they’re smooth and juicy. You can add a little bit of water if needed to make the consistency just right.
Pour the juice into a glass and serve with ice if desired. Now it’s time to serve and enjoy!
Serve and Enjoy!
Now that my freshly made apple juice is ready, it’s time to serve and enjoy!
For serving, I recommend pouring the juice into glasses and adding ice cubes for a refreshing drink.
If you have any leftovers, be sure to store them in an airtight container in the refrigerator to maintain freshness.
Happy sipping!
Serving Suggestions
For a more refreshing twist on your apple juice, consider adding a splash of sparkling water to it. This will not only add a bit of fizziness to your drink, but it will also enhance the apple flavor. It’s a great way to make your juice more enjoyable, especially on a hot summer day.
When it comes to presentation ideas, there are many ways to make your apple juice look visually appealing. Consider serving it in a clear glass with a slice of apple or a sprig of mint on the rim. You could also pair it with some light snacks such as apple slices, cheese, or crackers. These combinations will complement the taste of your apple juice and make for a satisfying snack.
After enjoying your apple juice, it’s important to store any leftovers properly. Pour the remaining juice into an airtight container and refrigerate it. It’ll last for up to 3 days, but it’s best to consume it as soon as possible to ensure its freshness.
Storing Leftovers
Properly storing your leftover apple juice is crucial to maintaining its freshness and flavor. The best containers to use for storing apple juice are glass jars with tight-fitting lids or plastic bottles made specifically for beverages. It is important to choose containers that are clean and dry to prevent any bacteria growth. I recommend using containers that are clear so you can easily see the juice and monitor any changes in color or texture.
The shelf life of apple juice depends on various factors such as the type of container used, temperature, and exposure to light. If stored in a refrigerator at a temperature between 32-40°F, apple juice can last up to 7 days. However, if left at room temperature for extended periods, the juice can spoil quickly. To extend the shelf life of your apple juice, consider freezing it in ice cube trays or freezer-safe containers. This way, you can enjoy fresh apple juice all year round.
To ensure the longevity of your apple juice, it is imperative to properly store it. Now that you know how to store your apple juice, it’s time to clean your blender and kitchen area to avoid any contamination.
Clean Your Blender and Kitchen Area
First, you gotta wipe down your blender and countertop to ensure cleanliness. The importance of sanitation can’t be overstated, especially when dealing with food and drinks. A dirty blender can be a breeding ground for harmful bacteria, which can make you and your family sick.
Using eco-friendly cleaning options, such as vinegar and baking soda, can help you clean your blender without putting harmful chemicals in your apple juice.
After wiping down your blender and countertop, make sure to wash your hands thoroughly with soap and warm water. Your hands can also harbor bacteria that can contaminate your apple juice.
Once you have cleaned your blender and kitchen area, you are now ready to make your apple juice. By following these simple steps, you can ensure that your apple juice is not only delicious but also safe to drink.
Frequently Asked Questions
How long does homemade apple juice last in the fridge?
Homemade apple juice can last up to 7 days in the fridge if stored properly in an airtight container. To maintain freshness, use a cold-pressed juicer and refrigerate immediately after juicing. Pasteurization can extend shelf life, but may compromise nutrients.
Can I use a food processor instead of a blender to make apple juice?
A food processor can be used to make apple juice, but a blender or juicer is more effective. Blenders puree the fruit while juicers extract the juice, resulting in a smoother consistency and better flavor.
What type of apples are best for making apple juice?
I prefer using Gala, Granny Smith, or Honeycrisp apples for juicing due to their high juice yield and natural sweetness. Additionally, leaving the skin on provides added nutritional benefits such as fiber and antioxidants.
Is it necessary to peel the apples before blending them?
Peeling apples before blending them reduces their nutritional value by nearly 30%. Although it may improve the taste and texture of apple juice, leaving the skin on can provide additional health benefits.
Can I add other fruits or vegetables to the apple juice for added nutrition?
Combining different fruits in homemade juice blends can provide a variety of nutrients. To balance sweetness and nutrition, I recommend using a mix of sweet and tart fruits and vegetables. Experiment and enjoy the benefits of a well-rounded juice.
Conclusion
In conclusion, making apple juice with a blender is a simple and satisfying process that yields a fresh and nutritious beverage. By following the steps outlined above, you can easily transform a batch of apples into a delicious drink that can be enjoyed on its own or mixed with other ingredients to create a custom blend.
Whether you prefer sweet or tart flavors, there are endless ways to customize your apple juice to suit your taste. As I savored a glass of homemade apple juice, I couldn’t help but marvel at the natural beauty of the process. From the crisp crunch of the apples to the smooth blend of the blender, every step felt like a celebration of the essence of the fruit.
By taking the time to make your own juice, you can connect with the earth and savor the flavors of the season in a way that’s both simple and profound. So go ahead, give it a try and experience the joy of creating something delicious from scratch.
Ilana has been a vegan for over 10 years. She originally made the switch for health reasons, but soon found herself becoming more and more passionate about the ethical and environmental implications of a vegan lifestyle. Ilana is the author of The Graceful Kitchen, a blog all about veganism. She loves to cook up delicious and nutritious vegan meals, and share her recipes with others who are interested in leading a cruelty-free life. Ilana is also a strong advocate for using whole foods as the foundation of a healthy diet, and believes that going vegan is one of the best ways to achieve this.
