Connect with us

Juice

How To Juice Limes

Published

on

I’m completely enamored with using limes in my cooking, and there’s truly nothing that compares to the zesty, tangy taste fresh lime juice adds to a meal. However, if you’re similar to me, you might have found it challenging previously to extract the maximum amount of juice from your limes.

That’s why I’m excited to share my tips and tricks for juicing limes like a pro! In this article, I’ll guide you through the process of selecting the perfect limes, preparing them for juicing, and using both manual and electric juicers to extract as much juice as possible.

I’ll also share some creative ways to store and use leftover lime juice, as well as tips for incorporating lime juice into your favorite recipes. Whether you’re a seasoned cook or a beginner looking to add some zest to your dishes, this guide will help you get the most out of your limes.

So let’s get started!

Key Takeaways

  • Look for heavy, bright green limes and avoid soft or brown-spotted limes
  • Soften limes by rolling or microwaving before juicing
  • Use manual, electric, or handheld juicers, with handheld press juicers being the most efficient
  • Lime juice can be used in a variety of recipes, including cocktails, ceviche, guacamole, marinades, dressings, desserts, and baked goods.

Choosing the Right Limes

Want to make the perfect lime juice? Start by picking the juiciest limes you can find! Choosing ripe limes is crucial for getting the right flavor and acidity in your juice.

When picking limes, look for ones that are heavy for their size and have a bright green color. Avoid limes that are too soft or have brown spots, as these are signs that they are overripe and may not have as much juice.

Advertisement

There are different types of limes available, but the most commonly used ones for juicing are Persian limes and Key limes. Persian limes are larger and have a thicker skin, making them easier to juice. Key limes, on the other hand, are smaller and have a thinner skin, but are more acidic and have a stronger flavor.

Whichever type of lime you choose, be sure to pick ones that are ripe and in good condition. Now that you’ve chosen your limes, it’s time to prepare them for juicing.

Preparing Your Limes

Before juicing my limes, I always make sure to rinse them thoroughly and dry them off with a clean towel. This ensures that any dirt or debris is removed and won’t contaminate the juice.

To make juicing easier, I also like to soften the limes by rolling them on a hard surface with the palm of my hand or microwaving them for a few seconds. These simple steps make a big difference in the outcome of my lime juice!

Rinse and Dry Your Limes

After picking up the limes, make sure to give them a good rinse and dry to remove any dirt or residue that may have accumulated on the skin. This is an important step that shouldn’t be overlooked as it can affect the taste and quality of your lime juice.

Advertisement

There are different drying techniques that you can use, but the most effective is to let the limes air-dry at room temperature. When drying the limes, avoid using a towel or cloth as it can transfer unwanted flavors onto the skin. It’s also not recommended to use hot water as it can cause the limes to lose their natural oils.

Simply rinse the limes under cold running water, then pat them dry with a clean paper towel. Once dry, your limes are now ready to be softened for easier juicing.

Soften Limes for Easier Juicing

To make the juicing process easier, it’s helpful to soften the skin of the citrus fruit. Using heat is a great way to achieve this. Microwaving a lime for just 10-15 seconds can help break down the cell walls and release more juice.

Here are three steps to follow when softening limes for juicing:

  1. Place the lime in the microwave and heat it for 10-15 seconds.
  2. Remove the lime from the microwave and let it cool for a few seconds.
  3. Roll the lime on the counter with the palm of your hand to help release even more juice.

By softening your limes, you’ll be able to extract more juice and make the juicing process much easier.

Now that we know how to soften limes, let’s move on to the next step and talk about the tools needed for juicing limes.

Advertisement

Tools for Juicing Limes

I’ve found that having the right tools is essential when it comes to juicing limes. In my experience, there are three main options: manual juicers, electric juicers, and handheld citrus juicers.

Manual juicers are great for small batches. Electric juicers are efficient for larger quantities. Handheld citrus juicers are convenient for juicing on the go.

Let’s take a closer look at each of these options and see which one might be the best fit for your needs.

Manual Juicers

You can easily juice limes with a manual juicer. Just place the cut lime face down and twist the handle to extract the juice. Manual juicers offer several benefits, including being affordable, lightweight, and easy to assemble and clean.

Here are four tips to help you take care of your manual juicer:

Advertisement
  1. Clean your juicer after use. Rinse it with warm water and soap, and dry it thoroughly.

  2. Use a soft brush to scrub the juicer’s parts. This will help remove any pulp or seeds stuck in the crevices.

  3. Avoid using abrasive cleaners or scrubbers that could damage the juicer’s surface.

  4. Store your juicer in a dry place to prevent rust and other damage.

While manual juicers are great for occasional use, electric juicers are more convenient for frequent juicing.

Electric Juicers

If you want to elevate your juicing game and save time, consider investing in an electric juicer. Unlike manual juicers, electric ones can extract juice from limes in seconds with just a push of a button. They are also more efficient at extracting every last drop of juice from each lime, which can be especially helpful when making large batches of cocktails or recipes that require a lot of lime juice.

However, cleaning electric juicers can be a bit more involved than cleaning manual juicers. Most electric juicers have multiple parts that need to be disassembled and washed separately. It’s important to read the manufacturer’s instructions carefully to ensure that you clean the juicer properly and don’t damage any of the parts.

Despite the extra effort required, the convenience and speed that electric juicers offer make them a worthwhile investment for anyone who juices frequently.

Now, let’s explore another type of juicer: handheld citrus juicers.

Advertisement

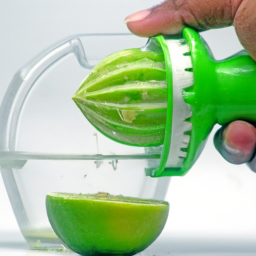
Handheld Citrus Juicers

Get ready to upgrade your citrus squeezing game with handheld juicers that are both efficient and easy to use. These tools come in two types – citrus reamers and handheld press juicers.

Citrus reamers are simple and affordable, with a conical shape that allows you to extract the juice by twisting and pressing the fruit against the reamer. Handheld press juicers, on the other hand, require more force but are faster and can handle larger fruits like oranges and grapefruits.

If you’re looking for a more precise and efficient way to juice limes, handheld press juicers are the way to go. These tools are perfect for squeezing every last drop of juice out of your limes, and they also work well for other citrus fruits like lemons and oranges. With a handheld press juicer, you simply cut your fruit in half, place it in the juicer, and squeeze the handles together to extract the juice.

It’s quick, easy, and mess-free, making it perfect for adding a zesty touch to your recipes. So let’s dive in and learn how to squeeze limes by hand!

Squeezing Limes by Hand

When it comes to squeezing limes by hand, there are a few key steps to keep in mind. First, I like to roll the lime on my countertop with the palm of my hand to help release the juices.

Advertisement

Then, I cut the lime in half using a sharp knife.

Finally, I use a citrus reamer or juicer to squeeze out all of the delicious lime juice.

These simple steps make it easy to extract all of the flavorful juice from your limes for your favorite recipes and drinks.

Rolling Limes

First, grab a lime and gently roll it on the counter with the palm of your hand to release the juice. Rolling limes before squeezing them has many benefits. It makes the fruit softer and easier to juice, and it also helps to extract more juice from the lime.

There are different rolling techniques you can use. You can roll the lime back and forth with your hand, or you can apply pressure and roll it between your hand and the counter. When rolling the lime, make sure to apply just enough pressure to release the juice without crushing the fruit.

Advertisement

A few rolls should do the trick, and you will immediately notice the difference in the amount of juice you are able to extract. Once you have rolled the lime, it’s time to move on to the next step: cutting it.

Cutting Limes

After rolling my limes, it’s time to move on to cutting them. I start by grabbing a sharp knife and placing my lime onto a cutting board. Knife techniques and safety precautions are important to keep in mind while cutting, as improper handling can lead to accidents.

To begin, I cut off both ends of the lime to create a flat surface. Then, I cut the lime in half lengthwise. Depending on the size of the lime and my personal preference, I may choose to cut each half into smaller wedges or leave them as is. It’s important to be careful while cutting and to always keep your fingers away from the blade.

To emphasize the importance of knife techniques and safety precautions, here’s a table outlining some tips to keep in mind:

Knife Techniques Safety Precautions
Use a sharp knife Keep fingers away from the blade
Cut on a stable surface Keep knife pointed away from yourself
Cut away from your body Use a cutting board to prevent damage to surfaces
Use a claw grip to hold food Put the knife down when not in use

With my limes now cut, it’s time to move on to squeezing them for their delicious juice.

Advertisement

Squeezing Limes

Now it’s your turn to get your hands dirty and extract the tangy essence from those citrus fruits. Squeezing limes is a simple yet crucial step in the process of juicing. Here are some tips on how to do it right:

  • Roll the limes on a hard surface before cutting them. This will help to soften the fruit and make it easier to extract the juice.

  • Cut the limes in half crosswise. This will expose the most juice-containing flesh.

  • Hold the lime half over a bowl or glass, with the cut side facing down. Use your fingers to gently twist and press the lime, releasing the juice.

  • Use a fork or a citrus reamer to further extract the juice from the pulp.

  • Don’t forget to strain the juice to remove any seeds or pulp before using it.

Not only is lime juice a refreshing addition to drinks, it also has many health benefits. It is high in vitamin C, which can boost your immune system and improve skin health. Lime juice also has anti-inflammatory properties and can aid in digestion.

There are many different ways to use lime juice, from adding it to marinades and dressings to using it as a natural cleaner. Now that you know how to squeeze limes, let’s move on to using a citrus juicer to make the process even easier.

Using a Citrus Juicer

Using a citrus juicer is a quick and efficient way to extract the juice from limes. It’s especially helpful if you need a lot of juice at once. I love using my citrus juicer because it saves me time and effort compared to hand juicing. However, if you’re new to juicing citrus fruits, there are a few tips to keep in mind to ensure you get the most juice out of your limes.

Here are some citrus juicing tips for beginners:

Advertisement
Tip Description
Use room temperature limes Limes at room temperature are easier to juice than those straight from the fridge.
Cut limes in half Cut the limes in half crosswise to expose the flesh.
Place the cut side down Place the cut side of the lime face down in the juicer.
Press the handle Press down on the handle to extract the juice.

With these tips, you’ll be able to juice limes like a pro in no time. Maximizing lime juice yield is important for getting the most out of your limes, so in the next section, I’ll share some more tips on how to do just that.

Maximizing Lime Juice Yield

To get the most out of your lime, it’s important to squeeze the fruit firmly and evenly. Here are some tips to maximize your lime juice yield:

  • Roll the lime on a hard surface before cutting it in half to break up the pulp and make it easier to extract the juice.
  • Use a hand-held citrus juicer or reamer to extract the juice, making sure to press down firmly and twist the fruit to release as much juice as possible.
  • For even more juice, try microwaving the lime for 10-15 seconds before juicing to soften it up.

If you don’t have a juicer, you can also use a fork or a pair of tongs to squeeze the juice out of the lime halves.

Not only is lime juice a great addition to many recipes, it also has numerous health benefits. Lime juice is high in vitamin C, which can help boost your immune system and fight off infections. It also contains antioxidants and compounds that can help lower inflammation and reduce the risk of chronic diseases.

And if you’re ever in a pinch and don’t have any lime juice on hand, you can substitute it with lemon juice or vinegar in most recipes.

Now that you know how to maximize your lime juice yield and the benefits of using it, let’s move on to the next step: storing lime juice.

Advertisement

Storing Lime Juice

When stored properly, lime juice can last for up to two weeks in the refrigerator, giving you plenty of time to add a zesty kick to your next dish. To ensure that your lime juice stays fresh for as long as possible, it’s crucial to store it in an airtight container. This will prevent oxygen from getting in and causing the juice to spoil faster. Additionally, it’s best to keep the container in the back of the fridge, where the temperature is the most consistent.

To make sure that you’re getting the most out of your limes, it’s important to know their shelf life. Freshly squeezed lime juice can be stored for up to 2 weeks in the fridge, while bottled lime juice can last up to 2 months after opening. However, it’s always best to use the juice as soon as possible to ensure maximum freshness and flavor. With proper storage, lime juice can be a versatile ingredient that adds a refreshing twist to any recipe.

Now that you know how to properly store your lime juice, let’s move on to using it in recipes.

Using Lime Juice in Recipes

So now that we’ve learned how to properly store lime juice, let’s talk about how to use it in some delicious recipes!

First up, cocktails – nothing beats a refreshing margarita or mojito made with fresh lime juice.

Advertisement

Next, we have ceviche, a popular Latin American dish where raw fish is ‘cooked’ in lime juice.

And finally, who doesn’t love a good guacamole? Lime juice adds the perfect tangy flavor to this classic dip.

Get ready to impress your taste buds!

Cocktails

Want to impress your friends at your next party? Mix up some delicious cocktails using freshly squeezed lime juice! As a bartender, I’ve learned a thing or two about mixology tips that can help take your cocktails to the next level.

Here are a few of my favorite tips:

Advertisement
  • Use a cocktail shaker to mix your ingredients thoroughly and evenly.
  • Rim the glass with salt or sugar for an extra burst of flavor.
  • Add a lime garnish to give your drink a pop of color and freshness.
  • Don’t be afraid to experiment with different flavors and ingredients to create your own signature cocktail.

By following these tips, you can create a refreshing and flavorful cocktail that your guests will love. And if you’re feeling adventurous, why not pair your cocktails with some delicious ceviche? It’s the perfect summer pairing that’s sure to impress.

Ceviche

To impress your guests with a refreshing and flavorful dish, try making ceviche using fresh seafood, tangy citrus, and crisp vegetables – have you ever tasted anything quite like it? The secret to making the perfect ceviche lies in the marinating techniques used. Traditionally, ceviche is made by marinating raw fish in citrus juices, which "cook"the fish without heat. However, modern variations of ceviche may include cooked seafood or additional ingredients like avocado or mango.

To make traditional ceviche, start by selecting the freshest seafood available. Cut the seafood into bite-sized pieces and mix with freshly squeezed lime juice and other seasonings like salt and chopped onions. Leave the mixture to marinate in the refrigerator for at least 30 minutes, or until the fish is opaque and cooked through. For modern variations, try experimenting with different types of seafood, fruits, or even adding a splash of hot sauce for some extra heat.

Moving on to the next dish, let’s talk about guacamole.

Guacamole

Indulge in the creamy and savory goodness of guacamole, a crowd-pleasing dip that’s sure to leave your taste buds craving more.

Making the perfect guacamole can be a challenge, but with a few simple tips, you can create a dip that will have everyone asking for the recipe. First and foremost, adding the right spices is crucial for creating a delicious guacamole. A blend of cumin, garlic powder, and chili powder can add the perfect amount of flavor without overpowering the natural taste of the avocado.

Advertisement

Additionally, achieving the perfect consistency is important for a successful guacamole. Using a fork to mash the avocados can create a chunky texture, while using a blender or food processor can create a smooth and creamy dip. Lastly, don’t be afraid to experiment with different ingredients such as diced tomatoes, chopped onion, or fresh cilantro to add a unique twist to your guacamole.

As you perfect your guacamole recipe, keep in mind that lime juice is a key ingredient for adding brightness and acidity to the dip.

Stay tuned for the next section to learn about alternative uses for lime juice in your cooking and cocktails.

Alternative Uses for Lime Juice

Mix a few drops of lime juice with honey and apply it to your face for a refreshing and rejuvenating facial treatment. Lime juice isn’t just a key ingredient in many recipes, it also has numerous health benefits for your skin.

The citric acid in lime juice helps to unclog pores and exfoliate dead skin cells, leaving your skin looking brighter and smoother. Honey, on the other hand, is a natural humectant that helps to retain moisture in your skin, making it look plumper and more hydrated.

Advertisement

Aside from its skincare benefits, lime juice can also be used as a natural cleaner for your household items. Its acidity makes it an effective disinfectant, making it perfect for cleaning cutting boards, kitchen counters, and even your showerhead. Plus, it’s a great alternative to harsh chemical cleaners that can be harmful to the environment.

With these alternative uses for lime juice, it’s clear that this citrus fruit is a versatile addition to any household. Now, let’s move on to some tips and tricks for juicing limes like a pro.

Tips and Tricks for Juicing Limes like a Pro

You can easily extract the most juice from your limes by rolling them on a hard surface with the palm of your hand before cutting them open. This technique helps to break down the cell walls and release the juice more easily. It also ensures that you get the maximum amount of juice from each lime, giving you a fresher and more flavorful result for your recipes.

Another great tip for juicing limes is to warm them up before juicing. You can do this by microwaving the limes for a few seconds or placing them in warm water for a few minutes. Warming the limes helps to soften them and make the juice flow more easily.

In addition to making your lime juice taste better, lime juice benefits include being high in vitamin C and antioxidants, which can help boost your immune system and promote healthy skin.

Advertisement

By using these lime juicing techniques, you can enjoy the many benefits of lime juice in your recipes with ease.

Frequently Asked Questions

Can I juice limes ahead of time and store the juice for later use?

Yes, lime juice can be stored ahead of time while preserving its freshness. To do so, store it in an airtight container in the fridge for up to a week. Don’t forget to shake well before use.

How do I know if a lime is ripe enough for juicing?

Oh boy, here we go again with the lime drama. As if juicing them wasn’t enough, now we have to figure out if they’re ripe enough too. Look for plumpness and thin skin for the best results with lime juicing techniques.

What’s the best way to clean my lime before juicing it?

To prepare limes for juicing, I rinse them under cold water and scrub them with a vegetable brush. Alternatively, I soak them in a solution of water and vinegar for a few minutes before rinsing. These lime cleaning methods ensure a clean and safe juicing experience.

Can I use bottled lime juice instead of fresh lime juice in recipes?

I’ve debated the bottled vs. fresh comparison and found that fresh lime juice is always better in recipes. Bottled juice lacks the same flavor and acidity, plus it often contains added preservatives. Fresh is the way to go, especially since limes have a long shelf life.

Advertisement

How long can I keep freshly squeezed lime juice in the fridge before it goes bad?

I can keep freshly squeezed lime juice in the fridge for up to two weeks. Its vibrant, zesty flavor makes me feel like I’m sipping sunshine. Maintaining proper lime juice storage is key to preserving its freshness timeline.

Conclusion

Well, folks, that’s how I juice my limes! It may seem like a small task, but it can make a big difference in the taste of your dishes and drinks.

By choosing the right limes, preparing them properly, and using the right tools, you can extract every last drop of tart, zesty goodness. And don’t forget to store your lime juice properly so it stays fresh and delicious for as long as possible.

Juicing limes can be a bit finicky, but with a few tips and tricks, you’ll be juicing like a pro in no time. So, go forth and squeeze those limes with confidence! Your taste buds (and your guests) will thank you.

Just remember, when life gives you limes, don’t let them go to waste – turn them into something magical!

Advertisement

Continue Reading
Advertisement

Vegan

How to Make Orange Juice

Published

on

By

Explore three techniques to make your own fresh-squeezed orange juice at home. This single-ingredient, sugar-free option for orange juice can be made either with or without pulp. Rich in vital nutrients, it’s delicious on its own or as part of a mixed juice blend!

How to Make Orange Juice

Making newly squeezed orange juice may take more effort than grabbing a juice box from a shop. However, the difference in the top quality of flavor, as well as freshness, is matchless. Fresh orange juice is fruity and excellent– so much sweeter than any kind of ‘from concentrate’ Orange Juice in stores and with no sugarcoated or anything ‘awful.’.

More than that, when making orange juice in your home, you can pick if you desire orange juice with pulp or without. In addition, it is full of vitamins and health and wellness advantages. Sugar-free orange juice has never tasted so great as when it’s straight from the fruit!

Is Orange Juice Helpful for You?

There are several primary health advantages of oranges. Most people know that this spicy fruit supplies tons of Vitamin C. One tool cup of orange juice provides nearly 100% of your daily recommended Vit C. However, it additionally consists of various other nutrients, including Vitamin A, calcium, folate, and iron.

Is Orange Juice Helpful for You?

Vitamin C helps to support our immune systems and aid with gum health, wound recovery, and bone development. At the same time, Potassium aids in decreasing the threat of cardiovascular disease, strokes, and bone loss. It additionally assists manage blood pressure and also decreases the risk of kidney rocks.

Folate is crucial for pregnant women and decreases the risk of abnormality, and OJ is just one of the most effective all-natural resources. Even much better, orange juice is high in antioxidants, which are fantastic for fighting dangerous complimentary radicals as well as shielding versus numerous persistent conditions and containing anti-inflammatory homes.

Advertisement

Among the only drawbacks of alcohol consumption of orange juice (or significant quantities of fruit juice) is the amount of all-natural sugars in the juice. Therefore, I drink homemade orange juice once or twice a week, freezing leftovers to stand out right into smoothie mixes in smaller-sized dosages or thaw them later.

How to Make Orange Juice (3 techniques)

Just how to make fresh-squeezed orange juice at home by using one of 3 methods. This sugar-free orange juice (with pulp or without) utilizes just one component, is packed with healthy vitamins and is fantastic alone or as part of a juice blend!

Making freshly squeezed orange juice might take much more initiative than getting a juice box from a store, yet the difference in the high quality of taste and the quality is matchless. Fresh orange juice is fruity and pleasant– so much sweeter than any kind of ‘from concentrate’ OJ in stores and without any added sugars or anything ‘unpleasant.’.

More than that, when making orange juice in your home, you can choose if you want orange juice with pulp or without. In addition to that, it contains vitamins and also health advantages. Sugar-free orange juice has never tasted so excellent as when it’s straight from the fruit!

Fresh orange juice

Is Orange Juice Great for You?

There are several main health and wellness advantages of oranges. Most people realize that this vibrant fruit offers tons of Vitamin C. One medium mug of orange juice supplies practically 100% of your everyday advised Vit C. Nonetheless, it also contains several other nutrients, including Vitamin A, calcium, folate, and iron.

Vitamin C supports our body’s immune systems and aids with gum health, wound healing, and bone development (Resource). Meanwhile, Potassium assists in reducing the danger of heart disease, strokes, and bone loss. It likewise helps manage blood pressure and lower the threat of kidney rocks.

Advertisement

Folate is necessary for pregnant females and lowers the danger of abnormality, as well as Orange Juice, is one of the best natural resources (source). Even better, orange juice is high in antioxidants, which are terrific for fighting damaging complimentary radicals, protecting against numerous chronic problems, and including anti-inflammatory properties.

One of the only drawbacks of alcohol consumption of orange juice (or huge amounts of fruit juice) is the number of natural sugars in the juice. Therefore, I tend to consume self-made orange juice one or two times a week and cold leftovers to stand out right into shakes in smaller-sized doses or thaw later.

How to Make Orange Juice with A Juicer

Prepare the oranges by initial peeling them. Then, slice them into smaller-sized parts to fit your juicer chute. Feed a few into your juicer chute at once– voila.

Orange juicer with electric juicer

With a Blender

Peel the oranges and, optionally, get rid of and discard the seeds (if you’re going to strain the juice, then this isn’t required).

Oranges in Blender

Add the orange sectors to a blender. You can add a little water to help them mix if needed (1/4 mug ought to be ample not to water it down too much).

Blend into a juicy, mushy consistency. After that, sieve the resulting pulpy juice via a sieve or nut milk bag or conversely, if you like orange juice with pulp (for even more nutrients), leave it as is.

With a Handheld Juicer

This possibly does not require much of an explanation. If you have a citrus juicer in your home, just slice the fruit in half, area it over it, push down, and squeeze while turning back and forth to get as much juice out as feasible.
For orange juice with pulp, simply spoon some straight off the staying orange (after pressing the juice out) and also include it in your glass.

Advertisement
Handheld Juicer

How to Store Orange Juice

Fresh pressed orange juice is best taken in quickly for the optimum quantity of nutrients. Nevertheless, any leftovers can be stored in a closed glass container in the refrigerator for approximately 3 days.

What to Perform with Any Extra Pulp

Orange pulp can be iced up right into an ice-cube tray for later usage– within smoothie mixes, broths, or baked items. Conversely, the pulp can be composted, which I do a lot in my yard.

What to Do with The Remaining Peel

You can zest some of the skin to include in meals or to flavor teas, lemonades, and even sugar. Alternatively, make some candied orange peel or, if the halves remain in good condition, use them to make orange candle lights.

Continue Reading

Juice

How To Make Low Lying Fog Juice

Published

on

By

I’ve always been captivated by the impact that ground-level mist has at concerts, gatherings, and haunted attractions. Being a person who enjoys diving into DIY activities, I set out to learn how to produce low lying fog juice myself. Following numerous experiments and a bit of trial and error, I’ve now honed the perfect formula, and I’m thrilled to share it with you.

Before we dive into the steps of making low lying fog juice, it is important to understand the chemistry behind fog. Fog is formed when water vapor in the air condenses into tiny droplets that float close to the ground.

To create low lying fog, we need to cool the water vapor and turn it into fog that stays close to the ground. This is where the ingredients and equipment come into play.

Let’s get started!

Key Takeaways

  • Glycerin is the main ingredient in low lying fog juice, with an optimal ratio of 20-30%.
  • Dry ice can be added for a thick, white fog effect.
  • Proper preparation and storage techniques, including the use of pure glycerin and straining the mixture, are crucial for maximizing shelf life.
  • When using a fog machine, follow safety precautions and adjust temperature and fan speed for optimal fog dispersion.

Understanding the Chemistry of Fog

If you want to make low-lying fog juice, you need to understand the chemistry behind how fog is created in the first place.

Fog formation occurs when warm, moist air comes into contact with cooler surfaces, causing the water vapor in the air to condense into tiny droplets.

Advertisement

Atmospheric conditions such as humidity, temperature, and wind speed all play a role in the formation of fog.

Chemical reactions and heat transfer are also involved in the creation of fog. When water vapor in the air condenses into droplets, it releases heat.

This heat is then absorbed by the surrounding air, causing it to rise and mix with cooler air above.

This creates a layer of fog that hovers close to the ground, hence the term ‘low-lying fog’.

Understanding these chemical processes is crucial to creating your own low-lying fog juice.

Advertisement

Now that we have a basic understanding of the science behind fog formation, let’s move on to gathering the necessary equipment and ingredients.

Gathering Equipment and Ingredients

First, you’ll need to round up all the necessary gear and components to whip up this chilling mixture. Choosing the right containers is crucial to ensure that the mixture is safe to handle and won’t react with any other chemicals. I recommend using glass or plastic containers with secure lids to prevent any spills or leaks.

It’s also important to source glycerin that’s at least 99% pure, as impurities can affect the quality of the fog. You can find glycerin at most chemical supply stores or online retailers.

Once you have your containers and glycerin, it’s time to measure out the rest of the ingredients. You’ll need distilled water, propylene glycol, and dry ice. It’s important to measure the ingredients precisely to ensure that the fog juice is safe to use.

Safety precautions are also necessary when handling dry ice, as it can cause burns if it comes into direct contact with skin. With all the necessary ingredients in hand, you’re ready to move on to preparing the glycerin mixture that’ll create the low lying fog effect.

Advertisement

Preparing the Glycerin Mixture

Now that I’ve got my equipment and ingredients, it’s time to mix the glycerin with distilled water and propylene glycol to create the base of my fog solution.

Glycerin is the main ingredient in low lying fog juice because it’s non-toxic and produces a thick and dense fog. However, there are glycerin alternatives, such as triethylene glycol and dipropylene glycol, that can be used instead. These alternatives may adjust the viscosity and density of the fog solution, so it’s important to experiment and find the best mixture that works for your specific needs.

To prepare the glycerin mixture, I’ll need to measure out the correct ratios of glycerin, distilled water, and propylene glycol. Typically, a mixture of 1 part glycerin to 3 parts distilled water and 1 part propylene glycol is a good starting point.

I’ll mix these ingredients together thoroughly until they’re fully combined. Once the mixture is complete, I can move on to the next step of adding the optional additives to enhance the fog solution.

Adding the Optional Additives

Now that I’ve got my glycerin mixture ready, I can move on to adding optional additives to enhance the fog effect.

Advertisement

Choosing the right additives is crucial, as they can affect the thickness, color, and durability of the fog.

I’ll carefully measure and mix the chosen additives into the glycerin mixture, making sure they’re well blended before use.

Choosing Additives

To create a low-lying fog, it’s essential to choose the right additives to mix with your fog juice. One popular additive is glycerin. This viscous liquid helps to create a denser fog that hangs low to the ground, giving off a haunting effect. It also helps to extend the life of the fog by slowing down the evaporation process.

The optimal ratio for glycerin in your fog juice is around 20-30%, but this can vary depending on the desired effect and the type of fog machine you’re using. Another popular additive is dry ice. This creates a thick, white fog that hugs the ground and has a spooky, eerie effect.

The key to using dry ice is to ensure that it’s handled safely, as it can cause burns if it comes into direct contact with the skin. You’ll need to place the dry ice in a container with warm water, and then place the container in the fog machine. The mixing ratio for dry ice is generally 1-2 pounds per gallon of fog juice.

Advertisement

With the right additives, you can create a low-lying fog that will add a spooky, eerie effect to your next event. In the next section, I’ll discuss how to mix these additives for the optimal effect.

Mixing the Additives

Get ready to enhance the haunting effect of your fog machine by mixing the right amount of glycerin and dry ice additives for a thick, white fog that hugs the ground.

To mix the additives, first make sure you have the correct ratio of glycerin to water. Mix one part glycerin to three parts water in a large container.

Next, slowly add small pieces of dry ice to the mixture. Be cautious when handling dry ice, as it can cause frostbite on contact with skin. As you add the dry ice, the mixture will begin to bubble and release carbon dioxide gas.

The glycerin will create a thick and dense fog when it reacts with the carbon dioxide gas. It’s essential to stir the mixture continuously to ensure that the dry ice is evenly distributed and to prevent the mixture from getting too hot.

Advertisement

Once the dry ice has completely dissolved, the fog juice is ready to use. With the right mixing techniques and understanding of chemical reactions, you can create a low lying fog that will add an eerie atmosphere to any event.

Now that the additives are mixed, the next step is to filter the mixture to remove any impurities before using it in your fog machine.

Filtering the Mixture

First, you’ll need to strain the mixture to ensure that no impurities clog up your fog machine. Filtering techniques are crucial to making the perfect low lying fog juice, as any impurities can result in a malfunctioning machine or poor fog output. To do this, you can use a cheesecloth or coffee filter to strain the mixture into a separate container.

This will remove any remaining chunks or particles that may have been missed during the mixing process. After straining, check the mixture’s consistency to ensure that it has an optimal viscosity. The fog juice should be thick enough to create a low-lying fog, but not too thick that it clogs up the machine.

If the mixture is too thick, you can add distilled water in small increments until it reaches the desired consistency. Once you’ve achieved the optimal viscosity, you’re now ready to fill your fog machine with the low lying fog juice.

Advertisement

Filling the Fog Machine

Before using my fog machine, I always make sure to prepare it properly. This involves checking for any damage or leaks and ensuring that the heating element is clean and functioning correctly. Once the machine is ready, I fill the tank with the appropriate amount of fog juice, making sure not to overfill it.

Proper preparation and filling of the fog machine is essential to ensure a consistent and reliable output of fog.

Preparing the Fog Machine

Now, you’ll need to make sure your fog machine is clean and ready to use. Before you begin, it’s important to follow the cleaning instructions and maintenance tips provided by the manufacturer. The last thing you want is for leftover residue or debris to affect the quality of your low lying fog.

Start by unplugging the machine and removing the fill cap. Use a soft cloth and mild soap to clean the exterior of the machine, being careful not to get any liquid inside.

Next, remove the heating element and clean it thoroughly with a cloth dampened with rubbing alcohol. Once everything is clean and dry, reassemble the machine and plug it back in.

Advertisement

With your fog machine now prepped and ready to go, you can move on to filling the tank with your homemade low lying fog juice.

Filling the Tank

Now that the fog machine is prepared, it’s time to fill the tank with the low lying fog juice. Before doing so, make sure that the tank capacity is appropriate for the amount of fog juice needed. This information can be found in the fog machine’s manual or by consulting with a professional.

To properly fill the tank, first make sure the machine is turned off and unplugged. Then, open the tank lid and carefully pour the low lying fog juice into the tank, using a funnel if necessary to avoid spillage. It’s important to take note of the proper filling technique to prevent any leaks or damage to the machine.

Once the tank is filled, securely close the lid and plug the machine back in.

Transitioning into the next section about testing the fog juice, it’s important to note that before using the fog machine, it’s necessary to check if the fog juice is working properly.

Advertisement

Testing the Fog Juice

Before using the fog juice, it’s important to conduct a test run to ensure that it produces the desired effect and doesn’t harm any equipment or surfaces.

I typically pour a small amount of the fog juice into the fog machine and run it for a few minutes to observe the results. If adjustments need to be made, I’ll refer back to the recipe and make changes accordingly.

It’s crucial to test and adjust the fog juice before using it in a performance or event to avoid any potential issues.

Conducting a Test Run

Let’s jump right into it and see the fog machine in action with a test run! Before conducting the test run, I made sure to set the fog machine to its optimal settings.

I adjusted the temperature knob and the fan speed to ensure that the fog was not too thick or too thin, and that it would disperse evenly. Additionally, I took all necessary safety precautions, such as making sure the machine was properly grounded and not placed near any flammable objects.

Advertisement

Once I felt confident that the machine was set up correctly, I poured the low lying fog juice into the reservoir and turned on the machine. I waited a few minutes for the fog to start flowing and then observed how it interacted with the room.

I noticed that the fog was too thick and not spreading evenly, so I decided to adjust the recipe by adding more distilled water to dilute the juice. With this simple adjustment, the fog began to disperse more evenly, creating a stunning low lying effect.

Adjusting the Recipe

You’re probably thinking that adjusting the recipe for your fog machine is as easy as adding more of the fog juice, but let me tell you, it’s not that simple. Adjusting the concentration of the fog juice can be a delicate process that requires careful experimentation and attention to detail. It’s important to keep in mind that adding too much fog juice can cause the fog to be too thick and heavy, while adding too little can result in a lackluster effect.

One way to adjust the concentration of your fog juice is to experiment with additives. For example, adding a small amount of glycerin or distilled water can help to thin out the fog and create a more subtle effect. On the other hand, adding a small amount of dry ice can create a thicker, more intense fog. By carefully adjusting the concentration of your fog juice and experimenting with different additives, you can create a customized effect that is perfect for your event or production. Once you’ve perfected your recipe, it’s time to move on to using the low lying fog juice to create a stunning and memorable visual display.

Using the Low Lying Fog Juice

To create an eerie atmosphere, simply pour the low lying fog juice into your fog machine and watch as the mist hovers just above the ground, sending shivers down your spine.

Advertisement

But before using the fog juice, it’s important to follow some best practices and safety precautions. First, make sure to read the instructions on your fog machine and use only the recommended amount of fog juice. Using too much can cause the fog to linger in the air longer than intended, potentially causing breathing difficulties for you and your guests.

Second, always use the fog machine in a well-ventilated area to avoid inhaling too much of the fog and to prevent any potential fire hazards. With these precautions in mind, you can safely use the low lying fog juice to create a spooky and memorable atmosphere for your next party or event.

When it comes to storing the fog juice, it’s important to keep it in a cool and dry place, away from any heat sources or direct sunlight. This will help to prevent the fog juice from degrading or evaporating before you have a chance to use it.

Storing the Fog Juice

Ensure your fog machine fluid remains in optimal condition by storing it in a cool, dry place away from heat and direct sunlight. Extreme temperatures can affect the shelf life and the quality of the low lying fog juice. Exposure to direct sunlight can also cause the liquid to break down and lose its effectiveness.

Therefore, it’s essential to store the fog juice in a well-ventilated area with a consistent temperature range of 40-100°F. Storing techniques can affect the longevity of the fog juice. For instance, it’s crucial to keep the container sealed tightly to prevent air and moisture from entering. Additionally, it’s advisable to store the fog juice away from any chemicals, cleaning agents, or pesticides.

Advertisement

Proper storage techniques can maximize the shelf life of the low lying fog juice, ensuring optimal performance every time it’s used. Now, let’s move on to troubleshooting common issues that may arise from using the low lying fog juice.

Troubleshooting Common Issues

Encountering complications with creating low lying fog can be challenging, but there are several common issues that can be resolved with a few simple fixes. Here are some common solutions and troubleshooting techniques:

  • Check the temperature: The fog machine and the fog juice work best in cooler temperatures, so make sure you’re not using them in hot or humid environments. If the temperature’s too warm, you may need to cool down the room or switch to a different type of fog juice that’s designed for warmer temperatures.

  • Check the machine: Make sure the fog machine’s clean and free of clogs. If the machine’s not producing enough fog, it may be because the nozzle’s clogged or the heating element’s not working properly. You may need to clean the nozzle or replace the heating element.

  • Check the fog juice: Make sure the fog juice’s the right type for your machine and that it’s not expired. If the juice is too old, it may not produce as much fog or may produce a strange smell. You may need to replace the juice or switch to a different brand.

  • Adjust the settings: If the fog machine’s producing too much or too little fog, you may need to adjust the settings. Most machines have a control knob that allows you to adjust the output of the fog. Try turning it up or down to see if that helps.

  • Experiment with different techniques: If none of the above solutions work, try experimenting with different techniques. For example, you may need to use a different type of fog juice or a different type of machine. You may also need to try different techniques for creating the fog, such as using dry ice or a fog chiller.

By following these common solutions and troubleshooting techniques, you should be able to create chilling clouds without any complications. Remember to always read the instructions carefully and follow all safety precautions when working with fog machines and fog juice.

Frequently Asked Questions

Can I use any type of glycerin for making low lying fog juice?

Yes, not all glycerin types are equally effective for making low lying fog juice. Some may produce less fog and pose safety concerns for respiratory health. It’s important to choose a high-quality, food-grade glycerin.

How long does the fog juice last in the fog machine before it needs to be refilled?

The frequency of fog juice refills depends on the size of the fog machine and the duration of use. Regular maintenance, such as cleaning the machine and using the appropriate glycerin types for low lying fog juice, can prolong the life of the juice.

Advertisement

Is it safe to breathe in the low lying fog produced by the juice?

While low lying fog is visually stunning, health concerns and environmental impact must be considered. Inhalation of fog juice should be avoided, as it contains glycols and other chemicals. Proper ventilation is necessary to ensure safety.

Can I use the fog juice outdoors or only indoors?

I can use the fog juice both indoors and outdoors, but the weather conditions may affect the quality of the fog. Humidity and wind can disperse the fog, while colder temperatures can make it linger. It’s important to test the juice in different conditions before use.

Can I use food coloring to tint the low lying fog produced by the juice?

I experimented with food coloring to enhance the visibility of low lying fog produced by fog juice. Results were mixed, as the coloring diluted the juice and affected its composition. Further testing is required before a conclusive answer can be given.

Conclusion

In conclusion, making low lying fog juice is a complex process that requires careful attention to detail. However, the end result is a mesmerizing display of mist that can add a touch of mystery and magic to any event or performance.

As with any chemical mixture, it’s crucial to understand the science behind it, gather the necessary equipment and ingredients, and follow the steps precisely. So, practice makes perfect, and this holds true for making low lying fog juice.

Advertisement

It may take a few tries to get the formula just right, but once you do, the results are well worth the effort. And with a little troubleshooting, any issues that may arise can be easily resolved.

So, go ahead, gather your materials, and let the fog roll in for a captivating and unforgettable experience.

Continue Reading

Juice

How To Make Lychee Juice

Published

on

By

I’m totally obsessed with lychees, and I never miss a chance to pick up a bag when I visit an Asian supermarket. However, there are times when I fancy a change and prefer to savor my lychees in an alternative form rather than just consuming them raw. This is when I turn to lychee juice!

It’s a refreshing, fruity drink that’s perfect for summertime sipping. In this article, I’ll be sharing my favorite recipe for making lychee juice at home, step by step.

To make lychee juice, you’ll need just a few simple ingredients and some basic kitchen equipment. Don’t worry if you’ve never made juice before – it’s really easy, and I’ll walk you through each step.

Whether you’re craving a sweet and tangy drink to cool off on a hot day or just want to try something new with your favorite fruit, my lychee juice recipe is sure to hit the spot. So let’s get started!

Key Takeaways

  • Precision in measuring is crucial for a well-balanced lychee juice.
  • Strain the blended mixture with a fine mesh sieve for a smoother texture.
  • Pair lychee juice with complementary foods to enhance its taste.
  • Refrigeration is the best way to store and preserve lychee juice, while freezing is a simple method for most home cooks.

Gather Your Ingredients

Gather all the ingredients you’ll need for making lychee juice, including fresh lychee fruit, water, sugar, and ice. Make sure to choose fresh lychees that are plump, firm, and have a bright color. You can find them at your local grocery store or Asian market.

Lychee is a tropical fruit that is sweet and juicy, and it’s packed with health benefits that make it a great choice for juicing. When it comes to juicing techniques, you can either use a juicer or a blender. Using a juicer will result in a smoother juice, while using a blender will create a more pulpy texture.

Advertisement

Regardless of the method you choose, make sure to remove the seeds and peel from the lychees before juicing them. Now that you have all the ingredients ready, it’s time to prepare your lychees for juicing.

Prepare Your Lychees

First, peel the rough, pinkish-red skin off of each lychee using your fingernails or a small knife, being careful not to damage the fruit. A helpful tip is to crack the skin open with your fingernail and then gently peel it away from the fruit. If you’re having trouble peeling the lychees, try soaking them in warm water for a few minutes to soften the skin.

It’s important to select the perfect lychee for your juice by choosing ones that are ripe and have a vibrant red color with no blemishes or bruises. After peeling the lychees, discard the skin and remove the seed from each fruit. You can do this by gently squeezing the fruit with your fingers until the seed pops out, or you can use a small knife to cut around the seed and remove it.

Once all of the lychees are peeled and seeded, you can move on to the next step of measuring your ingredients for the perfect lychee juice.

Measure Your Ingredients

Once you’ve peeled and seeded your lychees, it’s time to measure out your ingredients. Measuring techniques play a crucial role in the success of your lychee juice. Precision in measuring ensures that you get the right balance of flavors and sweetness in your juice. Here are some tips to help you measure your ingredients accurately and adjust the sweetness of your juice to your liking:

Advertisement

  • Use measuring cups and spoons instead of eyeballing the ingredients. This will help you get consistent results every time you make lychee juice.

  • Start by measuring out the lychee flesh. You’ll need about 2 cups of lychee flesh for 4 servings of juice.

  • Next, measure out the water. You’ll need 2 cups of water for every 2 cups of lychee flesh.

  • Add sugar to taste. Start with 1/4 cup of sugar and adjust to your liking. You can also use honey or agave syrup as a healthier alternative.

  • Finally, add a squeeze of lime juice to brighten up the flavors.

Now that you’ve measured out your ingredients and adjusted the sweetness to your liking, it’s time to blend your ingredients and turn them into a refreshing lychee juice.

Blend Your Ingredients

Now it’s time to toss all your measured ingredients into the blender and watch the magic happen! But before you do, let’s talk about blending techniques and flavor combinations.

To start, make sure to add the ice and lychee fruit to the blender first. This will help break down the fruit and create a smoother consistency. Then, pour in the coconut water and honey and blend on high for about 2-3 minutes. If you want a thicker consistency, add more ice. If you prefer a sweeter taste, add more honey.

Ingredients Measurements
Lychee fruit 1 cup
Coconut water 1/2 cup
Honey 2 tbsp
Ice 1 cup

Blending techniques can differ depending on the blender you use. Some blenders may not be as powerful and require you to blend for a longer period of time. Experiment with different blending techniques to find the consistency you prefer. As for flavor combinations, you can add other fruits such as pineapple or mango to enhance the tropical taste of the lychee juice.

Now that you have blended all your ingredients, the next step is to strain your juice.

Advertisement

Strain Your Juice

After blending all the ingredients, it’s important to strain the mixture to achieve a smoother texture and remove any unwanted bits. Straining techniques can vary depending on personal preference, but I find that using a fine mesh sieve works best.

Simply pour the blended mixture through the sieve and use a spatula to press down on the solids to extract as much juice as possible. Repeat this process until all the solids have been strained out.

If you want to add some extra flavor to your lychee juice, this is the perfect time to do so. You can mix in a small amount of sugar or honey to sweeten it up, or even add a splash of lime juice for a tangy kick.

Once you’re happy with the flavor, transfer the juice to a pitcher and chill it in the refrigerator for at least an hour before serving.

Next, we’ll move on to the final step of making delicious lychee juice – chilling it to perfection.

Advertisement

Chill Your Juice

Now that I’ve strained my lychee juice, it’s time to chill it.

I usually like to refrigerate my juice for a couple of hours before drinking it to enhance its flavor and make it more refreshing.

If you want to enjoy your juice immediately, you can add some ice to cool it down quickly.

Either way, chilling your juice is a crucial step to make it more enjoyable.

Refrigerating Your Juice

To keep your lychee juice fresh and tasty, you’ll want to pop it in the fridge as soon as possible after making it. Refrigeration is the best way to slow down the natural process of spoilage and prevent the growth of harmful bacteria. The benefits of refrigeration are numerous, including longer shelf life, preservation of nutrients and flavors, and reduction of waste. Plus, a cold and refreshing glass of lychee juice is the perfect way to beat the heat on a hot summer day.

Advertisement

Alternative cooling methods may include adding ice cubes or placing the juice in the freezer for a short period of time. However, these methods may dilute the flavor of the juice or alter its texture. That’s why refrigeration is the preferred method for keeping your lychee juice fresh and delicious. In the next section, we’ll explore the best ways to add ice to your drink without compromising its taste.

Adding Ice to Cool Your Drink

If you want to enjoy a refreshing summer drink, nothing beats the feeling of adding ice cubes to your glass. Here are some tips to make sure you get the most out of this classic drink addition:

  1. Use filtered water: The quality of your ice cubes will affect the taste of your drink, so make sure to use filtered water when making them.

  2. Freeze fruits: For an extra burst of flavor, try freezing fruits like strawberries or blueberries to use as ice cubes.

  3. Use ice alternatives: If you don’t want to dilute your drink with water, try using alternatives like frozen coconut water or coffee ice cubes.

  4. Serve in a chilled glass: To keep your drink cool for longer, serve it in a chilled glass or mason jar.

When it comes to serving suggestions, consider adding a sprig of mint or a slice of lime to your glass. These simple additions can elevate the flavor of your drink and make it feel even more refreshing.

Now that your juice is chilled and ready to go, it’s time to move on to the next step: serving.

Serve Your Juice

Ready to indulge? Nothing beats sipping on a refreshing glass of lychee juice, especially when it’s served over ice on a hot summer day. Once you’ve poured your juice into a glass, it’s time to think about how you want to serve it.

Advertisement

One way to make your lychee juice stand out is by adding creative garnishes. You can add a slice of fresh lime or mint leaves to enhance its flavor and aroma. Additionally, consider pairing your lychee juice with foods that complement its taste, such as spicy dishes or light salads.

By pairing your juice with the right food and adding a touch of creativity, you can elevate your drink to the next level. And with that, it’s time to store your juice for later.

Store Your Juice

Now that I’ve made my delicious lychee juice, I need to properly store it. The best way to do this is by refrigerating it in an airtight container.

This will ensure that the juice stays fresh and tasty for up to 3-4 days. If I want to keep the juice for longer, I can freeze it in ice cube trays and then transfer the cubes to a freezer-safe bag.

This way, I can enjoy my homemade lychee juice anytime I want, even if I don’t have fresh lychees on hand.

Advertisement

Refrigerating Your Juice

Once you’ve bottled your delicious lychee juice, don’t forget to pop it in the fridge to keep it fresh and cool for later.

There are a few storing options for your lychee juice, but refrigerating it is the most common.

When you’re storing your juice, make sure to keep it in an airtight container to prevent any air from getting in and spoiling the juice. You can also add a squeeze of lemon to your juice before bottling it to help preserve it for a few extra days.

The shelf life of your lychee juice will depend on a few factors, such as the freshness of the fruit, the temperature of your fridge, and how well you’ve stored it. Generally, fresh lychee juice can last up to 4-5 days in the fridge. However, it’s always best to check for any signs of spoilage, such as a sour smell or a change in color, before consuming.

Now that your lychee juice is safely stored in the fridge, let’s talk about how you can freeze it for later use.

Advertisement

Freezing Your Juice for Later

To preserve your delicious lychee juice for future use, you’ll want to freeze it in an appropriate container. Freezing is an excellent way to keep your beverage fresh for up to six months.

Start by pouring your lychee juice into a freezer-safe container, leaving about an inch of space at the top to allow for expansion. You can use a plastic container, glass jar, or even an ice cube tray, depending on how you plan to use the juice later. If you’re using an ice cube tray, freeze the juice until solid, then transfer the cubes to a larger container or freezer bag.

Another way to preserve your lychee juice is by canning it. Follow a canning recipe and process to ensure that your juice is safe to store at room temperature. However, keep in mind that canning requires specific equipment, and there is a risk of spoilage if not done correctly. Freezing is a simpler and more accessible method for most home cooks.

In the next section, I’ll discuss how to experiment with variations to add even more flavor to your lychee juice.

Experiment with Variations

Try mixing in some fresh mint leaves for a refreshing twist that’ll make your taste buds sing with delight. Variations experimentation is key to finding the perfect recipe that suits your taste. Flavor customization is easy with lychee juice, as it pairs well with a variety of fruits and herbs.

Advertisement

Here are three variations to try with your lychee juice:

  1. Lychee and Strawberry: Add a handful of fresh strawberries to the blender with your lychee juice for a sweet and tangy flavor combination.

  2. Lychee and Basil: Add a few fresh basil leaves to your lychee juice for a subtle, herbaceous flavor that pairs well with savory dishes.

  3. Lychee and Lime: Squeeze in some fresh lime juice to your lychee juice for a zesty twist that adds a burst of citrus flavor.

With these variations, you can create a unique blend that suits your taste buds perfectly.

Now that you’ve experimented with different flavors, it’s time to enjoy your lychee juice!

Enjoy Your Lychee Juice!

Now it’s time to savor your delicious lychee concoction and bask in the refreshing flavors. But before you take a sip, let’s talk about some ways you can enjoy your lychee juice. Of course, you can always drink it straight up, but why not get a little creative with it?

One idea is to mix it with some sparkling water and a splash of lime juice for a refreshing and bubbly lychee spritzer. Another option is to add a shot of vodka for a lychee martini. And if you’re feeling really adventurous, try blending the juice with some coconut milk and ice for a tropical lychee smoothie. The possibilities are endless, so experiment and find your favorite way to enjoy this delicious fruit juice.

Advertisement

Creative Cocktail Ideas for Lychee Juice Ingredients Instructions
Lychee Martini 2 oz lychee juice, 1.5 oz vodka, 1 oz triple sec, 1/2 oz lime juice Shake all ingredients with ice and strain into a martini glass. Garnish with a lychee fruit on a skewer.
Lychee Spritzer 1/2 cup lychee juice, 1/2 cup sparkling water, 1/4 lime juice Combine all ingredients in a glass filled with ice. Stir gently and garnish with a lime wedge.
Lychee Smoothie 1 cup lychee juice, 1 banana, 1/2 cup coconut milk, 1 cup ice Combine all ingredients in a blender and blend until smooth. Pour into a glass and enjoy.

So go ahead and try these creative cocktail ideas for lychee juice or come up with your own. With its sweet and delicate flavor, lychee juice is a great addition to any beverage. Enjoy!

Frequently Asked Questions

What are the health benefits of drinking lychee juice?

Sipping on lychee juice is like a burst of energy for my body. The nutritional value is impressive, containing high levels of vitamin C, potassium, and antioxidants. Some benefits include improved digestion, skin health, and immunity.

Can I use canned lychees instead of fresh ones?

Yes, canned lychees can be used instead of fresh ones in juice recipe variations. However, it’s important to check for added sugars or preservatives. Fresh lychees may provide a better flavor and more nutrients.

How long does lychee juice last in the refrigerator?

Hey there! Wondering how long your lychee juice will last in the fridge? Well, it all depends on how it’s stored. Generally, freshly made juice lasts 3-4 days, while store-bought can last up to a month. Keep it refrigerated and enjoy!

Can I add sugar or other sweeteners to the juice?

Yes, I can add sugar alternatives like honey, agave or Stevia to lychee juice. However, lychee itself has natural sweetness, so it may not require extra sweeteners. Experiment to find the perfect balance of sweetness to suit your taste.

Advertisement

Are there any potential side effects of drinking lychee juice?

Drinking lychee juice may have potential risks, such as allergies. It’s important to be aware of any reactions and consume in moderation. Always consult with a healthcare professional if you have concerns.

Conclusion

Well, folks, there you have it – your very own homemade lychee juice! As I take a sip of this sweet and refreshing concoction, I can’t help but feel a sense of pride and accomplishment.

It’s amazing how just a few simple steps can yield such a delicious result. As the juice slides down my throat, I’m transported to a tropical paradise – the sun beating down on my face, the sound of crashing waves in the distance, and the sweet aroma of lychees filling my nostrils.

It’s a sensory experience that I look forward to every time I make this juice. So go ahead and give it a try – experiment with different variations, adjust the sweetness to your liking, and enjoy the fruits of your labor.

Trust me, there’s nothing quite like a glass of homemade lychee juice to brighten up your day.

Advertisement

Continue Reading

Trending