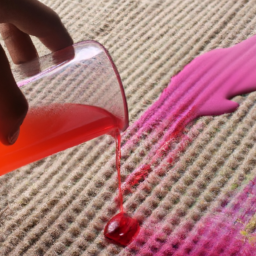
Whenever I wear a light-colored shirt, it seems like I always end up spilling juice on it. It can be frustrating and embarrassing, but luckily, I’ve learned some tricks for getting rid of those tough stains.
In this article, I’ll share my tried-and-true methods for removing juice stains from clothes.
First things first, it’s important to act quickly when it comes to juice stains. The longer you wait, the harder it will be to remove the stain. So as soon as you notice a juice spill, grab a clean cloth and start blotting the stain. Don’t rub it, as that can spread the stain and make it even harder to remove.
By acting quickly, you’ll give yourself the best chance of getting the stain out completely.
Key Takeaways
- Act quickly and avoid rubbing the stain.
- Use cold water to rinse the stain and identify the fabric before using stain-removing methods.
- Choose the right stain remover based on the type of stain and fabric, and follow instructions carefully.
- Prevention is key – use an apron and drip catcher, and be mindful while pouring juice.
Act Quickly
You’ll want to act quickly to prevent the juice stain from setting into your clothes, so grab some paper towels or a clean cloth and start blotting. The importance of fast action can’t be overstated.
The longer you wait, the harder it will be to remove the stain from your clothes. If you’re out and about, try to find a restroom with a sink where you can rinse the stain with cold water. Avoid using hot water as it could set the stain permanently.
Common mistakes to avoid include rubbing the stain vigorously or using a colored cloth or paper towel, which could transfer dye onto the fabric. Blot the stain gently from the outside inwards to avoid spreading it further.
Once you’ve blotted away as much of the juice as possible, it’s time to identify the fabric of your clothes. This will help you choose the best method of stain removal and avoid damaging the fabric.
Identify the Fabric
Before attempting to remove any stains from clothing, it’s important to identify the fabric. To do this, I always check the care label on the garment to see if there are any specific instructions for stain removal.
Additionally, I like to test a small, inconspicuous area of the fabric first to make sure that the stain removal method won’t cause any damage or discoloration. This helps me ensure that the stain will be properly removed without causing any further damage to the garment.
Check the Care Label
Take a peek at the label on your garment, it’s like decoding a secret message that can save your clothes from juice stains. The care label is often overlooked, but it’s the most important factor in determining how to clean your clothes.
The label contains valuable information about the garment’s fabric, as well as instructions for washing and care. Here are some things to look for:
-
Fabric type: The label will tell you what materials your garment is made from, such as cotton, polyester, or silk. This information is crucial because different fabrics require different cleaning methods.
-
Washing instructions: The label will also tell you how to wash your clothes, such as whether to machine wash or hand wash, and what temperature to use. It’s important to follow these instructions to avoid damaging your clothes.
-
Drying instructions: Finally, the label will tell you how to dry your clothes, such as whether to tumble dry or hang dry. Following these instructions will help prevent shrinkage and other damage.
Checking the care label is the first step in getting juice stains out of your clothes. Once you know what type of fabric you’re dealing with, you can move on to the next step: testing a small area.
Test a Small Area
Don’t risk ruining your favorite shirt – make sure to test a small area before attempting to clean it. This is a crucial step in the process of removing juice stains from clothes. Testimonial evidence shows that skipping this step can lead to irreversible damage to your garment.
Simply apply a small amount of your chosen pre-treatment option, such as white vinegar or baking soda, onto a hidden area of the fabric and wait for a few minutes to see if any discoloration or damage occurs.
Once you have successfully tested a small area, it’s time to move on to the next step – using dish soap to treat the stain. Dish soap is a great option for removing juice stains because it’s designed to break down oils and grease, which are common components of juice.
In the next section, we will discuss how to properly use dish soap to get rid of those pesky stains for good.
Use Dish Soap
Using dish soap is a quick and effective way to remove pesky juice stains from your clothes! Not only is it a common household item, but it also has many benefits when it comes to stain removal.
One of the main benefits is that it can break down the enzymes in the juice that cause the stain, making it easier to remove. In addition to its stain-fighting properties, dish soap can also be used in other ways when it comes to laundry care.
For example, it can be used to pre-treat stains before washing, or even added to the washing machine to help boost the cleaning power of your detergent. With all of these benefits, it’s no wonder why dish soap is a go-to option for many when it comes to fighting stains!
Moving on to the next step, another effective method to try is using white vinegar.
Try White Vinegar
To try removing the stubborn marks left behind by the spilled liquid, you can give white vinegar a shot. White vinegar is an excellent alternative method for getting juice stains out of clothes. Not only is it an effective solution, but it is also readily available in most households.
To demonstrate the effectiveness comparison of white vinegar and dish soap, I have created a table below. The table compares the two solutions’ ability to remove juice stains based on factors such as time and effort. As you can see, white vinegar is a more effective solution for removing juice stains than dish soap. So, if you’re looking for a quick and effortless solution to remove juice stains from your clothes, white vinegar should be your go-to solution. In the next section, we will explore another alternative method for removing juice stains from clothes – use baking soda.
| Solution | Time | Effort | Effectiveness |
|---|---|---|---|
| White Vinegar | 15 minutes | Low | High |
| Dish Soap | 30 minutes | High | Low |
Use Baking Soda
You can elevate your stain-removing game by incorporating baking soda into your laundry routine. Here are three reasons why you should consider using baking soda for your next laundry load:
-
Baking soda is gentle and won’t harm your clothes, unlike harsh alternatives that can cause damage over time.
-
Baking soda is effective for removing other stains besides juice, such as grease, oil, and even blood stains.
-
Baking soda is a natural deodorizer that can eliminate any unpleasant odors lingering on your clothes.
Now that you know the benefits of using baking soda, it’s time to move on to the next step: using hydrogen peroxide to tackle those tough stains.
Use Hydrogen Peroxide
Ready to tackle those stubborn marks on your favorite outfit? Hydrogen peroxide is your new secret weapon! This powerful chemical is known for its ability to remove tough stains like juice, blood, and even red wine.
To use hydrogen peroxide as a stain remover, simply dampen the affected area with cold water and pour a small amount of peroxide directly onto the stain. Let it sit for 5-10 minutes before rinsing with cold water and washing as usual.
While hydrogen peroxide is an effective alternative to traditional stain removers, it’s important to take safety precautions when using it. Always wear gloves and avoid contact with your eyes or skin.
Additionally, be sure to test the peroxide on an inconspicuous area of your garment before applying it to the stain to avoid discoloration or damage. With these steps in mind, you can confidently tackle even the most stubborn juice stains with hydrogen peroxide.
Ready to try ammonia?
Try Ammonia
If you’re at your wit’s end with those stubborn juice stains on your clothes, ammonia might just be the trick up your sleeve to blast away those pesky marks like a bolt of lightning.
But before you go ahead and use ammonia, it’s essential to know how to use it safely. Ammonia is a powerful chemical that can cause skin and eye irritation, so it’s essential to work in a well-ventilated area and wear gloves and protective eyewear. Also, never mix ammonia with bleach or other cleaning products as it can create harmful fumes.
One of the benefits of using ammonia is that it can effectively remove juice stains from clothes. However, there are some drawbacks to using ammonia. For instance, it has a strong odor that can linger even after rinsing. Also, excessive use of ammonia can cause fading and damage to the fabric. Therefore, it’s essential to use it sparingly and only on the affected area.
Now that you know how to use ammonia safely and the benefits and drawbacks of using it, it’s time to move on to the next step, which is using a stain remover to ensure the stain is gone for good.
Use Stain Remover
When it comes to getting rid of stubborn stains, using a stain remover can be a lifesaver.
The first step is to choose the right product based on the type of stain and fabric.
Once you have the right product, be sure to follow the instructions carefully and apply it directly to the stain.
After letting it sit for the recommended time, wash the garment as usual and enjoy a fresh, stain-free piece of clothing.
Choose the Right Product
To choose the right product for removing juice stains from your clothes, you’ll want to check the label for ingredients that target fruit pigments. Look for products that contain enzymes or oxygen bleach, as these are specifically designed to break down the color molecules in fruit juices.
You can also compare different brands to see which one has the best reputation for removing stains effectively. When selecting a product, be sure to consider the type of fabric you’ll be treating. Some fabrics, such as silk or wool, require more gentle treatment than others.
Check the label to make sure the product is safe for use on your specific type of fabric. Once you’ve chosen the right product, be sure to follow the instructions carefully to ensure the best results.
Follow the Instructions
Make sure you follow the instructions carefully to achieve optimal results when using the chosen stain remover product. Prevention techniques are great, but accidents happen!
When it comes to removing juice stains from common fabrics like cotton, polyester, and blends, it’s important to read the instructions on the stain remover product. Here are three tips to keep in mind:
-
Use the appropriate amount of product: Using too little product may not fully remove the stain, while using too much may damage the fabric.
-
Wait the recommended amount of time: Patience is key when it comes to stain removal. Wait the recommended amount of time before washing or rinsing the garment.
-
Test the product on a small, inconspicuous area first: This will prevent any potential damage or discoloration to the fabric.
After following the instructions and removing as much of the juice stain as possible, it’s time to wash the garment as usual.
Wash as Usual
Once the stain remover’s been applied and the recommended time has passed, simply toss the garment in the washing machine and let it do its magic!
It’s important to note that stain prevention is key to avoiding future mishaps. Try to avoid spilling juice on your clothes by using a straw or sippy cup, or by being mindful while drinking.
If the stain persists after washing, there are alternative solutions to consider.
For example, mixing equal parts baking soda and water to create a paste and applying it to the stain can help lift the remaining color.
Additionally, soaking the garment in a solution of one part white vinegar and three parts water can also help remove stubborn stains.
With these tips in mind, you can be sure to rid your clothes of any pesky juice stains. Now, onto the next step: wash and dry!
Wash and Dry
Before washing, it’s important to check the stain to make sure it’s fully removed. I always follow the recommended washing instructions on the clothing label to avoid any damage or shrinkage.
When it comes to drying, I typically air dry delicate fabrics and tumble dry everything else on low heat to prevent any further damage.
Check the Stain
Don’t delay, detect the damage: delve deeply into the fabric to determine the depth of the juice stain.
Inspect thoroughly by checking both sides of the garment and looking for any discoloration. Blot carefully with a clean cloth or paper towel to remove any excess juice.
Next, assess the type of fabric and color of the garment to determine the best method for removing the stain. If the fabric is delicate or the garment is a dark color, it may require special care. It’s important to act quickly to prevent the stain from setting in, but also to take care not to damage the fabric.
Once you’ve determined the best course of action, move on to the next step: washing as recommended.
Wash as Recommended
To effectively remove the juice stain from your clothes, it is important to follow the recommended washing instructions for your garment. This includes taking note of the laundry symbols on the care label and understanding the different types of fabric care. It is crucial to pay attention to these details as they can affect the effectiveness of the stain removal process.
To make things easier, here is a quick reference table for some common laundry symbols and their meanings:
| Symbol | Meaning |
|---|---|
| Washing tub with a number inside | Maximum temperature for washing |
| Hand in washing tub | Hand wash only |
| Iron | Maximum temperature for ironing |
| Circle with a letter | Dry cleaning |
| Square with a circle | Tumble dry |
| Line | Hang to dry |
By understanding the importance of laundry symbols and different types of fabric care, you can ensure that your clothes are being washed and treated properly. Once you have followed the recommended washing instructions, it’s time to move on to the next step: air dry or tumble dry.
Air Dry or Tumble Dry
Now that you’ve followed the recommended washing instructions, it’s time to decide whether to air dry or tumble dry your clothes. Both methods have their pros and cons, so it’s important to choose the one that works best for your clothing and lifestyle.
Air drying is a great option for delicate fabrics or items that are prone to shrinking. It’s also more eco-friendly and cost-effective than using a dryer. However, air drying can take longer and may not leave your clothes as soft as tumble drying.
On the other hand, tumble drying is quicker and more convenient, but can be harsh on fabrics and may cause shrinkage. To prevent shrinkage when tumble drying, be sure to use a low heat setting and remove the clothes as soon as they are dry.
Ultimately, the decision between air drying and tumble drying will depend on the specific item and your personal preferences.
When it comes to preventing juice stains, there are a few tips to keep in mind.
Tips for Preventing Juice Stains
When it comes to preventing juice stains, I always wear an apron. It’s a simple and effective way to protect my clothing.
Another trick I use is to use a straw when drinking juice. This keeps the liquid away from my clothes and reduces the risk of spills.
Finally, I always take care when pouring juice to avoid any spills or splatters. By being mindful and taking these simple precautions, I can avoid juice stains altogether.
Wear an Apron
Protect your clothes while you juice by wearing an apron. It not only safeguards your outfit but also adds a touch of style to your kitchen attire.
Aprons have come a long way from just being functional to stylish and trendy. Here are some benefits of wearing aprons while cooking:
-
Wearability of aprons: Aprons come in different fabrics, styles, and sizes, making them versatile and comfortable to wear. You can choose from cotton, denim, or even waterproof material to suit your needs.
-
Protection from stains: An apron acts as a barrier between your clothes and any spills or splatters that occur while juicing. It is easier to wash an apron than to remove stains from your clothes.
-
Convenience: An apron often has pockets, which come in handy to keep your phone, recipe book, or other kitchen tools. This way, you don’t have to run back and forth to get what you need.
-
Hygiene: Wearing an apron ensures that you don’t transfer any germs or bacteria from your clothes to the food you’re preparing.
-
Style: With so many stylish aprons available in the market, you can add a touch of personal style to your kitchen attire.
Wearing an apron is just one way to prevent juice stains. Another tip is to use a straw while drinking juice to avoid any spills.
Use a Straw
Utilize a straw to prevent any potential spillage while enjoying your freshly made juice. Not only does using a straw minimize the risk of spills, but it also reduces the chances of getting juice stains on your clothes.
The benefits of using a straw are plenty, and it’s a simple solution that can save you the trouble of having to deal with stubborn juice stains on your favorite garments. There are different types of straws you can use for juice stains, such as reusable silicone straws or biodegradable paper straws.
Whichever type of straw you choose, make sure it’s long enough to reach the bottom of your cup or glass to avoid any juice splatters. Remember, prevention is key when it comes to juice stains, so use a straw whenever possible.
With that being said, be careful when pouring your juice, which we’ll discuss in the next section.
Be Careful When Pouring
Now that we’ve talked about using a straw to prevent juice stains, let’s move on to the next step: being careful when pouring. This is especially important if you’re pouring juice from a container that doesn’t have a spout or if you’re pouring a particularly full glass.
One way to be mindful while pouring is to use a drip catcher. This can be as simple as placing a paper towel or napkin under the glass while pouring. This will catch any drips or spills and prevent them from staining your clothes.
Another tip to keep in mind is to avoid wearing light colored clothes while drinking juice. Darker colors are less likely to show stains, so if you’re worried about spills, opt for darker clothing.
Additionally, if you’re drinking juice while out and about, consider bringing a stain remover pen or wipes with you just in case.
By being mindful while pouring and taking a few extra precautions, you can prevent juice stains from ruining your clothes.
Frequently Asked Questions
Can I use bleach to remove juice stains?
Bleach can be effective for juice stains, but comes with pros and cons. It can remove color and weaken fabric fibers. Alternative methods include vinegar, baking soda, and enzyme-based cleaners.
Is it safe to use hydrogen peroxide on all types of fabrics?
I recommend exploring hydrogen peroxide alternatives for safe fabric cleaning. When dealing with juice stains, it’s important to consider the fabric’s care instructions and choose a method that won’t damage it. Fabric care tips can vary, so always do a spot test first.
Can I use lemon juice instead of white vinegar?
Lemon juice is a natural alternative to white vinegar for removing juice stains. However, it may not be as effective as white vinegar due to its lower acidity level. Other alternatives include baking soda and dish soap.
How long should I let the stain remover sit before washing the garment?
Best practices for removing stains involve letting the stain remover sit for at least 5 minutes before washing the garment. Alternative methods include using a mixture of baking soda and water or rubbing alcohol and water to remove juice stains.
Are there any home remedies for preventing juice stains from occurring in the first place?
To prevent spills, I always use spill-proof cups with my kids and encourage them to drink slowly. Another option is to choose stain resistant fabrics for clothing or use bibs for younger children.
Conclusion
So there you have it, folks! Getting juice stains out of your clothes may seem like a daunting task, but with a little bit of effort and the right techniques, it can be done.
Remember to act quickly, identify the fabric, and try different methods like dish soap, white vinegar, baking soda, ammonia, and stain remover. In my experience, I once spilled grape juice on a white shirt, and I thought it was ruined for good.
But by using a combination of white vinegar and baking soda, I was able to lift the stain completely and save my favorite shirt. So don’t give up hope if you encounter a tough juice stain – just follow these steps and you’ll have your clothes looking good as new in no time.


