I love making my own tomato juice with fresh tomatoes, but sometimes I have more than I can use before they go bad. So, I started freezing my tomato juice to enjoy it all year round.
In this article, I’ll share my step-by-step process for freezing tomato juice, from choosing the right tomatoes to storing the frozen juice.
The key to freezing tomato juice is to start with high-quality tomatoes. You want to choose tomatoes that are ripe, firm, and free from any bruises or blemishes. Roma or plum tomatoes are a good choice because they have a thicker flesh and less water content, which makes for a more concentrated juice.
Once you’ve selected your tomatoes, it’s time to prepare them for juicing.
Key Takeaways
- Use high-quality, ripe but not overripe tomatoes, such as Roma or plum varieties
- Properly wash and dry tomatoes before removing stems and cores
- Use freezer-safe containers or bags with airtight seals, labeling with date and amount
- Freeze quickly at a very low temperature to preserve nutrients and flavor
Choose the Right Tomatoes
To freeze tomato juice, you gotta choose the right tomatoes.
One of the most important things to consider when selecting tomatoes for juicing is to choose suitable varieties. You want to choose tomatoes that are meaty and have fewer seeds, as these are the best for juicing. Some of the best varieties for juicing include Roma, San Marzano, and Amish Paste.
Another thing to consider is the best time to harvest your tomatoes. Tomatoes should be ripe but not overripe when harvested for juicing. Overripe tomatoes will be too soft and may not yield as much juice, while underripe tomatoes will be too tangy and acidic.
The best time to harvest your tomatoes is when they are fully mature and have a deep red color.
Once you have chosen the right tomatoes and harvested them at the right time, it’s time to prepare them for freezing.
Preparing the Tomatoes
Before freezing tomato juice, it’s important to properly prepare the tomatoes.
First, I wash and dry the tomatoes thoroughly to ensure they’re clean and free of any dirt or debris.
Next, I remove the stems and cores of the tomatoes using a sharp knife. These parts can affect the taste and texture of the juice.
By following these steps, I can ensure that the tomato juice I freeze is of the highest quality and flavor.
Washing and Drying
Hey, you don’t want to end up with soggy tomato juice, so make sure you give those tomatoes a good rinse and shake off all that excess water before juicing them. This will prevent any unwanted moisture from getting into your juice and ultimately causing it to spoil faster.
When washing your tomatoes, there are a few tips for efficient washing that you should keep in mind. Firstly, use cool running water instead of hot water, since hot water can cause the tomatoes to become soft and mushy. Secondly, make sure to use a vegetable brush to gently scrub the tomatoes to remove any dirt or debris that may be on the skin.
After washing your tomatoes, it’s important to dry them properly before using them for juice. Drying techniques for tomato juice preservation include using a clean towel or paper towel to pat the tomatoes dry, or using a salad spinner to remove excess water. If you’re using a towel, be sure to pat gently to avoid damaging the tomatoes.
Once your tomatoes are dry, you can move on to the next step of removing stems and cores.
Removing Stems and Cores
Once you’ve washed and dried your tomatoes, it’s time to remove the stems and cores to prepare them for juicing. Removing stems and cores is a crucial step in making tomato juice because they can affect the taste and texture of the final product.
Here are some techniques to help you remove stems and cores effectively:
- Use a sharp knife to cut off the stem end of the tomato and discard it.
- Cut the tomato in half from top to bottom and gently remove the core with a spoon or your fingers.
- If you’re juicing a large quantity of tomatoes, consider investing in a tomato corer tool to speed up the process.
Don’t throw away the stems and cores! You can use them to make tomato paste or add them to soups and stews for extra flavor.
Removing stems and cores may seem like a tedious task, but it’s worth the effort to ensure a smooth and flavorful tomato juice. Plus, you can get creative with the discarded parts and make use of them in other recipes.
Once you’ve removed the stems and cores, it’s time to move on to blending the tomatoes to create a smooth puree.
Blending the Tomatoes
Now that I’ve prepared my tomatoes for freezing, it’s time to blend them.
To do this, I’ll be using my blender or food processor. This will help me create a smooth consistency that’s perfect for making tomato juice or sauce.
If desired, I can also add salt or other seasonings at this point to enhance the flavor.
Using a Blender or Food Processor
To make the freezing process easier, you can use a blender or food processor to puree the tomatoes before freezing them. When it comes to blending techniques, there are a few things to keep in mind. First, make sure your tomatoes are ripe and soft, as this will make them easier to blend. You can also add a small amount of water to help the blending process along.
As for equipment needed, you’ll need either a blender or food processor, depending on what you have available. A blender will work well for small batches, while a food processor is better for larger quantities. Whichever you choose, make sure it’s in good working order and clean before you start. Once your tomatoes are blended to your desired consistency, you can move on to the next step of the freezing process: adding salt or seasonings (optional).
Adding Salt or Seasonings (Optional)
If you want to add some extra flavor to your pureed tomatoes, you can sprinkle in some salt or your favorite seasonings before freezing them. Here are some benefits of adding salt and different seasonings to try:
- Salt helps to enhance the tomato flavor and preserve it during freezing.
- Basil adds a sweet and slightly minty flavor, making it a popular seasoning for tomato-based dishes.
- Garlic powder or minced garlic adds a savory and slightly spicy flavor that complements the sweetness of tomatoes.
Once you’ve added your desired seasoning, you can move on to the next step of straining the juice.
Straining the Juice
As you strain the juice, watch as the vibrant red liquid flows through the sieve like a river carving its way through the earth, leaving behind only the pulp and seeds.
To strain the juice, you can use a cheesecloth placed over a sieve or a fine-mesh strainer. The cheesecloth will filter out any remaining pulp or seeds, leaving you with a smooth and silky tomato juice.
To avoid having pulp in your juice, you can try pressing the tomato pulp against the cheesecloth with a spoon or spatula. This will help extract as much juice as possible while leaving behind any solid pieces.
Once you’ve strained all of the juice, transfer it to a clean container and prepare for freezing by following the next steps.
Preparing for Freezing
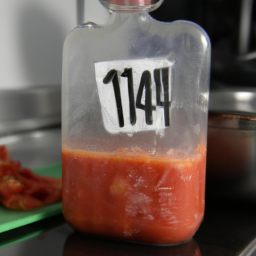
After straining the pulp and seeds from the vibrant red liquid, it is important to properly store the juice for future use. This involves choosing the right containers and labeling them accordingly. For freezing tomato juice, I recommend using freezer-safe containers or bags that have airtight seals. Avoid using glass containers as they may break when the liquid expands during the freezing process.
To ensure that you can easily identify the contents of each container, it is crucial to label them with the date and the amount of juice they contain. This will help you keep track of the freshness of the juice, as well as make it easier to grab the right amount when you need it. With the containers and labels ready, you can now move on to filling them with the freshly strained tomato juice.
Filling the Containers
Now it’s time to fill the containers with your freshly strained, vibrant red liquid for future use. But before you begin, make sure you have the right container sizes for your frozen tomato juice. Quart-sized containers are ideal for storing larger amounts, while pint-sized containers are perfect for smaller portions.
Here are some tips to help you fill the containers correctly:
- Leave about half an inch of headspace at the top of each container to allow for expansion during the freezing process.
- Use a ladle or funnel to transfer the tomato juice into the containers, taking care not to spill or overfill.
- Wipe the rims of the containers with a clean cloth to remove any drips or spills before sealing.
- Label each container with the date of freezing and the contents to help you easily identify them in the freezer.
Once you have filled the containers, it’s time to move on to sealing them.
Sealing the Containers
To keep your delicious, bright red liquid fresh for future use, simply seal the containers tightly with lids that fit snugly, like a cork in a bottle.
There are a variety of container options available for freezing tomato juice, including plastic freezer bags, mason jars, and plastic or glass containers with an airtight seal. Whichever container you choose, make sure it’s freezer-safe and has enough space at the top for expansion as the liquid freezes.
When sealing the containers, there are a few techniques you can use to ensure a tight seal. One option is to use a vacuum sealer, which removes all air from the container before sealing. Another option is to use freezer tape to seal the lid to the container, making sure to press down firmly to create a tight bond.
Once the containers are sealed, label them with the date and contents before placing them in the freezer. With these steps completed, you’re ready to move on to the next section about freezing the juice.
Freezing the Juice
Once you’ve sealed your containers tightly, you’ll want to make sure they’re stored properly to maintain the flavor and quality of your homemade creation. Freezing tomato juice is a simple process, but there are a few techniques to ensure that it doesn’t lose its flavor and freshness.
When it comes to freezing tomato juice, the key is to freeze it quickly at a very low temperature. This helps to preserve the nutrients and flavor of the juice. To achieve this, you can use a deep freezer set at -18°C or lower. Alternatively, you can use the freezer compartment of your refrigerator, but it may take longer to freeze the juice completely. Once the juice is frozen, you can store it in the freezer for up to 12 months. Below is a table that summarizes the freezing techniques and storage options for tomato juice.
| Freezing Techniques | Storage Options |
|---|---|
| Freeze quickly at -18°C or lower | Store in an airtight container |
| Use the freezer compartment of your refrigerator | Label and date the container |
| Store in the freezer for up to 12 months |
To store the frozen juice, you’ll want to make sure it’s placed in an airtight container to prevent freezer burn and moisture buildup. It’s also important to label and date the container so you know when it was frozen and how long it’s been stored. With these simple techniques, you can enjoy the taste of fresh tomato juice all year round.
Storing the Frozen Juice
You’re probably wondering how to keep your flavorful homemade tomato juice fresh and readily available for later use. Well, the good news is that frozen tomato juice can last for up to 12 months if stored properly.
There are a few storage options you can choose from, but the best containers to use are freezer-safe plastic containers or glass jars with airtight lids. It’s important to leave some space at the top of the container to allow for expansion during freezing.
When it comes to thawing the juice, it’s best to plan ahead and transfer the container to the refrigerator 24 to 48 hours before you plan to use it. This will allow the juice to slowly thaw without compromising its flavor and texture. If you’re in a rush, you can also place the container in a bowl of cold water to speed up the thawing process. Just make sure to change the water every 30 minutes to prevent the juice from becoming too warm.
With these storage and thawing techniques, your frozen tomato juice will be ready to use whenever you need it.
Next, let’s talk about how to use the juice in your favorite recipes without losing any of its delicious flavor.
Thawing and Using the Juice
Get ready to add a burst of flavor to your recipes with the thawed homemade tomato juice. Thawing the frozen juice is a simple process that requires minimal effort. The key is to plan ahead and take the juice out of the freezer in advance. Here are some thawing tips to ensure that your juice is ready to use when you need it:
| Thawing Tips |
|---|
| 1. Take the frozen juice out of the freezer and place it in the refrigerator. |
| 2. Allow the juice to thaw slowly in the refrigerator for 24-48 hours. |
| 3. Once the juice is completely thawed, give it a good stir to ensure that all the ingredients are well mixed. |
Once the juice is thawed, it’s time to put it to use. There are countless recipe ideas that call for tomato juice, from classic Bloody Marys to homemade spaghetti sauce. Here are a few recipes that you can try using your homemade tomato juice:
| Recipe Ideas |
|---|
| 1. Classic Bloody Mary |
| 2. Homemade Spaghetti Sauce |
| 3. Gazpacho Soup |
Thawing and using tomato juice is a simple process that can add a delicious twist to your favorite recipes. By following the thawing tips and trying out new recipe ideas, you can enjoy the full flavor of your homemade tomato juice all year round.
Frequently Asked Questions
Can I mix different varieties of tomatoes to make tomato juice?
Yes, you can mix different varieties of tomatoes to make tomato juice. Adjust the recipe by using equal amounts of each variety or by adjusting the proportions to achieve the desired taste and consistency. Experiment to find your preferred blend.
How long can I store the frozen tomato juice in the freezer?
I’ve stored frozen tomato juice for up to six months without spoilage. The shelf life of frozen juice depends on the quality of the juice and the temperature of the freezer. Keep it at a constant, low temperature for best results.
Can I add seasonings to the tomato juice before freezing it?
Yes, I recommend adding flavor to tomato juice before freezing it. However, be cautious not to add too much salt as it can enhance the freezing process. Store it in airtight containers for the best results.
Can I use a juicer instead of a blender to make tomato juice?
Oh, sure. If you want to waste half your tomatoes and have a mediocre juice, go ahead and use a juicer. But if you want the best flavor and texture, stick with a blender. And don’t forget to choose the right tomatoes!
Can I freeze tomato juice in plastic bottles instead of containers?
I’ve found that freezing tomato juice in plastic bottles can be a controversial topic among freezing techniques. While some recommend it, others suggest using containers to avoid the risk of the plastic leaching into the juice.
Conclusion
In conclusion, freezing tomato juice is a great way to preserve the fresh taste of summer year-round. With the right tomatoes and some simple preparation steps, you can easily make and store homemade tomato juice in your freezer.
Don’t forget to strain the juice to remove any seeds or skin, and use airtight containers to prevent freezer burn. As the old adage goes, "you reap what you sow."By taking the time to freeze your own tomato juice, you’ll be rewarded with a delicious and versatile ingredient for your favorite recipes.
Whether you’re making a hearty pasta sauce or a refreshing Bloody Mary, having homemade tomato juice on hand can elevate any dish. So why not give it a try and enjoy the taste of summer all year long?


