Connect with us

Juice

How Much Is Orange Juice

Published

on

As someone who loves starting my day with a glass of orange juice, I often think about what factors affect its price. With so many different types of orange juice available in stores, it can be challenging to determine which one offers the best value for your money.

In this article, I aim to provide a comprehensive guide on the price of orange juice, including the various factors that influence it and tips on how to save money while still enjoying your favorite drink.

Orange juice is a popular beverage worldwide, known for its refreshing taste and nutritional benefits. However, the price of orange juice can vary significantly depending on several factors. These factors could include the type of orange juice, its quality, and the location of where it’s sold.

As someone who is interested in knowing how much orange juice costs and who wants to make informed purchasing decisions, it’s important to understand these factors and how they affect the price of orange juice.

So, let’s dive in and explore the world of orange juice and its pricing.

Advertisement

Key Takeaways

  • Store-bought orange juice prices vary based on brand, container size, and type, with a 64-ounce container ranging from $2.99 to $7.99.
  • Tropicana, Simply Orange, and Florida’s Natural are some of the best brands to look for when purchasing orange juice.
  • Frozen orange juice is a convenient and cost-effective option that can be stored for months, while frozen orange juice concentrate is versatile and used in various recipes.
  • Organic orange juice is made from organically grown oranges and is free from synthetic pesticides and fertilizers, but may have a higher cost than non-organic options.

Overview of Orange Juice

Orange juice is a popular breakfast beverage that’s often enjoyed alongside pancakes and bacon. However, it’s more than just a tasty drink. Orange juice is packed with health benefits and nutritional value that make it an excellent choice for starting your day.

For example, it’s rich in vitamin C, which supports a healthy immune system, and it also contains potassium, folate, and thiamine, which are all essential nutrients for our bodies.

But how is orange juice made and distributed to consumers? The orange juice production process begins with harvesting the oranges, which are then washed and squeezed to extract the juice. The juice is then pasteurized to eliminate any harmful bacteria and packaged for distribution.

The supply chain for orange juice is complex, with oranges being grown in different regions and transported to processing plants before being distributed to retailers. All of these steps can affect the price of orange juice, which brings us to the next section about the factors that influence its cost.

Factors that Affect Orange Juice Prices

You’ll notice that the price of orange juice can fluctuate based on a variety of factors. One of the main factors affecting orange juice prices is seasonality. In the winter months, oranges are in peak season and there is an abundance of supply, which often leads to lower prices. In contrast, during the summer months, there is less supply, which can drive up the price of orange juice.

Another factor that affects orange juice prices is supply and demand. If there’s high demand for orange juice and a limited supply, prices will likely increase. On the other hand, if there’s a surplus of oranges and low demand for orange juice, prices may decrease.

Advertisement

Additionally, the cost of production can also impact the price of orange juice. Factors such as labor costs, transportation costs, and the cost of packaging materials can all contribute to the final price of orange juice.

When it comes to fresh-squeezed orange juice, there are additional factors that can affect pricing. Stay tuned to learn more about the difference between fresh-squeezed orange juice and store-bought orange juice and how that impacts the price.

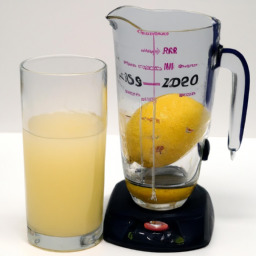
Fresh-Squeezed Orange Juice

If you’re looking for a taste that’s fresh and invigorating, nothing beats a glass of homemade orange juice. The juicing techniques used to make this type of juice ensure that the flavor is at its peak and the nutritional benefits are maximized.

Fresh-squeezed orange juice is rich in vitamins and minerals such as vitamin C, potassium, and folate. These nutrients are essential for maintaining a healthy immune system, promoting healthy digestion, and reducing the risk of chronic diseases.

When making fresh-squeezed orange juice, it’s important to use high-quality oranges that are ripe and juicy. The juicing process can be done by hand, using a citrus juicer, or a high-powered juicer. The type of equipment used will determine the amount of pulp in the final product. Some people prefer their juice with pulp, while others prefer it without.

Advertisement

Either way, fresh-squeezed orange juice is a delicious and healthy beverage option. Moving on to the next section about store-bought orange juice, it’s important to note that while it may be convenient, it often lacks the nutritional benefits of fresh-squeezed juice.

Store-Bought Orange Juice

I love drinking orange juice, but sometimes it’s just not practical to squeeze my own.

That’s where store-bought orange juice comes in.

There are a few different types to choose from, including pulp-free, low-pulp, and high-pulp.

Prices can vary depending on the brand and the size of the container, but generally range from about $2 to $6.

Advertisement

Types of Store-Bought Orange Juice

There are various types of store-bought orange juice available, with pulp-free being the most popular option, accounting for about 50% of sales. Here are some other types of orange juice you might come across:

  • Low-pulp orange juice: This type of orange juice has some pulp, but not as much as the high-pulp variety.
  • High-pulp orange juice: This type of orange juice has a lot of pulp, which some people prefer for the added texture.
  • Calcium-fortified orange juice: This type of orange juice has added calcium to increase its nutritional value.
  • Organic orange juice: This type of orange juice is made from organically grown oranges and is free from synthetic pesticides and fertilizers.

When it comes to flavor profiles, store-bought orange juice can vary depending on the type. Pulp-free orange juice typically has a sweeter taste, while high-pulp orange juice has a more complex flavor. In terms of nutritional value, orange juice is a good source of vitamin C and other nutrients, but it can also be high in sugar.

Moving on to the topic of price range, it’s important to note that the cost of orange juice can vary depending on the brand, type, and size of the container.

Price Range

The cost of store-bought orange juice can vary greatly based on factors such as brand, container size, and type. In general, a 64-ounce container of orange juice can range from $2.99 to $7.99, with organic and high-pulp varieties being on the higher end of the spectrum.

Store-bought orange juice can be a good source of vitamin C and other essential nutrients. However, it’s important to choose brands that don’t have added sugars or artificial flavors. Some of the best brands to look for include Tropicana, Simply Orange, and Florida’s Natural.

It’s important to note that while frozen concentrates may be cheaper than store-bought options, they may not provide the same level of nutritional benefits.

Advertisement

Frozen Orange Juice

You can almost taste the sweet tanginess of frozen orange juice as it sits in the carton in your freezer. It’s a convenient option for those who don’t have the time or equipment to juice fresh oranges.

Here are some reasons why frozen orange juice might be a good choice for you:

  • It’s easy to store: Frozen orange juice can be kept in the freezer for months, so you can always have it on hand.
  • It’s cost-effective: Buying frozen orange juice concentrate is often cheaper than buying fresh oranges or using a juicing machine.
  • It’s consistent: Frozen orange juice concentrate is made from a blend of oranges, so you can expect a consistent taste and quality every time.
  • It’s versatile: Frozen orange juice concentrate can be used in a variety of recipes, from smoothies to cocktails to marinades.
  • It’s convenient: With frozen orange juice concentrate, you don’t have to worry about squeezing oranges or cleaning up a juicing machine.

Speaking of juicing machines, let’s move on to concentrated orange juice.

Concentrated Orange Juice

Moving on from frozen orange juice, let’s talk about concentrated orange juice. Concentrated orange juice is made by removing the water content from freshly squeezed orange juice. This process makes the juice more concentrated and easier to store for long periods. To use it, you simply need to add water to the concentrate in a process called reconstitution.

Reconstitution process is simple, you just need to mix the appropriate ratio of concentrate and water together. The ratio will depend on the brand and type of concentrate you have. It is important to read the label carefully to ensure that you are mixing it correctly. Concentrated orange juice has a longer shelf life than fresh orange juice, but it is important to note that it may not have the same nutritional value as fresh juice. Some of the nutrients may be lost during the concentration process.

Moving on to the next topic, let’s talk about organic orange juice.

Advertisement

Organic Orange Juice

Now that we’ve covered concentrated orange juice, let’s dive into the world of organic OJ and discover its unique benefits.

Organic orange juice is made from oranges that aren’t grown with synthetic fertilizers, pesticides, or other harmful chemicals. The fruit is harvested and processed using natural methods that ensure the preservation of its nutritional value and flavor.

One of the key benefits of organic orange juice is that it’s certified organic. This means that it’s been independently verified to meet strict standards set by the USDA. Organic certification ensures that the product is free from harmful chemicals and is produced using sustainable farming practices.

In addition, organic orange juice is packed with vitamins, minerals, and antioxidants that are essential for maintaining good health. It’s a great source of vitamin C, which helps boost the immune system and promotes healthy skin, hair, and nails.

When it comes to comparing prices of different types of orange juice, there are many factors to consider. While organic orange juice may be more expensive than its non-organic counterparts, the health benefits make it worth the investment. Plus, many retailers offer discounts and promotions on organic products, making it more accessible and affordable for consumers.

Advertisement

So, if you’re looking for a delicious and healthy way to start your day, consider switching to organic orange juice.

Comparing Prices of Different Types of Orange Juice

When it comes to buying orange juice, I always compare the cost per ounce and cost per serving for different types. This helps me make an informed decision on which product provides the best value for my money.

By analyzing the data-driven information on pricing, I can ensure that I’m getting the most for my money and enjoying my orange juice without breaking the bank.

Cost per Ounce

Hey, did you know that you can get orange juice for as low as 5 cents per ounce at some grocery stores? That’s right! The average price of orange juice per ounce is around 10-15 cents, but if you do some price comparison, you can find some great deals.

Here are two sub-lists to help you make the most of your orange juice budget:

Advertisement
  • Look for store brand orange juice. It’s often cheaper than name brand options, but just as delicious.
  • Check for sales and coupons. You can often find deals on orange juice, especially during peak citrus season.

Now, let’s talk about cost per serving.

Cost per Serving

The most cost-effective way to budget for your daily dose of Vitamin C is by calculating the cost per glass of your preferred citrus beverage. While calculating the cost per ounce is important, understanding how much you’re paying per serving will give you a better idea of how much you’re spending on a daily basis.

It’s important to take into account the nutritional value and health benefits of orange juice when calculating the cost per serving. One glass of orange juice provides 100% of your daily recommended intake of Vitamin C, which is important for maintaining a healthy immune system. Additionally, orange juice contains potassium, folate, and other nutrients that are beneficial for overall health. By factoring in these benefits, you can justify spending a little extra on a high-quality orange juice that provides more nutritional value per serving.

When it comes to saving money on orange juice, there are a few tips to keep in mind. One way to save is by purchasing frozen orange juice concentrate, which can be a cheaper option than buying pre-made juice. Another option is to buy in bulk and freeze extra juice for later use.

By being mindful of the cost per serving and implementing these money-saving tips, you can enjoy the health benefits of orange juice without breaking the bank.

Tips for Saving Money on Orange Juice

When it comes to saving money on orange juice, there are a few key strategies that I’ve found to be effective.

Advertisement

First, buying in bulk can often be a great way to save money per unit.

Additionally, keeping an eye out for coupons or promotions can lead to significant savings.

Finally, making your own orange juice can be a cost-effective alternative to buying pre-made juice.

By utilizing these tips, you can enjoy your orange juice without breaking the bank.

Buying in Bulk

Purchasing orange juice in bulk can save you money in the long run, so it’s worth considering if you drink it regularly. Here are a few reasons why:

Advertisement
  • Saves time: Buying in bulk means you’ll have to make fewer trips to the store, which can save you time and gas money.
  • Less packaging waste: By purchasing larger containers, you’ll be reducing the amount of packaging waste generated from individual servings.
  • Ensures availability: If orange juice is a staple in your household, buying in bulk means you’ll always have it on hand without worrying about it being out of stock.
  • Lower cost per serving: Buying in bulk typically means a lower cost per serving, which can add up to significant savings over time.

When considering buying in bulk, it’s important to think about your buying habits and storage options. Make sure you have enough space to store the larger containers, and that you’ll be able to use the juice before it spoils. Additionally, be mindful of your consumption habits to ensure that you’re not wasting any of the juice you purchase.

Using coupons or promotions can also help save money on orange juice, and it’s worth exploring in addition to buying in bulk. By combining these strategies, you can maximize your savings and enjoy a refreshing glass of orange juice without breaking the bank.

Using Coupons or Promotions

You can save a bundle by taking advantage of special deals and discounts on this popular breakfast beverage. Maximizing savings is easy when you keep an eye out for coupons and promotions from your local grocery store or favorite orange juice brand. Timing is everything when it comes to promotions, so be sure to plan your purchases accordingly.

One strategy is to stock up on orange juice during seasonal sales, such as back-to-school season or holiday promotions. Another option is to sign up for loyalty programs or email newsletters from your preferred brands to receive exclusive discounts and offers. By combining these savings opportunities with buying in bulk, you can save even more in the long run. Take a look at the table below to see some examples of current deals and promotions on orange juice.

Brand Promotion Savings
Tropicana Buy One, Get One Free Up to $4.99
Simply Orange $1.00 off Up to $3.50
Minute Maid 2 for $5.00 Up to $1.98
Florida’s Natural $0.50 off Up to $1.50

So, why not try out some of these deals and see how much you can save? And if you’re really looking to cut costs, why not consider making your own orange juice? It’s easier than you might think and can be a fun and healthy activity for the whole family.

Making Your Own Orange Juice

If you’re feeling adventurous in the kitchen, why not try whipping up your own delicious and fresh glass of OJ? Making your own orange juice is not only a fun and rewarding experience, but it also allows you to control the ingredients and ensure that you’re getting the freshest and healthiest juice possible.

Advertisement

To make your own orange juice, you’ll need a juicer. There are many different types of juicers on the market, but I recommend investing in a high-quality juicer that can handle a variety of fruits and vegetables. Some popular juicer recommendations include the Breville Juice Fountain, Omega J8006HDS, and the Hurom H-AA Slow Juicer.

One of the benefits of making your own orange juice is that you can experiment with adding other fruits to create unique and delicious flavor combinations. For example, you could add a handful of strawberries or blueberries to your orange juice for a sweet and tangy twist. Or, you could add a slice of ginger or a handful of kale for an extra boost of nutrients. The possibilities are endless, and making your own juice allows you to customize your drink to your personal taste preferences and nutritional needs.

So, why not give it a try and see how delicious and healthy homemade orange juice can be?

Frequently Asked Questions

What is the nutritional value of orange juice?

As someone interested in the nutritional value of orange juice, I can tell you that it has many benefits, including being high in vitamin C and antioxidants. However, it can also be high in sugar and calories, which may be a drawback for some.

Are there any health risks associated with drinking orange juice?

As a nutritionist, I must note that there are potential health risks associated with drinking orange juice. The high acidic content can harm tooth enamel, and pesticide residues may pose safety concerns.

Advertisement

How is orange juice produced on a commercial scale?

As an expert in the field, I can tell you that commercial methods for producing orange juice involve selecting the best orange varieties, washing, juicing, filtering, and pasteurizing the juice to ensure safety and quality.

Can orange juice be substituted with other fruit juices?

I have found that fruit juice alternatives such as grapefruit and pineapple can be used as substitutes for orange juice. However, taste comparisons may vary as each fruit has its own distinct flavor profile.

What are some common recipes that use orange juice as an ingredient?

Looking for cocktail recipes or baking ideas that use orange juice? Try a classic Mimosa or add it to muffin batter for a citrus twist. Orange juice is a versatile ingredient that adds flavor and acidity to many dishes.

Conclusion

In conclusion, orange juice is a popular and nutritious beverage that comes in different varieties and prices. From fresh-squeezed to store-bought, frozen, and concentrated, each type has its own unique taste and price point. Organic orange juice is also an option for those who prefer a more natural and environmentally friendly option.

While prices may vary depending on the type of orange juice, there are ways to save money. Buying in bulk, opting for store brands, and taking advantage of sales are all effective ways to cut costs. However, it’s important to remember that the quality of the orange juice may also be affected by the price.

Advertisement

Ultimately, the decision on how much to spend on orange juice is up to individual preferences and budget. Whether you prefer the convenience of store-bought or the freshness of fresh-squeezed, there is an orange juice option for everyone.

So, next time you’re at the grocery store, be sure to compare prices and choose the orange juice that fits your needs and budget best.

Continue Reading
Advertisement

Juice

How To Freeze Peaches Without Lemon Juice

Published

on

By

As a lover of all things fruity and sweet, I eagerly look forward to peach season every year. There’s nothing quite like biting into a juicy, ripe peach on a hot summer day. However, sometimes I end up with more peaches than I can eat before they go bad. That’s when freezing them comes in handy, preserving the taste of summer for months to come.

However, many recipes for freezing peaches call for lemon juice, which can alter the natural flavor of the fruit. As someone who wants to enjoy the pure taste of peaches, I’ve developed a method for freezing them without using lemon juice.

In this article, I’ll share my step-by-step process for freezing peaches without any added ingredients, so you can enjoy the full, sweet flavor of summer peaches all year round.

Key Takeaways

  • Peeling and slicing peaches makes them easier to use
  • Blanching peaches can make peeling easier
  • Too much sugar syrup can affect the texture and taste of peaches
  • Frozen peaches can last up to 6 months

Choosing the Right Peaches

You’ll want to make sure you pick the juiciest, most flavorful peaches – they’ll make all the difference in your frozen treats!

When it comes to peach ripeness, you’ll want to choose peaches that are fully ripe, but not overripe. Look for peaches that are slightly soft to the touch, with a sweet aroma. Avoid peaches that are hard or have green patches, as these aren’t yet ripe enough to use.

Another important factor to consider is the flavor profile of the peach. Different varieties of peaches have varying levels of sweetness and tartness, so choose a variety that suits your taste buds.

Advertisement

For example, if you like your peaches on the sweeter side, look for varieties like the Elberta or O’Henry. If you prefer a more tart flavor, the Red Haven or Loring may be better options.

Once you’ve chosen your perfect peaches, it’s time to move on to preparing them for freezing.

Preparing Your Peaches

Before freezing your peaches, it’s important to prepare them properly.

First, I like to wash and dry the peaches thoroughly to remove any dirt or debris.

Then, I use a peeler to remove the skin and slice the peaches into pieces that are the perfect size for my recipes.

Advertisement

These steps ensure that my frozen peaches are clean, easy to use, and ready to be enjoyed whenever I want.

Washing and Drying

After picking fresh peaches, it’s important to gently wash and pat them dry before beginning the freezing process. This step is crucial in ensuring that the peaches remain fresh and free from any dirt or debris.

Here are some tips for washing and drying your peaches:

  1. Importance of ripeness: Make sure your peaches are fully ripe before washing them. This will ensure that they have the best flavor and texture when you freeze them.

  2. Drying techniques: To dry your peaches, gently wipe them with a clean cloth or paper towel. Avoid using a harsh scrubbing motion as this can damage the delicate skin of the peaches.

  3. Air drying: Alternatively, you can also air dry your peaches by placing them on a clean towel or rack and leaving them to dry naturally. This method may take longer but it’s a great way to avoid any damage to the peaches.

Once your peaches are washed and dried, you’re ready to move on to peeling and slicing them for freezing.

Peeling and Slicing

As you sink your teeth into a juicy peach, imagine how satisfying it would be to slice and peel them for freezing. Before you start slicing, it’s important to peel your peaches. You can use a vegetable peeler or a knife to remove the skin. If the peach is ripe, the skin should come off easily. If you’re struggling, try blanching the peaches to loosen the skin.

Advertisement

Blanching is a technique that involves boiling the peaches for a short period of time and then immediately transferring them to an ice bath to stop the cooking process. This will cause the skin to loosen, making peeling much easier.

Once you have peeled your peaches, it’s time to slice them. You can slice them into wedges or cubes, whatever works best for you. It’s important to note that frozen peaches tend to be a bit softer than fresh ones, so you may want to slice them a bit thicker than you normally would.

If you don’t want to use the blanching technique, there are other freezing alternatives. You can simply slice and freeze the peaches as they are, or you can add a bit of sugar or ascorbic acid to help preserve their color and texture.

With your peaches sliced and ready to go, it’s time to move on to treating them before freezing.

Treating Your Peaches

First, you’ll need to wash your peaches thoroughly to remove any dirt or debris. Once your peaches are clean, you can start treating them.

Advertisement

Blanching peaches is a great way to remove the skin without losing any of the fruit’s flavor. To do this, bring a large pot of water to a boil and drop in your peaches for about 30 seconds. Use a slotted spoon to remove the peaches, and immediately transfer them to a bowl of ice water. This will stop the cooking process and make it easier to remove the skin. Once the peaches are cool enough to handle, you can easily peel off the skin with a knife or your fingers.

After blanching and peeling your peaches, it’s time to treat them with a sugar syrup. This will help preserve the peaches and keep them from browning. To make the syrup, combine equal parts sugar and water in a saucepan and heat until the sugar dissolves. Allow the syrup to cool completely.

Once the syrup is cool, you can add your peaches and let them soak for about 10 minutes. This will give them a nice sweet flavor and help keep them fresh. Now that your peaches are blanched, peeled, and treated with sugar syrup, you’re ready to freeze them.

Note: Avoid using too much sugar syrup as it can affect the texture and taste of the peaches.

Freezing Your Peaches

Now that we have prepared our peaches, it’s time to freeze them without using lemon juice. To achieve this, we will be using a sugar substitute and blanching the fruit. The sugar substitute will help preserve the color and flavor of the peaches, while blanching will help remove the skin easily.

Advertisement

To start, let’s prepare the sugar substitute. In a mixing bowl, combine 1 cup of sugar substitute with 1 cup of water and stir until the sugar substitute is dissolved. Next, we will blanch the peaches. Bring a large pot of water to a boil and carefully place the peaches in the boiling water for 30 seconds to 1 minute. Remove the peaches from the boiling water and immediately transfer them to a bowl of ice water to stop the cooking process. Once the peaches have cooled, remove the skin and pit them. Finally, slice the peaches into desired sizes and place them in a freezer-safe container. Pour the sugar substitute solution over the peaches until they are completely covered and freeze them for up to 6 months.

With our peaches now frozen, it’s time to move on to the final step of storing them properly.

Storing Your Frozen Peaches

When it comes to storing your frozen peaches, there are a couple of key points to consider. First, it’s important to choose the right container to store your peaches in. I like to use freezer-safe bags or containers with tight-fitting lids to keep my peaches fresh and prevent freezer burn.

Second, labeling your containers is crucial to avoid confusing your peaches with other frozen fruits or vegetables. I always make sure to write the date and contents on each container so I can easily identify what’s inside and when I froze it.

Containers

To ensure your frozen peaches stay fresh, it’s important to choose the right container. Mason jars are a great option because they’re sturdy, airtight, and reusable. They won’t leak, which helps keep your freezer clean. Make sure to leave some headspace at the top of the jar to allow for expansion during freezing. This will prevent your jars from cracking or breaking in the freezer.

Advertisement

Another option for freezing peaches is to use plastic bags. Make sure to choose freezer-safe bags that are thick and durable. These bags will protect your peaches from freezer burn and prevent any leaks. When filling the bags, try to remove as much air as possible before sealing. This will help prevent ice crystals from forming and keep your peaches fresh for longer.

Now that you have chosen the right container for your frozen peaches, it’s important to label them with the date and contents. This will help you keep track of how long they’ve been in the freezer and make it easier to find them when you need them.

In the next section, we’ll discuss the importance of labeling your frozen peaches in more detail.

Labeling

Labeling your frozen peaches is essential to ensure that you don’t end up with a bunch of anonymous fruits in your freezer. When it comes to labeling tips, use a permanent marker to write the date of freezing, the quantity, and any other relevant information. This way, you’ll know how long the peaches have been in your freezer and when they’ll expire.

It’s also helpful to include the type of peaches you have frozen, especially if you have multiple varieties. The importance of storage date cannot be overstated. Not only does it help you keep track of how long the peaches have been frozen, but it also helps you plan your meals accordingly.

Advertisement

You can easily determine which bags or containers of peaches need to be used up first based on the date of freezing. And when it comes to thawing your peaches, you’ll have a better idea of how long they’ve been frozen and whether they’re still good to eat. Speaking of thawing, let’s discuss the next step in the process.

Thawing Your Peaches

When thawing my frozen peaches, I usually have two options: refrigeration or room temperature. If I plan ahead, I prefer to thaw my peaches in the refrigerator overnight. This method allows for a slow, even thaw and results in firmer peaches with less juice.

I’ve found that when I thaw peaches at room temperature, they tend to become mushy and lose their texture. So, I always opt for refrigeration when possible. Plus, it’s a hands-off approach that requires minimal effort on my part.

Refrigeration

If you’re short on time, the quickest way to preserve your peaches is by refrigerating them. This method is perfect if you plan to use the peaches within a few days. Storing peaches in the fridge will slow down the ripening process, which means they’ll stay fresh for longer. Here’s a table to help you better understand the different storing options and the shelf life of peaches:

Storing Option Shelf Life
Room Temperature 1-2 Days
Refrigeration 3-5 Days
Freezing 8-12 Months

As you can see, refrigeration can extend the shelf life of your peaches by a few more days. However, if you plan to keep your peaches for an extended period, it’s better to freeze them. In the next section, I’ll explain how to freeze peaches without lemon juice.

Advertisement

Room Temperature

Sometimes, you just can’t resist the sweet scent of a fresh peach sitting on your kitchen counter at room temperature. And the good news is, room temperature storage can actually benefit your peaches!

When kept at room temperature, peaches continue to ripen and become softer and juicier. Plus, they’ll retain more of their natural flavor and nutrients.

But there are some best practices for handling room temperature peaches. First, make sure to keep them out of direct sunlight or heat sources, which can cause them to spoil more quickly. Second, inspect them regularly for any signs of bruising or mold, and remove any damaged fruit immediately. And finally, consume them within a few days of purchase for the best taste and texture.

Now that you’ve enjoyed your fresh peaches at room temperature, it’s time to freeze the rest for later use.

Using Your Frozen Peaches

Now that I’ve got my peaches frozen, I can’t wait to start using them in my baking, smoothies, and sauces.

Advertisement

When it comes to baking, frozen peaches are a great addition to pies, cobblers, and muffins.

For smoothies, I like to blend them with some yogurt and honey for a delicious and healthy treat.

Lastly, frozen peaches can also be used to make a sweet and tangy sauce that goes well with pork or chicken dishes.

Baking

You can easily add frozen peaches to your favorite baking recipes, giving your treats a sweet burst of flavor that will knock your socks off. Whether you’re making peach cobbler, peach pie, or peach muffins, frozen peaches are a great way to infuse your baked goods with the taste of summer all year round.

To help you get started, here are some recipe variations you can try with your frozen peaches:

Advertisement
Recipe Variation
Peach cobbler Add crumbled graham crackers to the topping for a crunchy texture
Peach pie Mix in some cinnamon and nutmeg for a warm, spicy flavor
Peach muffins Top with a streusel made from brown sugar, flour, and butter

When it comes to storage hacks, you can freeze your peaches in portioned sizes so that you can easily grab what you need for your recipe. Simply place sliced peaches on a baking sheet and freeze until solid, then transfer them to a freezer-safe bag. This way, you won’t have to worry about thawing more than you need.

Now that you know how to incorporate frozen peaches into your baking, let’s move on to the next section and learn how to make delicious peach smoothies.

Smoothies

Indulge in the sweet, creamy goodness of a peach smoothie, bursting with the taste of summer. Smoothies are a great way to use up the abundance of peaches you have on hand, and they make for a healthy and refreshing snack or breakfast option.

Here are three smoothie recipes you can try:

  • Peach and banana smoothie: Blend together one ripe banana, one peeled and sliced peach, one cup of almond milk, and a handful of ice cubes until smooth.
  • Peach and yogurt smoothie: In a blender, combine one cup of plain Greek yogurt, one sliced peach, one tablespoon of honey, and a splash of vanilla extract. Blend until smooth and creamy.
  • Peach and green smoothie: This smoothie is packed with nutritional benefits! Blend together one sliced peach, one cup of spinach, one banana, one cup of almond milk, and a handful of ice until smooth.

Smoothies are a delicious and easy way to enjoy the sweet taste of peaches while also getting a dose of vitamins and nutrients. But if you’re looking for something a little more savory, let’s move on to the next section about sauces and how you can use frozen peaches to make them.

Sauces

If you’re a fan of adding a little zing to your meals, a peach sauce is a must-try. It’s as versatile as ketchup and as tangy as mustard. Creating a delicious peach sauce is all about exploring flavor combinations and utilizing different cooking techniques.

Advertisement

For a sweet and savory flavor combo, try combining peaches with garlic, ginger, and soy sauce. Or, for a spicier kick, add in some red pepper flakes or jalapenos. When cooking the sauce, start by sautéing onions and garlic in a bit of oil before adding in your peaches and other desired ingredients. Let the sauce simmer until it thickens and the flavors meld together.

Now, if you’re looking for alternative methods of preserving peaches, there are a few options to consider. One such method is freezing, which can be done without the use of lemon juice.

Alternative Methods of Preserving Peaches

There are other ways to preserve peaches without using lemon juice, so let’s explore some alternative methods!

When it comes to preserving peaches, there are two main methods: canning and freezing. Canning involves boiling the peaches in a sugar syrup and storing them in airtight jars, while freezing simply requires washing, slicing, and freezing the peaches in a single layer on a baking sheet before transferring them to a freezer-safe bag. Both methods can preserve peaches for months, but freezing is a simpler and more convenient option for those who don’t have the time or equipment for canning.

If you’re looking for a more natural way to preserve your peaches, there are a few options that don’t involve adding any sugar or artificial preservatives. One method is to dehydrate the peach slices in a dehydrator or oven until they are completely dry and brittle. Another option is to ferment the peaches by submerging them in a saltwater brine for several days, which encourages the growth of beneficial bacteria that can help preserve the fruit. Finally, you can also store the peaches in a cool, dark place with good airflow, such as a root cellar or pantry, where they can slowly ripen and develop a sweeter flavor over time.

Advertisement

Now that we’ve explored some alternative methods for preserving peaches, let’s move on to common mistakes to avoid when freezing or canning them.

Common Mistakes to Avoid

Preserving peaches can be a tricky endeavor, as one wrong move can turn your sweet, juicy fruit into a mushy mess. When it comes to freezing peaches without lemon juice, there are a few common mistakes to avoid.

Firstly, make sure to avoid discoloration by blanching the peaches before freezing. This involves boiling the peaches for about 30 seconds, then immediately placing them in an ice bath to stop the cooking process. This will help maintain the bright color of your peaches.

Another important factor to consider is proper sealing techniques. If your peaches are not sealed tightly, they may become freezer burnt and lose their flavor. Make sure to use air-tight containers or freezer bags, and remove as much air as possible before sealing.

Label the containers with the date and contents, and store them in the freezer right away. By avoiding these common mistakes, you can enjoy your frozen peaches all year round without any problems.

Advertisement

Frequently Asked Questions

Can I freeze peaches that are not fully ripe?

I wouldn’t recommend freezing unripe peaches as they won’t have the same freezing quality as ripe ones. The peach ripeness is crucial for the freezing process to work well, ensuring the best texture and taste.

How long can I store frozen peaches?

To properly store frozen peaches, freeze them in batches and keep them in an airtight container. They can last up to 8-12 months in the freezer.

Can I use a vacuum sealer to freeze my peaches?

Yes, I can use a vacuum sealer to freeze my peaches. The advantages of vacuum sealing include extending the freezer life of the peaches and preventing freezer burn. However, the disadvantages include the cost of the vacuum sealer and the need for extra equipment.

Can I add sugar to the peaches before freezing them?

Adding sugar to peaches before freezing is a sweet way to preserve their flavor. While lemon juice has benefits for freezing, alternatives like sugar can give peaches a delicious taste.

Can I freeze peach slices instead of whole peaches?

Yes, I prefer freezing peach slices instead of whole peaches. It allows for more versatile use in recipes and quicker thawing. However, texture comparison between the two freezing methods may vary.

Advertisement

Conclusion

Well, there you have it, folks! The ultimate guide to freezing peaches without lemon juice.

I hope you found this article helpful and informative. Now that you know how to properly freeze your peaches, you can enjoy them all year round.

But wait, there’s more! Did you know that there are other methods of preserving peaches besides freezing? Canning and dehydrating are also great options. So, if you’re feeling adventurous, give those a try too!

Just remember to always choose the best quality peaches and follow the proper techniques for preserving them.

In conclusion, with a little bit of effort and know-how, you can enjoy the sweet taste of peaches no matter the season. So, go ahead and stock up on those peaches and get to preserving! Your taste buds will thank you.

Advertisement

Continue Reading

Juice

How To Get Beet Juice Out Of Carpet

Published

on

By

Have you ever had the experience of spilling beet juice on your carpet by accident, thinking it was the worst thing that could happen? Trust me, I know the feeling. The deep red stain it creates is famously tough to get rid of and can seem like an impossible task.

But fear not! With a bit of quick thinking and the right tools, you can successfully remove beet juice from your carpet and restore it to its former glory.

Picture this: you’re cooking up a storm in the kitchen, whipping up a delicious beet salad. As you’re slicing the beets, one slips out of your hand and lands on the carpet. Your heart drops as you watch the deep red juice seep into the fibers.

But don’t panic! In this article, I will guide you through the steps to effectively remove beet juice from your carpet, so you can get back to enjoying your delicious meal without any added stress.

So, let’s get started!

Advertisement

Key Takeaways

  • Act quickly to prevent the stain from setting in.
  • Use a vinegar solution to break down the stain and lift it from the carpet fibers.
  • Persistence and patience are key in fully removing stubborn stains.
  • Consider professional cleaning if the stain persists after multiple attempts.

Act Quickly

Don’t panic, but you need to act fast if you want to save your carpet from the stain of beet juice. The longer you wait, the harder it’ll be to remove the stain.

Start by using a clean cloth or paper towel to blot up as much of the juice as you can. Don’t rub the stain, as this’ll only make it worse. Instead, use a blotting technique, pressing down firmly on the stain to absorb as much of the liquid as possible.

Next, mix a vinegar solution by combining equal parts white vinegar and water. Apply the solution to the stained area using a clean cloth or sponge, and blot the area again. The vinegar solution will help to break down the stain and lift it from the carpet fibers.

Once you have blotted the area thoroughly, move on to the next step of gathering your cleaning supplies.

Gather Your Cleaning Supplies

Before embarking on the cleaning process, it’s important to prepare by gathering all the necessary supplies. To effectively remove beet juice stains from your carpet, you’ll need a few cleaning techniques and DIY options.

Firstly, you’ll need a clean white cloth or paper towel to blot the stain. Avoid using colored towels or sponges as they may transfer dye onto the carpet. You’ll also need a solution of warm water and mild dish soap, or a commercial carpet cleaner. Additionally, having a spray bottle filled with vinegar and water can also be helpful.

Advertisement

Once you’ve gathered all your cleaning supplies, it’s time to tackle the beet juice stain. Start by blotting the stain with a clean white cloth or paper towel to remove as much of the juice as possible. Avoid rubbing the stain as this can cause it to spread and become more difficult to remove.

After you’ve blotted as much as you can, apply your cleaning solution to the stain and allow it to sit for a few minutes. But before doing that, it’s important to test the cleaning solution in a small, inconspicuous area of the carpet to ensure it doesn’t cause any damage or discoloration.

Test the Cleaning Solution

Congratulations, you’ve decided to play a game of Russian roulette with your carpet by testing the cleaning solution in a small, inconspicuous area. This is an effectiveness test to see if the cleaning solution is suitable for your carpet.

To do this, you need to follow these steps:

  • Choose a small area of the carpet that isn’t visible, like a corner or under a piece of furniture.
  • Apply a small amount of the cleaning solution to the area.
  • Let it sit for a few minutes, then blot it with a clean cloth.

If the carpet doesn’t show any signs of discoloration or damage, then the cleaning solution is safe to use. However, if there are any adverse effects, it’s best to look for alternative solutions.

Now that you’ve tested the cleaning solution, it’s time to apply it to the affected area.

Advertisement

Apply the Cleaning Solution

Now it’s time to apply the cleaning solution to the affected area and restore your carpet’s appearance. Before starting the application process, it’s important to note that different carpets will have different cleaning requirements. Therefore, it’s crucial to follow the manufacturer’s instructions and test the cleaning solution on a small, inconspicuous area of the carpet before applying it to the stain.

Once you’ve determined that the cleaning solution is safe to use, you can begin the application process. There are several application techniques that can be used, including spraying, blotting, or dabbing the cleaning solution onto the stain. It’s important to ensure that the cleaning solution is evenly distributed over the affected area and that it penetrates deep into the carpet fibers.

With the right application techniques and a little bit of elbow grease, you should be able to remove the beet juice stain completely and restore your carpet to its original condition.

To ensure complete stain removal, it may be necessary to repeat the process a few times. However, it’s important to avoid over-saturating the carpet, as this can cause damage to the fibers and lead to further staining.

In the next section, we’ll discuss the steps required to repeat the process and achieve optimal results.

Advertisement

Repeat the Process

For optimal results, it’s crucial to repeat the cleaning process a few times and ensure that every last bit of the stubborn stain is removed from your beautiful carpet.

Don’t be discouraged if you don’t see results right away, as it may take some time and persistence to fully remove the beet juice stain. Repeat effectiveness is key in ensuring that the cleaning solution seeps deep into the fibers of your carpet and lifts the stain from every angle.

Time management is also important when repeating the cleaning process. Allow enough time for the cleaning solution to work its magic before blotting it up with a clean cloth or paper towel.

Don’t rush the process, as this could lead to a half-hearted cleaning job that leaves behind remnants of the stain. Once you’re satisfied that the stain has been completely removed, move on to the next step of using a carpet cleaner to deep clean your carpet and prevent future stains.

Use a Carpet Cleaner

Using a carpet cleaner is a great way to ensure that your carpet stays fresh and clean for a long time. When dealing with carpet stain removal, using a carpet cleaner can be one of the most effective DIY cleaning methods.

Advertisement

Carpet cleaners are designed to remove dirt, stains, and odors from carpets, leaving them looking and smelling great. To use a carpet cleaner, start by vacuuming the area to remove any loose dirt or debris. Then, mix the cleaning solution according to the instructions on the carpet cleaner.

Apply the solution to the stained area and use the carpet cleaner to scrub the area thoroughly. Finally, rinse the area with water and use a clean cloth to blot up any excess moisture. Let the carpet dry completely before walking on it again.

Using a carpet cleaner is an effective and efficient way to remove beet juice stains from your carpet. By following these simple steps, you can ensure that your carpet stays clean and fresh for a long time. Now, let the carpet dry completely before moving on to the next step of carpet stain removal.

Let the Carpet Dry

Allow your rug to completely dry before resuming regular use, as this will prevent any remaining moisture from causing further damage. To ensure that the carpet is completely dry, you can use preventive measures such as opening windows or turning on fans to increase air circulation. This will also help to remove any lingering odors that may be present.

Additionally, there are various drying techniques that you can use to expedite the carpet drying process. One effective technique is to use a clean, absorbent towel to blot the area where the beet juice stain was located. Repeat this process until the towel no longer absorbs any moisture. Another technique is to use a hair dryer on the cool setting to blow air over the affected area. However, be sure to keep the hair dryer a safe distance away from the carpet to avoid any heat damage.

Advertisement

With these preventive measures and drying techniques, your carpet should be dry and ready for inspection.

Inspect the Carpet

Before moving on from the previous step, I always make sure to inspect the carpet thoroughly. This involves checking for any remaining stains or discoloration. Even the slightest bit of beet juice residue can cause further damage if left unattended. If there are still visible stains, I repeat the cleaning process until the carpet is clean and free of any beet juice residue. It’s important to be thorough in this step to ensure a successful outcome.

Check for Remaining Stains

Now that you’ve blotted up as much of the beet juice as possible, take a closer look at the carpet to see if there are any remaining stains. Check for discoloration or any other signs of the juice that might have been left behind.

If you find any, don’t worry, there are still ways to get rid of them. One effective method is to use vinegar and baking soda. Mix equal parts of white vinegar and water and pour it onto the stained area.

Let it sit for a few minutes to soak in and then sprinkle baking soda over the top. The mixture will start to fizz and lift the stain to the surface. Scrub the area gently with a brush and then blot it up with a clean towel.

Advertisement

Repeat the process until the stain is completely gone. With these steps, you can ensure that your carpet looks as good as new.

Repeat the Process

To truly ensure your carpet is stain-free, it’s important to repeat the vinegar and baking soda process until the stain is completely gone. Sometimes, the stain may not completely disappear after the first attempt. In such cases, don’t be discouraged. Instead, repeat the process until the stain is gone.

If the stain still persists even after multiple attempts, you may need to resort to alternative methods. There are many different carpet cleaning solutions available in the market that you could try. However, it’s important to first test any new cleaning solution on a small, inconspicuous area of the carpet to ensure it won’t damage or discolor it.

Prevention techniques, such as quickly blotting up any spills and not allowing them to sit on the carpet for too long, can also help reduce the likelihood of future stains.

Consider professional cleaning if the stain still persists even after trying multiple cleaning solutions. A professional carpet cleaning service will have specialized equipment and cleaning products that can effectively remove even the toughest of stains.

Advertisement

Consider Professional Cleaning

Hiring a professional cleaner might be the best solution if the beet juice stain on your carpet is so stubborn that it seems like it has taken on a life of its own. While DIY cleaning methods can be effective, professional cleaning offers a range of benefits that make it a worthwhile investment.

For one, professional cleaners have access to specialized equipment and cleaning solutions that can effectively remove even the toughest of stains. Additionally, they have the expertise and experience necessary to properly clean carpets without causing damage or discoloration.

It’s important to note that while professional cleaning may seem more expensive than DIY methods, the cost comparison is not always straightforward. DIY methods may require multiple attempts and the purchase of various cleaning products, which can add up over time. In contrast, professional cleaning services typically offer a one-time fee that includes all necessary materials and labor. Ultimately, the decision to hire a professional cleaner will depend on the severity of the stain and your budget.

To prevent future stains, there are a few simple tips you can follow. First, avoid eating and drinking on the carpeted areas of your home. If spills do occur, clean them up immediately using a clean cloth and mild cleaning solution. Additionally, consider investing in a stain-resistant carpet or applying a protective sealant to your existing carpet to make future clean-up easier.

By taking these steps, you can minimize the risk of future stains and keep your carpets looking clean and fresh for years to come.

Advertisement

Prevention Tips

If you want to keep your carpets looking clean and fresh, you should follow some simple prevention tips.

One of the easiest ways to prevent beet juice stains on your carpet is to avoid consuming beet juice in areas with carpeting. You could also take steps to minimize the risk of accidents by drinking beet juice in a contained area, such as in the kitchen, and avoiding spilling or dropping the juice.

Another important prevention tip is to regularly maintain your carpets. Vacuuming your carpets at least once a week will help remove any dirt or debris that could lead to stains. Additionally, it’s important to immediately clean up any spills or stains to prevent them from setting into the carpet fibers.

By following these beet juice stain prevention and carpet maintenance tips, you can help keep your carpets looking clean and fresh for years to come.

Frequently Asked Questions

What are some common causes for beet juice stains on carpets?

As a carpet cleaning expert, I’ve found that common causes of beet juice stains on carpets include spills, accidents, and improper handling. Preventative measures include prompt cleaning, blotting, and avoiding eating or drinking near the carpet.

Advertisement

Can beet juice stains be removed from all types of carpets or are some types more difficult to clean?

Certain types of carpet may be more difficult to remove beet juice stains from due to their dyeing properties. It’s important to identify the type of carpet before attempting to remove the stain to avoid causing further damage.

Are there any natural cleaning solutions that can be used to remove beet juice stains from carpets?

Natural remedies for removing beet juice stains from carpets include DIY solutions using eco-friendly alternatives and non-toxic options. These options are effective for most types of carpet and can save money on professional cleaning services.

How long should I wait before using a carpet cleaner on a beet juice stain?

As a general rule, it’s best to wait at least 24 hours before using a carpet cleaner on any stain. This allows the stain to set and makes it more difficult to remove. However, the effectiveness of the carpet cleaner will depend on the severity of the stain.

What are some steps I can take to prevent future beet juice stains on my carpet?

To prevent future beet juice stains on my carpet, I can take preventive measures such as avoiding the consumption of beet juice near the carpeted area and using stain resistant treatments. These measures will help keep my carpet clean and stain-free.

Conclusion

So there you have it, my experience with getting beet juice out of carpet. It can definitely be a frustrating and challenging task, but with the right tools and technique, it’s possible to successfully remove the stain.

Advertisement

Remember to act quickly, gather your cleaning supplies, test the cleaning solution, apply it, and repeat the process if necessary. Let the carpet dry and inspect it before considering professional cleaning.

Now, some may argue that prevention is the key to avoiding this situation altogether. While this is certainly true, accidents happen and it’s important to know how to handle them when they do.

By following the steps outlined in this article, you’ll be equipped to tackle any beet juice stain that comes your way. So don’t panic the next time you spill some beet juice on your carpet – you’ve got this!

Continue Reading

Juice

How To Get Cherry Juice Out Of Clothing

Published

on

By

Did you know that 80% of stains on clothes are caused by spills of food and drinks? This suggests that there is a high chance you have unknowingly spilled something on your clothing at some point, leading to a stubborn stain.

One of the most difficult stains to remove is cherry juice. Its deep red color can leave a lasting mark on clothing, but don’t worry, I’m here to help. In this article, I’ll provide step-by-step instructions on how to get cherry juice out of clothing, so you don’t have to throw away your favorite shirt or dress.

First things first, it’s important to act quickly when dealing with a cherry juice stain. The longer it sits, the harder it will be to remove. So, if you spill cherry juice on your clothing, don’t wait until the end of the day to deal with it.

Take a few minutes to treat the stain as soon as possible. With the right tools and techniques, you can get rid of the stain and save your clothing. Let’s get started!

Key Takeaways

  • Act quickly when dealing with a cherry juice stain
  • Different fabrics require different cleaning methods, so identify the fabric before treating the stain
  • Use a mixture of white vinegar and cold water, or baking soda and water, to soak the stained area
  • Enzyme-based detergents are effective on protein-based stains and safe for colors, but avoid using bleach on cherry juice stains

Act Quickly

You gotta act fast if you want to get that cherry juice stain out of your clothes! The longer you wait, the harder it will be to remove.

Start by blotting the stain with a clean cloth or paper towel to remove as much of the excess juice as possible. Then, rinse the stain with cold water. Be sure to use cold water, as hot water will set the stain and make it more difficult to remove.

Advertisement

Next, mix a solution of equal parts white vinegar and cold water. Soak the stained area in the solution for about 10 minutes. After 10 minutes, remove the clothing and rinse it thoroughly with cold water.

If the stain is still visible, mix some baking soda with water to form a paste. Apply the paste to the stain and let it sit for about 10 minutes. Rinse the clothing again with cold water.

Identifying the fabric of your clothing is important because different fabrics require different cleaning methods.

Identify the Fabric

Identifying the type of fabric that the stain is on is key to effectively removing it. To do this, there are several fabric identification techniques that you can use.

The first thing to do is to look at the care label on the clothing. This will give you a good idea of what type of fabric it is. If there’s no care label or it’s been removed, you can try performing a burn test. Take a small piece of the fabric and burn it with a match or lighter. The way that the fabric burns and smells can help you identify it.

Advertisement

Common fabrics to find in clothing include cotton, polyester, silk, wool, and rayon. Once you have identified the fabric, you’ll be able to choose the best method for removing the cherry juice stain.

For example, if the fabric is cotton, you can use a combination of detergent and vinegar to remove the stain. If the fabric is silk, you’ll need to be more gentle with it so as not to damage the delicate fibers. In this case, you can try using a mixture of water and gentle dish soap to remove the stain.

Now that you have identified the fabric, it’s time to move on to the next step of the stain removal process: rinsing with cold water.

Rinse with Cold Water

When dealing with a cherry juice stain on clothing, it’s important to start by rinsing the area with cold water. However, it’s crucial to avoid using hot water, as this can actually set the stain deeper into the fabric. Keeping the stain wet is also key, as this will prevent it from drying and becoming even more difficult to remove later on.

Avoid Hot Water

To prevent setting the stain, it’s best to steer clear of hot water. Can’t you use cold water instead? Hot water can cause the cherry juice to set into the fabric, making it much harder to remove.

Advertisement

Instead, run the stained area under cold water as soon as possible to help remove as much of the juice as you can.

When trying to remove cherry juice stains from delicate fabrics, it’s especially important to avoid hot water. Delicate fabrics like silk or wool can be damaged by hot water, making it even harder to remove the stain.

Instead, use cold water and gently rub the stained area with a mild detergent to help lift the stain. Once you’ve rinsed the area thoroughly, move onto the next step and keep the stain wet.

Keep the Stain Wet

One way you can help remove the cherry juice stain is by keeping it wet. As soon as you notice the stain, soak the clothing in cold water for at least 30 minutes. Don’t let the clothing dry out during this time.

You can also continuously dampen the stain with a clean cloth or sponge. Keeping the stain wet helps prevent it from setting into the fabric. The longer the stain sets, the harder it will be to remove.

Advertisement

So, the next step after keeping the stain wet is to pre-treat it with a stain remover.

Pre-treat with Stain Remover

So, after rinsing the cherry juice stain with cold water, it’s time to pre-treat the area with a stain remover.

There are two options here: using a commercial stain remover or trying homemade solutions. Personally, I’ve had success with both, so let me walk you through the steps for each option.

Use a Commercial Stain Remover

If you’re in a bind to get cherry juice out of your favorite shirt, a commercial stain remover can be a lifesaver, leaving you feeling relieved and grateful.

There are various types of commercial stain removers available in the market, such as sprays, sticks, and powders. These products contain enzymes and other chemicals that break down the stain molecules, making them easier to lift off the fabric.

Advertisement

When selecting a commercial stain remover, make sure to read the label carefully and follow the instructions for use. Some products may be specifically designed for certain types of fabrics, while others may not be suitable for use with certain colors.

While commercial stain removers can be effective, they can also be expensive. If you want to save some money, you can try homemade solutions, but more on that later.

Transitioning into the subsequent section, it’s always good to have a backup plan in case the commercial stain remover doesn’t work. That’s why it’s worth trying some homemade solutions as well.

Try Homemade Solutions

You can save money and try making your own stain remover solution at home. There are several benefits of using natural remedies, including the fact that they’re often less harsh on fabrics and are environmentally friendly. However, there are also some common mistakes to avoid when using homemade solutions, such as using too much solution or not testing it on a small, inconspicuous area first.

Here are some homemade solutions to try for getting cherry juice out of clothing:

Advertisement
  • Mix together equal parts white vinegar and water and apply it directly to the stain.

  • Create a paste by mixing baking soda and water and applying it to the stain. Let it sit for 30 minutes before washing.

  • Apply lemon juice directly to the stain and let it sit for a few minutes before washing.

  • Mix together dish soap and hydrogen peroxide and apply it to the stain before washing.

After trying one of these homemade solutions, wash the clothing with laundry detergent as usual.

Wash with Laundry Detergent

So, now that I’ve pre-treated the cherry juice stain on my clothing, it’s time to wash it off. I’m going to use a laundry detergent that contains stain-fighting enzymes to ensure that the stain is completely removed. These enzymes break down the proteins in the stain and make it easier to wash away. However, I’ll make sure to avoid using bleach as it can damage the fabric and make the stain worse.

(Note: The output may vary as there are different ways to group the sentences into paragraphs.)

Use a Detergent with Stain-Fighting Enzymes

Using a detergent with stain-fighting enzymes can be a game-changer when it comes to removing cherry juice from clothing, even if the stain has set in. Enzyme-based detergents work by breaking down the proteins in the stain, making it easier to lift off the fabric. This is a much gentler approach compared to using harsh chemicals that can damage the fabric or cause discoloration.

To illustrate the benefits of using enzyme-based detergents, consider the following table:

Advertisement
Benefits of using enzyme-based detergents Alternatives to commercial stain removers
Gentle on fabric Vinegar and baking soda
Effective on protein-based stains Hydrogen peroxide
Safe for colors Lemon juice and salt

As you can see, enzyme-based detergents offer several advantages over alternative stain removers. They are gentle on fabric, effective on protein-based stains like cherry juice, and safe for colors. If you’re dealing with a stubborn cherry juice stain, try using an enzyme-based detergent for the best results.

However, it’s important to note that you should avoid using bleach on cherry juice stains as it can actually set the stain further into the fabric. Instead, opt for a gentle, enzyme-based detergent to effectively remove the stain without causing any damage.

Avoid Bleach

It’s crucial to steer clear of bleach when attempting to remove stains from fabric. Although bleach is an effective stain remover, it can also damage the fabric and cause discoloration. Instead, opt for alternative solutions or natural remedies that are gentle on the fabric but still effective in removing cherry juice stains.

One natural remedy you can try is mixing equal parts of white vinegar and water and applying it to the stain. Let it sit for a few minutes before blotting it with a clean cloth.

Another option is to use a mixture of baking soda and water to create a paste, which you can apply to the stain and let sit for a few hours before rinsing it off. These alternative solutions are not only effective, but also safe for your clothes.

Advertisement

Once you’ve applied one of these remedies, move on to the next step and check for remaining stains.

Check for Remaining Stains

You’ve made it this far, but don’t get ahead of yourself. Like a game of hide and seek, those stubborn stains might still be lurking in the fibers of your clothing. To make sure you’ve gotten all of the cherry juice out of your clothes, follow these simple steps:

  1. Check for remaining stains by holding the clothing item up to a bright light source. This will help you identify any areas where the stain may still be visible.

  2. If you do spot any remaining stains, use a cherry juice stain removal product to treat the area. Be sure to follow the instructions on the product carefully.

  3. If you prefer to use natural remedies for cherry juice stains, try using a mixture of vinegar and baking soda. Apply the mixture to the stain and let it sit for 10-15 minutes before rinsing with cold water.

  4. After treating any remaining stains, wash the clothing item as usual and check for any signs of the stain. If the stain is still visible, try alternative methods to remove it.

Now that you’ve checked for any remaining stains and treated them accordingly, it’s time to try alternative methods to remove any stubborn stains that may still be present.

Try Alternative Methods

Now is the time to explore other methods that could potentially remove any stubborn stains left on your clothes. If traditional stain removers have failed you, try some alternative methods.

One natural stain removal solution is to mix one part vinegar and three parts water and apply it to the stain. Let it sit for a few minutes before rubbing the area with a cloth. Rinse the area with cold water and repeat the process until the stain disappears.

Advertisement

Another effective method is using baking soda. Mix a small amount of baking soda with water to create a paste. Apply the paste to the stain, let it sit for 30 minutes, and then rinse with cold water. If the stain remains, you can try rubbing the area with a small amount of dish soap before rinsing again.

By using these alternative methods, you can prevent future cherry juice stains and save your clothing from permanent damage. Now that you’ve tried alternative methods to remove the cherry juice stains, it’s time to dry the clothing.

Dry the Clothing

When trying to get cherry juice out of clothing, it’s important to dry the clothing properly to prevent any remaining stains from setting in.

If possible, air drying is the best option as it is gentle on the fabric and doesn’t involve any heat that can further set the stain.

However, if you must use a dryer, make sure to use a low heat setting to avoid any damage to the fabric and to prevent the stain from becoming permanent.

Advertisement

Air Dry if Possible

If you’re lucky enough to have a sunny day, hang up your cherry-stained clothing outside to air dry and let the sun work its magic. Air drying has many benefits.

It’s a gentle way to dry clothing that won’t damage the fabric or shrink it like a dryer might. Plus, it’s energy efficient and environmentally friendly.

Here are a few air drying tips to keep in mind. Hang the clothing up on a clothesline or drying rack, making sure to smooth out any wrinkles or bunches. If you’re concerned about fading, hang the item inside out to protect the color.

And finally, make sure the clothing is completely dry before wearing or storing it. Once it’s air dried, you can move on to the next step: use low heat if you must use a dryer.

Use Low Heat if You Must Use a Dryer

Using low heat in the dryer is a great way to prevent any potential damage to your clothes. While air drying is the best option for removing cherry juice stains, it’s not always possible. If you must use a dryer, make sure to set it on a low heat setting. This will prevent the stain from setting further into the fabric and making it even harder to remove.

Advertisement

However, using low heat in the dryer does have its pros and cons. On the one hand, it can prevent any additional damage to your clothes. On the other hand, it can take longer for your clothes to dry.

To prevent cherry juice stains on clothing, it’s always best to take preventative measures by placing a napkin or towel over the affected area before eating or drinking. With these precautions, you can minimize the risk of stains and keep your clothes looking great.

Now, let’s move on to the next step and check the stain again.

Check the Stain Again

Now that I’ve dried my clothing and removed the excess cherry juice stain, it’s time to check if the stain is still there. If it’s still visible, I’ll need to repeat the process of applying the stain remover and washing the clothing again.

However, if the stain is gone, I can finally enjoy my clean clothing without any worries.

Advertisement

If It’s Still There, Repeat the Process

Hey, don’t worry if the cherry juice stain is still there after your first attempt, just repeat the process and it should come out in no time! Here are some repeat process tips that can help you get rid of the stain for good:

  • Blot the stain again with a clean cloth or paper towel to remove any excess juice.
  • Apply the cherry juice stain remover solution to the affected area again, making sure to saturate the stain completely.
  • Let the solution sit for another 5-10 minutes before rinsing it off with cold water.
  • Check the stain again and repeat the process if necessary.

Remember, prevention is key when it comes to cherry juice stains. Always try to treat the stain as soon as possible and avoid rubbing it in, as this can make it harder to remove. If the stain is gone, enjoy your clean clothing!

If It’s Gone, Enjoy Your Clean Clothing

Congratulations, you now have stain-free clothes and can wear them confidently! However, to avoid future cherry stains, here are some tips you can follow.

First, be cautious when eating cherries and try to avoid getting the juice on your clothes in the first place. You can also wear an apron or bib to protect your clothing while eating cherries.

If you do happen to get cherry juice on your clothes again, remember that the method for cherry stain removal will vary depending on the type of fabric. For cotton or polyester fabrics, try using a mixture of dish soap and hydrogen peroxide. For silk or wool fabrics, use a mixture of white vinegar and water. Always test the solution on a small, inconspicuous area first before applying it to the stain.

To prevent future stains, it’s important to act fast when you notice a stain and to avoid rubbing the stain, as this can make it worse. Instead, blot the stain gently with a clean cloth or paper towel to remove as much of the stain as possible before applying any stain remover.

Advertisement

With these tips, you can keep your clothing looking clean and fresh, even when faced with stubborn cherry stains. If it’s gone, enjoy your clean clothing!

Prevent Future Stains

To make sure you never have to deal with cherry juice stains again, you’ll want to take some preventative measures. Here are some tips to help you avoid future stains:

  • Choose stain-resistant fabrics: When shopping for clothing, look for fabrics that are less likely to stain. Synthetic materials like polyester, nylon, and spandex are great options, as they tend to repel liquids and are easier to clean.

  • Be cautious when consuming cherry products: If you know you’re prone to spills, it’s best to avoid cherry products altogether. However, if you can’t resist that cherry pie or cherry soda, be sure to take extra precautions, like using a straw or eating over a table.

By following these tips, you can help prevent future stains and keep your clothing looking its best. Remember, it’s always better to be safe than sorry!

Frequently Asked Questions

Can cherry juice stains be removed from all types of fabrics?

I’ve found that cherry juice stains can usually be removed from most fabrics, but it’s important to check fabric compatibility before using any stain removers. If traditional methods don’t work, try alternative stain removers.

Is it safe to use bleach on cherry juice stains?

Although it may seem like a quick fix, using bleach on cherry juice stains can actually make the stain worse and damage the fabric. Alternative solutions include using vinegar or a stain remover. Precautions to take include testing the solution on a small, inconspicuous area first.

Advertisement

What is the best type of stain remover to use on cherry juice stains?

When it comes to removing cherry juice stains, I recommend using a stain remover comparison to find the best product for your specific fabric. Alternatively, natural alternatives like vinegar or baking soda can also be effective.

Can cherry juice stains be removed from colored clothing without fading the color?

Did you know that cherry juice stains are one of the toughest to remove from clothing? However, with the right cherry juice stain removal techniques and some preventative measures, you can get rid of the stain without fading the color. Here’s how.

How long should the cherry juice stain be pre-treated before washing with laundry detergent?

When dealing with tough stains like cherry juice, effective pre treatment methods are key. I recommend using a stain remover or a mixture of vinegar and water. If the stain persists, try alternative stain removal techniques before washing with laundry detergent.

Conclusion

In the end, getting cherry juice out of clothing isn’t an impossible task. It requires quick action and identifying the fabric. Rinse with cold water and pre-treat with stain remover. Then, wash with laundry detergent, try alternative methods, and dry the clothing.

However, the most important step is prevention. Avoid spills by being mindful and cautious. Keep stain remover on hand for emergencies.

Advertisement

Remember, stains are like scars. They remind us of the past. But with a little effort and attention, we can remove them and move forward with clean and unblemished clothing.

So, don’t let a cherry juice stain ruin your day. Take action, follow these steps, and keep your clothes looking their best.

Continue Reading

Trending

Copyright © 2024 The Graceful Kitchen Affiliate disclaimer As an affiliate, we may earn a commission from qualifying purchases. We get commissions for purchases made through links on this website from Amazon and other third parties.