As a lover of all things sweet and fruity, I have always been fascinated by the idea of making my own jelly using juice. While there have been many suggestions on how to do it, I wanted to uncover the actual process and share my results with you.
So, after some research and trial and error, I’ve come up with a foolproof method for making homemade jelly from your favorite juice.
First things first, you’ll need to gather your ingredients and equipment. Don’t worry, it’s nothing too complicated. You’ll need juice, pectin, sugar, jars with lids, and a large pot for cooking.
Once you have everything you need, it’s time to get started on making your delicious homemade jelly. So, let’s dive in and I’ll guide you through the process step by step.
Key Takeaways
- Making homemade jelly requires juice, pectin, sugar, jars with lids, and a large pot.
- Boil the juice to concentrate flavors and add pectin and sugar. Troubleshoot by adjusting the amount of pectin/sugar or juice and test with a spoon or candy thermometer.
- Store the jars in a cool, dark place and label them with the date made. They can be stored for up to a year at room temperature or 6 months in the fridge, or frozen for up to 2 years.
- Homemade jelly can be used in a variety of ways, such as a glaze for meats, appetizer with brie cheese, mix into BBQ sauce, drizzle over ice cream, or fill thumbprint cookies. Creative presentation ideas include using different shapes and sizes of jars and adding fruit slices to the bottom. Alternative ingredients like honey or maple syrup can be used instead of sugar.
Gather Your Ingredients and Equipment
Before you start, make sure you’ve got everything you need: a pot, juice, sugar, pectin, and jars. Creative presentation is also important, so consider using different shapes and sizes of jars or adding fruit slices to the bottom for a pop of color. If you want to try something different, you can also experiment with alternative ingredients like honey or maple syrup instead of sugar.
Once you’ve gathered all your ingredients and equipment, it’s time to prepare your juice.
Prepare Your Juice
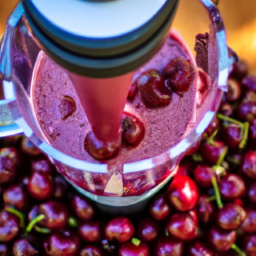
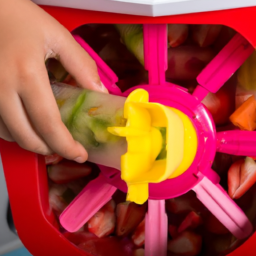
To start, you’ll need some fresh fruit and a juicer to extract the liquid gold that will serve as the base for your delicious spread. Imagine the juicer as a miner, sifting through the rough exterior of the fruit to reveal the valuable treasure within.
When selecting your juice, it’s important to choose a flavor that you enjoy and that will complement the other ingredients in the recipe. Popular options include grape, apple, and strawberry, but feel free to experiment with different fruits to create your own unique flavor.
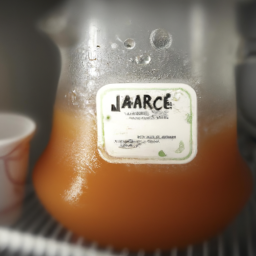
Once you have your juice, it’s time to prepare it for the jelly-making process. Start by pouring your juice into a large saucepan and bringing it to a boil over medium heat. This will help to concentrate the flavors and make it easier to add the pectin and sugar in the next step.
With your juice prepared, it’s time to move on to the next step of the jelly-making process: adding pectin and sugar.
Add Pectin and Sugar
Now that you’ve boiled your fruit nectar, it’s time to add the pectin and sugar to give your spread its signature texture and sweetness.
First, I usually stir in the pectin, which dissolves into the liquid and thickens it slightly. This step is crucial to achieve the desired jelly consistency.
Then, I slowly pour in the sugar, stirring continuously until it’s fully incorporated and the mixture is smooth. The amount of sugar you add will depend on your personal taste, and there are various flavor variations you can experiment with, such as adding spices or herbs.
As you stir in the sugar, you’ll notice the aroma of the fruit intensifying, making your mouth water in anticipation of the final product.
Once everything is well combined, you can start thinking about the next step: cooking your mixture. This will help set the jelly and give it the perfect texture.
Cook Your Mixture
As you cook the mixture, the flavors will meld together and the scent will fill your kitchen, making your mouth water with anticipation for the finished product. Keep stirring the mixture constantly to prevent it from burning or sticking to the bottom of the pot.
The mixture will slowly start to thicken as the pectin and sugar mix together with the juice. You can adjust the consistency by cooking it for a longer or shorter time depending on how thick you want your jelly to be.
If you encounter any problems, such as the mixture not thickening or becoming too thick, there are a few troubleshooting techniques you can try. If the mixture is not thickening, try adding more pectin or sugar to the mixture. If the mixture is becoming too thick, try adding more juice to the mixture to thin it out.
Once the mixture has reached the desired consistency, remove it from the heat and move on to the next step of testing your jelly to ensure that it has set properly.
Test Your Jelly
Now that I’ve cooked my jelly mixture, it’s time to test it.
There are two ways I can do this: using the spoon test or using a candy thermometer.
To perform the spoon test, I’ll dip a spoon into the jelly and watch how it drips off. If it drips in sheets or with a jelly-like consistency, it’s ready.
Alternatively, I can use a candy thermometer to check the temperature of the jelly. It should reach 220°F (104°C) for it to set properly.
Use the Spoon Test
Quickly check the consistency of your jelly with the Spoon Test. Simply dip a spoon into the hot jelly mixture and hold it up to eye level. If the jelly drips off the spoon in a sheet or gels together on the spoon, it’s ready to be canned. However, if it drips off the spoon in drops, it needs to be cooked longer.
The Spoon Test is a quick and easy way to ensure that your jelly will set properly and have the perfect texture. Using the Spoon Test can evoke a sense of excitement and satisfaction as you see the jelly come together on the spoon. It can also spark creativity as you think of alternative methods for using the jelly, such as spreading it on toast or using it as a glaze for meats.
Additionally, experimenting with different flavor variations can add a personal touch to the jelly and make it even more enjoyable to eat. However, if you’re aiming for a specific texture, it’s important to use a candy thermometer to ensure that the jelly reaches the correct temperature.
Use a Candy Thermometer
To ensure that your homemade jelly has the perfect texture, you’ll want to use a candy thermometer. Using a candy thermometer allows for accuracy in temperature control, which is crucial in achieving the desired consistency of your jelly.
Jelly making requires bringing the juice and sugar mixture to a precise temperature, typically between 220 and 225 degrees Fahrenheit. Without a thermometer, it can be difficult to know when the mixture has reached the correct temperature, leading to over or undercooked jelly.
While a candy thermometer is the most accurate way to control the temperature, there are alternatives. Some people use a meat thermometer or a digital thermometer, but these may not be as precise as a candy thermometer. It’s important to note that not using a thermometer at all can lead to inconsistent results.
However, the drawback of using a candy thermometer is that it may not be suitable for all types of pots or pans. Additionally, it may take some practice to get the hang of using a thermometer to make jelly.
Now that you’ve achieved the perfect texture for your jelly, it’s time to fill your jars.
Fill Your Jars
Don’t forget to tightly pack your jars with the colorful and sweet juice, ensuring that each spoonful of jelly will transport you to a moment of pure joy.
Here are some tips to keep in mind when filling your jars:
- Use a funnel to avoid any spills or messes.
- Leave about 1/4 inch of headspace at the top of each jar.
- Wipe off any excess jelly from the rim of the jar before placing the lid on top.
- Label each jar with the date and flavor of the jelly, and consider adding some jar decoration for a personal touch.
Once you have all your jars filled, it’s time to seal them up and let the jelly set.
To seal your jars, carefully screw on the lids and place them in a large pot of boiling water. Make sure the water covers the jars by at least an inch, and let them boil for about 10 minutes.
This process will create a vacuum seal and ensure that your jelly stays fresh for months to come.
Seal Your Jars
Once you’ve filled your jars with the delicious jelly, it’s time to seal them up and ensure their safety. Before sealing, it’s important to check each jar for any cracks or chips that could compromise the seal. Also, make sure to wipe the rims of the jars clean to remove any jelly residue that could prevent a proper seal.
To seal your jars, simply place a lid on top of each jar and then screw on the band until it’s just tight enough to hold the lid in place. Don’t overtighten the bands, as this could cause the lid to buckle and prevent a proper seal.
Once all the jars are sealed, it’s time to store them properly. Keep your jars in a cool, dark place, such as a pantry or cupboard, to prevent exposure to sunlight and heat which can cause the jelly to spoil.
Now that your jars are sealed and stored, it’s time to move on to the next step and process them for long-term storage.
Process Your Jars
Now you’re ready to take the next step in preserving your delicious jelly: processing your jars to ensure long-term storage. This step is crucial in making sure your jelly stays fresh for a long time. Below is a table that outlines the sterilization techniques and safety precautions you need to follow before processing your jars.
| Sterilization Techniques | Safety Precautions |
|---|---|
| Boiling jars and lids for 10 minutes | Use tongs to handle hot jars and lids |
| Heating jars in an oven at 225°F for 10 minutes | Do not touch the jars or lids with bare hands |
| Using a dishwasher on the hottest cycle | Empty dishwasher immediately after cycle and do not touch jars or lids with bare hands |
After processing your jars, you may want to decorate them and choose labels to make them look more appealing. This is entirely optional, but it can add a personal touch to your homemade jelly. Once you’ve completed this step, you’re ready to move on to the next section on how to store your jelly.
Store Your Jelly
To keep your homemade jelly fresh and tasty for as long as possible, you’ll need to store it properly. One of the best ways to store jelly is in sterilized jars with tight-fitting lids. Make sure to label the jars with the date you made the jelly so you know when it’s time to use it.
You can store your jelly at room temperature for up to a year, but for longer shelf life, consider refrigerating or freezing it. If you choose to refrigerate your jelly, it can last up to 6 months. Just make sure to keep it in an airtight container or jar to prevent any odors from affecting the taste.
For longer storage, freezing your jelly is the best option. It can last up to 2 years in the freezer without losing its flavor or texture. When you’re ready to use your jelly, just thaw it overnight in the refrigerator and it will be ready to enjoy!
Enjoy Your Delicious Homemade Jelly!
Savor the fruity goodness of your homemade jelly by spreading it on toast or mixing it into yogurt for a delectable treat. But don’t stop there! Get creative and use your homemade jelly in various ways to impress your friends and family.
Here are some serving suggestions:
- Use it as a glaze for roasted pork or chicken.
- Spread it over a wheel of brie cheese before baking for a delicious appetizer.
- Mix it into your favorite BBQ sauce for a sweet and tangy flavor.
- Drizzle it over vanilla ice cream for a fruity dessert.
- Use it to fill thumbprint cookies for a burst of flavor in every bite.
With these creative presentation ideas, you can turn your homemade jelly into a versatile ingredient that can be used in a variety of dishes. Impress your guests with your culinary skills and let the fruity goodness of your homemade jelly shine through.
Frequently Asked Questions
How long does it take for the jelly to set?
I find that jelly usually takes about 4-6 hours to set. If it’s not setting properly, try reducing the amount of liquid or adding more pectin. To switch up the flavors, experiment with different fruit juices or add in herbs like mint or lavender.
Can I use artificial sweeteners instead of sugar?
Artificial sweeteners can be used as an alternative to sugar in jelly making. They offer the benefits of being low in calories and not affecting blood sugar levels. However, they may not set as well as sugar.
Can I use frozen juice instead of fresh juice?
Yes, frozen juice can be used as an alternative to fresh juice when making jelly. However, the flavor may differ slightly due to the freezing process. It’s important to thaw the juice completely before using it in the recipe.
How do I prevent my jelly from crystallizing?
As they say, an ounce of prevention is worth a pound of cure. To prevent crystallization in jelly, try adding lemon juice or using pectin in the correct ratios. Troubleshoot common mistakes like overcooking or not enough sugar.
Can I add fruit chunks to my jelly?
Yes, adding fruit chunks to jelly is possible but may affect the consistency and shelf life. Fruitless jelly alternatives include using gelatin or pectin and adding texture with alternative ingredients like nuts or coconut flakes.
Conclusion
Well, that’s it! I’ve successfully made my own homemade jelly from juice. It was a fun and rewarding process that required some patience and attention to detail.
The result is a delicious spread that I can enjoy on toast, pancakes, or even as a glaze for meats.
But wait, there’s more! I can’t wait to experiment with different flavors and juices to create unique and tasty combinations. Maybe I’ll try adding some herbs or spices for an extra kick.
The possibilities are endless and I’m excited to continue my jelly-making journey. If you’re up for a fun and delicious challenge, give it a try yourself and see what creations you can come up with!