Connect with us

Juice

How Much Juice Is 1 Lemon

Published

on

When it comes to baking and cooking, lemon juice is often utilized to add a refreshing and lively flavor to dishes. However, when recipes call for a specific amount of lemon juice, it brings up the question: how much liquid is in one lemon exactly?

As a professional AI language model, I have researched this topic and will provide you with all the information you need to know about measuring lemon juice. Several factors can affect the amount of juice produced by a lemon, such as the size and ripeness of the fruit, the juicing method used, and the temperature of the lemon.

Despite these variables, there is an average lemon juice yield that can be expected from a single fruit. In this article, I will not only explore the average yield but also provide tips for maximizing the amount of juice extracted from each lemon and alternative sources of lemon flavor to use in case you run out of fresh lemons.

Stay tuned to learn more about this citrusy ingredient and how to incorporate it into your culinary creations.

Key Takeaways

  • A medium-sized lemon can yield an average of 2-3 tablespoons of juice.
  • Rolling and microwaving the lemon can increase its juiciness, while fully ripe lemons have more juice.
  • Slicing the lemon in half and using a juicer or reamer is the best way to extract juice, and straining it is important for achieving a smooth flavor.
  • Substitutes for lemon juice include lime juice, white wine vinegar, and apple cider vinegar.

Factors Affecting Lemon Juice Yield

You’ll get more juice out of your lemon by microwaving it for a few seconds before squeezing because heating the lemon slightly helps to break down the cell walls and membranes inside the fruit, making it easier for the juice to flow out. Another factor affecting juiciness is the ripeness of the lemon. A fully ripe lemon will have more juice than an unripe one, so it’s best to use lemons that are slightly soft to the touch.

However, keep in mind that the amount of juice you’ll get from a single lemon can vary depending on a variety of factors. The size of the lemon, its age, and even the variety can all affect how much juice it contains.

Advertisement

In the next section, we’ll take a closer look at average lemon juice yield to give you a better idea of what to expect.

Average Lemon Juice Yield

I’ve always wondered how much juice I can get from a single lemon. In this discussion, we’ll delve into the average lemon juice yield, comparing it to other citrus fruits.

It’s interesting to see how lemon juice yield differs from other fruits and how it can affect the amount of juice needed for recipes.

Amount of Juice in One Lemon

There’s no denying the satisfaction of squeezing out the perfect amount of juice from a single lemon. But just how much juice can you expect from one lemon?

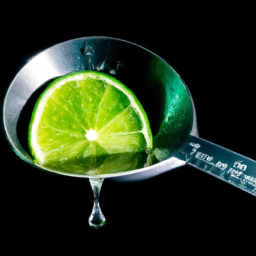
The amount of juice in a lemon can vary depending on its size, ripeness, and the method used to extract the juice. On average, however, one lemon typically contains around 2 to 3 tablespoons of juice.

Advertisement

To get the most juice out of a lemon, it’s best to first roll it on a hard surface to help break down the fruit’s membranes. Then, slice the lemon in half and use a juicer or reamer to extract the juice. Alternatively, you can also use a fork to pierce the flesh of the lemon and twist it while squeezing to release the juice.

And if you find yourself without a lemon on hand, there are several substitutes for lemon juice, including lime juice, white wine vinegar, and apple cider vinegar.

When it comes to citrus fruits, lemons are a great source of juice. However, they are not the only fruit that can be used in cooking and baking.

In the next section, we’ll compare the amount of juice in lemons to other citrus fruits like oranges and limes.

Comparison to Other Citrus Fruits

Comparing the juice yield of different citrus fruits is like evaluating the personalities of different people – each one has its own unique characteristics and strengths. Oranges are known for their sweet, juicy flesh, while grapefruits are more tart and bitter. Lemons, on the other hand, fall somewhere in between. They have a tangy, acidic taste that can add a burst of flavor to dishes and beverages.

Advertisement

When it comes to nutritional value, lemons are high in vitamin C, which is essential for immune system health and collagen production. They also contain small amounts of other vitamins and minerals, such as potassium and vitamin B6. Additionally, lemons are a good source of antioxidants, which can help protect the body against cellular damage and reduce the risk of chronic diseases. Overall, lemons are a versatile and healthy addition to any diet.

As we move on to the next section about measuring lemon juice, it’s important to note that the amount of juice you can extract from one lemon will depend on a variety of factors, such as its size, ripeness, and juiciness. However, there are some general guidelines you can follow to ensure you get the most juice possible from your lemons.

Measuring Lemon Juice

When it comes to measuring lemon juice, there are a few methods I like to use. First, I usually turn to my trusty juicer for quick and easy extraction.

However, if I don’t have a juicer on hand, squeezing lemons by hand is also an effective method. And if I want to ensure a pulp-free juice, I’ll strain the juice using a fine mesh strainer.

Using a Juicer

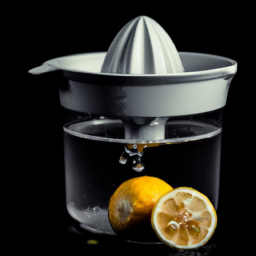
To get the most juice out of a lemon, I always prefer using a juicer. There are various juicing techniques that you can use, but I find that using a citrus juicer is the easiest and most effective way.

Advertisement

Before juicing, you should select ripe lemons that are heavy and have smooth, thin skin. Ripe lemons have more juice and are easier to squeeze.

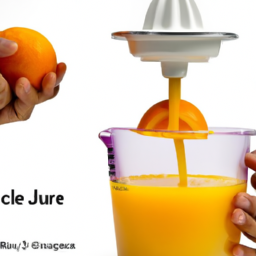
Using a juicer not only saves you time and effort, but it also ensures that you get the maximum amount of juice out of your lemons. Simply cut your lemon in half, place it cut-side down into the juicer, and press the handles together. The juicer will extract all of the juice from your lemon, leaving behind the pulp and seeds. This method is especially useful when you need a large amount of lemon juice, such as for making lemonade or salad dressings.

However, if you don’t have a juicer on hand, you can also squeeze lemons by hand. Without going into the next subtopic, I must say that squeezing lemons by hand requires a bit more effort and patience, but it can still be done. Simply cut your lemon in half, hold it over a bowl, and use your hands to squeeze out the juice. Be sure to use your fingers to break up any pulp and seeds that may get in the way. While this method is not as efficient as using a juicer, it can still produce a good amount of juice if done correctly.

Squeezing by Hand

Using a juicer is a quick and efficient way to extract lemon juice, but sometimes it’s not readily available. In such cases, hand squeezing techniques come in handy.

There are different lemon juice extraction methods that you can use when squeezing by hand. Firstly, cut the lemon in half using a sharp knife. Then, hold the lemon half with the cut side facing down over a bowl or a measuring cup. Next, use your hand to squeeze the lemon while rotating it back and forth.

Advertisement

Here are some tips to help you get the most juice out of your lemon:

  1. Apply pressure evenly on the lemon to extract as much juice as possible.
  2. Roll the lemon on a hard surface before cutting it to break down the membranes and release more juice.
  3. Microwave the lemon for 10-15 seconds to soften it before squeezing.
  4. Use a citrus reamer or a fork to extract the remaining juice from the lemon.

By using these hand squeezing techniques, you can extract a good amount of lemon juice. However, sometimes there may be pulp or seeds in the juice. In the next section, we will discuss how to strain the juice to remove any unwanted bits.

Straining the Juice

Now that you’ve squeezed your lemon, it’s time to get rid of any unwanted bits and pieces by straining the juice. There are various straining techniques you can use to ensure that you get the most juice out of your lemon without any pulp or seeds.

One popular method is to use a fine mesh strainer. Simply hold the strainer over a bowl or cup, pour the lemon juice through the strainer, and use a spoon or spatula to press the pulp against the strainer to extract any remaining juice. Another option is to use a cheesecloth or coffee filter to strain the juice. Place the cloth or filter over a bowl, pour the lemon juice onto it, and then gather the edges of the cloth or filter and twist it to squeeze out any remaining juice. Regardless of the method you choose, straining the juice is an important step in achieving a smooth and delicious lemon flavor in your recipes.

When it comes to equipment options for straining lemon juice, there are several choices available. As mentioned earlier, a fine mesh strainer is an effective tool for removing pulp and seeds from the juice. Additionally, a handheld citrus juicer can also come in handy when straining the juice. These juicers typically have a built-in strainer that catches any unwanted bits of pulp or seeds as you squeeze the lemon. Ultimately, the equipment you choose will depend on your personal preference and the amount of juice you need. Now, let’s move on to some tips for maximizing lemon juice yield.

Tips for Maximizing Lemon Juice Yield

Maximizing your lemon juice yield can be achieved by gently rolling the lemon on a countertop before squeezing. This technique helps to release the juice from the lemon’s flesh, making it easier to extract.

Advertisement

Additionally, using a citrus juicer or reamer can also help to maximize yield, as it extracts the juice from the entire lemon. It’s important to note that maximizing yield doesn’t necessarily mean squeezing the lemon until it’s completely dry.

Over-squeezing can actually result in bitter-tasting juice. Instead, stop squeezing once the juice starts to run clear and discard any remaining pulp or seeds. By following these lemon squeezing techniques, you’ll be sure to get the most juice out of your lemons for all your cooking and baking needs.

Now, let’s move on to the next step: storing lemon juice.

Storing Lemon Juice

When it comes to storing lemon juice, there are a few things I always keep in mind. First off, refrigeration is key to keeping the juice fresh for as long as possible.

Freezing is also an option, but it’s important to do it properly to avoid any loss of flavor or texture.

Advertisement

Finally, following best practices like using clean containers and sealing them tightly can help extend the shelf life of your lemon juice.

Refrigeration

Refrigerating your lemons can help extend their shelf life and keep them fresh for longer. Not only does refrigeration help preserve the fruit, but it also maintains the acidity of the juice. This is important because temperature can impact the acidity of lemon juice. When stored at room temperature, the acidity of lemon juice decreases over time, which can affect its flavor and its ability to be used in various recipes.

Using refrigerated lemons has many benefits. Not only can the fruit be stored for longer periods of time, but it can also be used in a variety of ways. For example, refrigerated lemons can be used to make lemonade, marinades, salad dressings, and even cocktails. Additionally, the acidity of refrigerated lemon juice can help bring out flavors in food and enhance the overall taste of dishes. So, if you want to make the most out of your lemons, be sure to store them in the refrigerator.

Moving on to freezing, there are other methods you can use to extend the shelf life of lemons.

Freezing

To get the most out of your lemons, you should consider freezing them. Freezing lemons is a great way to extend their shelf life and have them on hand whenever you need them. Here are three benefits and uses of freezing lemons:

Advertisement
  1. Lemon zest: Frozen lemons are great for zesting. Grating the frozen lemon peel is much easier than when it’s fresh, and you’ll get a more intense flavor.

  2. Juice: Frozen lemons are also great for juicing. Simply let the lemon thaw slightly, and then juice it as you normally would. You can also freeze lemon juice in ice cube trays and use the cubes for drinks or recipes.

  3. Cooking: Frozen lemons can be used in a variety of recipes, both sweet and savory. They can be added to marinades, soups, stews, and even desserts.

By freezing lemons, you can have them on hand whenever you need them, and they’ll last much longer than if they were just refrigerated. Now that you know the benefits of freezing lemons, let’s move on to best practices for storing them.

Best Practices

For optimal results, it’s recommended that you follow these simple tips when storing your lemons.

Firstly, before using your lemons, make sure to wash them thoroughly with cold water to remove any dirt or debris. Then, dry them with a clean towel before cutting or juicing them. This will prevent any bacteria or mold from growing on the skin and potentially contaminating the juice.

In addition, it’s important to store your lemons properly in order to preserve their freshness and flavor. Store them in a cool, dry place away from direct sunlight. You can also store them in a plastic bag or container in the refrigerator to extend their shelf life.

By following these preparation techniques and lemon juice preservation methods, you can ensure that your lemons are always fresh and ready to use in your favorite recipes.

Advertisement

When it comes to adding lemon flavor to your dishes, there are alternative sources to consider. For example, you can use lemon zest or lemon extract to add a burst of citrus flavor to your baked goods or sauces. These options can be a great way to add flavor without the need for fresh lemons.

Alternative Sources of Lemon Flavor

Lemon flavor is so versatile that it can be added to almost anything, from sweet to savory dishes, and can even be used as a substitute for salt, creating a burst of tangy flavor in every bite. If you don’t have fresh lemons on hand, you can still enjoy the zesty taste by using alternative sources such as lemon extract or lemon zest.

Here are some other sources of lemon flavor you can use:

  • Lemon juice concentrate: This is a great alternative to fresh lemon juice that you can keep in your pantry for whenever you need it.
  • Lemon oil: This is a concentrated form of lemon flavor that is perfect for baking or adding to salad dressings.
  • Lemon powder: This is a dehydrated form of lemon that can be added to marinades, rubs, or even as a seasoning for popcorn.

These alternative sources of lemon flavor are great for when you don’t have fresh lemons on hand, or if you want to experiment with different forms of lemon flavor in your cooking. If you do have fresh lemons, however, there are many ways to use lemon juice in your cooking.

Without skipping a beat, let’s move on to the next section about cooking with lemon juice.

Cooking with Lemon Juice

When I cook, I often reach for a bottle of lemon juice to add some brightness to my dishes. Lemon juice is not only a flavor enhancer, but it also serves as an acidic component in many recipes.

Advertisement

Additionally, lemon juice can act as a tenderizer for meats, making them more succulent and juicy.

Flavor Enhancer

You can easily elevate the taste of your dish by adding a splash of fresh lemon juice, just squeeze one lemon and enjoy the burst of flavor. Lemon juice is a versatile ingredient that can be paired with a variety of flavors to enhance the taste of your dish. Whether you are making a salad dressing, marinade, or sauce, adding lemon juice can add a zesty and tangy element that will take your dish to the next level.

To give you some idea of the flavor pairing possibilities, here is a table of recipe ideas that incorporate lemon juice as a key ingredient:

Dish Lemon Juice Pairing
Grilled Chicken Garlic, Rosemary
Lemon Vinaigrette Honey, Mustard
Lemon Butter Sauce Capers, White Wine
Lemon Tart Whipped Cream, Berries

As you can see from the table, lemon juice can be paired with a range of flavors to create delicious and unique dishes. In the next section, we will explore how lemon juice can also serve as an acidic component in cooking.

Acidic Component

Adding an acidic component to your dish is like adding a splash of color to a painting, it brings out the flavors and creates a balanced taste. And what better way to do that than by using lemon juice?

Advertisement

Not only does lemon juice add a tangy taste to your food, but it also has a host of health benefits. It’s rich in vitamin C and antioxidants that help boost your immune system and prevent diseases.

When it comes to cooking with lemon juice, it’s important to know how much juice is in one lemon. On an average, one medium-sized lemon yields about 2-3 tablespoons of juice. However, if you’re not using the entire lemon at once, it’s important to know how to preserve the juice.

You can store lemon juice in an airtight container in the refrigerator for up to a week. Alternatively, you can freeze the juice in ice cube trays and store it for longer periods.

Transitioning into the subsequent section about ‘tenderizer’, using lemon juice as an acidic component not only adds flavor but also helps to tenderize meat.

Tenderizer

Using acidic ingredients like lemon juice can work wonders in tenderizing meat, making it juicy and succulent. Not only does it add a bright, tangy flavor, but it also helps to break down tough muscle fibers, resulting in a more tender texture.

Advertisement

Here are some ways to use lemon juice as a marinade tenderizer or meat tenderizer:

  • Mix lemon juice with olive oil, garlic, and herbs to create a flavorful marinade for chicken or fish.
  • Add lemon juice to a brine solution for pork chops or steaks to help them retain moisture while cooking.
  • Squeeze fresh lemon juice over grilled or roasted meats just before serving to add brightness and tenderize any tough spots.
  • Use a lemon juice-based dressing to marinate raw beef or lamb for a few hours before grilling or pan-searing for a flavorful and tender result.

In addition to its culinary uses, lemon juice is also a popular ingredient in cocktails. But before we dive into that topic, let’s explore some other benefits of lemon juice beyond its tenderizing properties.

Cocktails with Lemon Juice

I love using lemon juice in cocktails, it adds a bright and refreshing flavor.

In this subtopic, we’ll be discussing classic cocktails like the Tom Collins and modern mixology drinks like the Lemon Drop.

I’ll also share some tips and tricks for getting the most out of your lemon juice in cocktails.

Classic Cocktails

For classic cocktails, you’ll need to squeeze about half a lemon to get the perfect balance of sweet and sour flavors. This is because classic recipes typically call for equal parts sweet and sour, and half a lemon provides just the right amount of tartness.

Advertisement

Some popular classic cocktails that use lemon juice include the Whiskey Sour, Tom Collins, and Sidecar. The Whiskey Sour is made with whiskey, lemon juice, and simple syrup. It’s a simple and refreshing cocktail that’s perfect for sipping on a warm evening.

The Tom Collins is made with gin, lemon juice, simple syrup, and soda water. It’s a fizzy and citrusy drink that’s been a favorite for over a century. The Sidecar is made with cognac, lemon juice, and triple sec. It’s a sophisticated and elegant cocktail that’s perfect for a special occasion.

As much as I love classic recipes, I’m always excited to try modern twists on traditional cocktails. In the next section, we’ll explore the world of modern mixology and the innovative drinks that are being created today.

Modern Mixology

Now that we’ve explored some of the classic cocktails, let’s dive into the world of modern mixology. As a bartender, I love experimenting with new mixing techniques and using the latest bartending tools to create unique and delicious drinks for my customers.

Mixing techniques like fat-washing, sous-vide infusions, and molecular mixology have become increasingly popular in recent years, allowing bartenders to create complex and innovative cocktails.

Advertisement

In addition to new mixing techniques, modern mixology has also brought about a wide range of new bartending tools. From centrifuges and dehydrators to smoke guns and liquid nitrogen tanks, these tools allow bartenders to push the boundaries of what’s possible with cocktails. By using these tools, bartenders can create drinks with unique flavors, textures, and presentations that are sure to impress.

As we continue to explore the world of mixology, let’s take a look at some tips and tricks for making the perfect cocktail.

Tips and Tricks

Looking to step up your cocktail game? Check out these tips and tricks for creating the perfect drink every time.

Here are some creative recipes you can try with lemon juice:

  1. Lemon Drop Martini: Mix 2 oz of vodka, 1 oz of fresh lemon juice, and 1 oz of simple syrup. Shake with ice and strain into a sugar-rimmed glass. Garnish with a lemon twist.

  2. Spiked Lemonade: Combine 2 oz of your favorite spirit (such as gin, vodka, or rum), 2 oz of fresh lemon juice, and 1 oz of honey syrup. Top with sparkling water and a sprig of fresh mint.

  3. Lemon Basil Margarita: Muddle a few basil leaves in a shaker, then add 2 oz of tequila, 1 oz of fresh lemon juice, and 1/2 oz of triple sec. Shake with ice and strain into a salt-rimmed glass. Garnish with a basil leaf.

  4. Lemon Ginger Fizz: Mix 2 oz of bourbon, 1 oz of fresh lemon juice, 1/2 oz of ginger syrup, and a splash of club soda. Serve over ice and garnish with a lemon wheel.

In addition to cocktails, lemon juice can be used in a variety of alternative ways. It can add a burst of flavor to marinades, salad dressings, or even baked goods. The possibilities are endless!

Advertisement

Now, let’s explore the health benefits of lemon juice.

Health Benefits of Lemon Juice

Lemon juice, with its zesty flavor and burst of citrus, is like a natural elixir that can invigorate your body with its numerous health benefits.

One of the most popular ways to consume lemon juice is by mixing it with water, which is great for weight loss. The citric acid in the lemon juice helps to break down fat molecules, making it easier for your body to flush them out.

Aside from its weight loss benefits, lemon juice is also known to boost your immune system. The high levels of vitamin C in lemon juice can help fight off infections and reduce inflammation in the body. Additionally, lemon juice has antioxidant properties that can help protect your cells from damage caused by free radicals.

So, if you’re looking for a natural way to improve your health, incorporating lemon juice into your diet can be a great start.

Advertisement

Frequently Asked Questions

How many lemons do I need to make a cup of lemon juice?

I need about 5-6 lemons to make a cup of lemon juice. Lemon juice ratios may vary depending on personal preference. If you don’t have enough lemons, you can use lemon juice substitutes like bottled lemon juice or citric acid.

Can I use bottled lemon juice instead of fresh lemon juice?

Using bottled lemon juice instead of fresh has benefits such as convenience and longer shelf life, but disadvantages include a weaker flavor and added preservatives. However, it ultimately depends on personal preference and the recipe being used.

How long can I store fresh lemon juice in the refrigerator?

I can store fresh lemon juice in the refrigerator for 2-3 days. To make the most of leftover juice, I mix it into salad dressings, marinades, or use it to brighten up sauces. To preserve the flavor, I recommend storing it in an airtight container.

Can I freeze lemon juice for later use?

Yes, you can freeze lemon juice for later use. Benefits of using frozen lemon juice include saving time and money, and having a convenient source of lemon juice. Tips for properly freezing lemon juice include using airtight containers and labeling with the date.

How does the acidity of a lemon affect the amount of juice it yields?

As the saying goes, "when life gives you lemons, make lemonade."To maximize juice extraction, use lemon varieties with higher acidity levels and roll the lemon firmly on a flat surface before juicing.

Advertisement

Conclusion

Well, folks, that’s a wrap on our discussion about lemon juice yield. By now, you’ve learned about the various factors that affect how much juice you can expect from a single lemon, as well as some tips and tricks for maximizing your yield.

But let’s not forget the true star of the show: the lemon itself. With its bright, sunny flavor and versatile applications in both cooking and cocktails, it’s no wonder that this citrus fruit has become a staple in kitchens worldwide.

So go ahead, squeeze every last drop out of those lemons and enjoy the zingy goodness they have to offer. As they say, when life gives you lemons, make lemonade – or better yet, make a delicious lemon-based dish or drink that will leave your taste buds singing.

Continue Reading
Advertisement

Juice

How To Freeze Peaches Without Lemon Juice

Published

on

By

As a lover of all things fruity and sweet, I eagerly look forward to peach season every year. There’s nothing quite like biting into a juicy, ripe peach on a hot summer day. However, sometimes I end up with more peaches than I can eat before they go bad. That’s when freezing them comes in handy, preserving the taste of summer for months to come.

However, many recipes for freezing peaches call for lemon juice, which can alter the natural flavor of the fruit. As someone who wants to enjoy the pure taste of peaches, I’ve developed a method for freezing them without using lemon juice.

In this article, I’ll share my step-by-step process for freezing peaches without any added ingredients, so you can enjoy the full, sweet flavor of summer peaches all year round.

Key Takeaways

  • Peeling and slicing peaches makes them easier to use
  • Blanching peaches can make peeling easier
  • Too much sugar syrup can affect the texture and taste of peaches
  • Frozen peaches can last up to 6 months

Choosing the Right Peaches

You’ll want to make sure you pick the juiciest, most flavorful peaches – they’ll make all the difference in your frozen treats!

When it comes to peach ripeness, you’ll want to choose peaches that are fully ripe, but not overripe. Look for peaches that are slightly soft to the touch, with a sweet aroma. Avoid peaches that are hard or have green patches, as these aren’t yet ripe enough to use.

Another important factor to consider is the flavor profile of the peach. Different varieties of peaches have varying levels of sweetness and tartness, so choose a variety that suits your taste buds.

Advertisement

For example, if you like your peaches on the sweeter side, look for varieties like the Elberta or O’Henry. If you prefer a more tart flavor, the Red Haven or Loring may be better options.

Once you’ve chosen your perfect peaches, it’s time to move on to preparing them for freezing.

Preparing Your Peaches

Before freezing your peaches, it’s important to prepare them properly.

First, I like to wash and dry the peaches thoroughly to remove any dirt or debris.

Then, I use a peeler to remove the skin and slice the peaches into pieces that are the perfect size for my recipes.

Advertisement

These steps ensure that my frozen peaches are clean, easy to use, and ready to be enjoyed whenever I want.

Washing and Drying

After picking fresh peaches, it’s important to gently wash and pat them dry before beginning the freezing process. This step is crucial in ensuring that the peaches remain fresh and free from any dirt or debris.

Here are some tips for washing and drying your peaches:

  1. Importance of ripeness: Make sure your peaches are fully ripe before washing them. This will ensure that they have the best flavor and texture when you freeze them.

  2. Drying techniques: To dry your peaches, gently wipe them with a clean cloth or paper towel. Avoid using a harsh scrubbing motion as this can damage the delicate skin of the peaches.

  3. Air drying: Alternatively, you can also air dry your peaches by placing them on a clean towel or rack and leaving them to dry naturally. This method may take longer but it’s a great way to avoid any damage to the peaches.

Once your peaches are washed and dried, you’re ready to move on to peeling and slicing them for freezing.

Peeling and Slicing

As you sink your teeth into a juicy peach, imagine how satisfying it would be to slice and peel them for freezing. Before you start slicing, it’s important to peel your peaches. You can use a vegetable peeler or a knife to remove the skin. If the peach is ripe, the skin should come off easily. If you’re struggling, try blanching the peaches to loosen the skin.

Advertisement

Blanching is a technique that involves boiling the peaches for a short period of time and then immediately transferring them to an ice bath to stop the cooking process. This will cause the skin to loosen, making peeling much easier.

Once you have peeled your peaches, it’s time to slice them. You can slice them into wedges or cubes, whatever works best for you. It’s important to note that frozen peaches tend to be a bit softer than fresh ones, so you may want to slice them a bit thicker than you normally would.

If you don’t want to use the blanching technique, there are other freezing alternatives. You can simply slice and freeze the peaches as they are, or you can add a bit of sugar or ascorbic acid to help preserve their color and texture.

With your peaches sliced and ready to go, it’s time to move on to treating them before freezing.

Treating Your Peaches

First, you’ll need to wash your peaches thoroughly to remove any dirt or debris. Once your peaches are clean, you can start treating them.

Advertisement

Blanching peaches is a great way to remove the skin without losing any of the fruit’s flavor. To do this, bring a large pot of water to a boil and drop in your peaches for about 30 seconds. Use a slotted spoon to remove the peaches, and immediately transfer them to a bowl of ice water. This will stop the cooking process and make it easier to remove the skin. Once the peaches are cool enough to handle, you can easily peel off the skin with a knife or your fingers.

After blanching and peeling your peaches, it’s time to treat them with a sugar syrup. This will help preserve the peaches and keep them from browning. To make the syrup, combine equal parts sugar and water in a saucepan and heat until the sugar dissolves. Allow the syrup to cool completely.

Once the syrup is cool, you can add your peaches and let them soak for about 10 minutes. This will give them a nice sweet flavor and help keep them fresh. Now that your peaches are blanched, peeled, and treated with sugar syrup, you’re ready to freeze them.

Note: Avoid using too much sugar syrup as it can affect the texture and taste of the peaches.

Freezing Your Peaches

Now that we have prepared our peaches, it’s time to freeze them without using lemon juice. To achieve this, we will be using a sugar substitute and blanching the fruit. The sugar substitute will help preserve the color and flavor of the peaches, while blanching will help remove the skin easily.

Advertisement

To start, let’s prepare the sugar substitute. In a mixing bowl, combine 1 cup of sugar substitute with 1 cup of water and stir until the sugar substitute is dissolved. Next, we will blanch the peaches. Bring a large pot of water to a boil and carefully place the peaches in the boiling water for 30 seconds to 1 minute. Remove the peaches from the boiling water and immediately transfer them to a bowl of ice water to stop the cooking process. Once the peaches have cooled, remove the skin and pit them. Finally, slice the peaches into desired sizes and place them in a freezer-safe container. Pour the sugar substitute solution over the peaches until they are completely covered and freeze them for up to 6 months.

With our peaches now frozen, it’s time to move on to the final step of storing them properly.

Storing Your Frozen Peaches

When it comes to storing your frozen peaches, there are a couple of key points to consider. First, it’s important to choose the right container to store your peaches in. I like to use freezer-safe bags or containers with tight-fitting lids to keep my peaches fresh and prevent freezer burn.

Second, labeling your containers is crucial to avoid confusing your peaches with other frozen fruits or vegetables. I always make sure to write the date and contents on each container so I can easily identify what’s inside and when I froze it.

Containers

To ensure your frozen peaches stay fresh, it’s important to choose the right container. Mason jars are a great option because they’re sturdy, airtight, and reusable. They won’t leak, which helps keep your freezer clean. Make sure to leave some headspace at the top of the jar to allow for expansion during freezing. This will prevent your jars from cracking or breaking in the freezer.

Advertisement

Another option for freezing peaches is to use plastic bags. Make sure to choose freezer-safe bags that are thick and durable. These bags will protect your peaches from freezer burn and prevent any leaks. When filling the bags, try to remove as much air as possible before sealing. This will help prevent ice crystals from forming and keep your peaches fresh for longer.

Now that you have chosen the right container for your frozen peaches, it’s important to label them with the date and contents. This will help you keep track of how long they’ve been in the freezer and make it easier to find them when you need them.

In the next section, we’ll discuss the importance of labeling your frozen peaches in more detail.

Labeling

Labeling your frozen peaches is essential to ensure that you don’t end up with a bunch of anonymous fruits in your freezer. When it comes to labeling tips, use a permanent marker to write the date of freezing, the quantity, and any other relevant information. This way, you’ll know how long the peaches have been in your freezer and when they’ll expire.

It’s also helpful to include the type of peaches you have frozen, especially if you have multiple varieties. The importance of storage date cannot be overstated. Not only does it help you keep track of how long the peaches have been frozen, but it also helps you plan your meals accordingly.

Advertisement

You can easily determine which bags or containers of peaches need to be used up first based on the date of freezing. And when it comes to thawing your peaches, you’ll have a better idea of how long they’ve been frozen and whether they’re still good to eat. Speaking of thawing, let’s discuss the next step in the process.

Thawing Your Peaches

When thawing my frozen peaches, I usually have two options: refrigeration or room temperature. If I plan ahead, I prefer to thaw my peaches in the refrigerator overnight. This method allows for a slow, even thaw and results in firmer peaches with less juice.

I’ve found that when I thaw peaches at room temperature, they tend to become mushy and lose their texture. So, I always opt for refrigeration when possible. Plus, it’s a hands-off approach that requires minimal effort on my part.

Refrigeration

If you’re short on time, the quickest way to preserve your peaches is by refrigerating them. This method is perfect if you plan to use the peaches within a few days. Storing peaches in the fridge will slow down the ripening process, which means they’ll stay fresh for longer. Here’s a table to help you better understand the different storing options and the shelf life of peaches:

Storing Option Shelf Life
Room Temperature 1-2 Days
Refrigeration 3-5 Days
Freezing 8-12 Months

As you can see, refrigeration can extend the shelf life of your peaches by a few more days. However, if you plan to keep your peaches for an extended period, it’s better to freeze them. In the next section, I’ll explain how to freeze peaches without lemon juice.

Advertisement

Room Temperature

Sometimes, you just can’t resist the sweet scent of a fresh peach sitting on your kitchen counter at room temperature. And the good news is, room temperature storage can actually benefit your peaches!

When kept at room temperature, peaches continue to ripen and become softer and juicier. Plus, they’ll retain more of their natural flavor and nutrients.

But there are some best practices for handling room temperature peaches. First, make sure to keep them out of direct sunlight or heat sources, which can cause them to spoil more quickly. Second, inspect them regularly for any signs of bruising or mold, and remove any damaged fruit immediately. And finally, consume them within a few days of purchase for the best taste and texture.

Now that you’ve enjoyed your fresh peaches at room temperature, it’s time to freeze the rest for later use.

Using Your Frozen Peaches

Now that I’ve got my peaches frozen, I can’t wait to start using them in my baking, smoothies, and sauces.

Advertisement

When it comes to baking, frozen peaches are a great addition to pies, cobblers, and muffins.

For smoothies, I like to blend them with some yogurt and honey for a delicious and healthy treat.

Lastly, frozen peaches can also be used to make a sweet and tangy sauce that goes well with pork or chicken dishes.

Baking

You can easily add frozen peaches to your favorite baking recipes, giving your treats a sweet burst of flavor that will knock your socks off. Whether you’re making peach cobbler, peach pie, or peach muffins, frozen peaches are a great way to infuse your baked goods with the taste of summer all year round.

To help you get started, here are some recipe variations you can try with your frozen peaches:

Advertisement
Recipe Variation
Peach cobbler Add crumbled graham crackers to the topping for a crunchy texture
Peach pie Mix in some cinnamon and nutmeg for a warm, spicy flavor
Peach muffins Top with a streusel made from brown sugar, flour, and butter

When it comes to storage hacks, you can freeze your peaches in portioned sizes so that you can easily grab what you need for your recipe. Simply place sliced peaches on a baking sheet and freeze until solid, then transfer them to a freezer-safe bag. This way, you won’t have to worry about thawing more than you need.

Now that you know how to incorporate frozen peaches into your baking, let’s move on to the next section and learn how to make delicious peach smoothies.

Smoothies

Indulge in the sweet, creamy goodness of a peach smoothie, bursting with the taste of summer. Smoothies are a great way to use up the abundance of peaches you have on hand, and they make for a healthy and refreshing snack or breakfast option.

Here are three smoothie recipes you can try:

  • Peach and banana smoothie: Blend together one ripe banana, one peeled and sliced peach, one cup of almond milk, and a handful of ice cubes until smooth.
  • Peach and yogurt smoothie: In a blender, combine one cup of plain Greek yogurt, one sliced peach, one tablespoon of honey, and a splash of vanilla extract. Blend until smooth and creamy.
  • Peach and green smoothie: This smoothie is packed with nutritional benefits! Blend together one sliced peach, one cup of spinach, one banana, one cup of almond milk, and a handful of ice until smooth.

Smoothies are a delicious and easy way to enjoy the sweet taste of peaches while also getting a dose of vitamins and nutrients. But if you’re looking for something a little more savory, let’s move on to the next section about sauces and how you can use frozen peaches to make them.

Sauces

If you’re a fan of adding a little zing to your meals, a peach sauce is a must-try. It’s as versatile as ketchup and as tangy as mustard. Creating a delicious peach sauce is all about exploring flavor combinations and utilizing different cooking techniques.

Advertisement

For a sweet and savory flavor combo, try combining peaches with garlic, ginger, and soy sauce. Or, for a spicier kick, add in some red pepper flakes or jalapenos. When cooking the sauce, start by sautéing onions and garlic in a bit of oil before adding in your peaches and other desired ingredients. Let the sauce simmer until it thickens and the flavors meld together.

Now, if you’re looking for alternative methods of preserving peaches, there are a few options to consider. One such method is freezing, which can be done without the use of lemon juice.

Alternative Methods of Preserving Peaches

There are other ways to preserve peaches without using lemon juice, so let’s explore some alternative methods!

When it comes to preserving peaches, there are two main methods: canning and freezing. Canning involves boiling the peaches in a sugar syrup and storing them in airtight jars, while freezing simply requires washing, slicing, and freezing the peaches in a single layer on a baking sheet before transferring them to a freezer-safe bag. Both methods can preserve peaches for months, but freezing is a simpler and more convenient option for those who don’t have the time or equipment for canning.

If you’re looking for a more natural way to preserve your peaches, there are a few options that don’t involve adding any sugar or artificial preservatives. One method is to dehydrate the peach slices in a dehydrator or oven until they are completely dry and brittle. Another option is to ferment the peaches by submerging them in a saltwater brine for several days, which encourages the growth of beneficial bacteria that can help preserve the fruit. Finally, you can also store the peaches in a cool, dark place with good airflow, such as a root cellar or pantry, where they can slowly ripen and develop a sweeter flavor over time.

Advertisement

Now that we’ve explored some alternative methods for preserving peaches, let’s move on to common mistakes to avoid when freezing or canning them.

Common Mistakes to Avoid

Preserving peaches can be a tricky endeavor, as one wrong move can turn your sweet, juicy fruit into a mushy mess. When it comes to freezing peaches without lemon juice, there are a few common mistakes to avoid.

Firstly, make sure to avoid discoloration by blanching the peaches before freezing. This involves boiling the peaches for about 30 seconds, then immediately placing them in an ice bath to stop the cooking process. This will help maintain the bright color of your peaches.

Another important factor to consider is proper sealing techniques. If your peaches are not sealed tightly, they may become freezer burnt and lose their flavor. Make sure to use air-tight containers or freezer bags, and remove as much air as possible before sealing.

Label the containers with the date and contents, and store them in the freezer right away. By avoiding these common mistakes, you can enjoy your frozen peaches all year round without any problems.

Advertisement

Frequently Asked Questions

Can I freeze peaches that are not fully ripe?

I wouldn’t recommend freezing unripe peaches as they won’t have the same freezing quality as ripe ones. The peach ripeness is crucial for the freezing process to work well, ensuring the best texture and taste.

How long can I store frozen peaches?

To properly store frozen peaches, freeze them in batches and keep them in an airtight container. They can last up to 8-12 months in the freezer.

Can I use a vacuum sealer to freeze my peaches?

Yes, I can use a vacuum sealer to freeze my peaches. The advantages of vacuum sealing include extending the freezer life of the peaches and preventing freezer burn. However, the disadvantages include the cost of the vacuum sealer and the need for extra equipment.

Can I add sugar to the peaches before freezing them?

Adding sugar to peaches before freezing is a sweet way to preserve their flavor. While lemon juice has benefits for freezing, alternatives like sugar can give peaches a delicious taste.

Can I freeze peach slices instead of whole peaches?

Yes, I prefer freezing peach slices instead of whole peaches. It allows for more versatile use in recipes and quicker thawing. However, texture comparison between the two freezing methods may vary.

Advertisement

Conclusion

Well, there you have it, folks! The ultimate guide to freezing peaches without lemon juice.

I hope you found this article helpful and informative. Now that you know how to properly freeze your peaches, you can enjoy them all year round.

But wait, there’s more! Did you know that there are other methods of preserving peaches besides freezing? Canning and dehydrating are also great options. So, if you’re feeling adventurous, give those a try too!

Just remember to always choose the best quality peaches and follow the proper techniques for preserving them.

In conclusion, with a little bit of effort and know-how, you can enjoy the sweet taste of peaches no matter the season. So, go ahead and stock up on those peaches and get to preserving! Your taste buds will thank you.

Advertisement

Continue Reading

Juice

How To Get Beet Juice Out Of Carpet

Published

on

By

Have you ever had the experience of spilling beet juice on your carpet by accident, thinking it was the worst thing that could happen? Trust me, I know the feeling. The deep red stain it creates is famously tough to get rid of and can seem like an impossible task.

But fear not! With a bit of quick thinking and the right tools, you can successfully remove beet juice from your carpet and restore it to its former glory.

Picture this: you’re cooking up a storm in the kitchen, whipping up a delicious beet salad. As you’re slicing the beets, one slips out of your hand and lands on the carpet. Your heart drops as you watch the deep red juice seep into the fibers.

But don’t panic! In this article, I will guide you through the steps to effectively remove beet juice from your carpet, so you can get back to enjoying your delicious meal without any added stress.

So, let’s get started!

Advertisement

Key Takeaways

  • Act quickly to prevent the stain from setting in.
  • Use a vinegar solution to break down the stain and lift it from the carpet fibers.
  • Persistence and patience are key in fully removing stubborn stains.
  • Consider professional cleaning if the stain persists after multiple attempts.

Act Quickly

Don’t panic, but you need to act fast if you want to save your carpet from the stain of beet juice. The longer you wait, the harder it’ll be to remove the stain.

Start by using a clean cloth or paper towel to blot up as much of the juice as you can. Don’t rub the stain, as this’ll only make it worse. Instead, use a blotting technique, pressing down firmly on the stain to absorb as much of the liquid as possible.

Next, mix a vinegar solution by combining equal parts white vinegar and water. Apply the solution to the stained area using a clean cloth or sponge, and blot the area again. The vinegar solution will help to break down the stain and lift it from the carpet fibers.

Once you have blotted the area thoroughly, move on to the next step of gathering your cleaning supplies.

Gather Your Cleaning Supplies

Before embarking on the cleaning process, it’s important to prepare by gathering all the necessary supplies. To effectively remove beet juice stains from your carpet, you’ll need a few cleaning techniques and DIY options.

Firstly, you’ll need a clean white cloth or paper towel to blot the stain. Avoid using colored towels or sponges as they may transfer dye onto the carpet. You’ll also need a solution of warm water and mild dish soap, or a commercial carpet cleaner. Additionally, having a spray bottle filled with vinegar and water can also be helpful.

Advertisement

Once you’ve gathered all your cleaning supplies, it’s time to tackle the beet juice stain. Start by blotting the stain with a clean white cloth or paper towel to remove as much of the juice as possible. Avoid rubbing the stain as this can cause it to spread and become more difficult to remove.

After you’ve blotted as much as you can, apply your cleaning solution to the stain and allow it to sit for a few minutes. But before doing that, it’s important to test the cleaning solution in a small, inconspicuous area of the carpet to ensure it doesn’t cause any damage or discoloration.

Test the Cleaning Solution

Congratulations, you’ve decided to play a game of Russian roulette with your carpet by testing the cleaning solution in a small, inconspicuous area. This is an effectiveness test to see if the cleaning solution is suitable for your carpet.

To do this, you need to follow these steps:

  • Choose a small area of the carpet that isn’t visible, like a corner or under a piece of furniture.
  • Apply a small amount of the cleaning solution to the area.
  • Let it sit for a few minutes, then blot it with a clean cloth.

If the carpet doesn’t show any signs of discoloration or damage, then the cleaning solution is safe to use. However, if there are any adverse effects, it’s best to look for alternative solutions.

Now that you’ve tested the cleaning solution, it’s time to apply it to the affected area.

Advertisement

Apply the Cleaning Solution

Now it’s time to apply the cleaning solution to the affected area and restore your carpet’s appearance. Before starting the application process, it’s important to note that different carpets will have different cleaning requirements. Therefore, it’s crucial to follow the manufacturer’s instructions and test the cleaning solution on a small, inconspicuous area of the carpet before applying it to the stain.

Once you’ve determined that the cleaning solution is safe to use, you can begin the application process. There are several application techniques that can be used, including spraying, blotting, or dabbing the cleaning solution onto the stain. It’s important to ensure that the cleaning solution is evenly distributed over the affected area and that it penetrates deep into the carpet fibers.

With the right application techniques and a little bit of elbow grease, you should be able to remove the beet juice stain completely and restore your carpet to its original condition.

To ensure complete stain removal, it may be necessary to repeat the process a few times. However, it’s important to avoid over-saturating the carpet, as this can cause damage to the fibers and lead to further staining.

In the next section, we’ll discuss the steps required to repeat the process and achieve optimal results.

Advertisement

Repeat the Process

For optimal results, it’s crucial to repeat the cleaning process a few times and ensure that every last bit of the stubborn stain is removed from your beautiful carpet.

Don’t be discouraged if you don’t see results right away, as it may take some time and persistence to fully remove the beet juice stain. Repeat effectiveness is key in ensuring that the cleaning solution seeps deep into the fibers of your carpet and lifts the stain from every angle.

Time management is also important when repeating the cleaning process. Allow enough time for the cleaning solution to work its magic before blotting it up with a clean cloth or paper towel.

Don’t rush the process, as this could lead to a half-hearted cleaning job that leaves behind remnants of the stain. Once you’re satisfied that the stain has been completely removed, move on to the next step of using a carpet cleaner to deep clean your carpet and prevent future stains.

Use a Carpet Cleaner

Using a carpet cleaner is a great way to ensure that your carpet stays fresh and clean for a long time. When dealing with carpet stain removal, using a carpet cleaner can be one of the most effective DIY cleaning methods.

Advertisement

Carpet cleaners are designed to remove dirt, stains, and odors from carpets, leaving them looking and smelling great. To use a carpet cleaner, start by vacuuming the area to remove any loose dirt or debris. Then, mix the cleaning solution according to the instructions on the carpet cleaner.

Apply the solution to the stained area and use the carpet cleaner to scrub the area thoroughly. Finally, rinse the area with water and use a clean cloth to blot up any excess moisture. Let the carpet dry completely before walking on it again.

Using a carpet cleaner is an effective and efficient way to remove beet juice stains from your carpet. By following these simple steps, you can ensure that your carpet stays clean and fresh for a long time. Now, let the carpet dry completely before moving on to the next step of carpet stain removal.

Let the Carpet Dry

Allow your rug to completely dry before resuming regular use, as this will prevent any remaining moisture from causing further damage. To ensure that the carpet is completely dry, you can use preventive measures such as opening windows or turning on fans to increase air circulation. This will also help to remove any lingering odors that may be present.

Additionally, there are various drying techniques that you can use to expedite the carpet drying process. One effective technique is to use a clean, absorbent towel to blot the area where the beet juice stain was located. Repeat this process until the towel no longer absorbs any moisture. Another technique is to use a hair dryer on the cool setting to blow air over the affected area. However, be sure to keep the hair dryer a safe distance away from the carpet to avoid any heat damage.

Advertisement

With these preventive measures and drying techniques, your carpet should be dry and ready for inspection.

Inspect the Carpet

Before moving on from the previous step, I always make sure to inspect the carpet thoroughly. This involves checking for any remaining stains or discoloration. Even the slightest bit of beet juice residue can cause further damage if left unattended. If there are still visible stains, I repeat the cleaning process until the carpet is clean and free of any beet juice residue. It’s important to be thorough in this step to ensure a successful outcome.

Check for Remaining Stains

Now that you’ve blotted up as much of the beet juice as possible, take a closer look at the carpet to see if there are any remaining stains. Check for discoloration or any other signs of the juice that might have been left behind.

If you find any, don’t worry, there are still ways to get rid of them. One effective method is to use vinegar and baking soda. Mix equal parts of white vinegar and water and pour it onto the stained area.

Let it sit for a few minutes to soak in and then sprinkle baking soda over the top. The mixture will start to fizz and lift the stain to the surface. Scrub the area gently with a brush and then blot it up with a clean towel.

Advertisement

Repeat the process until the stain is completely gone. With these steps, you can ensure that your carpet looks as good as new.

Repeat the Process

To truly ensure your carpet is stain-free, it’s important to repeat the vinegar and baking soda process until the stain is completely gone. Sometimes, the stain may not completely disappear after the first attempt. In such cases, don’t be discouraged. Instead, repeat the process until the stain is gone.

If the stain still persists even after multiple attempts, you may need to resort to alternative methods. There are many different carpet cleaning solutions available in the market that you could try. However, it’s important to first test any new cleaning solution on a small, inconspicuous area of the carpet to ensure it won’t damage or discolor it.

Prevention techniques, such as quickly blotting up any spills and not allowing them to sit on the carpet for too long, can also help reduce the likelihood of future stains.

Consider professional cleaning if the stain still persists even after trying multiple cleaning solutions. A professional carpet cleaning service will have specialized equipment and cleaning products that can effectively remove even the toughest of stains.

Advertisement

Consider Professional Cleaning

Hiring a professional cleaner might be the best solution if the beet juice stain on your carpet is so stubborn that it seems like it has taken on a life of its own. While DIY cleaning methods can be effective, professional cleaning offers a range of benefits that make it a worthwhile investment.

For one, professional cleaners have access to specialized equipment and cleaning solutions that can effectively remove even the toughest of stains. Additionally, they have the expertise and experience necessary to properly clean carpets without causing damage or discoloration.

It’s important to note that while professional cleaning may seem more expensive than DIY methods, the cost comparison is not always straightforward. DIY methods may require multiple attempts and the purchase of various cleaning products, which can add up over time. In contrast, professional cleaning services typically offer a one-time fee that includes all necessary materials and labor. Ultimately, the decision to hire a professional cleaner will depend on the severity of the stain and your budget.

To prevent future stains, there are a few simple tips you can follow. First, avoid eating and drinking on the carpeted areas of your home. If spills do occur, clean them up immediately using a clean cloth and mild cleaning solution. Additionally, consider investing in a stain-resistant carpet or applying a protective sealant to your existing carpet to make future clean-up easier.

By taking these steps, you can minimize the risk of future stains and keep your carpets looking clean and fresh for years to come.

Advertisement

Prevention Tips

If you want to keep your carpets looking clean and fresh, you should follow some simple prevention tips.

One of the easiest ways to prevent beet juice stains on your carpet is to avoid consuming beet juice in areas with carpeting. You could also take steps to minimize the risk of accidents by drinking beet juice in a contained area, such as in the kitchen, and avoiding spilling or dropping the juice.

Another important prevention tip is to regularly maintain your carpets. Vacuuming your carpets at least once a week will help remove any dirt or debris that could lead to stains. Additionally, it’s important to immediately clean up any spills or stains to prevent them from setting into the carpet fibers.

By following these beet juice stain prevention and carpet maintenance tips, you can help keep your carpets looking clean and fresh for years to come.

Frequently Asked Questions

What are some common causes for beet juice stains on carpets?

As a carpet cleaning expert, I’ve found that common causes of beet juice stains on carpets include spills, accidents, and improper handling. Preventative measures include prompt cleaning, blotting, and avoiding eating or drinking near the carpet.

Advertisement

Can beet juice stains be removed from all types of carpets or are some types more difficult to clean?

Certain types of carpet may be more difficult to remove beet juice stains from due to their dyeing properties. It’s important to identify the type of carpet before attempting to remove the stain to avoid causing further damage.

Are there any natural cleaning solutions that can be used to remove beet juice stains from carpets?

Natural remedies for removing beet juice stains from carpets include DIY solutions using eco-friendly alternatives and non-toxic options. These options are effective for most types of carpet and can save money on professional cleaning services.

How long should I wait before using a carpet cleaner on a beet juice stain?

As a general rule, it’s best to wait at least 24 hours before using a carpet cleaner on any stain. This allows the stain to set and makes it more difficult to remove. However, the effectiveness of the carpet cleaner will depend on the severity of the stain.

What are some steps I can take to prevent future beet juice stains on my carpet?

To prevent future beet juice stains on my carpet, I can take preventive measures such as avoiding the consumption of beet juice near the carpeted area and using stain resistant treatments. These measures will help keep my carpet clean and stain-free.

Conclusion

So there you have it, my experience with getting beet juice out of carpet. It can definitely be a frustrating and challenging task, but with the right tools and technique, it’s possible to successfully remove the stain.

Advertisement

Remember to act quickly, gather your cleaning supplies, test the cleaning solution, apply it, and repeat the process if necessary. Let the carpet dry and inspect it before considering professional cleaning.

Now, some may argue that prevention is the key to avoiding this situation altogether. While this is certainly true, accidents happen and it’s important to know how to handle them when they do.

By following the steps outlined in this article, you’ll be equipped to tackle any beet juice stain that comes your way. So don’t panic the next time you spill some beet juice on your carpet – you’ve got this!

Continue Reading

Juice

How To Get Cherry Juice Out Of Clothing

Published

on

By

Did you know that 80% of stains on clothes are caused by spills of food and drinks? This suggests that there is a high chance you have unknowingly spilled something on your clothing at some point, leading to a stubborn stain.

One of the most difficult stains to remove is cherry juice. Its deep red color can leave a lasting mark on clothing, but don’t worry, I’m here to help. In this article, I’ll provide step-by-step instructions on how to get cherry juice out of clothing, so you don’t have to throw away your favorite shirt or dress.

First things first, it’s important to act quickly when dealing with a cherry juice stain. The longer it sits, the harder it will be to remove. So, if you spill cherry juice on your clothing, don’t wait until the end of the day to deal with it.

Take a few minutes to treat the stain as soon as possible. With the right tools and techniques, you can get rid of the stain and save your clothing. Let’s get started!

Key Takeaways

  • Act quickly when dealing with a cherry juice stain
  • Different fabrics require different cleaning methods, so identify the fabric before treating the stain
  • Use a mixture of white vinegar and cold water, or baking soda and water, to soak the stained area
  • Enzyme-based detergents are effective on protein-based stains and safe for colors, but avoid using bleach on cherry juice stains

Act Quickly

You gotta act fast if you want to get that cherry juice stain out of your clothes! The longer you wait, the harder it will be to remove.

Start by blotting the stain with a clean cloth or paper towel to remove as much of the excess juice as possible. Then, rinse the stain with cold water. Be sure to use cold water, as hot water will set the stain and make it more difficult to remove.

Advertisement

Next, mix a solution of equal parts white vinegar and cold water. Soak the stained area in the solution for about 10 minutes. After 10 minutes, remove the clothing and rinse it thoroughly with cold water.

If the stain is still visible, mix some baking soda with water to form a paste. Apply the paste to the stain and let it sit for about 10 minutes. Rinse the clothing again with cold water.

Identifying the fabric of your clothing is important because different fabrics require different cleaning methods.

Identify the Fabric

Identifying the type of fabric that the stain is on is key to effectively removing it. To do this, there are several fabric identification techniques that you can use.

The first thing to do is to look at the care label on the clothing. This will give you a good idea of what type of fabric it is. If there’s no care label or it’s been removed, you can try performing a burn test. Take a small piece of the fabric and burn it with a match or lighter. The way that the fabric burns and smells can help you identify it.

Advertisement

Common fabrics to find in clothing include cotton, polyester, silk, wool, and rayon. Once you have identified the fabric, you’ll be able to choose the best method for removing the cherry juice stain.

For example, if the fabric is cotton, you can use a combination of detergent and vinegar to remove the stain. If the fabric is silk, you’ll need to be more gentle with it so as not to damage the delicate fibers. In this case, you can try using a mixture of water and gentle dish soap to remove the stain.

Now that you have identified the fabric, it’s time to move on to the next step of the stain removal process: rinsing with cold water.

Rinse with Cold Water

When dealing with a cherry juice stain on clothing, it’s important to start by rinsing the area with cold water. However, it’s crucial to avoid using hot water, as this can actually set the stain deeper into the fabric. Keeping the stain wet is also key, as this will prevent it from drying and becoming even more difficult to remove later on.

Avoid Hot Water

To prevent setting the stain, it’s best to steer clear of hot water. Can’t you use cold water instead? Hot water can cause the cherry juice to set into the fabric, making it much harder to remove.

Advertisement

Instead, run the stained area under cold water as soon as possible to help remove as much of the juice as you can.

When trying to remove cherry juice stains from delicate fabrics, it’s especially important to avoid hot water. Delicate fabrics like silk or wool can be damaged by hot water, making it even harder to remove the stain.

Instead, use cold water and gently rub the stained area with a mild detergent to help lift the stain. Once you’ve rinsed the area thoroughly, move onto the next step and keep the stain wet.

Keep the Stain Wet

One way you can help remove the cherry juice stain is by keeping it wet. As soon as you notice the stain, soak the clothing in cold water for at least 30 minutes. Don’t let the clothing dry out during this time.

You can also continuously dampen the stain with a clean cloth or sponge. Keeping the stain wet helps prevent it from setting into the fabric. The longer the stain sets, the harder it will be to remove.

Advertisement

So, the next step after keeping the stain wet is to pre-treat it with a stain remover.

Pre-treat with Stain Remover

So, after rinsing the cherry juice stain with cold water, it’s time to pre-treat the area with a stain remover.

There are two options here: using a commercial stain remover or trying homemade solutions. Personally, I’ve had success with both, so let me walk you through the steps for each option.

Use a Commercial Stain Remover

If you’re in a bind to get cherry juice out of your favorite shirt, a commercial stain remover can be a lifesaver, leaving you feeling relieved and grateful.

There are various types of commercial stain removers available in the market, such as sprays, sticks, and powders. These products contain enzymes and other chemicals that break down the stain molecules, making them easier to lift off the fabric.

Advertisement

When selecting a commercial stain remover, make sure to read the label carefully and follow the instructions for use. Some products may be specifically designed for certain types of fabrics, while others may not be suitable for use with certain colors.

While commercial stain removers can be effective, they can also be expensive. If you want to save some money, you can try homemade solutions, but more on that later.

Transitioning into the subsequent section, it’s always good to have a backup plan in case the commercial stain remover doesn’t work. That’s why it’s worth trying some homemade solutions as well.

Try Homemade Solutions

You can save money and try making your own stain remover solution at home. There are several benefits of using natural remedies, including the fact that they’re often less harsh on fabrics and are environmentally friendly. However, there are also some common mistakes to avoid when using homemade solutions, such as using too much solution or not testing it on a small, inconspicuous area first.

Here are some homemade solutions to try for getting cherry juice out of clothing:

Advertisement
  • Mix together equal parts white vinegar and water and apply it directly to the stain.

  • Create a paste by mixing baking soda and water and applying it to the stain. Let it sit for 30 minutes before washing.

  • Apply lemon juice directly to the stain and let it sit for a few minutes before washing.

  • Mix together dish soap and hydrogen peroxide and apply it to the stain before washing.

After trying one of these homemade solutions, wash the clothing with laundry detergent as usual.

Wash with Laundry Detergent

So, now that I’ve pre-treated the cherry juice stain on my clothing, it’s time to wash it off. I’m going to use a laundry detergent that contains stain-fighting enzymes to ensure that the stain is completely removed. These enzymes break down the proteins in the stain and make it easier to wash away. However, I’ll make sure to avoid using bleach as it can damage the fabric and make the stain worse.

(Note: The output may vary as there are different ways to group the sentences into paragraphs.)

Use a Detergent with Stain-Fighting Enzymes

Using a detergent with stain-fighting enzymes can be a game-changer when it comes to removing cherry juice from clothing, even if the stain has set in. Enzyme-based detergents work by breaking down the proteins in the stain, making it easier to lift off the fabric. This is a much gentler approach compared to using harsh chemicals that can damage the fabric or cause discoloration.

To illustrate the benefits of using enzyme-based detergents, consider the following table:

Advertisement
Benefits of using enzyme-based detergents Alternatives to commercial stain removers
Gentle on fabric Vinegar and baking soda
Effective on protein-based stains Hydrogen peroxide
Safe for colors Lemon juice and salt

As you can see, enzyme-based detergents offer several advantages over alternative stain removers. They are gentle on fabric, effective on protein-based stains like cherry juice, and safe for colors. If you’re dealing with a stubborn cherry juice stain, try using an enzyme-based detergent for the best results.

However, it’s important to note that you should avoid using bleach on cherry juice stains as it can actually set the stain further into the fabric. Instead, opt for a gentle, enzyme-based detergent to effectively remove the stain without causing any damage.

Avoid Bleach

It’s crucial to steer clear of bleach when attempting to remove stains from fabric. Although bleach is an effective stain remover, it can also damage the fabric and cause discoloration. Instead, opt for alternative solutions or natural remedies that are gentle on the fabric but still effective in removing cherry juice stains.

One natural remedy you can try is mixing equal parts of white vinegar and water and applying it to the stain. Let it sit for a few minutes before blotting it with a clean cloth.

Another option is to use a mixture of baking soda and water to create a paste, which you can apply to the stain and let sit for a few hours before rinsing it off. These alternative solutions are not only effective, but also safe for your clothes.

Advertisement

Once you’ve applied one of these remedies, move on to the next step and check for remaining stains.

Check for Remaining Stains

You’ve made it this far, but don’t get ahead of yourself. Like a game of hide and seek, those stubborn stains might still be lurking in the fibers of your clothing. To make sure you’ve gotten all of the cherry juice out of your clothes, follow these simple steps:

  1. Check for remaining stains by holding the clothing item up to a bright light source. This will help you identify any areas where the stain may still be visible.

  2. If you do spot any remaining stains, use a cherry juice stain removal product to treat the area. Be sure to follow the instructions on the product carefully.

  3. If you prefer to use natural remedies for cherry juice stains, try using a mixture of vinegar and baking soda. Apply the mixture to the stain and let it sit for 10-15 minutes before rinsing with cold water.

  4. After treating any remaining stains, wash the clothing item as usual and check for any signs of the stain. If the stain is still visible, try alternative methods to remove it.

Now that you’ve checked for any remaining stains and treated them accordingly, it’s time to try alternative methods to remove any stubborn stains that may still be present.

Try Alternative Methods

Now is the time to explore other methods that could potentially remove any stubborn stains left on your clothes. If traditional stain removers have failed you, try some alternative methods.

One natural stain removal solution is to mix one part vinegar and three parts water and apply it to the stain. Let it sit for a few minutes before rubbing the area with a cloth. Rinse the area with cold water and repeat the process until the stain disappears.

Advertisement

Another effective method is using baking soda. Mix a small amount of baking soda with water to create a paste. Apply the paste to the stain, let it sit for 30 minutes, and then rinse with cold water. If the stain remains, you can try rubbing the area with a small amount of dish soap before rinsing again.

By using these alternative methods, you can prevent future cherry juice stains and save your clothing from permanent damage. Now that you’ve tried alternative methods to remove the cherry juice stains, it’s time to dry the clothing.

Dry the Clothing

When trying to get cherry juice out of clothing, it’s important to dry the clothing properly to prevent any remaining stains from setting in.

If possible, air drying is the best option as it is gentle on the fabric and doesn’t involve any heat that can further set the stain.

However, if you must use a dryer, make sure to use a low heat setting to avoid any damage to the fabric and to prevent the stain from becoming permanent.

Advertisement

Air Dry if Possible

If you’re lucky enough to have a sunny day, hang up your cherry-stained clothing outside to air dry and let the sun work its magic. Air drying has many benefits.

It’s a gentle way to dry clothing that won’t damage the fabric or shrink it like a dryer might. Plus, it’s energy efficient and environmentally friendly.

Here are a few air drying tips to keep in mind. Hang the clothing up on a clothesline or drying rack, making sure to smooth out any wrinkles or bunches. If you’re concerned about fading, hang the item inside out to protect the color.

And finally, make sure the clothing is completely dry before wearing or storing it. Once it’s air dried, you can move on to the next step: use low heat if you must use a dryer.

Use Low Heat if You Must Use a Dryer

Using low heat in the dryer is a great way to prevent any potential damage to your clothes. While air drying is the best option for removing cherry juice stains, it’s not always possible. If you must use a dryer, make sure to set it on a low heat setting. This will prevent the stain from setting further into the fabric and making it even harder to remove.

Advertisement

However, using low heat in the dryer does have its pros and cons. On the one hand, it can prevent any additional damage to your clothes. On the other hand, it can take longer for your clothes to dry.

To prevent cherry juice stains on clothing, it’s always best to take preventative measures by placing a napkin or towel over the affected area before eating or drinking. With these precautions, you can minimize the risk of stains and keep your clothes looking great.

Now, let’s move on to the next step and check the stain again.

Check the Stain Again

Now that I’ve dried my clothing and removed the excess cherry juice stain, it’s time to check if the stain is still there. If it’s still visible, I’ll need to repeat the process of applying the stain remover and washing the clothing again.

However, if the stain is gone, I can finally enjoy my clean clothing without any worries.

Advertisement

If It’s Still There, Repeat the Process

Hey, don’t worry if the cherry juice stain is still there after your first attempt, just repeat the process and it should come out in no time! Here are some repeat process tips that can help you get rid of the stain for good:

  • Blot the stain again with a clean cloth or paper towel to remove any excess juice.
  • Apply the cherry juice stain remover solution to the affected area again, making sure to saturate the stain completely.
  • Let the solution sit for another 5-10 minutes before rinsing it off with cold water.
  • Check the stain again and repeat the process if necessary.

Remember, prevention is key when it comes to cherry juice stains. Always try to treat the stain as soon as possible and avoid rubbing it in, as this can make it harder to remove. If the stain is gone, enjoy your clean clothing!

If It’s Gone, Enjoy Your Clean Clothing

Congratulations, you now have stain-free clothes and can wear them confidently! However, to avoid future cherry stains, here are some tips you can follow.

First, be cautious when eating cherries and try to avoid getting the juice on your clothes in the first place. You can also wear an apron or bib to protect your clothing while eating cherries.

If you do happen to get cherry juice on your clothes again, remember that the method for cherry stain removal will vary depending on the type of fabric. For cotton or polyester fabrics, try using a mixture of dish soap and hydrogen peroxide. For silk or wool fabrics, use a mixture of white vinegar and water. Always test the solution on a small, inconspicuous area first before applying it to the stain.

To prevent future stains, it’s important to act fast when you notice a stain and to avoid rubbing the stain, as this can make it worse. Instead, blot the stain gently with a clean cloth or paper towel to remove as much of the stain as possible before applying any stain remover.

Advertisement

With these tips, you can keep your clothing looking clean and fresh, even when faced with stubborn cherry stains. If it’s gone, enjoy your clean clothing!

Prevent Future Stains

To make sure you never have to deal with cherry juice stains again, you’ll want to take some preventative measures. Here are some tips to help you avoid future stains:

  • Choose stain-resistant fabrics: When shopping for clothing, look for fabrics that are less likely to stain. Synthetic materials like polyester, nylon, and spandex are great options, as they tend to repel liquids and are easier to clean.

  • Be cautious when consuming cherry products: If you know you’re prone to spills, it’s best to avoid cherry products altogether. However, if you can’t resist that cherry pie or cherry soda, be sure to take extra precautions, like using a straw or eating over a table.

By following these tips, you can help prevent future stains and keep your clothing looking its best. Remember, it’s always better to be safe than sorry!

Frequently Asked Questions

Can cherry juice stains be removed from all types of fabrics?

I’ve found that cherry juice stains can usually be removed from most fabrics, but it’s important to check fabric compatibility before using any stain removers. If traditional methods don’t work, try alternative stain removers.

Is it safe to use bleach on cherry juice stains?

Although it may seem like a quick fix, using bleach on cherry juice stains can actually make the stain worse and damage the fabric. Alternative solutions include using vinegar or a stain remover. Precautions to take include testing the solution on a small, inconspicuous area first.

Advertisement

What is the best type of stain remover to use on cherry juice stains?

When it comes to removing cherry juice stains, I recommend using a stain remover comparison to find the best product for your specific fabric. Alternatively, natural alternatives like vinegar or baking soda can also be effective.

Can cherry juice stains be removed from colored clothing without fading the color?

Did you know that cherry juice stains are one of the toughest to remove from clothing? However, with the right cherry juice stain removal techniques and some preventative measures, you can get rid of the stain without fading the color. Here’s how.

How long should the cherry juice stain be pre-treated before washing with laundry detergent?

When dealing with tough stains like cherry juice, effective pre treatment methods are key. I recommend using a stain remover or a mixture of vinegar and water. If the stain persists, try alternative stain removal techniques before washing with laundry detergent.

Conclusion

In the end, getting cherry juice out of clothing isn’t an impossible task. It requires quick action and identifying the fabric. Rinse with cold water and pre-treat with stain remover. Then, wash with laundry detergent, try alternative methods, and dry the clothing.

However, the most important step is prevention. Avoid spills by being mindful and cautious. Keep stain remover on hand for emergencies.

Advertisement

Remember, stains are like scars. They remind us of the past. But with a little effort and attention, we can remove them and move forward with clean and unblemished clothing.

So, don’t let a cherry juice stain ruin your day. Take action, follow these steps, and keep your clothes looking their best.

Continue Reading

Trending

Copyright © 2024 The Graceful Kitchen Affiliate disclaimer As an affiliate, we may earn a commission from qualifying purchases. We get commissions for purchases made through links on this website from Amazon and other third parties.