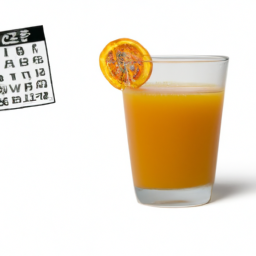
Connect with us

Juice

How Long Does Juice From A Juicer Last

Published

on

If you’re someone who pays close attention to your health and enjoys making your own juice, you might be curious about the shelf life of freshly prepared juice before it spoils. It’s understandable; no one wishes to invest effort and resources into preparing a juice only for it to spoil before enjoying it. However, fear not, for I have conducted thorough research on this topic and am eager to pass along the valuable information I have gathered to you.

First, let’s address the elephant in the room: some people believe that juice from a juicer doesn’t last long at all. They think that the minute you turn off the juicer, the juice starts to spoil. While it’s true that juice from a juicer does have a limited shelf life, it’s not as short as some people might think.

In fact, with the right juicer and storage techniques, you can enjoy fresh, healthy juice for up to three days after juicing. In this article, we’ll explore the factors that affect the shelf life of juice, as well as some tips and tricks for extending its life so you can enjoy it longer.

Key Takeaways

  • Freshly made juice can last up to three days if stored properly.
  • Masticating juicers are more efficient at extracting juice from leafy greens and wheatgrass, and juice from a masticating juicer can last for up to 72 hours without losing its nutritional value.
  • Batch juicing and pasteurization are effective preservation methods, but may result in a loss of nutrients and enzymes.
  • Proper food safety practices, including washing hands and storing juice in a refrigerator, can ensure safe consumption of fresh juice.

Factors that Affect the Shelf Life of Juice

Hey, did you know that the shelf life of juice from your juicer can be affected by factors such as the type of fruit or vegetable you use, how you store it, and when you consume it?

Factors affecting oxidation include temperature, exposure to light, and the presence of air. Oxygen in the air reacts with the enzymes in the juice, causing it to break down and become less nutritious over time. This process is called oxidation, and it can lead to spoilage if the juice is not consumed promptly.

To extend the shelf life of your juice, it’s important to store it properly. The best containers for storing juice are airtight and opaque, such as glass jars or plastic bottles. Avoid storing juice in clear glass or plastic containers, as these allow light to penetrate and can accelerate spoilage.

Advertisement

Additionally, it’s best to store juice in the refrigerator at a temperature between 34 and 40 degrees Fahrenheit. This will slow down the process of oxidation and help to preserve the nutrients in the juice for longer.

Understanding oxidation and spoilage is crucial to keeping your juice fresh and nutritious, so let’s explore this topic further.

Understanding Oxidation and Spoilage

Understanding how quickly fresh-squeezed juice can turn from a vibrant, invigorating elixir to a murky, off-putting concoction is like watching a beautiful butterfly slowly lose its wings.

This process, known as oxidation, occurs when juice is exposed to air, light, and heat. It can cause a loss of nutrients, flavor, and color, as well as an increase in bacteria growth. To prevent oxidation and extend the shelf life of your juice, it’s important to store it properly in an airtight container in the refrigerator.

Spoilage indicators are another important factor to consider when assessing the freshness of your juice. Signs of spoilage include a sour or off taste, a cloudy appearance, and a strong odor. If you notice any of these signs, it’s best to discard the juice to avoid consuming harmful bacteria.

Advertisement

By understanding oxidation and spoilage indicators, you can better preserve the quality and safety of your juice. In the following section, we’ll explore some tips on how to extend the shelf life of your juice.

How to Extend the Shelf Life of Your Juice

As someone who loves to juice, I know how important it is to extend the shelf life of my juice.

One of the best ways to do this is to use fresh produce that isn’t already spoiled or oxidized.

Adding citrus or other acidic ingredients can also help to slow down the oxidation process and preserve the freshness of your juice.

Finally, it’s crucial to store your juice properly in an airtight container and in the fridge to maintain its quality and nutritional value.

Advertisement

Use Fresh Produce

To ensure your juice lasts as long as possible, make sure you’re using fresh produce when juicing. Using frozen produce may seem like a convenient option, but it can actually lead to a shorter shelf life for your juice.

This is because frozen produce has already gone through a process of freezing and thawing, which can affect its texture and nutrient content. Additionally, when blending with other liquids, such as water or milk, it’s important to make sure those ingredients are fresh as well.

Using fresh produce not only helps to extend the shelf life of your juice, but it also ensures that you’re getting the most nutrients possible. Fresh fruits and vegetables are loaded with vitamins, minerals, and antioxidants that can help to boost your immune system and improve your overall health.

When juicing, try to use produce that is in season and grown locally, as it will often be the freshest and most nutrient-dense. With fresh ingredients, you can enjoy your juice for up to three days in the refrigerator.

To further extend the shelf life of your juice, consider adding citrus or other acidic ingredients. This will help to preserve the juice and prevent it from spoiling as quickly. In the next section, we’ll discuss the benefits of adding these types of ingredients to your juice.

Advertisement

Add Citrus or Other Acidic Ingredients

Adding citrus or other acidic ingredients can give your juice a tangy kick and help it stay fresh for longer. Using acidic ingredients is a great way to balance flavors and prevent spoiling. Here are three ways acidic ingredients can help your juice last:

  1. Citrus fruits like lemons, limes, and oranges are high in citric acid. This acid can preserve the juice by inhibiting bacterial growth.

  2. Other acidic ingredients like apple cider vinegar or cranberry juice can also keep your juice fresh. They lower the pH level, making it harder for bacteria to thrive.

  3. Balancing your juice’s flavors with acidic ingredients can make it more enjoyable to drink. Acidic flavors cut through sweetness and add a refreshing tang.

By adding acidic ingredients, you can enhance your juice’s flavor and extend its shelf life. However, be careful not to add too much acid, which can affect the taste and potentially spoil the juice. In the next section, we’ll discuss how to properly store your juice to ensure freshness.

Store Your Juice Properly

Properly storing your freshly made juice is essential to maintaining its quality and taste. For example, imagine you’ve just made a delicious green juice packed with kale, celery, and cucumber. To ensure that your juice stays fresh for as long as possible, it’s important to follow some simple tips and best practices.

One of the most important things to keep in mind when storing your juice is that oxidation is your enemy. This is why it’s recommended to drink your juice immediately after making it, but if you can’t, then try to store it in an airtight container in the fridge. The less air that comes into contact with your juice, the longer it will last.

Another tip is to make sure that your juice is properly chilled before storing it. This will help to slow down the oxidation process and keep your juice fresher for longer. By following these tips and best practices, you can ensure that your freshly made juice remains delicious and nutritious for as long as possible.

Advertisement

When it comes to using a masticating juicer, there are some additional steps you can take to ensure that your juice lasts even longer. One of the advantages of using a masticating juicer is that it produces less heat and thus less oxidation. This means that your juice will last longer than if you had used a centrifugal juicer.

Additionally, masticating juicers are better at extracting juice from leafy greens, which means that you’ll get more juice out of your produce and waste less. With these benefits in mind, it’s clear that using a masticating juicer is a great way to get the most out of your produce and enjoy delicious, fresh juice for longer.

Using a Masticating Juicer

When I use a masticating juicer, I always get a high-quality juice that lasts longer than juices made with other types of juicers. This is because masticating juicers use a slower, more gentle process of juicing that produces less heat and oxidation, which can degrade the juice.

Additionally, the slower process means that more of the nutrients and enzymes in the fruits and vegetables are retained, which also helps to extend the shelf life of the juice.

How it Works

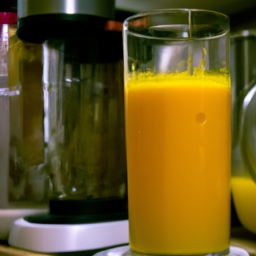
To use your juicer, simply chop up your fruits and veggies into small enough pieces to fit into the chute, turn it on, and watch as the machine works its magic to create fresh and delicious juice that will keep you hydrated and healthy! The juice extraction process involves crushing the produce to extract the juice, and then separating the liquid from the pulp. There are two main types of juicers: centrifugal and masticating. Centrifugal juicers use a high-speed spinning blade to chop and extract juice, while masticating juicers utilize a slower crushing and squeezing process to extract juice. Masticating juicers are known to produce higher quality juice with more nutrients and enzymes, and they also have a longer shelf life.

Advertisement

To understand how a masticating juicer works, it’s important to know that it has an auger that rotates slowly and crushes the fruits and vegetables against a mesh screen. The juice is then squeezed out of the pulp and collected in a container. Masticating juicers are more efficient at extracting juice from leafy greens and wheatgrass, which can be difficult for centrifugal juicers to handle. Additionally, because they operate at a slower speed and produce less heat, the juice from a masticating juicer can last for up to 72 hours without losing its nutritional value. This makes it a great choice for those who want to make a large batch of juice and store it for later use. With this knowledge on how a masticating juicer works, let’s move on to the benefits for juice shelf life.

Benefits for Juice Shelf Life

You’ll love knowing that your freshly squeezed juice from a masticating juicer can stay nutritious and delicious for up to 72 hours! This is because masticating juicers use a slow and gentle process to extract juice, minimizing heat and oxidation that can cause nutrient loss and spoilage. Additionally, juice preservation techniques such as vacuum-sealing and refrigeration can further extend the shelf life of your juice.

It’s important to note that chemical reactions in juice storage can also affect its quality and taste. For example, exposure to light and air can cause enzymatic breakdown and the formation of off-flavors. However, by using proper storage methods and consuming your juice within the recommended timeframe, you can ensure that it maintains its nutritional value and flavor.

Now, let’s explore the benefits and limitations of using a centrifugal juicer.

Using a Centrifugal Juicer

If you’re looking to make fresh juice with a centrifugal juicer, it’s important to know that the juice will only last for about 24 to 48 hours in the refrigerator. This is because the centrifugal juicer extracts juice by using a fast-spinning blade that generates heat and exposes the juice to oxygen, which can cause the juice to oxidize and break down quickly. However, there are ways to improve the shelf life of your juice, such as maximizing the juice yield and following a thorough cleaning process.

Advertisement

To maximize the juice yield, make sure to choose fruits and vegetables that are ripe and juicy, and cut them into small enough pieces to fit into the juicer’s chute. Additionally, you can try running the pulp through the juicer again to extract any remaining juice. To ensure the longevity of your juicer and prevent contamination, it’s essential to clean it thoroughly after each use. This involves disassembling the juicer and washing each part separately with warm soapy water, then rinsing and drying them thoroughly before reassembling. By following these tips, you can extend the shelf life of your fresh juice and enjoy it for longer.

When making juice in batches, it’s important to keep in mind that the longer the juice sits, the more it will oxidize and lose some of its nutritional value. To minimize this, try to make only as much juice as you need for the day and store it in an airtight container in the refrigerator. Alternatively, you can freeze the juice in ice cube trays and thaw them as needed. By being mindful of the shelf life of your juice and taking steps to preserve it, you can enjoy the full benefits of fresh juice for longer.

Making Juice in Batches

Using a centrifugal juicer can be a quick and convenient way to extract juice from fruits and vegetables. However, this method may not be the best choice if you want to make larger batches of juice that can last for several days. That’s where batch juicing comes in handy.

Batch juicing involves making a large amount of juice at once and storing it in airtight containers in the refrigerator. This method can save you time and effort, as you don’t have to clean the juicer every time you want a glass of juice. Plus, it allows you to enjoy fresh juice for several days without having to make it from scratch each time.

To make batch juicing easier, here are some tips:

Advertisement
  • Choose fruits and vegetables that have a long shelf life, such as carrots, apples, and citrus fruits.
  • Wash and prep all the ingredients before juicing. This will save you time and ensure that you have everything you need.
  • Use glass containers with airtight lids to store the juice. Mason jars work well for this purpose.
  • Label the containers with the date of preparation to keep track of how long the juice has been stored.
  • Consume the juice within 3-5 days for the best taste and nutrition.

Batch juicing can be a great time management strategy for busy individuals who want to enjoy fresh juice without spending too much time in the kitchen. However, it’s important to keep in mind that even though the juice can last for several days, it may lose some of its nutritional value over time. This is where pasteurization comes in, which we’ll discuss in the next section.

The Pros and Cons of Pasteurization

Pasteurization is a popular method for preserving the quality and safety of many food products, including juices. There are two main pasteurization methods used in the juice industry: flash pasteurization and high pressure processing (HPP). Flash pasteurization involves heating the juice to a high temperature for a short time, while HPP uses high pressure instead of heat. Both methods are effective in reducing harmful bacteria and extending the shelf life of juice.

However, there are some health concerns regarding pasteurization. Some people believe that pasteurization destroys important nutrients and enzymes in the juice, which can affect its overall nutritional value. Additionally, some studies have suggested that consuming unpasteurized juice may have health benefits, such as improving digestion and boosting the immune system.

Ultimately, the decision to drink pasteurized or unpasteurized juice is a personal one, and it is important to weigh the potential benefits and risks before making a choice.

As a juice enthusiast, it’s important to know when your juice has gone bad. Signs that your juice has gone bad include a sour or off taste, discoloration, and a strange odor. If you notice any of these signs, it’s best to discard the juice to avoid any potential health risks.

In the next section, we’ll discuss how to properly store your juice to prevent it from going bad.

Advertisement

Signs that Your Juice Has Gone Bad

As someone who enjoys juicing, it’s important to know the signs of when your juice has gone bad.

The appearance of the juice can be a key indicator, as it may become cloudy or have a brownish tint.

Additionally, the smell can be a dead giveaway, as the juice may emit a sour or rancid odor.

Lastly, the taste can be a final confirmation, as it may have a funky or off flavor.

Keep an eye out for these signs to ensure your juice is fresh and safe to consume.

Advertisement

Appearance

The appearance of freshly juiced fruits and vegetables is a feast for the eyes, and it’s a common adage that we eat with our eyes first. When it comes to determining the freshness of juiced produce, the appearance of the juice can give us important clues.

Here are four visual indicators to look out for:

  1. Juice clarity – Freshly squeezed juice should be clear and free of any cloudiness. If the juice appears murky or has a cloudy appearance, it may be an indication that the produce used was not fresh or that the juice has been sitting for too long.

  2. Sedimentation – It is common for some juices to have a layer of sediment at the bottom after they have been sitting for a while. However, excessive sedimentation is a sign that the juice has gone bad. Sedimentation can occur due to the breakdown of the produce’s fibers, which can result in a gritty texture in the juice.

  3. Separation – Separation of the juice into layers is another visual indicator of spoilage. If the juice separates into layers and cannot be easily mixed back together, it may be an indication that the juice has gone bad.

  4. Color – The color of the juice can also provide information about its freshness. Freshly juiced produce should have a vibrant color, and any discoloration or fading may be an indication that the juice has gone bad.

While appearance can be a helpful indicator of juice freshness, it isn’t the only factor to consider. The smell of the juice can also provide important information about its freshness.

Smell

When you take a whiff of freshly juiced produce, the aroma should be pleasant and inviting, indicating its freshness. However, the smell of juice can be affected by the types of produce used and how long the juice has been stored.

For example, using pungent vegetables like garlic or onions can result in a strong and unpleasant odor. On the other hand, using sweet fruits like apples or oranges can create a delightful fragrance.

Advertisement

If you notice an unpleasant smell coming from your juice, there are ways to eliminate it. One way is to add a small amount of lemon juice to the mixture, as the acidity can help neutralize the odor. Another option is to add fresh herbs like mint or basil, which can add a pleasant aroma to the juice.

Ultimately, the smell of juice can be an indicator of its freshness and quality, so it’s important to pay attention to it. As for taste, it’s closely related to the smell of the juice. So, if you notice a less-than-pleasant smell, it’s likely that the taste will be affected as well.

Therefore, it’s crucial to pay attention to both the smell and taste of your juice to ensure its quality and freshness.

Taste

Did you know that taste is the most important factor in determining whether or not people continue to consume freshly juiced fruits and vegetables? Even if the juice looks good and smells fresh, if it doesn’t taste good, people are less likely to want to drink it. This is why flavor preservation is so important when it comes to juicing.

To ensure the best flavor preservation, it’s important to taste test your juice right after you make it. This will give you an idea of how the juice should taste when it’s at its freshest. You can also make note of how the flavor changes over time by conducting taste tests at different intervals after juicing. For example, you could taste the juice right after juicing, then again after 24 hours, 48 hours, and so on. By doing this, you can determine how long the juice will still be drinkable, and at what point it starts to lose its flavor.

Advertisement
Factors Impact on Flavor Preservation
Type of fruit/vegetable Some fruits and vegetables are more prone to flavor loss than others
Storage container Air-tight containers are best for preserving flavor
Temperature Colder temperatures slow down the process of flavor loss
Exposure to light Juice should be stored in a dark place to prevent light from breaking down the flavor
Time since juicing Flavor loss will occur over time, but the rate will vary based on other factors

As you can see from the table, there are several factors that can impact flavor preservation in freshly juiced fruits and vegetables. By paying attention to these factors and conducting taste tests, you can determine how long your juice will last while still maintaining its flavor. However, it’s also important to consider food safety when consuming juice, which we’ll discuss in the next section.

The Importance of Food Safety

You should always prioritize food safety, especially when it comes to the preservation of juice from your juicer. The importance of food safety cannot be overstated, as it’s critical to ensure that the juice you consume is free from harmful contaminants that can cause illnesses.

One of the main concerns when it comes to juice contamination is the growth of bacteria. Bacteria can multiply rapidly in juice that’s left out at room temperature, leading to foodborne illnesses such as salmonella and E. coli.

To ensure that your juice remains safe for consumption, it’s important to follow proper food safety practices. This includes washing your hands before handling the juicer or the juice, using clean utensils and containers, and storing the juice in a refrigerator.

Furthermore, it’s recommended to consume freshly made juice within 24-48 hours, as juice can start to lose its nutritional value and freshness over time. By prioritizing food safety and following these guidelines, you can enjoy the health benefits of fresh juice without worrying about the risk of contamination.

Advertisement

Frequently Asked Questions

Can I mix different types of juice together and still expect the same shelf life?

Based on my experience, mixing different types of juice together can result in different shelf lives. To ensure the best juice storage methods, keep the juice refrigerated and consume within 24-48 hours. Juice mixing tips include combining juices with similar pH levels.

Does the age of the produce used affect the shelf life of the juice?

The freshness of produce used in juicing affects the shelf life of the resulting juice. Optimal storage conditions include refrigeration in an airtight container. Properly stored, fresh juice can last up to 72 hours.

Is it safe to drink juice that has been frozen and thawed?

Freezing juice can be safe, but it can affect the nutritional value. The freezing process can cause the breakdown of some nutrients, but it’s still a good option for preserving juice for a short period.

Can I add preservatives to my juice to extend its shelf life?

I do not recommend adding preservatives to extend the shelf life of juice. Instead, consider using natural alternatives like lemon juice or citric acid. Proper storage and immediate consumption will also help maintain freshness.

Can I store my juice in a metal container instead of glass?

Storing juice in a metal container may impact juice oxidation, affecting its freshness and taste. Glass containers offer a better storage option due to their non-reactive properties.

Advertisement

Conclusion

Overall, it’s crucial to keep in mind that the shelf life of juice from a juicer depends on various factors, including the type of juicer used, storage temperature, and ingredients. To extend the shelf life of your juice, consider using a masticating juicer, making juice in batches, and pasteurizing it.

However, even with these precautions, it’s essential to recognize the signs of spoilage and discard any juice that has gone bad. In summary, the shelf life of juice from a juicer can range from a few hours to a few days, but by taking the appropriate measures, you can maximize its longevity.

Remember to prioritize food safety and always err on the side of caution when it comes to consuming juice that may be past its prime. With these tips in mind, you can enjoy fresh, delicious juice for longer and reap the numerous health benefits of juicing.

Continue Reading
Advertisement

Vegan

How to Make Orange Juice

Published

on

By

Explore three techniques to make your own fresh-squeezed orange juice at home. This single-ingredient, sugar-free option for orange juice can be made either with or without pulp. Rich in vital nutrients, it’s delicious on its own or as part of a mixed juice blend!

How to Make Orange Juice

Making newly squeezed orange juice may take more effort than grabbing a juice box from a shop. However, the difference in the top quality of flavor, as well as freshness, is matchless. Fresh orange juice is fruity and excellent– so much sweeter than any kind of ‘from concentrate’ Orange Juice in stores and with no sugarcoated or anything ‘awful.’.

More than that, when making orange juice in your home, you can pick if you desire orange juice with pulp or without. In addition, it is full of vitamins and health and wellness advantages. Sugar-free orange juice has never tasted so great as when it’s straight from the fruit!

Is Orange Juice Helpful for You?

There are several primary health advantages of oranges. Most people know that this spicy fruit supplies tons of Vitamin C. One tool cup of orange juice provides nearly 100% of your daily recommended Vit C. However, it additionally consists of various other nutrients, including Vitamin A, calcium, folate, and iron.

Is Orange Juice Helpful for You?

Vitamin C helps to support our immune systems and aid with gum health, wound recovery, and bone development. At the same time, Potassium aids in decreasing the threat of cardiovascular disease, strokes, and bone loss. It additionally assists manage blood pressure and also decreases the risk of kidney rocks.

Folate is crucial for pregnant women and decreases the risk of abnormality, and OJ is just one of the most effective all-natural resources. Even much better, orange juice is high in antioxidants, which are fantastic for fighting dangerous complimentary radicals as well as shielding versus numerous persistent conditions and containing anti-inflammatory homes.

Advertisement

Among the only drawbacks of alcohol consumption of orange juice (or significant quantities of fruit juice) is the amount of all-natural sugars in the juice. Therefore, I drink homemade orange juice once or twice a week, freezing leftovers to stand out right into smoothie mixes in smaller-sized dosages or thaw them later.

How to Make Orange Juice (3 techniques)

Just how to make fresh-squeezed orange juice at home by using one of 3 methods. This sugar-free orange juice (with pulp or without) utilizes just one component, is packed with healthy vitamins and is fantastic alone or as part of a juice blend!

Making freshly squeezed orange juice might take much more initiative than getting a juice box from a store, yet the difference in the high quality of taste and the quality is matchless. Fresh orange juice is fruity and pleasant– so much sweeter than any kind of ‘from concentrate’ OJ in stores and without any added sugars or anything ‘unpleasant.’.

More than that, when making orange juice in your home, you can choose if you want orange juice with pulp or without. In addition to that, it contains vitamins and also health advantages. Sugar-free orange juice has never tasted so excellent as when it’s straight from the fruit!

Fresh orange juice

Is Orange Juice Great for You?

There are several main health and wellness advantages of oranges. Most people realize that this vibrant fruit offers tons of Vitamin C. One medium mug of orange juice supplies practically 100% of your everyday advised Vit C. Nonetheless, it also contains several other nutrients, including Vitamin A, calcium, folate, and iron.

Vitamin C supports our body’s immune systems and aids with gum health, wound healing, and bone development (Resource). Meanwhile, Potassium assists in reducing the danger of heart disease, strokes, and bone loss. It likewise helps manage blood pressure and lower the threat of kidney rocks.

Advertisement

Folate is necessary for pregnant females and lowers the danger of abnormality, as well as Orange Juice, is one of the best natural resources (source). Even better, orange juice is high in antioxidants, which are terrific for fighting damaging complimentary radicals, protecting against numerous chronic problems, and including anti-inflammatory properties.

One of the only drawbacks of alcohol consumption of orange juice (or huge amounts of fruit juice) is the number of natural sugars in the juice. Therefore, I tend to consume self-made orange juice one or two times a week and cold leftovers to stand out right into shakes in smaller-sized doses or thaw later.

How to Make Orange Juice with A Juicer

Prepare the oranges by initial peeling them. Then, slice them into smaller-sized parts to fit your juicer chute. Feed a few into your juicer chute at once– voila.

Orange juicer with electric juicer

With a Blender

Peel the oranges and, optionally, get rid of and discard the seeds (if you’re going to strain the juice, then this isn’t required).

Oranges in Blender

Add the orange sectors to a blender. You can add a little water to help them mix if needed (1/4 mug ought to be ample not to water it down too much).

Blend into a juicy, mushy consistency. After that, sieve the resulting pulpy juice via a sieve or nut milk bag or conversely, if you like orange juice with pulp (for even more nutrients), leave it as is.

With a Handheld Juicer

This possibly does not require much of an explanation. If you have a citrus juicer in your home, just slice the fruit in half, area it over it, push down, and squeeze while turning back and forth to get as much juice out as feasible.
For orange juice with pulp, simply spoon some straight off the staying orange (after pressing the juice out) and also include it in your glass.

Advertisement
Handheld Juicer

How to Store Orange Juice

Fresh pressed orange juice is best taken in quickly for the optimum quantity of nutrients. Nevertheless, any leftovers can be stored in a closed glass container in the refrigerator for approximately 3 days.

What to Perform with Any Extra Pulp

Orange pulp can be iced up right into an ice-cube tray for later usage– within smoothie mixes, broths, or baked items. Conversely, the pulp can be composted, which I do a lot in my yard.

What to Do with The Remaining Peel

You can zest some of the skin to include in meals or to flavor teas, lemonades, and even sugar. Alternatively, make some candied orange peel or, if the halves remain in good condition, use them to make orange candle lights.

Continue Reading

Juice

How To Make Low Lying Fog Juice

Published

on

By

I’ve always been captivated by the impact that ground-level mist has at concerts, gatherings, and haunted attractions. Being a person who enjoys diving into DIY activities, I set out to learn how to produce low lying fog juice myself. Following numerous experiments and a bit of trial and error, I’ve now honed the perfect formula, and I’m thrilled to share it with you.

Before we dive into the steps of making low lying fog juice, it is important to understand the chemistry behind fog. Fog is formed when water vapor in the air condenses into tiny droplets that float close to the ground.

To create low lying fog, we need to cool the water vapor and turn it into fog that stays close to the ground. This is where the ingredients and equipment come into play.

Let’s get started!

Key Takeaways

  • Glycerin is the main ingredient in low lying fog juice, with an optimal ratio of 20-30%.
  • Dry ice can be added for a thick, white fog effect.
  • Proper preparation and storage techniques, including the use of pure glycerin and straining the mixture, are crucial for maximizing shelf life.
  • When using a fog machine, follow safety precautions and adjust temperature and fan speed for optimal fog dispersion.

Understanding the Chemistry of Fog

If you want to make low-lying fog juice, you need to understand the chemistry behind how fog is created in the first place.

Fog formation occurs when warm, moist air comes into contact with cooler surfaces, causing the water vapor in the air to condense into tiny droplets.

Advertisement

Atmospheric conditions such as humidity, temperature, and wind speed all play a role in the formation of fog.

Chemical reactions and heat transfer are also involved in the creation of fog. When water vapor in the air condenses into droplets, it releases heat.

This heat is then absorbed by the surrounding air, causing it to rise and mix with cooler air above.

This creates a layer of fog that hovers close to the ground, hence the term ‘low-lying fog’.

Understanding these chemical processes is crucial to creating your own low-lying fog juice.

Advertisement

Now that we have a basic understanding of the science behind fog formation, let’s move on to gathering the necessary equipment and ingredients.

Gathering Equipment and Ingredients

First, you’ll need to round up all the necessary gear and components to whip up this chilling mixture. Choosing the right containers is crucial to ensure that the mixture is safe to handle and won’t react with any other chemicals. I recommend using glass or plastic containers with secure lids to prevent any spills or leaks.

It’s also important to source glycerin that’s at least 99% pure, as impurities can affect the quality of the fog. You can find glycerin at most chemical supply stores or online retailers.

Once you have your containers and glycerin, it’s time to measure out the rest of the ingredients. You’ll need distilled water, propylene glycol, and dry ice. It’s important to measure the ingredients precisely to ensure that the fog juice is safe to use.

Safety precautions are also necessary when handling dry ice, as it can cause burns if it comes into direct contact with skin. With all the necessary ingredients in hand, you’re ready to move on to preparing the glycerin mixture that’ll create the low lying fog effect.

Advertisement

Preparing the Glycerin Mixture

Now that I’ve got my equipment and ingredients, it’s time to mix the glycerin with distilled water and propylene glycol to create the base of my fog solution.

Glycerin is the main ingredient in low lying fog juice because it’s non-toxic and produces a thick and dense fog. However, there are glycerin alternatives, such as triethylene glycol and dipropylene glycol, that can be used instead. These alternatives may adjust the viscosity and density of the fog solution, so it’s important to experiment and find the best mixture that works for your specific needs.

To prepare the glycerin mixture, I’ll need to measure out the correct ratios of glycerin, distilled water, and propylene glycol. Typically, a mixture of 1 part glycerin to 3 parts distilled water and 1 part propylene glycol is a good starting point.

I’ll mix these ingredients together thoroughly until they’re fully combined. Once the mixture is complete, I can move on to the next step of adding the optional additives to enhance the fog solution.

Adding the Optional Additives

Now that I’ve got my glycerin mixture ready, I can move on to adding optional additives to enhance the fog effect.

Advertisement

Choosing the right additives is crucial, as they can affect the thickness, color, and durability of the fog.

I’ll carefully measure and mix the chosen additives into the glycerin mixture, making sure they’re well blended before use.

Choosing Additives

To create a low-lying fog, it’s essential to choose the right additives to mix with your fog juice. One popular additive is glycerin. This viscous liquid helps to create a denser fog that hangs low to the ground, giving off a haunting effect. It also helps to extend the life of the fog by slowing down the evaporation process.

The optimal ratio for glycerin in your fog juice is around 20-30%, but this can vary depending on the desired effect and the type of fog machine you’re using. Another popular additive is dry ice. This creates a thick, white fog that hugs the ground and has a spooky, eerie effect.

The key to using dry ice is to ensure that it’s handled safely, as it can cause burns if it comes into direct contact with the skin. You’ll need to place the dry ice in a container with warm water, and then place the container in the fog machine. The mixing ratio for dry ice is generally 1-2 pounds per gallon of fog juice.

Advertisement

With the right additives, you can create a low-lying fog that will add a spooky, eerie effect to your next event. In the next section, I’ll discuss how to mix these additives for the optimal effect.

Mixing the Additives

Get ready to enhance the haunting effect of your fog machine by mixing the right amount of glycerin and dry ice additives for a thick, white fog that hugs the ground.

To mix the additives, first make sure you have the correct ratio of glycerin to water. Mix one part glycerin to three parts water in a large container.

Next, slowly add small pieces of dry ice to the mixture. Be cautious when handling dry ice, as it can cause frostbite on contact with skin. As you add the dry ice, the mixture will begin to bubble and release carbon dioxide gas.

The glycerin will create a thick and dense fog when it reacts with the carbon dioxide gas. It’s essential to stir the mixture continuously to ensure that the dry ice is evenly distributed and to prevent the mixture from getting too hot.

Advertisement

Once the dry ice has completely dissolved, the fog juice is ready to use. With the right mixing techniques and understanding of chemical reactions, you can create a low lying fog that will add an eerie atmosphere to any event.

Now that the additives are mixed, the next step is to filter the mixture to remove any impurities before using it in your fog machine.

Filtering the Mixture

First, you’ll need to strain the mixture to ensure that no impurities clog up your fog machine. Filtering techniques are crucial to making the perfect low lying fog juice, as any impurities can result in a malfunctioning machine or poor fog output. To do this, you can use a cheesecloth or coffee filter to strain the mixture into a separate container.

This will remove any remaining chunks or particles that may have been missed during the mixing process. After straining, check the mixture’s consistency to ensure that it has an optimal viscosity. The fog juice should be thick enough to create a low-lying fog, but not too thick that it clogs up the machine.

If the mixture is too thick, you can add distilled water in small increments until it reaches the desired consistency. Once you’ve achieved the optimal viscosity, you’re now ready to fill your fog machine with the low lying fog juice.

Advertisement

Filling the Fog Machine

Before using my fog machine, I always make sure to prepare it properly. This involves checking for any damage or leaks and ensuring that the heating element is clean and functioning correctly. Once the machine is ready, I fill the tank with the appropriate amount of fog juice, making sure not to overfill it.

Proper preparation and filling of the fog machine is essential to ensure a consistent and reliable output of fog.

Preparing the Fog Machine

Now, you’ll need to make sure your fog machine is clean and ready to use. Before you begin, it’s important to follow the cleaning instructions and maintenance tips provided by the manufacturer. The last thing you want is for leftover residue or debris to affect the quality of your low lying fog.

Start by unplugging the machine and removing the fill cap. Use a soft cloth and mild soap to clean the exterior of the machine, being careful not to get any liquid inside.

Next, remove the heating element and clean it thoroughly with a cloth dampened with rubbing alcohol. Once everything is clean and dry, reassemble the machine and plug it back in.

Advertisement

With your fog machine now prepped and ready to go, you can move on to filling the tank with your homemade low lying fog juice.

Filling the Tank

Now that the fog machine is prepared, it’s time to fill the tank with the low lying fog juice. Before doing so, make sure that the tank capacity is appropriate for the amount of fog juice needed. This information can be found in the fog machine’s manual or by consulting with a professional.

To properly fill the tank, first make sure the machine is turned off and unplugged. Then, open the tank lid and carefully pour the low lying fog juice into the tank, using a funnel if necessary to avoid spillage. It’s important to take note of the proper filling technique to prevent any leaks or damage to the machine.

Once the tank is filled, securely close the lid and plug the machine back in.

Transitioning into the next section about testing the fog juice, it’s important to note that before using the fog machine, it’s necessary to check if the fog juice is working properly.

Advertisement

Testing the Fog Juice

Before using the fog juice, it’s important to conduct a test run to ensure that it produces the desired effect and doesn’t harm any equipment or surfaces.

I typically pour a small amount of the fog juice into the fog machine and run it for a few minutes to observe the results. If adjustments need to be made, I’ll refer back to the recipe and make changes accordingly.

It’s crucial to test and adjust the fog juice before using it in a performance or event to avoid any potential issues.

Conducting a Test Run

Let’s jump right into it and see the fog machine in action with a test run! Before conducting the test run, I made sure to set the fog machine to its optimal settings.

I adjusted the temperature knob and the fan speed to ensure that the fog was not too thick or too thin, and that it would disperse evenly. Additionally, I took all necessary safety precautions, such as making sure the machine was properly grounded and not placed near any flammable objects.

Advertisement

Once I felt confident that the machine was set up correctly, I poured the low lying fog juice into the reservoir and turned on the machine. I waited a few minutes for the fog to start flowing and then observed how it interacted with the room.

I noticed that the fog was too thick and not spreading evenly, so I decided to adjust the recipe by adding more distilled water to dilute the juice. With this simple adjustment, the fog began to disperse more evenly, creating a stunning low lying effect.

Adjusting the Recipe

You’re probably thinking that adjusting the recipe for your fog machine is as easy as adding more of the fog juice, but let me tell you, it’s not that simple. Adjusting the concentration of the fog juice can be a delicate process that requires careful experimentation and attention to detail. It’s important to keep in mind that adding too much fog juice can cause the fog to be too thick and heavy, while adding too little can result in a lackluster effect.

One way to adjust the concentration of your fog juice is to experiment with additives. For example, adding a small amount of glycerin or distilled water can help to thin out the fog and create a more subtle effect. On the other hand, adding a small amount of dry ice can create a thicker, more intense fog. By carefully adjusting the concentration of your fog juice and experimenting with different additives, you can create a customized effect that is perfect for your event or production. Once you’ve perfected your recipe, it’s time to move on to using the low lying fog juice to create a stunning and memorable visual display.

Using the Low Lying Fog Juice

To create an eerie atmosphere, simply pour the low lying fog juice into your fog machine and watch as the mist hovers just above the ground, sending shivers down your spine.

Advertisement

But before using the fog juice, it’s important to follow some best practices and safety precautions. First, make sure to read the instructions on your fog machine and use only the recommended amount of fog juice. Using too much can cause the fog to linger in the air longer than intended, potentially causing breathing difficulties for you and your guests.

Second, always use the fog machine in a well-ventilated area to avoid inhaling too much of the fog and to prevent any potential fire hazards. With these precautions in mind, you can safely use the low lying fog juice to create a spooky and memorable atmosphere for your next party or event.

When it comes to storing the fog juice, it’s important to keep it in a cool and dry place, away from any heat sources or direct sunlight. This will help to prevent the fog juice from degrading or evaporating before you have a chance to use it.

Storing the Fog Juice

Ensure your fog machine fluid remains in optimal condition by storing it in a cool, dry place away from heat and direct sunlight. Extreme temperatures can affect the shelf life and the quality of the low lying fog juice. Exposure to direct sunlight can also cause the liquid to break down and lose its effectiveness.

Therefore, it’s essential to store the fog juice in a well-ventilated area with a consistent temperature range of 40-100°F. Storing techniques can affect the longevity of the fog juice. For instance, it’s crucial to keep the container sealed tightly to prevent air and moisture from entering. Additionally, it’s advisable to store the fog juice away from any chemicals, cleaning agents, or pesticides.

Advertisement

Proper storage techniques can maximize the shelf life of the low lying fog juice, ensuring optimal performance every time it’s used. Now, let’s move on to troubleshooting common issues that may arise from using the low lying fog juice.

Troubleshooting Common Issues

Encountering complications with creating low lying fog can be challenging, but there are several common issues that can be resolved with a few simple fixes. Here are some common solutions and troubleshooting techniques:

  • Check the temperature: The fog machine and the fog juice work best in cooler temperatures, so make sure you’re not using them in hot or humid environments. If the temperature’s too warm, you may need to cool down the room or switch to a different type of fog juice that’s designed for warmer temperatures.

  • Check the machine: Make sure the fog machine’s clean and free of clogs. If the machine’s not producing enough fog, it may be because the nozzle’s clogged or the heating element’s not working properly. You may need to clean the nozzle or replace the heating element.

  • Check the fog juice: Make sure the fog juice’s the right type for your machine and that it’s not expired. If the juice is too old, it may not produce as much fog or may produce a strange smell. You may need to replace the juice or switch to a different brand.

  • Adjust the settings: If the fog machine’s producing too much or too little fog, you may need to adjust the settings. Most machines have a control knob that allows you to adjust the output of the fog. Try turning it up or down to see if that helps.

  • Experiment with different techniques: If none of the above solutions work, try experimenting with different techniques. For example, you may need to use a different type of fog juice or a different type of machine. You may also need to try different techniques for creating the fog, such as using dry ice or a fog chiller.

By following these common solutions and troubleshooting techniques, you should be able to create chilling clouds without any complications. Remember to always read the instructions carefully and follow all safety precautions when working with fog machines and fog juice.

Frequently Asked Questions

Can I use any type of glycerin for making low lying fog juice?

Yes, not all glycerin types are equally effective for making low lying fog juice. Some may produce less fog and pose safety concerns for respiratory health. It’s important to choose a high-quality, food-grade glycerin.

How long does the fog juice last in the fog machine before it needs to be refilled?

The frequency of fog juice refills depends on the size of the fog machine and the duration of use. Regular maintenance, such as cleaning the machine and using the appropriate glycerin types for low lying fog juice, can prolong the life of the juice.

Advertisement

Is it safe to breathe in the low lying fog produced by the juice?

While low lying fog is visually stunning, health concerns and environmental impact must be considered. Inhalation of fog juice should be avoided, as it contains glycols and other chemicals. Proper ventilation is necessary to ensure safety.

Can I use the fog juice outdoors or only indoors?

I can use the fog juice both indoors and outdoors, but the weather conditions may affect the quality of the fog. Humidity and wind can disperse the fog, while colder temperatures can make it linger. It’s important to test the juice in different conditions before use.

Can I use food coloring to tint the low lying fog produced by the juice?

I experimented with food coloring to enhance the visibility of low lying fog produced by fog juice. Results were mixed, as the coloring diluted the juice and affected its composition. Further testing is required before a conclusive answer can be given.

Conclusion

In conclusion, making low lying fog juice is a complex process that requires careful attention to detail. However, the end result is a mesmerizing display of mist that can add a touch of mystery and magic to any event or performance.

As with any chemical mixture, it’s crucial to understand the science behind it, gather the necessary equipment and ingredients, and follow the steps precisely. So, practice makes perfect, and this holds true for making low lying fog juice.

Advertisement

It may take a few tries to get the formula just right, but once you do, the results are well worth the effort. And with a little troubleshooting, any issues that may arise can be easily resolved.

So, go ahead, gather your materials, and let the fog roll in for a captivating and unforgettable experience.

Continue Reading

Juice

How To Make Lychee Juice

Published

on

By

I’m totally obsessed with lychees, and I never miss a chance to pick up a bag when I visit an Asian supermarket. However, there are times when I fancy a change and prefer to savor my lychees in an alternative form rather than just consuming them raw. This is when I turn to lychee juice!

It’s a refreshing, fruity drink that’s perfect for summertime sipping. In this article, I’ll be sharing my favorite recipe for making lychee juice at home, step by step.

To make lychee juice, you’ll need just a few simple ingredients and some basic kitchen equipment. Don’t worry if you’ve never made juice before – it’s really easy, and I’ll walk you through each step.

Whether you’re craving a sweet and tangy drink to cool off on a hot day or just want to try something new with your favorite fruit, my lychee juice recipe is sure to hit the spot. So let’s get started!

Key Takeaways

  • Precision in measuring is crucial for a well-balanced lychee juice.
  • Strain the blended mixture with a fine mesh sieve for a smoother texture.
  • Pair lychee juice with complementary foods to enhance its taste.
  • Refrigeration is the best way to store and preserve lychee juice, while freezing is a simple method for most home cooks.

Gather Your Ingredients

Gather all the ingredients you’ll need for making lychee juice, including fresh lychee fruit, water, sugar, and ice. Make sure to choose fresh lychees that are plump, firm, and have a bright color. You can find them at your local grocery store or Asian market.

Lychee is a tropical fruit that is sweet and juicy, and it’s packed with health benefits that make it a great choice for juicing. When it comes to juicing techniques, you can either use a juicer or a blender. Using a juicer will result in a smoother juice, while using a blender will create a more pulpy texture.

Advertisement

Regardless of the method you choose, make sure to remove the seeds and peel from the lychees before juicing them. Now that you have all the ingredients ready, it’s time to prepare your lychees for juicing.

Prepare Your Lychees

First, peel the rough, pinkish-red skin off of each lychee using your fingernails or a small knife, being careful not to damage the fruit. A helpful tip is to crack the skin open with your fingernail and then gently peel it away from the fruit. If you’re having trouble peeling the lychees, try soaking them in warm water for a few minutes to soften the skin.

It’s important to select the perfect lychee for your juice by choosing ones that are ripe and have a vibrant red color with no blemishes or bruises. After peeling the lychees, discard the skin and remove the seed from each fruit. You can do this by gently squeezing the fruit with your fingers until the seed pops out, or you can use a small knife to cut around the seed and remove it.

Once all of the lychees are peeled and seeded, you can move on to the next step of measuring your ingredients for the perfect lychee juice.

Measure Your Ingredients

Once you’ve peeled and seeded your lychees, it’s time to measure out your ingredients. Measuring techniques play a crucial role in the success of your lychee juice. Precision in measuring ensures that you get the right balance of flavors and sweetness in your juice. Here are some tips to help you measure your ingredients accurately and adjust the sweetness of your juice to your liking:

Advertisement

  • Use measuring cups and spoons instead of eyeballing the ingredients. This will help you get consistent results every time you make lychee juice.

  • Start by measuring out the lychee flesh. You’ll need about 2 cups of lychee flesh for 4 servings of juice.

  • Next, measure out the water. You’ll need 2 cups of water for every 2 cups of lychee flesh.

  • Add sugar to taste. Start with 1/4 cup of sugar and adjust to your liking. You can also use honey or agave syrup as a healthier alternative.

  • Finally, add a squeeze of lime juice to brighten up the flavors.

Now that you’ve measured out your ingredients and adjusted the sweetness to your liking, it’s time to blend your ingredients and turn them into a refreshing lychee juice.

Blend Your Ingredients

Now it’s time to toss all your measured ingredients into the blender and watch the magic happen! But before you do, let’s talk about blending techniques and flavor combinations.

To start, make sure to add the ice and lychee fruit to the blender first. This will help break down the fruit and create a smoother consistency. Then, pour in the coconut water and honey and blend on high for about 2-3 minutes. If you want a thicker consistency, add more ice. If you prefer a sweeter taste, add more honey.

Ingredients Measurements
Lychee fruit 1 cup
Coconut water 1/2 cup
Honey 2 tbsp
Ice 1 cup

Blending techniques can differ depending on the blender you use. Some blenders may not be as powerful and require you to blend for a longer period of time. Experiment with different blending techniques to find the consistency you prefer. As for flavor combinations, you can add other fruits such as pineapple or mango to enhance the tropical taste of the lychee juice.

Now that you have blended all your ingredients, the next step is to strain your juice.

Advertisement

Strain Your Juice

After blending all the ingredients, it’s important to strain the mixture to achieve a smoother texture and remove any unwanted bits. Straining techniques can vary depending on personal preference, but I find that using a fine mesh sieve works best.

Simply pour the blended mixture through the sieve and use a spatula to press down on the solids to extract as much juice as possible. Repeat this process until all the solids have been strained out.

If you want to add some extra flavor to your lychee juice, this is the perfect time to do so. You can mix in a small amount of sugar or honey to sweeten it up, or even add a splash of lime juice for a tangy kick.

Once you’re happy with the flavor, transfer the juice to a pitcher and chill it in the refrigerator for at least an hour before serving.

Next, we’ll move on to the final step of making delicious lychee juice – chilling it to perfection.

Advertisement

Chill Your Juice

Now that I’ve strained my lychee juice, it’s time to chill it.

I usually like to refrigerate my juice for a couple of hours before drinking it to enhance its flavor and make it more refreshing.

If you want to enjoy your juice immediately, you can add some ice to cool it down quickly.

Either way, chilling your juice is a crucial step to make it more enjoyable.

Refrigerating Your Juice

To keep your lychee juice fresh and tasty, you’ll want to pop it in the fridge as soon as possible after making it. Refrigeration is the best way to slow down the natural process of spoilage and prevent the growth of harmful bacteria. The benefits of refrigeration are numerous, including longer shelf life, preservation of nutrients and flavors, and reduction of waste. Plus, a cold and refreshing glass of lychee juice is the perfect way to beat the heat on a hot summer day.

Advertisement

Alternative cooling methods may include adding ice cubes or placing the juice in the freezer for a short period of time. However, these methods may dilute the flavor of the juice or alter its texture. That’s why refrigeration is the preferred method for keeping your lychee juice fresh and delicious. In the next section, we’ll explore the best ways to add ice to your drink without compromising its taste.

Adding Ice to Cool Your Drink

If you want to enjoy a refreshing summer drink, nothing beats the feeling of adding ice cubes to your glass. Here are some tips to make sure you get the most out of this classic drink addition:

  1. Use filtered water: The quality of your ice cubes will affect the taste of your drink, so make sure to use filtered water when making them.

  2. Freeze fruits: For an extra burst of flavor, try freezing fruits like strawberries or blueberries to use as ice cubes.

  3. Use ice alternatives: If you don’t want to dilute your drink with water, try using alternatives like frozen coconut water or coffee ice cubes.

  4. Serve in a chilled glass: To keep your drink cool for longer, serve it in a chilled glass or mason jar.

When it comes to serving suggestions, consider adding a sprig of mint or a slice of lime to your glass. These simple additions can elevate the flavor of your drink and make it feel even more refreshing.

Now that your juice is chilled and ready to go, it’s time to move on to the next step: serving.

Serve Your Juice

Ready to indulge? Nothing beats sipping on a refreshing glass of lychee juice, especially when it’s served over ice on a hot summer day. Once you’ve poured your juice into a glass, it’s time to think about how you want to serve it.

Advertisement

One way to make your lychee juice stand out is by adding creative garnishes. You can add a slice of fresh lime or mint leaves to enhance its flavor and aroma. Additionally, consider pairing your lychee juice with foods that complement its taste, such as spicy dishes or light salads.

By pairing your juice with the right food and adding a touch of creativity, you can elevate your drink to the next level. And with that, it’s time to store your juice for later.

Store Your Juice

Now that I’ve made my delicious lychee juice, I need to properly store it. The best way to do this is by refrigerating it in an airtight container.

This will ensure that the juice stays fresh and tasty for up to 3-4 days. If I want to keep the juice for longer, I can freeze it in ice cube trays and then transfer the cubes to a freezer-safe bag.

This way, I can enjoy my homemade lychee juice anytime I want, even if I don’t have fresh lychees on hand.

Advertisement

Refrigerating Your Juice

Once you’ve bottled your delicious lychee juice, don’t forget to pop it in the fridge to keep it fresh and cool for later.

There are a few storing options for your lychee juice, but refrigerating it is the most common.

When you’re storing your juice, make sure to keep it in an airtight container to prevent any air from getting in and spoiling the juice. You can also add a squeeze of lemon to your juice before bottling it to help preserve it for a few extra days.

The shelf life of your lychee juice will depend on a few factors, such as the freshness of the fruit, the temperature of your fridge, and how well you’ve stored it. Generally, fresh lychee juice can last up to 4-5 days in the fridge. However, it’s always best to check for any signs of spoilage, such as a sour smell or a change in color, before consuming.

Now that your lychee juice is safely stored in the fridge, let’s talk about how you can freeze it for later use.

Advertisement

Freezing Your Juice for Later

To preserve your delicious lychee juice for future use, you’ll want to freeze it in an appropriate container. Freezing is an excellent way to keep your beverage fresh for up to six months.

Start by pouring your lychee juice into a freezer-safe container, leaving about an inch of space at the top to allow for expansion. You can use a plastic container, glass jar, or even an ice cube tray, depending on how you plan to use the juice later. If you’re using an ice cube tray, freeze the juice until solid, then transfer the cubes to a larger container or freezer bag.

Another way to preserve your lychee juice is by canning it. Follow a canning recipe and process to ensure that your juice is safe to store at room temperature. However, keep in mind that canning requires specific equipment, and there is a risk of spoilage if not done correctly. Freezing is a simpler and more accessible method for most home cooks.

In the next section, I’ll discuss how to experiment with variations to add even more flavor to your lychee juice.

Experiment with Variations

Try mixing in some fresh mint leaves for a refreshing twist that’ll make your taste buds sing with delight. Variations experimentation is key to finding the perfect recipe that suits your taste. Flavor customization is easy with lychee juice, as it pairs well with a variety of fruits and herbs.

Advertisement

Here are three variations to try with your lychee juice:

  1. Lychee and Strawberry: Add a handful of fresh strawberries to the blender with your lychee juice for a sweet and tangy flavor combination.

  2. Lychee and Basil: Add a few fresh basil leaves to your lychee juice for a subtle, herbaceous flavor that pairs well with savory dishes.

  3. Lychee and Lime: Squeeze in some fresh lime juice to your lychee juice for a zesty twist that adds a burst of citrus flavor.

With these variations, you can create a unique blend that suits your taste buds perfectly.

Now that you’ve experimented with different flavors, it’s time to enjoy your lychee juice!

Enjoy Your Lychee Juice!

Now it’s time to savor your delicious lychee concoction and bask in the refreshing flavors. But before you take a sip, let’s talk about some ways you can enjoy your lychee juice. Of course, you can always drink it straight up, but why not get a little creative with it?

One idea is to mix it with some sparkling water and a splash of lime juice for a refreshing and bubbly lychee spritzer. Another option is to add a shot of vodka for a lychee martini. And if you’re feeling really adventurous, try blending the juice with some coconut milk and ice for a tropical lychee smoothie. The possibilities are endless, so experiment and find your favorite way to enjoy this delicious fruit juice.

Advertisement

Creative Cocktail Ideas for Lychee Juice Ingredients Instructions
Lychee Martini 2 oz lychee juice, 1.5 oz vodka, 1 oz triple sec, 1/2 oz lime juice Shake all ingredients with ice and strain into a martini glass. Garnish with a lychee fruit on a skewer.
Lychee Spritzer 1/2 cup lychee juice, 1/2 cup sparkling water, 1/4 lime juice Combine all ingredients in a glass filled with ice. Stir gently and garnish with a lime wedge.
Lychee Smoothie 1 cup lychee juice, 1 banana, 1/2 cup coconut milk, 1 cup ice Combine all ingredients in a blender and blend until smooth. Pour into a glass and enjoy.

So go ahead and try these creative cocktail ideas for lychee juice or come up with your own. With its sweet and delicate flavor, lychee juice is a great addition to any beverage. Enjoy!

Frequently Asked Questions

What are the health benefits of drinking lychee juice?

Sipping on lychee juice is like a burst of energy for my body. The nutritional value is impressive, containing high levels of vitamin C, potassium, and antioxidants. Some benefits include improved digestion, skin health, and immunity.

Can I use canned lychees instead of fresh ones?

Yes, canned lychees can be used instead of fresh ones in juice recipe variations. However, it’s important to check for added sugars or preservatives. Fresh lychees may provide a better flavor and more nutrients.

How long does lychee juice last in the refrigerator?

Hey there! Wondering how long your lychee juice will last in the fridge? Well, it all depends on how it’s stored. Generally, freshly made juice lasts 3-4 days, while store-bought can last up to a month. Keep it refrigerated and enjoy!

Can I add sugar or other sweeteners to the juice?

Yes, I can add sugar alternatives like honey, agave or Stevia to lychee juice. However, lychee itself has natural sweetness, so it may not require extra sweeteners. Experiment to find the perfect balance of sweetness to suit your taste.

Advertisement

Are there any potential side effects of drinking lychee juice?

Drinking lychee juice may have potential risks, such as allergies. It’s important to be aware of any reactions and consume in moderation. Always consult with a healthcare professional if you have concerns.

Conclusion

Well, folks, there you have it – your very own homemade lychee juice! As I take a sip of this sweet and refreshing concoction, I can’t help but feel a sense of pride and accomplishment.

It’s amazing how just a few simple steps can yield such a delicious result. As the juice slides down my throat, I’m transported to a tropical paradise – the sun beating down on my face, the sound of crashing waves in the distance, and the sweet aroma of lychees filling my nostrils.

It’s a sensory experience that I look forward to every time I make this juice. So go ahead and give it a try – experiment with different variations, adjust the sweetness to your liking, and enjoy the fruits of your labor.

Trust me, there’s nothing quite like a glass of homemade lychee juice to brighten up your day.

Advertisement

Continue Reading

Trending

Copyright © 2024 The Graceful Kitchen Affiliate disclaimer As an affiliate, we may earn a commission from qualifying purchases. We get commissions for purchases made through links on this website from Amazon and other third parties.