The secret to great bread with a Dutch oven is harnessing its ability to trap steam and develop a perfect crust while ensuring even heat distribution. By choosing a high-quality, well-seasoned Dutch oven and preheating it thoroughly, you create the ideal environment for oven spring and a glossy, crispy crust. Proper dough hydration, shaping, and patience are essential too. Keep exploring these tips, and you’ll discover the full potential of your bread baking journey.
Key Takeaways
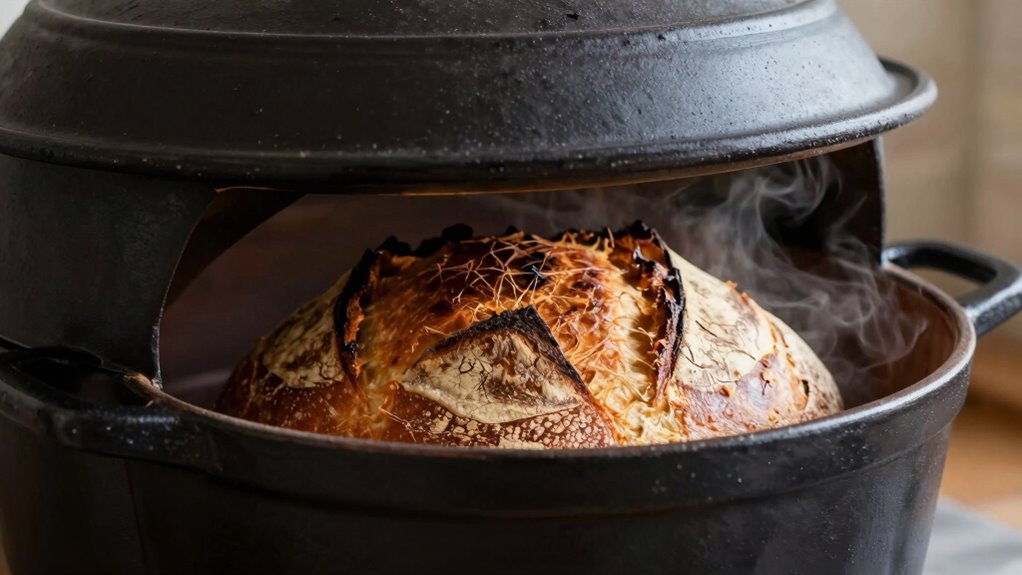
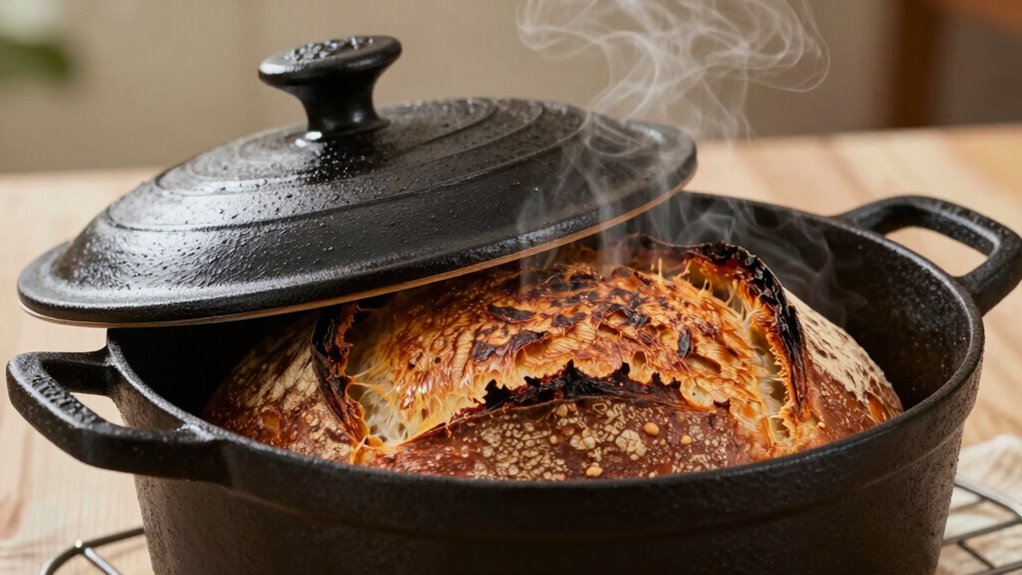
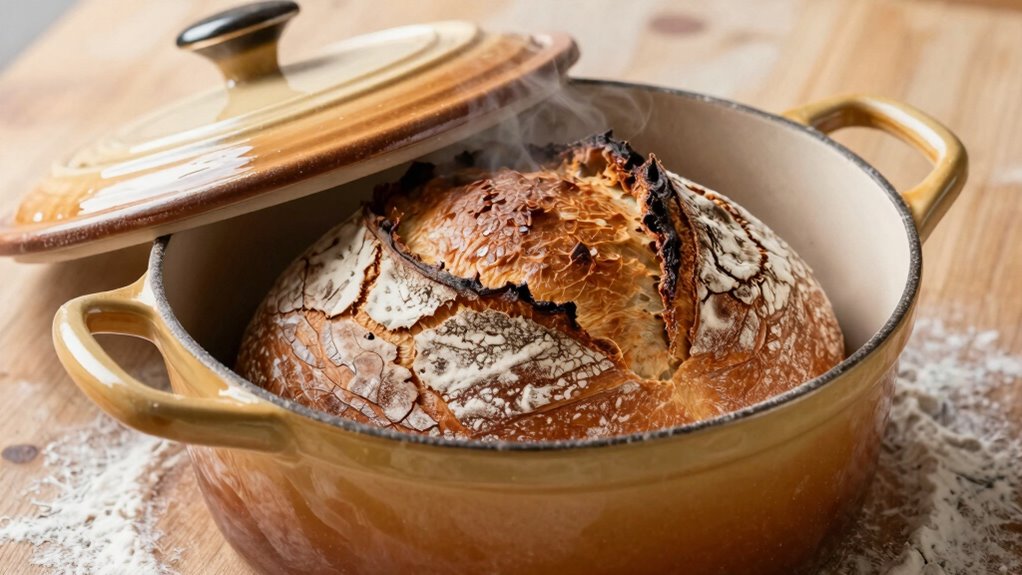
- The snug-fitting lid traps steam, promoting oven spring and a glossy, crispy crust.
- Proper preheating ensures even heat distribution and optimal crust development.
- Consistent seasoning and maintenance prevent rust and enhance non-stick performance.
- Creating steam inside the Dutch oven during initial baking improves crust texture and color.
- Precise dough hydration and gentle shaping are vital for achieving an airy crumb and good oven spring.

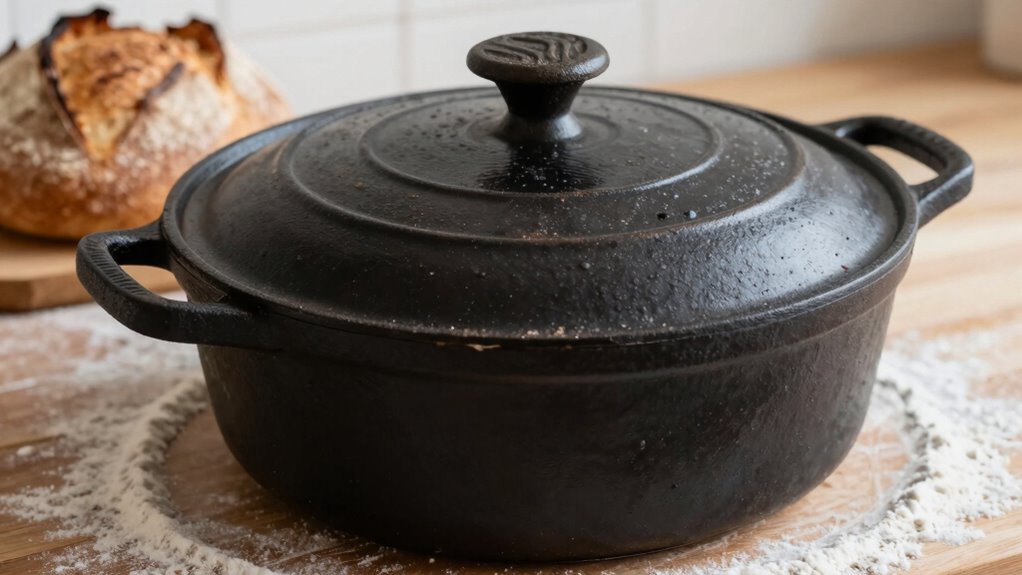
5QT Pre-Seasoned Cast Iron Dutch Oven For Bread Baking, Dutch Oven with Domed Lid, Sourdough Bread Baking Supplies, Multi-Functional Bread Pan For Baking, Frying, Roasting
- Dome Design for Crispy Crusts: Locks in steam for perfect bread crusts
- Large 5-Quart Capacity: Accommodates big sourdough loaves
- Premium Cast Iron Construction: Ensures even heat and moisture retention
As an affiliate, we earn on qualifying purchases.
As an affiliate, we earn on qualifying purchases.
Why a Dutch Oven Is Essential for Perfect Bread
A Dutch oven is a must-have tool for achieving bakery-quality bread at home. Its durability guarantees it can withstand high temperatures without cracking or warping, making it a reliable choice for consistent baking results. The thick, cast-iron construction helps retain heat evenly, creating a perfect environment for the dough to rise and develop a crispy crust. The lid design is essential—its snug fit traps steam, which is vital for creating that authentic oven spring and glossy crust. A well-designed lid also helps maintain moisture inside, preventing the bread from drying out. High-temperature durability ensures your Dutch oven remains reliable over many uses. Additionally, understanding the importance of contrast ratio in your baking environment can influence how well you see the bread’s crust development during baking. Recognizing how the heat retention properties of cast iron contribute to consistent baking can further improve your bread results. Proper seasoning of your Dutch oven can enhance its non-stick qualities and extend its lifespan. When selecting a Dutch oven, considering its material quality can also impact its longevity and baking performance. Investing in a sturdy Dutch oven with a thoughtfully crafted lid ensures you get professional-quality bread with every bake, transforming your home kitchen into a bakery.
How to Choose the Best Dutch Oven for Baking Bread
Choosing the right Dutch oven for baking bread involves considering several key factors to guarantee you get the best results. First, opt for a heavy, enameled cast iron Dutch oven, which retains heat evenly—crucial for artisan techniques. Size matters: a 5-7 quart capacity provides enough space for a rising dough and a good crust. Look for a lid that fits snugly to trap moisture, mimicking professional steam-injected ovens. When selecting oven accessories, consider tools like oven mitts and trivets for safe handling. The material and construction impact heat retention and durability, so invest in quality. A well-chosen Dutch oven enhances authenticity and consistency, helping you master artisan techniques and achieve bakery-quality bread at home. Proper oven temperature control is also essential for consistent baking outcomes. Additionally, understanding heat retention properties of different materials can help you select the most effective Dutch oven for your baking needs. To maximize performance, consider the thermal conductivity of the material, which influences how quickly and evenly heat is distributed throughout the oven. A good understanding of heat transfer mechanisms can further improve your baking results and help you troubleshoot issues. Furthermore, taking the time to learn about preheating techniques ensures optimal temperature stability during baking.
Preparing Your Dutch Oven for Baking
Before you start baking, make sure your Dutch oven is well-prepared. Season it if needed, preheat it thoroughly, and clean and dry it after each use. These steps help guarantee your bread turns out perfect every time. Additionally, understanding how to maintain optimal temperature can improve your baking results and prevent common issues. To ensure your appliance functions efficiently, regularly checking and cleaning filters can also support air quality considerations that influence your kitchen environment. Being mindful of ethical choices in your kitchen, such as choosing eco-friendly cleaning products, can also contribute to a more sustainable baking practice. Incorporating accessibility features can make your baking process more inclusive and enjoyable for everyone involved. Paying attention to humidity levels in your kitchen can also help prevent dough from drying out or becoming too sticky during baking.
Season Your Dutch Oven
Seasoning your Dutch oven creates a natural, non-stick surface that’s essential for successful bread baking. Proper seasoning techniques not only improve non-stick properties but also protect your Dutch oven from rust and damage, ensuring it lasts for years. To season, apply a thin layer of vegetable oil or shortening, then bake it upside down in a 450°F oven for about an hour. Let it cool completely before use. Regular Dutch oven care, including seasoning, keeps the surface smooth and durable. Additionally, maintaining the seasoning process can prevent common issues like rust formation and extend the lifespan of your cookware. Using the right candy tools can also make the seasoning process easier and more effective. A well-seasoned Dutch oven not only enhances your bread baking but also supports sustainable practices in backyard design, making it a valuable investment for your culinary and outdoor activities. Proper cleaning and storage routines also contribute to maintaining a long-lasting non-stick surface.
Preheat Properly Every Time
Getting your Dutch oven ready for baking starts with proper preheating. This step guarantees even heat distribution, which is essential for achieving that perfect crust. A well-preheated Dutch oven enhances its durability by minimizing thermal shock, helping it last for years. To preheat correctly, place the Dutch oven in your oven while it heats up, typically at 450°F (232°C), for at least 30 minutes. This process creates a consistent, hot environment that mimics professional steam ovens. If you don’t have a Dutch oven, you can use alternative baking vessels like cast iron skillets or ceramic baking pots, but they may not offer the same durability or heat retention. Proper preheating is key to baking bread with a crisp crust and fluffy interior every time, especially when considering the benefits of heat retention for optimal baking results. Ensuring your oven and vessel are properly prepared helps achieve the best baking outcomes and consistent results. Additionally, using quality cookware can extend the lifespan of your baking tools and improve your baking experience.
Clean and Dry Thoroughly
Have you ever wondered why your bread doesn’t turn out as crisp or evenly baked as you’d like? It often comes down to how well you clean and dry your Dutch oven. Proper cleaning techniques are essential—use hot water and a gentle brush to remove residue, avoiding soap that can affect flavor. After cleaning, dry your Dutch oven thoroughly to prevent rust, especially if it’s cast iron. Storing it in a dry, well-ventilated space to keep it in top condition is also crucial. These storage tips help maintain its non-stick surface and prevent corrosion. Before each use, guarantee the Dutch oven is completely dry, and lightly oil if needed. A clean, dry Dutch oven ensures even heat distribution and great crusts every time you bake. Regularly checking the measurement accuracy of your tools can also help you monitor the oven’s temperature precisely for perfect baking results. Additionally, paying attention to seasoning maintenance will keep your Dutch oven performing at its best over time.
Step-by-Step: Baking Bakery-Quality Bread in Your Dutch Oven
Baking bakery-quality bread in your Dutch oven is simpler than you might think, and it all begins with preparing your dough correctly. Mix your ingredients, paying attention to flavor combinations that suit your taste. Let the dough rise until it’s doubled in size, then shape it gently. Preheat your Dutch oven thoroughly to guarantee even baking. When ready, carefully transfer the dough into the hot pot, cover it, and bake. The lid traps steam, creating that perfect crust. Once baked, let the bread cool completely before slicing. Proper bread storage is essential to maintain freshness and flavor, so keep leftovers in a breathable bag or bread box. Follow these steps, and you’ll consistently produce bakery-quality bread with rich flavor and ideal texture.
Avoid These Common Dutch Oven Bread Baking Mistakes
Even experienced bakers can stumble into common Dutch oven bread mistakes that compromise texture and flavor. One myth is that a Dutch oven is the only way to bake perfect bread; in reality, alternative baking vessels like cast iron or ceramic pots can work just as well. Avoid opening the lid too early, which releases steam and hampers oven spring. Also, don’t neglect proper preheating—an unheated vessel can lead to uneven baking.
| Mistake | Correct Approach |
|---|---|
| Relying solely on Dutch oven myths | Try alternative baking vessels for variety |
| Opening lid too soon | Keep lid on until bread is nearly baked |
| Not preheating the vessel | Preheat thoroughly for even heat distribution |
Tips for Achieving the Perfect Crust and Light, Airy Crumb
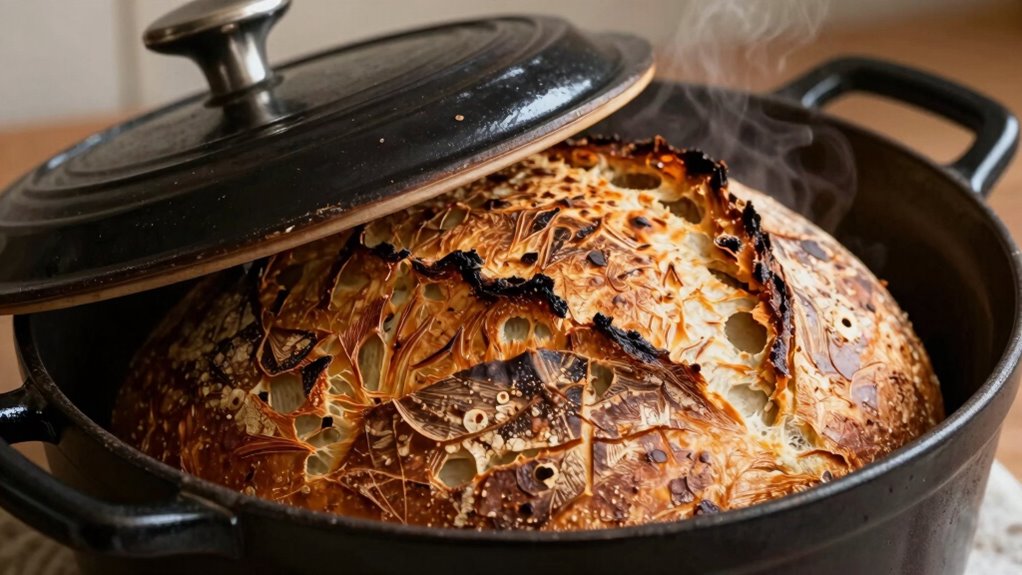
Achieving the perfect crust and a light, airy crumb starts with understanding how to control moisture and heat during baking. Proper steam during the initial baking phase enhances crust texture, making it crisp without sacrificing tenderness inside. Using a hot Dutch oven traps moisture, encouraging gluten development and a better bread flavor. Avoid overproofing, which can lead to a dense crumb, and underproofing, which hampers rise. Score your dough to allow steam escape and control expansion. Confirm your oven is fully preheated for even heat distribution. These steps help develop a beautifully crisp crust and a soft, open crumb. By paying attention to these details, you’ll consistently bake bread with exceptional crust texture and irresistible flavor.
Troubleshooting and Refining Your Dutch Oven Bread
If your Dutch oven bread isn’t turning out as expected, you can make quick adjustments to improve your results. Focus on achieving a perfect crust, fixing underbaked loaves, and optimizing dough hydration. These tweaks will help you bake consistently delicious bread every time.
Achieving Perfect Crust
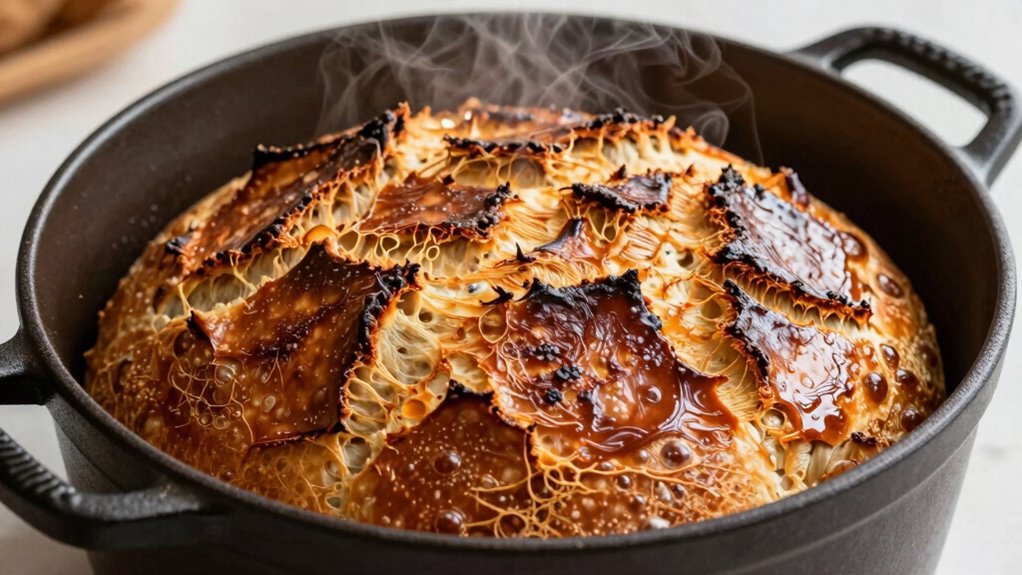
Are you struggling to get that bakery-quality crust on your Dutch oven bread? Achieving the perfect crust involves mastering artisan techniques like proper steam creation and high heat. Experiment with ingredient variations, such as using different flours or adjusting hydration levels, to influence crust development. A hotter oven and preheated Dutch oven help create a crisp, golden exterior. Keep your dough slightly sticky but manageable, which promotes better caramelization. Also, consider scoring your loaf to control expansion and enhance crust texture. Using a baking stone or adding steam during the initial baking phase can boost crust formation. With consistent practice and small adjustments, you’ll refine your process and enjoy a crust that’s crackly, flavorful, and bakery-worthy every time.
Fixing Underbaked Loaves
Noticing that your bread is underbaked can be frustrating, but the good news is that you can troubleshoot and improve your results with some simple adjustments. To guarantee a fully baked loaf, consider oven temperature, baking time, and steam quality. Sometimes, ingredient substitutions—like adding a bit more water or adjusting flour types—can help achieve better heat transfer and crust development.
| Issue | Fix |
|---|---|
| Pale or doughy interior | Bake longer at a consistent temperature, check oven calibration |
| Uneven baking | Rotate the loaf mid-bake, ensure proper oven heat distribution |
| Crust too soft | Extend baking time or increase steam for a crispier crust |
| Dense crumb | Use artisan techniques, like proper proofing and ingredient tweaks |
Adjusting these factors helps refine your Dutch oven baking for perfectly baked bread.
Improving Dough Hydration
Adjusting your dough’s hydration level can considerably improve your bread’s texture and oven spring. Higher hydration levels create a more open crumb and better oven spring, but too much can make the dough sticky and hard to handle. To refine dough consistency, experiment with small adjustments—adding water gradually until the dough feels tacky but manageable. Visualize your dough as a sticky, elastic mass that holds its shape yet stretches easily. Think of it as:
- A slightly moist sponge that’s easy to fold
- A supple, pliable mass that doesn’t tear
- An elastic dough that springs back when pressed
- A shiny surface with a slight sheen
Frequently Asked Questions
Can I Use a Dutch Oven Made of Materials Other Than Cast Iron?
Yes, you can use material alternatives to cast iron for a Dutch oven, but keep in mind that heat retention and distribution vary. Materials like ceramic, enameled cast iron, or even silicone can work, but make sure they can withstand oven temperatures. The lid’s necessity depends on the material; some alternatives may not hold heat well or require a different lid design. Always check the manufacturer’s guidelines for safe baking.
How Does the Size of the Dutch Oven Affect Bread Baking?
A larger Dutch oven lets you bake bigger loaves, giving your bread room to expand and develop a beautiful crust, while a smaller one makes it easier to control oven temperature and shape. Think of the oven as a canvas—size influences your bread’s shape and crust. If it’s too small, your dough might be crowded, affecting oven temperature and resulting in uneven baking. Choose a size that matches your bread’s shape and your baking goals.
Is It Necessary to Preheat the Dutch Oven Every Time?
Yes, preheating requirements are essential for consistent bread baking. You should always preheat your Dutch oven to the recommended oven temperature before baking. This guarantees a hot, even environment that helps develop a crispy crust and proper rise. Skipping preheating can lead to uneven baking and less desirable texture. So, always give your Dutch oven enough time to reach the right temperature for the best results.
Can I Bake Bread in a Dutch Oven Without a Lid?
You can bake bread in a Dutch oven without a lid, but it’s not ideal. The lid creates a steamy environment that helps develop a crispy crust. If you don’t have a lid, consider using alternative baking vessels like a covered baking sheet or a cast iron skillet with foil. To mimic the lid’s effect, you might also use Dutch oven accessories like a silicone lid or a heatproof dome.
How Do I Clean and Maintain My Dutch Oven for Bread Baking?
Think of your Dutch oven as a trusted partner in baking; keep it in top shape with proper maintenance. To clean, avoid harsh soaps—use warm water and gentle scrubbing, then dry thoroughly. Regular seasoning techniques build a natural non-stick surface, so occasionally apply a thin layer of oil and bake it at high heat. This routine preserves your Dutch oven’s magic, ensuring perfect bread every time.
Conclusion
Mastering bread baking with a Dutch oven transforms your kitchen into a bakery. Did you know that using one can improve loaf rise by up to 50%? With the right preparation and techniques, you’ll consistently create crusty, airy bread that rivals professional bakers. So, don’t overlook this simple yet powerful tool. Embrace the process, and watch your baking skills rise—literally! Your perfect loaf is just a Dutch oven away.