Connect with us

Juice

How Much Is Juice Of 1 Lime

Published

on

Have you ever squeezed a lime, wondering how much juice you could get? Find out the surprising amount of liquid hidden in this small fruit! Discover the secret behind the impressive juice content of limes that will leave you amazed and thirsty for more knowledge.

I remember the first time I tried to make a recipe that required lime juice, and I was shocked at how little juice one lime seemed to produce. It was like trying to get blood from a stone. But as I learned more about the science of juicing and the properties of limes, I discovered that there are many factors that can affect the amount of juice you can get from a lime.

Lime juice is an essential ingredient in many recipes, from marinades and dressings to cocktails and desserts. It adds a tangy, acidic flavor that can brighten up even the most basic dish. But getting the right amount of juice can be tricky, especially if you don’t know how to choose, prepare, and juice your limes properly.

In this article, I’ll share some tips and tricks for getting the most juice out of your limes, as well as some creative ways to use lime juice in your cooking and mixology.

So let’s get started!

Advertisement

Key Takeaways

  • The yield of juice from one lime can vary depending on its size, ripeness, and other factors.
  • Tips for maximizing juice yield from limes include warming the lime before juicing, using a strainer, and re-juicing the pulp.
  • Lime juice is high in vitamin C, antioxidants, and other beneficial nutrients that can boost immunity, aid digestion, and promote overall health.
  • Storing lime juice in an airtight container in the refrigerator helps preserve its freshness and it can also be frozen for later use.
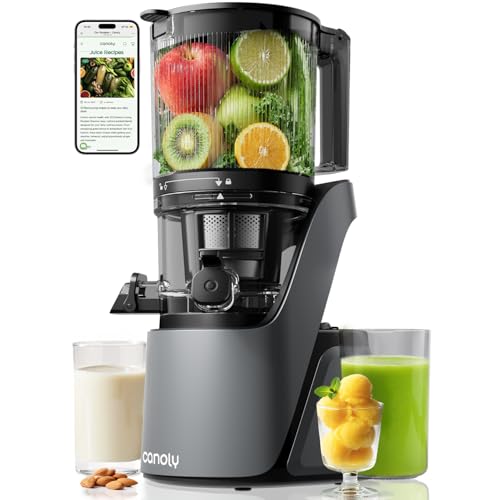
The Importance of Lime Juice in Cooking and Mixology

Lime juice’s crucial role in cooking and mixology can’t be overstated. It adds a zesty and refreshing touch to any recipe. But its versatility goes beyond just culinary uses.

Lime juice is packed with vitamin C and antioxidants, making it a great addition to any health regimen. It can also be used around the house as a natural cleaner due to its antibacterial properties. And let’s not forget its eco-friendliness, as limes are easily grown and harvested, making them a sustainable choice compared to other fruits.

One of the most exciting aspects of lime juice is its ability to transform any dish or drink. From marinades to cocktails, a squeeze of lime can take a recipe from ordinary to extraordinary. Plus, with its numerous health benefits and household uses, it’s a staple that should always be stocked in your kitchen.

But how much juice can you really expect to get from one lime? Let’s dive into the factors that affect the amount of juice in a lime.

Factors Affecting the Amount of Juice in a Lime

When it comes to juicing limes, there are a few factors that can affect the amount of juice you get.

First, the size of the lime can make a big difference. A larger lime will obviously yield more juice than a smaller one.

Advertisement

Second, the ripeness of the fruit can impact the amount of juice available. A fully ripe lime will be juicier than one that is still under-ripe.

Finally, the juicing method you choose can also make a difference in the amount of juice you get. By considering these three factors, you can maximize the amount of juice you get from your limes and ensure that you have enough for all your cooking and mixology needs.

Size of the lime

Nowadays, a single lime can yield about 2 tablespoons of juice. However, this amount can vary depending on the size of the lime. Common lime varieties, such as the Persian lime and the Key lime, can have different sizes and shapes that affect their juice content. Generally, the larger the lime, the more juice it will contain.

It’s also important to note that the skin of the lime does not affect the amount of juice it produces, so it’s best to choose limes that are firm and free of bruises or soft spots. To get the most juice out of a lime, it’s important to store it properly. Limes should be stored in a cool, dry place away from direct sunlight. They can also be kept in the refrigerator for up to a month. However, it’s best to let them come to room temperature before juicing to maximize the amount of juice extracted.

By keeping these factors in mind, you can ensure that you’re getting the most out of your limes and adding the perfect amount of citrus to your dishes and drinks.

Advertisement

Moving on to the next subtopic, the ripeness of the fruit also plays a crucial role in determining the amount of juice it contains.

Ripeness of the fruit

As the fruit ripens, it becomes softer and more fragrant, making it easier to extract its tangy and zesty flavor. The lime is a versatile fruit that can be used in a variety of dishes and drinks, and its ripeness can impact the intensity of its flavor. A lime that is too unripe may have a bitter taste, while an overly ripe lime can have a dull flavor. Therefore, it is important to choose limes that are ripe but not overripe for optimal flavor.

There are several benefits to allowing limes to ripen before use. As the lime ripens, it develops a higher concentration of vitamin C, which can help boost the immune system and protect against disease. Additionally, the ripening process breaks down the complex sugars in the lime, making it easier to digest. To ensure that limes stay fresh, it is best to store them at room temperature or in the refrigerator. However, it is important to note that refrigeration can slow down the ripening process, so it is best to only refrigerate limes that are already fully ripe. With the proper storage methods, limes can be enjoyed at their best flavor and nutritional value. In the next section, I will discuss the best juicing method for extracting the juice from a ripe lime.

Juicing method

To get the most out of a ripe lime, it’s best to use a juicer that can efficiently extract the tangy and zesty flavor. Here are some things to keep in mind when juicing a lime:

  • Pulp extraction can be tricky, but it’s important for achieving a smooth and consistent juice. Use a fine mesh strainer or cheesecloth to filter out any unwanted bits of pulp.

  • Limes can be preserved for longer periods by storing them in the refrigerator or freezer. When preparing to juice a lime, it’s best to let it come to room temperature before squeezing to get the most juice out of it.

  • On average, one lime will yield about 1-2 tablespoons of juice. However, the yield can vary depending on the ripeness and size of the lime.

  • To get the most juice out of a lime, roll it on a hard surface before slicing it in half. This will help break down the pulp and release more juice.

When it comes to juicing a lime, the right tools and techniques can make all the difference. In the next section, we’ll explore some of the best tools and techniques for juicing a lime to ensure maximum juice yield and minimal waste.

Advertisement

Tools and Techniques for Juicing a Lime

You’ll need a juicer or a reamer to extract the juice from a lime. There are different juicing techniques and tools you can use to get the most juice from your lime. A lime squeezer is a popular alternative to a juicer or reamer, but keep in mind that it may not extract as much juice as the other tools. To use a lime squeezer, simply cut the lime in half and press it against the squeezer. Rotate the lime while applying pressure to extract as much juice as possible.

When using a juicer or reamer, cut the lime in half and place it cut side down on the juicer or reamer. Apply pressure and twist the lime to extract the juice. A citrus press can also be used, which works by squeezing the lime between two ridged surfaces to extract the juice. No matter which tool you choose, it’s important to use firm and ripe limes for the best results. Speaking of which, let’s discuss how to choose the best limes for juicing.

How to Choose the Best Limes for Juicing

When picking limes for juicing, look for ones that are firm, brightly colored, and have a slight give when gently squeezed, ensuring that they are juicy, flavorful, and ready to be juiced. Here are some important things to consider when choosing the best limes for juicing:

  • Ripeness: Choose ripe limes that are heavy for their size and have a thin, smooth skin. Overly ripe limes will have a rough, puffy skin and may be dry and flavorless, while underripe limes will be hard and acidic.

  • Juice content: Look for limes that have a high juice content, which can be determined by gently rolling them on a hard surface before cutting them open. Limes that are heavy and have a lot of juice inside will yield more juice when juiced.

  • Lime juice benefits: In addition to adding flavor to drinks and recipes, lime juice is high in vitamin C, antioxidants, and other beneficial nutrients that can boost immunity, aid digestion, and promote overall health.

Now that you know how to choose the best limes for juicing, let’s move on to how to prepare them for juicing.

How to Prepare Limes for Juicing

Get ready to experience the zesty aroma and tangy flavor of freshly squeezed lime juice with these simple preparation tips.

Advertisement

To remove the seeds, start by cutting the lime in half horizontally. Then, use a small pointed knife to carefully cut around the circumference of the lime halves to loosen the flesh from the skin.

Next, use a small spoon or your fingers to scoop out the flesh, making sure to remove any seeds that may have been left behind. When it comes to cutting techniques, there are a few options to choose from depending on your preference.

Some people like to cut the lime into wedges, while others prefer to slice it into rounds. If you’re using a citrus juicer, it’s best to cut the lime in half horizontally.

Finally, to preserve the freshness of your limes, store them in the refrigerator in a sealed plastic bag or container. This will help prevent them from drying out and losing their flavor.

Now that you know how to prepare your limes, it’s time to move on to the next step: juicing them!

Advertisement

How to Juice a Lime

When I want to juice a lime, I have three options: using a juicer, hand-squeezing with a fork or citrus reamer, or using a citrus press.

Each method has its benefits and drawbacks. Using a juicer is the most efficient way to extract the maximum amount of juice, but it can be expensive and difficult to clean.

Hand-squeezing is a cheap and easy method, but it may not yield as much juice as the other methods.

Using a citrus press is a good compromise between the two, providing a higher yield than hand-squeezing while still being relatively affordable and easy to use.

Using a juicer

Using a juicer can make extracting the juice of 1 lime a breeze, giving you more time to enjoy your favorite cocktail.

Advertisement

When it comes to juicing techniques, there are a few citrus juicing tips to keep in mind. Firstly, it’s important to choose a juicer that’s specifically designed for citrus fruits. This’ll ensure that you get the most juice out of your lime without wasting any of it.

Additionally, make sure to cut your lime in half before feeding it into the juicer, as this’ll make it easier for the machine to extract the juice. Another tip is to press down firmly on the juicer while it’s in use. This’ll help to extract even more juice from the lime.

Once you’ve finished juicing, be sure to clean your juicer thoroughly to prevent any build-up of bacteria or mold. With these tips in mind, you’ll be able to extract the juice of 1 lime quickly and efficiently.

However, if you don’t have a juicer on hand, don’t worry! You can still extract the juice by hand-squeezing with a fork or citrus reamer.

Hand-squeezing with a fork or citrus reamer

To extract the flavorful essence of a citrus fruit without a juicer, simply grip a fork or citrus reamer with your dominant hand and press it firmly into the fruit’s flesh. This is one of the alternative methods for hand squeezing limes, and it has both pros and cons.

Advertisement

On the one hand, hand-squeezing with a fork or citrus reamer is a low-cost and easy way to get fresh lime juice at home. On the other hand, it requires some effort and may not yield as much juice as a juicer or citrus press.

When hand-squeezing with a fork or citrus reamer, it’s important to use a firm grip and apply steady pressure to fully extract the juice. The yield will vary depending on the size and ripeness of the lime, but generally, one lime will yield about 1-2 tablespoons of juice.

While this method may not be as efficient as a juicer or citrus press, it’s a good option for small quantities or when a juicer is not available.

Moving on to using a citrus press, this method offers a more efficient way to extract lime juice without the need for manual effort.

Using a citrus press

If you’re looking for a quicker and more efficient method of extracting citrus juice, a citrus press may be the tool for you. Here are some benefits of using a citrus press over hand-squeezing with a fork or citrus reamer:

Advertisement
  1. Less effort: With a citrus press, you simply place the halved fruit cut-side down and press the handles together. The press does the work for you, so you don’t need to exert as much force as you would when hand-squeezing.

  2. More juice: Because a citrus press applies more pressure to the fruit, it can extract more juice than hand-squeezing. On average, you can expect to get about 20% more juice from a lime using a press.

  3. Cleaner juice: When hand-squeezing, it’s easy to accidentally include bits of pulp or seeds in the juice. With a citrus press, the juice is often clearer and pulp-free.

  4. Consistency: A citrus press can also help you achieve consistent results. When hand-squeezing, the amount of juice you extract can vary depending on your technique and the ripeness of the fruit.

Using a citrus press can be a great alternative to hand squeezing, but there are still benefits to the latter method. In the next section, we’ll explore just how much juice you can expect to get from one lime when hand squeezing.

How Much Juice Can You Get from One Lime?

Squeezing a lime can yield about 1-2 tablespoons of flavorful juice. This citrus fruit is a common ingredient in many recipes, such as salads, marinades, and cocktails.

Lime juice is also known for its potential health benefits, including improving digestion and boosting the immune system. Consuming lime juice can provide a good source of vitamin C, antioxidants, and other essential nutrients.

However, to make the most out of your lime, it’s important to know how to maximize its juice yield. By using a citrus press or rolling the lime on a hard surface before squeezing, you can extract more juice from the fruit. This will not only enhance the flavor of your dishes but also provide you with more nutritional benefits.

Tips for Maximizing Juice Yield

When it comes to maximizing juice yield from limes, I’ve found a few simple tips can make a big difference.

Advertisement

First, I like to warm up my limes by rolling them on the counter or microwaving them for a few seconds. This helps to break down the cell walls and release more juice.

Second, I always strain my juice to remove any pulp or seeds that can reduce yield.

Finally, if I have any leftover pulp, I’ll re-juice it by squeezing it again to extract every last drop.

These small tricks can add up to a significant increase in juice yield and make all the difference in your cooking and baking.

Warming the lime

Heating up the lime is like putting a cozy sweater on before going outside on a chilly day. It helps to soften the fruit and make it easier to extract the juice.

Advertisement

The benefits of warming limes are numerous, including an increase in the amount of juice that can be extracted. When a lime is heated, the cells in the fruit expand, making it easier for the juice to flow out.

In addition to yielding more juice, warming limes can also improve the flavor of the juice. This is because the heat helps to break down the natural sugars in the fruit, making them more soluble. As a result, the juice becomes sweeter and less tart.

So, if you want to get the most out of your limes, try warming them up before juicing. As you move on to using a strainer, keep in mind that the amount of juice you get from a lime can vary depending on its size, ripeness, and other factors.

Using a strainer

After warming the lime, it’s time to squeeze out the juice. To ensure that the juice is free from pulp and seeds, I often use a strainer. This handy kitchen tool is a great way to keep the juice smooth and consistent, making it perfect for cocktails or any other recipe that requires lime juice.

However, if you don’t have a strainer at home, there are some alternatives that you can use. One option is to use a fine mesh sieve, which will also remove any unwanted bits from the juice. Another alternative is to use a cheesecloth, which works well for larger quantities of lime juice. With these options, you can still enjoy the benefits of fresh lime juice without any pulp or seeds. And speaking of recipes, some of the best ones for lime juice cocktails include margaritas, mojitos, and caipirinhas.

Advertisement

Moving on to the next step, re-juicing the pulp can be a great way to extract even more juice from the lime.

Re-juicing the pulp

Now that you’ve strained the lime juice, don’t throw away the pulp just yet! You can actually re-juice the pulp to extract even more of that delicious citrus flavor. Here are some techniques you can use to get the most out of your lime:

  • Squeeze the pulp with your hands: Take the pulp and squeeze it with your hands over a sieve to catch any seeds. This method is quick and easy, but may not extract all the juice.
  • Blend the pulp: Put the pulp in a blender with a little bit of water and blend until smooth. Strain the mixture to remove any solids and you’ll have more juice.
  • Boil the pulp: Place the pulp in a small saucepan with just enough water to cover it. Bring the mixture to a boil, then reduce the heat and simmer for 5 minutes. Strain the mixture and you’ll have concentrated lime juice.
  • Freeze the pulp: Place the pulp in an ice cube tray and freeze. When you need lime juice, simply thaw out a cube and squeeze the juice from it.

Re-juicing the pulp can have a significant impact on the flavor of your lime juice. By using these techniques, you can extract as much juice as possible and ensure that your lime juice is bursting with flavor.

When it comes to storing lime juice, it’s best to store it in an airtight container in the refrigerator. It will keep for up to a week, but the flavor will deteriorate over time. For longer storage, you can freeze the juice in an ice cube tray and use as needed.

Storing Lime Juice

To keep your lime juice fresh, it’s important to store it properly. Storing lime juice in an airtight container in the refrigerator is the best way to preserve its freshness. When exposed to air and heat, lime juice can quickly lose its flavor and nutritional value.

By keeping it in a sealed container in the refrigerator, you can extend the shelf life of your lime juice for up to a week. It’s important to note that lime juice, like all citrus juices, can undergo changes in flavor and appearance over time. If your lime juice begins to smell off or change color, it’s best to discard it.

Advertisement

When using lime juice in cooking or cocktails, it’s always best to start with fresh juice to ensure the best flavor and nutritional value. With this in mind, let’s explore some creative ways to use lime juice in your culinary creations.

Creative Ways to Use Lime Juice in Cooking and Cocktails

Get ready to experience a burst of zesty and tangy flavors that’ll take your taste buds on a wild ride with these incredibly creative ways to incorporate lime juice in your cooking and cocktails.

Lime juice adds a refreshing and citrusy flavor that pairs well with a variety of dishes and drinks. Here are some pairing suggestions to elevate your dishes and cocktails:

  1. Grilled Fish: Squeeze some lime juice over grilled fish to add a zesty flavor that cuts through the richness of the fish.

  2. Spicy Foods: Use lime juice to tone down the heat in spicy foods like curries and chili. The acidity of lime juice balances the heat and adds a tangy flavor.

  3. Margaritas: No margarita is complete without lime juice. Use freshly squeezed lime juice to create a bright and refreshing cocktail.

  4. Fruit Salads: Add a pop of freshness to fruit salads by drizzling lime juice over them. Lime juice brings out the sweetness of the fruits and adds a tangy flavor that complements the sweetness.

Aside from its delicious taste, lime juice also offers a range of health benefits. Lime juice’s an excellent source of vitamin C, which’s essential for the immune system. It also contains antioxidants that protect the body from free radicals. Incorporating lime juice into your diet can boost your overall health and wellness.

So, go ahead and add a squeeze of lime juice to your dishes and cocktails for a burst of flavor and health benefits.

Advertisement

Frequently Asked Questions

What is the nutritional value of lime juice?

Lime juice has numerous benefits, including being a great source of vitamin C and antioxidants. It can be used in a variety of recipes, such as marinades and dressings. It’s important to note that the nutritional value may vary depending on the amount used.

Can lime juice be substituted with lemon juice in recipes?

Lemon juice can be a suitable substitute for lime juice in recipes, but be aware of flavor differences and make recipe adjustments accordingly. As a nutrition expert, I know the chemical properties of both fruits and can provide precise measurements and recommendations based on scientific evidence.

Does the ripeness of the lime affect the amount of juice it yields?

Lime ripeness and juice extraction techniques can affect the amount of juice a lime yields. Ripe limes may yield more juice than unripe ones, and using the right extraction method can also increase juice yield.

How long does lime juice stay fresh in the fridge?

To properly store lime juice, transfer it to an airtight container and refrigerate for up to a week. Use it in cocktails or as a marinade. One lime typically yields about 2 tablespoons of juice.

Does the temperature of the lime affect the amount of juice it yields?

The temperature of a lime can affect the yield of its juice. Citrus juicing techniques can also impact the amount of juice extracted. Precise measurements and calculations are essential for accurate nutrition information. Objectivity is crucial for making evidence-based recommendations.

Advertisement

Conclusion

In conclusion, lime juice is a versatile ingredient that can elevate the flavor profile of both savory and sweet dishes, as well as cocktails. As someone who loves to cook and mix drinks, I’ve found that understanding how to juice a lime and maximize its yield has been critical in achieving the perfect balance of acidity and brightness.

While the amount of juice in a lime can vary depending on factors such as ripeness and juicing technique, on average, you can expect to get about 1-2 tablespoons of juice from one lime.

It’s amazing how such a small fruit can pack such a punch of flavor! I’d even go so far as to say that lime juice is the unsung hero of the culinary world, adding zest and zing to everything it touches. So whether you’re making a classic margarita or a tangy ceviche, don’t underestimate the power of a freshly squeezed lime. It might just be the missing ingredient that takes your dish from good to great.

Continue Reading
Advertisement

Juice

Lemon = How Much Juice

Published

on

By

As someone who loves cooking and baking, I know the importance of accurate measurements when it comes to preparing food. This is especially crucial when using lemon juice in recipes, as it’s important to know the exact amount of juice needed.

Whether youre making lemonade, salad dressing, or a lemon tart, understanding the yield of a lemon will ensure that your recipe turns out perfectly.

There are a few factors that can affect the amount of juice a lemon produces, such as its ripeness and size. Additionally, the juicing method you use can also impact the yield.

In this article, I will provide a step-by-step guide for juicing lemons and share tips for getting the most juice out of your fruit. Plus, I will answer the burning question: how much juice does one lemon yield?

So, lets get started and master the art of juicing lemons!

Advertisement

Key Takeaways

  • Accurate measurements are crucial when cooking and baking with lemons, as factors like ripeness, size, and juicing method can affect lemon juice yield.
  • Knowing how much juice a lemon produces can help save money by buying the right amount of lemons needed, and using the right tool for juicing lemons can make a big difference in juice yield.
  • Lemon juice has health benefits, including aiding in digestion, boosting immune function, and being high in vitamin C and antioxidants, making it beneficial for skincare.
  • Lemon juice can be stored in the refrigerator, freezer, or canned, and can be used in a variety of recipes, including cocktails, salad dressings, and marinades for meats or fish.

The Importance of Knowing How Much Juice a Lemon Produces

You gotta know how much juice a lemon gives, it’s kinda important if you wanna impress your guests with a killer cocktail.

But beyond the realm of mixology, lemon juice has numerous benefits in the realm of health. Rich in vitamin C, potassium, and antioxidants, lemon juice has been shown to aid in digestion, boost immune function, and even prevent kidney stones.

So not only is it important to know how much juice a lemon produces for culinary purposes, but for health reasons as well.

However, the amount of juice a lemon produces can vary depending on a variety of factors, including the ripeness of the fruit, its size, and its temperature. Understanding these factors and how they affect lemon juice yield is crucial in ensuring consistent and accurate measurements in cooking and mixology.

Factors That Affect Lemon Juice Yield

Factors affecting the yield of lemon juice include the ripeness of the fruit and the method of extraction.

When it comes to ripeness, the amount of juice a lemon produces is directly related to how ripe it is. The more mature the fruit, the more juice it will contain. On the other hand, an under-ripe fruit will yield less juice.

Advertisement

Another factor that affects juice yield is the variety of lemon. Some varieties are naturally juicier than others, so it’s important to choose the right variety if you’re looking for maximum juice.

In addition to these factors, the method of extraction also plays a role in how much juice you can get from a lemon. Lemon juice extraction techniques vary, but some methods are more efficient than others. For example, using a hand juicer or a citrus press can yield more juice than simply squeezing the lemon with your hands.

By understanding these factors and choosing the right extraction method, you can maximize your lemon juice yield and get the most out of your fruit.

As we move on to the next section, it’s important to note that having the right tools for juicing lemons can make a big difference in the amount of juice you’re able to extract.

Tools You Will Need for Juicing Lemons

To get the most out of your citrus, you’ll need the right tools. When it comes to juicing lemons, there are two common options: hand-held lemon squeezers and electronic juicers.

Advertisement

Hand-held lemon squeezers are a low-cost and easy-to-use option. They come in a variety of sizes and shapes, but all function in a similar way. Simply cut the lemon in half, place it in the squeezer, and press down on the handles to extract the juice.

Electronic juicers can be a more expensive investment, but they can save time and effort. These machines can handle larger quantities of lemons and often have adjustable settings to customize the level of pulp in your juice.

No matter which tool you choose, having the right equipment can make the process of juicing lemons much easier and more efficient.

Now that you have the appropriate tools, it’s time to learn how to use them effectively. In the next section, we’ll provide a step-by-step guide for juicing lemons to help you maximize your lemon juice yield.

Step-by-Step Guide for Juicing Lemons

Once I’ve got my chosen juicing tool at hand, such as a citrus reamer or a handheld juicer, I begin the process of extracting lemon juice.

Advertisement

First, I cut the lemon in half and place one half onto the juicing tool, with the cut side facing down. Then, I firmly press and twist the juicing tool, extracting the juice from the lemon.

I repeat this process with the other half of the lemon, until all the juice has been extracted.

There are several lemon juicer alternatives available, but the most important thing is to choose a tool that allows for efficient extraction of the juice.

Additionally, lemon juice has many benefits for skin care, as it’s high in vitamin C and antioxidants. Incorporating lemon juice into a daily skincare routine can help brighten and even out skin tone, while also helping to reduce the appearance of fine lines and wrinkles.

With that being said, let’s move on to some tips for getting the most juice out of your lemons.

Advertisement

Tips for Getting the Most Juice Out of Your Lemons

If you want to make the most out of your citrus, it’s important to know a few tricks for maximizing the amount of tangy goodness you can squeeze out of each fruit. Here are three tips for getting the most juice out of your lemons:

  • Use a lemon zester to break up the membranes inside the lemon before juicing. This will help release more juice and make juicing easier.

  • Roll the lemon on a hard surface to break down the pulp before juicing. This will also help release more juice.

  • Consider alternative juicing methods, such as using a garlic press or a citrus squeezer, to get even more juice out of your lemons.

By following these tips, you can ensure that you’re getting the most juice out of each lemon.

But how much juice does one lemon yield? Let’s explore that in the next section.

How Much Juice Does One Lemon Yield?

Did you know that squeezing a single lemon can yield up to a quarter cup of tart and zesty liquid? As someone who loves to cook and bake, knowing how much juice one lemon yields is essential. Not only does it help me plan my recipes better, but it also helps me save money by buying just the right amount of lemons I need.

To give you an idea of just how much juice you can get from a lemon, take a look at this table:

Advertisement
Size of Lemon Amount of Juice
Small 1-2 tablespoons
Medium 2-3 tablespoons
Large 4-5 tablespoons

Aside from adding flavor to your dishes, lemon juice also has numerous health benefits. It’s rich in Vitamin C, which is known to boost the immune system and improve skin health. It also aids in digestion and can help prevent kidney stones. And if you ever find yourself without a fresh lemon on hand, you can always use substitutes such as vinegar or lime juice in a pinch.

Transitioning to the next subtopic, understanding how much juice one lemon yields is essential when it comes to recipe conversion. Knowing how to calculate the amount of lemon juice needed for a recipe can make or break the final outcome.

Recipe Conversion: How to Calculate Lemon Juice Needed

Understanding the recipe conversion process can be complex, especially when it comes to calculating the necessary amount of lemon juice needed. However, having the right amount of this tart and zesty liquid can make all the difference in the final product.

Here are some tips on how to calculate the right amount of lemon juice for your recipe:

  1. Start by determining how much juice you need. This can be done by looking at the recipe and identifying the amount of lemon juice required in the ingredient list.

  2. The next step is to figure out how much juice is in each lemon. On average, a medium-sized lemon yields about 2-3 tablespoons of juice. However, this can vary based on the size and ripeness of the fruit.

  3. Once you know how much juice is in each lemon, you can calculate how many lemons you need for your recipe. Simply divide the required amount of juice by the amount of juice in each lemon to get the number of lemons needed.

By following these simple steps, you can ensure that you have the right amount of lemon juice for your recipe.

Advertisement

In the next section, we’ll discuss how to store any excess juice for future use.

Storing Lemon Juice

Now that we know how to calculate the amount of lemon juice needed for a recipe conversion, it’s important to discuss proper storing techniques and shelf life.

Lemon juice can be stored in a variety of ways, including in the refrigerator, freezer, or even canned. When storing in the refrigerator, it’s important to keep the juice in an airtight container to prevent oxidation and maintain freshness. The juice can also be frozen in ice cube trays and then transferred to a freezer-safe container for later use. Canning is another option, but requires proper equipment and techniques to ensure safety.

The shelf life of lemon juice varies depending on the storage method. Freshly squeezed lemon juice stored in the refrigerator can last up to 2-3 days, while frozen juice can last up to 6 months. Canned lemon juice can last even longer, up to a year or more. It’s important to always check for signs of spoilage, such as a sour smell or mold, before using any stored lemon juice.

Moving on to other uses for lemon juice, it can be used for more than just cooking.

Advertisement

Other Uses for Lemon Juice

If you’ve ever struggled with removing stubborn stains or rust, a little bit of this versatile citrus liquid can work wonders. Lemon juice is not only a great ingredient for adding a tangy flavor to your dishes, but it also has some impressive uses in skincare and home cleaning. Here are three benefits of using lemon juice for skincare:

  1. Lemon juice is rich in citric acid, which can help exfoliate dead skin cells and brighten your complexion.

  2. It contains vitamin C, an antioxidant that helps protect your skin from damage caused by free radicals and UV rays.

  3. Lemon juice can also help reduce the appearance of dark spots and acne scars due to its natural bleaching properties.

When it comes to cooking, there are different types of lemon juice you can use depending on your recipe. Freshly squeezed lemon juice is ideal for adding a bright, citrusy flavor to your dishes, while bottled lemon juice can be used for convenience and consistency. Here are a few more ways you can incorporate lemon juice into your cooking:

  1. Use lemon juice as a marinade for meats or fish to add flavor and tenderize the protein.

  2. Add lemon juice to your salad dressings for a tangy kick.

  3. Mix lemon juice with olive oil and herbs to create a flavorful dipping sauce for bread or vegetables.

Overall, lemon juice is a versatile ingredient that can be used in a variety of ways to enhance your skincare routine and cooking skills.

Frequently Asked Questions

What are the health benefits of lemon juice?

As a nutritionist, I can attest to the numerous health benefits of lemon juice. It’s packed with vitamin C, antioxidants, and has anti-inflammatory properties. Lemon juice can also aid digestion, boost immunity, and improve skin health. Check out the nutrition facts for more details.

How long does it take for a lemon to produce juice?

To extract lemon juice, the fruit must first be cut and squeezed. The production timeline depends on the method used, but typically takes only a few minutes. Other factors, such as the ripeness of the lemon, can also impact the amount of juice produced.

Advertisement

Can you juice a lemon without a juicer?

Yes, you can juice a lemon without a juicer using alternative methods such as hand-squeezing, using a fork, or rolling the lemon to release the juice. Different lemon squeezing techniques can also affect the amount of juice extracted.

What is the best way to remove seeds from lemon juice?

The best way to remove seeds from lemon juice is to use a fine mesh strainer or cheesecloth. Simply pour the juice through the strainer or wrap the cheesecloth around the seeds and squeeze. This technique ensures a smooth, seedless juice.

How do you know if a lemon is ripe enough to juice?

To determine if a lemon is ripe enough for juicing, I check for a bright yellow color and a slight give when squeezed. I use lemon juice extraction techniques such as rolling the lemon to release more juice.

Conclusion

In conclusion, knowing how much juice a lemon produces is essential for any cook or bartender. It can mean the difference between a mediocre dish and an exceptional one. By understanding the factors that affect lemon juice yield and using the right tools and techniques, you can maximize the amount of juice you extract from each lemon.

Whether you’re making a lemon vinaigrette or a lemon drop martini, having the right amount of juice is crucial. In short, the power of a lemon shouldn’t be underestimated. This small fruit can pack a punch, and its juice has a wide range of uses. From enhancing the flavor of dishes to providing health benefits, lemon juice is a versatile ingredient that should be a staple in every kitchen.

Advertisement

So grab your juicer and some lemons, and start exploring the endless possibilities of this zesty citrus fruit. Trust me, your taste buds will thank you.

Continue Reading

Juice

How To Make Papaya Juice

Published

on

By

As a health enthusiast, I am always on the lookout for creative and delicious ways to incorporate nutrient-rich foods into my diet. Lately, I have been intrigued by the papaya. Its vibrant orange flesh, sweet taste, and numerous health benefits make it a perfect addition to any smoothie.

Making your own papaya juice is not only easy but also incredibly rewarding. It’s like a burst of sunshine in a glass, delivering a refreshing and invigorating dose of vitamins and minerals straight to your body.

In this article, I will guide you through the step-by-step process of creating your own homemade papaya juice, so you too can enjoy the many health benefits and delicious taste of this tropical fruit.

Key Takeaways

  • The ripeness of the papaya is important when making juice, so look for a mostly yellow fruit with some green spots.
  • Water should be added in the blender to help the ingredients blend smoothly, and a proper water to fruit ratio should be maintained.
  • Blender maintenance is important and blending should be done at a low speed and gradually increased to avoid overblending and creating a foamy texture.
  • Honey or agave syrup can be added as a sweetener for taste and health benefits, but adding too much will increase the calorie and sugar content of the juice, so consume in moderation.

Gather Your Ingredients

Don’t forget to grab that juicy papaya and get ready for a refreshing experience that will quench your thirst like never before! Before we can start making the juice, we need to gather our ingredients.

Apart from the papaya, you’ll need some water, lime juice, and sugar or honey for sweetening. Papaya is an excellent source of vitamins A and C, potassium, and fiber. It’s also rich in antioxidants that help boost your immune system and protect against chronic diseases.

To make the juice more interesting, you can add other fruits like strawberries, pineapple, or mangoes. These flavor variations not only add taste but also enhance the health benefits of the juice.

Advertisement

Now that we have gathered our ingredients, let’s move on to preparing our papaya.

Prepare Your Papaya

Once you’ve got your hands on a ripe papaya, it’s as easy as slicing it open like a smile to reveal the juicy goodness inside. But before you get started, it’s important to know that there are several varieties of papaya, and each one has a different level of ripeness that’s optimal for juice-making.

Here are three things to keep in mind regarding papaya ripeness:

  1. Look for a papaya that is mostly yellow with some green spots. This indicates that the fruit is ripe and ready to be used for juice.

  2. If the papaya is fully green, it’s not yet ripe enough to use. You’ll need to wait a few more days until the papaya turns yellow.

  3. If the papaya is mostly yellow with brown spots, it’s overripe and may not taste as good in juice.

Now that you know how to choose the perfect papaya, it’s time to cut it into pieces and get ready to make some delicious juice.

Cut the Papaya into Pieces

To start, simply grab a sharp knife and slice the ripe papaya in half lengthwise, revealing the bright orange flesh and black seeds inside. Next, scoop out the seeds with a spoon and then proceed to cut the papaya into pieces. I like to cut the papaya into cubes, but you can cut them into any size you prefer.

Advertisement

When selecting a papaya for juice, it’s important to choose a ripe one. A ripe papaya should have a yellowish-orange skin and should yield slightly to pressure. Papayas are a great source of vitamins A and C, and they contain an enzyme called papain that aids in digestion. By adding papaya juice to your diet, you can reap all of these health benefits and more.

Now that the papaya is cut into pieces, it’s time to add it to the blender. But before we do that, we need to add water to the blender to help the blending process.

Add Water to the Blender

Now we’re ready to blend everything together, so let’s go ahead and add some water to the blender. It’ll help the ingredients blend smoothly and create a refreshing and hydrating drink that’ll leave you feeling energized. When adding water to the blender, it’s important to maintain a proper water to fruit ratio to ensure that the juice isn’t too thick or too watery. As a general rule of thumb, I like to add about 1/2 cup of water for every 1 cup of fruit. This ratio can be adjusted based on personal preference, but be careful not to add too much water as it can dilute the flavor of the papaya.

Proper blender maintenance is also important when making papaya juice. Before adding the water, make sure the blender is clean and free of any residue from previous use. After blending, take the time to thoroughly clean the blender to prevent any lingering flavors or bacteria. Now that we’ve added the water to the blender, it’s time to move onto the next step and add the papaya to create a delicious and nutrient-packed juice.

Add the Papaya to the Blender

With the blender prepped and water added, it’s time to blend in the juicy papaya chunks for a tropical burst of flavor. Before adding the papaya, make sure to remove the skin and seeds. Papaya is rich in vitamins A and C, and adding it to your diet can help improve digestion and boost your immune system.

Advertisement

When blending the papaya, it’s important to start at a low speed and gradually increase it to avoid overblending and creating a foamy texture. Depending on your preference, you can add other fruits such as pineapple or banana to create different variations of papaya juice.

Once the papaya is fully blended, we can move on to the next step of the process: blending the mixture until smooth.

Blend the Mixture

You’re ready to blend the mixture and create a delicious papaya juice. Before we start, let’s talk about blender maintenance. It’s important to keep your blender clean and free from any remnants of past use. Make sure to wash the blender thoroughly with soap and water before using it.

Now, let’s blend the mixture. Start by placing the lid on the blender and turning it on. Blend on high speed until the mixture is smooth and creamy. If you don’t have a blender, you can use a food processor or immersion blender as an alternative blending method. Once you’ve achieved the desired consistency, you can move on to the next step: strain the mixture (optional).

Strain the Mixture (optional)

If you wanna go the extra mile, strain out any unwanted bits and bobs from your blended concoction with a sieve or cheesecloth. This step is optional, but it can make a huge difference in the texture and taste of your papaya juice.

Advertisement

By removing the fibrous pieces and seeds, you’ll get a smoother and more pleasant drink that is easier to digest. The benefits of straining go beyond aesthetics and taste.

Papaya seeds, for instance, have a bitter flavor and can cause digestive discomfort if ingested in large amounts. While they’re edible and have some health benefits, such as being anti-inflammatory and antibacterial, they’re not suitable for everyone.

Straining also allows you to remove any dirt, debris, or pesticides that may be present in the fruit. If you don’t have a sieve or cheesecloth, you can skip this step or use a fine-mesh strainer, but keep in mind that you may end up with a chunkier juice.

Now that you have your pulp-free papaya juice, you can proceed to the next step: adding sweetener (optional).

Add Sweetener (optional)

To enhance the flavor and add a touch of sweetness, consider mixing in honey or agave syrup to create a tropical paradise in your mouth. Not only do these alternative sweeteners provide a delicious taste, but they also come with health benefits.

Advertisement

Honey contains antioxidants and has antibacterial properties, while agave syrup has a lower glycemic index compared to traditional sugar. When adding the sweetener, start with a small amount and adjust to your preference. Here are some tips to keep in mind:

  • Use raw, unprocessed honey or organic agave syrup for maximum health benefits.
  • Consider using a honey or agave syrup that is locally sourced to support small businesses and reduce your carbon footprint.
  • If you prefer a sweeter juice, add more sweetener gradually to avoid overpowering the natural flavor of the papaya.
  • Keep in mind that adding sweetener will increase the calorie and sugar content of the juice, so consume in moderation.

Now that the juice is sweetened to your liking, it’s time to chill and serve.

Chill and Serve

Once the mixture is chilled and ready, simply grab a glass and pour in the deliciously tropical juice. Savor every sip, as papaya juice is not only refreshing but also packed with numerous health benefits. It’s rich in antioxidants, vitamins A and C, and enzymes that aid digestion. Regular consumption of papaya juice can improve skin health, boost immunity, and reduce inflammation.

To switch things up, try different serving suggestions for your homemade papaya juice. Add a slice of lime or a sprig of mint for an extra kick of flavor. You can also mix it with other juices like pineapple or orange for a tropical fruit medley. However, it’s important to note that papaya juice should be consumed in moderation as it contains high amounts of natural sugars.

Enjoy your homemade papaya juice and reap the benefits of this delicious and nutritious beverage!

Enjoy Your Homemade Papaya Juice!

You can savor the delicious and nutritious homemade tropical beverage by pouring it into a glass and adding a slice of lime or a sprig of mint for an extra kick of flavor. The best part about making papaya juice at home is that you can customize it according to your preferences and health needs. Here are some health benefits and recipe variations that you can try:

Advertisement
Health Benefits Recipe Variations
High in Vitamin C and antioxidants Add ginger or turmeric for additional anti-inflammatory properties
Supports digestion and gut health Mix with coconut water or kefir for probiotic benefits
Lowers blood sugar levels Blend with spinach or kale for an extra boost of vitamins and minerals

By incorporating these recipe variations, you can enhance the taste and nutritional value of your homemade papaya juice. Enjoy this refreshing beverage as a healthy breakfast drink or a post-workout thirst quencher. Cheers to good health and delicious taste!

Frequently Asked Questions

What are the health benefits of drinking papaya juice?

After researching, I found that papaya juice is high in vitamin C, antioxidants, and fiber. It may aid in digestion and boost immunity. However, it may also cause allergic reactions or interact with certain medications.

Can I use frozen papaya instead of fresh papaya?

Yes, frozen papaya can be used as a substitute for fresh papaya in smoothie options. It still retains its nutritional benefits and can be a convenient option for those who don’t have access to fresh papaya.

How long does homemade papaya juice last in the refrigerator?

To preserve the freshness of homemade papaya juice, store it in an airtight container in the refrigerator. This will extend the juice’s shelf life for up to three days. Keeping the juice fresh is key to maximizing its health benefits.

Can I add other fruits or vegetables to my papaya juice?

Oh, the possibilities! I love getting creative with my papaya juice variations. Mixing papaya with other fruits like mango or pineapple can add a tropical twist, while adding spinach or kale can boost the health benefits. The options are endless!

Advertisement

Is it possible to make papaya juice without a blender?

Yes, it is possible to make papaya juice without a blender. You can use blender alternatives such as a food processor or manual extraction methods like squeezing the juice out of the fruit by hand or using a juicer.

Conclusion

Well, that’s how I make my delicious papaya juice! It’s so easy and refreshing, and it’s a great way to get some extra vitamins and nutrients into your diet.

Did you know that papaya is high in vitamin C, folate, and potassium? In fact, one medium papaya contains about 224% of your daily recommended intake of vitamin C! That’s pretty impressive.

But beyond just being a healthy choice, papaya juice is also a delicious one. It’s naturally sweet and has a tropical flavor that’s perfect for sipping on a hot summer day.

Plus, by making it at home, you can control the sweetness and add in any other ingredients you like. So if you’re looking for a tasty and healthy drink option, give papaya juice a try!

Advertisement

Continue Reading

Juice

How To Make My Own Vape Juice

Published

on

By

As a passionate vaping enthusiast, I have always been fascinated by the art of creating my own e-liquid. The process of blending different flavors to create a unique taste that suits my preferences has been an exciting adventure. However, making your own vape juice can be daunting, especially for beginners.

In this guide, I will share with you the steps I took to make my own vape juice, including the basic ingredients and equipment needed, how to determine the PG/VG ratio, and how to calculate the recipe.

Before we delve into the process of making your own vape juice, it is crucial to understand the basic ingredients and equipment needed. The main ingredients of vape juice include vegetable glycerin (VG), propylene glycol (PG), nicotine, and flavorings. VG and PG are the base liquids used to create the vapor, while nicotine and flavorings are added to enhance the taste and nicotine content.

The equipment needed includes a mixing container, a scale, syringes, gloves, and bottles for storage. With these basic ingredients and equipment, you can start making your own vape juice and customize it to your liking.

Key Takeaways

  • Prioritize ingredient safety and equipment maintenance to ensure purity and consistency.
  • Experiment with flavor combinations and adjust ratios for desired flavor and nicotine strength.
  • Use a mixing calculator and measure ingredients accurately for consistency and safety.
  • Properly store ingredients and finished e-liquids to maintain flavor and potency.

Understand the Basic Ingredients and Equipment Needed

To make your own vape juice, you’ll need some basic ingredients and equipment, like VG (vegetable glycerin), PG (propylene glycol), nicotine, flavorings, syringes, and bottles. These are all readily available online or at your local vape shop.

When it comes to equipment options, you can use either a scale or syringes to measure out your ingredients. A scale is more precise and efficient, while syringes are easier to find and use.

Advertisement

It’s important to note that some flavorings may contain oils or other additives that can be harmful if vaporized, so be sure to research and choose safe options.

Ingredient substitutions are also possible, but may affect the overall flavor and vaping experience. For example, you can swap VG and PG ratios to adjust the thickness and throat hit of your juice. You can also choose different types of nicotine, such as freebase or salt nicotine, depending on your preference.

Flavorings can be substituted or combined to create unique blends, but make sure to use ones that are specifically made for vaping. With all these options, it’s important to experiment and find what works best for you.

Now that you understand the basic ingredients and equipment needed, let’s move on to gathering everything necessary to start making your own vape juice.

Gather the Necessary Ingredients and Equipment

First, you’ll need to gather all the essential ingredients and equipment needed for crafting your own custom e-liquid. When it comes to ingredients, it’s important to prioritize ingredient safety. Make sure to purchase pharmaceutical-grade ingredients from reputable suppliers to ensure the purity of your e-liquid. Some of the key ingredients you’ll need include propylene glycol (PG), vegetable glycerin (VG), nicotine (if desired), and flavor concentrates. It’s also important to properly store your ingredients in a cool, dry place to maintain their quality.

Advertisement

In addition to the necessary ingredients, you’ll need to have the proper equipment for mixing and storing your e-liquid. This includes a scale for accurate measurements, syringes for precise dispensing, mixing containers, and bottles for storing your finished product. It’s also important to prioritize equipment maintenance to ensure the longevity and accuracy of your tools. Regularly clean your equipment and replace any worn or damaged components. By gathering the necessary ingredients and equipment and prioritizing ingredient safety and equipment maintenance, you’ll be well on your way to crafting your own custom e-liquid with confidence.

As you gather your ingredients and equipment, it’s important to keep in mind the flavor profile you want to achieve in your e-liquid. In the next section, we’ll discuss how to choose your flavor profile and create a unique and satisfying vaping experience.

Choose Your Flavor Profile

When it comes to choosing a flavor profile for my vape juice, I like to consider whether I want a single flavor or a combination of flavors. Experimenting with different combinations can lead to unique and interesting results.

Additionally, adjusting the intensity of the flavors can greatly affect the overall taste of the vape juice. It’s important to keep in mind that finding the perfect flavor profile may take some trial and error, but the end result is worth it.

Single Flavor vs. Combination

Deciding between using a single flavor or combining flavors can be a tough choice, but it ultimately depends on personal preference and taste.

Advertisement

There are pros and cons to both options. Using a single flavor can be simple and straightforward, making it easier to control the taste and nicotine strength. However, it can also be limiting in terms of variety and complexity.

On the other hand, combining flavors can open up a whole new world of possibilities, allowing you to create unique and complex blends. The downside is that it can be tricky to get the ratios right and achieve a balanced flavor.

When it comes to popular combinations, there are endless options to choose from. Some common pairings include fruit and menthol, dessert and cream, and tobacco and caramel. However, don’t be afraid to get creative and experiment with different flavors to find the perfect mix for you.

Remember, taste is subjective, so what works for one person may not work for another. The key is to start with small batches and adjust the ratios until you find the right balance of flavor and nicotine strength. With a bit of trial and error, you’ll be able to create your own unique vape juice that perfectly suits your taste buds.

Experimenting with Flavors

Combining different flavor profiles can lead to a multitude of unique and unexpected tastes, allowing for an exciting exploration of the vast world of vaping. However, it’s important to be mindful of certain flavor combinations to avoid.

Advertisement

For example, mixing mint and cinnamon can create an overpowering taste that can be unpleasant to some. Similarly, combining citrus and dairy flavors can result in a curdled and unappetizing vape juice.

On the other hand, finding inspiration for unique flavors can lead to great success. Experimenting with combining fruits like strawberry and kiwi, or mixing dessert flavors like caramel and vanilla can create a delicious and complex vape juice.

It’s also helpful to try out pre-made flavor concentrates from reputable brands to get a sense of different flavor profiles and how they can be mixed together. With a bit of creativity and caution, the possibilities for creating your own unique vape juice flavors are endless.

Now, let’s move on to adjusting flavor intensity.

Adjusting Flavor Intensity

To add an extra kick to your flavor, try using a drop or two of flavor enhancers like EM or AP, which are available at most vape shops. These flavor enhancers are meant to balance out the overall flavor profile of your vape juice.

Advertisement

For example, if you feel like your fruit flavor is lacking some sweetness, you can add a drop of EM, which is ethyl maltol, to enhance the sweetness. On the other hand, if you feel like your bakery flavor is too overpowering, you can add a drop of AP, which is acetyl pyrazine, to tone down the bakery notes.

It’s important to note that when adjusting the flavor intensity, you should always taste your vape juice after adding the enhancer to avoid overdoing it. Additionally, steeping techniques can also affect the overall strength of the flavor.

Steeping is the process of letting your vape juice sit in a cool, dark place for a period of time, allowing the flavors to meld together and become more pronounced. Depending on the flavor and the recipe, some vape juices may need to steep for a few days or even a few weeks.

Once you’ve adjusted the flavor intensity and determined the steeping time, it’s time to move on to determining the pg/vg ratio.

Determine the PG/VG Ratio

Finding the perfect PG/VG ratio can truly make or break the flavor and overall vaping experience. PG and VG are the two main components of vape juice, and they each have their own properties that affect the final product.

Advertisement

PG is thinner and has a stronger throat hit, which is great for those who want a stronger sensation when vaping. On the other hand, VG is thicker and produces more vapor, making it ideal for cloud chasers.

When deciding on the PG/VG ratio for your vape juice, it’s important to consider your personal preferences and vaping style. If you want a stronger throat hit, a higher PG ratio may be better for you. However, if you prefer bigger clouds and a smoother vaping experience, a higher VG ratio may be the way to go. Additionally, you can adjust the throat hit in your vape juice by adding more or less PG, depending on your desired effect.

Moving on to the next step, calculating the recipe for your vape juice involves taking into account the flavorings, nicotine, and PG/VG ratio.

Calculate the Recipe

To calculate the recipe for my DIY vape juice, I need to use a mixing calculator. This tool will help me determine the exact measurements of each ingredient based on my desired nicotine strength, flavor intensity, and PG/VG ratio.

It’s important to measure the ingredients accurately to ensure consistency and safety, and to adjust the recipe for different batch sizes.

Advertisement

Using a Mixing Calculator

Using a mixing calculator can be a game-changer for DIY vape juice makers. It simplifies the process and ensures accurate measurements, making it a piece of cake.

One of the benefits of DIY vape juice is the ability to customize the flavor to your liking. However, this can be challenging without the right tools. Using a mixing calculator eliminates the guesswork and ensures that you have the right amount of each ingredient.

Common mixing mistakes can lead to an unpleasant vaping experience, such as too much flavoring or not enough nicotine. A mixing calculator takes into account the specific gravity and concentration of each ingredient to ensure that you have the perfect balance.

It also allows you to adjust the recipe based on the size of the batch you want to make. With a mixing calculator, you can confidently create your own unique vape juice flavors without worrying about making mistakes that could ruin the final product.

Accurately measuring ingredients is crucial for creating a successful vape juice recipe. In the next section, I’ll discuss the importance of using precise measurements and how to do it correctly.

Advertisement

Measuring Ingredients Accurately

Now that we’ve got the hang of using a mixing calculator, let’s talk about the importance of precision in measuring the ingredients for our vape juice.

Measuring ingredients accurately is crucial to the success of our mix. Even the slightest variation in measurements can greatly affect the flavor and consistency of our final product. That’s why it’s important to use the appropriate tools, such as a graduated cylinder or a scale, for measuring each ingredient.

Common measuring mistakes include eyeballing measurements, using the wrong measuring tools, and not properly leveling off dry ingredients. These mistakes can lead to an imbalanced flavor profile, harsh throat hits, or even a ruined batch.

To avoid these issues, it’s essential to follow the recipe and measure each ingredient carefully. Remember, precision is key when it comes to making your own vape juice.

Now that we understand the importance of accurate measurements, let’s move on to the next step: adjusting for batch size.

Advertisement

Adjusting for Batch Size

When we want to mix up a bigger or smaller batch of our delicious e-liquid, we need to adjust the ingredients accordingly to ensure the perfect balance of flavors. Here are some tips and tricks for adjusting for batch size:

  1. Use a calculator to scale the recipe: This is the easiest and most accurate way to adjust for batch size. Simply multiply the ingredients by the desired batch size and divide by the original batch size. For example, if the original recipe is for a 100ml batch and you want to make a 50ml batch, you would multiply all the ingredients by 0.5.

  2. Be mindful of flavor concentration: Some flavorings can be very potent, and a little goes a long way. When adjusting for batch size, make sure to adjust the flavoring accordingly. For example, if the original recipe calls for 10% flavoring in a 100ml batch, you may only need 5% in a 50ml batch.

  3. Keep track of your adjustments: It’s important to keep a record of the adjustments you make to the recipe. This will help you replicate the recipe in the future and make adjustments as needed.

Now that we’ve discussed adjusting for batch size, it’s time to mix the ingredients.

Mix the Ingredients

As I mix the ingredients for my own vape juice, I need to be aware of the different mixing techniques to achieve the desired result. One common mistake that beginners make is not mixing the ingredients thoroughly, resulting in an uneven distribution of flavors. To prevent this, I need to use a magnetic stirrer or a handheld mixer to ensure that the ingredients are well-blended.

Another important factor to consider is the order in which the ingredients are mixed. I usually start by adding the base liquid, followed by the flavorings, and then the nicotine (if desired). This ensures that the flavors are evenly distributed and that the nicotine is evenly dispersed throughout the mixture.

As I mix the ingredients, I can already start to imagine the flavor profile of my vape juice. But before I can enjoy it, I need to steep the e-liquid to allow the flavors to fully develop.

Advertisement

Once the ingredients are mixed, it’s time to let the e-liquid steep and mature, enhancing the flavors and improving the overall vaping experience.

Steep the E-Liquid

To fully develop the flavors of your e-liquid, steeping is essential. Steeping is the process of letting the e-liquid mixture sit for a certain period of time to allow the flavors to blend together. This process is necessary because some of the ingredients used in the mixture may not be fully incorporated at first, resulting in a harsh or unpleasant taste if vaped immediately.

Steeping techniques vary depending on the recipe and the desired outcome, but the general rule is to store the e-liquid in a cool, dark place and shake it regularly. The importance of patience in steeping can’t be overstated. Some e-liquids may require a few days to a few weeks of steeping before they’re ready to vape. It can be tempting to try the e-liquid right away, but the flavors won’t be as developed as they could be.

Patience is key to achieving the best possible flavor from your homemade e-liquid. Once the steeping process is complete, it’s time to move on to the next step: testing and adjusting the e-liquid to your preference.

Test and Adjust

Now that I’ve steeped my e-liquid, it’s time to test and adjust the flavor and nicotine levels to my liking.

Advertisement

I’ll begin by testing the e-liquid by dripping a small amount onto my atomizer and taking a few puffs.

From there, I can adjust the flavor or nicotine levels accordingly and make notes for future batches.

By taking the time to test and adjust my e-liquid, I can ensure a satisfying experience every time I vape.

Testing the E-Liquid

Before you start vaping your homemade juice, make sure you test it first to ensure the flavor and nicotine levels are to your liking. To test the e-liquid, you can use various flavor testing techniques such as dripper testing or tank testing.

Dripper testing involves adding a small amount of the e-liquid onto a dripper and vaping it without any previous juice in the tank.

Advertisement

Tank testing involves filling your vape tank with the e-liquid and vaping it. This method is best for evaluating how the e-liquid tastes when it is heated.

It’s also important to keep in mind the steeping time for e-liquids. Steeping is the process of letting e-liquids age to improve their flavor. It’s recommended that you let your e-liquid steep for at least a week before testing it. You can steep your e-liquid by letting it sit in a cool, dark place and shaking it every day.

Once you’ve tested your e-liquid and determined the flavor and nicotine levels, you can move on to adjusting flavor or nicotine to your liking.

Adjusting Flavor or Nicotine

Once you’ve tested your e-liquid and determined the flavor and nicotine levels, it’s time to personalize your vaping experience by customizing the nicotine strength and balancing the flavor profile.

To adjust nicotine levels, you’ll need to add more or less nicotine concentrate to your e-liquid base. It’s important to measure the nicotine concentrate accurately to avoid ending up with a nicotine level that’s too strong or too weak. You can use an online calculator to determine the amount of nicotine concentrate to add, based on the strength of your base and the desired nicotine level.

Advertisement

When it comes to balancing the flavor profile, you can adjust the amount of flavoring used to make it stronger or weaker. Be careful not to add too much flavoring, as this can overpower the other flavors and make the e-liquid taste artificial.

It’s a good idea to start with small adjustments and test the e-liquid again before making any major changes. Once you’ve achieved the perfect balance of nicotine and flavor, you can make notes for future batches to ensure consistency.

Making Notes for Future Batches

To ensure consistency in your e-liquid batches, it’s crucial to jot down notes like a baker writing down a recipe for their signature dish. By keeping track of your flavor notes and recipe adjustments, you can easily replicate your favorite e-juice flavors that suit your taste buds.

Here are a few tips on how to make notes for future batches:

  • Start with the basics: Write down the name of the recipe, the date it was made, the nicotine level, and the VG/PG ratio. This will help you keep track of the different batches you make.

  • Flavor notes: Write down the flavors you used, their brand, and the percentage used. This will help you remember which flavors work well together and which ones need to be adjusted.

  • Recipe adjustments: If you made any adjustments to the recipe, like increasing or decreasing the percentage of a flavor, write it down. This will help you achieve the desired taste in future batches.

  • Personal preferences: If you made a recipe that you loved, write down any personal preferences you have, like increasing the sweetness or adding menthol. This will help you customize the recipe to suit your taste buds.

By taking notes, you can easily replicate your favorite e-juice flavors and make any necessary adjustments. Now that you’ve got your notes, it’s time to store the e-liquid properly to ensure it stays fresh and flavorful.

Advertisement

Store the E-Liquid

Storing your homemade e-liquid properly is crucial to maintaining its flavor and nicotine potency. Proper storage ensures that your e-liquid lasts longer and maintains its quality. The shelf life of e-liquid depends on various factors such as nicotine strength, flavoring, and the base used.

To store your e-liquid, you’ll need to keep it away from heat and direct sunlight. Heat and sunlight can cause the nicotine to degrade and alter the flavor. It’s best to store your e-liquid in a cool, dark place, such as a cabinet or drawer. Additionally, make sure to keep your e-liquid away from children and pets, as nicotine is poisonous if ingested. The table below summarizes the proper ways to store your e-liquid.

Factor to Consider Proper Storage
Temperature Cool and dark place
Sunlight Keep away from direct sunlight
Children and pets Keep out of reach

Now that you’ve learned about proper storage for your e-liquid, you can enjoy your custom vape juice!

Enjoy Your Custom Vape Juice!

After properly storing your homemade e-liquid, savoring its flavor and potency is like taking a sip of a fine wine. The customized flavor combinations and tailored nicotine strengths are just some of the benefits of making your own vape juice.

Compared to store-bought options, DIY e-liquids offer more control over the ingredients, allowing you to adjust the flavor and nicotine levels to your liking. To enjoy your custom vape juice, it’s important to use the right equipment and technique.

Advertisement

First, ensure that your vape device is compatible with the e-liquid you made. Then, prime your coil to prevent dry hits and burnt flavors. Finally, start with a low wattage setting and gradually increase it until you find the sweet spot for your desired flavor and vapor production.

With practice, you’ll be able to create a perfect blend that suits your taste and vaping preferences. Enjoy your custom vape juice!

Frequently Asked Questions

Is it safe to make my own vape juice at home?

When making vape juice at home, home safety and ingredients quality are key factors to consider. Ensure proper storage, handling, and labeling of ingredients. Purchase high-quality ingredients from reputable sources.

How much money can I save by making my own vape juice compared to buying it pre-made?

I saved a ton of money by making my own vape juice compared to buying pre-made. DIY vape juice cost comparison showed a 75% reduction in cost. Homemade e liquid quality analysis is crucial for safe and satisfying vaping.

Can I make vape juice without nicotine?

Yes, it is possible to make vape juice without nicotine. There are nicotine-free options available, and flavor customization is still possible without nicotine. It’s important to carefully measure ingredients and follow safety precautions when making your own vape juice.

Advertisement

How long does it take to steep the e-liquid, and why is this step necessary?

Like aging wine, steeping e-liquid is a crucial process that allows flavors to develop fully. The steeping process can take anywhere from a few days to several weeks, depending on the recipe. It’s necessary to achieve optimal taste and quality.

Are there any special precautions I need to take when mixing the ingredients or handling nicotine?

When mixing vape juice, it’s crucial to take mixing precautions and handle nicotine safely. Nicotine is a toxic substance that can cause harm if ingested or absorbed through the skin, so gloves and eye protection should be worn.

Conclusion

Well, after all that effort, I’ve finally made my own vape juice.

I followed all the steps, gathered all the ingredients and equipment, and calculated the perfect recipe for my desired flavor profile.

I steeped the e-liquid, tested and adjusted it to my liking, and stored it in a cool, dark place.

Advertisement

It’s ironic that after all that work, I’m left wondering if it was worth it.

Sure, I have a unique blend of vape juice that no one else has, but was the time and effort worth the end result?

Maybe it’s just me, but I think I’ll stick to buying pre-made vape juice from now on.

At least I know exactly what I’m getting and can save myself the hassle of making it myself.

Advertisement

Continue Reading
Advertisement

Affiliate disclaimer
As an affiliate, we may earn a commission from qualifying purchases. We get commissions for purchases made through links on this website from Amazon and other third parties.

Advertisement

Trending

Copyright © 2024 The Graceful Kitchen Affiliate disclaimer As an affiliate, we may earn a commission from qualifying purchases. We get commissions for purchases made through links on this website from Amazon and other third parties.