Connect with us

Juice

How Long Can Juice Sit Out

Published

on

Have you ever wondered how long fresh squeezed juice can sit out at room temperature before it goes bad?

As a juice enthusiast myself, I understand the importance of proper juice storage to maintain its freshness and nutrients.

But with so many factors affecting the shelf life of juice, it can be difficult to know how long it’s safe to leave your juice sitting out on the counter.

In this article, I will delve into the science behind juice storage and the factors that can affect its shelf life.

I will also provide tips on how to properly store your juice to ensure it stays fresh for as long as possible.

Advertisement

With this knowledge, you can enjoy your favorite juice without worrying about its safety or losing its nutritional value.

Key Takeaways

  • Freshly squeezed juice has a room temperature shelf life of 2-4 hours and a fridge shelf life of 2-3 days.
  • Proper refrigeration at 32-40°F can extend the shelf life of juice and slow down bacterial growth.
  • Leaving juice out at room temperature for too long can cause bacterial growth and pose a serious health risk.
  • If juice has been left out for too long and lost its freshness, it’s generally recommended to dispose of it properly.

The Importance of Proper Juice Storage

You need to make sure you’re storing your juice properly, or else it’ll quickly go bad and become a breeding ground for harmful bacteria. Proper juice storage involves practicing good hygiene and preservation techniques to ensure that your juice stays fresh and safe to consume.

One of the first things to consider is the type of container you’re using to store your juice. Glass containers are ideal because they don’t leach chemicals into the juice, and they’re easy to clean. Plastic containers, on the other hand, can absorb odors and flavors, which can negatively affect the taste of your juice.

Another important factor to consider is the juicing technique you’re using. Maximizing nutrient retention is key to getting the most out of your juice, but it can also impact how long your juice will last. Slow juicers, for example, tend to produce more nutritious juice that lasts longer than fast juicers.

Additionally, storing your juice in the refrigerator as soon as possible after juicing can help to preserve its freshness. All of these factors can play a role in determining how long your juice will last, so it’s important to pay attention to the details when it comes to proper juice storage.

With that said, let’s take a look at some other factors that can affect juice shelf life.
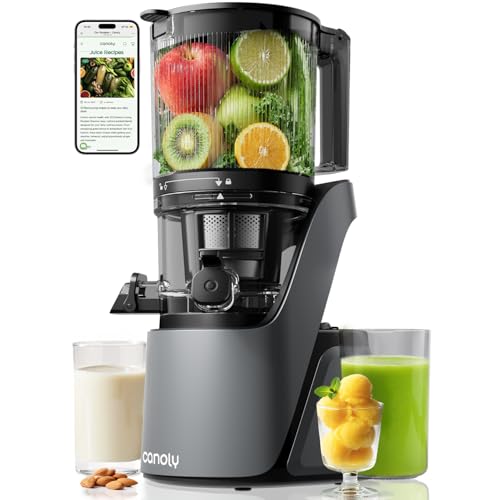
Advertisement

Factors That Affect Juice Shelf Life

The clock is ticking on the lifespan of your favorite fruit drink as it’s subject to a host of variables that can impact its freshness.

Factors affecting juice spoilage include pH level, temperature, exposure to light and air, and the addition of preservatives. High acidity levels and warmer temperatures can hasten the breakdown of nutrients and encourage the growth of harmful microorganisms, leading to spoilage.

To preserve the freshness of your juice, it’s best to store it in a cool, dark place. Refrigeration is the most effective way to slow down the process of spoilage and extend the shelf life of your juice. Properly sealed containers can also help prevent contamination from outside sources.

Best practices for juice preservation also include consuming the juice within a few days of opening, avoiding exposure to direct sunlight, and refraining from reusing containers that haven’t been thoroughly cleaned and sanitized.

By following these guidelines, you can enjoy your juice at its peak freshness for as long as possible before it reaches its expiration date.

Advertisement

As we now understand the factors affecting juice spoilage and best practices for juice preservation, it’s important to know how long juice can sit out before it goes bad.

How Long Can Juice Sit Out?

When it comes to the shelf life of juice, there are two main factors to consider: unopened juice and opened juice. Unopened juice can typically last for several months past its expiration date if stored properly in a cool, dry place.

However, once juice has been opened, it should be consumed within a few days to prevent spoilage and potential foodborne illness.

Shelf Life of Unopened Juice

Juice lovers, rest assured that unopened juice can last for several months when stored properly. The shelf life of unopened juice depends on several factors such as the type of juice, packaging, and preservative use. For instance, pasteurized juice that is stored in a sealed container can last for up to eight months in the fridge. However, unopened fresh juice that has no preservatives can only last for up to seven days.

To give you a better idea of the shelf life of unopened juice, below is a table that shows the approximate duration that different types of juice can last when stored in unopened containers:

Advertisement
Type of Juice Shelf Life (Unopened)
Apple Juice 8 months
Orange Juice 6 months
Cranberry Juice 12 months
Grape Juice 12 months

As you can see, the shelf life of unopened juice varies depending on the type of juice. It’s important to note that the shelf life of juice can also be affected by how it’s stored. It’s always best to store juice in the fridge and away from direct sunlight to ensure that it lasts as long as possible.

Moving forward to the next subtopic, let’s discuss the shelf life of opened juice.

Shelf Life of Opened Juice

You can increase the lifespan of your opened juice by refrigerating it and sealing it tightly with a lid or plastic wrap. This is because juice preservation techniques like refrigeration help to slow down the growth of bacteria that can cause spoilage.

Additionally, sealing the juice with a lid or plastic wrap helps to prevent oxygen from getting in, which can cause oxidation and lead to a sour taste. Best juice storage practices also include using a clean glass or plastic container for your juice, as dirty containers can introduce bacteria that can spoil the juice.

It’s also important to check the expiration date on the juice before opening it, as expired juice is more susceptible to spoilage. By following these best juice storage practices, you can enjoy your opened juice for a longer period of time without worrying about it going bad.

Advertisement

If you notice any signs that your juice has gone bad, such as a foul odor, mold, or a change in color, it’s best to discard it immediately. These signs indicate that the juice has spoiled and may not be safe to consume.

To avoid wasting your juice, be mindful of its shelf life and consume it within a reasonable time frame.

Signs That Your Juice Has Gone Bad

If your juice smells funky or has a strange taste, it may have gone bad. As juice sits out, it can become a breeding ground for bacteria, which can cause spoilage and health risks.

Here are four signs that your juice has gone bad:

  1. Mold: If you see mold floating around in your juice, it’s time to toss it out.

  2. Foul Odor: If your juice smells sour, rancid or off-putting, it’s no longer safe to consume.

  3. Bubbles or Foam: If you notice bubbles or foam on the surface of your juice, this could be a sign of fermentation, which means it’s gone bad.

  4. Change in Color: If your juice has a different color than when you first opened it, this could be a sign of spoilage.

It’s important to be aware of these signs of spoilage, as consuming bad juice can lead to health risks. To prevent this, it’s important to properly store your juice.

Advertisement

Tips for Storing Juice

Wow, keeping your juice fresh can be a real challenge, but with these tips for storing it properly, you’ll be able to enjoy delicious, healthy juice for days to come!

One of the best ways to keep your juice fresh for a longer period is to vacuum seal it. This method removes all the air from the container, preventing oxidation and reducing the growth of bacteria and mold. You can use a vacuum sealer machine or manually remove the air from the container using a straw. Once you’ve vacuum sealed your juice, it can last up to 2 weeks in the refrigerator.

Another way to store your juice is to freeze it. Freezing is a great option if you have more juice than you can drink in a few days. Simply pour the juice into an airtight container, leaving some space at the top for expansion. You can also freeze the juice in ice cube trays and then transfer the cubes to a freezer bag. Frozen juice can last up to 6 months in the freezer.

When you’re ready to drink the juice, simply thaw it in the refrigerator or at room temperature.

Now that you know how to properly store your juice, let’s move on to the next section where we’ll discuss how to tell if your juice is still good.

Advertisement

How to Tell If Your Juice Is Still Good

As someone who consumes juice regularly, it’s important to know how to tell if your juice is still good.

Firstly, check the expiration date on the packaging to ensure that it hasn’t passed.

Secondly, perform a smell test to detect any off-putting odors that may indicate spoilage.

Lastly, look for any mold growth or cloudiness in the juice, as these are signs that it has gone bad and should not be consumed.

By following these simple steps, you can ensure that you’re drinking safe and fresh juice.

Advertisement

Check the Expiration Date

Make sure to check the expiration date of the juice before consuming it, as drinking expired juice can lead to potential health risks. It is important to note that the expiration date is not a guarantee of freshness, but rather a guideline for when the juice is at its best quality. Additionally, proper juice handling techniques can also affect the shelf life of the juice.

To better understand the importance of checking the expiration date, refer to the table below. The table compares the recommended shelf life of different types of juice when stored in the fridge and when left at room temperature. It is important to follow the recommended storage guidelines to ensure the juice stays fresh and safe to consume.

Juice Type Fridge Shelf Life Room Temperature Shelf Life
Freshly squeezed juice 2-3 days 2-4 hours
Pasteurized juice 5-7 days 2-4 hours
Shelf-stable juice Up to 1 year Up to 1 year

With a better understanding of how long juice can sit out, it is important to also perform a smell test before consuming the juice. This allows for the detection of any signs of spoilage, such as a sour or rancid smell. By following these tips, you can ensure the juice you consume is both fresh and safe.

Perform a Smell Test

As I mentioned earlier, checking the expiration date is crucial in determining the freshness of juice. However, sometimes the expiration date may not be accurate, or the juice may have been left out for too long, causing it to spoil.

In such cases, performing a smell test can help identify spoiled juice. To perform a smell test, simply open the container of juice and take a whiff. If the juice smells sour or has a rancid odor, it’s likely spoiled and should not be consumed. However, if the juice smells normal, it may still be safe to drink.

Advertisement

But what if the juice has been left out for a while and has lost its freshness? Unfortunately, there are no surefire ways to revive old juice, and it’s generally recommended to dispose of it properly.

Pouring it down the drain or flushing it down the toilet is not the proper way to dispose of spoiled juice, as it can contaminate the water supply and harm the environment. Instead, it’s recommended to pour the juice into a sealable bag or container and dispose of it in the trash.

As we move on to the next section, it’s important to note that if the juice is showing signs of mold or cloudiness, it’s likely too late to salvage it. But how can we identify these signs?

Look for Mold or Cloudiness

You can easily spot mold or cloudiness in your juice by checking for any unusual discoloration or texture. This is a clear sign that your juice has started to spoil. Mold can develop on the surface of the juice or at the bottom of the container. Cloudiness, on the other hand, is caused by bacteria growth. If you notice either of these signs, it’s best to discard the juice immediately.

To avoid spoilage in the first place, it’s important to pay attention to the pH levels in your juice. The pH level is a measure of the acidity or alkalinity of a substance, and it can affect how quickly bacteria and mold grow. Juice with a pH level below 4.6 is more acidic and less likely to spoil quickly.

Advertisement

By monitoring the pH levels and storing the juice properly, you can extend the shelf life of your juice and reduce the risk of spoilage.

Ensuring the safety of your juice is crucial for maintaining good health. By being mindful of spoilage and pH levels, you can enjoy your juice without any worries.

Safe Juice Consumption Habits

As someone who understands the importance of safe juice consumption practices, I strongly advise against drinking expired juice. Consuming expired juice can lead to food poisoning, which can cause nausea, vomiting, and diarrhea.

Additionally, it’s important to always use clean glasses and containers when drinking juice. Avoid cross-contamination by washing your hands before handling any food or drink.

Don’t Drink Expired Juice

Drinking expired juice can lead to food poisoning, so it’s important to always check the expiration date before consuming. Even if the juice looks and smells fine, there is a risk of harmful bacteria growing in the juice over time. When juice is past its expiration date, it may also lose its nutritional value and taste. Therefore, it’s best to err on the side of caution and dispose of any expired juice.

Advertisement

To further emphasize the importance of checking juice expiration dates, here is a table that outlines the potential health risks associated with consuming expired juice:

Health Risks Description
Food Poisoning Consuming expired juice can lead to gastrointestinal issues, such as vomiting and diarrhea, caused by harmful bacteria that may have grown in the juice.
Allergic Reactions Over time, the ingredients in the juice may break down and cause an allergic reaction in individuals with certain food sensitivities.
Reduced Nutritional Value Expired juice may lose its nutritional value, leading to a decrease in vitamins and minerals that the body needs.
Off Taste Even if the juice is not harmful, it may have a strange taste or smell due to the breakdown of ingredients over time.
Mold Growth If juice is left out for too long, it can develop mold, which can be harmful to consume.

Remember to always check the expiration date before consuming juice to avoid any potential health risks. Additionally, it’s important to use clean glasses and containers to prevent contamination and further reduce the risk of food poisoning.

Use Clean Glasses and Containers

Make sure your glasses and containers are as clean as a whistle to prevent any harmful bacteria from contaminating your juice. Proper sanitation of your glasses and containers is important to prevent any contamination from occurring.

Here are a few tips to ensure that your glasses and containers are clean:

  • Use hot water and soap to clean your glasses and containers thoroughly. Rinse them well to remove any soap residue.

  • Sanitize your glasses and containers by soaking them in a solution of one tablespoon of bleach in one gallon of water for at least one minute. Then rinse them well with hot water and let them air dry.

In addition to proper sanitation, it’s also important to store your juice at the correct temperature. Store your juice in the refrigerator at 40°F or below to prevent the growth of harmful bacteria. By following these guidelines, you can ensure that your juice stays fresh and safe to drink.

Advertisement

To avoid cross-contamination, it’s important to take extra precautions when handling and storing food.

Avoid Cross-Contamination

When handling food, it’s crucial to be mindful of cross-contamination to prevent harmful bacteria from spreading. This is especially important when dealing with juice as it can quickly become a breeding ground for bacteria if not handled correctly.

To prevent contamination, it’s essential to properly clean all utensils, surfaces, and containers that come into contact with the juice. When preparing juice, always use clean cutting boards, knives, and other utensils. Wash your hands thoroughly before and after handling juice to prevent the spread of harmful bacteria. Additionally, it’s essential to use separate containers for different types of juice and avoid reusing containers without proper cleaning.

By taking these steps, you can ensure that your juice remains safe to consume and free of harmful bacteria. Moving on to the next section about common misconceptions about juice storage, it’s important to note that proper cleaning and storage are crucial to maintaining the freshness and safety of juice.

Common Misconceptions About Juice Storage

When it comes to storing juice, there are many misconceptions that can lead to spoilage and waste. One common misconception is that juice can be stored at room temperature for extended periods of time without spoiling. However, this is not the case as microorganisms can grow rapidly in warm environments.

Advertisement

Another common misconception is that all juices can be stored in the refrigerator, regardless of their acidity level. In reality, some juices require specific refrigeration requirements to maintain their freshness and quality.

Room Temperature Storage

Leaving juice out at room temperature for too long can cause bacterial growth, leading to a sour, undrinkable liquid. This is because room temperature is the perfect breeding ground for bacteria, providing them with the ideal environment to multiply rapidly. As a result, juice that has been left out for too long poses a serious health risk.

Therefore, it’s crucial to store your juice properly to avoid this catastrophic outcome. While refrigeration is the best method for preserving juice, there are alternatives to refrigeration that can be used. For example, freezing juice can help to extend its shelf life.

The process of freezing slows down the growth of bacteria, preventing the juice from spoiling. However, it’s important to note that freezing can affect the taste and texture of the juice, so it may not be the best option for everyone. Ultimately, the best way to ensure the safety and quality of your juice is to refrigerate it as soon as possible.

Refrigeration Requirements

If you want to keep your juice fresh and safe to drink, it’s important to refrigerate it properly according to the manufacturer’s instructions. The ideal temperature for storing juice in the refrigerator is between 32 and 40 degrees Fahrenheit. At this temperature, the growth of bacteria and other microorganisms is slowed down, which helps to preserve the freshness of the juice for a longer period of time.

Advertisement

It’s also important to use the best containers for storing juice in the refrigerator. Glass or plastic containers with airtight lids are ideal for keeping the juice fresh. These containers prevent oxygen from getting in and moisture from evaporating out, which can cause the juice to spoil more quickly. Additionally, it’s important to keep the juice away from other foods that may have strong odors, as this can affect the flavor of the juice. By following these guidelines, you can ensure that your juice stays fresh and safe to drink for as long as possible.

Positive Emotion Negative Emotion
Happy Sad
Excited Depressed
Grateful Angry
Hopeful Anxious

Frequently Asked Questions

What are some common types of juice that have a shorter shelf life?

Wow, some juice types are so finicky they’ll spoil faster than milk left out in the sun! Common juice spoilage factors include exposure to air, light, and heat. Juice types with shorter shelf life include fresh squeezed juices and those without added preservatives.

Can you still consume juice that has been left out for a few hours?

Consuming juice left out for a few hours increases the risk of foodborne illness. Properly dispose of spoiled juice to prevent contamination. Health risks associated with consuming spoiled juice include diarrhea, vomiting, and fever.

What is the best way to store homemade juice?

To ensure Proper Juice Storage and preservation, it’s essential to follow certain techniques. Store homemade juice in an airtight container in the fridge to maintain freshness and prevent oxidation. Additionally, avoid exposing it to sunlight or heat.

How can you tell if juice has gone bad if it doesn’t have an expiration date?

Juice, like people, can spoil without warning. Tips for storing open juice include refrigeration and sealing the container tightly. Signs of spoilage in juice include a sour smell, a change in color, and visible mold.

Advertisement

Is it safe to drink juice that has been refrigerated for several weeks?

Drinking refrigerated juice that has been stored for several weeks may pose health concerns due to a decline in juice quality over time. It is recommended to consume juice within a few days of opening.

Conclusion

In conclusion, proper juice storage is crucial to ensure that the juice remains safe and healthy for consumption. Understanding the factors that affect juice shelf life, such as temperature and exposure to air, can help you determine how long your juice can sit out before it should be discarded.

Signs that your juice has gone bad include changes in color, smell, and taste. It’s always better to err on the side of caution and dispose of questionable juice.

When storing juice, it’s important to keep it in a sealed container in the refrigerator. Make sure to consume the juice within the recommended time frame and follow safe consumption habits, such as washing your hands before handling the container and not leaving the juice out for too long.

Despite common misconceptions, juice storage is not as simple as leaving it out on the counter. By following these guidelines, you can enjoy fresh and safe juice for longer periods of time.

Advertisement

In fact, proper juice storage can make the difference between mediocre and outstanding juice. Imagine taking a sip of perfectly chilled and refreshing juice, bursting with flavor and vitality. The thought alone is enough to make your taste buds dance with joy. So don’t let improper storage ruin your juice experience take the necessary steps to keep your juice fresh and delicious.

Continue Reading
Advertisement

Juice

Lemon = How Much Juice

Published

on

By

As someone who loves cooking and baking, I know the importance of accurate measurements when it comes to preparing food. This is especially crucial when using lemon juice in recipes, as it’s important to know the exact amount of juice needed.

Whether youre making lemonade, salad dressing, or a lemon tart, understanding the yield of a lemon will ensure that your recipe turns out perfectly.

There are a few factors that can affect the amount of juice a lemon produces, such as its ripeness and size. Additionally, the juicing method you use can also impact the yield.

In this article, I will provide a step-by-step guide for juicing lemons and share tips for getting the most juice out of your fruit. Plus, I will answer the burning question: how much juice does one lemon yield?

So, lets get started and master the art of juicing lemons!

Advertisement

Key Takeaways

  • Accurate measurements are crucial when cooking and baking with lemons, as factors like ripeness, size, and juicing method can affect lemon juice yield.
  • Knowing how much juice a lemon produces can help save money by buying the right amount of lemons needed, and using the right tool for juicing lemons can make a big difference in juice yield.
  • Lemon juice has health benefits, including aiding in digestion, boosting immune function, and being high in vitamin C and antioxidants, making it beneficial for skincare.
  • Lemon juice can be stored in the refrigerator, freezer, or canned, and can be used in a variety of recipes, including cocktails, salad dressings, and marinades for meats or fish.

The Importance of Knowing How Much Juice a Lemon Produces

You gotta know how much juice a lemon gives, it’s kinda important if you wanna impress your guests with a killer cocktail.

But beyond the realm of mixology, lemon juice has numerous benefits in the realm of health. Rich in vitamin C, potassium, and antioxidants, lemon juice has been shown to aid in digestion, boost immune function, and even prevent kidney stones.

So not only is it important to know how much juice a lemon produces for culinary purposes, but for health reasons as well.

However, the amount of juice a lemon produces can vary depending on a variety of factors, including the ripeness of the fruit, its size, and its temperature. Understanding these factors and how they affect lemon juice yield is crucial in ensuring consistent and accurate measurements in cooking and mixology.

Factors That Affect Lemon Juice Yield

Factors affecting the yield of lemon juice include the ripeness of the fruit and the method of extraction.

When it comes to ripeness, the amount of juice a lemon produces is directly related to how ripe it is. The more mature the fruit, the more juice it will contain. On the other hand, an under-ripe fruit will yield less juice.

Advertisement

Another factor that affects juice yield is the variety of lemon. Some varieties are naturally juicier than others, so it’s important to choose the right variety if you’re looking for maximum juice.

In addition to these factors, the method of extraction also plays a role in how much juice you can get from a lemon. Lemon juice extraction techniques vary, but some methods are more efficient than others. For example, using a hand juicer or a citrus press can yield more juice than simply squeezing the lemon with your hands.

By understanding these factors and choosing the right extraction method, you can maximize your lemon juice yield and get the most out of your fruit.

As we move on to the next section, it’s important to note that having the right tools for juicing lemons can make a big difference in the amount of juice you’re able to extract.

Tools You Will Need for Juicing Lemons

To get the most out of your citrus, you’ll need the right tools. When it comes to juicing lemons, there are two common options: hand-held lemon squeezers and electronic juicers.

Advertisement

Hand-held lemon squeezers are a low-cost and easy-to-use option. They come in a variety of sizes and shapes, but all function in a similar way. Simply cut the lemon in half, place it in the squeezer, and press down on the handles to extract the juice.

Electronic juicers can be a more expensive investment, but they can save time and effort. These machines can handle larger quantities of lemons and often have adjustable settings to customize the level of pulp in your juice.

No matter which tool you choose, having the right equipment can make the process of juicing lemons much easier and more efficient.

Now that you have the appropriate tools, it’s time to learn how to use them effectively. In the next section, we’ll provide a step-by-step guide for juicing lemons to help you maximize your lemon juice yield.

Step-by-Step Guide for Juicing Lemons

Once I’ve got my chosen juicing tool at hand, such as a citrus reamer or a handheld juicer, I begin the process of extracting lemon juice.

Advertisement

First, I cut the lemon in half and place one half onto the juicing tool, with the cut side facing down. Then, I firmly press and twist the juicing tool, extracting the juice from the lemon.

I repeat this process with the other half of the lemon, until all the juice has been extracted.

There are several lemon juicer alternatives available, but the most important thing is to choose a tool that allows for efficient extraction of the juice.

Additionally, lemon juice has many benefits for skin care, as it’s high in vitamin C and antioxidants. Incorporating lemon juice into a daily skincare routine can help brighten and even out skin tone, while also helping to reduce the appearance of fine lines and wrinkles.

With that being said, let’s move on to some tips for getting the most juice out of your lemons.

Advertisement

Tips for Getting the Most Juice Out of Your Lemons

If you want to make the most out of your citrus, it’s important to know a few tricks for maximizing the amount of tangy goodness you can squeeze out of each fruit. Here are three tips for getting the most juice out of your lemons:

  • Use a lemon zester to break up the membranes inside the lemon before juicing. This will help release more juice and make juicing easier.

  • Roll the lemon on a hard surface to break down the pulp before juicing. This will also help release more juice.

  • Consider alternative juicing methods, such as using a garlic press or a citrus squeezer, to get even more juice out of your lemons.

By following these tips, you can ensure that you’re getting the most juice out of each lemon.

But how much juice does one lemon yield? Let’s explore that in the next section.

How Much Juice Does One Lemon Yield?

Did you know that squeezing a single lemon can yield up to a quarter cup of tart and zesty liquid? As someone who loves to cook and bake, knowing how much juice one lemon yields is essential. Not only does it help me plan my recipes better, but it also helps me save money by buying just the right amount of lemons I need.

To give you an idea of just how much juice you can get from a lemon, take a look at this table:

Advertisement
Size of Lemon Amount of Juice
Small 1-2 tablespoons
Medium 2-3 tablespoons
Large 4-5 tablespoons

Aside from adding flavor to your dishes, lemon juice also has numerous health benefits. It’s rich in Vitamin C, which is known to boost the immune system and improve skin health. It also aids in digestion and can help prevent kidney stones. And if you ever find yourself without a fresh lemon on hand, you can always use substitutes such as vinegar or lime juice in a pinch.

Transitioning to the next subtopic, understanding how much juice one lemon yields is essential when it comes to recipe conversion. Knowing how to calculate the amount of lemon juice needed for a recipe can make or break the final outcome.

Recipe Conversion: How to Calculate Lemon Juice Needed

Understanding the recipe conversion process can be complex, especially when it comes to calculating the necessary amount of lemon juice needed. However, having the right amount of this tart and zesty liquid can make all the difference in the final product.

Here are some tips on how to calculate the right amount of lemon juice for your recipe:

  1. Start by determining how much juice you need. This can be done by looking at the recipe and identifying the amount of lemon juice required in the ingredient list.

  2. The next step is to figure out how much juice is in each lemon. On average, a medium-sized lemon yields about 2-3 tablespoons of juice. However, this can vary based on the size and ripeness of the fruit.

  3. Once you know how much juice is in each lemon, you can calculate how many lemons you need for your recipe. Simply divide the required amount of juice by the amount of juice in each lemon to get the number of lemons needed.

By following these simple steps, you can ensure that you have the right amount of lemon juice for your recipe.

Advertisement

In the next section, we’ll discuss how to store any excess juice for future use.

Storing Lemon Juice

Now that we know how to calculate the amount of lemon juice needed for a recipe conversion, it’s important to discuss proper storing techniques and shelf life.

Lemon juice can be stored in a variety of ways, including in the refrigerator, freezer, or even canned. When storing in the refrigerator, it’s important to keep the juice in an airtight container to prevent oxidation and maintain freshness. The juice can also be frozen in ice cube trays and then transferred to a freezer-safe container for later use. Canning is another option, but requires proper equipment and techniques to ensure safety.

The shelf life of lemon juice varies depending on the storage method. Freshly squeezed lemon juice stored in the refrigerator can last up to 2-3 days, while frozen juice can last up to 6 months. Canned lemon juice can last even longer, up to a year or more. It’s important to always check for signs of spoilage, such as a sour smell or mold, before using any stored lemon juice.

Moving on to other uses for lemon juice, it can be used for more than just cooking.

Advertisement

Other Uses for Lemon Juice

If you’ve ever struggled with removing stubborn stains or rust, a little bit of this versatile citrus liquid can work wonders. Lemon juice is not only a great ingredient for adding a tangy flavor to your dishes, but it also has some impressive uses in skincare and home cleaning. Here are three benefits of using lemon juice for skincare:

  1. Lemon juice is rich in citric acid, which can help exfoliate dead skin cells and brighten your complexion.

  2. It contains vitamin C, an antioxidant that helps protect your skin from damage caused by free radicals and UV rays.

  3. Lemon juice can also help reduce the appearance of dark spots and acne scars due to its natural bleaching properties.

When it comes to cooking, there are different types of lemon juice you can use depending on your recipe. Freshly squeezed lemon juice is ideal for adding a bright, citrusy flavor to your dishes, while bottled lemon juice can be used for convenience and consistency. Here are a few more ways you can incorporate lemon juice into your cooking:

  1. Use lemon juice as a marinade for meats or fish to add flavor and tenderize the protein.

  2. Add lemon juice to your salad dressings for a tangy kick.

  3. Mix lemon juice with olive oil and herbs to create a flavorful dipping sauce for bread or vegetables.

Overall, lemon juice is a versatile ingredient that can be used in a variety of ways to enhance your skincare routine and cooking skills.

Frequently Asked Questions

What are the health benefits of lemon juice?

As a nutritionist, I can attest to the numerous health benefits of lemon juice. It’s packed with vitamin C, antioxidants, and has anti-inflammatory properties. Lemon juice can also aid digestion, boost immunity, and improve skin health. Check out the nutrition facts for more details.

How long does it take for a lemon to produce juice?

To extract lemon juice, the fruit must first be cut and squeezed. The production timeline depends on the method used, but typically takes only a few minutes. Other factors, such as the ripeness of the lemon, can also impact the amount of juice produced.

Advertisement

Can you juice a lemon without a juicer?

Yes, you can juice a lemon without a juicer using alternative methods such as hand-squeezing, using a fork, or rolling the lemon to release the juice. Different lemon squeezing techniques can also affect the amount of juice extracted.

What is the best way to remove seeds from lemon juice?

The best way to remove seeds from lemon juice is to use a fine mesh strainer or cheesecloth. Simply pour the juice through the strainer or wrap the cheesecloth around the seeds and squeeze. This technique ensures a smooth, seedless juice.

How do you know if a lemon is ripe enough to juice?

To determine if a lemon is ripe enough for juicing, I check for a bright yellow color and a slight give when squeezed. I use lemon juice extraction techniques such as rolling the lemon to release more juice.

Conclusion

In conclusion, knowing how much juice a lemon produces is essential for any cook or bartender. It can mean the difference between a mediocre dish and an exceptional one. By understanding the factors that affect lemon juice yield and using the right tools and techniques, you can maximize the amount of juice you extract from each lemon.

Whether you’re making a lemon vinaigrette or a lemon drop martini, having the right amount of juice is crucial. In short, the power of a lemon shouldn’t be underestimated. This small fruit can pack a punch, and its juice has a wide range of uses. From enhancing the flavor of dishes to providing health benefits, lemon juice is a versatile ingredient that should be a staple in every kitchen.

Advertisement

So grab your juicer and some lemons, and start exploring the endless possibilities of this zesty citrus fruit. Trust me, your taste buds will thank you.

Continue Reading

Juice

How To Make Papaya Juice

Published

on

By

As a health enthusiast, I am always on the lookout for creative and delicious ways to incorporate nutrient-rich foods into my diet. Lately, I have been intrigued by the papaya. Its vibrant orange flesh, sweet taste, and numerous health benefits make it a perfect addition to any smoothie.

Making your own papaya juice is not only easy but also incredibly rewarding. It’s like a burst of sunshine in a glass, delivering a refreshing and invigorating dose of vitamins and minerals straight to your body.

In this article, I will guide you through the step-by-step process of creating your own homemade papaya juice, so you too can enjoy the many health benefits and delicious taste of this tropical fruit.

Key Takeaways

  • The ripeness of the papaya is important when making juice, so look for a mostly yellow fruit with some green spots.
  • Water should be added in the blender to help the ingredients blend smoothly, and a proper water to fruit ratio should be maintained.
  • Blender maintenance is important and blending should be done at a low speed and gradually increased to avoid overblending and creating a foamy texture.
  • Honey or agave syrup can be added as a sweetener for taste and health benefits, but adding too much will increase the calorie and sugar content of the juice, so consume in moderation.

Gather Your Ingredients

Don’t forget to grab that juicy papaya and get ready for a refreshing experience that will quench your thirst like never before! Before we can start making the juice, we need to gather our ingredients.

Apart from the papaya, you’ll need some water, lime juice, and sugar or honey for sweetening. Papaya is an excellent source of vitamins A and C, potassium, and fiber. It’s also rich in antioxidants that help boost your immune system and protect against chronic diseases.

To make the juice more interesting, you can add other fruits like strawberries, pineapple, or mangoes. These flavor variations not only add taste but also enhance the health benefits of the juice.

Advertisement

Now that we have gathered our ingredients, let’s move on to preparing our papaya.

Prepare Your Papaya

Once you’ve got your hands on a ripe papaya, it’s as easy as slicing it open like a smile to reveal the juicy goodness inside. But before you get started, it’s important to know that there are several varieties of papaya, and each one has a different level of ripeness that’s optimal for juice-making.

Here are three things to keep in mind regarding papaya ripeness:

  1. Look for a papaya that is mostly yellow with some green spots. This indicates that the fruit is ripe and ready to be used for juice.

  2. If the papaya is fully green, it’s not yet ripe enough to use. You’ll need to wait a few more days until the papaya turns yellow.

  3. If the papaya is mostly yellow with brown spots, it’s overripe and may not taste as good in juice.

Now that you know how to choose the perfect papaya, it’s time to cut it into pieces and get ready to make some delicious juice.

Cut the Papaya into Pieces

To start, simply grab a sharp knife and slice the ripe papaya in half lengthwise, revealing the bright orange flesh and black seeds inside. Next, scoop out the seeds with a spoon and then proceed to cut the papaya into pieces. I like to cut the papaya into cubes, but you can cut them into any size you prefer.

Advertisement

When selecting a papaya for juice, it’s important to choose a ripe one. A ripe papaya should have a yellowish-orange skin and should yield slightly to pressure. Papayas are a great source of vitamins A and C, and they contain an enzyme called papain that aids in digestion. By adding papaya juice to your diet, you can reap all of these health benefits and more.

Now that the papaya is cut into pieces, it’s time to add it to the blender. But before we do that, we need to add water to the blender to help the blending process.

Add Water to the Blender

Now we’re ready to blend everything together, so let’s go ahead and add some water to the blender. It’ll help the ingredients blend smoothly and create a refreshing and hydrating drink that’ll leave you feeling energized. When adding water to the blender, it’s important to maintain a proper water to fruit ratio to ensure that the juice isn’t too thick or too watery. As a general rule of thumb, I like to add about 1/2 cup of water for every 1 cup of fruit. This ratio can be adjusted based on personal preference, but be careful not to add too much water as it can dilute the flavor of the papaya.

Proper blender maintenance is also important when making papaya juice. Before adding the water, make sure the blender is clean and free of any residue from previous use. After blending, take the time to thoroughly clean the blender to prevent any lingering flavors or bacteria. Now that we’ve added the water to the blender, it’s time to move onto the next step and add the papaya to create a delicious and nutrient-packed juice.

Add the Papaya to the Blender

With the blender prepped and water added, it’s time to blend in the juicy papaya chunks for a tropical burst of flavor. Before adding the papaya, make sure to remove the skin and seeds. Papaya is rich in vitamins A and C, and adding it to your diet can help improve digestion and boost your immune system.

Advertisement

When blending the papaya, it’s important to start at a low speed and gradually increase it to avoid overblending and creating a foamy texture. Depending on your preference, you can add other fruits such as pineapple or banana to create different variations of papaya juice.

Once the papaya is fully blended, we can move on to the next step of the process: blending the mixture until smooth.

Blend the Mixture

You’re ready to blend the mixture and create a delicious papaya juice. Before we start, let’s talk about blender maintenance. It’s important to keep your blender clean and free from any remnants of past use. Make sure to wash the blender thoroughly with soap and water before using it.

Now, let’s blend the mixture. Start by placing the lid on the blender and turning it on. Blend on high speed until the mixture is smooth and creamy. If you don’t have a blender, you can use a food processor or immersion blender as an alternative blending method. Once you’ve achieved the desired consistency, you can move on to the next step: strain the mixture (optional).

Strain the Mixture (optional)

If you wanna go the extra mile, strain out any unwanted bits and bobs from your blended concoction with a sieve or cheesecloth. This step is optional, but it can make a huge difference in the texture and taste of your papaya juice.

Advertisement

By removing the fibrous pieces and seeds, you’ll get a smoother and more pleasant drink that is easier to digest. The benefits of straining go beyond aesthetics and taste.

Papaya seeds, for instance, have a bitter flavor and can cause digestive discomfort if ingested in large amounts. While they’re edible and have some health benefits, such as being anti-inflammatory and antibacterial, they’re not suitable for everyone.

Straining also allows you to remove any dirt, debris, or pesticides that may be present in the fruit. If you don’t have a sieve or cheesecloth, you can skip this step or use a fine-mesh strainer, but keep in mind that you may end up with a chunkier juice.

Now that you have your pulp-free papaya juice, you can proceed to the next step: adding sweetener (optional).

Add Sweetener (optional)

To enhance the flavor and add a touch of sweetness, consider mixing in honey or agave syrup to create a tropical paradise in your mouth. Not only do these alternative sweeteners provide a delicious taste, but they also come with health benefits.

Advertisement

Honey contains antioxidants and has antibacterial properties, while agave syrup has a lower glycemic index compared to traditional sugar. When adding the sweetener, start with a small amount and adjust to your preference. Here are some tips to keep in mind:

  • Use raw, unprocessed honey or organic agave syrup for maximum health benefits.
  • Consider using a honey or agave syrup that is locally sourced to support small businesses and reduce your carbon footprint.
  • If you prefer a sweeter juice, add more sweetener gradually to avoid overpowering the natural flavor of the papaya.
  • Keep in mind that adding sweetener will increase the calorie and sugar content of the juice, so consume in moderation.

Now that the juice is sweetened to your liking, it’s time to chill and serve.

Chill and Serve

Once the mixture is chilled and ready, simply grab a glass and pour in the deliciously tropical juice. Savor every sip, as papaya juice is not only refreshing but also packed with numerous health benefits. It’s rich in antioxidants, vitamins A and C, and enzymes that aid digestion. Regular consumption of papaya juice can improve skin health, boost immunity, and reduce inflammation.

To switch things up, try different serving suggestions for your homemade papaya juice. Add a slice of lime or a sprig of mint for an extra kick of flavor. You can also mix it with other juices like pineapple or orange for a tropical fruit medley. However, it’s important to note that papaya juice should be consumed in moderation as it contains high amounts of natural sugars.

Enjoy your homemade papaya juice and reap the benefits of this delicious and nutritious beverage!

Enjoy Your Homemade Papaya Juice!

You can savor the delicious and nutritious homemade tropical beverage by pouring it into a glass and adding a slice of lime or a sprig of mint for an extra kick of flavor. The best part about making papaya juice at home is that you can customize it according to your preferences and health needs. Here are some health benefits and recipe variations that you can try:

Advertisement
Health Benefits Recipe Variations
High in Vitamin C and antioxidants Add ginger or turmeric for additional anti-inflammatory properties
Supports digestion and gut health Mix with coconut water or kefir for probiotic benefits
Lowers blood sugar levels Blend with spinach or kale for an extra boost of vitamins and minerals

By incorporating these recipe variations, you can enhance the taste and nutritional value of your homemade papaya juice. Enjoy this refreshing beverage as a healthy breakfast drink or a post-workout thirst quencher. Cheers to good health and delicious taste!

Frequently Asked Questions

What are the health benefits of drinking papaya juice?

After researching, I found that papaya juice is high in vitamin C, antioxidants, and fiber. It may aid in digestion and boost immunity. However, it may also cause allergic reactions or interact with certain medications.

Can I use frozen papaya instead of fresh papaya?

Yes, frozen papaya can be used as a substitute for fresh papaya in smoothie options. It still retains its nutritional benefits and can be a convenient option for those who don’t have access to fresh papaya.

How long does homemade papaya juice last in the refrigerator?

To preserve the freshness of homemade papaya juice, store it in an airtight container in the refrigerator. This will extend the juice’s shelf life for up to three days. Keeping the juice fresh is key to maximizing its health benefits.

Can I add other fruits or vegetables to my papaya juice?

Oh, the possibilities! I love getting creative with my papaya juice variations. Mixing papaya with other fruits like mango or pineapple can add a tropical twist, while adding spinach or kale can boost the health benefits. The options are endless!

Advertisement

Is it possible to make papaya juice without a blender?

Yes, it is possible to make papaya juice without a blender. You can use blender alternatives such as a food processor or manual extraction methods like squeezing the juice out of the fruit by hand or using a juicer.

Conclusion

Well, that’s how I make my delicious papaya juice! It’s so easy and refreshing, and it’s a great way to get some extra vitamins and nutrients into your diet.

Did you know that papaya is high in vitamin C, folate, and potassium? In fact, one medium papaya contains about 224% of your daily recommended intake of vitamin C! That’s pretty impressive.

But beyond just being a healthy choice, papaya juice is also a delicious one. It’s naturally sweet and has a tropical flavor that’s perfect for sipping on a hot summer day.

Plus, by making it at home, you can control the sweetness and add in any other ingredients you like. So if you’re looking for a tasty and healthy drink option, give papaya juice a try!

Advertisement

Continue Reading

Juice

How To Make My Own Vape Juice

Published

on

By

As a passionate vaping enthusiast, I have always been fascinated by the art of creating my own e-liquid. The process of blending different flavors to create a unique taste that suits my preferences has been an exciting adventure. However, making your own vape juice can be daunting, especially for beginners.

In this guide, I will share with you the steps I took to make my own vape juice, including the basic ingredients and equipment needed, how to determine the PG/VG ratio, and how to calculate the recipe.

Before we delve into the process of making your own vape juice, it is crucial to understand the basic ingredients and equipment needed. The main ingredients of vape juice include vegetable glycerin (VG), propylene glycol (PG), nicotine, and flavorings. VG and PG are the base liquids used to create the vapor, while nicotine and flavorings are added to enhance the taste and nicotine content.

The equipment needed includes a mixing container, a scale, syringes, gloves, and bottles for storage. With these basic ingredients and equipment, you can start making your own vape juice and customize it to your liking.

Key Takeaways

  • Prioritize ingredient safety and equipment maintenance to ensure purity and consistency.
  • Experiment with flavor combinations and adjust ratios for desired flavor and nicotine strength.
  • Use a mixing calculator and measure ingredients accurately for consistency and safety.
  • Properly store ingredients and finished e-liquids to maintain flavor and potency.

Understand the Basic Ingredients and Equipment Needed

To make your own vape juice, you’ll need some basic ingredients and equipment, like VG (vegetable glycerin), PG (propylene glycol), nicotine, flavorings, syringes, and bottles. These are all readily available online or at your local vape shop.

When it comes to equipment options, you can use either a scale or syringes to measure out your ingredients. A scale is more precise and efficient, while syringes are easier to find and use.

Advertisement

It’s important to note that some flavorings may contain oils or other additives that can be harmful if vaporized, so be sure to research and choose safe options.

Ingredient substitutions are also possible, but may affect the overall flavor and vaping experience. For example, you can swap VG and PG ratios to adjust the thickness and throat hit of your juice. You can also choose different types of nicotine, such as freebase or salt nicotine, depending on your preference.

Flavorings can be substituted or combined to create unique blends, but make sure to use ones that are specifically made for vaping. With all these options, it’s important to experiment and find what works best for you.

Now that you understand the basic ingredients and equipment needed, let’s move on to gathering everything necessary to start making your own vape juice.

Gather the Necessary Ingredients and Equipment

First, you’ll need to gather all the essential ingredients and equipment needed for crafting your own custom e-liquid. When it comes to ingredients, it’s important to prioritize ingredient safety. Make sure to purchase pharmaceutical-grade ingredients from reputable suppliers to ensure the purity of your e-liquid. Some of the key ingredients you’ll need include propylene glycol (PG), vegetable glycerin (VG), nicotine (if desired), and flavor concentrates. It’s also important to properly store your ingredients in a cool, dry place to maintain their quality.

Advertisement

In addition to the necessary ingredients, you’ll need to have the proper equipment for mixing and storing your e-liquid. This includes a scale for accurate measurements, syringes for precise dispensing, mixing containers, and bottles for storing your finished product. It’s also important to prioritize equipment maintenance to ensure the longevity and accuracy of your tools. Regularly clean your equipment and replace any worn or damaged components. By gathering the necessary ingredients and equipment and prioritizing ingredient safety and equipment maintenance, you’ll be well on your way to crafting your own custom e-liquid with confidence.

As you gather your ingredients and equipment, it’s important to keep in mind the flavor profile you want to achieve in your e-liquid. In the next section, we’ll discuss how to choose your flavor profile and create a unique and satisfying vaping experience.

Choose Your Flavor Profile

When it comes to choosing a flavor profile for my vape juice, I like to consider whether I want a single flavor or a combination of flavors. Experimenting with different combinations can lead to unique and interesting results.

Additionally, adjusting the intensity of the flavors can greatly affect the overall taste of the vape juice. It’s important to keep in mind that finding the perfect flavor profile may take some trial and error, but the end result is worth it.

Single Flavor vs. Combination

Deciding between using a single flavor or combining flavors can be a tough choice, but it ultimately depends on personal preference and taste.

Advertisement

There are pros and cons to both options. Using a single flavor can be simple and straightforward, making it easier to control the taste and nicotine strength. However, it can also be limiting in terms of variety and complexity.

On the other hand, combining flavors can open up a whole new world of possibilities, allowing you to create unique and complex blends. The downside is that it can be tricky to get the ratios right and achieve a balanced flavor.

When it comes to popular combinations, there are endless options to choose from. Some common pairings include fruit and menthol, dessert and cream, and tobacco and caramel. However, don’t be afraid to get creative and experiment with different flavors to find the perfect mix for you.

Remember, taste is subjective, so what works for one person may not work for another. The key is to start with small batches and adjust the ratios until you find the right balance of flavor and nicotine strength. With a bit of trial and error, you’ll be able to create your own unique vape juice that perfectly suits your taste buds.

Experimenting with Flavors

Combining different flavor profiles can lead to a multitude of unique and unexpected tastes, allowing for an exciting exploration of the vast world of vaping. However, it’s important to be mindful of certain flavor combinations to avoid.

Advertisement

For example, mixing mint and cinnamon can create an overpowering taste that can be unpleasant to some. Similarly, combining citrus and dairy flavors can result in a curdled and unappetizing vape juice.

On the other hand, finding inspiration for unique flavors can lead to great success. Experimenting with combining fruits like strawberry and kiwi, or mixing dessert flavors like caramel and vanilla can create a delicious and complex vape juice.

It’s also helpful to try out pre-made flavor concentrates from reputable brands to get a sense of different flavor profiles and how they can be mixed together. With a bit of creativity and caution, the possibilities for creating your own unique vape juice flavors are endless.

Now, let’s move on to adjusting flavor intensity.

Adjusting Flavor Intensity

To add an extra kick to your flavor, try using a drop or two of flavor enhancers like EM or AP, which are available at most vape shops. These flavor enhancers are meant to balance out the overall flavor profile of your vape juice.

Advertisement

For example, if you feel like your fruit flavor is lacking some sweetness, you can add a drop of EM, which is ethyl maltol, to enhance the sweetness. On the other hand, if you feel like your bakery flavor is too overpowering, you can add a drop of AP, which is acetyl pyrazine, to tone down the bakery notes.

It’s important to note that when adjusting the flavor intensity, you should always taste your vape juice after adding the enhancer to avoid overdoing it. Additionally, steeping techniques can also affect the overall strength of the flavor.

Steeping is the process of letting your vape juice sit in a cool, dark place for a period of time, allowing the flavors to meld together and become more pronounced. Depending on the flavor and the recipe, some vape juices may need to steep for a few days or even a few weeks.

Once you’ve adjusted the flavor intensity and determined the steeping time, it’s time to move on to determining the pg/vg ratio.

Determine the PG/VG Ratio

Finding the perfect PG/VG ratio can truly make or break the flavor and overall vaping experience. PG and VG are the two main components of vape juice, and they each have their own properties that affect the final product.

Advertisement

PG is thinner and has a stronger throat hit, which is great for those who want a stronger sensation when vaping. On the other hand, VG is thicker and produces more vapor, making it ideal for cloud chasers.

When deciding on the PG/VG ratio for your vape juice, it’s important to consider your personal preferences and vaping style. If you want a stronger throat hit, a higher PG ratio may be better for you. However, if you prefer bigger clouds and a smoother vaping experience, a higher VG ratio may be the way to go. Additionally, you can adjust the throat hit in your vape juice by adding more or less PG, depending on your desired effect.

Moving on to the next step, calculating the recipe for your vape juice involves taking into account the flavorings, nicotine, and PG/VG ratio.

Calculate the Recipe

To calculate the recipe for my DIY vape juice, I need to use a mixing calculator. This tool will help me determine the exact measurements of each ingredient based on my desired nicotine strength, flavor intensity, and PG/VG ratio.

It’s important to measure the ingredients accurately to ensure consistency and safety, and to adjust the recipe for different batch sizes.

Advertisement

Using a Mixing Calculator

Using a mixing calculator can be a game-changer for DIY vape juice makers. It simplifies the process and ensures accurate measurements, making it a piece of cake.

One of the benefits of DIY vape juice is the ability to customize the flavor to your liking. However, this can be challenging without the right tools. Using a mixing calculator eliminates the guesswork and ensures that you have the right amount of each ingredient.

Common mixing mistakes can lead to an unpleasant vaping experience, such as too much flavoring or not enough nicotine. A mixing calculator takes into account the specific gravity and concentration of each ingredient to ensure that you have the perfect balance.

It also allows you to adjust the recipe based on the size of the batch you want to make. With a mixing calculator, you can confidently create your own unique vape juice flavors without worrying about making mistakes that could ruin the final product.

Accurately measuring ingredients is crucial for creating a successful vape juice recipe. In the next section, I’ll discuss the importance of using precise measurements and how to do it correctly.

Advertisement

Measuring Ingredients Accurately

Now that we’ve got the hang of using a mixing calculator, let’s talk about the importance of precision in measuring the ingredients for our vape juice.

Measuring ingredients accurately is crucial to the success of our mix. Even the slightest variation in measurements can greatly affect the flavor and consistency of our final product. That’s why it’s important to use the appropriate tools, such as a graduated cylinder or a scale, for measuring each ingredient.

Common measuring mistakes include eyeballing measurements, using the wrong measuring tools, and not properly leveling off dry ingredients. These mistakes can lead to an imbalanced flavor profile, harsh throat hits, or even a ruined batch.

To avoid these issues, it’s essential to follow the recipe and measure each ingredient carefully. Remember, precision is key when it comes to making your own vape juice.

Now that we understand the importance of accurate measurements, let’s move on to the next step: adjusting for batch size.

Advertisement

Adjusting for Batch Size

When we want to mix up a bigger or smaller batch of our delicious e-liquid, we need to adjust the ingredients accordingly to ensure the perfect balance of flavors. Here are some tips and tricks for adjusting for batch size:

  1. Use a calculator to scale the recipe: This is the easiest and most accurate way to adjust for batch size. Simply multiply the ingredients by the desired batch size and divide by the original batch size. For example, if the original recipe is for a 100ml batch and you want to make a 50ml batch, you would multiply all the ingredients by 0.5.

  2. Be mindful of flavor concentration: Some flavorings can be very potent, and a little goes a long way. When adjusting for batch size, make sure to adjust the flavoring accordingly. For example, if the original recipe calls for 10% flavoring in a 100ml batch, you may only need 5% in a 50ml batch.

  3. Keep track of your adjustments: It’s important to keep a record of the adjustments you make to the recipe. This will help you replicate the recipe in the future and make adjustments as needed.

Now that we’ve discussed adjusting for batch size, it’s time to mix the ingredients.

Mix the Ingredients

As I mix the ingredients for my own vape juice, I need to be aware of the different mixing techniques to achieve the desired result. One common mistake that beginners make is not mixing the ingredients thoroughly, resulting in an uneven distribution of flavors. To prevent this, I need to use a magnetic stirrer or a handheld mixer to ensure that the ingredients are well-blended.

Another important factor to consider is the order in which the ingredients are mixed. I usually start by adding the base liquid, followed by the flavorings, and then the nicotine (if desired). This ensures that the flavors are evenly distributed and that the nicotine is evenly dispersed throughout the mixture.

As I mix the ingredients, I can already start to imagine the flavor profile of my vape juice. But before I can enjoy it, I need to steep the e-liquid to allow the flavors to fully develop.

Advertisement

Once the ingredients are mixed, it’s time to let the e-liquid steep and mature, enhancing the flavors and improving the overall vaping experience.

Steep the E-Liquid

To fully develop the flavors of your e-liquid, steeping is essential. Steeping is the process of letting the e-liquid mixture sit for a certain period of time to allow the flavors to blend together. This process is necessary because some of the ingredients used in the mixture may not be fully incorporated at first, resulting in a harsh or unpleasant taste if vaped immediately.

Steeping techniques vary depending on the recipe and the desired outcome, but the general rule is to store the e-liquid in a cool, dark place and shake it regularly. The importance of patience in steeping can’t be overstated. Some e-liquids may require a few days to a few weeks of steeping before they’re ready to vape. It can be tempting to try the e-liquid right away, but the flavors won’t be as developed as they could be.

Patience is key to achieving the best possible flavor from your homemade e-liquid. Once the steeping process is complete, it’s time to move on to the next step: testing and adjusting the e-liquid to your preference.

Test and Adjust

Now that I’ve steeped my e-liquid, it’s time to test and adjust the flavor and nicotine levels to my liking.

Advertisement

I’ll begin by testing the e-liquid by dripping a small amount onto my atomizer and taking a few puffs.

From there, I can adjust the flavor or nicotine levels accordingly and make notes for future batches.

By taking the time to test and adjust my e-liquid, I can ensure a satisfying experience every time I vape.

Testing the E-Liquid

Before you start vaping your homemade juice, make sure you test it first to ensure the flavor and nicotine levels are to your liking. To test the e-liquid, you can use various flavor testing techniques such as dripper testing or tank testing.

Dripper testing involves adding a small amount of the e-liquid onto a dripper and vaping it without any previous juice in the tank.

Advertisement

Tank testing involves filling your vape tank with the e-liquid and vaping it. This method is best for evaluating how the e-liquid tastes when it is heated.

It’s also important to keep in mind the steeping time for e-liquids. Steeping is the process of letting e-liquids age to improve their flavor. It’s recommended that you let your e-liquid steep for at least a week before testing it. You can steep your e-liquid by letting it sit in a cool, dark place and shaking it every day.

Once you’ve tested your e-liquid and determined the flavor and nicotine levels, you can move on to adjusting flavor or nicotine to your liking.

Adjusting Flavor or Nicotine

Once you’ve tested your e-liquid and determined the flavor and nicotine levels, it’s time to personalize your vaping experience by customizing the nicotine strength and balancing the flavor profile.

To adjust nicotine levels, you’ll need to add more or less nicotine concentrate to your e-liquid base. It’s important to measure the nicotine concentrate accurately to avoid ending up with a nicotine level that’s too strong or too weak. You can use an online calculator to determine the amount of nicotine concentrate to add, based on the strength of your base and the desired nicotine level.

Advertisement

When it comes to balancing the flavor profile, you can adjust the amount of flavoring used to make it stronger or weaker. Be careful not to add too much flavoring, as this can overpower the other flavors and make the e-liquid taste artificial.

It’s a good idea to start with small adjustments and test the e-liquid again before making any major changes. Once you’ve achieved the perfect balance of nicotine and flavor, you can make notes for future batches to ensure consistency.

Making Notes for Future Batches

To ensure consistency in your e-liquid batches, it’s crucial to jot down notes like a baker writing down a recipe for their signature dish. By keeping track of your flavor notes and recipe adjustments, you can easily replicate your favorite e-juice flavors that suit your taste buds.

Here are a few tips on how to make notes for future batches:

  • Start with the basics: Write down the name of the recipe, the date it was made, the nicotine level, and the VG/PG ratio. This will help you keep track of the different batches you make.

  • Flavor notes: Write down the flavors you used, their brand, and the percentage used. This will help you remember which flavors work well together and which ones need to be adjusted.

  • Recipe adjustments: If you made any adjustments to the recipe, like increasing or decreasing the percentage of a flavor, write it down. This will help you achieve the desired taste in future batches.

  • Personal preferences: If you made a recipe that you loved, write down any personal preferences you have, like increasing the sweetness or adding menthol. This will help you customize the recipe to suit your taste buds.

By taking notes, you can easily replicate your favorite e-juice flavors and make any necessary adjustments. Now that you’ve got your notes, it’s time to store the e-liquid properly to ensure it stays fresh and flavorful.

Advertisement

Store the E-Liquid

Storing your homemade e-liquid properly is crucial to maintaining its flavor and nicotine potency. Proper storage ensures that your e-liquid lasts longer and maintains its quality. The shelf life of e-liquid depends on various factors such as nicotine strength, flavoring, and the base used.

To store your e-liquid, you’ll need to keep it away from heat and direct sunlight. Heat and sunlight can cause the nicotine to degrade and alter the flavor. It’s best to store your e-liquid in a cool, dark place, such as a cabinet or drawer. Additionally, make sure to keep your e-liquid away from children and pets, as nicotine is poisonous if ingested. The table below summarizes the proper ways to store your e-liquid.

Factor to Consider Proper Storage
Temperature Cool and dark place
Sunlight Keep away from direct sunlight
Children and pets Keep out of reach

Now that you’ve learned about proper storage for your e-liquid, you can enjoy your custom vape juice!

Enjoy Your Custom Vape Juice!

After properly storing your homemade e-liquid, savoring its flavor and potency is like taking a sip of a fine wine. The customized flavor combinations and tailored nicotine strengths are just some of the benefits of making your own vape juice.

Compared to store-bought options, DIY e-liquids offer more control over the ingredients, allowing you to adjust the flavor and nicotine levels to your liking. To enjoy your custom vape juice, it’s important to use the right equipment and technique.

Advertisement

First, ensure that your vape device is compatible with the e-liquid you made. Then, prime your coil to prevent dry hits and burnt flavors. Finally, start with a low wattage setting and gradually increase it until you find the sweet spot for your desired flavor and vapor production.

With practice, you’ll be able to create a perfect blend that suits your taste and vaping preferences. Enjoy your custom vape juice!

Frequently Asked Questions

Is it safe to make my own vape juice at home?

When making vape juice at home, home safety and ingredients quality are key factors to consider. Ensure proper storage, handling, and labeling of ingredients. Purchase high-quality ingredients from reputable sources.

How much money can I save by making my own vape juice compared to buying it pre-made?

I saved a ton of money by making my own vape juice compared to buying pre-made. DIY vape juice cost comparison showed a 75% reduction in cost. Homemade e liquid quality analysis is crucial for safe and satisfying vaping.

Can I make vape juice without nicotine?

Yes, it is possible to make vape juice without nicotine. There are nicotine-free options available, and flavor customization is still possible without nicotine. It’s important to carefully measure ingredients and follow safety precautions when making your own vape juice.

Advertisement

How long does it take to steep the e-liquid, and why is this step necessary?

Like aging wine, steeping e-liquid is a crucial process that allows flavors to develop fully. The steeping process can take anywhere from a few days to several weeks, depending on the recipe. It’s necessary to achieve optimal taste and quality.

Are there any special precautions I need to take when mixing the ingredients or handling nicotine?

When mixing vape juice, it’s crucial to take mixing precautions and handle nicotine safely. Nicotine is a toxic substance that can cause harm if ingested or absorbed through the skin, so gloves and eye protection should be worn.

Conclusion

Well, after all that effort, I’ve finally made my own vape juice.

I followed all the steps, gathered all the ingredients and equipment, and calculated the perfect recipe for my desired flavor profile.

I steeped the e-liquid, tested and adjusted it to my liking, and stored it in a cool, dark place.

Advertisement

It’s ironic that after all that work, I’m left wondering if it was worth it.

Sure, I have a unique blend of vape juice that no one else has, but was the time and effort worth the end result?

Maybe it’s just me, but I think I’ll stick to buying pre-made vape juice from now on.

At least I know exactly what I’m getting and can save myself the hassle of making it myself.

Advertisement

Continue Reading
Advertisement

Affiliate disclaimer
As an affiliate, we may earn a commission from qualifying purchases. We get commissions for purchases made through links on this website from Amazon and other third parties.

Advertisement

Trending

Copyright © 2024 The Graceful Kitchen Affiliate disclaimer As an affiliate, we may earn a commission from qualifying purchases. We get commissions for purchases made through links on this website from Amazon and other third parties.