To make a one-pot Mediterranean quinoa pilaf, start by gathering fresh vegetables, herbs, and seasonings. Rinse the quinoa well, then toast it in a skillet with olive oil and aromatics like garlic and onions. Add vegetables, spices, and broth, then simmer until the quinoa is fluffy and flavorful. Finish with herbs, nuts, or cheese for extra texture. Want tips on perfecting each step? Keep exploring for all the details.
Key Takeaways
- Rinse quinoa thoroughly and toast it in a dry skillet to enhance nutty flavor before cooking.
- Sauté garlic, onions, and colorful vegetables in olive oil for a flavorful base.
- Add water or broth, bring to a simmer, then cover and cook until quinoa is fluffy and absorbed.
- Incorporate herbs like parsley and mint, and season with spices such as cumin or smoked paprika.
- Garnish with fresh herbs, lemon wedges, or toppings like feta and pine nuts before serving.
Gathering Your Ingredients

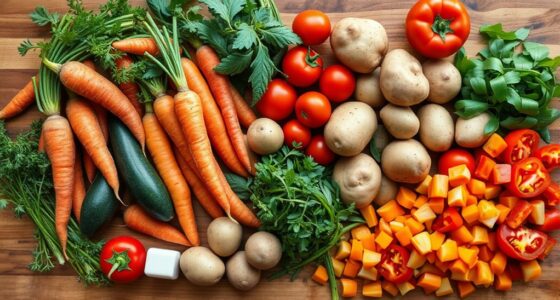
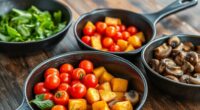
Before you begin cooking, gather all the ingredients you’ll need for this Mediterranean quinoa pilaf. Collect fresh vegetables like tomatoes, cucumbers, and bell peppers, along with herbs such as parsley and mint. Don’t forget the quinoa, olive oil, lemon juice, and your preferred seasonings. As you prepare, consider pairing wine that complements the dish’s flavors—something crisp like a Sauvignon Blanc works well. To keep your ingredients fresh, follow proper storage tips: store fresh herbs in a damp cloth in the fridge and keep quinoa in an airtight container in a cool, dry place. Having everything ready guarantees a smooth cooking process and helps you focus on balancing flavors perfectly. Proper prep ultimately leads to a flavorful, well-balanced Mediterranean quinoa pilaf. Organized kitchen space can make the entire cooking process more efficient and enjoyable. Additionally, understanding best grocery savings strategies can help you purchase quality ingredients at a lower cost, making your meal both delicious and budget-friendly. Learning about pinball history can also add an interesting touch to your kitchen ambiance if you display vintage arcade memorabilia. Incorporating cleaning and maintenance tips for your kitchen tools and surfaces can further enhance your cooking environment and ensure longevity of your equipment.
Preparing the Quinoa
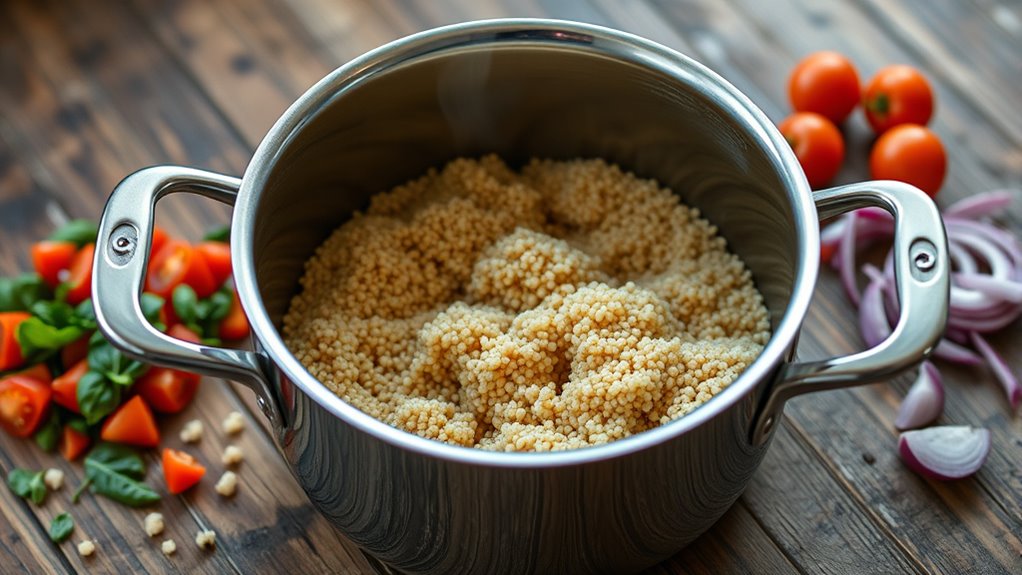
Start by rinsing the quinoa thoroughly under cold water to remove any bitterness. Measure the water precisely to guarantee perfect texture, then add it to the quinoa. Toast the rinsed quinoa in the pot for a few minutes to boost its nutty flavor before cooking. Incorporating a gentle exfoliation process can help improve the overall texture and appearance of the cooked quinoa, similar to how performance tuning enhances vehicle efficiency and power. Proper filter maintenance can also ensure that your kitchen appliances function optimally during cooking. Additionally, selecting quality fats can support flavor and nutritional value in your dish.
Rinse Quinoa Thoroughly
Have you ever noticed how rinsing quinoa thoroughly can improve the final dish? Rinsing removes the bitter saponins on the surface, ensuring a cleaner, milder flavor. When you rinse, imagine:
- Cold water swirling around the grains, washing away residues
- Quinoa glistening as it’s cleansed, ready for cooking
- The grains losing any remaining bitterness, enhancing taste
Proper rinsing also helps prevent clumping and ensures even cooking. If you’re storing quinoa long-term or considering alternative grains, rinsing becomes even more important to maintain freshness and prevent residue buildup. Rinsing is a simple step that makes a significant difference in texture and flavor, setting a perfect foundation for your Mediterranean pilaf. A quick rinse guarantees a delicious, well-prepared dish every time.
Measure Water Precisely
To guarantee your quinoa cooks perfectly, measuring the water accurately is essential. Use reliable measuring tools, like a liquid measuring cup, to ensure you add the correct amount. Typically, a 2:1 water-to-quinoa ratio works best, so double-check your measurements before cooking. Pay attention to water temperature; starting with hot or boiling water can influence the cooking process, especially if you’re aiming for tender grains. Precise measurement prevents undercooking or mushiness, resulting in fluffy quinoa. Avoid eyeballing or guessing; instead, carefully pour water and double-check your measurements. By using proper measuring tools and controlling water temperature, you set a solid foundation for perfectly cooked quinoa every time. Accurate measurement makes your pilaf consistent and delicious. Additionally, understanding culinary techniques can help refine your cooking process for better results.
Toast for Flavor
Once you’ve measured your water carefully, the next step is to enhance the flavor of your quinoa by toasting it. To do this, heat a dry skillet over medium heat and add the rinsed quinoa. Stir frequently as the grains turn a light golden brown and release a nutty aroma. This step amplifies the natural flavors and creates a richer base for your pilaf. Imagine the aroma pairing perfectly with crusty bread or a fresh herb salad. Toasted quinoa complements a variety of beverage options, from crisp white wines to herbal teas. Visualize the grains shimmering with a toasted hue, ready to absorb the liquid. Incorporating color temperature adjustments can help safeguard your assets, similar to how toasting enhances the flavor complexity of your dish. This simple step elevates your dish, making it more flavorful and satisfying.
Sautéing Aromatics and Vegetables
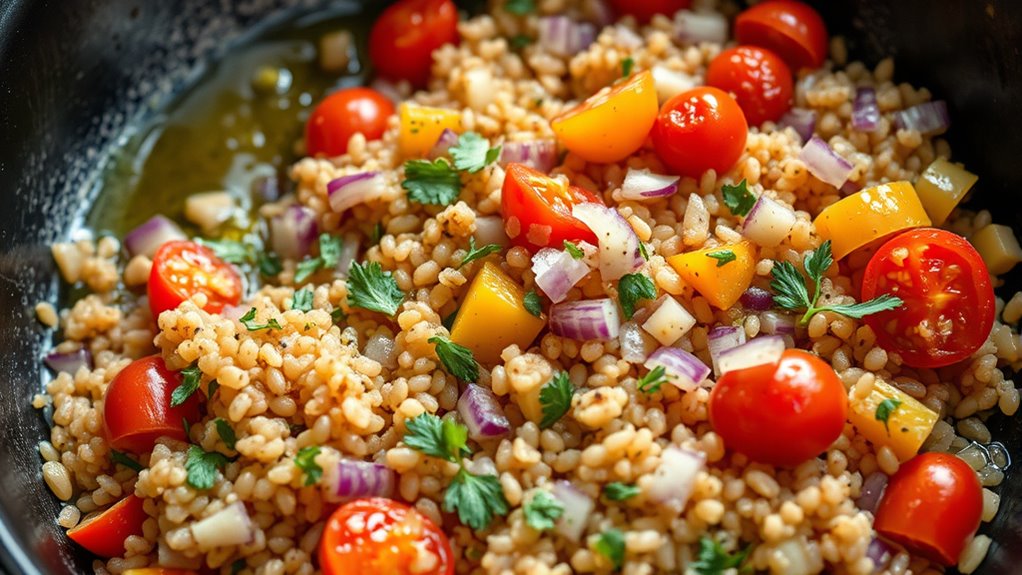
Sautéing aromatics and vegetables is a crucial step that builds the foundation of flavor for your quinoa pilaf. Start by heating a generous drizzle of olive oil in your pot over medium heat. Once hot, add minced garlic cloves, stirring constantly to prevent burning. Cook for about 30 seconds until fragrant. Next, add diced vegetables such as bell peppers, onions, or zucchini. Sauté, stirring occasionally, until they soften and develop a slight caramelization, about 5-7 minutes. This process releases their natural sweetness and enhances their flavor, creating a savory base for your pilaf. Keep the heat steady to avoid burning the garlic or vegetables. This step ensures your dish has rich, layered flavors right from the start.
Adding Flavorful Elements
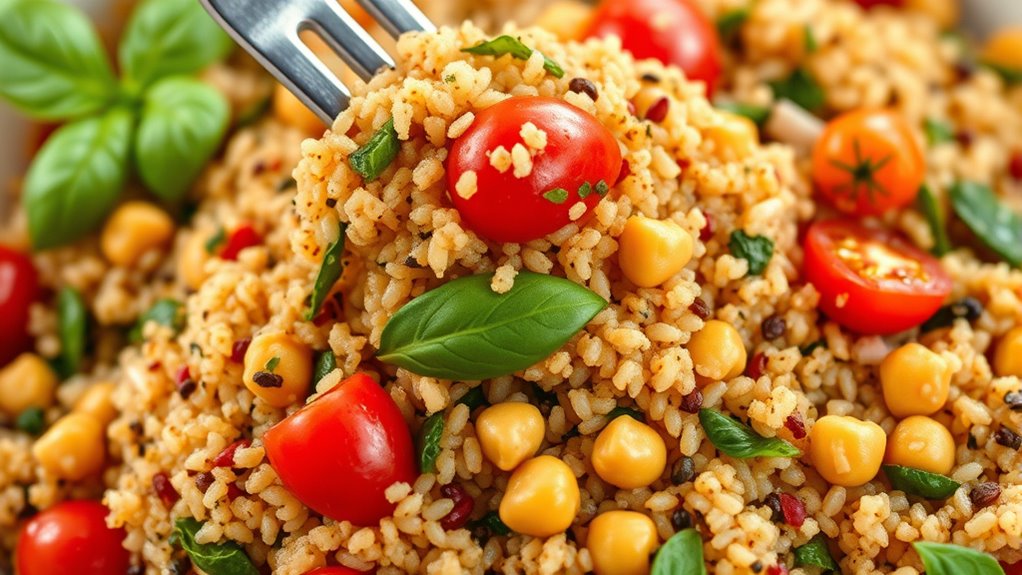
Adding fresh herbs like parsley or mint instantly brightens the dish, giving it a vibrant, aromatic touch. Layering spices such as cumin or smoked paprika enhances depth and complexity in every bite. You’ll find that combining these elements creates a rich, flavorful profile that elevates your quinoa pilaf. Embracing flavor layering by experimenting with different herb and spice combinations can lead to discovering unique flavor pairings. Incorporating expert advice from top-rated guides can also help refine your seasoning techniques for optimal taste. Additionally, understanding consumer preferences for specialty and artisanal teas can inspire innovative flavor combinations in your cooking.
Fresh Herb Boosts
Fresh herbs bring vibrant flavor and aroma to your quinoa pilaf, elevating its overall taste. They serve as natural flavor enhancers and perfect herb pairings that brighten each bite. By adding herbs like parsley, basil, or mint, you create a lively, fragrant layer that complements the Mediterranean ingredients. Imagine chopping bright green parsley, releasing a clean, grassy scent, or tearing fragrant basil leaves to release their sweet aroma. Visualize finely chopped mint adding a cool, invigorating note. These herbs are versatile and can be added at different stages for maximum flavor. Their lively presence transforms simple ingredients into a dish bursting with herbal notes. Incorporate these fresh herb boosts to enhance the flavor profile and bring a lively, aromatic quality to your quinoa pilaf.
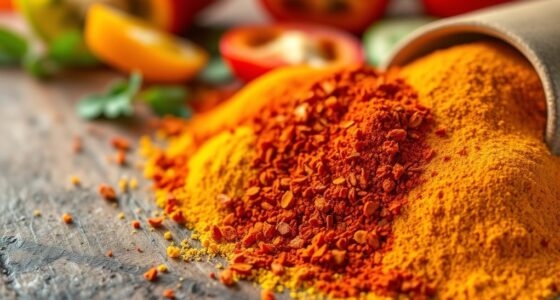
Spice Layering Techniques
To build a rich, layered flavor in your quinoa pilaf, you should focus on spice layering techniques that gradually develop depth and complexity. Start by sautéing aromatics like garlic and onions to create a flavorful base. Then, add spices in stages, beginning with milder ones such as cumin or paprika, and finishing with bolder spices like cinnamon or sumac for flavor enhancement. This method allows each spice to release its unique aroma, enriching the dish. Proper spice layering guarantees a balanced, multi-dimensional taste. Additionally, understanding the spice layering process can help you tailor the dish to your taste preferences. Incorporating appreciation for the different spice qualities can elevate your cooking experience and result in a more sophisticated flavor profile. Recognizing the importance of layering techniques can also prevent the overpowering of delicate flavors. Here’s a quick guide:
| Stage | Technique |
|---|---|
| Base | Sauté aromatics |
| Development | Add mild spices early |
| Finish & Boost | Incorporate bold spices last |
Cooking the Quinoa Mixture
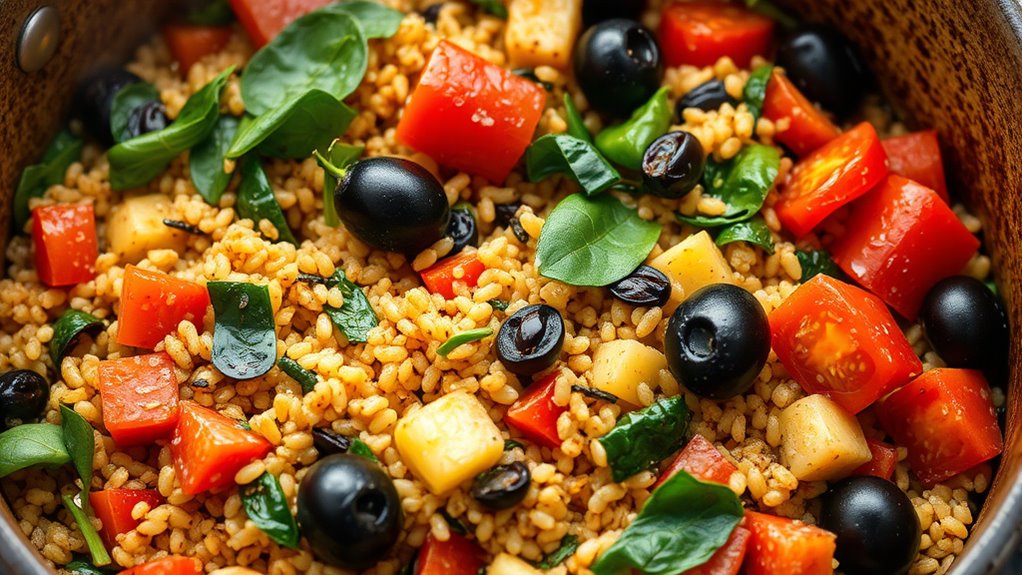
Once the quinoa mixture is prepared, it’s time to cook it thoroughly. Pour the mixture into a large skillet or pot, and bring it to a gentle simmer. Cover and let it cook on low heat until the quinoa absorbs the flavorful broth and becomes fluffy. As it cooks, envision the aroma of roasted garlic, fresh herbs, and tender vegetables meld together. Imagine the vibrant kale salad awaiting you as a fresh accompaniment or the smoky notes of grilled vegetables adding depth. During cooking, occasionally lift the lid to check for even absorption and stir gently to prevent sticking. The goal is a tender, flavorful pilaf with distinct grains, ready to be combined with your favorite sides or enjoyed on its own. Remember to monitor the heat to ensure the quinoa cooks evenly and doesn’t dry out during the process.
Fluffing and Combining
Have you finished cooking the quinoa mixture? Now, it’s time to fluff and combine. Use a fork to gently lift and separate the grains, which helps prevent clumping and guarantees a light, airy texture. This step is essential for ideal grain storage, as fluffing releases excess steam and moisture, keeping the quinoa from becoming soggy. If you’ve purchased quinoa in packaging, fluffing helps distribute the flavors evenly throughout the grains. Be careful not to overmix, as this can mash the quinoa. Once fluffed, you can gently fold in any additional ingredients or herbs to enhance the dish’s flavor. Properly fluffed and combined, your quinoa pilaf will have a perfect, fluffy consistency ready for serving.
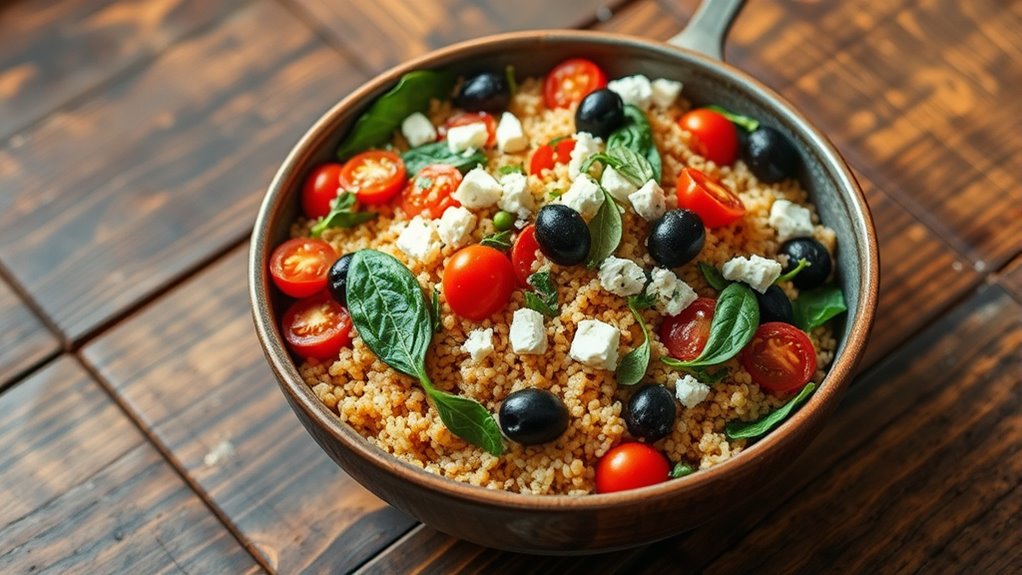
Garnishing and Serving
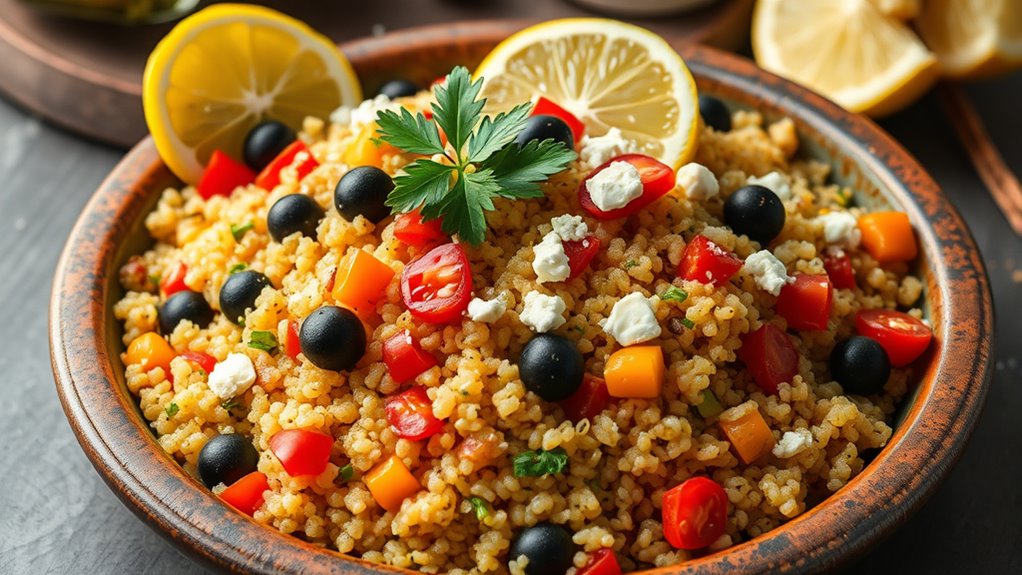
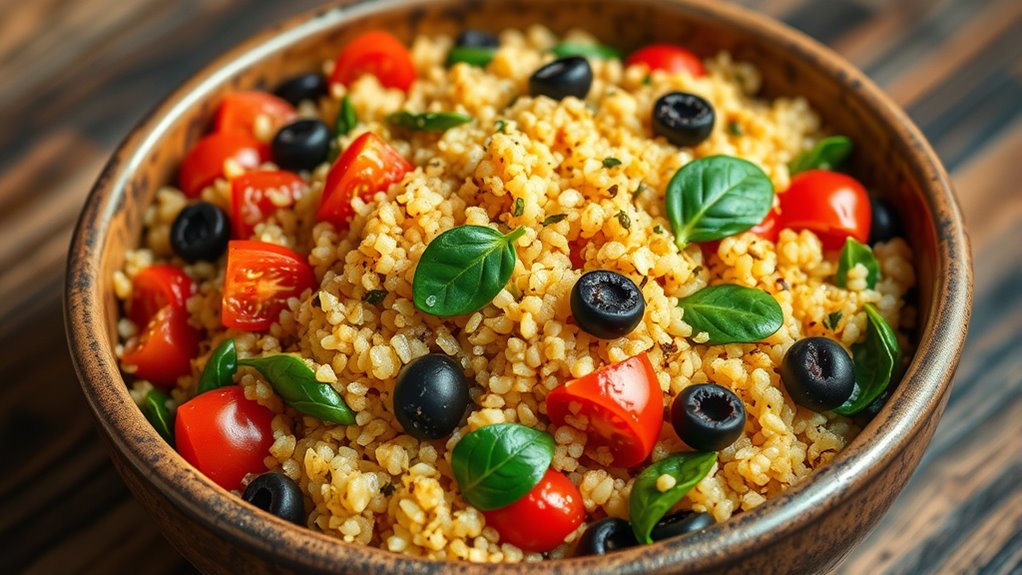
After you’ve fluffed and combined the quinoa, it’s time to focus on garnishing and serving. Use plating techniques to make your dish visually appealing—consider shaping the pilaf into a mound or using a ring mold for clean edges. For garnishing, sprinkle fresh herbs like parsley or cilantro for a burst of color and flavor. You can also add lemon wedges or a dollop of Greek yogurt for extra zest. To enhance serving suggestions, serve the pilaf warm in a shallow bowl or plate, allowing the vibrant ingredients to shine. Think about adding a few extra toppings like toasted pine nuts or crumbled feta cheese for texture and richness. These simple steps elevate your presentation and make your Mediterranean quinoa pilaf irresistible.
Variations and Customizations
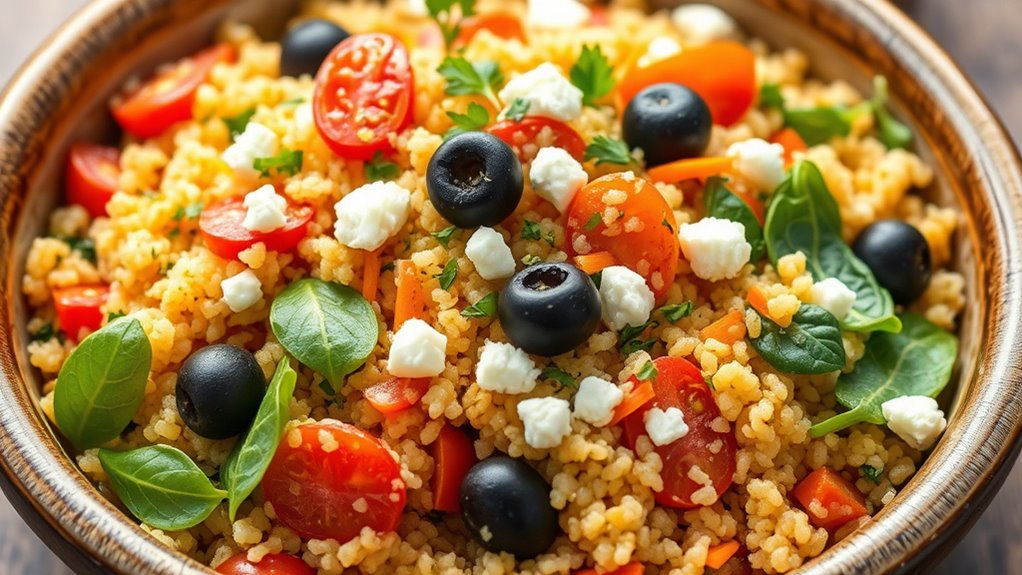
To make your Mediterranean quinoa pilaf truly your own, you can customize it with a variety of ingredients and flavors. Add different seasoning blends like za’atar, herbes de Provence, or smoked paprika to enhance the dish’s depth. Incorporate ingredients such as sun-dried tomatoes, olives, or roasted vegetables for extra texture and flavor. You can also experiment with presentation styles—serve it in individual bowls, layered in a glass dish, or molded into a ring for a more elegant look. Adjust the salt, pepper, or lemon juice to suit your taste preferences. These variations allow you to tailor the dish to your liking, making it versatile for different occasions or dietary needs while keeping the core Mediterranean essence intact.
Tips for Perfect Results
Achieving perfect results with your Mediterranean quinoa pilaf starts with rinsing the quinoa thoroughly under cold water to remove its natural bitterness. Use a fine-mesh strainer and let the water run until it runs clear. For consistent cooking, choose a good-quality pot with a tight-fitting lid that distributes heat evenly. When customizing, feel free to swap ingredients like cherry tomatoes for roasted red peppers or feta for goat cheese, depending on your preference. Keep these tips in mind:
- Use the right cooking equipment to prevent uneven cooking or sticking.
- Adjust liquid ratios if substituting ingredients to keep the pilaf moist but not soggy.
- Taste and season as you go, especially when making ingredient substitutions, to balance flavors perfectly.
Frequently Asked Questions
Can I Make This Dish Vegan or Vegetarian?
You can definitely make this dish vegan or vegetarian. For plant-based options, skip cheese or use vegan cheese alternatives. You might also add extra vegetables or plant-based proteins like chickpeas or tofu to boost flavor and nutrition. Feel free to experiment with cheese substitutions such as nutritional yeast or cashew cheese. These changes keep the dish flavorful and inclusive for various dietary preferences.
How Long Does This Pilaf Stay Fresh in the Refrigerator?
You wonder about the storage duration of your dish in the fridge. Generally, cooked dishes like this stay fresh for 3 to 4 days when properly refrigerated. Use airtight containers to keep it fresh longer, and always store it within two hours of cooking. For best results, reheat thoroughly before eating, and check for any signs of spoilage. Following refrigeration tips guarantees your meal stays tasty and safe.
Can I Substitute Other Grains for Quinoa?
Imagine swapping vibrant quinoa for other grains—think hearty millet, colorful buckwheat, or nutty amaranth. You can definitely substitute grain alternatives in your pilaf; just keep in mind some may need different cooking times. For gluten-free options, choose naturally gluten-free grains like millet or buckwheat. These swaps give your dish a new twist while maintaining a nutritious, delicious meal, perfect for variety and dietary needs.
Is This Recipe Suitable for Meal Prep?
Yes, this recipe is great for meal prep. You can store leftovers in an airtight container for up to four days, making it perfect for weekly meals. When reheating, add a splash of water or broth to keep it moist, and microwave until hot. These reheating tips help maintain flavor and texture, ensuring you enjoy a delicious, nutritious meal even days later.
What Wine Pairings Go Well With This Dish?
Imagine you’re in a vintage wine shop selecting the perfect bottle. For this dish, a crisp white like Sauvignon Blanc or a light rosé works well, enhancing the fresh Mediterranean flavors. These wine pairings add a delightful flavor enhancement without overpowering the dish. Their acidity complements the quinoa and vegetables, making each bite even more enjoyable. Cheers to choosing a wine that elevates your meal and transports you to the Mediterranean coast!
Conclusion
Now that you’ve mastered this one-pot Mediterranean quinoa pilaf, you’ve created a dish that’s as vibrant as a summer sunset and as comforting as a cozy evening. It’s simple to make, yet bursting with flavor—like a bustling market in every bite. Whether you enjoy it alone or as a side, it’s proof that good food doesn’t have to be complicated. Enjoy your delicious, wholesome creation, and savor the perfect balance of ease and excitement.