
When mixing bread dough in a stand mixer, start on a low speed to combine ingredients, then gradually increase to medium for kneading, aiming for 8 to 12 minutes. Watch for signs of overmixing, like tough or sticky dough, or undermixing, which causes rough texture. Adjust mixing time and speed based on your bread type. Proper technique prevents common issues and guarantees perfect gluten development—keep going to discover more tips.
Key Takeaways
- Start mixing at low speed with a paddle, then switch to medium speed with a dough hook for 8-12 minutes.
- Use low to medium speed to develop gluten without overworking or overheating the dough.
- Recognize proper dough readiness by its smooth, elastic texture and windowpane test.
- Avoid overmixing, which toughens dough, or undermixing, resulting in shaggy, underdeveloped gluten.
- Adjust mixing times based on bread type and dough consistency, considering ingredients and desired crumb structure.
The Basics of Mixing Bread Dough in a Stand Mixer
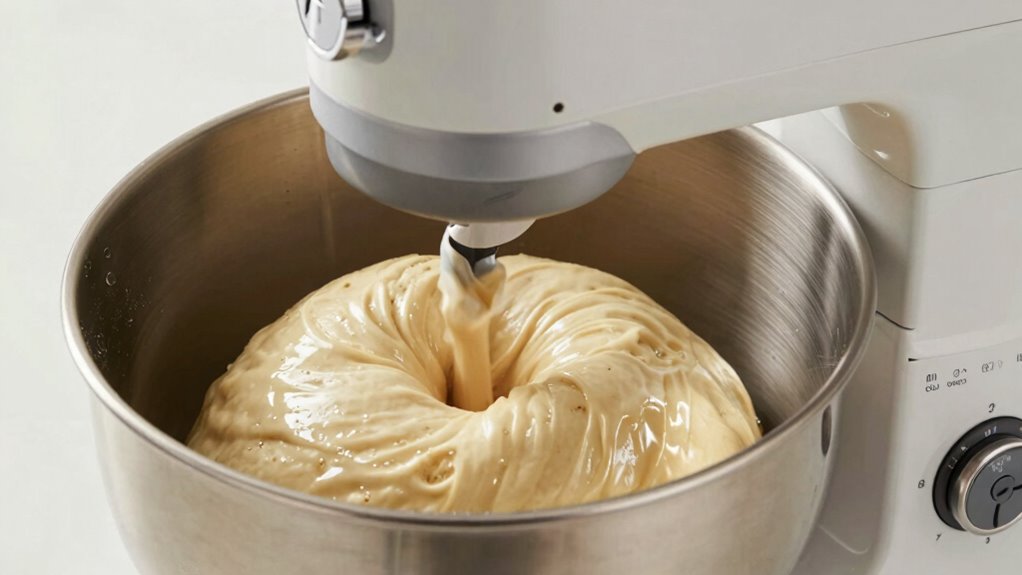
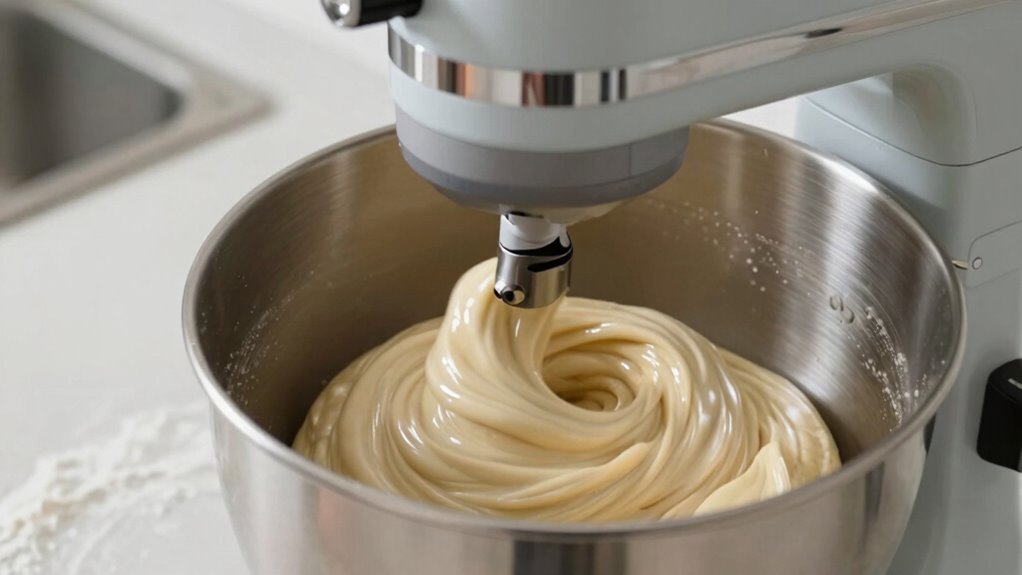
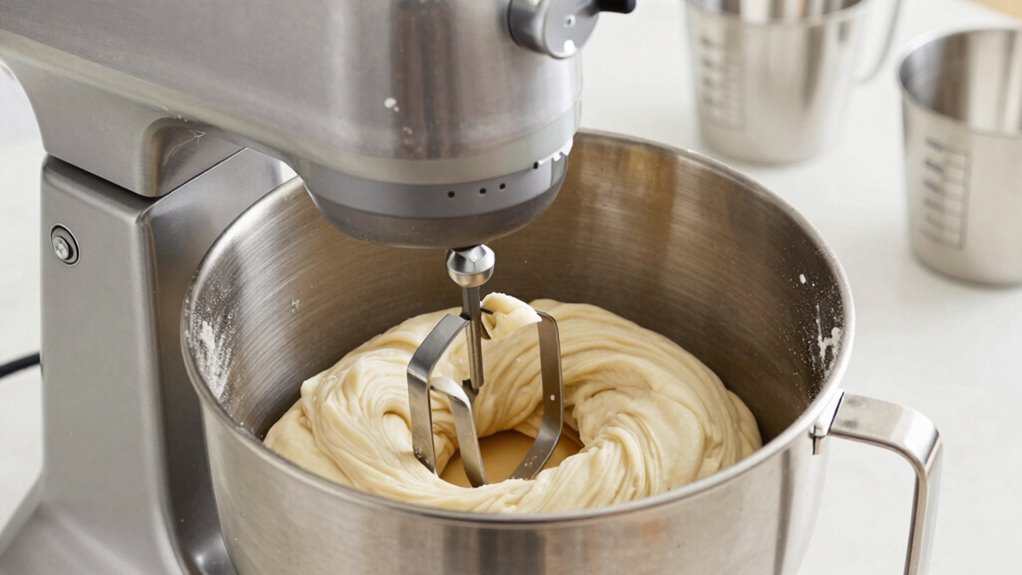
Mixing bread dough in a stand mixer is a straightforward process that saves time and effort compared to kneading by hand. To achieve the best results, pay attention to the mixing temperature; warm ingredients help activate yeast and promote proper fermentation. Keep your ingredients’ ratios balanced—too much liquid can make the dough sticky, while too little can lead to dense bread. Use the paddle attachment initially to combine ingredients smoothly. Once combined, switch to the dough hook for thorough mixing. Guarantee ingredients are evenly incorporated, but avoid overmixing, which can affect gluten development. Maintaining the right mixing temperature and ingredient ratios helps produce a consistent dough texture, setting a solid foundation for perfect bread.
Choosing the Right Speed for Kneading Bread Dough
Selecting the appropriate speed on your stand mixer is essential for effective kneading without overworking the dough. Start with a low speed during initial mixing to combine ingredients gently. Once the dough begins to form, increase the mixer settings to a medium speed for kneading. This allows the dough to develop gluten structure without tearing or overheating. Proper speed adjustment helps prevent overmixing and ensures your bread turns out with the right texture and structure. Avoid using high speeds, as they can cause the dough to become tough and the mixer to strain. Adjusting the speed correctly ensures even kneading and ideal gluten development. Remember, different recipes may require slight variations in speed, so monitor the dough’s consistency carefully. Knowing the right speed is crucial for achieving a perfect rise and texture in your bread.
How Long Should You Knead Bread Dough?

Knowing how long to knead your bread dough is key to achieving the right texture. Typically, you should knead until the dough is smooth and elastic, which shows proper gluten development. Keep an eye out for signs that the dough has been kneaded enough, so you don’t overdo it. Understanding gluten development can help you better recognize when your dough has reached the ideal kneading point. Additionally, using a stand mixer with the correct speed settings can ensure consistent kneading without overworking the dough. Being aware of Free Floating techniques can also assist in managing your kneading process effectively. Paying attention to dough texture can further improve your kneading accuracy and final bread quality. For best results, consider the Suprem fabric characteristics that enhance durability and flexibility in your baking tools and surfaces.
Ideal Kneading Duration
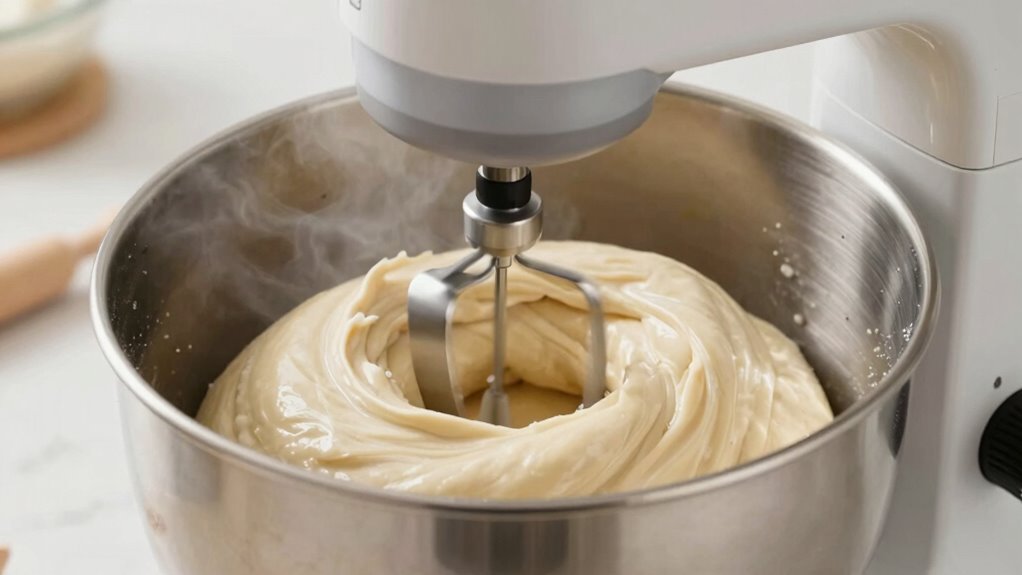
The ideal kneading time for bread dough typically ranges from 8 to 12 minutes, depending on the recipe and your mixer’s power. During this period, your goal is to achieve maximum gluten development, which gives the dough its structure and elasticity. Kneading duration varies based on ingredients and mixer speed, but over-kneading can weaken gluten, while under-kneading leaves it underdeveloped. Pay attention to how the dough feels—smooth, slightly tacky, and elastic—indicating proper kneading. Using a stand mixer allows for consistent kneading, but it’s essential to monitor the time and dough’s texture closely. Remember, the right kneading duration ensures your bread will rise well and have the ideal crumb. Monitoring dough texture is crucial to avoid common mistakes and achieve optimal results. Understanding gluten development can help you better judge when your dough has been kneaded sufficiently. Additionally, observing the dough’s elasticity and smoothness can provide practical cues that it has been kneaded adequately. To enhance your understanding, watching for the windowpane test can be a helpful way to confirm proper gluten development. Moreover, paying attention to dough consistency can prevent issues like tearing or collapsing during shaping.
Signs of Proper Gluten Development
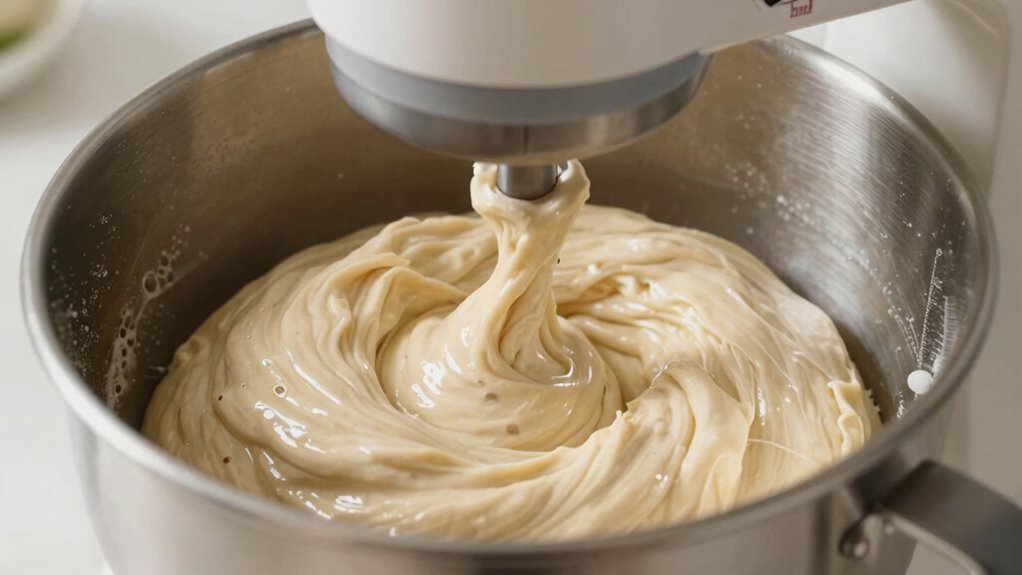
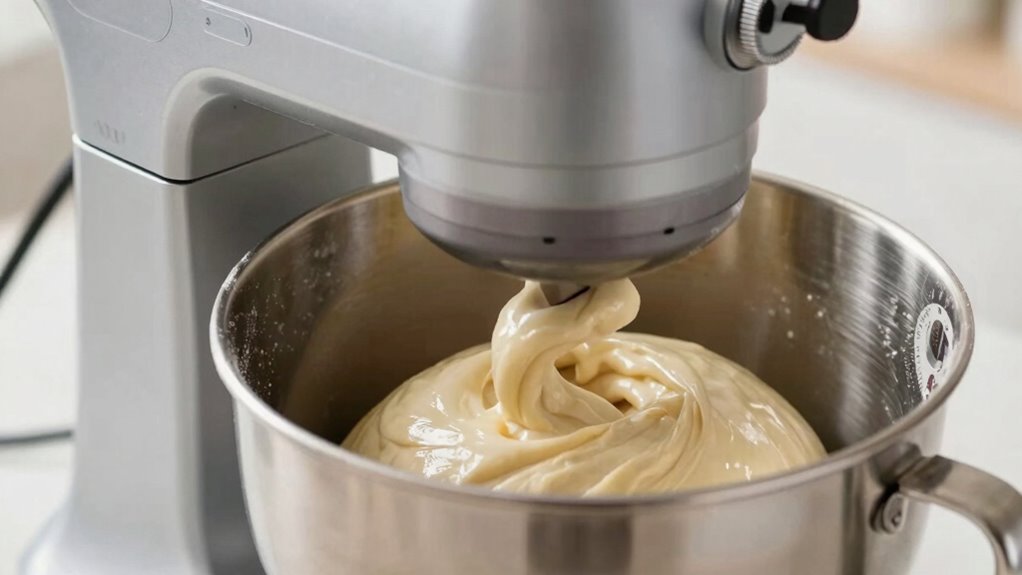
As you knead bread dough, watch for specific signs that indicate proper gluten development. One key indicator is the formation of a strong gluten network, which makes the dough smooth, elastic, and slightly tacky. You should notice increased dough elasticity, meaning it stretches without tearing easily. When you perform the windowpane test—gently stretching a small piece of dough into a thin, translucent membrane—it should hold together without tearing. The dough should also spring back slowly when pressed with a finger. These signs confirm that gluten strands are well-developed, giving your bread structure and chewiness. Proper gluten development also depends on kneading time, which ensures the gluten network forms correctly. Avoid over-kneading, which can break down the gluten network, or under-kneading, which results in weak elasticity. Proper gluten development guarantees a light, airy crumb and good oven spring.
How to Recognize Overmixing and Undermixing
As you mix your dough, pay close attention to its texture—overmixed dough becomes tough, while undermixed dough feels shaggy. Keep an eye on gluten development; it should form a smooth, elastic structure. By evaluating these signs, you can prevent overmixing or undermixing and achieve the perfect dough.
Recognize Texture Changes
Recognizing texture changes during mixing is essential to achieve perfect bread dough. Pay close attention to texture cues, as they reveal whether your dough is undermixed or overmixed. When the dough feels sticky and shaggy, it’s a sign that it needs more mixing; it hasn’t developed enough gluten structure. As mixing progresses, the dough should become smoother and more elastic, with a slightly tacky feel—indicating proper development. Overmixing, however, makes the dough overly elastic and sticky, losing its initial dough feel and becoming tough to handle. Conversely, undermixed dough feels rougher, less cohesive, and lacks stretchiness. By monitoring these texture cues throughout the mixing process, you can adjust speed and timing to ensure ideal dough consistency. Proper technique during mixing helps prevent common mistakes and ensures consistent results.
Watch for Gluten Development
Monitoring gluten development during mixing helps confirm your dough reaches the right strength and elasticity. You want to watch for signs of proper gluten formation, which results in a smooth, slightly tacky dough. Overmixing can cause the gluten strands to become too developed, leading to a stiff, overly elastic dough that’s hard to shape. Conversely, undermixing leaves the gluten underdeveloped, resulting in a slack, weak dough that won’t rise well. To gauge gluten development:
- Look for a shiny, elastic surface that stretches without tearing
- Feel for dough that holds its shape and resists tearing when pulled
- Observe a smooth, cohesive texture with minimal lumps
Pay close attention to these cues to ensure your dough has the ideal elasticity for perfect bread. Proper gluten formation is essential for achieving the best bread texture and rise.
Assess Dough Elasticity
Evaluating dough elasticity is crucial to prevent overmixing or undermixing your bread dough. When you gently stretch a small piece of dough, it should feel smooth, elastic, and resilient—indicating a well-developed gluten structure. If the dough tears easily or feels stiff, it’s likely undermixed, and the gluten hasn’t formed enough. Conversely, if it stretches too thin and becomes sticky or overly elastic, you’ve overmixed, breaking down the gluten network. Proper dough elasticity shows a balance where the dough is tacky but not sticky and springs back after gentle stretching. Paying close attention to this feel helps you recognize the right stage of mixing, ensuring your bread develops the ideal gluten structure for a light, chewy crumb.
Fixing Sticky or Stiff Bread Dough in a Stand Mixer
If your bread dough turns out sticky or stiff after mixing, there are simple adjustments you can make to achieve the right consistency. To fix a sticky dough, try adding a small amount of flour gradually, ensuring you don’t overdo it to maintain proper dough hydration. For stiff dough, incorporate a teaspoon of water at a time to loosen it up. Adjust your kneading techniques: longer kneading can develop gluten for stiffness, while gentler kneading helps if it’s too sticky. Using the appropriate kneading speed for your mixer can also influence dough texture and elasticity. Additionally, monitoring dough hydration closely helps prevent extremes and results in a better final product. Proper ventilation considerations can help maintain consistent dough temperature and humidity during mixing. Being mindful of dough temperature can also impact the final texture and rise. Ensuring the right dough elasticity is achieved through proper kneading and ingredient adjustments. Using gentle kneading to improve elasticity and adding flour or water sparingly to fine-tune texture are effective steps. These steps help you achieve ideal dough consistency, making your bread perfect.
Common Mistakes to Avoid When Mixing Bread Dough

One common mistake to avoid when mixing bread dough is overmixing, which can develop too much gluten and lead to a dense, chewy loaf. Overmixing pitfalls include creating tough bread and weakening dough structure. Conversely, under kneading results in poor gluten development, causing holes or uneven texture. Recognizing under kneading signs, like sticky or shaggy dough, helps prevent under-processed bread. Proper kneading techniques are essential for optimal gluten development and a better rise.
Tips for Achieving Perfect Bread Dough Consistency

Achieving the perfect bread dough consistency requires paying close attention to texture and feel throughout the mixing process. To do this, monitor how the dough forms and adjust your techniques accordingly. Incorporate fermentation techniques that promote even gluten development and flavor. Choosing the right baking vessel also impacts dough consistency; a proper container helps maintain moisture and temperature. Additionally, understanding home energy considerations, such as maintaining consistent temperature and humidity levels in your kitchen, can help ensure optimal dough conditions during proofing. Consider these tips:
- Use a proofing basket or a covered bowl to support dough structure during fermentation.
- Adjust hydration levels based on dough feel—adding water gradually if too dry or reducing if too sticky.
- Observe how the dough responds to gentle kneading in your stand mixer, ensuring it’s elastic and smooth, not overly sticky or dry.
- Maintaining consistent kitchen environment conditions can significantly influence fermentation and dough development.
Adjusting Mixing Time for Different Types of Bread Dough

Different types of bread dough require varying mixing times to develop the right gluten structure and texture. For denser breads like whole wheat or rye, shorten mixing to avoid overworking delicate ingredients. For airy loaves like baguettes, extend mixing slightly to strengthen gluten. Adjust your mixing time based on fermentation timing, as longer fermentation can compensate for less mixing, or vice versa. Ingredient adjustments, such as adding fats or sugars, may also influence mixing duration needed. Understanding gluten development can help optimize the dough development process for each bread type. Use the table below as a guide:
| Bread Type | Mixing Time (minutes) | Notes |
|---|---|---|
| Whole Wheat | 8-10 | Shorter to prevent overmixing |
| Baguette | 10-12 | Longer for gluten strength |
| Enriched Loaf | 6-8 | Adjust for fats and sugars |
How to Maintain and Clean Your Stand Mixer
To keep your stand mixer functioning smoothly and guarantee it lasts, regular maintenance and cleaning are essential. Proper cleaning tips help prevent buildup and ensure peak performance. Start by unplugging the mixer and removing attachments after each use. Wash the beaters or dough hook with warm, soapy water and dry thoroughly. Wipe down the mixer’s body with a damp cloth, avoiding excess moisture. For deeper maintenance routines, periodically check the cord and motor vents for dust or debris, and lubricate moving parts if recommended by the manufacturer.
- Clean attachments and bowls regularly to prevent residue buildup
- Inspect and tighten any loose screws or parts
- Keep vents clear to ensure proper airflow and cooling
Frequently Asked Questions
Can I Use a Stand Mixer for All Bread Types?
Yes, you can use a stand mixer for most bread types, but pay attention to mixing speed and dough consistency. Use a low or medium speed for kneading to avoid overworking the dough, which can affect texture. Some heavier doughs, like whole wheat or rye, might require longer mixing times or manual assistance. Always monitor the dough’s consistency to guarantee it’s smooth, elastic, and not overly sticky or dry.
How Do I Prevent the Dough From Overheating During Mixing?
Think of your dough as a delicate dance partner—too much twirling can tire them out. To prevent overheating, monitor the dough temperature with a thermometer; keep it below 80°F to avoid overmixing concerns. Use short mixing bursts and pause to let the dough rest, ensuring it doesn’t get too warm. This way, you preserve the dough’s elasticity, and your bread turns out perfect every time.
Is It Necessary to Manually Knead After Using a Stand Mixer?
You don’t need to manually knead after using a stand mixer if you’ve kneaded the dough properly. The mixer’s kneading process develops dough elasticity just as well. However, if the dough feels sticky or underdeveloped, a brief manual knead can help improve structure. Keep an eye on the dough’s texture during mixing to ensure it’s ready, and skip manual kneading unless necessary for better gluten formation.
What Should I Do if My Dough Doesn’t Rise Properly?
Think of your dough like a sleeping giant—if it doesn’t rise, it’s likely not fully awakened. First, check if your yeast activated properly; it should foam within 5-10 minutes. Confirm your dough has the right consistency—neither too sticky nor too stiff. Warm, draft-free environments help. If needed, give it more time or gently knead again, encouraging the yeast to do its job and help your bread rise perfectly.
How Do I Store Leftover Bread Dough Safely?
To store leftover bread dough safely, you should refrigerate it using airtight storage. Wrap the dough tightly in plastic wrap or place it in an airtight container to prevent it from drying out and absorbing odors. Refrigeration methods slow fermentation, so your dough stays fresh longer. When you’re ready to use it, let it come to room temperature, and then proceed with your baking. This keeps your dough safe and ready to bake later.
Conclusion
Mastering bread dough in your stand mixer is like revealing the secret to bakery-quality loaves at home. By paying attention to timing, speed, and common pitfalls, you’ll avoid the chaos of a stubborn, uncooperative dough. With a little practice, your mixer becomes your trusty sidekick, turning simple ingredients into heavenly bread. Stick with it, and soon, you’ll be creating loaves so good, they’ll make your oven feel like a culinary wizard’s enchanted cauldron!