
Did you know that according to a report from the Centers for Disease Control and Prevention, only one out of every ten Americans consumes the recommended daily amount of fruits and vegetables? This statistic is concerning to me, as I prioritize maintaining a balanced and nutritious diet.
That’s why I’m excited to share with you a fun and delicious way to incorporate more fruits and vegetables into your diet: homemade juice popsicles! Making juice popsicles is not only a tasty treat but also a great way to get more nutrients into your body.
By using whole fruits and vegetables, you can ensure that your popsicles are packed with vitamins, minerals, and antioxidants. Plus, you have the freedom to customize your popsicles with your favorite flavors and ingredients.
In this article, I’ll guide you through the process of making your own juice popsicles, from choosing your flavors to unmolding the finished product. Let’s get started!
Key Takeaways
- Homemade juice popsicles are a fun and easy way to incorporate more fruits and vegetables into your diet.
- Using fresh, organic fruits and vegetables is recommended for optimal nutrition and flavor.
- Layering different fruit juices and adding diced fruit or chopped herbs can enhance flavor and provide additional health benefits.
- Proper storage and freezing techniques are important for maintaining the quality and taste of popsicles.
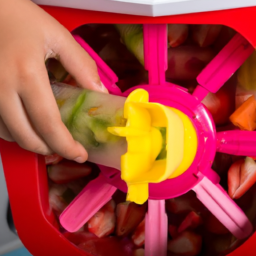
Gather Your Materials and Ingredients
You’re gonna need some juicy fruits and a few popsicle molds to get started – get excited, because these frozen treats are gonna be the perfect summer refreshment!
When it comes to selecting your materials, you’ll want to make sure you have enough molds for the amount of juice you plan to use, as well as a sturdy base to hold them in the freezer. I recommend using silicone molds, as they’re flexible and make it easier to remove the popsicles when they’re ready.
In addition to molds, you’ll also need some fresh, ripe fruit to make the juice. Try experimenting with different combinations of fruits to create unique and delicious flavors. To ensure your popsicles come out perfectly, be sure to blend the fruit thoroughly to avoid any chunks or clumps.
With the right materials and a little bit of preparation, you’ll be well on your way to making delicious and refreshing juice popsicles. Now, let’s move on to choosing our flavors!
Choose Your Flavors
When it comes to choosing the flavors for your juice popsicles, there are a wide variety of options to consider. Personally, I like to include a mix of fruity, tangy, and sweet flavors for a balanced and nutritious treat.
Fruity options like strawberry and raspberry provide a natural sweetness, while tangy options like lemon and lime add a refreshing zing. And for those with a sweet tooth, options like mango and pineapple can satisfy that craving without relying on added sugars.
Remember, incorporating a variety of flavors is not only delicious but also helps to ensure a well-rounded and healthy snack.
Fruity Options
For a refreshing and healthy treat, try blending together your favorite fruits and freezing them into delicious popsicles. Not only do these fruity popsicles provide a creative presentation, but they also offer a range of healthy benefits.
Here are three fruity options to get you started:
-
Berry Blast: Mix together strawberries, blueberries, and raspberries for a sweet and tangy flavor. Berries are packed with antioxidants, vitamins, and fiber, making them a nutritious addition to any diet.
-
Mango Madness: Blend together fresh mango, pineapple, and coconut water for a tropical twist. Mangos are rich in vitamin C and fiber, while pineapple contains enzymes that aid in digestion.
-
Peachy Keen: Combine fresh peaches with Greek yogurt and honey for a creamy and satisfying treat. Peaches are a great source of vitamins A and C, while Greek yogurt adds protein and probiotics for a healthy gut.
Next up, let’s explore some tangy options for those who prefer a more tart taste.
Tangy Options
Get ready to pucker up with these tangy options that will add some zing to your taste buds! When it comes to making juice popsicles, citrus combinations and sour fruits are great options to consider. Not only do they provide a refreshing burst of flavor, but they also offer a variety of health benefits.
Citrus fruits like lemons, limes, and oranges are rich in vitamin C, which is essential for a healthy immune system. Combining these fruits with other tangy options like grapefruit or pineapple can create a delicious and nutritious juice pop. Sour fruits like raspberries and cranberries are also great choices, as they are packed with antioxidants that can help protect against disease. Mixing them with a sweeter fruit like strawberries can balance out the tartness and create a well-rounded flavor.
Moving on to the next section about sweet options, there are plenty of fruits that can satisfy your sweet tooth without adding too much sugar.
Sweet Options
Indulge in a variety of naturally sweet fruits that’ll leave your taste buds satisfied without the added sugar.
When it comes to making sweet juice popsicles, there are endless fruit combinations to choose from. Some of my favorites include strawberries, mangoes, pineapples, and watermelons. These fruits are not only delicious but also packed with nutrients like vitamin C, fiber, and antioxidants.
If you’re looking for a sweetener alternative to sugar, you can use honey, maple syrup, or agave nectar. These natural sweeteners add a touch of sweetness without the added calories or artificial ingredients. However, keep in mind that fruits already contain natural sugars, so you may not need to add any sweeteners at all.
Experiment with different combinations of fruits and sweeteners until you find the perfect balance that satisfies your taste buds and nutritional needs.
Now that you’ve chosen your fruit combinations and sweeteners, it’s time to prepare your juice.
Prepare Your Juice
First things first, you gotta squeeze those fresh fruits like your life depends on it! Juicing tips are essential to extract as much juice as possible to achieve the ultimate flavor explosion in your popsicles.
When it comes to making juice popsicles, you want to use ripe produce for optimal sweetness and nutritional value. Always choose fruits that are in season, as they’re usually the most flavorful and affordable.
It’s important to note that some fruits and vegetables yield more juice than others. For example, citrus fruits like oranges and lemons are excellent juicing options because they have a high water content. On the other hand, berries and leafy greens may require a bit more effort to extract juice, but they’re still great choices for popsicles.
By preparing your juice properly, you’ll ensure that your popsicles are packed with all the vitamins and minerals your body needs. Now that you have your juice, it’s time to fill your popsicle molds.
Fill Your Popsicle Molds
Now that I’ve prepared my juice, it’s time to fill my popsicle molds!
There are a few key points to keep in mind when filling your molds. Firstly, layering your juice can create an aesthetically pleasing effect and add variety to the flavors. Secondly, adding fruit or herbs to your popsicles can add extra nutrients and flavor. Finally, be sure to leave space at the top of your molds for expansion during freezing.
Keep these tips in mind to create delicious and nutritious popsicles.
Layering
To achieve a visually appealing effect, try layering different fruit juices in the popsicle molds. Color combinations play a significant role in how the popsicles look on the plate. When layering, consider the color contrast between the different juices. For instance, a bright red juice like watermelon will contrast well with a light yellow juice like pineapple.
Presentation ideas are endless, and you can choose to layer the juices in any order you prefer. However, it’s essential to keep in mind that balanced nutrition is crucial. Ensure you include juices from different fruit groups such as citrus fruits, berries, and tropical fruits to provide a wide range of vitamins and minerals.
Layering can also help you achieve a balanced flavor profile by mixing sweet and sour juices. Once you have layered the fruit juices, you can move on to the next step of adding fruit or herbs to create a unique flavor.
Adding Fruit or Herbs
Another way to enhance the flavor of your popsicles is by adding diced fruit or chopped herbs. Fruit and herb combinations can add depth and complexity to your popsicles, making them taste even better than before.
However, it’s important to use flavor balancing techniques to ensure that the flavors complement each other, instead of overwhelming the taste buds. For example, if you’re adding diced strawberries to a lemon and lime layer, you might want to balance out the sweetness with a hint of basil or thyme.
On the other hand, if you’re using diced pineapple, you could add a pinch of cayenne pepper for a spicy kick. Adding herbs like mint, basil, or thyme can also provide additional health benefits, such as boosting digestion or reducing inflammation. By experimenting with different combinations, you can create unique and delicious popsicles that are both refreshing and nutritious.
To ensure that your popsicles freeze evenly and don’t expand too much, it’s important to leave some space at the top of each mold. This will give the liquid room to expand as it freezes, preventing any overflow or messy leaks.
By following these simple tips and tricks, you can create perfect, flavorful popsicles that will be a hit at any summer party or gathering.
Leaving Space for Expansion
It’s essential to leave room at the top of your molds when creating popsicles, as the liquid needs space to expand as it freezes, preventing any messy leaks and ensuring perfect pops every time.
This is especially important when making juice popsicles, as the liquid can expand quite a bit during the freezing process. Without enough space, the pressure can cause the mixture to overflow or the molds to crack, ruining your hard work.
Leaving space for expansion also allows you to experiment with expanding juice flavors. By leaving a little room at the top of the mold, you can add other ingredients like chopped fruit, herbs, or even a splash of carbonated water to give your popsicles some extra pizzazz. Just be sure not to go overboard with your additions, or you might end up with a mixture that won’t freeze properly.
With space allowance, you’ll have the freedom to create unique and delicious juice popsicles every time. Now, it’s time to insert the popsicle sticks.
Insert Popsicle Sticks
Now, grab your popsicle sticks and gently insert them into the juice-filled molds, making sure they’re centered and straight. Adding popsicle sticks can be tricky, but with a few tips and tricks, you can make it a breeze.
First, consider using decorative sticks to add an extra touch of fun to your popsicles. You can find sticks that are shaped like animals or have fun designs on them. Another creative way to display and serve your popsicles is by using a holder specifically designed for them. These holders can be made of plastic or silicone and come in a variety of shapes and sizes.
Not only do they make serving your popsicles easier, but they can also add a fun element to your presentation. Once your popsicle sticks are securely in place, it’s time to freeze your popsicles. This is a crucial step in creating the perfect juice popsicles, as it allows the liquid to solidify into a frozen treat.
Be sure to freeze your popsicles for at least four hours, or until they’re completely solid. In the next section, we’ll discuss some tips for removing your popsicles from the molds.
Freeze Your Popsicles
Now that I’ve inserted the popsicle sticks into my juice popsicles, it’s time to freeze them! Timing is crucial in ensuring that your popsicles freeze properly.
I recommend freezing them for at least 4-6 hours or overnight for best results. When it comes to freezing technique, make sure to place the popsicles in an upright position, and avoid overcrowding them in the freezer.
Proper storage is also important to maintain the quality of your popsicles, so keep them in an airtight container or plastic bag to prevent freezer burn.
Remember, homemade popsicles are a fun and nutritious way to cool down on a hot day, so don’t forget to include them in your balanced diet!
Timing
When the heat’s on during the summer months, timing is everything when it comes to making refreshing juice popsicles that’ll cool you down in no time. Maximizing freshness is crucial when it comes to getting the most out of your ingredients.
Here are some tips on the best time to freeze your popsicles:
-
Use fresh fruits and vegetables that are in season for maximum flavor.
-
Freeze your juice mixture as soon as possible after blending to lock in nutrients and prevent oxidation.
-
If using citrus fruits, wait until the end of the day to juice them as they can become bitter if left out for too long.
-
Freeze your popsicles during the coldest part of the day, typically early in the morning or late at night, to ensure they freeze evenly.
It’s important to remember that the timing of freezing your popsicles can have a big impact on their taste and texture.
Next, we’ll discuss the proper freezing technique to ensure your juice popsicles come out perfectly every time.
Freezing Technique
Get ready to experience the ultimate icy treat with these tips on how to freeze your refreshing juice popsicles to perfection. While you can simply pour your juice mixture into popsicle molds and let them sit in the freezer, there are alternative freezing methods that can help improve the texture and consistency of your homemade popsicles.
One such method is to freeze the mixture in stages, adding a layer of juice mixture to the mold and freezing it for about 30 minutes before adding the next layer. This will give you popsicles that are evenly mixed and have a nice, smooth texture.
Another alternative freezing method is to use an ice cream maker. Simply pour your juice mixture into the ice cream maker and let it churn for about 15-20 minutes before pouring the mixture into popsicle molds and freezing it. This method incorporates air into the mixture, resulting in popsicles that are lighter and creamier than those made with traditional freezing methods.
Benefits of homemade popsicles include knowing exactly what ingredients are going into your sweet treat, avoiding additives and preservatives, and being able to customize the flavors to your liking.
Now that your popsicles are frozen to perfection, it’s important to think about how to store them to maintain their deliciousness.
Storage
To keep your homemade juice popsicles fresh and ready to enjoy, proper storage is key. After freezing your popsicles, transfer them into a resealable plastic bag or airtight container and store them in the freezer. This will not only prevent freezer burn, but it will also ensure long term preservation of your treats.
Proper storage of your juice popsicles is essential for maintaining their quality and taste. Below is a table outlining the recommended storage times for various types of juice popsicles:
| Type of Juice Popsicles | Storage Time |
|---|---|
| Fruit Juice | 3-4 months |
| Vegetable Juice | 2-3 months |
| Milk-Based Juice | 1-2 months |
By following these guidelines for proper storage, you can enjoy your homemade juice popsicles for weeks to come. Now, let’s move on to the next step of unmolding your popsicles.
Unmold Your Popsicles
Now that my juice popsicles have frozen overnight, it’s time to unmold them and enjoy their refreshing taste.
To do this, I’ll need to use a warm water bath to loosen the popsicles from their molds without damaging their shape. I’ll also need to gently remove the popsicles from the molds to prevent any breakage.
Once unmolded, I can serve these healthy treats as a refreshing snack or dessert option that supports my balanced nutrition goals.
Warm Water Bath
When you’re ready to remove your juice popsicles from their molds, immerse them in a warm water bath for a few seconds to loosen the frozen treat from the mold. This technique is known as "unmolding"and it’s a common practice in cooking and baking. The benefits of warm water baths for cooking are numerous. It helps to melt ingredients for smoother and more consistent textures, prevent cracking, and to heat food evenly without the risk of burning.
To properly set up a warm water bath for cooking, you’ll need a container large enough to hold your molds, water, and a thermometer. Fill the container with warm water, making sure it’s not too hot or too cold. The ideal temperature for a water bath is between 120°F and 150°F. Place the container on a stable surface and insert the thermometer. Once the water reaches the desired temperature, you’re ready to use it.
With the warm water bath, your juice popsicles will come out of their molds easily and smoothly. The gentle removal process ensures that the popsicles retain their shape and texture.
Gentle Removal
Gently removing your frozen juice popsicles is crucial for preserving their shape and texture. You don’t want to ruin all your hard work by accidentally breaking them or causing cracks.
To prevent this, gently wiggle the popsicle mold back and forth until the popsicles come loose. If they don’t come out right away, try running the mold under warm water for a few seconds to loosen them up.
Not only does gentle removal help prevent breakage, it also minimizes mess and preserves the appearance of your popsicles. Plus, it helps maintain the flavor and texture of the juice popsicles by preventing melting and minimizing waste.
Once your juice popsicles are out of the mold, you can serve them up in a variety of ways.
Serving Suggestions
To add some pizzazz to your frozen treats, consider trying out different serving suggestions. Here are some ideas to get you started:
-
Fruit Pairings – Pair your juice popsicles with fresh fruit slices or chunks for a delicious and nutritious snack. Some great options include berries, sliced kiwi, diced mango, or chunks of pineapple. Not only do they add a burst of flavor, but they also provide important nutrients like vitamin C and fiber.
-
Presentation Ideas – Presentation is key when it comes to serving your juice popsicles. Try serving them in a tall glass with a sprig of mint or a slice of lemon on the rim. Or, turn them into a dessert by drizzling them with melted dark chocolate and topping with chopped nuts or coconut flakes.
-
Yogurt Dip – For a creamy and tangy twist, serve your juice popsicles with a side of yogurt dip. Simply mix plain Greek yogurt with a drizzle of honey and a dash of cinnamon for a delicious dip that complements any flavor.
-
Granola Topping – Top your juice popsicles with a sprinkle of granola for added texture and crunch. This also adds a dose of whole grains to your snack, making it even more satisfying and nutritious.
By incorporating these serving suggestions, you can take your juice popsicles to the next level. But why stop there? Let’s dive into how to customize your popsicles for even more variety.
Customize Your Popsicles
Now that I’ve successfully unmolded my juice popsicles, it’s time to get creative and customize them!
Adding texture to your popsicles can be a fun way to mix things up. Try adding fruit chunks, nuts, or even chia seeds for some added crunch.
Experimenting with flavors can also be a fun way to create unique and delicious popsicles. Consider mixing different juices or adding in herbs like mint or basil.
Finally, don’t forget about decorating! A simple drizzle of chocolate or a sprinkle of coconut flakes can add a touch of elegance to your popsicles.
Remember, creating balanced and nutritious popsicles is key, so don’t go overboard on the sweeteners or toppings.
Adding Texture
Sprinkle in some crushed fruit or nuts to give your popsicles a satisfying crunch and burst of flavor that will leave you craving more. Different textures can add a whole new dimension to your juice popsicles. Plus, they’re an easy and delicious way to incorporate healthy fats and proteins into your snack.
Adding nuts, such as almonds or walnuts, to your popsicle mixture can provide a satisfying crunch and a source of heart-healthy fats. Crushed berries or mangoes can also add texture and a burst of flavor. Experiment with different flavor combinations and textures to create your own unique popsicle creations.
Now that you’ve added some texture to your popsicles, it’s time to start experimenting with flavors.
Experimenting with Flavors
Let’s get creative and try out some new flavor combos for our icy treats! Flavor combinations are endless, and taste testing is the best way to find your favorites.
Here are three flavor combinations to get you started:
-
Strawberry Mango: A sweet and tangy blend of two tropical fruits. Mango’s rich in vitamin C, while strawberries are packed with antioxidants and fiber.
-
Blueberry Lavender: A refreshing and floral combination that’s perfect for a hot summer day. Blueberries are high in vitamin K and fiber, while lavender has calming effects and may improve digestion.
-
Pineapple Coconut: A classic tropical flavor that’ll transport you to a sunny beach. Pineapple’s a great source of vitamin C and bromelain, an enzyme that aids in digestion. Coconut adds healthy fats and a creamy texture.
Remember to use fresh and ripe fruits for optimal flavor and nutrition. Also, consider adding herbs or spices to your juice mixture for added complexity.
Now that we’ve got our flavor combinations, it’s time to move on to decorating our popsicles with fun toppings.
Decorating
To add some pizzazz to your icy treats, you can use various decorating ideas that will make your juice popsicles visually appealing. By using colorful sprinkles, chopped nuts, or shredded coconut as toppings, you can enhance the appearance of your popsicles. These toppings not only add color and texture, but they also provide additional nutrients to your frozen treat.
To create a visually stunning popsicle, consider using different color combinations for your ingredients. For example, using blueberries and raspberries can add a pop of color to your popsicle, while also providing antioxidants and vitamin C. Mixing pineapple and mango will give your popsicle a tropical feel, while also providing vitamin A and fiber. By using a variety of colorful ingredients, you can create a visually pleasing and nutritious popsicle.
As we’ve explored some fun decorating ideas for juice popsicles, let’s move on to the next section where we will discuss how to make healthy and nutritious popsicles without sacrificing taste.
Make Healthy and Nutritious Popsicles
For a healthier alternative to traditional popsicles, I recommend using fresh fruits and alternative sweeteners to create delicious and nutritious treats. By doing so, you can enjoy the benefits of fresh fruits, which are rich in vitamins, minerals, and fiber, while avoiding the artificial colors, flavors, and refined sugars found in many store-bought popsicles.
Here are some tips to help you make healthy and nutritious popsicles:
- Choose a variety of fruits that are in season and ripe for maximum flavor and nutrition.
- Use natural sweeteners like honey, maple syrup, or agave nectar instead of refined sugar to reduce the glycemic load and add more nutrients.
- Blend the fruits with plain or Greek yogurt to increase the protein and probiotic content, and to create a creamy texture.
- Add some nuts, seeds, or spices like cinnamon, ginger, or nutmeg to enhance the flavor and texture, and to add more healthy fats and antioxidants.
- Freeze the mixture in popsicle molds or paper cups, and enjoy them as a healthy snack or dessert.
By following these simple steps, you can make healthy and delicious popsicles that are good for your body and your taste buds. So, go ahead and experiment with different fruit combinations and sweeteners to find your favorite flavors, and enjoy your homemade juice popsicles!
Enjoy Your Homemade Juice Popsicles!
Now that we’ve talked about how to make healthy and nutritious popsicles, let’s move on to the fun part – enjoying them!
There are so many ways to enjoy your homemade juice popsicles. You can share them with friends and family on a hot summer day, or simply indulge in one as a refreshing snack.
One of the great benefits of making juice popsicles at home is that you have complete control over the ingredients. You can choose to use fresh, organic fruits and vegetables which are packed with essential nutrients.
You can also experiment with different flavor combinations and add in extras such as chia seeds or protein powder for an added nutritional boost. By making your own popsicles, you can ensure that you and your loved ones are getting a well-rounded and balanced diet.
So go ahead, get creative and enjoy your delicious and healthy juice popsicles!
Frequently Asked Questions
How long do the popsicles need to freeze before they can be eaten?
I typically freeze my popsicles for at least 4 hours before taste testing. It’s important to make sure they are fully frozen, as partially frozen popsicles can taste icy and unappetizing. Always remember to prioritize balanced nutrition in your frozen treats!
Can I use fresh fruit instead of juice in my popsicles?
Fresh fruit alternatives can be used in popsicles, but the benefits of using juice are numerous. Juice provides essential vitamins and minerals, aiding in a balanced diet. Plus, juice freezes better than fresh fruit, ensuring your popsicles are a hit!
How do I prevent air bubbles from forming in my popsicles?
To prevent air bubbles in popsicles, I recommend tapping the mold gently on a hard surface before freezing. Another trick is to fill the mold slowly and allow it to settle before adding more. For alternative ingredients, try making popsicles with purees for added nutrition.
Can I use silicone molds instead of plastic molds for my popsicles?
Yes, silicone molds can be used for popsicles. Compared to plastic molds, they are more durable and have less environmental impact. There are no health concerns, and they are cost-effective in the long run. They are widely available.
How long can I keep the popsicles in the freezer before they go bad?
I can keep my juice popsicles in the freezer for up to three months before they start to lose their quality. Proper freeze time and storage will help maintain the popsicles’ shelf life while preserving their nutritional value.
Conclusion
Well, that was quite an adventure! Making juice popsicles is a fun and easy way to enjoy a healthy and delicious treat. By using fresh fruits and vegetables, you can create a variety of flavors that will satisfy your taste buds and provide essential nutrients for your body.
It’s important to remember that balanced nutrition is key to maintaining a healthy lifestyle. By incorporating fruits and vegetables into your diet, you’re providing your body with important vitamins, minerals, and antioxidants that can help prevent chronic diseases.
So, next time you’re craving something sweet, try making your own juice popsicles instead of reaching for a sugary treat. Your body will thank you!