Connect with us

Juice

How To Make Green Juice Without A Juicer

Published

on

I used to think it was impossible to make green juice without using a juicer. After all, how could you blend different vegetables and fruits into a smooth liquid without the help of a fancy machine?

But then I realized that you don’t actually need a juicer to make delicious, nutritious green juice. All you need is a blender, a few key ingredients, and a little bit of know-how.

Making green juice without a juicer is like baking a cake without an oven. Sure, it might seem like an essential tool for the task, but with a little creativity and resourcefulness, you can still achieve delicious results.

Plus, making green juice at home is a great way to save money, reduce waste, and customize your blend to your personal taste preferences.

In this article, I’ll walk you through the steps of making green juice without a juicer, so you can enjoy all of the health benefits of this popular beverage without breaking the bank.

Advertisement

Key Takeaways

  • Making green juice without a juicer is possible with a blender and a few key ingredients.
  • Frozen or canned fruits and vegetables can be used as alternatives to fresh produce.
  • Ingredients should be washed and chopped into small pieces.
  • Experiment with different ingredient combinations to enhance flavor.

Gather Your Ingredients

Now that I’m ready to make my own green juice without a juicer, I need to gather my ingredients. While a juicer makes the process easier, it’s still possible to make green juice without one.

The first thing I need to consider is ingredient alternatives. If I don’t have access to fresh fruits and vegetables, I can still make green juice using frozen or canned options. These can be just as healthy as fresh produce, as long as they are not loaded with added sugars or preservatives.

Some great frozen options include spinach, kale, and berries. Canned options like peas and beets are also great additions to green juice. Incorporating these ingredient alternatives can help me get all the health benefits of green juice without breaking the bank or relying solely on fresh produce.

Now, it’s time to prepare my ingredients.

Prepare Your Ingredients

Before I start preparing my ingredients for green juice, I always make sure to wash my greens thoroughly. Then, I chop them into small pieces that fit easily into my blender.

For my fruits and vegetables, I peel them and chop them into smaller pieces to help my blender puree them better. By taking these steps, I ensure that my green juice is filled with fresh, nutrient-rich ingredients.

Advertisement

Wash and Chop Your Greens

First things first, grab a sharp knife and chop your leafy greens into small pieces, making sure to remove any tough stems. Not only are raw greens an excellent source of vitamins and minerals, but they also contain enzymes that aid in digestion and boost your overall health.

To properly wash and dry your greens, fill a large bowl with cold water and submerge your chopped greens, gently swishing them around to remove any dirt or debris. Then, transfer them to a salad spinner or use a clean kitchen towel to pat them dry.

Once your greens are washed and dried, it’s time to move on to the next step and peel and chop your fruits and vegetables. By incorporating a variety of colorful produce, you’ll not only add flavor and sweetness to your green juice, but you’ll also provide your body with a range of nutrients.

Peel and Chop Your Fruits and Vegetables

Get ready to add some delicious and nutritious fruits and veggies to your chopped greens by peeling and chopping them into bite-sized pieces. Peeling your fruits has a few benefits. It can remove any residue or pesticides that may be on the skin, and it can also improve the texture and taste of your juice.

Some fruits, like oranges and grapefruits, can be peeled by hand. Others, like pineapple and kiwi, may require a peeler or knife. When it comes to chopping your vegetables, it’s important to keep in mind the size of your blender. Chopping your produce into smaller pieces can make it easier for your blender to process and can result in a smoother juice.

Advertisement

Here are a few tips for chopping your vegetables:

  1. Use a sharp knife to avoid crushing or bruising your produce.
  2. Cut your vegetables into evenly sized pieces to ensure they blend evenly.
  3. If you’re using tougher vegetables like carrots or beets, consider steaming them first to soften them up.

Now that you’ve got your produce washed, chopped, and peeled, it’s time to choose your blender.
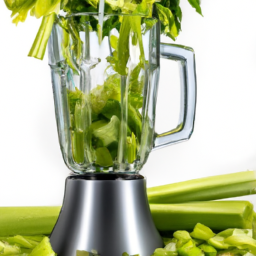
Choose Your Blender

To select the perfect blender for your green juice, you’ll want to make sure it has at least 1000 watts of power, so your drink will be smooth and creamy. Blender types range from personal-sized blenders to high-powered professional blenders. Personal-sized blenders are a great budget option and take up less space on your kitchen counter, but they may not have the power needed to blend tougher fruits and vegetables. Professional blenders, on the other hand, have more power and can handle larger quantities of ingredients, but they can be expensive and take up more space.

Here’s a table to help you choose the best blender for your green juice:

Blender Type Power Price Range Suitable For
Personal Blender 300-600 watts $20-$100 Soft Fruits and Vegetables
Countertop Blender 1000-1500 watts $50-$300 Tough Fruits and Vegetables
High-Powered Blender 1500-2000 watts $300-$500+ Large Quantities and Tough Ingredients

Now that you’ve chosen the perfect blender for your green juice, it’s time to blend your ingredients.

Blend Your Ingredients

Now that you’ve got your blender, let’s start blending your ingredients into a delicious and nutritious green juice. When it comes to blending techniques, it’s important to add your ingredients in stages.

Advertisement

Begin with the leafy greens, such as spinach or kale, followed by the softer fruits and vegetables like cucumber or avocado. Finally, add any frozen fruits or ice cubes to give your juice a refreshing texture.

To enhance the flavor of your green juice, experiment with different combinations of ingredients. For example, adding ginger or lemon can give your juice a zesty kick, while adding pineapple or apple can make it sweeter. Don’t be afraid to mix and match until you find the perfect combination for your taste buds.

Now that your ingredients have been blended, it’s time to strain your juice. This will remove any pulp or chunks, leaving you with a smooth and refreshing juice.

Strain Your Juice

Once your ingredients have been blended, it’s time to strain the juice to achieve a smooth and refreshing texture, ensuring that there are no pulp or chunks left behind. Straining your juice also helps to remove any excess fiber, making it easier for your body to absorb the nutrients.

The benefits of straining your juice include a smoother texture, better taste, and easier digestion. There are different types of strainers available for making green juice without a juicer, such as a fine-mesh strainer or cheesecloth.

Advertisement

A fine-mesh strainer is ideal for removing large chunks of pulp, while cheesecloth is perfect for removing small particles and extracting as much juice as possible. Simply place the strainer over a bowl and pour the blended juice through it, using a spoon or spatula to press the juice through the strainer.

Once you’ve strained the juice, you can add optional extras to enhance the flavor, such as ginger, lemon, or honey.

Add Optional Extras

Enhance the flavor of your freshly strained juice with some optional extras like ginger, lemon, or honey! Not only do these ingredients add a delicious taste to your juice, but they also come with added health benefits.

Here are some tips on how to choose the right optional extras for your green juice:

  • Ginger: known for its anti-inflammatory properties, ginger can help reduce muscle soreness and joint pain. It also aids in digestion and can help alleviate nausea.
  • Lemon: rich in vitamin C, lemon can help boost your immune system and promote healthy skin. It also has detoxifying properties and can aid in digestion.
  • Honey: a natural sweetener, honey can help regulate blood sugar levels and has antibacterial properties. It also contains antioxidants that can help reduce the risk of chronic diseases.
  • Mint: refreshing and cooling, mint can help soothe an upset stomach and aid in digestion. It also has antioxidant properties that can help protect against cell damage.
  • Cucumber: high in water content, cucumber can help keep you hydrated and promote healthy skin. It’s also rich in vitamins and minerals that can help regulate blood pressure.

By adding these optional extras to your green juice, you not only enhance the taste but also reap added health benefits. Once you’ve chosen your preferred ingredients, mix them in with your strained juice and give it a good stir.

Now that your green juice is complete, it’s time to store it properly to ensure it stays fresh and nutritious.

Advertisement

Store Your Juice

Now that I’ve made my green juice without a juicer and added any optional extras, it’s time to store it properly.

To keep the nutrients and freshness intact, I always use an airtight container. Then, I either refrigerate it for up to three days or freeze it for longer storage.

Use an Airtight Container

To keep your green juice fresh and flavorful, all you need is an airtight container. Airtight containers are important for preserving the nutrients and flavors in your juice and preventing oxidation. They also prevent spills and leaks, making it easier to transport your juice on the go.

When choosing an airtight container for your green juice, look for one that’s made of durable, non-toxic materials like glass or stainless steel. Plastic containers can contain harmful chemicals that can leach into your drink over time. Additionally, opt for a container with a tight-fitting lid to prevent air from entering and spoiling your juice.

To maintain the freshness of your green juice, it’s important to either refrigerate or freeze it as soon as possible.

Advertisement

In the next section, we’ll discuss how to properly store and preserve your green juice for later consumption.

Refrigerate or Freeze

If you want your green juice to last longer and retain its nutrients, the best thing you can do is refrigerate or freeze it as soon as possible. Refrigeration slows down the oxidation process, which helps to preserve the nutrients in the juice. Moreover, refrigerating the green juice can also help to prevent the growth of harmful bacteria, which can cause the juice to spoil quickly.

Here are some benefits of refrigerating green juice and freezing it for future use:

  1. Refrigerating green juice can help to extend its shelf life by up to 72 hours.

  2. Freezing green juice can preserve its nutrients for up to three months.

  3. Frozen green juice can be thawed in the refrigerator or at room temperature, and it should be consumed within 24 hours of thawing.

Now that you know how to store your green juice properly, it’s time to learn how to clean your blender.

Clean Your Blender

Before you begin blending your green juice ingredients, make sure to give your blender a thorough cleaning by wiping down the blades and base with a damp cloth and mild soap. Effective cleaning of your blender is crucial to prevent the buildup of bacteria and mold, especially if you plan to use your blender regularly for making green juice.

Advertisement

One common mistake people make is not cleaning their blender immediately after use, which can lead to stubborn stains and odors that are difficult to remove. Apart from health concerns, keeping your blender clean also benefits the taste and quality of your green juice. A dirty blender can leave behind residue and flavors from previous blends, affecting the taste of your current mixture.

Additionally, a clean blender can prevent any unwanted chunks or fibers in your juice, resulting in a smoother and more enjoyable drinking experience. So, take the time to clean your blender properly before each use and experience the benefits of a fresh and flavorful green juice.

Now, let’s move on to the next step and experiment with different combinations of green juice ingredients.

Experiment with Different Combinations

You must try experimenting with different combinations of ingredients to take your green juice game to the next level. Flavor combinations can make all the difference when it comes to enjoying your homemade green juice. Don’t be afraid to mix and match fruits and vegetables to see what works best for your taste buds.

Some popular combinations include spinach, cucumber, and apple, or kale, pineapple, and ginger. Benefits of experimenting with different ingredients go beyond just taste. Different fruits and vegetables offer a variety of health benefits. For example, adding ginger to your green juice can help with digestion and reduce inflammation. Pineapple contains bromelain, which can aid in digestion and reduce inflammation as well.

Advertisement

By experimenting with different combinations, you can create a green juice that not only tastes great but also helps you feel your best. Now that you’ve experimented with different flavor combinations, it’s time to sit back and enjoy your homemade green juice!

Enjoy Your Homemade Green Juice!

Now that you’ve experimented with different combinations of fruits and vegetables, it’s time to enjoy your homemade green juice! There are many benefits to drinking green juice, such as providing a boost of nutrients, aiding digestion, and promoting overall health. Plus, making your own juice allows you to control the ingredients and avoid added sugars or preservatives found in store-bought options.

To make incorporating green juice into your daily routine easier, try these tips:

  • Start with a small amount, such as a shot or half a cup, and gradually increase as your body adjusts.
  • Drink your juice in the morning on an empty stomach for optimal absorption of nutrients.
  • Mix it up with different fruits and vegetables to prevent boredom and maximize nutritional benefits.
  • Store your juice in an airtight container in the fridge for up to 24 hours to maintain freshness.
  • Don’t be afraid to experiment and find what works best for you and your taste preferences.

By following these tips and enjoying your homemade green juice, you can reap the many benefits of this nutrient-packed beverage. So grab a glass and cheers to your health!

Benefits of Drinking Green Juice Tips for Incorporating Green Juice into Your Daily Routine
Provides a boost of nutrients Start with a small amount and gradually increase
Aids digestion Drink on an empty stomach in the morning
Promotes overall health Mix it up with different fruits and vegetables
Allows control of ingredients Store in an airtight container in the fridge
Avoids added sugars or preservatives Experiment and find what works best for you and enjoy the benefits of a delicious and nutritious morning smoothie every day!

Frequently Asked Questions

Can I use frozen fruits and vegetables in my green juice?

Frozen fruits and vegetables can be used in green juice, but fresh produce is typically better. To properly thaw frozen produce, place it in the fridge overnight. Avoid microwaving or leaving it at room temperature.

How long can I store my green juice in the refrigerator?

Storing green juice is like preserving a delicate flower. To maximize nutrients, select fresh ingredients and prepare them properly. Best practices for freshness and taste include refrigerating immediately, using airtight containers, and consuming within 48 hours to prevent spoilage.

Advertisement

Can I use a food processor instead of a blender to make green juice?

A food processor can be used instead of a blender for green juice, but the result may be less smooth. Pros of using a food processor include easier cleanup and lower cost. Protein powder can be added to green juice for added nutrition.

What’s the best way to clean my blender after making green juice?

To clean my blender after making green juice, I immediately rinse it with warm water and dish soap. Then, I fill it with water and blend again to remove any leftover pulp. Finally, I give it a thorough scrub and let it dry. Blender cleaning tips include avoiding leaving pulp in the blender and using a brush or sponge to clean hard-to-reach areas.

Do I need to peel my fruits and vegetables before adding them to my green juice?

Peeling fruits and vegetables before juicing is a personal preference. However, the peels contain important nutrients and fiber, so leaving them on can increase the nutritional value of your juice. Various juice extraction methods can handle peels differently.

Conclusion

All in all, making green juice without a juicer is a simple and rewarding process. It’s a great way to incorporate more fruits and vegetables into your diet and to boost your overall health and well-being. Plus, it’s a fun and creative way to experiment with different flavors and combinations.

So next time you’re in the mood for a refreshing and nutritious drink, don’t hesitate to try making your own green juice at home. With a few easy steps and the right tools, you can enjoy the benefits of fresh, homemade juice anytime you want. And who knows, you may even discover a new favorite recipe that becomes a staple in your daily routine.

Advertisement

So go ahead, grab your blender and get juicing!

In conclusion, as Ferris Bueller once said, "Life moves pretty fast. If you don’t stop and look around once in a while, you could miss it."Don’t let the fast pace of modern life prevent you from taking care of yourself and enjoying the simple pleasures of homemade green juice. With a little effort and creativity, you can make a positive impact on your health and your taste buds.

So go ahead, give it a try and see how much better you feel!

Continue Reading
Advertisement

Juice

Lemon = How Much Juice

Published

on

By

As someone who loves cooking and baking, I know the importance of accurate measurements when it comes to preparing food. This is especially crucial when using lemon juice in recipes, as it’s important to know the exact amount of juice needed.

Whether youre making lemonade, salad dressing, or a lemon tart, understanding the yield of a lemon will ensure that your recipe turns out perfectly.

There are a few factors that can affect the amount of juice a lemon produces, such as its ripeness and size. Additionally, the juicing method you use can also impact the yield.

In this article, I will provide a step-by-step guide for juicing lemons and share tips for getting the most juice out of your fruit. Plus, I will answer the burning question: how much juice does one lemon yield?

So, lets get started and master the art of juicing lemons!

Advertisement

Key Takeaways

  • Accurate measurements are crucial when cooking and baking with lemons, as factors like ripeness, size, and juicing method can affect lemon juice yield.
  • Knowing how much juice a lemon produces can help save money by buying the right amount of lemons needed, and using the right tool for juicing lemons can make a big difference in juice yield.
  • Lemon juice has health benefits, including aiding in digestion, boosting immune function, and being high in vitamin C and antioxidants, making it beneficial for skincare.
  • Lemon juice can be stored in the refrigerator, freezer, or canned, and can be used in a variety of recipes, including cocktails, salad dressings, and marinades for meats or fish.

The Importance of Knowing How Much Juice a Lemon Produces

You gotta know how much juice a lemon gives, it’s kinda important if you wanna impress your guests with a killer cocktail.

But beyond the realm of mixology, lemon juice has numerous benefits in the realm of health. Rich in vitamin C, potassium, and antioxidants, lemon juice has been shown to aid in digestion, boost immune function, and even prevent kidney stones.

So not only is it important to know how much juice a lemon produces for culinary purposes, but for health reasons as well.

However, the amount of juice a lemon produces can vary depending on a variety of factors, including the ripeness of the fruit, its size, and its temperature. Understanding these factors and how they affect lemon juice yield is crucial in ensuring consistent and accurate measurements in cooking and mixology.

Factors That Affect Lemon Juice Yield

Factors affecting the yield of lemon juice include the ripeness of the fruit and the method of extraction.

When it comes to ripeness, the amount of juice a lemon produces is directly related to how ripe it is. The more mature the fruit, the more juice it will contain. On the other hand, an under-ripe fruit will yield less juice.

Advertisement

Another factor that affects juice yield is the variety of lemon. Some varieties are naturally juicier than others, so it’s important to choose the right variety if you’re looking for maximum juice.

In addition to these factors, the method of extraction also plays a role in how much juice you can get from a lemon. Lemon juice extraction techniques vary, but some methods are more efficient than others. For example, using a hand juicer or a citrus press can yield more juice than simply squeezing the lemon with your hands.

By understanding these factors and choosing the right extraction method, you can maximize your lemon juice yield and get the most out of your fruit.

As we move on to the next section, it’s important to note that having the right tools for juicing lemons can make a big difference in the amount of juice you’re able to extract.

Tools You Will Need for Juicing Lemons

To get the most out of your citrus, you’ll need the right tools. When it comes to juicing lemons, there are two common options: hand-held lemon squeezers and electronic juicers.

Advertisement

Hand-held lemon squeezers are a low-cost and easy-to-use option. They come in a variety of sizes and shapes, but all function in a similar way. Simply cut the lemon in half, place it in the squeezer, and press down on the handles to extract the juice.

Electronic juicers can be a more expensive investment, but they can save time and effort. These machines can handle larger quantities of lemons and often have adjustable settings to customize the level of pulp in your juice.

No matter which tool you choose, having the right equipment can make the process of juicing lemons much easier and more efficient.

Now that you have the appropriate tools, it’s time to learn how to use them effectively. In the next section, we’ll provide a step-by-step guide for juicing lemons to help you maximize your lemon juice yield.

Step-by-Step Guide for Juicing Lemons

Once I’ve got my chosen juicing tool at hand, such as a citrus reamer or a handheld juicer, I begin the process of extracting lemon juice.

Advertisement

First, I cut the lemon in half and place one half onto the juicing tool, with the cut side facing down. Then, I firmly press and twist the juicing tool, extracting the juice from the lemon.

I repeat this process with the other half of the lemon, until all the juice has been extracted.

There are several lemon juicer alternatives available, but the most important thing is to choose a tool that allows for efficient extraction of the juice.

Additionally, lemon juice has many benefits for skin care, as it’s high in vitamin C and antioxidants. Incorporating lemon juice into a daily skincare routine can help brighten and even out skin tone, while also helping to reduce the appearance of fine lines and wrinkles.

With that being said, let’s move on to some tips for getting the most juice out of your lemons.

Advertisement

Tips for Getting the Most Juice Out of Your Lemons

If you want to make the most out of your citrus, it’s important to know a few tricks for maximizing the amount of tangy goodness you can squeeze out of each fruit. Here are three tips for getting the most juice out of your lemons:

  • Use a lemon zester to break up the membranes inside the lemon before juicing. This will help release more juice and make juicing easier.

  • Roll the lemon on a hard surface to break down the pulp before juicing. This will also help release more juice.

  • Consider alternative juicing methods, such as using a garlic press or a citrus squeezer, to get even more juice out of your lemons.

By following these tips, you can ensure that you’re getting the most juice out of each lemon.

But how much juice does one lemon yield? Let’s explore that in the next section.

How Much Juice Does One Lemon Yield?

Did you know that squeezing a single lemon can yield up to a quarter cup of tart and zesty liquid? As someone who loves to cook and bake, knowing how much juice one lemon yields is essential. Not only does it help me plan my recipes better, but it also helps me save money by buying just the right amount of lemons I need.

To give you an idea of just how much juice you can get from a lemon, take a look at this table:

Advertisement
Size of Lemon Amount of Juice
Small 1-2 tablespoons
Medium 2-3 tablespoons
Large 4-5 tablespoons

Aside from adding flavor to your dishes, lemon juice also has numerous health benefits. It’s rich in Vitamin C, which is known to boost the immune system and improve skin health. It also aids in digestion and can help prevent kidney stones. And if you ever find yourself without a fresh lemon on hand, you can always use substitutes such as vinegar or lime juice in a pinch.

Transitioning to the next subtopic, understanding how much juice one lemon yields is essential when it comes to recipe conversion. Knowing how to calculate the amount of lemon juice needed for a recipe can make or break the final outcome.

Recipe Conversion: How to Calculate Lemon Juice Needed

Understanding the recipe conversion process can be complex, especially when it comes to calculating the necessary amount of lemon juice needed. However, having the right amount of this tart and zesty liquid can make all the difference in the final product.

Here are some tips on how to calculate the right amount of lemon juice for your recipe:

  1. Start by determining how much juice you need. This can be done by looking at the recipe and identifying the amount of lemon juice required in the ingredient list.

  2. The next step is to figure out how much juice is in each lemon. On average, a medium-sized lemon yields about 2-3 tablespoons of juice. However, this can vary based on the size and ripeness of the fruit.

  3. Once you know how much juice is in each lemon, you can calculate how many lemons you need for your recipe. Simply divide the required amount of juice by the amount of juice in each lemon to get the number of lemons needed.

By following these simple steps, you can ensure that you have the right amount of lemon juice for your recipe.

Advertisement

In the next section, we’ll discuss how to store any excess juice for future use.

Storing Lemon Juice

Now that we know how to calculate the amount of lemon juice needed for a recipe conversion, it’s important to discuss proper storing techniques and shelf life.

Lemon juice can be stored in a variety of ways, including in the refrigerator, freezer, or even canned. When storing in the refrigerator, it’s important to keep the juice in an airtight container to prevent oxidation and maintain freshness. The juice can also be frozen in ice cube trays and then transferred to a freezer-safe container for later use. Canning is another option, but requires proper equipment and techniques to ensure safety.

The shelf life of lemon juice varies depending on the storage method. Freshly squeezed lemon juice stored in the refrigerator can last up to 2-3 days, while frozen juice can last up to 6 months. Canned lemon juice can last even longer, up to a year or more. It’s important to always check for signs of spoilage, such as a sour smell or mold, before using any stored lemon juice.

Moving on to other uses for lemon juice, it can be used for more than just cooking.

Advertisement

Other Uses for Lemon Juice

If you’ve ever struggled with removing stubborn stains or rust, a little bit of this versatile citrus liquid can work wonders. Lemon juice is not only a great ingredient for adding a tangy flavor to your dishes, but it also has some impressive uses in skincare and home cleaning. Here are three benefits of using lemon juice for skincare:

  1. Lemon juice is rich in citric acid, which can help exfoliate dead skin cells and brighten your complexion.

  2. It contains vitamin C, an antioxidant that helps protect your skin from damage caused by free radicals and UV rays.

  3. Lemon juice can also help reduce the appearance of dark spots and acne scars due to its natural bleaching properties.

When it comes to cooking, there are different types of lemon juice you can use depending on your recipe. Freshly squeezed lemon juice is ideal for adding a bright, citrusy flavor to your dishes, while bottled lemon juice can be used for convenience and consistency. Here are a few more ways you can incorporate lemon juice into your cooking:

  1. Use lemon juice as a marinade for meats or fish to add flavor and tenderize the protein.

  2. Add lemon juice to your salad dressings for a tangy kick.

  3. Mix lemon juice with olive oil and herbs to create a flavorful dipping sauce for bread or vegetables.

Overall, lemon juice is a versatile ingredient that can be used in a variety of ways to enhance your skincare routine and cooking skills.

Frequently Asked Questions

What are the health benefits of lemon juice?

As a nutritionist, I can attest to the numerous health benefits of lemon juice. It’s packed with vitamin C, antioxidants, and has anti-inflammatory properties. Lemon juice can also aid digestion, boost immunity, and improve skin health. Check out the nutrition facts for more details.

How long does it take for a lemon to produce juice?

To extract lemon juice, the fruit must first be cut and squeezed. The production timeline depends on the method used, but typically takes only a few minutes. Other factors, such as the ripeness of the lemon, can also impact the amount of juice produced.

Advertisement

Can you juice a lemon without a juicer?

Yes, you can juice a lemon without a juicer using alternative methods such as hand-squeezing, using a fork, or rolling the lemon to release the juice. Different lemon squeezing techniques can also affect the amount of juice extracted.

What is the best way to remove seeds from lemon juice?

The best way to remove seeds from lemon juice is to use a fine mesh strainer or cheesecloth. Simply pour the juice through the strainer or wrap the cheesecloth around the seeds and squeeze. This technique ensures a smooth, seedless juice.

How do you know if a lemon is ripe enough to juice?

To determine if a lemon is ripe enough for juicing, I check for a bright yellow color and a slight give when squeezed. I use lemon juice extraction techniques such as rolling the lemon to release more juice.

Conclusion

In conclusion, knowing how much juice a lemon produces is essential for any cook or bartender. It can mean the difference between a mediocre dish and an exceptional one. By understanding the factors that affect lemon juice yield and using the right tools and techniques, you can maximize the amount of juice you extract from each lemon.

Whether you’re making a lemon vinaigrette or a lemon drop martini, having the right amount of juice is crucial. In short, the power of a lemon shouldn’t be underestimated. This small fruit can pack a punch, and its juice has a wide range of uses. From enhancing the flavor of dishes to providing health benefits, lemon juice is a versatile ingredient that should be a staple in every kitchen.

Advertisement

So grab your juicer and some lemons, and start exploring the endless possibilities of this zesty citrus fruit. Trust me, your taste buds will thank you.

Continue Reading

Juice

How To Make Papaya Juice

Published

on

By

As a health enthusiast, I am always on the lookout for creative and delicious ways to incorporate nutrient-rich foods into my diet. Lately, I have been intrigued by the papaya. Its vibrant orange flesh, sweet taste, and numerous health benefits make it a perfect addition to any smoothie.

Making your own papaya juice is not only easy but also incredibly rewarding. It’s like a burst of sunshine in a glass, delivering a refreshing and invigorating dose of vitamins and minerals straight to your body.

In this article, I will guide you through the step-by-step process of creating your own homemade papaya juice, so you too can enjoy the many health benefits and delicious taste of this tropical fruit.

Key Takeaways

  • The ripeness of the papaya is important when making juice, so look for a mostly yellow fruit with some green spots.
  • Water should be added in the blender to help the ingredients blend smoothly, and a proper water to fruit ratio should be maintained.
  • Blender maintenance is important and blending should be done at a low speed and gradually increased to avoid overblending and creating a foamy texture.
  • Honey or agave syrup can be added as a sweetener for taste and health benefits, but adding too much will increase the calorie and sugar content of the juice, so consume in moderation.

Gather Your Ingredients

Don’t forget to grab that juicy papaya and get ready for a refreshing experience that will quench your thirst like never before! Before we can start making the juice, we need to gather our ingredients.

Apart from the papaya, you’ll need some water, lime juice, and sugar or honey for sweetening. Papaya is an excellent source of vitamins A and C, potassium, and fiber. It’s also rich in antioxidants that help boost your immune system and protect against chronic diseases.

To make the juice more interesting, you can add other fruits like strawberries, pineapple, or mangoes. These flavor variations not only add taste but also enhance the health benefits of the juice.

Advertisement

Now that we have gathered our ingredients, let’s move on to preparing our papaya.

Prepare Your Papaya

Once you’ve got your hands on a ripe papaya, it’s as easy as slicing it open like a smile to reveal the juicy goodness inside. But before you get started, it’s important to know that there are several varieties of papaya, and each one has a different level of ripeness that’s optimal for juice-making.

Here are three things to keep in mind regarding papaya ripeness:

  1. Look for a papaya that is mostly yellow with some green spots. This indicates that the fruit is ripe and ready to be used for juice.

  2. If the papaya is fully green, it’s not yet ripe enough to use. You’ll need to wait a few more days until the papaya turns yellow.

  3. If the papaya is mostly yellow with brown spots, it’s overripe and may not taste as good in juice.

Now that you know how to choose the perfect papaya, it’s time to cut it into pieces and get ready to make some delicious juice.

Cut the Papaya into Pieces

To start, simply grab a sharp knife and slice the ripe papaya in half lengthwise, revealing the bright orange flesh and black seeds inside. Next, scoop out the seeds with a spoon and then proceed to cut the papaya into pieces. I like to cut the papaya into cubes, but you can cut them into any size you prefer.

Advertisement

When selecting a papaya for juice, it’s important to choose a ripe one. A ripe papaya should have a yellowish-orange skin and should yield slightly to pressure. Papayas are a great source of vitamins A and C, and they contain an enzyme called papain that aids in digestion. By adding papaya juice to your diet, you can reap all of these health benefits and more.

Now that the papaya is cut into pieces, it’s time to add it to the blender. But before we do that, we need to add water to the blender to help the blending process.

Add Water to the Blender

Now we’re ready to blend everything together, so let’s go ahead and add some water to the blender. It’ll help the ingredients blend smoothly and create a refreshing and hydrating drink that’ll leave you feeling energized. When adding water to the blender, it’s important to maintain a proper water to fruit ratio to ensure that the juice isn’t too thick or too watery. As a general rule of thumb, I like to add about 1/2 cup of water for every 1 cup of fruit. This ratio can be adjusted based on personal preference, but be careful not to add too much water as it can dilute the flavor of the papaya.

Proper blender maintenance is also important when making papaya juice. Before adding the water, make sure the blender is clean and free of any residue from previous use. After blending, take the time to thoroughly clean the blender to prevent any lingering flavors or bacteria. Now that we’ve added the water to the blender, it’s time to move onto the next step and add the papaya to create a delicious and nutrient-packed juice.

Add the Papaya to the Blender

With the blender prepped and water added, it’s time to blend in the juicy papaya chunks for a tropical burst of flavor. Before adding the papaya, make sure to remove the skin and seeds. Papaya is rich in vitamins A and C, and adding it to your diet can help improve digestion and boost your immune system.

Advertisement

When blending the papaya, it’s important to start at a low speed and gradually increase it to avoid overblending and creating a foamy texture. Depending on your preference, you can add other fruits such as pineapple or banana to create different variations of papaya juice.

Once the papaya is fully blended, we can move on to the next step of the process: blending the mixture until smooth.

Blend the Mixture

You’re ready to blend the mixture and create a delicious papaya juice. Before we start, let’s talk about blender maintenance. It’s important to keep your blender clean and free from any remnants of past use. Make sure to wash the blender thoroughly with soap and water before using it.

Now, let’s blend the mixture. Start by placing the lid on the blender and turning it on. Blend on high speed until the mixture is smooth and creamy. If you don’t have a blender, you can use a food processor or immersion blender as an alternative blending method. Once you’ve achieved the desired consistency, you can move on to the next step: strain the mixture (optional).

Strain the Mixture (optional)

If you wanna go the extra mile, strain out any unwanted bits and bobs from your blended concoction with a sieve or cheesecloth. This step is optional, but it can make a huge difference in the texture and taste of your papaya juice.

Advertisement

By removing the fibrous pieces and seeds, you’ll get a smoother and more pleasant drink that is easier to digest. The benefits of straining go beyond aesthetics and taste.

Papaya seeds, for instance, have a bitter flavor and can cause digestive discomfort if ingested in large amounts. While they’re edible and have some health benefits, such as being anti-inflammatory and antibacterial, they’re not suitable for everyone.

Straining also allows you to remove any dirt, debris, or pesticides that may be present in the fruit. If you don’t have a sieve or cheesecloth, you can skip this step or use a fine-mesh strainer, but keep in mind that you may end up with a chunkier juice.

Now that you have your pulp-free papaya juice, you can proceed to the next step: adding sweetener (optional).

Add Sweetener (optional)

To enhance the flavor and add a touch of sweetness, consider mixing in honey or agave syrup to create a tropical paradise in your mouth. Not only do these alternative sweeteners provide a delicious taste, but they also come with health benefits.

Advertisement

Honey contains antioxidants and has antibacterial properties, while agave syrup has a lower glycemic index compared to traditional sugar. When adding the sweetener, start with a small amount and adjust to your preference. Here are some tips to keep in mind:

  • Use raw, unprocessed honey or organic agave syrup for maximum health benefits.
  • Consider using a honey or agave syrup that is locally sourced to support small businesses and reduce your carbon footprint.
  • If you prefer a sweeter juice, add more sweetener gradually to avoid overpowering the natural flavor of the papaya.
  • Keep in mind that adding sweetener will increase the calorie and sugar content of the juice, so consume in moderation.

Now that the juice is sweetened to your liking, it’s time to chill and serve.

Chill and Serve

Once the mixture is chilled and ready, simply grab a glass and pour in the deliciously tropical juice. Savor every sip, as papaya juice is not only refreshing but also packed with numerous health benefits. It’s rich in antioxidants, vitamins A and C, and enzymes that aid digestion. Regular consumption of papaya juice can improve skin health, boost immunity, and reduce inflammation.

To switch things up, try different serving suggestions for your homemade papaya juice. Add a slice of lime or a sprig of mint for an extra kick of flavor. You can also mix it with other juices like pineapple or orange for a tropical fruit medley. However, it’s important to note that papaya juice should be consumed in moderation as it contains high amounts of natural sugars.

Enjoy your homemade papaya juice and reap the benefits of this delicious and nutritious beverage!

Enjoy Your Homemade Papaya Juice!

You can savor the delicious and nutritious homemade tropical beverage by pouring it into a glass and adding a slice of lime or a sprig of mint for an extra kick of flavor. The best part about making papaya juice at home is that you can customize it according to your preferences and health needs. Here are some health benefits and recipe variations that you can try:

Advertisement
Health Benefits Recipe Variations
High in Vitamin C and antioxidants Add ginger or turmeric for additional anti-inflammatory properties
Supports digestion and gut health Mix with coconut water or kefir for probiotic benefits
Lowers blood sugar levels Blend with spinach or kale for an extra boost of vitamins and minerals

By incorporating these recipe variations, you can enhance the taste and nutritional value of your homemade papaya juice. Enjoy this refreshing beverage as a healthy breakfast drink or a post-workout thirst quencher. Cheers to good health and delicious taste!

Frequently Asked Questions

What are the health benefits of drinking papaya juice?

After researching, I found that papaya juice is high in vitamin C, antioxidants, and fiber. It may aid in digestion and boost immunity. However, it may also cause allergic reactions or interact with certain medications.

Can I use frozen papaya instead of fresh papaya?

Yes, frozen papaya can be used as a substitute for fresh papaya in smoothie options. It still retains its nutritional benefits and can be a convenient option for those who don’t have access to fresh papaya.

How long does homemade papaya juice last in the refrigerator?

To preserve the freshness of homemade papaya juice, store it in an airtight container in the refrigerator. This will extend the juice’s shelf life for up to three days. Keeping the juice fresh is key to maximizing its health benefits.

Can I add other fruits or vegetables to my papaya juice?

Oh, the possibilities! I love getting creative with my papaya juice variations. Mixing papaya with other fruits like mango or pineapple can add a tropical twist, while adding spinach or kale can boost the health benefits. The options are endless!

Advertisement

Is it possible to make papaya juice without a blender?

Yes, it is possible to make papaya juice without a blender. You can use blender alternatives such as a food processor or manual extraction methods like squeezing the juice out of the fruit by hand or using a juicer.

Conclusion

Well, that’s how I make my delicious papaya juice! It’s so easy and refreshing, and it’s a great way to get some extra vitamins and nutrients into your diet.

Did you know that papaya is high in vitamin C, folate, and potassium? In fact, one medium papaya contains about 224% of your daily recommended intake of vitamin C! That’s pretty impressive.

But beyond just being a healthy choice, papaya juice is also a delicious one. It’s naturally sweet and has a tropical flavor that’s perfect for sipping on a hot summer day.

Plus, by making it at home, you can control the sweetness and add in any other ingredients you like. So if you’re looking for a tasty and healthy drink option, give papaya juice a try!

Advertisement

Continue Reading

Juice

How To Make My Own Vape Juice

Published

on

By

As a passionate vaping enthusiast, I have always been fascinated by the art of creating my own e-liquid. The process of blending different flavors to create a unique taste that suits my preferences has been an exciting adventure. However, making your own vape juice can be daunting, especially for beginners.

In this guide, I will share with you the steps I took to make my own vape juice, including the basic ingredients and equipment needed, how to determine the PG/VG ratio, and how to calculate the recipe.

Before we delve into the process of making your own vape juice, it is crucial to understand the basic ingredients and equipment needed. The main ingredients of vape juice include vegetable glycerin (VG), propylene glycol (PG), nicotine, and flavorings. VG and PG are the base liquids used to create the vapor, while nicotine and flavorings are added to enhance the taste and nicotine content.

The equipment needed includes a mixing container, a scale, syringes, gloves, and bottles for storage. With these basic ingredients and equipment, you can start making your own vape juice and customize it to your liking.

Key Takeaways

  • Prioritize ingredient safety and equipment maintenance to ensure purity and consistency.
  • Experiment with flavor combinations and adjust ratios for desired flavor and nicotine strength.
  • Use a mixing calculator and measure ingredients accurately for consistency and safety.
  • Properly store ingredients and finished e-liquids to maintain flavor and potency.

Understand the Basic Ingredients and Equipment Needed

To make your own vape juice, you’ll need some basic ingredients and equipment, like VG (vegetable glycerin), PG (propylene glycol), nicotine, flavorings, syringes, and bottles. These are all readily available online or at your local vape shop.

When it comes to equipment options, you can use either a scale or syringes to measure out your ingredients. A scale is more precise and efficient, while syringes are easier to find and use.

Advertisement

It’s important to note that some flavorings may contain oils or other additives that can be harmful if vaporized, so be sure to research and choose safe options.

Ingredient substitutions are also possible, but may affect the overall flavor and vaping experience. For example, you can swap VG and PG ratios to adjust the thickness and throat hit of your juice. You can also choose different types of nicotine, such as freebase or salt nicotine, depending on your preference.

Flavorings can be substituted or combined to create unique blends, but make sure to use ones that are specifically made for vaping. With all these options, it’s important to experiment and find what works best for you.

Now that you understand the basic ingredients and equipment needed, let’s move on to gathering everything necessary to start making your own vape juice.

Gather the Necessary Ingredients and Equipment

First, you’ll need to gather all the essential ingredients and equipment needed for crafting your own custom e-liquid. When it comes to ingredients, it’s important to prioritize ingredient safety. Make sure to purchase pharmaceutical-grade ingredients from reputable suppliers to ensure the purity of your e-liquid. Some of the key ingredients you’ll need include propylene glycol (PG), vegetable glycerin (VG), nicotine (if desired), and flavor concentrates. It’s also important to properly store your ingredients in a cool, dry place to maintain their quality.

Advertisement

In addition to the necessary ingredients, you’ll need to have the proper equipment for mixing and storing your e-liquid. This includes a scale for accurate measurements, syringes for precise dispensing, mixing containers, and bottles for storing your finished product. It’s also important to prioritize equipment maintenance to ensure the longevity and accuracy of your tools. Regularly clean your equipment and replace any worn or damaged components. By gathering the necessary ingredients and equipment and prioritizing ingredient safety and equipment maintenance, you’ll be well on your way to crafting your own custom e-liquid with confidence.

As you gather your ingredients and equipment, it’s important to keep in mind the flavor profile you want to achieve in your e-liquid. In the next section, we’ll discuss how to choose your flavor profile and create a unique and satisfying vaping experience.

Choose Your Flavor Profile

When it comes to choosing a flavor profile for my vape juice, I like to consider whether I want a single flavor or a combination of flavors. Experimenting with different combinations can lead to unique and interesting results.

Additionally, adjusting the intensity of the flavors can greatly affect the overall taste of the vape juice. It’s important to keep in mind that finding the perfect flavor profile may take some trial and error, but the end result is worth it.

Single Flavor vs. Combination

Deciding between using a single flavor or combining flavors can be a tough choice, but it ultimately depends on personal preference and taste.

Advertisement

There are pros and cons to both options. Using a single flavor can be simple and straightforward, making it easier to control the taste and nicotine strength. However, it can also be limiting in terms of variety and complexity.

On the other hand, combining flavors can open up a whole new world of possibilities, allowing you to create unique and complex blends. The downside is that it can be tricky to get the ratios right and achieve a balanced flavor.

When it comes to popular combinations, there are endless options to choose from. Some common pairings include fruit and menthol, dessert and cream, and tobacco and caramel. However, don’t be afraid to get creative and experiment with different flavors to find the perfect mix for you.

Remember, taste is subjective, so what works for one person may not work for another. The key is to start with small batches and adjust the ratios until you find the right balance of flavor and nicotine strength. With a bit of trial and error, you’ll be able to create your own unique vape juice that perfectly suits your taste buds.

Experimenting with Flavors

Combining different flavor profiles can lead to a multitude of unique and unexpected tastes, allowing for an exciting exploration of the vast world of vaping. However, it’s important to be mindful of certain flavor combinations to avoid.

Advertisement

For example, mixing mint and cinnamon can create an overpowering taste that can be unpleasant to some. Similarly, combining citrus and dairy flavors can result in a curdled and unappetizing vape juice.

On the other hand, finding inspiration for unique flavors can lead to great success. Experimenting with combining fruits like strawberry and kiwi, or mixing dessert flavors like caramel and vanilla can create a delicious and complex vape juice.

It’s also helpful to try out pre-made flavor concentrates from reputable brands to get a sense of different flavor profiles and how they can be mixed together. With a bit of creativity and caution, the possibilities for creating your own unique vape juice flavors are endless.

Now, let’s move on to adjusting flavor intensity.

Adjusting Flavor Intensity

To add an extra kick to your flavor, try using a drop or two of flavor enhancers like EM or AP, which are available at most vape shops. These flavor enhancers are meant to balance out the overall flavor profile of your vape juice.

Advertisement

For example, if you feel like your fruit flavor is lacking some sweetness, you can add a drop of EM, which is ethyl maltol, to enhance the sweetness. On the other hand, if you feel like your bakery flavor is too overpowering, you can add a drop of AP, which is acetyl pyrazine, to tone down the bakery notes.

It’s important to note that when adjusting the flavor intensity, you should always taste your vape juice after adding the enhancer to avoid overdoing it. Additionally, steeping techniques can also affect the overall strength of the flavor.

Steeping is the process of letting your vape juice sit in a cool, dark place for a period of time, allowing the flavors to meld together and become more pronounced. Depending on the flavor and the recipe, some vape juices may need to steep for a few days or even a few weeks.

Once you’ve adjusted the flavor intensity and determined the steeping time, it’s time to move on to determining the pg/vg ratio.

Determine the PG/VG Ratio

Finding the perfect PG/VG ratio can truly make or break the flavor and overall vaping experience. PG and VG are the two main components of vape juice, and they each have their own properties that affect the final product.

Advertisement

PG is thinner and has a stronger throat hit, which is great for those who want a stronger sensation when vaping. On the other hand, VG is thicker and produces more vapor, making it ideal for cloud chasers.

When deciding on the PG/VG ratio for your vape juice, it’s important to consider your personal preferences and vaping style. If you want a stronger throat hit, a higher PG ratio may be better for you. However, if you prefer bigger clouds and a smoother vaping experience, a higher VG ratio may be the way to go. Additionally, you can adjust the throat hit in your vape juice by adding more or less PG, depending on your desired effect.

Moving on to the next step, calculating the recipe for your vape juice involves taking into account the flavorings, nicotine, and PG/VG ratio.

Calculate the Recipe

To calculate the recipe for my DIY vape juice, I need to use a mixing calculator. This tool will help me determine the exact measurements of each ingredient based on my desired nicotine strength, flavor intensity, and PG/VG ratio.

It’s important to measure the ingredients accurately to ensure consistency and safety, and to adjust the recipe for different batch sizes.

Advertisement

Using a Mixing Calculator

Using a mixing calculator can be a game-changer for DIY vape juice makers. It simplifies the process and ensures accurate measurements, making it a piece of cake.

One of the benefits of DIY vape juice is the ability to customize the flavor to your liking. However, this can be challenging without the right tools. Using a mixing calculator eliminates the guesswork and ensures that you have the right amount of each ingredient.

Common mixing mistakes can lead to an unpleasant vaping experience, such as too much flavoring or not enough nicotine. A mixing calculator takes into account the specific gravity and concentration of each ingredient to ensure that you have the perfect balance.

It also allows you to adjust the recipe based on the size of the batch you want to make. With a mixing calculator, you can confidently create your own unique vape juice flavors without worrying about making mistakes that could ruin the final product.

Accurately measuring ingredients is crucial for creating a successful vape juice recipe. In the next section, I’ll discuss the importance of using precise measurements and how to do it correctly.

Advertisement

Measuring Ingredients Accurately

Now that we’ve got the hang of using a mixing calculator, let’s talk about the importance of precision in measuring the ingredients for our vape juice.

Measuring ingredients accurately is crucial to the success of our mix. Even the slightest variation in measurements can greatly affect the flavor and consistency of our final product. That’s why it’s important to use the appropriate tools, such as a graduated cylinder or a scale, for measuring each ingredient.

Common measuring mistakes include eyeballing measurements, using the wrong measuring tools, and not properly leveling off dry ingredients. These mistakes can lead to an imbalanced flavor profile, harsh throat hits, or even a ruined batch.

To avoid these issues, it’s essential to follow the recipe and measure each ingredient carefully. Remember, precision is key when it comes to making your own vape juice.

Now that we understand the importance of accurate measurements, let’s move on to the next step: adjusting for batch size.

Advertisement

Adjusting for Batch Size

When we want to mix up a bigger or smaller batch of our delicious e-liquid, we need to adjust the ingredients accordingly to ensure the perfect balance of flavors. Here are some tips and tricks for adjusting for batch size:

  1. Use a calculator to scale the recipe: This is the easiest and most accurate way to adjust for batch size. Simply multiply the ingredients by the desired batch size and divide by the original batch size. For example, if the original recipe is for a 100ml batch and you want to make a 50ml batch, you would multiply all the ingredients by 0.5.

  2. Be mindful of flavor concentration: Some flavorings can be very potent, and a little goes a long way. When adjusting for batch size, make sure to adjust the flavoring accordingly. For example, if the original recipe calls for 10% flavoring in a 100ml batch, you may only need 5% in a 50ml batch.

  3. Keep track of your adjustments: It’s important to keep a record of the adjustments you make to the recipe. This will help you replicate the recipe in the future and make adjustments as needed.

Now that we’ve discussed adjusting for batch size, it’s time to mix the ingredients.

Mix the Ingredients

As I mix the ingredients for my own vape juice, I need to be aware of the different mixing techniques to achieve the desired result. One common mistake that beginners make is not mixing the ingredients thoroughly, resulting in an uneven distribution of flavors. To prevent this, I need to use a magnetic stirrer or a handheld mixer to ensure that the ingredients are well-blended.

Another important factor to consider is the order in which the ingredients are mixed. I usually start by adding the base liquid, followed by the flavorings, and then the nicotine (if desired). This ensures that the flavors are evenly distributed and that the nicotine is evenly dispersed throughout the mixture.

As I mix the ingredients, I can already start to imagine the flavor profile of my vape juice. But before I can enjoy it, I need to steep the e-liquid to allow the flavors to fully develop.

Advertisement

Once the ingredients are mixed, it’s time to let the e-liquid steep and mature, enhancing the flavors and improving the overall vaping experience.

Steep the E-Liquid

To fully develop the flavors of your e-liquid, steeping is essential. Steeping is the process of letting the e-liquid mixture sit for a certain period of time to allow the flavors to blend together. This process is necessary because some of the ingredients used in the mixture may not be fully incorporated at first, resulting in a harsh or unpleasant taste if vaped immediately.

Steeping techniques vary depending on the recipe and the desired outcome, but the general rule is to store the e-liquid in a cool, dark place and shake it regularly. The importance of patience in steeping can’t be overstated. Some e-liquids may require a few days to a few weeks of steeping before they’re ready to vape. It can be tempting to try the e-liquid right away, but the flavors won’t be as developed as they could be.

Patience is key to achieving the best possible flavor from your homemade e-liquid. Once the steeping process is complete, it’s time to move on to the next step: testing and adjusting the e-liquid to your preference.

Test and Adjust

Now that I’ve steeped my e-liquid, it’s time to test and adjust the flavor and nicotine levels to my liking.

Advertisement

I’ll begin by testing the e-liquid by dripping a small amount onto my atomizer and taking a few puffs.

From there, I can adjust the flavor or nicotine levels accordingly and make notes for future batches.

By taking the time to test and adjust my e-liquid, I can ensure a satisfying experience every time I vape.

Testing the E-Liquid

Before you start vaping your homemade juice, make sure you test it first to ensure the flavor and nicotine levels are to your liking. To test the e-liquid, you can use various flavor testing techniques such as dripper testing or tank testing.

Dripper testing involves adding a small amount of the e-liquid onto a dripper and vaping it without any previous juice in the tank.

Advertisement

Tank testing involves filling your vape tank with the e-liquid and vaping it. This method is best for evaluating how the e-liquid tastes when it is heated.

It’s also important to keep in mind the steeping time for e-liquids. Steeping is the process of letting e-liquids age to improve their flavor. It’s recommended that you let your e-liquid steep for at least a week before testing it. You can steep your e-liquid by letting it sit in a cool, dark place and shaking it every day.

Once you’ve tested your e-liquid and determined the flavor and nicotine levels, you can move on to adjusting flavor or nicotine to your liking.

Adjusting Flavor or Nicotine

Once you’ve tested your e-liquid and determined the flavor and nicotine levels, it’s time to personalize your vaping experience by customizing the nicotine strength and balancing the flavor profile.

To adjust nicotine levels, you’ll need to add more or less nicotine concentrate to your e-liquid base. It’s important to measure the nicotine concentrate accurately to avoid ending up with a nicotine level that’s too strong or too weak. You can use an online calculator to determine the amount of nicotine concentrate to add, based on the strength of your base and the desired nicotine level.

Advertisement

When it comes to balancing the flavor profile, you can adjust the amount of flavoring used to make it stronger or weaker. Be careful not to add too much flavoring, as this can overpower the other flavors and make the e-liquid taste artificial.

It’s a good idea to start with small adjustments and test the e-liquid again before making any major changes. Once you’ve achieved the perfect balance of nicotine and flavor, you can make notes for future batches to ensure consistency.

Making Notes for Future Batches

To ensure consistency in your e-liquid batches, it’s crucial to jot down notes like a baker writing down a recipe for their signature dish. By keeping track of your flavor notes and recipe adjustments, you can easily replicate your favorite e-juice flavors that suit your taste buds.

Here are a few tips on how to make notes for future batches:

  • Start with the basics: Write down the name of the recipe, the date it was made, the nicotine level, and the VG/PG ratio. This will help you keep track of the different batches you make.

  • Flavor notes: Write down the flavors you used, their brand, and the percentage used. This will help you remember which flavors work well together and which ones need to be adjusted.

  • Recipe adjustments: If you made any adjustments to the recipe, like increasing or decreasing the percentage of a flavor, write it down. This will help you achieve the desired taste in future batches.

  • Personal preferences: If you made a recipe that you loved, write down any personal preferences you have, like increasing the sweetness or adding menthol. This will help you customize the recipe to suit your taste buds.

By taking notes, you can easily replicate your favorite e-juice flavors and make any necessary adjustments. Now that you’ve got your notes, it’s time to store the e-liquid properly to ensure it stays fresh and flavorful.

Advertisement

Store the E-Liquid

Storing your homemade e-liquid properly is crucial to maintaining its flavor and nicotine potency. Proper storage ensures that your e-liquid lasts longer and maintains its quality. The shelf life of e-liquid depends on various factors such as nicotine strength, flavoring, and the base used.

To store your e-liquid, you’ll need to keep it away from heat and direct sunlight. Heat and sunlight can cause the nicotine to degrade and alter the flavor. It’s best to store your e-liquid in a cool, dark place, such as a cabinet or drawer. Additionally, make sure to keep your e-liquid away from children and pets, as nicotine is poisonous if ingested. The table below summarizes the proper ways to store your e-liquid.

Factor to Consider Proper Storage
Temperature Cool and dark place
Sunlight Keep away from direct sunlight
Children and pets Keep out of reach

Now that you’ve learned about proper storage for your e-liquid, you can enjoy your custom vape juice!

Enjoy Your Custom Vape Juice!

After properly storing your homemade e-liquid, savoring its flavor and potency is like taking a sip of a fine wine. The customized flavor combinations and tailored nicotine strengths are just some of the benefits of making your own vape juice.

Compared to store-bought options, DIY e-liquids offer more control over the ingredients, allowing you to adjust the flavor and nicotine levels to your liking. To enjoy your custom vape juice, it’s important to use the right equipment and technique.

Advertisement

First, ensure that your vape device is compatible with the e-liquid you made. Then, prime your coil to prevent dry hits and burnt flavors. Finally, start with a low wattage setting and gradually increase it until you find the sweet spot for your desired flavor and vapor production.

With practice, you’ll be able to create a perfect blend that suits your taste and vaping preferences. Enjoy your custom vape juice!

Frequently Asked Questions

Is it safe to make my own vape juice at home?

When making vape juice at home, home safety and ingredients quality are key factors to consider. Ensure proper storage, handling, and labeling of ingredients. Purchase high-quality ingredients from reputable sources.

How much money can I save by making my own vape juice compared to buying it pre-made?

I saved a ton of money by making my own vape juice compared to buying pre-made. DIY vape juice cost comparison showed a 75% reduction in cost. Homemade e liquid quality analysis is crucial for safe and satisfying vaping.

Can I make vape juice without nicotine?

Yes, it is possible to make vape juice without nicotine. There are nicotine-free options available, and flavor customization is still possible without nicotine. It’s important to carefully measure ingredients and follow safety precautions when making your own vape juice.

Advertisement

How long does it take to steep the e-liquid, and why is this step necessary?

Like aging wine, steeping e-liquid is a crucial process that allows flavors to develop fully. The steeping process can take anywhere from a few days to several weeks, depending on the recipe. It’s necessary to achieve optimal taste and quality.

Are there any special precautions I need to take when mixing the ingredients or handling nicotine?

When mixing vape juice, it’s crucial to take mixing precautions and handle nicotine safely. Nicotine is a toxic substance that can cause harm if ingested or absorbed through the skin, so gloves and eye protection should be worn.

Conclusion

Well, after all that effort, I’ve finally made my own vape juice.

I followed all the steps, gathered all the ingredients and equipment, and calculated the perfect recipe for my desired flavor profile.

I steeped the e-liquid, tested and adjusted it to my liking, and stored it in a cool, dark place.

Advertisement

It’s ironic that after all that work, I’m left wondering if it was worth it.

Sure, I have a unique blend of vape juice that no one else has, but was the time and effort worth the end result?

Maybe it’s just me, but I think I’ll stick to buying pre-made vape juice from now on.

At least I know exactly what I’m getting and can save myself the hassle of making it myself.

Advertisement

Continue Reading
Advertisement

Affiliate disclaimer
As an affiliate, we may earn a commission from qualifying purchases. We get commissions for purchases made through links on this website from Amazon and other third parties.

Advertisement

Trending

Copyright © 2024 The Graceful Kitchen Affiliate disclaimer As an affiliate, we may earn a commission from qualifying purchases. We get commissions for purchases made through links on this website from Amazon and other third parties.