Connect with us

Juice

How To Make Cranberry Juice Less Acidic

Published

on

As someone who loves drinking cranberry juice, I have often faced the issue of its high acidity. This sharpness can be overwhelming at times, leading to discomfort in my stomach. However, I have slowly learned a few methods to decrease the acidity in cranberry juice, making it a more enjoyable drink.

In this article, I will share these tips with you, so you too can enjoy the many health benefits of cranberry juice without the unpleasant taste.

Cranberry juice is widely known for its ability to prevent and treat urinary tract infections, due to its high levels of antioxidants and anti-inflammatory properties. However, despite its many health benefits, the high acidity of cranberry juice can make it difficult for some people to drink.

The acidic taste can be especially troublesome for those with sensitive stomachs, as it can cause heartburn, acid reflux, and other digestive issues. Fortunately, there are several ways to make cranberry juice less acidic, and in this article, we will explore some of the most effective methods.

Key Takeaways

  • Dilute cranberry juice with water or other neutral liquids
  • Add sweeteners like honey, maple syrup, or stevia to reduce acidity
  • Use a blender or juicer to smooth out cranberries
  • Add alternative ingredients like apples or pears to reduce acidity and increase flavor

Why Cranberry Juice is Acidic

Did you know that one of the reasons why cranberry juice can be so acidic is because of its high levels of citric acid? Citric acid is a weak organic acid that is naturally found in many fruits, including cranberries. It is responsible for giving cranberry juice its tart, acidic taste.

However, for people who suffer from urinary tract infections (UTIs), the high acidity of cranberry juice can exacerbate their symptoms, causing discomfort and pain during urination.

Advertisement

Despite its acidic nature, cranberry juice is also packed with essential vitamins and minerals that are beneficial for overall health. It is rich in vitamin C, which supports a healthy immune system and helps to fight off infections. Additionally, cranberry juice contains antioxidants that protect the body against free radical damage and inflammation.

However, for those who find the acidity of cranberry juice too much to handle, there are ways to make it less acidic. One of the easiest ways is to dilute it with water or another neutral liquid.

Dilute with Water or Another Neutral Liquid

When it comes to reducing the acidity of cranberry juice, diluting it with water or another neutral liquid is a simple and effective solution. Personally, I prefer using water as it’s easily accessible and doesn’t affect the taste too much.

But if you want to experiment with other neutral liquids, try adding apple juice or coconut water for a slightly sweeter taste. The key is to find the perfect ratio of cranberry juice to the diluting liquid that suits your taste buds.

How Much Water to Add

Congratulations, you’ve decided to dilute your cranberry juice with water! Now, let’s get to the important question: how much H2O should you add to make it less acidic? Measuring accurately is key to achieving the desired taste. I recommend adding 1 part water for every 3 parts cranberry juice. This will make the juice less tart and more refreshing.

Advertisement

To make it easier for you to measure, here’s a simple table that shows the amount of water to add for different amounts of cranberry juice:

Cranberry Juice Water
1 cup 1/3 cup
2 cups 2/3 cup
3 cups 1 cup

Using other liquids, such as apple juice or grape juice, can also be effective in reducing the acidity of cranberry juice. These liquids have a natural sweetness that complements the tartness of cranberry juice. However, be mindful of the added sugar in these other liquids, as it can increase the overall sugar content of your drink.

Other Neutral Liquids to Try

Looking to experiment with the taste of your cranberry juice? Try adding alternative options like apple or grape juice. These neutral liquids complement the tartness of cranberry and offer a delicious twist to your juice.

Depending on your taste preferences, you can adjust the amount of neutral liquid you add to your cranberry juice. Start with small amounts and gradually increase until you find the perfect balance. It’s important to note that adding other liquids will dilute the cranberry juice, so keep this in mind when measuring out the amount of juice you need.

Also, be mindful of the sugar content of the additional liquids you add. If you’re trying to reduce your sugar intake, look for unsweetened options. Once you’ve added your neutral liquid, give your cranberry juice a taste. If you find that it’s still too tart, move on to the next step and add a natural sweetener.

Advertisement

Add a Natural Sweetener

When trying to make cranberry juice less acidic, adding a natural sweetener can be a great option. Personally, I prefer using honey because it not only adds sweetness but also has antibacterial properties that can help with maintaining a healthy gut.

Maple syrup is another great option for those who prefer a more earthy flavor, while stevia is perfect for those who are looking for a zero-calorie sweetener. Keep in mind, when adding sweeteners, it’s important to do so in moderation to avoid overloading on sugar.

Honey

If you’re looking to make your cranberry juice less acidic, adding a touch of honey can make all the difference. Not only does honey sweeten the tartness of cranberry juice, but it also offers additional health benefits.

Here are 4 reasons why using honey as a natural sweetener for your cranberry juice is a great idea:

  1. Honey is a natural source of antioxidants, which can help protect your body from damage caused by free radicals.

  2. Honey has antibacterial properties that can help promote a healthy immune system.

  3. Honey contains phytonutrients that can help reduce inflammation in the body.

  4. Honey has a lower glycemic index than sugar, meaning it won’t cause a spike in blood sugar levels.

Now that you know the benefits of honey, it’s time to move on to another natural sweetener option – maple syrup.

Advertisement

Maple Syrup

So, in our previous discussion, we talked about using honey to make cranberry juice less acidic. If you’re not a fan of honey or simply want to try something different, there are other alternatives available.

One of them is maple syrup. Maple syrup is a popular natural sweetener that can be used in various ways. It contains antioxidants and minerals such as zinc, calcium, and potassium. It also has a lower glycemic index than sugar, making it a great alternative for those watching their blood sugar levels.

To use maple syrup in your cranberry juice, simply add a small amount and adjust to your desired sweetness. You can also experiment with using maple syrup in other drinks, such as coffee or tea, to add a touch of sweetness.

Moving on to other alternatives, another option to consider is stevia.

Stevia

Interestingly, using stevia as a natural sweetener can bring a hint of sweetness to your favorite drinks without adding any calories. This makes it an excellent alternative to sugar or other high-calorie sweeteners when trying to make cranberry juice less acidic.

Advertisement

Stevia is a plant-based sugar substitute that is 200-300 times sweeter than regular sugar, so you only need a small amount to sweeten your juice. Compared to other sweeteners, stevia has a low glycemic index, which means it doesn’t cause a spike in blood sugar levels. It also has no carbohydrates, making it a suitable option for those following a low-carb or diabetic diet.

While other sweeteners like honey or maple syrup may add flavor to your cranberry juice, they also add calories. Stevia, on the other hand, allows you to enjoy a sweet treat without worrying about the added calories.

When it comes to making cranberry juice less acidic, using stevia is a great option. However, to get the most out of your cranberries, you may want to consider using a blender or juicer.

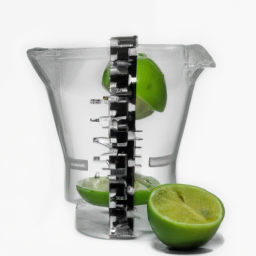
Use a Blender or Juicer

To make cranberry juice less acidic, I recommend using a blender or juicer. Blending techniques are a great way to break down the cranberries until they are smooth, which ultimately reduces their acidity. By doing this, the juice becomes less tart and more palatable.

If you don’t have a juicer, you can blend the cranberries with water and strain the mixture through a cheesecloth to remove any pulp or seeds. You can also try finding alternative ingredients to mix with the cranberries, such as apples or pears, to help balance out the acidity.

Advertisement

Once the juice is prepared, it’s essential to remember to drink it cold or over ice, as this can also help to mask any residual sourness.

Using a blender or juicer is an effective way to make cranberry juice less acidic. By blending the berries until they are smooth and straining the mixture, you can create a delicious and less tart juice. Don’t forget to add alternative ingredients or serve the juice cold or over ice to balance out the acidity.

Drink Cold or over Ice

I’ve found that one effective way to make cranberry juice less acidic is by drinking it cold or over ice. Temperature matters when it comes to the taste and acidity of a beverage. Colder temperatures can help to mask the tartness of cranberry juice. Additionally, ice can act as a neutralizer, further reducing the acidic taste.

Why Temperature Matters

While it may seem counterintuitive, heating up your cranberry juice can actually help to reduce its acidity. This is because the heat breaks down the chemical structure of the juice, making it less acidic. In fact, many professional chefs and bartenders use this technique to control acidity in fruit juices.

To make your cranberry juice less acidic, you can heat it up in a saucepan over low heat until it reaches a temperature of about 120°F. Be careful not to overheat the juice as this can cause it to lose its flavor and nutritional value. Once heated, you can add a few ingredients to balance the flavor and further reduce the acidity. Consider adding honey, sugar, or cinnamon to create a warm and comforting drink that is perfect for colder months.

Advertisement

By warming up your cranberry juice, you can reduce its acidity and create a more balanced flavor. However, if you prefer a cooler drink, there are other ways to control the acidity. One popular method is to drink the juice cold or over ice, which we’ll discuss in the next section.

Ice as a Neutralizer

Now that we know why temperature matters when it comes to reducing the acidity of cranberry juice, let’s move on to another technique.

Have you ever tried using ice as a neutralizer? It might sound strange, but it can actually work wonders in reducing the tartness of cranberry juice.

By adding a few ice cubes to your glass of cranberry juice, the cold temperature can help to mellow out the acidity and create a smoother taste. You can also experiment with different sweeteners, such as honey or agave, to balance out the flavor and make it more palatable. However, be careful not to overdo it with the sweeteners, as this can add unnecessary calories and negate the health benefits of cranberry juice.

As we continue our journey towards making cranberry juice less acidic, the next step is to choose low-acid varieties.

Advertisement

Choose Low-Acid Varieties

I want to share some information about choosing low-acid varieties of cranberry juice.

Did you know that there are different types of cranberries that vary in acidity levels? By choosing a low-acid variety, you can reduce the acidity in your cranberry juice and make it more enjoyable to drink.

You can find low-acid cranberry juice at specialty health food stores or online retailers.

Different Types of Cranberries

You’ll love learning about the different types of cranberries that can be used to make your cranberry juice less acidic.

There are two main types of cranberries: the American cranberry (Vaccinium macrocarpon) and the European cranberry (Vaccinium oxycoccos). The American cranberry is the more commonly cultivated variety and is the one typically used in commercial cranberry juice production. The European cranberry, on the other hand, is smaller, tarter, and less commonly cultivated.

Advertisement

Despite their differences in taste, both types of cranberries offer numerous nutritional benefits. They are low in calories and high in antioxidants, vitamins, and minerals. Cranberries are particularly rich in vitamin C and fiber, and have been shown to have anti-inflammatory and antibacterial properties.

With these benefits in mind, it’s easy to see why incorporating cranberries into your diet can be a smart choice.

Now, let’s explore where to buy low-acid cranberry juice.

Where to Buy Low-Acid Cranberry Juice

If you’re looking for a way to enjoy the nutritional benefits of cranberries without the high acidity, finding low-acid cranberry juice can be an excellent option. Low-acid cranberry juice is available in most health food stores and online retailers. Here are some popular brands and their respective acid levels:

Brand Acid Level
Ocean Spray 2.3-2.5
Lakewood Organic 2.5-2.8
Knudsen Just Cranberry 2.8-3.3

In addition to being easier on the stomach, low-acid diets have been linked to various health benefits. These include improved digestion, reduced inflammation, and lower risk of certain diseases such as osteoporosis and kidney stones. However, if low-acid cranberry juice is not readily available or doesn’t suit your taste, there are alternatives to consider such as mixing with other juices or beverages.

Advertisement

By mixing low-acid cranberry juice with other juices or beverages, you can create a delicious and nutritious drink that suits your taste preferences. In the next section, we’ll explore some of the best juices and drinks to mix with cranberry juice for a flavorful and healthful beverage.

Mix with Other Juices or Beverages

Mixing cranberry juice with other juices or beverages can make it less acidic and more enjoyable to drink. Here are some mixing options and flavor combinations to try:

  1. Mix with orange juice: Orange juice is a great option to mix with cranberry juice because it neutralizes the acidity and adds a sweet flavor. Mix equal parts of cranberry and orange juice to create a refreshing drink that’s perfect for breakfast or as a mid-day snack.

  2. Add honey: If you prefer to drink pure cranberry juice but find it too acidic, try adding a teaspoon of honey to a glass of cranberry juice. Honey is a natural sweetener that can help balance out the tartness of the cranberry juice.

  3. Mix with sparkling water: For a more refreshing and bubbly drink, mix cranberry juice with sparkling water. This combination not only reduces the acidic taste but also adds a bit of effervescence to your drink.

By mixing cranberry juice with other beverages or adding a sweetener like honey, you can make it less acidic and more enjoyable to drink. However, if you prefer to take cranberry supplements instead, read on to the next section.

Take Cranberry Supplements

I’ve found that taking cranberry supplements can be an effective way to reap the benefits of this tart fruit without having to consume large amounts of cranberry juice.

Capsules and tablets are available in many health food stores and pharmacies, and they offer a convenient way to get a concentrated dose of cranberry extract.

Advertisement

However, it’s important to be aware of the potential benefits and risks associated with taking cranberry supplements.

Capsules and Tablets

One solution for reducing the acidity of cranberry juice is to try taking capsules or tablets instead. Capsules and tablets offer a more concentrated form of cranberry that can be easier on the stomach. Additionally, they provide a convenient way to consume cranberry without having to worry about the tart taste.

If you decide to take cranberry capsules or tablets, it’s important to be mindful of the proper dosage and potential side effects. The table below highlights some benefits and dosage recommendations for capsules, as well as potential side effects of tablets:

Capsules Benefits Dosage
Cranberry extract capsules May prevent urinary tract infections 500mg twice daily
Cranberry powder capsules May improve gut health 500mg twice daily
Tablets Potential Side Effects
Cranberry chewable tablets Upset stomach
Cranberry effervescent tablets High sugar content

It’s always a good idea to consult with a healthcare professional before starting any new supplements or medications. With proper guidance, taking cranberry capsules or tablets can be a helpful way to reap the benefits of cranberry without the added acidity of the juice. Moving forward, it’s important to weigh the benefits and risks of different cranberry products to find the best option for your individual needs.

Benefits and Risks

To fully understand the benefits and risks of consuming cranberry, it’s important to consider all available information and consult with a healthcare professional. Here are some benefits and risks to keep in mind:

Advertisement
  • Benefits: Cranberry juice has been shown to help prevent urinary tract infections (UTIs) in some people. It’s also high in antioxidants, which can help protect against cell damage.

  • Risks: Cranberry juice can be high in sugar, which can be a problem for people with diabetes or other conditions that require them to monitor their blood sugar levels. Additionally, some people may experience stomach upset or diarrhea after consuming cranberry juice.

It’s important to weigh the benefits and risks before deciding whether or not to consume cranberry juice. If you have a history of UTIs or are looking for a natural way to prevent them, cranberry juice may be a good option for you. However, if you have concerns about sugar intake or have experienced negative side effects from consuming cranberry juice in the past, it may be best to avoid it.

In the next section, we’ll discuss how adjusting your diet can also help prevent UTIs.

Adjust Your Diet

You can reduce the acidity of your cranberry juice by changing your eating habits and incorporating low-acidic foods into your diet. Consuming foods that are low in acid can help neutralize the acid in your stomach and reduce the acidic content of cranberry juice.

Some low-acidic foods that you can incorporate into your diet include bananas, melons, oatmeal, and green vegetables, such as broccoli and spinach. Additionally, you can try reducing your intake of high-acidic foods, such as citrus fruits, tomatoes, and processed foods, which can contribute to high acidity levels in your body.

By making these dietary changes, you can make your cranberry juice less acidic, which may help reduce the risk of developing acid reflux or other digestive problems. However, it’s important to consult with a doctor if you have any concerns about your diet or health.

Advertisement

Consult with a Doctor

When it comes to drinking cranberry juice, it’s important to know when to seek medical advice. While cranberry juice is generally safe for most people, there are some potential side effects to be aware of.

As someone who’s experienced urinary tract infections in the past, I know that it’s important to consult with a doctor if symptoms persist or worsen after drinking cranberry juice.

When to Seek Medical Advice

If you’re experiencing persistent stomach pain or other symptoms after drinking cranberry juice, it may be time to consult a healthcare professional. While cranberry juice is generally considered safe for most people, there are certain symptoms to watch for that may indicate a problem.

These symptoms include nausea, vomiting, diarrhea, and abdominal pain. It’s also important to note the importance of regular check-ups with your doctor, especially if you have any underlying health conditions.

Some people may be more susceptible to the acidic nature of cranberry juice, and may experience more severe symptoms as a result. If you’re unsure whether or not cranberry juice is safe for you to consume, it’s always best to err on the side of caution and consult with your healthcare provider.

Advertisement

With that said, let’s now take a look at possible side effects of drinking cranberry juice.

Possible Side Effects of Drinking Cranberry Juice

Be aware of the potential side effects of drinking cranberry juice, as they can impact your overall health and well-being. While cranberry juice is generally safe for most people, some individuals may experience adverse reactions.

One of the most common side effects of drinking cranberry juice is stomach upset, such as nausea, diarrhea, or abdominal pain. This is due to the high acidity of cranberry juice, which can irritate the lining of the stomach and cause digestive distress.

In addition to stomach upset, drinking too much cranberry juice can also lead to increased risk of kidney stones. Cranberries contain high levels of oxalate, a substance that can bind with calcium to form kidney stones. Therefore, individuals with a history of kidney stones or calcium oxalate stones should avoid consuming large amounts of cranberry juice.

As with any food or beverage, it’s important to consume cranberry juice in moderation and be aware of your body’s response to it.

Advertisement

Frequently Asked Questions

How does the acidity of cranberry juice affect the body?

The acidity of cranberry juice can erode tooth enamel and lead to tooth decay. It’s important to limit consumption or use alkaline alternatives like water or milk to neutralize the acidity.

Can adding milk or cream to cranberry juice help reduce acidity?

Adding milk or cream to cranberry juice can help reduce acidity and create a smoother taste. Milk can also add beneficial nutrients and proteins to the drink. Alternative ways to reduce acidity include adding water or a sweetener.

How does the ripeness of cranberries impact the acidity of the resulting juice?

The ripeness of cranberries impacts the acidity of resulting juice. Cranberry harvesters aim for an ideal ripeness that balances sweetness and tartness. The more ripe the cranberries, the less acidic the juice will be.

Are there any potential side effects of consuming cranberry juice that is too acidic?

Consuming cranberry juice that is too acidic can cause potential risks and health concerns such as stomach upset, heartburn, and acid reflux. It’s important to consume in moderation and consider adding alkaline ingredients to balance the acidity.

How long can cranberry juice be stored before it becomes too acidic to consume?

Storing cranberry juice properly is key to maintaining its quality. Check the expiration date and refrigerate promptly. Preserving freshness extends usability, preventing spoilage. As for acidity, it varies by brand and storage conditions.

Advertisement

Conclusion

Overall, making cranberry juice less acidic can be a simple and effective way to enjoy this tart and flavorful beverage without any unwanted digestive issues. As someone who’s personally struggled with acid reflux and other stomach problems, I can attest to the benefits of diluting cranberry juice with water or adding a natural sweetener to balance out the acidity.

Interestingly, recent studies have also shown that drinking cranberry juice may have some surprising health benefits beyond just its delicious taste. For example, research has found that regular consumption of cranberry juice may help prevent urinary tract infections, lower blood pressure, and even improve cognitive function.

So, if you’re looking for a way to improve your health while still enjoying a refreshing drink, consider trying out some of these tips for making cranberry juice less acidic. Your taste buds (and your body) will thank you!

Continue Reading
Advertisement

Juice

Lemon = How Much Juice

Published

on

By

As someone who loves cooking and baking, I know the importance of accurate measurements when it comes to preparing food. This is especially crucial when using lemon juice in recipes, as it’s important to know the exact amount of juice needed.

Whether youre making lemonade, salad dressing, or a lemon tart, understanding the yield of a lemon will ensure that your recipe turns out perfectly.

There are a few factors that can affect the amount of juice a lemon produces, such as its ripeness and size. Additionally, the juicing method you use can also impact the yield.

In this article, I will provide a step-by-step guide for juicing lemons and share tips for getting the most juice out of your fruit. Plus, I will answer the burning question: how much juice does one lemon yield?

So, lets get started and master the art of juicing lemons!

Advertisement

Key Takeaways

  • Accurate measurements are crucial when cooking and baking with lemons, as factors like ripeness, size, and juicing method can affect lemon juice yield.
  • Knowing how much juice a lemon produces can help save money by buying the right amount of lemons needed, and using the right tool for juicing lemons can make a big difference in juice yield.
  • Lemon juice has health benefits, including aiding in digestion, boosting immune function, and being high in vitamin C and antioxidants, making it beneficial for skincare.
  • Lemon juice can be stored in the refrigerator, freezer, or canned, and can be used in a variety of recipes, including cocktails, salad dressings, and marinades for meats or fish.

The Importance of Knowing How Much Juice a Lemon Produces

You gotta know how much juice a lemon gives, it’s kinda important if you wanna impress your guests with a killer cocktail.

But beyond the realm of mixology, lemon juice has numerous benefits in the realm of health. Rich in vitamin C, potassium, and antioxidants, lemon juice has been shown to aid in digestion, boost immune function, and even prevent kidney stones.

So not only is it important to know how much juice a lemon produces for culinary purposes, but for health reasons as well.

However, the amount of juice a lemon produces can vary depending on a variety of factors, including the ripeness of the fruit, its size, and its temperature. Understanding these factors and how they affect lemon juice yield is crucial in ensuring consistent and accurate measurements in cooking and mixology.

Factors That Affect Lemon Juice Yield

Factors affecting the yield of lemon juice include the ripeness of the fruit and the method of extraction.

When it comes to ripeness, the amount of juice a lemon produces is directly related to how ripe it is. The more mature the fruit, the more juice it will contain. On the other hand, an under-ripe fruit will yield less juice.

Advertisement

Another factor that affects juice yield is the variety of lemon. Some varieties are naturally juicier than others, so it’s important to choose the right variety if you’re looking for maximum juice.

In addition to these factors, the method of extraction also plays a role in how much juice you can get from a lemon. Lemon juice extraction techniques vary, but some methods are more efficient than others. For example, using a hand juicer or a citrus press can yield more juice than simply squeezing the lemon with your hands.

By understanding these factors and choosing the right extraction method, you can maximize your lemon juice yield and get the most out of your fruit.

As we move on to the next section, it’s important to note that having the right tools for juicing lemons can make a big difference in the amount of juice you’re able to extract.

Tools You Will Need for Juicing Lemons

To get the most out of your citrus, you’ll need the right tools. When it comes to juicing lemons, there are two common options: hand-held lemon squeezers and electronic juicers.

Advertisement

Hand-held lemon squeezers are a low-cost and easy-to-use option. They come in a variety of sizes and shapes, but all function in a similar way. Simply cut the lemon in half, place it in the squeezer, and press down on the handles to extract the juice.

Electronic juicers can be a more expensive investment, but they can save time and effort. These machines can handle larger quantities of lemons and often have adjustable settings to customize the level of pulp in your juice.

No matter which tool you choose, having the right equipment can make the process of juicing lemons much easier and more efficient.

Now that you have the appropriate tools, it’s time to learn how to use them effectively. In the next section, we’ll provide a step-by-step guide for juicing lemons to help you maximize your lemon juice yield.

Step-by-Step Guide for Juicing Lemons

Once I’ve got my chosen juicing tool at hand, such as a citrus reamer or a handheld juicer, I begin the process of extracting lemon juice.

Advertisement

First, I cut the lemon in half and place one half onto the juicing tool, with the cut side facing down. Then, I firmly press and twist the juicing tool, extracting the juice from the lemon.

I repeat this process with the other half of the lemon, until all the juice has been extracted.

There are several lemon juicer alternatives available, but the most important thing is to choose a tool that allows for efficient extraction of the juice.

Additionally, lemon juice has many benefits for skin care, as it’s high in vitamin C and antioxidants. Incorporating lemon juice into a daily skincare routine can help brighten and even out skin tone, while also helping to reduce the appearance of fine lines and wrinkles.

With that being said, let’s move on to some tips for getting the most juice out of your lemons.

Advertisement

Tips for Getting the Most Juice Out of Your Lemons

If you want to make the most out of your citrus, it’s important to know a few tricks for maximizing the amount of tangy goodness you can squeeze out of each fruit. Here are three tips for getting the most juice out of your lemons:

  • Use a lemon zester to break up the membranes inside the lemon before juicing. This will help release more juice and make juicing easier.

  • Roll the lemon on a hard surface to break down the pulp before juicing. This will also help release more juice.

  • Consider alternative juicing methods, such as using a garlic press or a citrus squeezer, to get even more juice out of your lemons.

By following these tips, you can ensure that you’re getting the most juice out of each lemon.

But how much juice does one lemon yield? Let’s explore that in the next section.

How Much Juice Does One Lemon Yield?

Did you know that squeezing a single lemon can yield up to a quarter cup of tart and zesty liquid? As someone who loves to cook and bake, knowing how much juice one lemon yields is essential. Not only does it help me plan my recipes better, but it also helps me save money by buying just the right amount of lemons I need.

To give you an idea of just how much juice you can get from a lemon, take a look at this table:

Advertisement
Size of Lemon Amount of Juice
Small 1-2 tablespoons
Medium 2-3 tablespoons
Large 4-5 tablespoons

Aside from adding flavor to your dishes, lemon juice also has numerous health benefits. It’s rich in Vitamin C, which is known to boost the immune system and improve skin health. It also aids in digestion and can help prevent kidney stones. And if you ever find yourself without a fresh lemon on hand, you can always use substitutes such as vinegar or lime juice in a pinch.

Transitioning to the next subtopic, understanding how much juice one lemon yields is essential when it comes to recipe conversion. Knowing how to calculate the amount of lemon juice needed for a recipe can make or break the final outcome.

Recipe Conversion: How to Calculate Lemon Juice Needed

Understanding the recipe conversion process can be complex, especially when it comes to calculating the necessary amount of lemon juice needed. However, having the right amount of this tart and zesty liquid can make all the difference in the final product.

Here are some tips on how to calculate the right amount of lemon juice for your recipe:

  1. Start by determining how much juice you need. This can be done by looking at the recipe and identifying the amount of lemon juice required in the ingredient list.

  2. The next step is to figure out how much juice is in each lemon. On average, a medium-sized lemon yields about 2-3 tablespoons of juice. However, this can vary based on the size and ripeness of the fruit.

  3. Once you know how much juice is in each lemon, you can calculate how many lemons you need for your recipe. Simply divide the required amount of juice by the amount of juice in each lemon to get the number of lemons needed.

By following these simple steps, you can ensure that you have the right amount of lemon juice for your recipe.

Advertisement

In the next section, we’ll discuss how to store any excess juice for future use.

Storing Lemon Juice

Now that we know how to calculate the amount of lemon juice needed for a recipe conversion, it’s important to discuss proper storing techniques and shelf life.

Lemon juice can be stored in a variety of ways, including in the refrigerator, freezer, or even canned. When storing in the refrigerator, it’s important to keep the juice in an airtight container to prevent oxidation and maintain freshness. The juice can also be frozen in ice cube trays and then transferred to a freezer-safe container for later use. Canning is another option, but requires proper equipment and techniques to ensure safety.

The shelf life of lemon juice varies depending on the storage method. Freshly squeezed lemon juice stored in the refrigerator can last up to 2-3 days, while frozen juice can last up to 6 months. Canned lemon juice can last even longer, up to a year or more. It’s important to always check for signs of spoilage, such as a sour smell or mold, before using any stored lemon juice.

Moving on to other uses for lemon juice, it can be used for more than just cooking.

Advertisement

Other Uses for Lemon Juice

If you’ve ever struggled with removing stubborn stains or rust, a little bit of this versatile citrus liquid can work wonders. Lemon juice is not only a great ingredient for adding a tangy flavor to your dishes, but it also has some impressive uses in skincare and home cleaning. Here are three benefits of using lemon juice for skincare:

  1. Lemon juice is rich in citric acid, which can help exfoliate dead skin cells and brighten your complexion.

  2. It contains vitamin C, an antioxidant that helps protect your skin from damage caused by free radicals and UV rays.

  3. Lemon juice can also help reduce the appearance of dark spots and acne scars due to its natural bleaching properties.

When it comes to cooking, there are different types of lemon juice you can use depending on your recipe. Freshly squeezed lemon juice is ideal for adding a bright, citrusy flavor to your dishes, while bottled lemon juice can be used for convenience and consistency. Here are a few more ways you can incorporate lemon juice into your cooking:

  1. Use lemon juice as a marinade for meats or fish to add flavor and tenderize the protein.

  2. Add lemon juice to your salad dressings for a tangy kick.

  3. Mix lemon juice with olive oil and herbs to create a flavorful dipping sauce for bread or vegetables.

Overall, lemon juice is a versatile ingredient that can be used in a variety of ways to enhance your skincare routine and cooking skills.

Frequently Asked Questions

What are the health benefits of lemon juice?

As a nutritionist, I can attest to the numerous health benefits of lemon juice. It’s packed with vitamin C, antioxidants, and has anti-inflammatory properties. Lemon juice can also aid digestion, boost immunity, and improve skin health. Check out the nutrition facts for more details.

How long does it take for a lemon to produce juice?

To extract lemon juice, the fruit must first be cut and squeezed. The production timeline depends on the method used, but typically takes only a few minutes. Other factors, such as the ripeness of the lemon, can also impact the amount of juice produced.

Advertisement

Can you juice a lemon without a juicer?

Yes, you can juice a lemon without a juicer using alternative methods such as hand-squeezing, using a fork, or rolling the lemon to release the juice. Different lemon squeezing techniques can also affect the amount of juice extracted.

What is the best way to remove seeds from lemon juice?

The best way to remove seeds from lemon juice is to use a fine mesh strainer or cheesecloth. Simply pour the juice through the strainer or wrap the cheesecloth around the seeds and squeeze. This technique ensures a smooth, seedless juice.

How do you know if a lemon is ripe enough to juice?

To determine if a lemon is ripe enough for juicing, I check for a bright yellow color and a slight give when squeezed. I use lemon juice extraction techniques such as rolling the lemon to release more juice.

Conclusion

In conclusion, knowing how much juice a lemon produces is essential for any cook or bartender. It can mean the difference between a mediocre dish and an exceptional one. By understanding the factors that affect lemon juice yield and using the right tools and techniques, you can maximize the amount of juice you extract from each lemon.

Whether you’re making a lemon vinaigrette or a lemon drop martini, having the right amount of juice is crucial. In short, the power of a lemon shouldn’t be underestimated. This small fruit can pack a punch, and its juice has a wide range of uses. From enhancing the flavor of dishes to providing health benefits, lemon juice is a versatile ingredient that should be a staple in every kitchen.

Advertisement

So grab your juicer and some lemons, and start exploring the endless possibilities of this zesty citrus fruit. Trust me, your taste buds will thank you.

Continue Reading

Juice

How To Make Papaya Juice

Published

on

By

As a health enthusiast, I am always on the lookout for creative and delicious ways to incorporate nutrient-rich foods into my diet. Lately, I have been intrigued by the papaya. Its vibrant orange flesh, sweet taste, and numerous health benefits make it a perfect addition to any smoothie.

Making your own papaya juice is not only easy but also incredibly rewarding. It’s like a burst of sunshine in a glass, delivering a refreshing and invigorating dose of vitamins and minerals straight to your body.

In this article, I will guide you through the step-by-step process of creating your own homemade papaya juice, so you too can enjoy the many health benefits and delicious taste of this tropical fruit.

Key Takeaways

  • The ripeness of the papaya is important when making juice, so look for a mostly yellow fruit with some green spots.
  • Water should be added in the blender to help the ingredients blend smoothly, and a proper water to fruit ratio should be maintained.
  • Blender maintenance is important and blending should be done at a low speed and gradually increased to avoid overblending and creating a foamy texture.
  • Honey or agave syrup can be added as a sweetener for taste and health benefits, but adding too much will increase the calorie and sugar content of the juice, so consume in moderation.

Gather Your Ingredients

Don’t forget to grab that juicy papaya and get ready for a refreshing experience that will quench your thirst like never before! Before we can start making the juice, we need to gather our ingredients.

Apart from the papaya, you’ll need some water, lime juice, and sugar or honey for sweetening. Papaya is an excellent source of vitamins A and C, potassium, and fiber. It’s also rich in antioxidants that help boost your immune system and protect against chronic diseases.

To make the juice more interesting, you can add other fruits like strawberries, pineapple, or mangoes. These flavor variations not only add taste but also enhance the health benefits of the juice.

Advertisement

Now that we have gathered our ingredients, let’s move on to preparing our papaya.

Prepare Your Papaya

Once you’ve got your hands on a ripe papaya, it’s as easy as slicing it open like a smile to reveal the juicy goodness inside. But before you get started, it’s important to know that there are several varieties of papaya, and each one has a different level of ripeness that’s optimal for juice-making.

Here are three things to keep in mind regarding papaya ripeness:

  1. Look for a papaya that is mostly yellow with some green spots. This indicates that the fruit is ripe and ready to be used for juice.

  2. If the papaya is fully green, it’s not yet ripe enough to use. You’ll need to wait a few more days until the papaya turns yellow.

  3. If the papaya is mostly yellow with brown spots, it’s overripe and may not taste as good in juice.

Now that you know how to choose the perfect papaya, it’s time to cut it into pieces and get ready to make some delicious juice.

Cut the Papaya into Pieces

To start, simply grab a sharp knife and slice the ripe papaya in half lengthwise, revealing the bright orange flesh and black seeds inside. Next, scoop out the seeds with a spoon and then proceed to cut the papaya into pieces. I like to cut the papaya into cubes, but you can cut them into any size you prefer.

Advertisement

When selecting a papaya for juice, it’s important to choose a ripe one. A ripe papaya should have a yellowish-orange skin and should yield slightly to pressure. Papayas are a great source of vitamins A and C, and they contain an enzyme called papain that aids in digestion. By adding papaya juice to your diet, you can reap all of these health benefits and more.

Now that the papaya is cut into pieces, it’s time to add it to the blender. But before we do that, we need to add water to the blender to help the blending process.

Add Water to the Blender

Now we’re ready to blend everything together, so let’s go ahead and add some water to the blender. It’ll help the ingredients blend smoothly and create a refreshing and hydrating drink that’ll leave you feeling energized. When adding water to the blender, it’s important to maintain a proper water to fruit ratio to ensure that the juice isn’t too thick or too watery. As a general rule of thumb, I like to add about 1/2 cup of water for every 1 cup of fruit. This ratio can be adjusted based on personal preference, but be careful not to add too much water as it can dilute the flavor of the papaya.

Proper blender maintenance is also important when making papaya juice. Before adding the water, make sure the blender is clean and free of any residue from previous use. After blending, take the time to thoroughly clean the blender to prevent any lingering flavors or bacteria. Now that we’ve added the water to the blender, it’s time to move onto the next step and add the papaya to create a delicious and nutrient-packed juice.

Add the Papaya to the Blender

With the blender prepped and water added, it’s time to blend in the juicy papaya chunks for a tropical burst of flavor. Before adding the papaya, make sure to remove the skin and seeds. Papaya is rich in vitamins A and C, and adding it to your diet can help improve digestion and boost your immune system.

Advertisement

When blending the papaya, it’s important to start at a low speed and gradually increase it to avoid overblending and creating a foamy texture. Depending on your preference, you can add other fruits such as pineapple or banana to create different variations of papaya juice.

Once the papaya is fully blended, we can move on to the next step of the process: blending the mixture until smooth.

Blend the Mixture

You’re ready to blend the mixture and create a delicious papaya juice. Before we start, let’s talk about blender maintenance. It’s important to keep your blender clean and free from any remnants of past use. Make sure to wash the blender thoroughly with soap and water before using it.

Now, let’s blend the mixture. Start by placing the lid on the blender and turning it on. Blend on high speed until the mixture is smooth and creamy. If you don’t have a blender, you can use a food processor or immersion blender as an alternative blending method. Once you’ve achieved the desired consistency, you can move on to the next step: strain the mixture (optional).

Strain the Mixture (optional)

If you wanna go the extra mile, strain out any unwanted bits and bobs from your blended concoction with a sieve or cheesecloth. This step is optional, but it can make a huge difference in the texture and taste of your papaya juice.

Advertisement

By removing the fibrous pieces and seeds, you’ll get a smoother and more pleasant drink that is easier to digest. The benefits of straining go beyond aesthetics and taste.

Papaya seeds, for instance, have a bitter flavor and can cause digestive discomfort if ingested in large amounts. While they’re edible and have some health benefits, such as being anti-inflammatory and antibacterial, they’re not suitable for everyone.

Straining also allows you to remove any dirt, debris, or pesticides that may be present in the fruit. If you don’t have a sieve or cheesecloth, you can skip this step or use a fine-mesh strainer, but keep in mind that you may end up with a chunkier juice.

Now that you have your pulp-free papaya juice, you can proceed to the next step: adding sweetener (optional).

Add Sweetener (optional)

To enhance the flavor and add a touch of sweetness, consider mixing in honey or agave syrup to create a tropical paradise in your mouth. Not only do these alternative sweeteners provide a delicious taste, but they also come with health benefits.

Advertisement

Honey contains antioxidants and has antibacterial properties, while agave syrup has a lower glycemic index compared to traditional sugar. When adding the sweetener, start with a small amount and adjust to your preference. Here are some tips to keep in mind:

  • Use raw, unprocessed honey or organic agave syrup for maximum health benefits.
  • Consider using a honey or agave syrup that is locally sourced to support small businesses and reduce your carbon footprint.
  • If you prefer a sweeter juice, add more sweetener gradually to avoid overpowering the natural flavor of the papaya.
  • Keep in mind that adding sweetener will increase the calorie and sugar content of the juice, so consume in moderation.

Now that the juice is sweetened to your liking, it’s time to chill and serve.

Chill and Serve

Once the mixture is chilled and ready, simply grab a glass and pour in the deliciously tropical juice. Savor every sip, as papaya juice is not only refreshing but also packed with numerous health benefits. It’s rich in antioxidants, vitamins A and C, and enzymes that aid digestion. Regular consumption of papaya juice can improve skin health, boost immunity, and reduce inflammation.

To switch things up, try different serving suggestions for your homemade papaya juice. Add a slice of lime or a sprig of mint for an extra kick of flavor. You can also mix it with other juices like pineapple or orange for a tropical fruit medley. However, it’s important to note that papaya juice should be consumed in moderation as it contains high amounts of natural sugars.

Enjoy your homemade papaya juice and reap the benefits of this delicious and nutritious beverage!

Enjoy Your Homemade Papaya Juice!

You can savor the delicious and nutritious homemade tropical beverage by pouring it into a glass and adding a slice of lime or a sprig of mint for an extra kick of flavor. The best part about making papaya juice at home is that you can customize it according to your preferences and health needs. Here are some health benefits and recipe variations that you can try:

Advertisement
Health Benefits Recipe Variations
High in Vitamin C and antioxidants Add ginger or turmeric for additional anti-inflammatory properties
Supports digestion and gut health Mix with coconut water or kefir for probiotic benefits
Lowers blood sugar levels Blend with spinach or kale for an extra boost of vitamins and minerals

By incorporating these recipe variations, you can enhance the taste and nutritional value of your homemade papaya juice. Enjoy this refreshing beverage as a healthy breakfast drink or a post-workout thirst quencher. Cheers to good health and delicious taste!

Frequently Asked Questions

What are the health benefits of drinking papaya juice?

After researching, I found that papaya juice is high in vitamin C, antioxidants, and fiber. It may aid in digestion and boost immunity. However, it may also cause allergic reactions or interact with certain medications.

Can I use frozen papaya instead of fresh papaya?

Yes, frozen papaya can be used as a substitute for fresh papaya in smoothie options. It still retains its nutritional benefits and can be a convenient option for those who don’t have access to fresh papaya.

How long does homemade papaya juice last in the refrigerator?

To preserve the freshness of homemade papaya juice, store it in an airtight container in the refrigerator. This will extend the juice’s shelf life for up to three days. Keeping the juice fresh is key to maximizing its health benefits.

Can I add other fruits or vegetables to my papaya juice?

Oh, the possibilities! I love getting creative with my papaya juice variations. Mixing papaya with other fruits like mango or pineapple can add a tropical twist, while adding spinach or kale can boost the health benefits. The options are endless!

Advertisement

Is it possible to make papaya juice without a blender?

Yes, it is possible to make papaya juice without a blender. You can use blender alternatives such as a food processor or manual extraction methods like squeezing the juice out of the fruit by hand or using a juicer.

Conclusion

Well, that’s how I make my delicious papaya juice! It’s so easy and refreshing, and it’s a great way to get some extra vitamins and nutrients into your diet.

Did you know that papaya is high in vitamin C, folate, and potassium? In fact, one medium papaya contains about 224% of your daily recommended intake of vitamin C! That’s pretty impressive.

But beyond just being a healthy choice, papaya juice is also a delicious one. It’s naturally sweet and has a tropical flavor that’s perfect for sipping on a hot summer day.

Plus, by making it at home, you can control the sweetness and add in any other ingredients you like. So if you’re looking for a tasty and healthy drink option, give papaya juice a try!

Advertisement

Continue Reading

Juice

How To Make My Own Vape Juice

Published

on

By

As a passionate vaping enthusiast, I have always been fascinated by the art of creating my own e-liquid. The process of blending different flavors to create a unique taste that suits my preferences has been an exciting adventure. However, making your own vape juice can be daunting, especially for beginners.

In this guide, I will share with you the steps I took to make my own vape juice, including the basic ingredients and equipment needed, how to determine the PG/VG ratio, and how to calculate the recipe.

Before we delve into the process of making your own vape juice, it is crucial to understand the basic ingredients and equipment needed. The main ingredients of vape juice include vegetable glycerin (VG), propylene glycol (PG), nicotine, and flavorings. VG and PG are the base liquids used to create the vapor, while nicotine and flavorings are added to enhance the taste and nicotine content.

The equipment needed includes a mixing container, a scale, syringes, gloves, and bottles for storage. With these basic ingredients and equipment, you can start making your own vape juice and customize it to your liking.

Key Takeaways

  • Prioritize ingredient safety and equipment maintenance to ensure purity and consistency.
  • Experiment with flavor combinations and adjust ratios for desired flavor and nicotine strength.
  • Use a mixing calculator and measure ingredients accurately for consistency and safety.
  • Properly store ingredients and finished e-liquids to maintain flavor and potency.

Understand the Basic Ingredients and Equipment Needed

To make your own vape juice, you’ll need some basic ingredients and equipment, like VG (vegetable glycerin), PG (propylene glycol), nicotine, flavorings, syringes, and bottles. These are all readily available online or at your local vape shop.

When it comes to equipment options, you can use either a scale or syringes to measure out your ingredients. A scale is more precise and efficient, while syringes are easier to find and use.

Advertisement

It’s important to note that some flavorings may contain oils or other additives that can be harmful if vaporized, so be sure to research and choose safe options.

Ingredient substitutions are also possible, but may affect the overall flavor and vaping experience. For example, you can swap VG and PG ratios to adjust the thickness and throat hit of your juice. You can also choose different types of nicotine, such as freebase or salt nicotine, depending on your preference.

Flavorings can be substituted or combined to create unique blends, but make sure to use ones that are specifically made for vaping. With all these options, it’s important to experiment and find what works best for you.

Now that you understand the basic ingredients and equipment needed, let’s move on to gathering everything necessary to start making your own vape juice.

Gather the Necessary Ingredients and Equipment

First, you’ll need to gather all the essential ingredients and equipment needed for crafting your own custom e-liquid. When it comes to ingredients, it’s important to prioritize ingredient safety. Make sure to purchase pharmaceutical-grade ingredients from reputable suppliers to ensure the purity of your e-liquid. Some of the key ingredients you’ll need include propylene glycol (PG), vegetable glycerin (VG), nicotine (if desired), and flavor concentrates. It’s also important to properly store your ingredients in a cool, dry place to maintain their quality.

Advertisement

In addition to the necessary ingredients, you’ll need to have the proper equipment for mixing and storing your e-liquid. This includes a scale for accurate measurements, syringes for precise dispensing, mixing containers, and bottles for storing your finished product. It’s also important to prioritize equipment maintenance to ensure the longevity and accuracy of your tools. Regularly clean your equipment and replace any worn or damaged components. By gathering the necessary ingredients and equipment and prioritizing ingredient safety and equipment maintenance, you’ll be well on your way to crafting your own custom e-liquid with confidence.

As you gather your ingredients and equipment, it’s important to keep in mind the flavor profile you want to achieve in your e-liquid. In the next section, we’ll discuss how to choose your flavor profile and create a unique and satisfying vaping experience.

Choose Your Flavor Profile

When it comes to choosing a flavor profile for my vape juice, I like to consider whether I want a single flavor or a combination of flavors. Experimenting with different combinations can lead to unique and interesting results.

Additionally, adjusting the intensity of the flavors can greatly affect the overall taste of the vape juice. It’s important to keep in mind that finding the perfect flavor profile may take some trial and error, but the end result is worth it.

Single Flavor vs. Combination

Deciding between using a single flavor or combining flavors can be a tough choice, but it ultimately depends on personal preference and taste.

Advertisement

There are pros and cons to both options. Using a single flavor can be simple and straightforward, making it easier to control the taste and nicotine strength. However, it can also be limiting in terms of variety and complexity.

On the other hand, combining flavors can open up a whole new world of possibilities, allowing you to create unique and complex blends. The downside is that it can be tricky to get the ratios right and achieve a balanced flavor.

When it comes to popular combinations, there are endless options to choose from. Some common pairings include fruit and menthol, dessert and cream, and tobacco and caramel. However, don’t be afraid to get creative and experiment with different flavors to find the perfect mix for you.

Remember, taste is subjective, so what works for one person may not work for another. The key is to start with small batches and adjust the ratios until you find the right balance of flavor and nicotine strength. With a bit of trial and error, you’ll be able to create your own unique vape juice that perfectly suits your taste buds.

Experimenting with Flavors

Combining different flavor profiles can lead to a multitude of unique and unexpected tastes, allowing for an exciting exploration of the vast world of vaping. However, it’s important to be mindful of certain flavor combinations to avoid.

Advertisement

For example, mixing mint and cinnamon can create an overpowering taste that can be unpleasant to some. Similarly, combining citrus and dairy flavors can result in a curdled and unappetizing vape juice.

On the other hand, finding inspiration for unique flavors can lead to great success. Experimenting with combining fruits like strawberry and kiwi, or mixing dessert flavors like caramel and vanilla can create a delicious and complex vape juice.

It’s also helpful to try out pre-made flavor concentrates from reputable brands to get a sense of different flavor profiles and how they can be mixed together. With a bit of creativity and caution, the possibilities for creating your own unique vape juice flavors are endless.

Now, let’s move on to adjusting flavor intensity.

Adjusting Flavor Intensity

To add an extra kick to your flavor, try using a drop or two of flavor enhancers like EM or AP, which are available at most vape shops. These flavor enhancers are meant to balance out the overall flavor profile of your vape juice.

Advertisement

For example, if you feel like your fruit flavor is lacking some sweetness, you can add a drop of EM, which is ethyl maltol, to enhance the sweetness. On the other hand, if you feel like your bakery flavor is too overpowering, you can add a drop of AP, which is acetyl pyrazine, to tone down the bakery notes.

It’s important to note that when adjusting the flavor intensity, you should always taste your vape juice after adding the enhancer to avoid overdoing it. Additionally, steeping techniques can also affect the overall strength of the flavor.

Steeping is the process of letting your vape juice sit in a cool, dark place for a period of time, allowing the flavors to meld together and become more pronounced. Depending on the flavor and the recipe, some vape juices may need to steep for a few days or even a few weeks.

Once you’ve adjusted the flavor intensity and determined the steeping time, it’s time to move on to determining the pg/vg ratio.

Determine the PG/VG Ratio

Finding the perfect PG/VG ratio can truly make or break the flavor and overall vaping experience. PG and VG are the two main components of vape juice, and they each have their own properties that affect the final product.

Advertisement

PG is thinner and has a stronger throat hit, which is great for those who want a stronger sensation when vaping. On the other hand, VG is thicker and produces more vapor, making it ideal for cloud chasers.

When deciding on the PG/VG ratio for your vape juice, it’s important to consider your personal preferences and vaping style. If you want a stronger throat hit, a higher PG ratio may be better for you. However, if you prefer bigger clouds and a smoother vaping experience, a higher VG ratio may be the way to go. Additionally, you can adjust the throat hit in your vape juice by adding more or less PG, depending on your desired effect.

Moving on to the next step, calculating the recipe for your vape juice involves taking into account the flavorings, nicotine, and PG/VG ratio.

Calculate the Recipe

To calculate the recipe for my DIY vape juice, I need to use a mixing calculator. This tool will help me determine the exact measurements of each ingredient based on my desired nicotine strength, flavor intensity, and PG/VG ratio.

It’s important to measure the ingredients accurately to ensure consistency and safety, and to adjust the recipe for different batch sizes.

Advertisement

Using a Mixing Calculator

Using a mixing calculator can be a game-changer for DIY vape juice makers. It simplifies the process and ensures accurate measurements, making it a piece of cake.

One of the benefits of DIY vape juice is the ability to customize the flavor to your liking. However, this can be challenging without the right tools. Using a mixing calculator eliminates the guesswork and ensures that you have the right amount of each ingredient.

Common mixing mistakes can lead to an unpleasant vaping experience, such as too much flavoring or not enough nicotine. A mixing calculator takes into account the specific gravity and concentration of each ingredient to ensure that you have the perfect balance.

It also allows you to adjust the recipe based on the size of the batch you want to make. With a mixing calculator, you can confidently create your own unique vape juice flavors without worrying about making mistakes that could ruin the final product.

Accurately measuring ingredients is crucial for creating a successful vape juice recipe. In the next section, I’ll discuss the importance of using precise measurements and how to do it correctly.

Advertisement

Measuring Ingredients Accurately

Now that we’ve got the hang of using a mixing calculator, let’s talk about the importance of precision in measuring the ingredients for our vape juice.

Measuring ingredients accurately is crucial to the success of our mix. Even the slightest variation in measurements can greatly affect the flavor and consistency of our final product. That’s why it’s important to use the appropriate tools, such as a graduated cylinder or a scale, for measuring each ingredient.

Common measuring mistakes include eyeballing measurements, using the wrong measuring tools, and not properly leveling off dry ingredients. These mistakes can lead to an imbalanced flavor profile, harsh throat hits, or even a ruined batch.

To avoid these issues, it’s essential to follow the recipe and measure each ingredient carefully. Remember, precision is key when it comes to making your own vape juice.

Now that we understand the importance of accurate measurements, let’s move on to the next step: adjusting for batch size.

Advertisement

Adjusting for Batch Size

When we want to mix up a bigger or smaller batch of our delicious e-liquid, we need to adjust the ingredients accordingly to ensure the perfect balance of flavors. Here are some tips and tricks for adjusting for batch size:

  1. Use a calculator to scale the recipe: This is the easiest and most accurate way to adjust for batch size. Simply multiply the ingredients by the desired batch size and divide by the original batch size. For example, if the original recipe is for a 100ml batch and you want to make a 50ml batch, you would multiply all the ingredients by 0.5.

  2. Be mindful of flavor concentration: Some flavorings can be very potent, and a little goes a long way. When adjusting for batch size, make sure to adjust the flavoring accordingly. For example, if the original recipe calls for 10% flavoring in a 100ml batch, you may only need 5% in a 50ml batch.

  3. Keep track of your adjustments: It’s important to keep a record of the adjustments you make to the recipe. This will help you replicate the recipe in the future and make adjustments as needed.

Now that we’ve discussed adjusting for batch size, it’s time to mix the ingredients.

Mix the Ingredients

As I mix the ingredients for my own vape juice, I need to be aware of the different mixing techniques to achieve the desired result. One common mistake that beginners make is not mixing the ingredients thoroughly, resulting in an uneven distribution of flavors. To prevent this, I need to use a magnetic stirrer or a handheld mixer to ensure that the ingredients are well-blended.

Another important factor to consider is the order in which the ingredients are mixed. I usually start by adding the base liquid, followed by the flavorings, and then the nicotine (if desired). This ensures that the flavors are evenly distributed and that the nicotine is evenly dispersed throughout the mixture.

As I mix the ingredients, I can already start to imagine the flavor profile of my vape juice. But before I can enjoy it, I need to steep the e-liquid to allow the flavors to fully develop.

Advertisement

Once the ingredients are mixed, it’s time to let the e-liquid steep and mature, enhancing the flavors and improving the overall vaping experience.

Steep the E-Liquid

To fully develop the flavors of your e-liquid, steeping is essential. Steeping is the process of letting the e-liquid mixture sit for a certain period of time to allow the flavors to blend together. This process is necessary because some of the ingredients used in the mixture may not be fully incorporated at first, resulting in a harsh or unpleasant taste if vaped immediately.

Steeping techniques vary depending on the recipe and the desired outcome, but the general rule is to store the e-liquid in a cool, dark place and shake it regularly. The importance of patience in steeping can’t be overstated. Some e-liquids may require a few days to a few weeks of steeping before they’re ready to vape. It can be tempting to try the e-liquid right away, but the flavors won’t be as developed as they could be.

Patience is key to achieving the best possible flavor from your homemade e-liquid. Once the steeping process is complete, it’s time to move on to the next step: testing and adjusting the e-liquid to your preference.

Test and Adjust

Now that I’ve steeped my e-liquid, it’s time to test and adjust the flavor and nicotine levels to my liking.

Advertisement

I’ll begin by testing the e-liquid by dripping a small amount onto my atomizer and taking a few puffs.

From there, I can adjust the flavor or nicotine levels accordingly and make notes for future batches.

By taking the time to test and adjust my e-liquid, I can ensure a satisfying experience every time I vape.

Testing the E-Liquid

Before you start vaping your homemade juice, make sure you test it first to ensure the flavor and nicotine levels are to your liking. To test the e-liquid, you can use various flavor testing techniques such as dripper testing or tank testing.

Dripper testing involves adding a small amount of the e-liquid onto a dripper and vaping it without any previous juice in the tank.

Advertisement

Tank testing involves filling your vape tank with the e-liquid and vaping it. This method is best for evaluating how the e-liquid tastes when it is heated.

It’s also important to keep in mind the steeping time for e-liquids. Steeping is the process of letting e-liquids age to improve their flavor. It’s recommended that you let your e-liquid steep for at least a week before testing it. You can steep your e-liquid by letting it sit in a cool, dark place and shaking it every day.

Once you’ve tested your e-liquid and determined the flavor and nicotine levels, you can move on to adjusting flavor or nicotine to your liking.

Adjusting Flavor or Nicotine

Once you’ve tested your e-liquid and determined the flavor and nicotine levels, it’s time to personalize your vaping experience by customizing the nicotine strength and balancing the flavor profile.

To adjust nicotine levels, you’ll need to add more or less nicotine concentrate to your e-liquid base. It’s important to measure the nicotine concentrate accurately to avoid ending up with a nicotine level that’s too strong or too weak. You can use an online calculator to determine the amount of nicotine concentrate to add, based on the strength of your base and the desired nicotine level.

Advertisement

When it comes to balancing the flavor profile, you can adjust the amount of flavoring used to make it stronger or weaker. Be careful not to add too much flavoring, as this can overpower the other flavors and make the e-liquid taste artificial.

It’s a good idea to start with small adjustments and test the e-liquid again before making any major changes. Once you’ve achieved the perfect balance of nicotine and flavor, you can make notes for future batches to ensure consistency.

Making Notes for Future Batches

To ensure consistency in your e-liquid batches, it’s crucial to jot down notes like a baker writing down a recipe for their signature dish. By keeping track of your flavor notes and recipe adjustments, you can easily replicate your favorite e-juice flavors that suit your taste buds.

Here are a few tips on how to make notes for future batches:

  • Start with the basics: Write down the name of the recipe, the date it was made, the nicotine level, and the VG/PG ratio. This will help you keep track of the different batches you make.

  • Flavor notes: Write down the flavors you used, their brand, and the percentage used. This will help you remember which flavors work well together and which ones need to be adjusted.

  • Recipe adjustments: If you made any adjustments to the recipe, like increasing or decreasing the percentage of a flavor, write it down. This will help you achieve the desired taste in future batches.

  • Personal preferences: If you made a recipe that you loved, write down any personal preferences you have, like increasing the sweetness or adding menthol. This will help you customize the recipe to suit your taste buds.

By taking notes, you can easily replicate your favorite e-juice flavors and make any necessary adjustments. Now that you’ve got your notes, it’s time to store the e-liquid properly to ensure it stays fresh and flavorful.

Advertisement

Store the E-Liquid

Storing your homemade e-liquid properly is crucial to maintaining its flavor and nicotine potency. Proper storage ensures that your e-liquid lasts longer and maintains its quality. The shelf life of e-liquid depends on various factors such as nicotine strength, flavoring, and the base used.

To store your e-liquid, you’ll need to keep it away from heat and direct sunlight. Heat and sunlight can cause the nicotine to degrade and alter the flavor. It’s best to store your e-liquid in a cool, dark place, such as a cabinet or drawer. Additionally, make sure to keep your e-liquid away from children and pets, as nicotine is poisonous if ingested. The table below summarizes the proper ways to store your e-liquid.

Factor to Consider Proper Storage
Temperature Cool and dark place
Sunlight Keep away from direct sunlight
Children and pets Keep out of reach

Now that you’ve learned about proper storage for your e-liquid, you can enjoy your custom vape juice!

Enjoy Your Custom Vape Juice!

After properly storing your homemade e-liquid, savoring its flavor and potency is like taking a sip of a fine wine. The customized flavor combinations and tailored nicotine strengths are just some of the benefits of making your own vape juice.

Compared to store-bought options, DIY e-liquids offer more control over the ingredients, allowing you to adjust the flavor and nicotine levels to your liking. To enjoy your custom vape juice, it’s important to use the right equipment and technique.

Advertisement

First, ensure that your vape device is compatible with the e-liquid you made. Then, prime your coil to prevent dry hits and burnt flavors. Finally, start with a low wattage setting and gradually increase it until you find the sweet spot for your desired flavor and vapor production.

With practice, you’ll be able to create a perfect blend that suits your taste and vaping preferences. Enjoy your custom vape juice!

Frequently Asked Questions

Is it safe to make my own vape juice at home?

When making vape juice at home, home safety and ingredients quality are key factors to consider. Ensure proper storage, handling, and labeling of ingredients. Purchase high-quality ingredients from reputable sources.

How much money can I save by making my own vape juice compared to buying it pre-made?

I saved a ton of money by making my own vape juice compared to buying pre-made. DIY vape juice cost comparison showed a 75% reduction in cost. Homemade e liquid quality analysis is crucial for safe and satisfying vaping.

Can I make vape juice without nicotine?

Yes, it is possible to make vape juice without nicotine. There are nicotine-free options available, and flavor customization is still possible without nicotine. It’s important to carefully measure ingredients and follow safety precautions when making your own vape juice.

Advertisement

How long does it take to steep the e-liquid, and why is this step necessary?

Like aging wine, steeping e-liquid is a crucial process that allows flavors to develop fully. The steeping process can take anywhere from a few days to several weeks, depending on the recipe. It’s necessary to achieve optimal taste and quality.

Are there any special precautions I need to take when mixing the ingredients or handling nicotine?

When mixing vape juice, it’s crucial to take mixing precautions and handle nicotine safely. Nicotine is a toxic substance that can cause harm if ingested or absorbed through the skin, so gloves and eye protection should be worn.

Conclusion

Well, after all that effort, I’ve finally made my own vape juice.

I followed all the steps, gathered all the ingredients and equipment, and calculated the perfect recipe for my desired flavor profile.

I steeped the e-liquid, tested and adjusted it to my liking, and stored it in a cool, dark place.

Advertisement

It’s ironic that after all that work, I’m left wondering if it was worth it.

Sure, I have a unique blend of vape juice that no one else has, but was the time and effort worth the end result?

Maybe it’s just me, but I think I’ll stick to buying pre-made vape juice from now on.

At least I know exactly what I’m getting and can save myself the hassle of making it myself.

Advertisement

Continue Reading

Trending

Copyright © 2024 The Graceful Kitchen Affiliate disclaimer As an affiliate, we may earn a commission from qualifying purchases. We get commissions for purchases made through links on this website from Amazon and other third parties.