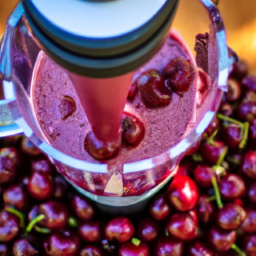
You may think that making cherry juice at home is a daunting task. But trust me, it’s easier than you think and the end result is truly satisfying.
Not only is homemade cherry juice delicious, it’s also packed with health benefits that you won’t find in store-bought versions.
First off, let’s talk about the benefits of cherry juice. Cherries are loaded with antioxidants and anti-inflammatory compounds that have been shown to reduce inflammation, ease arthritis pain, and even improve sleep.
Plus, cherry juice is a natural source of melatonin, which can help regulate your sleep cycle. So not only will making your own cherry juice save you money, it’ll also give you a health boost that you won’t find in any other store-bought juice.
Ready to get started? Let’s dive in.
Key Takeaways
- Homemade cherry juice is packed with health benefits not found in store-bought versions, such as antioxidants, anti-inflammatory compounds, and natural melatonin.
- Ripe cherries must be washed thoroughly, cooked, and strained to make cherry juice, and adding vanilla extract or lemon juice can enhance its taste.
- Cherry juice can be mixed with different flavors, stored in glass bottles away from sunlight, and used in various recipes or skincare routines.
- Cherry juice has health benefits such as reducing muscle damage and inflammation, relieving joint pain and stiffness, and being a good source of vitamins and minerals, but it is important to avoid products with added sugars or preservatives.
Gather Your Ingredients
You’ll need to grab all the necessary ingredients for making delicious cherry juice. First and foremost, you’ll need fresh cherries. Depending on the recipe you choose, you may also need water, sugar, lemon juice, and other flavorings.
It’s important to choose ripe cherries that are sweet and juicy for the best flavor and health benefits. Speaking of health benefits, cherry juice is packed with nutrients and antioxidants. It’s been shown to reduce inflammation, support heart health, and even improve sleep.
Plus, there are endless variations of cherry juice recipes to try, from simple blends to more complex cocktails. But before you can start mixing, you’ll need to wash and prepare your cherries.
Wash and Prepare Your Cherries
Once you’ve gathered your fresh cherries, it’s time to rinse them thoroughly in a colander under cool running water. This is a crucial step to ensure that your cherry juice is free from dirt, debris, and pesticides. Here’s how to wash and prepare your cherries:
- Sort through your cherries and remove any stems or leaves that may still be attached.
- Place the cherries in a colander and rinse them under cool running water for a few minutes.
- Use your fingers to gently rub the cherries to remove any dirt or debris that may be stuck to them.
- Once the cherries are clean, place them on a clean towel and pat them dry with another towel.
Cherry juice has numerous health benefits, including reducing inflammation, improving sleep quality, and aiding in muscle recovery after exercise. With a few simple steps, you can make your own cherry juice at home.
Now that your cherries are clean and ready to go, it’s time to move on to the next step: cooking your cherries.
Cook Your Cherries
Now that the cherries are clean and prepped, it’s time to start cooking them to release their natural sweetness and flavor. There are different cooking techniques you can use to make cherry juice, depending on your preferences and the recipe you’re following. One popular method is to simmer the cherries in water and sugar until they break down and form a thick syrup. This technique works well for recipes that call for a concentrated juice or syrup, such as cherry cordials or cherry glazes for meats.
Another option is to use a slow cooker or crockpot to cook the cherries over low heat for several hours. This technique is ideal for recipes that require a milder, more subtle flavor, such as cherry lemonade or cherry-infused water. If you prefer a more intense flavor, you can also roast the cherries in the oven until they caramelize and become soft and juicy. Whatever cooking technique you choose, make sure to follow the recipe instructions carefully to ensure the best results.
To strain and cool your cherry mixture, you will need a fine-mesh sieve or a cheesecloth. Gently pour the cooked cherries into the sieve or cheesecloth and press down with a spoon to extract as much juice as possible. Discard the solids and let the juice cool to room temperature before transferring it to a container with a lid. You can store the cherry juice in the fridge for up to a week, or freeze it for longer storage. Enjoy your homemade cherry juice as a refreshing drink, or use it as a base for cocktails, smoothies, and other delicious beverages.
Strain and Cool Your Cherry Mixture
Now that I’ve cooked my cherries and extracted the juice, it’s time to strain and cool the mixture.
Choosing the right strainer is crucial to ensure that all the pulp and seeds are removed from the juice. I prefer using a fine mesh strainer to achieve a smooth consistency.
Once strained, it’s important to let the juice cool to room temperature before storing it in the refrigerator.
Choosing the Right Strainer
To get the most juice out of your cherries, it’s important to use a fine mesh strainer, like a chinois, which will catch any remaining pulp or bits of skin. When choosing the right strainer, consider the following:
-
Nylon vs. metal: Nylon strainers are cheaper and easier to find, but metal strainers are more durable and won’t retain odors or flavors.
-
Mesh size vs. pulp retention: A finer mesh will catch more pulp and result in a clearer juice, but it may take longer to strain. A coarser mesh will let more pulp through, but will result in a cloudier juice.
-
Straining techniques: Pressing the cherries through the strainer will yield more juice, but may also result in more pulp and a cloudier juice. Pouring the mixture through the strainer will result in a clearer juice, but may take longer and require more effort.
-
Using cheesecloth or coffee filters: If you want an even clearer juice, you can strain it through cheesecloth or a coffee filter. This will remove any remaining pulp or sediment.
Once you’ve chosen the right strainer and strained your cherry mixture, it’s time to cool it down before serving.
Cooling Your Cherry Mixture
After straining, it’s essential to let the cherry mixture cool to room temperature before adding it to your recipe. This step is important because adding hot cherry juice to a recipe could cause it to curdle or separate.
Not to mention, it’s easier to handle and mix the juice when it’s at room temperature.
When it comes to cherry juice recipes, there are many benefits and risks to consider. Cherries are high in antioxidants and have anti-inflammatory properties, which can help reduce inflammation and improve overall health. However, cherries are also high in sugar and should be consumed in moderation, especially for those with diabetes or other health concerns.
It’s important to weigh the benefits and risks before incorporating cherry juice into your diet.
To add flavorings to your cherry juice, you can consider adding honey or lemon juice. These ingredients can enhance the taste of the juice and provide additional health benefits.
Add Flavorings
Now that I’ve strained and cooled my cherry mixture, it’s time to add some flavorings! Choosing the right flavorings is crucial to creating a delicious cherry juice.
I like to experiment with different combinations. For example, adding a touch of vanilla extract or a squeeze of lemon juice can make a big difference.
Choosing the Right Flavorings
Picking the perfect flavorings is like finding the cherry on top of your sundae. It’s the finishing touch that takes your cherry juice from good to great. When it comes to flavoring options, there are countless choices available. From spices like cinnamon and nutmeg to herbs like basil and mint, the possibilities are endless.
However, when selecting your flavorings, there are a few things to consider:
-
Taste testing: Before adding any flavorings to your cherry juice, it’s important to taste them individually. This way, you can see how they might interact with the natural sweetness of the cherries. Some flavorings may overpower the cherry taste, while others may complement it perfectly.
-
Purpose: Think about why you want to add flavorings to your cherry juice. Are you looking to add depth and complexity to the flavor, or simply enhance the natural sweetness of the cherries? Once you have a clear purpose in mind, it will be easier to select the right flavorings.
-
Seasonality: Certain flavorings work better in different seasons. For example, cinnamon and nutmeg are perfect for fall and winter, while fresh herbs like basil and mint are better suited for spring and summer.
-
Quantity: When it comes to adding flavorings, less is often more. Start with a small amount and gradually add more until you achieve the desired taste. You can always add more, but you can’t take it away.
Choosing the right flavorings is an important step in making delicious cherry juice. Once you’ve selected your flavorings, the next step is to experiment with different combinations to find the perfect balance of taste.
Experimenting with Different Combinations
Get creative with your flavorings and mix and match different combinations to find the perfect blend for your taste buds! Cherry juice, on its own, can be quite tart and overpowering for some. However, by experimenting with different flavor combinations, you can come up with a delicious and unique drink that will be perfect for any occasion.
One way to mix up your cherry juice is by adding other beverages to it. For example, mixing cherry juice with lemonade or limeade can create a refreshing summer drink. Alternatively, you could mix cherry juice with tea for a warm and cozy winter beverage. To help get you started, here is a table of some different combinations to try:
| Beverage | Cherry Juice Ratio | Flavor Profile |
|---|---|---|
| Lemonade | 1:1 | Tart and refreshing |
| Limeade | 1:1 | Citrusy and sweet |
| Tea | 1:2 | Warm and cozy |
| Ginger Ale | 1:3 | Spicy and sweet |
With so many different cherry juice flavor experiments to try, the possibilities are endless! Once you have found your perfect blend, it’s important to store your cherry juice properly to ensure it stays fresh and delicious.
Store Your Cherry Juice
Once the cherry juice has been strained and bottled, it’s a good idea to keep it in the fridge to ensure it stays fresh. Remember, time flies like an arrow, but fruit flies like a banana, so be sure to keep the lid on tight!
Here are some preservation methods that can help extend the shelf life of your cherry juice:
-
Use glass bottles: Plastic bottles can release chemicals into the juice over time, affecting its taste and quality. Glass bottles, on the other hand, are non-reactive and can preserve the flavor and nutrients of the juice for longer periods.
-
Keep it away from sunlight: Sunlight can cause the juice to spoil faster due to oxidation. Store your cherry juice in a cool, dark place to prevent exposure to light.
-
Freeze in ice cube trays: If you have excess cherry juice, freeze it in ice cube trays. These cubes can be added to smoothies or juices for added flavor and health benefits.
-
Use preservatives: If you want to extend the shelf life of your cherry juice even further, consider using natural preservatives like lemon juice or honey. These ingredients can help prevent bacterial growth and keep your juice fresh for longer.
By following these preservation methods, you can ensure that your cherry juice stays fresh and flavorful for as long as possible. Now, it’s time to enjoy your delicious creation!
Enjoy Your Cherry Juice
Now that you’ve stored your cherry juice properly, it’s time to enjoy it! There are numerous ways to enjoy cherry juice, both as a drink and as an ingredient in recipes.
One of my favorite ways to drink cherry juice is to simply pour a glass of it over ice and add a splash of sparkling water for a refreshing spritzer. You can also mix cherry juice with other fruit juices, such as orange or pineapple, to create a delicious and healthy blend.
Aside from being a tasty drink, cherry juice also offers a variety of health benefits. It’s high in antioxidants, which can help protect your cells from damage caused by free radicals. Additionally, cherry juice has anti-inflammatory properties, which may help reduce inflammation in the body.
If you’re looking for ways to incorporate cherry juice into your diet beyond just drinking it, there are plenty of tasty recipes that use it as an ingredient, such as cherry smoothies, cherry BBQ sauce, and cherry chia seed pudding.
In the next section, we’ll dive deeper into the health benefits of cherry juice.
Health Benefits of Cherry Juice
I’m excited to discuss the health benefits of cherry juice with you. Cherry juice is packed with antioxidants and anti-inflammatory properties that help reduce inflammation in the body.
In addition, it contains essential vitamins and minerals that contribute to overall health and wellness.
Let’s dive in and explore these key points in greater detail.
Antioxidants and Anti-Inflammatory Properties
Cherry juice isn’t just delicious; it’s also packed with antioxidants and anti-inflammatory properties that can benefit your health and well-being. As an athlete, incorporating cherry juice into your daily routine can be especially helpful.
The antioxidants in cherry juice help reduce muscle damage and inflammation, leading to faster recovery times and improved performance. Additionally, cherry juice’s anti-inflammatory properties have been shown to reduce joint pain and stiffness, making it an excellent option for those with arthritis or other inflammatory conditions.
So, whether you’re an athlete or just looking to improve your overall health, adding cherry juice to your diet can provide a wide range of benefits. Moving on to the next section, let’s talk about the essential vitamins and minerals found in cherry juice.
Vitamins and Minerals
You’ll be thrilled to know that incorporating cherry juice into your daily routine can provide you with essential vitamins and minerals that can benefit your overall health and well-being.
Cherry juice is a good source of vitamin C, which can help boost your immune system and improve skin health. It also contains vitamin A, which is important for maintaining healthy vision and skin. Additionally, cherry juice provides minerals such as potassium, which is essential for maintaining healthy blood pressure levels, and copper, which plays an important role in the formation of red blood cells.
It’s important to ensure that you’re getting enough vitamins and minerals in your daily intake, and cherry juice is a great way to do that. However, it’s important to note that not all cherry juice products are created equal. Some juices may have added sugars or preservatives, which can negate the health benefits.
In the next section, we’ll explore different variations of cherry juice that you can make at home to ensure that you’re getting the most out of this delicious drink.
Cherry Juice Variations
There are various ways to jazz up your cherry juice, such as adding a splash of lime or mixing it with sparkling water. Here are some ideas to add some excitement to your cherry juice:
-
Cherry Juice Cocktails: Mix your cherry juice with your favorite liquor and create a refreshing cocktail. Some popular options include mixing it with vodka, rum, or tequila. You can also add some soda or tonic water to give it a fizzy kick.
-
Cherry Juice for Skincare: Cherry juice is rich in antioxidants, making it a great addition to your skincare routine. You can use it as a toner or mix it with other natural ingredients like honey and yogurt to create a face mask. It’s also great for hydrating your skin and reducing inflammation.
So, next time you pour yourself a glass of cherry juice, try one of these variations to mix things up and enjoy the health benefits in a fun and delicious way.
Frequently Asked Questions
Can cherry juice be made with frozen cherries?
Like a frozen tundra, frozen cherries offer the convenience of year-round availability but may lack the juiciness of fresh ones. To store them, seal in an airtight container and freeze up to 6 months. Yes, you can make cherry juice with frozen cherries, but they may require more sugar and water to achieve the desired consistency.
How long does it take to cook the cherries?
Cooking time for cherries depends on the preparation method. If boiling, it can take up to 30 minutes, while simmering can take 10-15 minutes. Once soft, strain the cherries for juice.
Can sugar be substituted with honey or another sweetener?
Honey is the holy grail of natural sweeteners for cherry juice. Unlike sugar, honey has antibacterial properties that can boost your immune system. It’s a healthier option that also enhances the flavor of the juice.
How long does cherry juice last in the fridge?
Cherry juice lasts about 5-7 days in the fridge. Signs of spoilage include a sour smell and an off taste. Leftover juice can be used for smoothies, cocktails, or as a marinade for meat.
Can cherry pits be left in the mixture while cooking?
It is not recommended to cook with cherry pits as they contain small amounts of cyanide which can be toxic. However, cherry pits have potential health benefits such as reducing inflammation and promoting better sleep when consumed in small amounts.
Conclusion
Well, there you have it, folks – a simple and easy recipe for making delicious cherry juice.
Not only is it a tasty drink, but it also has numerous health benefits. Did you know that a cup of cherry juice contains the equivalent of 90-100 cherries? That’s a lot of antioxidants and anti-inflammatory compounds packed into one cup!
Research has shown that cherry juice can aid in reducing inflammation, improving sleep quality, and even reducing muscle soreness after a workout. So why not try making your own cherry juice at home and reap the benefits?
With just a few ingredients and a little bit of time, you can have a refreshing and healthy drink to enjoy any time of the day.


