Connect with us

Juice

How To Juice Oranges Without A Juicer

Published

on

Were you aware that, on average, an American consumes roughly 2.7 cups of orange juice each week?

But what if you don’t have a juicer to make your own fresh-squeezed orange juice at home? Don’t worry, because I’m here to show you how to juice oranges without a juicer!

Using just a few basic supplies and some elbow grease, you can easily make delicious, fresh orange juice right in your own kitchen. Whether you’re a fan of sweet, tangy juice or prefer a more tart flavor, this step-by-step guide will help you get the most out of your oranges and create the perfect glass of juice every time.

So let’s get started and learn how to juice oranges like a pro!

Key Takeaways

  • Wash oranges thoroughly before cutting to remove any dirt or bacteria
  • Cut oranges in half from top to bottom to expose juicy flesh and make it easier to juice
  • Strain juice to remove pulp and seeds using a fine mesh sieve, coffee filter, cheesecloth, or clean cotton t-shirt
  • Add sweeteners like sugar or honey, or flavorings like ginger or mint, for a custom taste
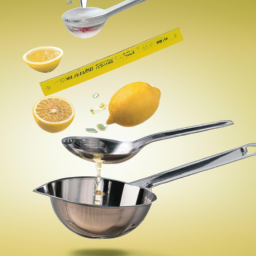
Gather Your Supplies

Now, let’s get started by gathering all the supplies you’ll need to juice those sweet oranges without a juicer! First, you’ll need a sharp knife and a cutting board to prepare the oranges. Make sure the knife is sharp enough to easily cut through the thick skin of the oranges.

You’ll also need a large bowl to collect the juice and a hand juicer or a strainer. Before you start cutting the oranges, make sure to wash them thoroughly with water and a gentle scrub brush. Then, pat them dry with a clean towel. This will ensure that there are no dirt or bacteria on the oranges that could contaminate the juice.

Advertisement

Once you’ve gathered all the supplies and prepared the oranges, it’s time to cut them into smaller pieces.

Transitioning to the next section, start by placing the first orange on the cutting board and cutting it into quarters.

Cut the Oranges

After washing and drying the citrus fruit, simply slice the ends off and then cut it in half from top to bottom, resulting in two halves that are easy to squeeze by hand.

These orange juicing techniques are simple yet effective, and they allow you to enjoy the benefits of fresh orange juice without the need for a juicer. By cutting the oranges in half, you’re exposing the juicy flesh inside, which can be easily squeezed to extract the sweet and tangy juice.

Freshly squeezed orange juice is packed with vitamins and minerals that are essential for a healthy lifestyle. As mentioned earlier, one medium-sized orange contains about 70 milligrams of vitamin C, which is vital for boosting your immune system and keeping your skin healthy.

Advertisement

So, go ahead and cut those oranges in half, and let’s move on to the next step – juicing the oranges by hand.

Juice the Oranges by Hand

Get ready to enjoy the sweet and tangy taste of freshly squeezed orange juice by using your hands to extract every drop of juice from the juicy flesh of the citrus fruit. Hand juicing techniques can be just as effective as using a juicer, and there are many benefits to fresh squeezed juice that make it worth the extra effort.

  1. Satisfaction: There’s something satisfying about feeling the juice squirt out from the fruit as you squeeze it, and knowing that you’re getting every last drop of flavor.

  2. Control: When you juice by hand, you have more control over the amount of pulp and the overall texture of the juice.

  3. Cost-effective: Hand juicing is a cost-effective alternative to buying a juicer, and it allows you to make smaller batches of juice without taking up valuable counter space.

Now that you’ve extracted all the juice from your oranges, it’s time to strain it to remove any remaining pulp or seeds.
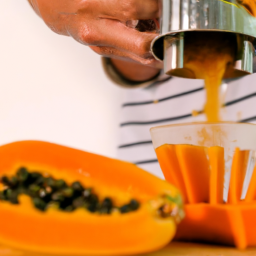
Strain the Juice

Now that I’ve freshly squeezed orange juice, it’s time to strain it.

I always use a strainer to remove any pulp and seeds that may have made their way into the juice. If I want an even smoother consistency, I’ll use a cheesecloth to strain the juice again.

Advertisement

It’s a simple step, but it makes a big difference in the overall texture of the juice.

Use a Strainer to Remove Pulp and Seeds

To easily get rid of pesky pulp and seeds, strain your freshly squeezed orange juice through a fine mesh sieve – it’s like giving your juice a spa day! Using strainers creatively can help you achieve a smoother and clearer juice, but if you don’t have a fine mesh sieve, fret not! There are alternatives to strainers that you can use, such as a coffee filter, cheesecloth, or even a clean cotton t-shirt.

When straining your orange juice, here are some tips to keep in mind:

  • Place the sieve over a bowl or pitcher to catch the juice.
  • Use a ladle to pour the juice into the sieve, pressing down on the pulp with the back of the ladle to extract as much juice as possible.
  • Clean the sieve between batches to prevent build up of pulp and seeds.
  • Don’t forget to scrape the underside of the sieve to get every last drop of juice.

If using a coffee filter or cheesecloth, be sure to rinse it thoroughly beforehand to remove any residual flavors.

For a smoother consistency, use a cheesecloth to strain the juice further.

Use a Cheesecloth for a Smoother Consistency

Achieve a smoother consistency by using a cheesecloth – simply place the cloth over a bowl and pour your freshly squeezed orange juice over it, then gather the edges and twist to extract every last drop of deliciousness. Cheesecloth is a versatile and inexpensive kitchen tool that can be used for a variety of purposes, such as straining broth, making cheese, and even wrapping herbs for bouquet garni. When choosing a cheesecloth, look for a fine, tight weave that will catch all the pulp and seeds while allowing the juice to flow through easily.

Advertisement

To get the best flavor and yield from your oranges, choose ones that are firm, heavy for their size, and brightly colored. Avoid oranges that are soft, spongy, or have blemishes or bruises, as they may not be as juicy or flavorful. Navel oranges are a popular choice for juicing, as they are seedless and have a sweet, tangy taste. Valencia oranges are another great option, as they are juicier and have a slightly tart flavor.

Once you have your oranges and cheesecloth ready, you can move on to the next step of adding sweeteners or other flavors to your freshly squeezed juice.

Add Sweeteners or Other Flavors

Now that I’ve strained my orange juice, it’s time to add some sweetness and flavor. I like to use a little bit of sugar or honey to enhance the natural sweetness of the oranges.

If I’m feeling adventurous, I might add some freshly grated ginger or muddled mint leaves for a unique twist. Adding sweeteners or other flavors is a great way to customize your orange juice to your liking.

Sugar or Honey

Adding sugar or honey to freshly squeezed orange juice can give it a sweet twist, making it as refreshing as a cool breeze on a hot summer day. However, there are a few things to consider when choosing between sugar and honey.

Advertisement
  1. Sugar: It’s important to note that refined sugar contains empty calories and has no nutritional value. It can also lead to health issues such as weight gain, diabetes, and heart disease. Therefore, it’s important to use sugar in moderation.

  2. Honey: On the other hand, honey is a natural sweetener that’s rich in antioxidants, anti-inflammatory compounds, and has antibacterial properties. It’s also known to boost immunity and soothe sore throats. However, it’s important to keep in mind that honey is still a form of sugar and should also be used in moderation.

  3. Health benefits: Both sugar and honey have their own health benefits. However, when it comes to adding sweeteners to orange juice, using a natural sweetener like honey can provide additional health benefits.

  4. Moderation: Regardless of which sweetener you choose to use, it’s important to use them in moderation. Too much sugar or honey can still lead to health issues.

Now that we’ve discussed the differences between sugar and honey, let’s move on to the next sweet twist option – ginger or mint.

Ginger or Mint

Opting for either ginger or mint can provide a refreshing and invigorating twist to your freshly squeezed orange beverage. Ginger, in particular, has many benefits when added to orange juice. It can help reduce inflammation in the body, boost the immune system, and aid in digestion. Simply grate a small amount of ginger into your orange juice and mix well for a zesty and healthy drink.

Mint is another great addition to orange juice recipes. It adds a cooling sensation to the drink and can also aid in digestion. For the best results, muddle a few fresh mint leaves in the bottom of a glass before pouring in the freshly squeezed orange juice. This will release the oils in the mint and infuse the drink with its refreshing flavor.

Adding ginger or mint to your freshly squeezed orange juice can take it to the next level. After adding your desired herbs, consider chilling the orange juice for a refreshing and thirst-quenching drink.

Chill the Orange Juice

First, grab your freshly squeezed orange juice and pop it in the fridge to chill for at least 30 minutes.

Advertisement

There are many ways to enjoy chilled orange juice, such as drinking it straight up, mixing it with other juices, or making a refreshing smoothie. The benefits of drinking chilled orange juice are numerous, including helping to cool down your body on a hot day, providing a boost of vitamin C, and aiding in digestion.

Once your orange juice is chilled, it’s important to store any leftover juice properly. One tip is to transfer the juice to an airtight container and store it in the fridge for up to three days. Another option is to freeze the juice in ice cube trays and use them to add a burst of citrus flavor to your drinks or smoothies.

By following these simple steps, you can enjoy freshly squeezed orange juice at any time without the need for a juicer.

Store Any Leftover Juice

Properly storing your leftover orange juice is key to enjoying it later on. There are several storing techniques that you can use to keep your orange juice fresh and delicious.

One option is to transfer the juice into an airtight container and store it in the refrigerator for up to two days. This will help preserve the freshness and flavor of the juice, as well as prevent it from oxidizing and spoiling.

Advertisement

Another option is to add a preservative to the juice. Citric acid, vitamin C, or lemon juice are all great options that can help extend the shelf life of your orange juice. Simply add a small amount to the juice before storing it in the refrigerator. This will not only help preserve the juice, but also enhance its flavor and nutritional value.

With these storing techniques and preservative options, you can enjoy your homemade orange juice for days to come.

Now that you know how to properly store your orange juice, it’s time to experiment with different oranges. There are many types of oranges available, each with its own unique flavor and nutritional benefits.

In the next section, we’ll explore some of these options and how they can enhance your homemade orange juice.

Experiment with Different Oranges

I love experimenting with different types of oranges when making fresh juice. Navel oranges are my go-to for their sweet flavor and easy-to-peel skin.

Advertisement

Valencia oranges are perfect for juicing as they have a high juice content and a tangy taste.

And for a unique twist, I like to use blood oranges for their ruby-red color and slightly tart flavor.

Try using different oranges to find your perfect citrus combination.

Navel Oranges

When juicing navel oranges, it’s like squeezing sunshine into a glass. These oranges are known for their sweet and tangy flavor, making them a popular choice for juicing. Not only do they taste delicious, but they also have many health benefits.

Navel oranges are a great source of vitamin C, fiber, and antioxidants. Incorporating them into your diet can help boost your immune system and improve digestion. If you’re looking for navel orange recipes, there are plenty to choose from.

Advertisement

You can simply juice them for a refreshing drink, or mix them with other fruits for a tasty smoothie. They can also be used in salads, desserts, and marinades. The possibilities are endless with these versatile fruits.

Now, let’s move on to the next type of orange – the valencia orange.

Valencia Oranges

Valencia oranges are a popular choice for making marmalade due to their high pectin content and tangy flavor. These oranges are believed to have originated in Spain, specifically in the city of Valencia, and were introduced to the United States in the late 1800s. They are now grown throughout the world, with California and Florida being major producers.

In addition to marmalade, Valencia oranges are great for juicing due to their sweet and tart flavor. They’re also commonly used in salads, marinades, and baked goods. One of my favorite recipes using Valencia oranges is a citrus salad with avocado and shrimp. The combination of the tangy oranges, creamy avocado, and succulent shrimp is simply delicious.

Moving on to the next topic, blood oranges…

Advertisement

Blood Oranges

I hope you enjoyed learning about Valencia oranges in the previous section. Now, let’s talk about another popular orange variety called blood oranges. These oranges are known for their deep red flesh and sweet, tangy flavor. They’re a great option for juicing and can be easily incorporated into a variety of recipes.

If you’re looking for a healthy and delicious way to start your day, try making a blood orange juice. Here are a few nutritional benefits of adding blood oranges to your diet:

  • High in vitamin C: One medium-sized blood orange contains approximately 70% of your daily recommended intake of vitamin C.
  • Rich in antioxidants: Blood oranges are packed with antioxidants, which help to protect your cells from damage caused by harmful free radicals.
  • Good source of fiber: Eating a blood orange can help to keep you feeling full and satisfied, thanks to its high fiber content.

To make a delicious blood orange juice, simply peel and segment the oranges, removing any seeds and pith. Then, add the segments to a blender or juicer and blend until smooth. You can also add other ingredients like ginger, honey, or mint to create a unique flavor profile.

Now that you know how to juice blood oranges, it’s time to try different juicing methods to find your favorite.

Try Different Juicing Methods

To switch things up, why not give different juicing methods a go? You can juice using alternatives such as a blender or food processor for a smoother juice compared to using a manual juicer. To make a smooth orange juice, simply peel the oranges and remove the seeds, then blend the fruit. Strain the juice using a fine mesh strainer or cheesecloth to remove any pulp or fibrous bits.

You can also mix and match different citrus fruits to create unique flavor combinations. For example, try juicing oranges with grapefruits or lemons for a tangy and sweet blend. Don’t be afraid to experiment and find the perfect blend for your taste. With these different juicing methods and citrus fruit options, you can enjoy your freshly squeezed orange juice in a variety of ways.

Advertisement

Enjoy Your Freshly Squeezed Orange Juice!

Now that you’ve tried different juicing methods, it’s time to enjoy your freshly squeezed orange juice! There’s nothing quite like the taste of a freshly squeezed orange, and knowing how to juice oranges without a juicer opens up a world of possibilities.

Plus, there are many benefits to drinking orange juice, from providing essential vitamins and minerals to boosting your immune system.

To make the most delicious orange juice, it’s important to choose the best oranges. Look for oranges that are heavy for their size and have smooth, firm skin. If you prefer sweeter juice, choose oranges with a lighter skin color, as they tend to be riper and sweeter. And if you’re looking for a tangier taste, go for oranges with a darker skin color.

Once you’ve chosen your oranges, simply cut them in half and squeeze the juice out into a glass or container. You can use a handheld juicer or even just your hands. Don’t worry if there are a few seeds or pulp in your juice – that’s just a sign that you’re getting all the natural goodness from the oranges.

So go ahead, enjoy your freshly squeezed orange juice and feel good about giving your body a healthy boost!

Advertisement

Frequently Asked Questions

How long does it take to juice oranges by hand?

Hand juicing tips: slice the orange in half, use a fork to loosen the flesh, then squeeze the juice into a container. Best tools for hand juicing: citrus squeezer or reamer. Time varies, but it usually takes me 2-3 minutes per orange.

Can I use a blender instead of a strainer to remove pulp?

I’ve found that using a blender to juice oranges can be a great alternative to a strainer. For a pulp-free option, blend the oranges on high speed and pour the mixture through a cheesecloth or fine mesh sieve. Blender alternatives can be just as effective as juicers, just be sure to strain the juice for a smooth texture.

How many oranges do I need to make a glass of juice?

To make a glass of orange juice, I recommend using about 3-4 medium-sized oranges. Choosing the right oranges is important for optimal flavor and juiciness. Experiment with different orange juicing techniques to find what works best for you.

Can I juice frozen oranges?

Like a kid with a popsicle, I was curious about juicing frozen oranges. But after trying various Juicing Techniques and Orange Preparation methods, I found it best to stick with fresh, room temperature oranges for optimal juice yield and flavor.

How long can I store freshly squeezed orange juice in the fridge?

Freshly squeezed orange juice can stay fresh in the fridge for up to 3 days. To preserve it longer, freeze it in an airtight container. Daily intake of freshly squeezed orange juice boosts immunity and provides a rich source of vitamins and antioxidants.

Advertisement

Conclusion

In conclusion, learning how to juice oranges without a juicer is a useful skill that can save you a lot of money and give you a healthier beverage option. It’s a process that requires patience, effort, and a little bit of creativity. Just like life requires us to gather our supplies, cut through obstacles, and strain out the negativity to enjoy the sweet moments.

The process of juicing oranges is a metaphor for life. It reminds us that the best things in life require a little bit of effort, but the end result is always worth it. When you experiment with different oranges and juicing methods, you are also reminded that life is full of surprises and that there are always new things to discover.

Just like how a different type of orange can give you a completely unique flavor, life can bring unexpected twists and turns that can lead to new opportunities and experiences. So, enjoy the process of juicing oranges and embrace the journey of life with open arms.

Continue Reading
Advertisement

Juice

How To Freeze Peaches Without Lemon Juice

Published

on

By

As a lover of all things fruity and sweet, I eagerly look forward to peach season every year. There’s nothing quite like biting into a juicy, ripe peach on a hot summer day. However, sometimes I end up with more peaches than I can eat before they go bad. That’s when freezing them comes in handy, preserving the taste of summer for months to come.

However, many recipes for freezing peaches call for lemon juice, which can alter the natural flavor of the fruit. As someone who wants to enjoy the pure taste of peaches, I’ve developed a method for freezing them without using lemon juice.

In this article, I’ll share my step-by-step process for freezing peaches without any added ingredients, so you can enjoy the full, sweet flavor of summer peaches all year round.

Key Takeaways

  • Peeling and slicing peaches makes them easier to use
  • Blanching peaches can make peeling easier
  • Too much sugar syrup can affect the texture and taste of peaches
  • Frozen peaches can last up to 6 months

Choosing the Right Peaches

You’ll want to make sure you pick the juiciest, most flavorful peaches – they’ll make all the difference in your frozen treats!

When it comes to peach ripeness, you’ll want to choose peaches that are fully ripe, but not overripe. Look for peaches that are slightly soft to the touch, with a sweet aroma. Avoid peaches that are hard or have green patches, as these aren’t yet ripe enough to use.

Another important factor to consider is the flavor profile of the peach. Different varieties of peaches have varying levels of sweetness and tartness, so choose a variety that suits your taste buds.

Advertisement

For example, if you like your peaches on the sweeter side, look for varieties like the Elberta or O’Henry. If you prefer a more tart flavor, the Red Haven or Loring may be better options.

Once you’ve chosen your perfect peaches, it’s time to move on to preparing them for freezing.

Preparing Your Peaches

Before freezing your peaches, it’s important to prepare them properly.

First, I like to wash and dry the peaches thoroughly to remove any dirt or debris.

Then, I use a peeler to remove the skin and slice the peaches into pieces that are the perfect size for my recipes.

Advertisement

These steps ensure that my frozen peaches are clean, easy to use, and ready to be enjoyed whenever I want.

Washing and Drying

After picking fresh peaches, it’s important to gently wash and pat them dry before beginning the freezing process. This step is crucial in ensuring that the peaches remain fresh and free from any dirt or debris.

Here are some tips for washing and drying your peaches:

  1. Importance of ripeness: Make sure your peaches are fully ripe before washing them. This will ensure that they have the best flavor and texture when you freeze them.

  2. Drying techniques: To dry your peaches, gently wipe them with a clean cloth or paper towel. Avoid using a harsh scrubbing motion as this can damage the delicate skin of the peaches.

  3. Air drying: Alternatively, you can also air dry your peaches by placing them on a clean towel or rack and leaving them to dry naturally. This method may take longer but it’s a great way to avoid any damage to the peaches.

Once your peaches are washed and dried, you’re ready to move on to peeling and slicing them for freezing.

Peeling and Slicing

As you sink your teeth into a juicy peach, imagine how satisfying it would be to slice and peel them for freezing. Before you start slicing, it’s important to peel your peaches. You can use a vegetable peeler or a knife to remove the skin. If the peach is ripe, the skin should come off easily. If you’re struggling, try blanching the peaches to loosen the skin.

Advertisement

Blanching is a technique that involves boiling the peaches for a short period of time and then immediately transferring them to an ice bath to stop the cooking process. This will cause the skin to loosen, making peeling much easier.

Once you have peeled your peaches, it’s time to slice them. You can slice them into wedges or cubes, whatever works best for you. It’s important to note that frozen peaches tend to be a bit softer than fresh ones, so you may want to slice them a bit thicker than you normally would.

If you don’t want to use the blanching technique, there are other freezing alternatives. You can simply slice and freeze the peaches as they are, or you can add a bit of sugar or ascorbic acid to help preserve their color and texture.

With your peaches sliced and ready to go, it’s time to move on to treating them before freezing.

Treating Your Peaches

First, you’ll need to wash your peaches thoroughly to remove any dirt or debris. Once your peaches are clean, you can start treating them.

Advertisement

Blanching peaches is a great way to remove the skin without losing any of the fruit’s flavor. To do this, bring a large pot of water to a boil and drop in your peaches for about 30 seconds. Use a slotted spoon to remove the peaches, and immediately transfer them to a bowl of ice water. This will stop the cooking process and make it easier to remove the skin. Once the peaches are cool enough to handle, you can easily peel off the skin with a knife or your fingers.

After blanching and peeling your peaches, it’s time to treat them with a sugar syrup. This will help preserve the peaches and keep them from browning. To make the syrup, combine equal parts sugar and water in a saucepan and heat until the sugar dissolves. Allow the syrup to cool completely.

Once the syrup is cool, you can add your peaches and let them soak for about 10 minutes. This will give them a nice sweet flavor and help keep them fresh. Now that your peaches are blanched, peeled, and treated with sugar syrup, you’re ready to freeze them.

Note: Avoid using too much sugar syrup as it can affect the texture and taste of the peaches.

Freezing Your Peaches

Now that we have prepared our peaches, it’s time to freeze them without using lemon juice. To achieve this, we will be using a sugar substitute and blanching the fruit. The sugar substitute will help preserve the color and flavor of the peaches, while blanching will help remove the skin easily.

Advertisement

To start, let’s prepare the sugar substitute. In a mixing bowl, combine 1 cup of sugar substitute with 1 cup of water and stir until the sugar substitute is dissolved. Next, we will blanch the peaches. Bring a large pot of water to a boil and carefully place the peaches in the boiling water for 30 seconds to 1 minute. Remove the peaches from the boiling water and immediately transfer them to a bowl of ice water to stop the cooking process. Once the peaches have cooled, remove the skin and pit them. Finally, slice the peaches into desired sizes and place them in a freezer-safe container. Pour the sugar substitute solution over the peaches until they are completely covered and freeze them for up to 6 months.

With our peaches now frozen, it’s time to move on to the final step of storing them properly.

Storing Your Frozen Peaches

When it comes to storing your frozen peaches, there are a couple of key points to consider. First, it’s important to choose the right container to store your peaches in. I like to use freezer-safe bags or containers with tight-fitting lids to keep my peaches fresh and prevent freezer burn.

Second, labeling your containers is crucial to avoid confusing your peaches with other frozen fruits or vegetables. I always make sure to write the date and contents on each container so I can easily identify what’s inside and when I froze it.

Containers

To ensure your frozen peaches stay fresh, it’s important to choose the right container. Mason jars are a great option because they’re sturdy, airtight, and reusable. They won’t leak, which helps keep your freezer clean. Make sure to leave some headspace at the top of the jar to allow for expansion during freezing. This will prevent your jars from cracking or breaking in the freezer.

Advertisement

Another option for freezing peaches is to use plastic bags. Make sure to choose freezer-safe bags that are thick and durable. These bags will protect your peaches from freezer burn and prevent any leaks. When filling the bags, try to remove as much air as possible before sealing. This will help prevent ice crystals from forming and keep your peaches fresh for longer.

Now that you have chosen the right container for your frozen peaches, it’s important to label them with the date and contents. This will help you keep track of how long they’ve been in the freezer and make it easier to find them when you need them.

In the next section, we’ll discuss the importance of labeling your frozen peaches in more detail.

Labeling

Labeling your frozen peaches is essential to ensure that you don’t end up with a bunch of anonymous fruits in your freezer. When it comes to labeling tips, use a permanent marker to write the date of freezing, the quantity, and any other relevant information. This way, you’ll know how long the peaches have been in your freezer and when they’ll expire.

It’s also helpful to include the type of peaches you have frozen, especially if you have multiple varieties. The importance of storage date cannot be overstated. Not only does it help you keep track of how long the peaches have been frozen, but it also helps you plan your meals accordingly.

Advertisement

You can easily determine which bags or containers of peaches need to be used up first based on the date of freezing. And when it comes to thawing your peaches, you’ll have a better idea of how long they’ve been frozen and whether they’re still good to eat. Speaking of thawing, let’s discuss the next step in the process.

Thawing Your Peaches

When thawing my frozen peaches, I usually have two options: refrigeration or room temperature. If I plan ahead, I prefer to thaw my peaches in the refrigerator overnight. This method allows for a slow, even thaw and results in firmer peaches with less juice.

I’ve found that when I thaw peaches at room temperature, they tend to become mushy and lose their texture. So, I always opt for refrigeration when possible. Plus, it’s a hands-off approach that requires minimal effort on my part.

Refrigeration

If you’re short on time, the quickest way to preserve your peaches is by refrigerating them. This method is perfect if you plan to use the peaches within a few days. Storing peaches in the fridge will slow down the ripening process, which means they’ll stay fresh for longer. Here’s a table to help you better understand the different storing options and the shelf life of peaches:

Storing Option Shelf Life
Room Temperature 1-2 Days
Refrigeration 3-5 Days
Freezing 8-12 Months

As you can see, refrigeration can extend the shelf life of your peaches by a few more days. However, if you plan to keep your peaches for an extended period, it’s better to freeze them. In the next section, I’ll explain how to freeze peaches without lemon juice.

Advertisement

Room Temperature

Sometimes, you just can’t resist the sweet scent of a fresh peach sitting on your kitchen counter at room temperature. And the good news is, room temperature storage can actually benefit your peaches!

When kept at room temperature, peaches continue to ripen and become softer and juicier. Plus, they’ll retain more of their natural flavor and nutrients.

But there are some best practices for handling room temperature peaches. First, make sure to keep them out of direct sunlight or heat sources, which can cause them to spoil more quickly. Second, inspect them regularly for any signs of bruising or mold, and remove any damaged fruit immediately. And finally, consume them within a few days of purchase for the best taste and texture.

Now that you’ve enjoyed your fresh peaches at room temperature, it’s time to freeze the rest for later use.

Using Your Frozen Peaches

Now that I’ve got my peaches frozen, I can’t wait to start using them in my baking, smoothies, and sauces.

Advertisement

When it comes to baking, frozen peaches are a great addition to pies, cobblers, and muffins.

For smoothies, I like to blend them with some yogurt and honey for a delicious and healthy treat.

Lastly, frozen peaches can also be used to make a sweet and tangy sauce that goes well with pork or chicken dishes.

Baking

You can easily add frozen peaches to your favorite baking recipes, giving your treats a sweet burst of flavor that will knock your socks off. Whether you’re making peach cobbler, peach pie, or peach muffins, frozen peaches are a great way to infuse your baked goods with the taste of summer all year round.

To help you get started, here are some recipe variations you can try with your frozen peaches:

Advertisement
Recipe Variation
Peach cobbler Add crumbled graham crackers to the topping for a crunchy texture
Peach pie Mix in some cinnamon and nutmeg for a warm, spicy flavor
Peach muffins Top with a streusel made from brown sugar, flour, and butter

When it comes to storage hacks, you can freeze your peaches in portioned sizes so that you can easily grab what you need for your recipe. Simply place sliced peaches on a baking sheet and freeze until solid, then transfer them to a freezer-safe bag. This way, you won’t have to worry about thawing more than you need.

Now that you know how to incorporate frozen peaches into your baking, let’s move on to the next section and learn how to make delicious peach smoothies.

Smoothies

Indulge in the sweet, creamy goodness of a peach smoothie, bursting with the taste of summer. Smoothies are a great way to use up the abundance of peaches you have on hand, and they make for a healthy and refreshing snack or breakfast option.

Here are three smoothie recipes you can try:

  • Peach and banana smoothie: Blend together one ripe banana, one peeled and sliced peach, one cup of almond milk, and a handful of ice cubes until smooth.
  • Peach and yogurt smoothie: In a blender, combine one cup of plain Greek yogurt, one sliced peach, one tablespoon of honey, and a splash of vanilla extract. Blend until smooth and creamy.
  • Peach and green smoothie: This smoothie is packed with nutritional benefits! Blend together one sliced peach, one cup of spinach, one banana, one cup of almond milk, and a handful of ice until smooth.

Smoothies are a delicious and easy way to enjoy the sweet taste of peaches while also getting a dose of vitamins and nutrients. But if you’re looking for something a little more savory, let’s move on to the next section about sauces and how you can use frozen peaches to make them.

Sauces

If you’re a fan of adding a little zing to your meals, a peach sauce is a must-try. It’s as versatile as ketchup and as tangy as mustard. Creating a delicious peach sauce is all about exploring flavor combinations and utilizing different cooking techniques.

Advertisement

For a sweet and savory flavor combo, try combining peaches with garlic, ginger, and soy sauce. Or, for a spicier kick, add in some red pepper flakes or jalapenos. When cooking the sauce, start by sautéing onions and garlic in a bit of oil before adding in your peaches and other desired ingredients. Let the sauce simmer until it thickens and the flavors meld together.

Now, if you’re looking for alternative methods of preserving peaches, there are a few options to consider. One such method is freezing, which can be done without the use of lemon juice.

Alternative Methods of Preserving Peaches

There are other ways to preserve peaches without using lemon juice, so let’s explore some alternative methods!

When it comes to preserving peaches, there are two main methods: canning and freezing. Canning involves boiling the peaches in a sugar syrup and storing them in airtight jars, while freezing simply requires washing, slicing, and freezing the peaches in a single layer on a baking sheet before transferring them to a freezer-safe bag. Both methods can preserve peaches for months, but freezing is a simpler and more convenient option for those who don’t have the time or equipment for canning.

If you’re looking for a more natural way to preserve your peaches, there are a few options that don’t involve adding any sugar or artificial preservatives. One method is to dehydrate the peach slices in a dehydrator or oven until they are completely dry and brittle. Another option is to ferment the peaches by submerging them in a saltwater brine for several days, which encourages the growth of beneficial bacteria that can help preserve the fruit. Finally, you can also store the peaches in a cool, dark place with good airflow, such as a root cellar or pantry, where they can slowly ripen and develop a sweeter flavor over time.

Advertisement

Now that we’ve explored some alternative methods for preserving peaches, let’s move on to common mistakes to avoid when freezing or canning them.

Common Mistakes to Avoid

Preserving peaches can be a tricky endeavor, as one wrong move can turn your sweet, juicy fruit into a mushy mess. When it comes to freezing peaches without lemon juice, there are a few common mistakes to avoid.

Firstly, make sure to avoid discoloration by blanching the peaches before freezing. This involves boiling the peaches for about 30 seconds, then immediately placing them in an ice bath to stop the cooking process. This will help maintain the bright color of your peaches.

Another important factor to consider is proper sealing techniques. If your peaches are not sealed tightly, they may become freezer burnt and lose their flavor. Make sure to use air-tight containers or freezer bags, and remove as much air as possible before sealing.

Label the containers with the date and contents, and store them in the freezer right away. By avoiding these common mistakes, you can enjoy your frozen peaches all year round without any problems.

Advertisement

Frequently Asked Questions

Can I freeze peaches that are not fully ripe?

I wouldn’t recommend freezing unripe peaches as they won’t have the same freezing quality as ripe ones. The peach ripeness is crucial for the freezing process to work well, ensuring the best texture and taste.

How long can I store frozen peaches?

To properly store frozen peaches, freeze them in batches and keep them in an airtight container. They can last up to 8-12 months in the freezer.

Can I use a vacuum sealer to freeze my peaches?

Yes, I can use a vacuum sealer to freeze my peaches. The advantages of vacuum sealing include extending the freezer life of the peaches and preventing freezer burn. However, the disadvantages include the cost of the vacuum sealer and the need for extra equipment.

Can I add sugar to the peaches before freezing them?

Adding sugar to peaches before freezing is a sweet way to preserve their flavor. While lemon juice has benefits for freezing, alternatives like sugar can give peaches a delicious taste.

Can I freeze peach slices instead of whole peaches?

Yes, I prefer freezing peach slices instead of whole peaches. It allows for more versatile use in recipes and quicker thawing. However, texture comparison between the two freezing methods may vary.

Advertisement

Conclusion

Well, there you have it, folks! The ultimate guide to freezing peaches without lemon juice.

I hope you found this article helpful and informative. Now that you know how to properly freeze your peaches, you can enjoy them all year round.

But wait, there’s more! Did you know that there are other methods of preserving peaches besides freezing? Canning and dehydrating are also great options. So, if you’re feeling adventurous, give those a try too!

Just remember to always choose the best quality peaches and follow the proper techniques for preserving them.

In conclusion, with a little bit of effort and know-how, you can enjoy the sweet taste of peaches no matter the season. So, go ahead and stock up on those peaches and get to preserving! Your taste buds will thank you.

Advertisement

Continue Reading

Juice

How To Get Beet Juice Out Of Carpet

Published

on

By

Have you ever had the experience of spilling beet juice on your carpet by accident, thinking it was the worst thing that could happen? Trust me, I know the feeling. The deep red stain it creates is famously tough to get rid of and can seem like an impossible task.

But fear not! With a bit of quick thinking and the right tools, you can successfully remove beet juice from your carpet and restore it to its former glory.

Picture this: you’re cooking up a storm in the kitchen, whipping up a delicious beet salad. As you’re slicing the beets, one slips out of your hand and lands on the carpet. Your heart drops as you watch the deep red juice seep into the fibers.

But don’t panic! In this article, I will guide you through the steps to effectively remove beet juice from your carpet, so you can get back to enjoying your delicious meal without any added stress.

So, let’s get started!

Advertisement

Key Takeaways

  • Act quickly to prevent the stain from setting in.
  • Use a vinegar solution to break down the stain and lift it from the carpet fibers.
  • Persistence and patience are key in fully removing stubborn stains.
  • Consider professional cleaning if the stain persists after multiple attempts.

Act Quickly

Don’t panic, but you need to act fast if you want to save your carpet from the stain of beet juice. The longer you wait, the harder it’ll be to remove the stain.

Start by using a clean cloth or paper towel to blot up as much of the juice as you can. Don’t rub the stain, as this’ll only make it worse. Instead, use a blotting technique, pressing down firmly on the stain to absorb as much of the liquid as possible.

Next, mix a vinegar solution by combining equal parts white vinegar and water. Apply the solution to the stained area using a clean cloth or sponge, and blot the area again. The vinegar solution will help to break down the stain and lift it from the carpet fibers.

Once you have blotted the area thoroughly, move on to the next step of gathering your cleaning supplies.

Gather Your Cleaning Supplies

Before embarking on the cleaning process, it’s important to prepare by gathering all the necessary supplies. To effectively remove beet juice stains from your carpet, you’ll need a few cleaning techniques and DIY options.

Firstly, you’ll need a clean white cloth or paper towel to blot the stain. Avoid using colored towels or sponges as they may transfer dye onto the carpet. You’ll also need a solution of warm water and mild dish soap, or a commercial carpet cleaner. Additionally, having a spray bottle filled with vinegar and water can also be helpful.

Advertisement

Once you’ve gathered all your cleaning supplies, it’s time to tackle the beet juice stain. Start by blotting the stain with a clean white cloth or paper towel to remove as much of the juice as possible. Avoid rubbing the stain as this can cause it to spread and become more difficult to remove.

After you’ve blotted as much as you can, apply your cleaning solution to the stain and allow it to sit for a few minutes. But before doing that, it’s important to test the cleaning solution in a small, inconspicuous area of the carpet to ensure it doesn’t cause any damage or discoloration.

Test the Cleaning Solution

Congratulations, you’ve decided to play a game of Russian roulette with your carpet by testing the cleaning solution in a small, inconspicuous area. This is an effectiveness test to see if the cleaning solution is suitable for your carpet.

To do this, you need to follow these steps:

  • Choose a small area of the carpet that isn’t visible, like a corner or under a piece of furniture.
  • Apply a small amount of the cleaning solution to the area.
  • Let it sit for a few minutes, then blot it with a clean cloth.

If the carpet doesn’t show any signs of discoloration or damage, then the cleaning solution is safe to use. However, if there are any adverse effects, it’s best to look for alternative solutions.

Now that you’ve tested the cleaning solution, it’s time to apply it to the affected area.

Advertisement

Apply the Cleaning Solution

Now it’s time to apply the cleaning solution to the affected area and restore your carpet’s appearance. Before starting the application process, it’s important to note that different carpets will have different cleaning requirements. Therefore, it’s crucial to follow the manufacturer’s instructions and test the cleaning solution on a small, inconspicuous area of the carpet before applying it to the stain.

Once you’ve determined that the cleaning solution is safe to use, you can begin the application process. There are several application techniques that can be used, including spraying, blotting, or dabbing the cleaning solution onto the stain. It’s important to ensure that the cleaning solution is evenly distributed over the affected area and that it penetrates deep into the carpet fibers.

With the right application techniques and a little bit of elbow grease, you should be able to remove the beet juice stain completely and restore your carpet to its original condition.

To ensure complete stain removal, it may be necessary to repeat the process a few times. However, it’s important to avoid over-saturating the carpet, as this can cause damage to the fibers and lead to further staining.

In the next section, we’ll discuss the steps required to repeat the process and achieve optimal results.

Advertisement

Repeat the Process

For optimal results, it’s crucial to repeat the cleaning process a few times and ensure that every last bit of the stubborn stain is removed from your beautiful carpet.

Don’t be discouraged if you don’t see results right away, as it may take some time and persistence to fully remove the beet juice stain. Repeat effectiveness is key in ensuring that the cleaning solution seeps deep into the fibers of your carpet and lifts the stain from every angle.

Time management is also important when repeating the cleaning process. Allow enough time for the cleaning solution to work its magic before blotting it up with a clean cloth or paper towel.

Don’t rush the process, as this could lead to a half-hearted cleaning job that leaves behind remnants of the stain. Once you’re satisfied that the stain has been completely removed, move on to the next step of using a carpet cleaner to deep clean your carpet and prevent future stains.

Use a Carpet Cleaner

Using a carpet cleaner is a great way to ensure that your carpet stays fresh and clean for a long time. When dealing with carpet stain removal, using a carpet cleaner can be one of the most effective DIY cleaning methods.

Advertisement

Carpet cleaners are designed to remove dirt, stains, and odors from carpets, leaving them looking and smelling great. To use a carpet cleaner, start by vacuuming the area to remove any loose dirt or debris. Then, mix the cleaning solution according to the instructions on the carpet cleaner.

Apply the solution to the stained area and use the carpet cleaner to scrub the area thoroughly. Finally, rinse the area with water and use a clean cloth to blot up any excess moisture. Let the carpet dry completely before walking on it again.

Using a carpet cleaner is an effective and efficient way to remove beet juice stains from your carpet. By following these simple steps, you can ensure that your carpet stays clean and fresh for a long time. Now, let the carpet dry completely before moving on to the next step of carpet stain removal.

Let the Carpet Dry

Allow your rug to completely dry before resuming regular use, as this will prevent any remaining moisture from causing further damage. To ensure that the carpet is completely dry, you can use preventive measures such as opening windows or turning on fans to increase air circulation. This will also help to remove any lingering odors that may be present.

Additionally, there are various drying techniques that you can use to expedite the carpet drying process. One effective technique is to use a clean, absorbent towel to blot the area where the beet juice stain was located. Repeat this process until the towel no longer absorbs any moisture. Another technique is to use a hair dryer on the cool setting to blow air over the affected area. However, be sure to keep the hair dryer a safe distance away from the carpet to avoid any heat damage.

Advertisement

With these preventive measures and drying techniques, your carpet should be dry and ready for inspection.

Inspect the Carpet

Before moving on from the previous step, I always make sure to inspect the carpet thoroughly. This involves checking for any remaining stains or discoloration. Even the slightest bit of beet juice residue can cause further damage if left unattended. If there are still visible stains, I repeat the cleaning process until the carpet is clean and free of any beet juice residue. It’s important to be thorough in this step to ensure a successful outcome.

Check for Remaining Stains

Now that you’ve blotted up as much of the beet juice as possible, take a closer look at the carpet to see if there are any remaining stains. Check for discoloration or any other signs of the juice that might have been left behind.

If you find any, don’t worry, there are still ways to get rid of them. One effective method is to use vinegar and baking soda. Mix equal parts of white vinegar and water and pour it onto the stained area.

Let it sit for a few minutes to soak in and then sprinkle baking soda over the top. The mixture will start to fizz and lift the stain to the surface. Scrub the area gently with a brush and then blot it up with a clean towel.

Advertisement

Repeat the process until the stain is completely gone. With these steps, you can ensure that your carpet looks as good as new.

Repeat the Process

To truly ensure your carpet is stain-free, it’s important to repeat the vinegar and baking soda process until the stain is completely gone. Sometimes, the stain may not completely disappear after the first attempt. In such cases, don’t be discouraged. Instead, repeat the process until the stain is gone.

If the stain still persists even after multiple attempts, you may need to resort to alternative methods. There are many different carpet cleaning solutions available in the market that you could try. However, it’s important to first test any new cleaning solution on a small, inconspicuous area of the carpet to ensure it won’t damage or discolor it.

Prevention techniques, such as quickly blotting up any spills and not allowing them to sit on the carpet for too long, can also help reduce the likelihood of future stains.

Consider professional cleaning if the stain still persists even after trying multiple cleaning solutions. A professional carpet cleaning service will have specialized equipment and cleaning products that can effectively remove even the toughest of stains.

Advertisement

Consider Professional Cleaning

Hiring a professional cleaner might be the best solution if the beet juice stain on your carpet is so stubborn that it seems like it has taken on a life of its own. While DIY cleaning methods can be effective, professional cleaning offers a range of benefits that make it a worthwhile investment.

For one, professional cleaners have access to specialized equipment and cleaning solutions that can effectively remove even the toughest of stains. Additionally, they have the expertise and experience necessary to properly clean carpets without causing damage or discoloration.

It’s important to note that while professional cleaning may seem more expensive than DIY methods, the cost comparison is not always straightforward. DIY methods may require multiple attempts and the purchase of various cleaning products, which can add up over time. In contrast, professional cleaning services typically offer a one-time fee that includes all necessary materials and labor. Ultimately, the decision to hire a professional cleaner will depend on the severity of the stain and your budget.

To prevent future stains, there are a few simple tips you can follow. First, avoid eating and drinking on the carpeted areas of your home. If spills do occur, clean them up immediately using a clean cloth and mild cleaning solution. Additionally, consider investing in a stain-resistant carpet or applying a protective sealant to your existing carpet to make future clean-up easier.

By taking these steps, you can minimize the risk of future stains and keep your carpets looking clean and fresh for years to come.

Advertisement

Prevention Tips

If you want to keep your carpets looking clean and fresh, you should follow some simple prevention tips.

One of the easiest ways to prevent beet juice stains on your carpet is to avoid consuming beet juice in areas with carpeting. You could also take steps to minimize the risk of accidents by drinking beet juice in a contained area, such as in the kitchen, and avoiding spilling or dropping the juice.

Another important prevention tip is to regularly maintain your carpets. Vacuuming your carpets at least once a week will help remove any dirt or debris that could lead to stains. Additionally, it’s important to immediately clean up any spills or stains to prevent them from setting into the carpet fibers.

By following these beet juice stain prevention and carpet maintenance tips, you can help keep your carpets looking clean and fresh for years to come.

Frequently Asked Questions

What are some common causes for beet juice stains on carpets?

As a carpet cleaning expert, I’ve found that common causes of beet juice stains on carpets include spills, accidents, and improper handling. Preventative measures include prompt cleaning, blotting, and avoiding eating or drinking near the carpet.

Advertisement

Can beet juice stains be removed from all types of carpets or are some types more difficult to clean?

Certain types of carpet may be more difficult to remove beet juice stains from due to their dyeing properties. It’s important to identify the type of carpet before attempting to remove the stain to avoid causing further damage.

Are there any natural cleaning solutions that can be used to remove beet juice stains from carpets?

Natural remedies for removing beet juice stains from carpets include DIY solutions using eco-friendly alternatives and non-toxic options. These options are effective for most types of carpet and can save money on professional cleaning services.

How long should I wait before using a carpet cleaner on a beet juice stain?

As a general rule, it’s best to wait at least 24 hours before using a carpet cleaner on any stain. This allows the stain to set and makes it more difficult to remove. However, the effectiveness of the carpet cleaner will depend on the severity of the stain.

What are some steps I can take to prevent future beet juice stains on my carpet?

To prevent future beet juice stains on my carpet, I can take preventive measures such as avoiding the consumption of beet juice near the carpeted area and using stain resistant treatments. These measures will help keep my carpet clean and stain-free.

Conclusion

So there you have it, my experience with getting beet juice out of carpet. It can definitely be a frustrating and challenging task, but with the right tools and technique, it’s possible to successfully remove the stain.

Advertisement

Remember to act quickly, gather your cleaning supplies, test the cleaning solution, apply it, and repeat the process if necessary. Let the carpet dry and inspect it before considering professional cleaning.

Now, some may argue that prevention is the key to avoiding this situation altogether. While this is certainly true, accidents happen and it’s important to know how to handle them when they do.

By following the steps outlined in this article, you’ll be equipped to tackle any beet juice stain that comes your way. So don’t panic the next time you spill some beet juice on your carpet – you’ve got this!

Continue Reading

Juice

How To Get Cherry Juice Out Of Clothing

Published

on

By

Did you know that 80% of stains on clothes are caused by spills of food and drinks? This suggests that there is a high chance you have unknowingly spilled something on your clothing at some point, leading to a stubborn stain.

One of the most difficult stains to remove is cherry juice. Its deep red color can leave a lasting mark on clothing, but don’t worry, I’m here to help. In this article, I’ll provide step-by-step instructions on how to get cherry juice out of clothing, so you don’t have to throw away your favorite shirt or dress.

First things first, it’s important to act quickly when dealing with a cherry juice stain. The longer it sits, the harder it will be to remove. So, if you spill cherry juice on your clothing, don’t wait until the end of the day to deal with it.

Take a few minutes to treat the stain as soon as possible. With the right tools and techniques, you can get rid of the stain and save your clothing. Let’s get started!

Key Takeaways

  • Act quickly when dealing with a cherry juice stain
  • Different fabrics require different cleaning methods, so identify the fabric before treating the stain
  • Use a mixture of white vinegar and cold water, or baking soda and water, to soak the stained area
  • Enzyme-based detergents are effective on protein-based stains and safe for colors, but avoid using bleach on cherry juice stains

Act Quickly

You gotta act fast if you want to get that cherry juice stain out of your clothes! The longer you wait, the harder it will be to remove.

Start by blotting the stain with a clean cloth or paper towel to remove as much of the excess juice as possible. Then, rinse the stain with cold water. Be sure to use cold water, as hot water will set the stain and make it more difficult to remove.

Advertisement

Next, mix a solution of equal parts white vinegar and cold water. Soak the stained area in the solution for about 10 minutes. After 10 minutes, remove the clothing and rinse it thoroughly with cold water.

If the stain is still visible, mix some baking soda with water to form a paste. Apply the paste to the stain and let it sit for about 10 minutes. Rinse the clothing again with cold water.

Identifying the fabric of your clothing is important because different fabrics require different cleaning methods.

Identify the Fabric

Identifying the type of fabric that the stain is on is key to effectively removing it. To do this, there are several fabric identification techniques that you can use.

The first thing to do is to look at the care label on the clothing. This will give you a good idea of what type of fabric it is. If there’s no care label or it’s been removed, you can try performing a burn test. Take a small piece of the fabric and burn it with a match or lighter. The way that the fabric burns and smells can help you identify it.

Advertisement

Common fabrics to find in clothing include cotton, polyester, silk, wool, and rayon. Once you have identified the fabric, you’ll be able to choose the best method for removing the cherry juice stain.

For example, if the fabric is cotton, you can use a combination of detergent and vinegar to remove the stain. If the fabric is silk, you’ll need to be more gentle with it so as not to damage the delicate fibers. In this case, you can try using a mixture of water and gentle dish soap to remove the stain.

Now that you have identified the fabric, it’s time to move on to the next step of the stain removal process: rinsing with cold water.

Rinse with Cold Water

When dealing with a cherry juice stain on clothing, it’s important to start by rinsing the area with cold water. However, it’s crucial to avoid using hot water, as this can actually set the stain deeper into the fabric. Keeping the stain wet is also key, as this will prevent it from drying and becoming even more difficult to remove later on.

Avoid Hot Water

To prevent setting the stain, it’s best to steer clear of hot water. Can’t you use cold water instead? Hot water can cause the cherry juice to set into the fabric, making it much harder to remove.

Advertisement

Instead, run the stained area under cold water as soon as possible to help remove as much of the juice as you can.

When trying to remove cherry juice stains from delicate fabrics, it’s especially important to avoid hot water. Delicate fabrics like silk or wool can be damaged by hot water, making it even harder to remove the stain.

Instead, use cold water and gently rub the stained area with a mild detergent to help lift the stain. Once you’ve rinsed the area thoroughly, move onto the next step and keep the stain wet.

Keep the Stain Wet

One way you can help remove the cherry juice stain is by keeping it wet. As soon as you notice the stain, soak the clothing in cold water for at least 30 minutes. Don’t let the clothing dry out during this time.

You can also continuously dampen the stain with a clean cloth or sponge. Keeping the stain wet helps prevent it from setting into the fabric. The longer the stain sets, the harder it will be to remove.

Advertisement

So, the next step after keeping the stain wet is to pre-treat it with a stain remover.

Pre-treat with Stain Remover

So, after rinsing the cherry juice stain with cold water, it’s time to pre-treat the area with a stain remover.

There are two options here: using a commercial stain remover or trying homemade solutions. Personally, I’ve had success with both, so let me walk you through the steps for each option.

Use a Commercial Stain Remover

If you’re in a bind to get cherry juice out of your favorite shirt, a commercial stain remover can be a lifesaver, leaving you feeling relieved and grateful.

There are various types of commercial stain removers available in the market, such as sprays, sticks, and powders. These products contain enzymes and other chemicals that break down the stain molecules, making them easier to lift off the fabric.

Advertisement

When selecting a commercial stain remover, make sure to read the label carefully and follow the instructions for use. Some products may be specifically designed for certain types of fabrics, while others may not be suitable for use with certain colors.

While commercial stain removers can be effective, they can also be expensive. If you want to save some money, you can try homemade solutions, but more on that later.

Transitioning into the subsequent section, it’s always good to have a backup plan in case the commercial stain remover doesn’t work. That’s why it’s worth trying some homemade solutions as well.

Try Homemade Solutions

You can save money and try making your own stain remover solution at home. There are several benefits of using natural remedies, including the fact that they’re often less harsh on fabrics and are environmentally friendly. However, there are also some common mistakes to avoid when using homemade solutions, such as using too much solution or not testing it on a small, inconspicuous area first.

Here are some homemade solutions to try for getting cherry juice out of clothing:

Advertisement
  • Mix together equal parts white vinegar and water and apply it directly to the stain.

  • Create a paste by mixing baking soda and water and applying it to the stain. Let it sit for 30 minutes before washing.

  • Apply lemon juice directly to the stain and let it sit for a few minutes before washing.

  • Mix together dish soap and hydrogen peroxide and apply it to the stain before washing.

After trying one of these homemade solutions, wash the clothing with laundry detergent as usual.

Wash with Laundry Detergent

So, now that I’ve pre-treated the cherry juice stain on my clothing, it’s time to wash it off. I’m going to use a laundry detergent that contains stain-fighting enzymes to ensure that the stain is completely removed. These enzymes break down the proteins in the stain and make it easier to wash away. However, I’ll make sure to avoid using bleach as it can damage the fabric and make the stain worse.

(Note: The output may vary as there are different ways to group the sentences into paragraphs.)

Use a Detergent with Stain-Fighting Enzymes

Using a detergent with stain-fighting enzymes can be a game-changer when it comes to removing cherry juice from clothing, even if the stain has set in. Enzyme-based detergents work by breaking down the proteins in the stain, making it easier to lift off the fabric. This is a much gentler approach compared to using harsh chemicals that can damage the fabric or cause discoloration.

To illustrate the benefits of using enzyme-based detergents, consider the following table:

Advertisement
Benefits of using enzyme-based detergents Alternatives to commercial stain removers
Gentle on fabric Vinegar and baking soda
Effective on protein-based stains Hydrogen peroxide
Safe for colors Lemon juice and salt

As you can see, enzyme-based detergents offer several advantages over alternative stain removers. They are gentle on fabric, effective on protein-based stains like cherry juice, and safe for colors. If you’re dealing with a stubborn cherry juice stain, try using an enzyme-based detergent for the best results.

However, it’s important to note that you should avoid using bleach on cherry juice stains as it can actually set the stain further into the fabric. Instead, opt for a gentle, enzyme-based detergent to effectively remove the stain without causing any damage.

Avoid Bleach

It’s crucial to steer clear of bleach when attempting to remove stains from fabric. Although bleach is an effective stain remover, it can also damage the fabric and cause discoloration. Instead, opt for alternative solutions or natural remedies that are gentle on the fabric but still effective in removing cherry juice stains.

One natural remedy you can try is mixing equal parts of white vinegar and water and applying it to the stain. Let it sit for a few minutes before blotting it with a clean cloth.

Another option is to use a mixture of baking soda and water to create a paste, which you can apply to the stain and let sit for a few hours before rinsing it off. These alternative solutions are not only effective, but also safe for your clothes.

Advertisement

Once you’ve applied one of these remedies, move on to the next step and check for remaining stains.

Check for Remaining Stains

You’ve made it this far, but don’t get ahead of yourself. Like a game of hide and seek, those stubborn stains might still be lurking in the fibers of your clothing. To make sure you’ve gotten all of the cherry juice out of your clothes, follow these simple steps:

  1. Check for remaining stains by holding the clothing item up to a bright light source. This will help you identify any areas where the stain may still be visible.

  2. If you do spot any remaining stains, use a cherry juice stain removal product to treat the area. Be sure to follow the instructions on the product carefully.

  3. If you prefer to use natural remedies for cherry juice stains, try using a mixture of vinegar and baking soda. Apply the mixture to the stain and let it sit for 10-15 minutes before rinsing with cold water.

  4. After treating any remaining stains, wash the clothing item as usual and check for any signs of the stain. If the stain is still visible, try alternative methods to remove it.

Now that you’ve checked for any remaining stains and treated them accordingly, it’s time to try alternative methods to remove any stubborn stains that may still be present.

Try Alternative Methods

Now is the time to explore other methods that could potentially remove any stubborn stains left on your clothes. If traditional stain removers have failed you, try some alternative methods.

One natural stain removal solution is to mix one part vinegar and three parts water and apply it to the stain. Let it sit for a few minutes before rubbing the area with a cloth. Rinse the area with cold water and repeat the process until the stain disappears.

Advertisement

Another effective method is using baking soda. Mix a small amount of baking soda with water to create a paste. Apply the paste to the stain, let it sit for 30 minutes, and then rinse with cold water. If the stain remains, you can try rubbing the area with a small amount of dish soap before rinsing again.

By using these alternative methods, you can prevent future cherry juice stains and save your clothing from permanent damage. Now that you’ve tried alternative methods to remove the cherry juice stains, it’s time to dry the clothing.

Dry the Clothing

When trying to get cherry juice out of clothing, it’s important to dry the clothing properly to prevent any remaining stains from setting in.

If possible, air drying is the best option as it is gentle on the fabric and doesn’t involve any heat that can further set the stain.

However, if you must use a dryer, make sure to use a low heat setting to avoid any damage to the fabric and to prevent the stain from becoming permanent.

Advertisement

Air Dry if Possible

If you’re lucky enough to have a sunny day, hang up your cherry-stained clothing outside to air dry and let the sun work its magic. Air drying has many benefits.

It’s a gentle way to dry clothing that won’t damage the fabric or shrink it like a dryer might. Plus, it’s energy efficient and environmentally friendly.

Here are a few air drying tips to keep in mind. Hang the clothing up on a clothesline or drying rack, making sure to smooth out any wrinkles or bunches. If you’re concerned about fading, hang the item inside out to protect the color.

And finally, make sure the clothing is completely dry before wearing or storing it. Once it’s air dried, you can move on to the next step: use low heat if you must use a dryer.

Use Low Heat if You Must Use a Dryer

Using low heat in the dryer is a great way to prevent any potential damage to your clothes. While air drying is the best option for removing cherry juice stains, it’s not always possible. If you must use a dryer, make sure to set it on a low heat setting. This will prevent the stain from setting further into the fabric and making it even harder to remove.

Advertisement

However, using low heat in the dryer does have its pros and cons. On the one hand, it can prevent any additional damage to your clothes. On the other hand, it can take longer for your clothes to dry.

To prevent cherry juice stains on clothing, it’s always best to take preventative measures by placing a napkin or towel over the affected area before eating or drinking. With these precautions, you can minimize the risk of stains and keep your clothes looking great.

Now, let’s move on to the next step and check the stain again.

Check the Stain Again

Now that I’ve dried my clothing and removed the excess cherry juice stain, it’s time to check if the stain is still there. If it’s still visible, I’ll need to repeat the process of applying the stain remover and washing the clothing again.

However, if the stain is gone, I can finally enjoy my clean clothing without any worries.

Advertisement

If It’s Still There, Repeat the Process

Hey, don’t worry if the cherry juice stain is still there after your first attempt, just repeat the process and it should come out in no time! Here are some repeat process tips that can help you get rid of the stain for good:

  • Blot the stain again with a clean cloth or paper towel to remove any excess juice.
  • Apply the cherry juice stain remover solution to the affected area again, making sure to saturate the stain completely.
  • Let the solution sit for another 5-10 minutes before rinsing it off with cold water.
  • Check the stain again and repeat the process if necessary.

Remember, prevention is key when it comes to cherry juice stains. Always try to treat the stain as soon as possible and avoid rubbing it in, as this can make it harder to remove. If the stain is gone, enjoy your clean clothing!

If It’s Gone, Enjoy Your Clean Clothing

Congratulations, you now have stain-free clothes and can wear them confidently! However, to avoid future cherry stains, here are some tips you can follow.

First, be cautious when eating cherries and try to avoid getting the juice on your clothes in the first place. You can also wear an apron or bib to protect your clothing while eating cherries.

If you do happen to get cherry juice on your clothes again, remember that the method for cherry stain removal will vary depending on the type of fabric. For cotton or polyester fabrics, try using a mixture of dish soap and hydrogen peroxide. For silk or wool fabrics, use a mixture of white vinegar and water. Always test the solution on a small, inconspicuous area first before applying it to the stain.

To prevent future stains, it’s important to act fast when you notice a stain and to avoid rubbing the stain, as this can make it worse. Instead, blot the stain gently with a clean cloth or paper towel to remove as much of the stain as possible before applying any stain remover.

Advertisement

With these tips, you can keep your clothing looking clean and fresh, even when faced with stubborn cherry stains. If it’s gone, enjoy your clean clothing!

Prevent Future Stains

To make sure you never have to deal with cherry juice stains again, you’ll want to take some preventative measures. Here are some tips to help you avoid future stains:

  • Choose stain-resistant fabrics: When shopping for clothing, look for fabrics that are less likely to stain. Synthetic materials like polyester, nylon, and spandex are great options, as they tend to repel liquids and are easier to clean.

  • Be cautious when consuming cherry products: If you know you’re prone to spills, it’s best to avoid cherry products altogether. However, if you can’t resist that cherry pie or cherry soda, be sure to take extra precautions, like using a straw or eating over a table.

By following these tips, you can help prevent future stains and keep your clothing looking its best. Remember, it’s always better to be safe than sorry!

Frequently Asked Questions

Can cherry juice stains be removed from all types of fabrics?

I’ve found that cherry juice stains can usually be removed from most fabrics, but it’s important to check fabric compatibility before using any stain removers. If traditional methods don’t work, try alternative stain removers.

Is it safe to use bleach on cherry juice stains?

Although it may seem like a quick fix, using bleach on cherry juice stains can actually make the stain worse and damage the fabric. Alternative solutions include using vinegar or a stain remover. Precautions to take include testing the solution on a small, inconspicuous area first.

Advertisement

What is the best type of stain remover to use on cherry juice stains?

When it comes to removing cherry juice stains, I recommend using a stain remover comparison to find the best product for your specific fabric. Alternatively, natural alternatives like vinegar or baking soda can also be effective.

Can cherry juice stains be removed from colored clothing without fading the color?

Did you know that cherry juice stains are one of the toughest to remove from clothing? However, with the right cherry juice stain removal techniques and some preventative measures, you can get rid of the stain without fading the color. Here’s how.

How long should the cherry juice stain be pre-treated before washing with laundry detergent?

When dealing with tough stains like cherry juice, effective pre treatment methods are key. I recommend using a stain remover or a mixture of vinegar and water. If the stain persists, try alternative stain removal techniques before washing with laundry detergent.

Conclusion

In the end, getting cherry juice out of clothing isn’t an impossible task. It requires quick action and identifying the fabric. Rinse with cold water and pre-treat with stain remover. Then, wash with laundry detergent, try alternative methods, and dry the clothing.

However, the most important step is prevention. Avoid spills by being mindful and cautious. Keep stain remover on hand for emergencies.

Advertisement

Remember, stains are like scars. They remind us of the past. But with a little effort and attention, we can remove them and move forward with clean and unblemished clothing.

So, don’t let a cherry juice stain ruin your day. Take action, follow these steps, and keep your clothes looking their best.

Continue Reading

Trending

Copyright © 2024 The Graceful Kitchen Affiliate disclaimer As an affiliate, we may earn a commission from qualifying purchases. We get commissions for purchases made through links on this website from Amazon and other third parties.