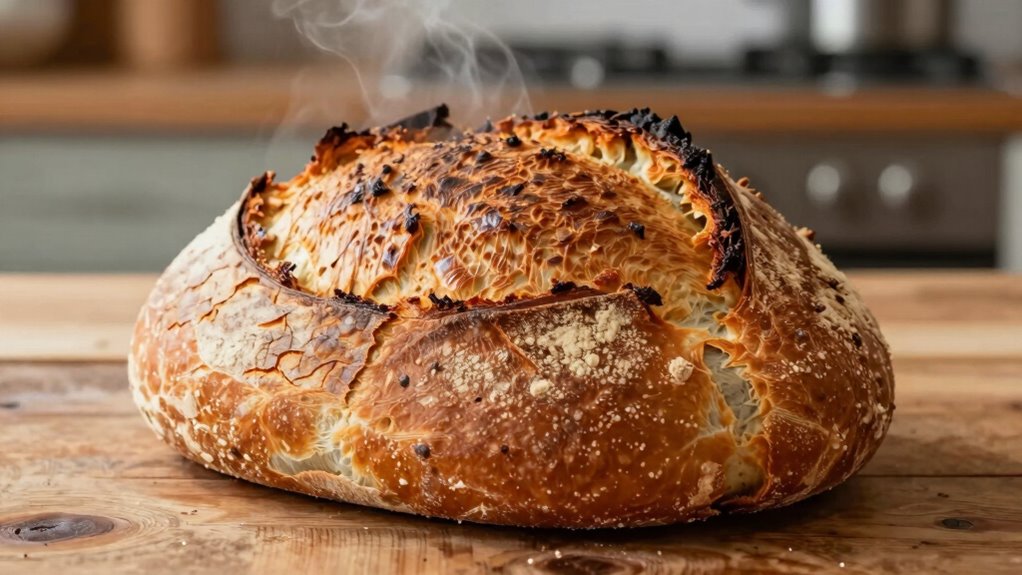

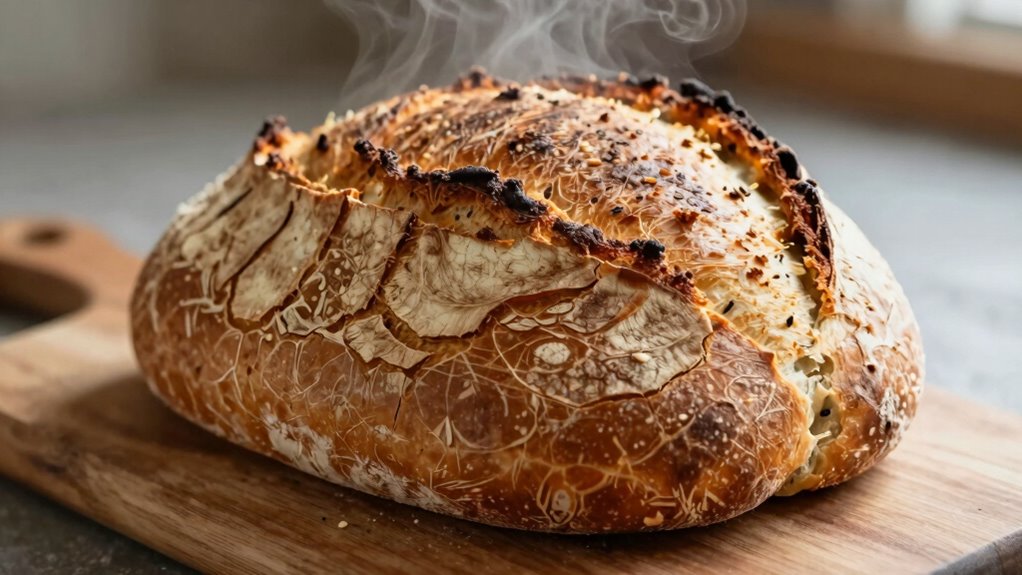
To achieve a crispy crust on Dutch oven bread without fancy gear, focus on high-quality flour, proper fermentation, and shaping your dough with surface tension. Preheat your Dutch oven thoroughly and create steam by using the lid or adding water or ice during baking. Maintain a hot oven at around 450°F and don’t open it early. With simple tweaks, you’ll release bakery-style crusts—learn more tips to perfect your technique.
Key Takeaways
- Preheat your Dutch oven thoroughly and bake with the lid on initially to trap steam and develop a crispy crust.
- Use high-quality bread or whole-grain flours and proper dough fermentation for better crust formation and flavor.
- Create steam during baking by placing water in the oven, using a hot tray, or spraying water to enhance crust crispness.
- Ensure proper dough shaping and surface tension; score the loaf to allow even expansion and crust development.
- Maintain your Dutch oven’s seasoning and handle it gently after baking to ensure long-term crust quality.
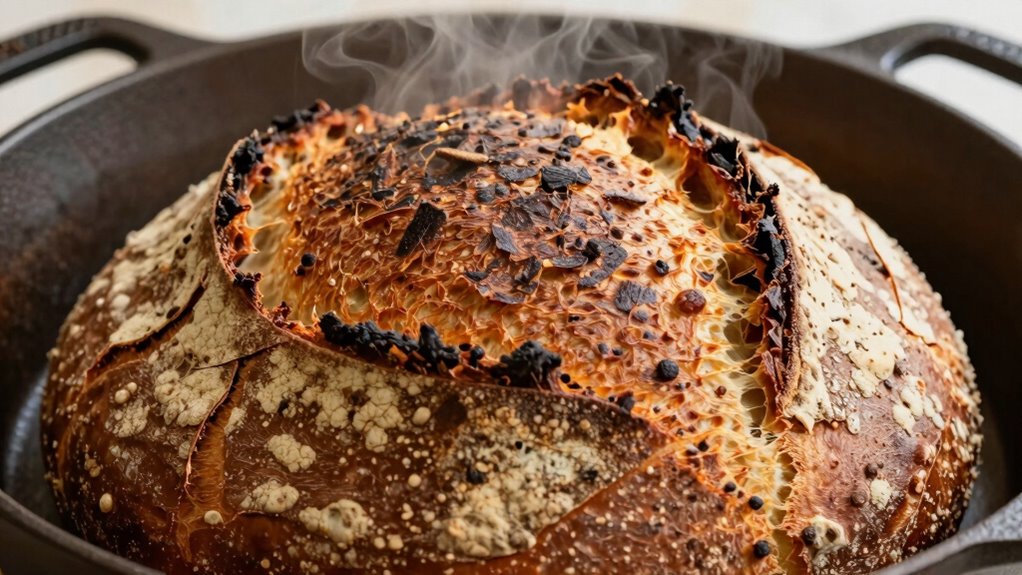
Why a Crispy Crust Is Key to Great Dutch Oven Bread
A crispy crust is essential for truly great Dutch oven bread because it enhances flavor, texture, and visual appeal. Achieving this starts with careful grain selection; using high-quality, whole-grain or bread flours helps develop a robust crust. The fermentation process plays a crucial role too—longer fermentation allows gluten to strengthen and creates gases that contribute to crust formation. Properly fermented dough develops surface tension, which is vital for a crisp exterior. When you bake in a preheated Dutch oven, the intense heat causes the dough’s surface to rapidly dehydrate and caramelize, forming that desirable crunchy crust. Additionally, choosing the right grain quality ingredients can complement your bread and elevate your meal experience. This combination of thoughtful grain choice and a well-managed fermentation process ensures your bread develops the perfect crust, making it irresistible and visually appealing.
Essential Ingredients for Making Perfect Dutch Oven Bread
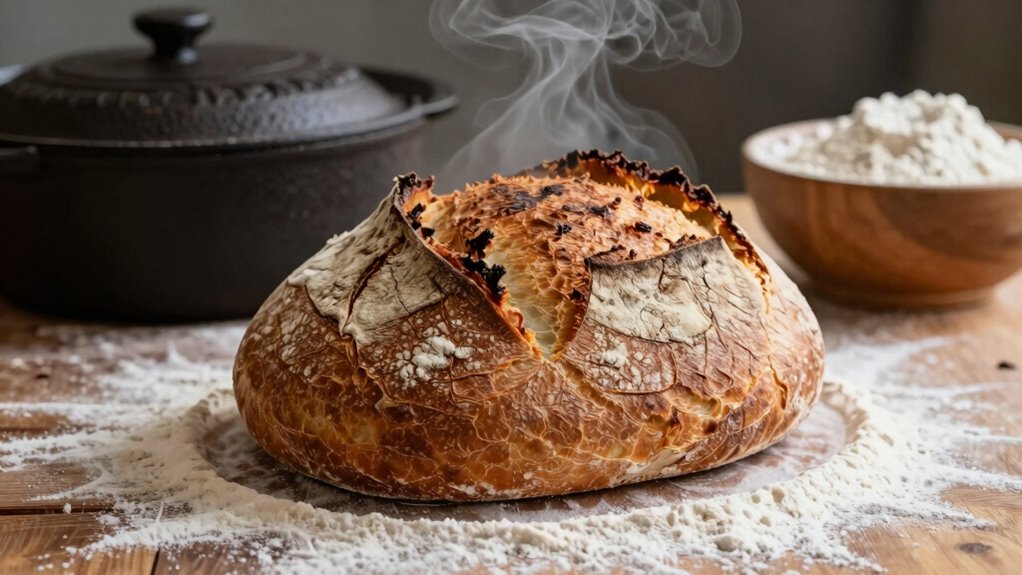
What are the vital ingredients that transform simple flour and water into perfect Dutch oven bread? You need just a few: high-quality bread flour, water, salt, and yeast. These basic ingredients create a strong gluten network, giving your bread structure and chew. For a professional finish, proper bread scoring is essential—it allows your bread to expand evenly in the oven and prevents uncontrolled bursting. Oven placement also matters; you should preheat your Dutch oven along with your oven to ensure a hot, even environment that promotes a crispy crust. Sometimes, a small amount of sugar or malt can help with browning, but the core ingredients remain simple. Focus on these essentials, and you’ll achieve bakery-quality results every time.
How to Prepare and Shape Your Dough for Best Results
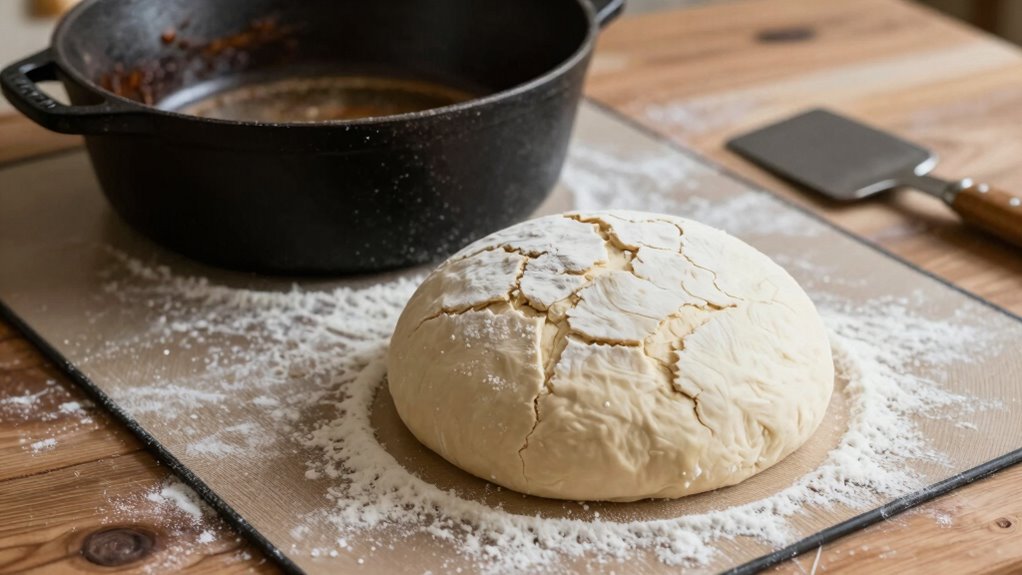
Once your dough has rested and developed its gluten structure, shaping it properly sets the stage for a perfect bake. Good dough shaping creates surface tension, leading to a better rise and crispy crust. To do this effectively, follow these steps:
Proper shaping develops surface tension for a better rise and crust.
- Shape with confidence: Gently pull the dough edges inward, forming a tight ball or loaf, ensuring surface tension. Developing proper artistic expression can also help you feel more confident in your technique. Paying attention to dough tension techniques can improve your shaping results. Additionally, understanding gluten development can help you optimize the dough’s elasticity and strength. Building dough strength through proper shaping is essential for a professional-looking loaf.
- Use proper proofing techniques: Let it proof until it’s slightly puffy and passes the finger dent test—about 1-2 hours, depending on room temperature.
- Prepare for baking: Place the shaped dough on parchment, seam side down, and cover loosely. This prevents skin formation and maintains moisture for even proofing. Maintaining the right wave and wind conditions during baking can also enhance the crust’s texture and overall quality.
Achieving the Right Oven Temperature for Crispy, Even Baking
To achieve that perfect crispy crust and evenly baked bread, it’s essential to set your oven to the right temperature. An ideal oven temperature for Dutch oven bread is usually between 450-500°F. Using a thermometer helps you monitor and maintain this temperature accurately, ensuring consistent heat distribution. Proper heat distribution allows the bread to develop a uniform crust while baking through evenly. Preheating your Dutch oven along with the oven ensures the heat is concentrated and stable when you place the dough inside. Avoid opening the oven frequently during the initial baking stage, as this can cause temperature drops. Maintaining the correct oven temperature and even heat distribution is key to achieving a beautifully crisp crust and a perfectly baked loaf.
How to Create Steam in Your Oven Without Special Equipment

You can create steam in your oven by simply adding water during the baking process. Relying on oven steaming helps develop a crispy crust without extra equipment. Using your Dutch oven lid to trap moisture is an easy way to generate steam naturally. Incorporating adaptive lighting features can help you better monitor the baking process and achieve optimal results. Additionally, understanding air quality can influence how you manage moisture and ventilation during baking to ensure a healthier kitchen environment. Managing humidity levels effectively can also prevent excess moisture buildup that might affect indoor air quality during baking, and considering proper sound vibrations can enhance your awareness of baking progress through auditory cues. Being mindful of baking environment conditions can further improve your results and consistency.
Rely on Oven Steaming
Creating steam in your oven doesn’t require fancy equipment—just a simple approach that works with what you already have. Relying on oven steaming boosts oven moisture, which is key for good crust formation. Here are three effective methods:
- Place a metal baking tray on the lower rack before preheating, then pour hot water into it just before loading the bread.
- Spray water into the oven walls using a spray bottle during the initial baking minutes.
- Add ice cubes to a preheated skillet at the oven’s bottom to generate quick steam.
- Understanding the importance of oven humidity can help you optimize your steaming techniques for better crust development. Maintaining proper oven humidity levels supports consistent crust quality and enhances browning. Additionally, controlling baking environment factors can lead to more reliable results. Being aware of humidity control techniques allows bakers to fine-tune their oven conditions for optimal bread crusts. Monitoring steam generation methods can further improve your baking outcomes.
These techniques create a humid environment, helping your bread develop a crispy, well-formed crust without any special gear. Just remember, quick and consistent steam is what makes the difference.
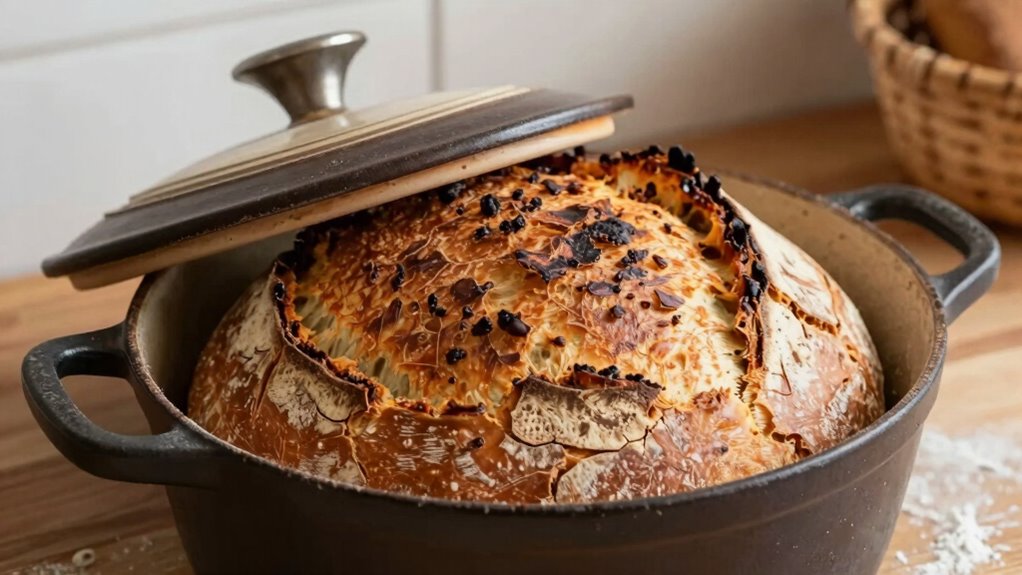
Use a Dutch Oven Lid
Using a Dutch oven lid is a simple way to trap steam and boost crust formation without any extra equipment. When you place your dough inside the Dutch oven and cover it, the lid creates a sealed environment that holds moisture released during baking. This trapped steam helps keep the dough surface moist initially, allowing the bread to expand fully and develop a crispy, golden crust. The Dutch oven lid effectively mimics professional steam-injected ovens, promoting even heat distribution and ideal crust development. To maximize results, preheat the Dutch oven with the lid on, then carefully transfer your dough inside. Covering the dough during baking ensures consistent steam, resulting in a beautifully crispy crust without the need for fancy gear or additional tricks.
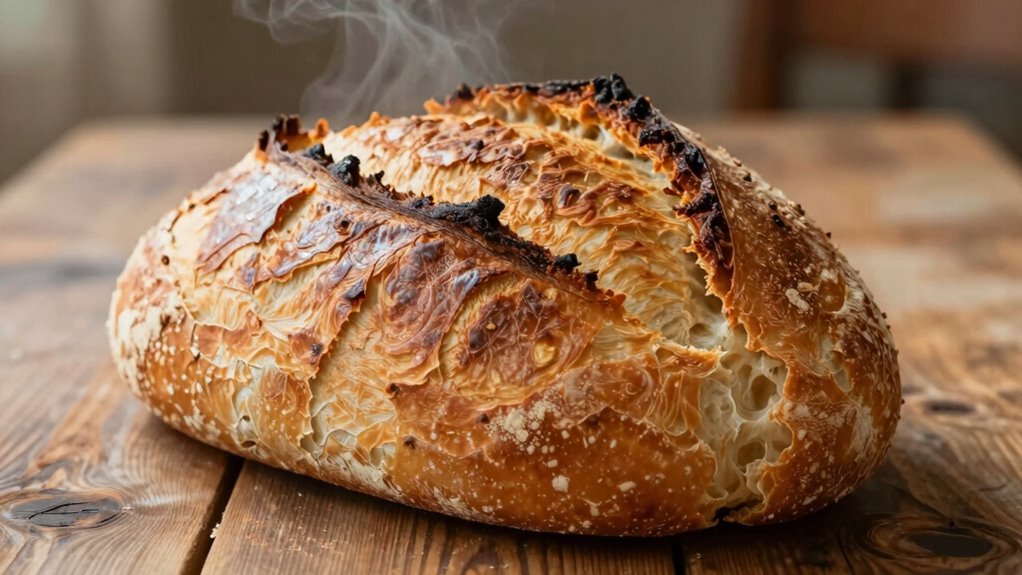
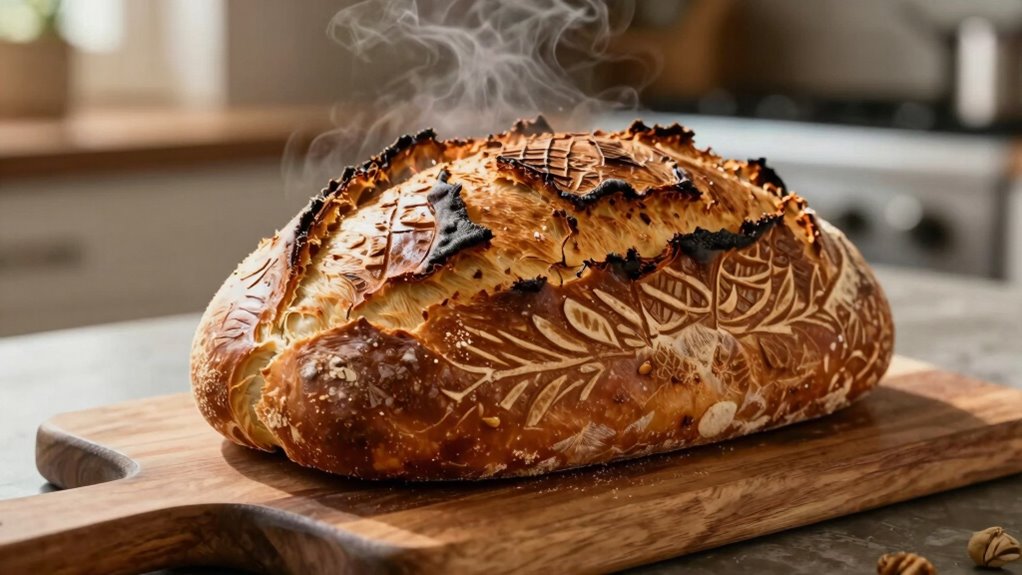
Step-by-Step: Baking Your Dutch Oven Bread for That Perfect Crust
To achieve that irresistible, crispy crust, preheat your Dutch oven thoroughly before baking. Proper preheating ensures even heat distribution, promoting ideal crust formation. Follow these steps for perfect results:
- Preheat your oven to 450°F (232°C) with the Dutch oven inside for at least 30 minutes. This high oven temperature creates the ideal environment for crust formation.
- Carefully remove the hot Dutch oven using oven mitts, then place your dough inside. Cover with the lid to trap steam, essential for a crispy crust.
- Bake for 30-35 minutes, then uncover and bake for an additional 10 minutes to deepen the crust color and crispness. Proper oven temperature control ensures consistent crust development.
Troubleshooting Common Crust Problems and Easy Fixes

Even with careful preheating and proper baking techniques, you might encounter issues with your bread’s crust. One common problem is a crust that’s too soft or chewy, often caused by low oven humidity. To fix this, try adding steam during the initial bake—place a tray of water in the oven or spritz water into the oven at the start. This increases oven humidity, helping develop a crisp, glossy crust. If your crust is too thick or hard, it might be due to overbaking or too high oven temperature. Adjust by lowering the temperature slightly or reducing baking time. Also, ensure your dough is properly hydrated; a wetter dough creates a better crust texture. Small tweaks can markedly improve your bread’s crust, making it perfectly crispy and satisfying. Additionally, using proper oven techniques can help you control crust outcomes more consistently. Being aware of cloud service outages can also remind bakers to have contingency plans for their baking schedules in case of unexpected disruptions. Moreover, understanding how oven temperature impacts crust formation can guide you in fine-tuning your baking process for optimal results. Furthermore, paying attention to thermal behavior during baking can improve your ability to predict and control crust quality. Remember that baking environment moisture levels also play a role in crust development and can be adjusted for better results.
Tips for Flavor Variations and Customizing Your Dutch Oven Bread
Adding flavor variations to your Dutch oven bread is a simple way to customize it to your taste. You can achieve this through flavor infusion or ingredient swaps that enhance the bread’s uniqueness. Here are some tips:
Customize your Dutch oven bread easily with herbs, olives, nuts, or flour swaps for unique flavors.
- Mix in herbs like rosemary, thyme, or basil to add aromatic flavor.
- Incorporate ingredients such as olives, sun-dried tomatoes, or nuts for texture and taste.
- Swap part of the flour with whole wheat, rye, or spelt for a different flavor profile and nutritional boost.
These simple adjustments let you tailor your bread without complicating the process. Experimenting with different ingredients helps you discover new favorites and keeps your baking exciting. Just remember to balance flavors and maintain proper hydration for the best results.
Caring for Your Dutch Oven to Keep Baking Perfect Loaves
Taking good care of your Dutch oven guarantees it performs beautifully and lasts for years. Start by maintaining proper Dutch oven seasoning; after each use, clean it gently without soap, and apply a thin layer of oil before storing to prevent rust. Proper lid maintenance is essential—check the lid fit regularly and clean it thoroughly to ensure a tight seal, which helps retain moisture and develop that crispy crust. Avoid harsh scrubbing, as it can remove the seasoning. Instead, use a soft brush or sponge. When storing, keep the lid slightly ajar to prevent moisture buildup. Regularly re-season your Dutch oven as needed, especially if the surface looks dull or starts to chip. Additionally, using the correct cleaning tools and techniques, such as a soft-bristled brush or sponge, preserves the seasoning layer more effectively. To further protect your Dutch oven, consider using protective covers when not in use, especially during harsh weather. With proper care, your Dutch oven will continue to bake perfect, crusty loaves for years to come.
Frequently Asked Questions
Can I Make Dutch Oven Bread Without a Cast Iron Dutch Oven?
Yes, you can make Dutch oven bread without a cast iron Dutch oven by using alternative cookware like a heavy-duty stainless steel or ceramic pot with a tight-fitting lid. Just verify it can withstand high oven temperatures. Use proper bread shaping techniques to create surface tension, and add a baking sheet or pan underneath to catch drips if needed. This method helps achieve that crispy crust and rustic look you’re after.
How Long Can I Store Freshly Baked Dutch Oven Bread?
Your freshly baked Dutch oven bread is like a treasure chest meant to stay fresh. Store it in an airtight container or wrap it tightly with plastic wrap, then keep it at room temperature for up to 2 days, preserving its crust and softness. For longer storage, freeze it, and enjoy the bread’s freshness and flavor for up to 3 months. Just reheat to rekindle that bakery aroma and crunch.
Is It Necessary to Use Bread Flour or Can I Substitute?
You don’t have to use bread flour; you can definitely substitute with all-purpose flour. While bread flour helps create a chewier texture and a better crust, flour substitution still results in delicious bread. Keep in mind, using all-purpose flour might make the crust slightly less crisp and the crumb a bit softer, but with proper hydration and baking techniques, your bread will turn out great regardless of the flour you choose.
Can I Bake Gluten-Free Dutch Oven Bread Successfully?
Yes, you can bake gluten-free Dutch oven bread successfully. Start with gluten-free flour, and don’t forget to focus on flawless loaf shaping to maintain structure. Gluten-free dough can be delicate, so handle it gently and let it rest longer. With patience and practice, you’ll produce a beautiful, crusty crust and a tender crumb, proving that gluten-free baking can be just as satisfying as traditional bread baking.
How Do I Prevent My Bread From Sticking to the Dutch Oven?
To prevent your bread from sticking, start by coating your dough with a generous layer of flour before placing it in the Dutch oven. You can also use parchment paper to lift the bread easily and create a non-stick surface. Make sure to preheat the Dutch oven thoroughly and avoid opening it during baking. These steps help guarantee your bread releases smoothly with a crispy crust every time.
Conclusion
With a few simple tricks, you can master the art of baking Dutch oven bread with a crust that’s as crispy as a autumn leaf. Remember, patience and practice are your best friends on this journey. Each loaf is a blank canvas waiting to be transformed into a warm, crusty masterpiece. So, don’t be afraid to experiment and enjoy the delicious reward of your efforts—your oven’s magic will never fail to surprise you.