Connect with us

Juice

How Long Can Juice Last In The Fridge

Published

on

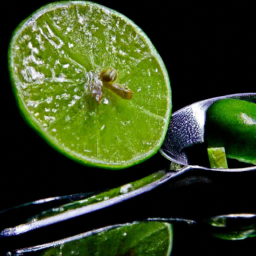
Juice always has a place in my fridge. It provides a quick and easy way to get some important vitamins and minerals without having to chop up different fruits and vegetables. However, I often find myself wondering how long juice can stay fresh in the refrigerator, especially since I tend to buy it in bulk.

The answer isn’t as straightforward as you might think. Juice is a perishable item, which means it has a limited shelf life. However, there are many factors that can impact how long it lasts, including the type of juice, packaging, temperature, and duration of storage.

In this article, I’ll dive into the details of juice shelf life and provide some tips for extending its freshness.

Key Takeaways

  • Fruit juices can last up to a week in the fridge, while vegetable juices have a shorter shelf life of around 3-4 days.
  • Properly preserving juice can help extend its shelf life and retain its nutrients, including refrigeration, avoiding heat and sunlight, and paying attention to expiration dates.
  • Freezing juice in ice cube trays or freezer-safe containers can help prolong its shelf life.
  • Signs of spoiled juice include an off odor, discoloration, and a sour taste, and it is important to use sight, smell, and taste to determine if juice has gone bad.

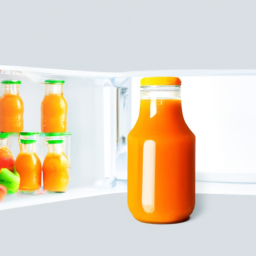
Understanding the Shelf Life of Juice

You may be surprised to know that your juice can actually last for up to a week in the fridge, but don’t get too comfortable – after that, it’s time to say goodbye to that delicious, refreshing drink.

The shelf life of juice is dependent on a number of factors, including the type of juice, the preservation methods used, and the expiration date.

To ensure that your juice lasts as long as possible, it’s important to understand how to properly preserve it. This includes keeping it refrigerated at all times, as well as avoiding exposure to heat and sunlight. Additionally, it’s important to pay attention to the expiration date on the juice container, as consuming expired juice can be dangerous to your health.

Advertisement

Understanding these preservation methods and expiration dates can help you to enjoy your juice for longer periods of time.

As for the types of juices and their shelf life, it’s important to note that not all juices are equal. Some juices, such as those made from fresh fruits and vegetables, have a shorter shelf life than others.

In the next section, we will explore the shelf life of different types of juices and how you can best preserve them.

Types of Juices and Their Shelf Life

As a nutrition expert, I believe it’s important to understand the different types of juices and how long they can last in the fridge.

Fruit juices, like orange juice, can last for up to a week if stored properly.

Advertisement

Vegetable juices, like carrot juice, tend to have a shorter shelf life of around 3-4 days.

Freshly squeezed juices, whether fruit or vegetable, should be consumed within 24 hours for maximum freshness and nutrients.

Fruit Juices

When you open a carton of fruit juice, its shelf life in the fridge coincides with the expiration date on the package. However, there are ways to extend the juice’s freshness and preserve its nutrients. Here are some tips to help prolong the shelf life of your fruit juice:

  • Keep the juice refrigerated at all times, even before opening it.
  • Store the juice in an airtight container to prevent air exposure and oxidation.
  • Avoid exposing the juice to direct sunlight or heat.
  • Consume the juice within a week of opening it.
  • Freeze the juice in ice cube trays or freezer-safe containers for longer storage.

By following these tips, you can help extend the shelf life of your fruit juice while preserving its nutrients.

However, it’s important to note that not all fruit juices are created equal when it comes to shelf life. Some juices, such as citrus juices, have a shorter shelf life than others.

In the next section, we’ll discuss the shelf life of vegetable juices and how to extend their freshness.
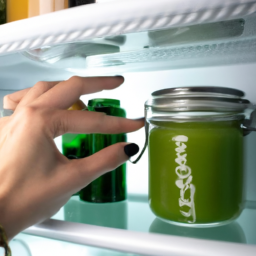
Advertisement

Vegetable Juices

Vegetable juices can be a refreshing and nutritious addition to your daily diet. They’re packed with vitamins, minerals, and antioxidants that can help boost your immunity and keep you healthy.

Some of the benefits of vegetable juices include improved digestion, increased energy levels, and better skin health. When it comes to the best vegetables for juicing, you want to choose those that are high in nutrients and low in sugar.

Some of the top vegetables for juicing include kale, spinach, cucumber, celery, and carrots. These vegetables are rich in vitamins A, C, and K, as well as minerals like iron, calcium, and magnesium. They’re also low in calories, making them a great option for weight loss.

As for freshly squeezed juices, they’re another great option for getting all the benefits of fruits and vegetables. However, it’s important to note that freshly squeezed juices should be consumed immediately after juicing to ensure maximum nutritional value.

In the next section, we’ll discuss how long freshly squeezed juices can last in the fridge.

Advertisement

Freshly Squeezed Juices

Nothing beats the refreshing taste and nutritional benefits of freshly squeezed juices that have to be consumed immediately to keep all the goodness intact. But what if you have some leftover juice? How long can you keep it in the fridge before it goes bad? The answer depends on the type of juice and how it was prepared.

In the table below, I have listed some popular juice recipes and their recommended storage time in the fridge. It is important to note that these are just general guidelines and the actual shelf life may vary depending on factors such as temperature, storage container, and freshness of the ingredients. Nevertheless, following these recommendations can help ensure that your juice stays fresh and safe to drink for as long as possible while still retaining its health benefits.

Juice Recipe Recommended Storage Time
Orange Juice 1-2 days
Apple Juice 3-5 days
Carrot Juice 3-4 days
Beetroot Juice 1-2 days
Green Juice (Kale, Spinach, etc.) 2-3 days

Packaging and its impact on juice freshness is an important consideration when it comes to storing juice. In the next section, I will discuss how different types of containers affect the shelf life of juice and what you can do to extend its freshness.

Packaging and Its Impact on Juice Freshness

As a juice enthusiast, I’ve always been keen on finding the best packaging for preserving the freshness of my favorite juices. The three common types of packaging are Tetra Pak, glass bottles, and plastic bottles.

Each type has its own advantages and disadvantages in terms of impact on juice freshness, which I will discuss in this subtopic.

Advertisement

Tetra Pak

You’ll be surprised at how long Tetra Pak juice can last in your fridge! As an AI language model, I’ve been programmed to understand the technicalities of packaging and its impact on juice freshness.

Tetra Pak is a type of packaging material that’s commonly used for juice products. It’s made up of several layers of plastic and aluminum foil, which help to protect the juice from light, oxygen, and other environmental factors that can cause spoilage.

Here are some reasons why Tetra Pak is a popular choice for juice packaging, and why it can help to extend the shelf-life of your juice:

  • Tetra Pak is lightweight and easy to transport, which reduces the environmental impact of shipping and distribution.
  • The layers of plastic and aluminum foil provide an excellent barrier against light, oxygen, and moisture, which can cause spoilage and deterioration of the juice.
  • Tetra Pak is recyclable, and many recycling programs accept it as a common type of packaging material.
  • The shape of Tetra Pak cartons is designed to make it easy to pour and drink the juice, without the need for additional cups or containers.

As you can see, Tetra Pak is a versatile and effective packaging material that can help to extend the shelf-life of your juice. However, if you prefer a more traditional and eco-friendly option, glass bottles may be a better choice for you.

Glass Bottles

If you want to experience the satisfying clink of glass and the refreshing taste of chilled juice, grab a glass bottle from the fridge and enjoy. Glass bottles offer several advantages over other types of containers, such as Tetra Pak. First and foremost, glass is non-toxic and non-reactive, meaning it won’t leach harmful chemicals into your juice. Additionally, glass is impermeable, so it won’t allow air or other contaminants to enter the bottle and spoil your juice. Finally, glass is easy to clean and can be reused multiple times, making it an eco-friendly option for juice storage.

However, there are also some disadvantages of glass bottles for juice storage. Glass is heavy and fragile, which makes it difficult to transport and increases the risk of breakage. Glass bottles also tend to be more expensive than other types of containers, which may not be ideal for those on a budget. Additionally, glass is not as flexible as other materials, which means it may not be suitable for juices that require high pressure processing. Overall, glass bottles are a great option for those who prioritize the quality and safety of their juice, but may not be the most practical choice for every situation.

Advertisement

Moving on to plastic bottles…

Plastic Bottles

Now that we’ve discussed the longevity of juice stored in glass bottles, let’s shift our focus to plastic bottles. As previously mentioned, plastic bottles tend to have a shorter shelf life than glass bottles due to their porous nature. This means they’re more susceptible to absorbing flavors and odors from other foods in the fridge, which can affect the taste of the juice.

In addition to the impact on taste, there’s also a growing concern about the environmental impact of plastic bottles. Many consumers are opting for alternatives such as reusable water bottles and glass containers to reduce their carbon footprint. While plastic bottles can be recycled, the process requires a significant amount of energy and resources. As a result, it’s important to consider the environmental impact of our packaging choices when storing juice or any other food or beverage.

Moving on to the next section, temperature and its effect on juice freshness, it’s important to note that the temperature at which juice is stored can greatly impact its shelf life.

Temperature and Its Effect on Juice Freshness

Chilling your juice in the fridge can significantly slow down spoilage and extend its shelf life. Temperature control is crucial in preserving freshness, as it can affect the growth of bacteria and other microorganisms that cause spoilage.

Advertisement

Here are some important things to keep in mind when it comes to temperature and juice freshness:

  1. Store your juice at a temperature of 40°F or below to slow down the growth of bacteria and other microorganisms that cause spoilage.

  2. Avoid storing your juice in the door of the fridge, as the temperature can fluctuate too much and affect the juice’s freshness.

  3. Keep your fridge clean and well-maintained to prevent contamination and ensure that it’s operating at the right temperature.

  4. Don’t leave your juice out at room temperature for too long, as this can speed up spoilage and make it unsafe to drink.

Considering the impact of temperature on juice freshness, it’s important to also consider the duration of storage and its impact on the juice’s quality.

Duration of Storage and Its Impact on Juice Freshness

When it comes to preserving the freshness of juice, the duration of storage plays a critical role. In my experience, short-term storage of juices in the fridge can help maintain their quality for up to 3-5 days, depending on the type of fruit used.

For longer-term storage, freezing juice is an effective option, as it can extend the shelf life of juice for several months.

Short-term Storage

Short-term storage for juice typically lasts for 3-5 days in the fridge. However, the juice expiration can vary depending on the type of juice and how it was processed.

Advertisement

For example, fresh juice will spoil faster than pasteurized juice, which has been treated to kill bacteria and extend its shelf life. Additionally, acidic juices like orange or grapefruit juice will last longer than less acidic juices like apple juice.

When storing juice in the fridge, it’s important to keep it in an airtight container to prevent exposure to oxygen, which can cause the juice to spoil faster. Proper storage is key to preserving the quality and freshness of your juice.

By following proper storage techniques, you can extend the life of your juice and enjoy it at its freshest for a few days. Moving on to long-term storage, there are additional steps you can take to keep your juice fresh for an even longer period.

Long-term Storage

If you want to savor your juice for an extended period, it’s wise to consider preserving it in a freezer using a vacuum sealer to seal in the flavors and nutrients. Here are some tips for long-term juice storage:

  • Use the best containers for long-term juice storage, such as glass jars or BPA-free plastic containers. Avoid using metal containers as they can react with the juice and alter its taste.
  • Label and date the containers to avoid confusion and to keep track of the storage time.
  • Experiment with different creative juice recipes to add variety to your storage options. You can mix different fruits and vegetables to create unique and delicious flavors.

Freezing juice is a great way to extend its shelf life and preserve its nutrients. But before we delve into the process of freezing juice, let’s first explore some of the benefits of freezing and why it’s a great option for long-term storage.

Freezing Juice

To preserve your tasty and nutritious juice for later consumption, you should definitely consider freezing it. Freezing juice is one of the most effective juice preservation techniques and has many benefits.

Advertisement

First and foremost, freezing juice can extend its shelf life by several months. This means that you can enjoy your favorite juice even if it is out of season or if you’ve bought it in bulk.

Additionally, freezing juice can help to retain its flavor and nutrient content. When juice is frozen, its cellular structure is altered, allowing it to maintain its taste and nutritional value for a longer period of time.

Moreover, freezing juice is a convenient way to have a quick and healthy drink on hand, as you can easily thaw out a portion of juice whenever you need it.

Overall, freezing juice is a great option for anyone looking to extend the shelf life of their juice while maintaining its taste and nutritional benefits.

As important as it is to know how to preserve your juice, it’s equally important to know when it has gone bad. Signs of spoiled juice include an off odor, discoloration, and a sour taste.

Advertisement

If you notice any of these signs, it’s best to discard the juice as consuming spoiled juice can lead to illness. Therefore, it’s crucial to keep an eye out for these signs and to consume your juice before it spoils.

Signs of Spoiled Juice

As a juice enthusiast, I know that the appearance, smell, and taste of a juice can reveal a lot about its freshness. When it comes to identifying spoiled juice, these three sensory cues are crucial.

The appearance of spoiled juice can range from changes in color to the presence of mold or sediment. Spoiled juice also tends to emit a foul odor, often described as sour or rancid. Finally, the taste of spoiled juice is typically unpleasant and can range from sour to bitter.

As a consumer, it’s important to know these signs in order to avoid consuming spoiled juice and potentially harmful bacteria.

Appearance

Did you know that even though juice may still look and smell okay, it can start to lose its nutritional value after just a few days in the fridge? This is why it’s important to pay attention to the appearance of your juice before consuming it.

Advertisement

Here are a few things to keep an eye out for:

  • Juice clarity: If your juice appears cloudy or has sediment at the bottom, this could be a sign that it’s starting to go bad.
  • Color changes: If your juice starts to change color, it could indicate that it’s spoiled. Look out for brown, green, or grayish hues.
  • Mold growth and bacterial contamination: If you see any mold growing on the surface of your juice, or notice an off smell, it’s best to discard the juice immediately.

By paying close attention to the appearance of your juice, you can ensure that you’re consuming a healthy and safe product.

Now, let’s move on to discussing the importance of smelling your juice before consuming it.

Smell

Take a deep whiff of your juice before drinking it to make sure it smells fresh and fruity, not sour or rancid. Smelling your juice is one of the best ways to determine if it has gone bad.

The smell of spoiled juice is often described as musty, sour, or fermented. This odor is caused by the growth of bacteria and yeast in the juice, which can occur due to a variety of factors.

One of the main causes of smelly juice is improper storage. When juice is exposed to air, it can oxidize and spoil more quickly. Additionally, if the juice is not kept at a consistent temperature, bacteria and yeast can grow more rapidly.

Advertisement

To prevent juice spoilage, it’s important to store it properly. Keep juice in a tightly sealed container in the refrigerator and try to use it within three to five days of opening. If you notice any off smells or flavors, it’s best to err on the side of caution and discard the juice.

As we move into discussing the taste of juice, it’s important to note that the taste can often be closely linked to the smell. A sour or musty smell can indicate that the juice has a similarly unpleasant taste.

Taste

You’ll notice right away if the juice tastes sweet or tart, and the flavor will be the result of the fruit used to make it. But how long the taste lasts is dependent on how well the juice is stored. Maintaining freshness is key to ensuring the juice stays enjoyable to drink, and proper storage techniques can make all the difference.

Here is a table that outlines the recommended storage times for different types of juice:

Juice Type Refrigerator Storage Time
Freshly Squeezed 2-3 Days
Store-Bought 7-10 Days
Pasteurized 14-21 Days

It’s important to note that these are general guidelines and some juices may last longer or shorter depending on the specific brand or type. Regardless, it’s always a good idea to consume juice as soon as possible to ensure maximum freshness. In the next section, I’ll share some tips for extending juice freshness even further.

Advertisement

Tips for Extending Juice Freshness

To keep your juice fresh for longer, store it in an airtight container in the refrigerator. This will help prevent the juice from oxidizing and losing its flavor, like a seal on a jar locking in freshness.

When choosing a container, glass, plastic, or stainless steel are all great options, as long as they have a tight-fitting lid. Avoid using containers made of materials that can react with the juice, such as copper or aluminum.

Another way to extend the freshness of your juice is to add a little bit of lemon juice to it. Lemon juice contains citric acid, which can help preserve the juice and prevent the growth of bacteria.

Additionally, make sure to keep your fridge clean and at the right temperature, as a dirty or too-warm fridge can encourage the growth of bacteria and spoil your juice.

By following these tips, you can extend the life of your juice and enjoy it for longer periods of time.

Advertisement

As you continue to store your juice, it’s important to use your senses to determine its freshness. In the next section, we’ll explore how to use sight, smell, and taste to determine if your juice has gone bad.

Using Your Senses to Determine Juice Freshness

Using your senses is the key to determining if your juice is still fresh and safe to consume. While the expiration date on the packaging is a good starting point, it doesn’t always reflect the actual freshness of the juice.

There are various freshness indicators you can observe to assess the quality of your juice. First, take a look at the color of the juice. If it has significantly darkened or appears cloudy, it may have started to spoil. Then, smell the juice. If it has a sour or off odor, it’s likely past its prime. Lastly, taste a small amount of the juice. If it has a funky or unpleasant taste, it’s time to discard it.

By using your senses, you can avoid consuming juice that has gone bad and potentially causing foodborne illness. When it comes to determining when to discard juice, it’s important to keep in mind that the freshness indicators listed above are just that – indicators. If you’re unsure about the quality of the juice, it’s always better to err on the side of caution and throw it away.

In the next section, we’ll discuss some guidelines for determining when it’s time to discard juice based on how long it’s been in the fridge.

Advertisement

When to Discard Juice

Wondering when it’s time to toss that bottle in the trash? Determining the expiry of juice can be tricky, but there are a few key things to keep in mind.

First, always check the expiration date on the bottle or container. This will give you a general idea of how long the juice can last. However, it’s important to note that this date is not always accurate, especially if the juice has been opened or if it’s been stored improperly.

To ensure optimal freshness, it’s recommended to store juice in the refrigerator at a temperature between 32-40°F. This will help slow down the growth of bacteria and prevent spoilage. However, even if stored properly, juice can still go bad.

Signs that it’s time to toss the juice include a sour or off smell, a change in color, or a cloudy appearance. If you notice any of these signs, it’s best to err on the side of caution and discard the juice.

Frequently Asked Questions

Can I freeze juice to make it last longer?

Yes, freezing fruit juice is a common Juice Preservation Technique. It can extend the shelf life of juice by several months. However, it’s important to leave some room in the container for expansion during freezing.

Advertisement

How long can freshly squeezed juice last in the fridge compared to store-bought juice?

Freshly squeezed juice, unlike pasteurized store-bought juice, retains more of its nutrients due to minimal processing. However, it has a shorter shelf life in the fridge, typically 2-3 days compared to store-bought juice that can last up to 2 weeks.

Is it safe to drink juice that has been left out of the fridge overnight?

Leaving juice out of the fridge overnight poses health risks due to bacterial growth. It is not safe to drink as harmful bacteria can multiply rapidly, leading to food poisoning and other illnesses.

Can I mix different types of juice together and still expect them to last as long as they would separately?

Mixing juices can create unique flavor combinations, but it may affect their shelf life. Factors like acidity, preservatives, and packaging can impact how long they last. It’s best to store them separately and consume them within their respective expiry dates.

Does the expiration date on the juice bottle indicate when the juice will start to spoil, or when it will be unsafe to consume?

The expiration date on a juice bottle indicates when the juice will start to spoil, but not necessarily when it will be unsafe to consume. The difference between spoilage and safety should be noted when consuming expired juice.

Conclusion

In conclusion, understanding the shelf life of juice is crucial in ensuring that you consume safe and fresh beverages. The type of juice, packaging, temperature, and duration of storage all play a significant role in determining the freshness of your juice. Signs of spoiled juice include changes in color, odor, and taste.

Advertisement

To extend the freshness of your juice, consider refrigerating it immediately after opening, using airtight containers, and consuming it within the recommended time frame. Always trust your senses to determine if the juice is still safe to consume.

Remember, consuming spoiled juice can lead to foodborne illnesses. So, the next time you ask yourself, "how long can juice last in the fridge?"remember these tips to ensure that you enjoy fresh and safe juice.

Continue Reading
Advertisement

Juice

Lemon = How Much Juice

Published

on

By

As someone who loves cooking and baking, I know the importance of accurate measurements when it comes to preparing food. This is especially crucial when using lemon juice in recipes, as it’s important to know the exact amount of juice needed.

Whether youre making lemonade, salad dressing, or a lemon tart, understanding the yield of a lemon will ensure that your recipe turns out perfectly.

There are a few factors that can affect the amount of juice a lemon produces, such as its ripeness and size. Additionally, the juicing method you use can also impact the yield.

In this article, I will provide a step-by-step guide for juicing lemons and share tips for getting the most juice out of your fruit. Plus, I will answer the burning question: how much juice does one lemon yield?

So, lets get started and master the art of juicing lemons!

Advertisement

Key Takeaways

  • Accurate measurements are crucial when cooking and baking with lemons, as factors like ripeness, size, and juicing method can affect lemon juice yield.
  • Knowing how much juice a lemon produces can help save money by buying the right amount of lemons needed, and using the right tool for juicing lemons can make a big difference in juice yield.
  • Lemon juice has health benefits, including aiding in digestion, boosting immune function, and being high in vitamin C and antioxidants, making it beneficial for skincare.
  • Lemon juice can be stored in the refrigerator, freezer, or canned, and can be used in a variety of recipes, including cocktails, salad dressings, and marinades for meats or fish.

The Importance of Knowing How Much Juice a Lemon Produces

You gotta know how much juice a lemon gives, it’s kinda important if you wanna impress your guests with a killer cocktail.

But beyond the realm of mixology, lemon juice has numerous benefits in the realm of health. Rich in vitamin C, potassium, and antioxidants, lemon juice has been shown to aid in digestion, boost immune function, and even prevent kidney stones.

So not only is it important to know how much juice a lemon produces for culinary purposes, but for health reasons as well.

However, the amount of juice a lemon produces can vary depending on a variety of factors, including the ripeness of the fruit, its size, and its temperature. Understanding these factors and how they affect lemon juice yield is crucial in ensuring consistent and accurate measurements in cooking and mixology.

Factors That Affect Lemon Juice Yield

Factors affecting the yield of lemon juice include the ripeness of the fruit and the method of extraction.

When it comes to ripeness, the amount of juice a lemon produces is directly related to how ripe it is. The more mature the fruit, the more juice it will contain. On the other hand, an under-ripe fruit will yield less juice.

Advertisement

Another factor that affects juice yield is the variety of lemon. Some varieties are naturally juicier than others, so it’s important to choose the right variety if you’re looking for maximum juice.

In addition to these factors, the method of extraction also plays a role in how much juice you can get from a lemon. Lemon juice extraction techniques vary, but some methods are more efficient than others. For example, using a hand juicer or a citrus press can yield more juice than simply squeezing the lemon with your hands.

By understanding these factors and choosing the right extraction method, you can maximize your lemon juice yield and get the most out of your fruit.

As we move on to the next section, it’s important to note that having the right tools for juicing lemons can make a big difference in the amount of juice you’re able to extract.

Tools You Will Need for Juicing Lemons

To get the most out of your citrus, you’ll need the right tools. When it comes to juicing lemons, there are two common options: hand-held lemon squeezers and electronic juicers.

Advertisement

Hand-held lemon squeezers are a low-cost and easy-to-use option. They come in a variety of sizes and shapes, but all function in a similar way. Simply cut the lemon in half, place it in the squeezer, and press down on the handles to extract the juice.

Electronic juicers can be a more expensive investment, but they can save time and effort. These machines can handle larger quantities of lemons and often have adjustable settings to customize the level of pulp in your juice.

No matter which tool you choose, having the right equipment can make the process of juicing lemons much easier and more efficient.

Now that you have the appropriate tools, it’s time to learn how to use them effectively. In the next section, we’ll provide a step-by-step guide for juicing lemons to help you maximize your lemon juice yield.

Step-by-Step Guide for Juicing Lemons

Once I’ve got my chosen juicing tool at hand, such as a citrus reamer or a handheld juicer, I begin the process of extracting lemon juice.

Advertisement

First, I cut the lemon in half and place one half onto the juicing tool, with the cut side facing down. Then, I firmly press and twist the juicing tool, extracting the juice from the lemon.

I repeat this process with the other half of the lemon, until all the juice has been extracted.

There are several lemon juicer alternatives available, but the most important thing is to choose a tool that allows for efficient extraction of the juice.

Additionally, lemon juice has many benefits for skin care, as it’s high in vitamin C and antioxidants. Incorporating lemon juice into a daily skincare routine can help brighten and even out skin tone, while also helping to reduce the appearance of fine lines and wrinkles.

With that being said, let’s move on to some tips for getting the most juice out of your lemons.

Advertisement

Tips for Getting the Most Juice Out of Your Lemons

If you want to make the most out of your citrus, it’s important to know a few tricks for maximizing the amount of tangy goodness you can squeeze out of each fruit. Here are three tips for getting the most juice out of your lemons:

  • Use a lemon zester to break up the membranes inside the lemon before juicing. This will help release more juice and make juicing easier.

  • Roll the lemon on a hard surface to break down the pulp before juicing. This will also help release more juice.

  • Consider alternative juicing methods, such as using a garlic press or a citrus squeezer, to get even more juice out of your lemons.

By following these tips, you can ensure that you’re getting the most juice out of each lemon.

But how much juice does one lemon yield? Let’s explore that in the next section.

How Much Juice Does One Lemon Yield?

Did you know that squeezing a single lemon can yield up to a quarter cup of tart and zesty liquid? As someone who loves to cook and bake, knowing how much juice one lemon yields is essential. Not only does it help me plan my recipes better, but it also helps me save money by buying just the right amount of lemons I need.

To give you an idea of just how much juice you can get from a lemon, take a look at this table:

Advertisement
Size of Lemon Amount of Juice
Small 1-2 tablespoons
Medium 2-3 tablespoons
Large 4-5 tablespoons

Aside from adding flavor to your dishes, lemon juice also has numerous health benefits. It’s rich in Vitamin C, which is known to boost the immune system and improve skin health. It also aids in digestion and can help prevent kidney stones. And if you ever find yourself without a fresh lemon on hand, you can always use substitutes such as vinegar or lime juice in a pinch.

Transitioning to the next subtopic, understanding how much juice one lemon yields is essential when it comes to recipe conversion. Knowing how to calculate the amount of lemon juice needed for a recipe can make or break the final outcome.

Recipe Conversion: How to Calculate Lemon Juice Needed

Understanding the recipe conversion process can be complex, especially when it comes to calculating the necessary amount of lemon juice needed. However, having the right amount of this tart and zesty liquid can make all the difference in the final product.

Here are some tips on how to calculate the right amount of lemon juice for your recipe:

  1. Start by determining how much juice you need. This can be done by looking at the recipe and identifying the amount of lemon juice required in the ingredient list.

  2. The next step is to figure out how much juice is in each lemon. On average, a medium-sized lemon yields about 2-3 tablespoons of juice. However, this can vary based on the size and ripeness of the fruit.

  3. Once you know how much juice is in each lemon, you can calculate how many lemons you need for your recipe. Simply divide the required amount of juice by the amount of juice in each lemon to get the number of lemons needed.

By following these simple steps, you can ensure that you have the right amount of lemon juice for your recipe.

Advertisement

In the next section, we’ll discuss how to store any excess juice for future use.

Storing Lemon Juice

Now that we know how to calculate the amount of lemon juice needed for a recipe conversion, it’s important to discuss proper storing techniques and shelf life.

Lemon juice can be stored in a variety of ways, including in the refrigerator, freezer, or even canned. When storing in the refrigerator, it’s important to keep the juice in an airtight container to prevent oxidation and maintain freshness. The juice can also be frozen in ice cube trays and then transferred to a freezer-safe container for later use. Canning is another option, but requires proper equipment and techniques to ensure safety.

The shelf life of lemon juice varies depending on the storage method. Freshly squeezed lemon juice stored in the refrigerator can last up to 2-3 days, while frozen juice can last up to 6 months. Canned lemon juice can last even longer, up to a year or more. It’s important to always check for signs of spoilage, such as a sour smell or mold, before using any stored lemon juice.

Moving on to other uses for lemon juice, it can be used for more than just cooking.

Advertisement

Other Uses for Lemon Juice

If you’ve ever struggled with removing stubborn stains or rust, a little bit of this versatile citrus liquid can work wonders. Lemon juice is not only a great ingredient for adding a tangy flavor to your dishes, but it also has some impressive uses in skincare and home cleaning. Here are three benefits of using lemon juice for skincare:

  1. Lemon juice is rich in citric acid, which can help exfoliate dead skin cells and brighten your complexion.

  2. It contains vitamin C, an antioxidant that helps protect your skin from damage caused by free radicals and UV rays.

  3. Lemon juice can also help reduce the appearance of dark spots and acne scars due to its natural bleaching properties.

When it comes to cooking, there are different types of lemon juice you can use depending on your recipe. Freshly squeezed lemon juice is ideal for adding a bright, citrusy flavor to your dishes, while bottled lemon juice can be used for convenience and consistency. Here are a few more ways you can incorporate lemon juice into your cooking:

  1. Use lemon juice as a marinade for meats or fish to add flavor and tenderize the protein.

  2. Add lemon juice to your salad dressings for a tangy kick.

  3. Mix lemon juice with olive oil and herbs to create a flavorful dipping sauce for bread or vegetables.

Overall, lemon juice is a versatile ingredient that can be used in a variety of ways to enhance your skincare routine and cooking skills.

Frequently Asked Questions

What are the health benefits of lemon juice?

As a nutritionist, I can attest to the numerous health benefits of lemon juice. It’s packed with vitamin C, antioxidants, and has anti-inflammatory properties. Lemon juice can also aid digestion, boost immunity, and improve skin health. Check out the nutrition facts for more details.

How long does it take for a lemon to produce juice?

To extract lemon juice, the fruit must first be cut and squeezed. The production timeline depends on the method used, but typically takes only a few minutes. Other factors, such as the ripeness of the lemon, can also impact the amount of juice produced.

Advertisement

Can you juice a lemon without a juicer?

Yes, you can juice a lemon without a juicer using alternative methods such as hand-squeezing, using a fork, or rolling the lemon to release the juice. Different lemon squeezing techniques can also affect the amount of juice extracted.

What is the best way to remove seeds from lemon juice?

The best way to remove seeds from lemon juice is to use a fine mesh strainer or cheesecloth. Simply pour the juice through the strainer or wrap the cheesecloth around the seeds and squeeze. This technique ensures a smooth, seedless juice.

How do you know if a lemon is ripe enough to juice?

To determine if a lemon is ripe enough for juicing, I check for a bright yellow color and a slight give when squeezed. I use lemon juice extraction techniques such as rolling the lemon to release more juice.

Conclusion

In conclusion, knowing how much juice a lemon produces is essential for any cook or bartender. It can mean the difference between a mediocre dish and an exceptional one. By understanding the factors that affect lemon juice yield and using the right tools and techniques, you can maximize the amount of juice you extract from each lemon.

Whether you’re making a lemon vinaigrette or a lemon drop martini, having the right amount of juice is crucial. In short, the power of a lemon shouldn’t be underestimated. This small fruit can pack a punch, and its juice has a wide range of uses. From enhancing the flavor of dishes to providing health benefits, lemon juice is a versatile ingredient that should be a staple in every kitchen.

Advertisement

So grab your juicer and some lemons, and start exploring the endless possibilities of this zesty citrus fruit. Trust me, your taste buds will thank you.

Continue Reading

Juice

How To Make Papaya Juice

Published

on

By

As a health enthusiast, I am always on the lookout for creative and delicious ways to incorporate nutrient-rich foods into my diet. Lately, I have been intrigued by the papaya. Its vibrant orange flesh, sweet taste, and numerous health benefits make it a perfect addition to any smoothie.

Making your own papaya juice is not only easy but also incredibly rewarding. It’s like a burst of sunshine in a glass, delivering a refreshing and invigorating dose of vitamins and minerals straight to your body.

In this article, I will guide you through the step-by-step process of creating your own homemade papaya juice, so you too can enjoy the many health benefits and delicious taste of this tropical fruit.

Key Takeaways

  • The ripeness of the papaya is important when making juice, so look for a mostly yellow fruit with some green spots.
  • Water should be added in the blender to help the ingredients blend smoothly, and a proper water to fruit ratio should be maintained.
  • Blender maintenance is important and blending should be done at a low speed and gradually increased to avoid overblending and creating a foamy texture.
  • Honey or agave syrup can be added as a sweetener for taste and health benefits, but adding too much will increase the calorie and sugar content of the juice, so consume in moderation.

Gather Your Ingredients

Don’t forget to grab that juicy papaya and get ready for a refreshing experience that will quench your thirst like never before! Before we can start making the juice, we need to gather our ingredients.

Apart from the papaya, you’ll need some water, lime juice, and sugar or honey for sweetening. Papaya is an excellent source of vitamins A and C, potassium, and fiber. It’s also rich in antioxidants that help boost your immune system and protect against chronic diseases.

To make the juice more interesting, you can add other fruits like strawberries, pineapple, or mangoes. These flavor variations not only add taste but also enhance the health benefits of the juice.

Advertisement

Now that we have gathered our ingredients, let’s move on to preparing our papaya.

Prepare Your Papaya

Once you’ve got your hands on a ripe papaya, it’s as easy as slicing it open like a smile to reveal the juicy goodness inside. But before you get started, it’s important to know that there are several varieties of papaya, and each one has a different level of ripeness that’s optimal for juice-making.

Here are three things to keep in mind regarding papaya ripeness:

  1. Look for a papaya that is mostly yellow with some green spots. This indicates that the fruit is ripe and ready to be used for juice.

  2. If the papaya is fully green, it’s not yet ripe enough to use. You’ll need to wait a few more days until the papaya turns yellow.

  3. If the papaya is mostly yellow with brown spots, it’s overripe and may not taste as good in juice.

Now that you know how to choose the perfect papaya, it’s time to cut it into pieces and get ready to make some delicious juice.

Cut the Papaya into Pieces

To start, simply grab a sharp knife and slice the ripe papaya in half lengthwise, revealing the bright orange flesh and black seeds inside. Next, scoop out the seeds with a spoon and then proceed to cut the papaya into pieces. I like to cut the papaya into cubes, but you can cut them into any size you prefer.

Advertisement

When selecting a papaya for juice, it’s important to choose a ripe one. A ripe papaya should have a yellowish-orange skin and should yield slightly to pressure. Papayas are a great source of vitamins A and C, and they contain an enzyme called papain that aids in digestion. By adding papaya juice to your diet, you can reap all of these health benefits and more.

Now that the papaya is cut into pieces, it’s time to add it to the blender. But before we do that, we need to add water to the blender to help the blending process.

Add Water to the Blender

Now we’re ready to blend everything together, so let’s go ahead and add some water to the blender. It’ll help the ingredients blend smoothly and create a refreshing and hydrating drink that’ll leave you feeling energized. When adding water to the blender, it’s important to maintain a proper water to fruit ratio to ensure that the juice isn’t too thick or too watery. As a general rule of thumb, I like to add about 1/2 cup of water for every 1 cup of fruit. This ratio can be adjusted based on personal preference, but be careful not to add too much water as it can dilute the flavor of the papaya.

Proper blender maintenance is also important when making papaya juice. Before adding the water, make sure the blender is clean and free of any residue from previous use. After blending, take the time to thoroughly clean the blender to prevent any lingering flavors or bacteria. Now that we’ve added the water to the blender, it’s time to move onto the next step and add the papaya to create a delicious and nutrient-packed juice.

Add the Papaya to the Blender

With the blender prepped and water added, it’s time to blend in the juicy papaya chunks for a tropical burst of flavor. Before adding the papaya, make sure to remove the skin and seeds. Papaya is rich in vitamins A and C, and adding it to your diet can help improve digestion and boost your immune system.

Advertisement

When blending the papaya, it’s important to start at a low speed and gradually increase it to avoid overblending and creating a foamy texture. Depending on your preference, you can add other fruits such as pineapple or banana to create different variations of papaya juice.

Once the papaya is fully blended, we can move on to the next step of the process: blending the mixture until smooth.

Blend the Mixture

You’re ready to blend the mixture and create a delicious papaya juice. Before we start, let’s talk about blender maintenance. It’s important to keep your blender clean and free from any remnants of past use. Make sure to wash the blender thoroughly with soap and water before using it.

Now, let’s blend the mixture. Start by placing the lid on the blender and turning it on. Blend on high speed until the mixture is smooth and creamy. If you don’t have a blender, you can use a food processor or immersion blender as an alternative blending method. Once you’ve achieved the desired consistency, you can move on to the next step: strain the mixture (optional).

Strain the Mixture (optional)

If you wanna go the extra mile, strain out any unwanted bits and bobs from your blended concoction with a sieve or cheesecloth. This step is optional, but it can make a huge difference in the texture and taste of your papaya juice.

Advertisement

By removing the fibrous pieces and seeds, you’ll get a smoother and more pleasant drink that is easier to digest. The benefits of straining go beyond aesthetics and taste.

Papaya seeds, for instance, have a bitter flavor and can cause digestive discomfort if ingested in large amounts. While they’re edible and have some health benefits, such as being anti-inflammatory and antibacterial, they’re not suitable for everyone.

Straining also allows you to remove any dirt, debris, or pesticides that may be present in the fruit. If you don’t have a sieve or cheesecloth, you can skip this step or use a fine-mesh strainer, but keep in mind that you may end up with a chunkier juice.

Now that you have your pulp-free papaya juice, you can proceed to the next step: adding sweetener (optional).

Add Sweetener (optional)

To enhance the flavor and add a touch of sweetness, consider mixing in honey or agave syrup to create a tropical paradise in your mouth. Not only do these alternative sweeteners provide a delicious taste, but they also come with health benefits.

Advertisement

Honey contains antioxidants and has antibacterial properties, while agave syrup has a lower glycemic index compared to traditional sugar. When adding the sweetener, start with a small amount and adjust to your preference. Here are some tips to keep in mind:

  • Use raw, unprocessed honey or organic agave syrup for maximum health benefits.
  • Consider using a honey or agave syrup that is locally sourced to support small businesses and reduce your carbon footprint.
  • If you prefer a sweeter juice, add more sweetener gradually to avoid overpowering the natural flavor of the papaya.
  • Keep in mind that adding sweetener will increase the calorie and sugar content of the juice, so consume in moderation.

Now that the juice is sweetened to your liking, it’s time to chill and serve.

Chill and Serve

Once the mixture is chilled and ready, simply grab a glass and pour in the deliciously tropical juice. Savor every sip, as papaya juice is not only refreshing but also packed with numerous health benefits. It’s rich in antioxidants, vitamins A and C, and enzymes that aid digestion. Regular consumption of papaya juice can improve skin health, boost immunity, and reduce inflammation.

To switch things up, try different serving suggestions for your homemade papaya juice. Add a slice of lime or a sprig of mint for an extra kick of flavor. You can also mix it with other juices like pineapple or orange for a tropical fruit medley. However, it’s important to note that papaya juice should be consumed in moderation as it contains high amounts of natural sugars.

Enjoy your homemade papaya juice and reap the benefits of this delicious and nutritious beverage!

Enjoy Your Homemade Papaya Juice!

You can savor the delicious and nutritious homemade tropical beverage by pouring it into a glass and adding a slice of lime or a sprig of mint for an extra kick of flavor. The best part about making papaya juice at home is that you can customize it according to your preferences and health needs. Here are some health benefits and recipe variations that you can try:

Advertisement
Health Benefits Recipe Variations
High in Vitamin C and antioxidants Add ginger or turmeric for additional anti-inflammatory properties
Supports digestion and gut health Mix with coconut water or kefir for probiotic benefits
Lowers blood sugar levels Blend with spinach or kale for an extra boost of vitamins and minerals

By incorporating these recipe variations, you can enhance the taste and nutritional value of your homemade papaya juice. Enjoy this refreshing beverage as a healthy breakfast drink or a post-workout thirst quencher. Cheers to good health and delicious taste!

Frequently Asked Questions

What are the health benefits of drinking papaya juice?

After researching, I found that papaya juice is high in vitamin C, antioxidants, and fiber. It may aid in digestion and boost immunity. However, it may also cause allergic reactions or interact with certain medications.

Can I use frozen papaya instead of fresh papaya?

Yes, frozen papaya can be used as a substitute for fresh papaya in smoothie options. It still retains its nutritional benefits and can be a convenient option for those who don’t have access to fresh papaya.

How long does homemade papaya juice last in the refrigerator?

To preserve the freshness of homemade papaya juice, store it in an airtight container in the refrigerator. This will extend the juice’s shelf life for up to three days. Keeping the juice fresh is key to maximizing its health benefits.

Can I add other fruits or vegetables to my papaya juice?

Oh, the possibilities! I love getting creative with my papaya juice variations. Mixing papaya with other fruits like mango or pineapple can add a tropical twist, while adding spinach or kale can boost the health benefits. The options are endless!

Advertisement

Is it possible to make papaya juice without a blender?

Yes, it is possible to make papaya juice without a blender. You can use blender alternatives such as a food processor or manual extraction methods like squeezing the juice out of the fruit by hand or using a juicer.

Conclusion

Well, that’s how I make my delicious papaya juice! It’s so easy and refreshing, and it’s a great way to get some extra vitamins and nutrients into your diet.

Did you know that papaya is high in vitamin C, folate, and potassium? In fact, one medium papaya contains about 224% of your daily recommended intake of vitamin C! That’s pretty impressive.

But beyond just being a healthy choice, papaya juice is also a delicious one. It’s naturally sweet and has a tropical flavor that’s perfect for sipping on a hot summer day.

Plus, by making it at home, you can control the sweetness and add in any other ingredients you like. So if you’re looking for a tasty and healthy drink option, give papaya juice a try!

Advertisement

Continue Reading

Juice

How To Make My Own Vape Juice

Published

on

By

As a passionate vaping enthusiast, I have always been fascinated by the art of creating my own e-liquid. The process of blending different flavors to create a unique taste that suits my preferences has been an exciting adventure. However, making your own vape juice can be daunting, especially for beginners.

In this guide, I will share with you the steps I took to make my own vape juice, including the basic ingredients and equipment needed, how to determine the PG/VG ratio, and how to calculate the recipe.

Before we delve into the process of making your own vape juice, it is crucial to understand the basic ingredients and equipment needed. The main ingredients of vape juice include vegetable glycerin (VG), propylene glycol (PG), nicotine, and flavorings. VG and PG are the base liquids used to create the vapor, while nicotine and flavorings are added to enhance the taste and nicotine content.

The equipment needed includes a mixing container, a scale, syringes, gloves, and bottles for storage. With these basic ingredients and equipment, you can start making your own vape juice and customize it to your liking.

Key Takeaways

  • Prioritize ingredient safety and equipment maintenance to ensure purity and consistency.
  • Experiment with flavor combinations and adjust ratios for desired flavor and nicotine strength.
  • Use a mixing calculator and measure ingredients accurately for consistency and safety.
  • Properly store ingredients and finished e-liquids to maintain flavor and potency.

Understand the Basic Ingredients and Equipment Needed

To make your own vape juice, you’ll need some basic ingredients and equipment, like VG (vegetable glycerin), PG (propylene glycol), nicotine, flavorings, syringes, and bottles. These are all readily available online or at your local vape shop.

When it comes to equipment options, you can use either a scale or syringes to measure out your ingredients. A scale is more precise and efficient, while syringes are easier to find and use.

Advertisement

It’s important to note that some flavorings may contain oils or other additives that can be harmful if vaporized, so be sure to research and choose safe options.

Ingredient substitutions are also possible, but may affect the overall flavor and vaping experience. For example, you can swap VG and PG ratios to adjust the thickness and throat hit of your juice. You can also choose different types of nicotine, such as freebase or salt nicotine, depending on your preference.

Flavorings can be substituted or combined to create unique blends, but make sure to use ones that are specifically made for vaping. With all these options, it’s important to experiment and find what works best for you.

Now that you understand the basic ingredients and equipment needed, let’s move on to gathering everything necessary to start making your own vape juice.

Gather the Necessary Ingredients and Equipment

First, you’ll need to gather all the essential ingredients and equipment needed for crafting your own custom e-liquid. When it comes to ingredients, it’s important to prioritize ingredient safety. Make sure to purchase pharmaceutical-grade ingredients from reputable suppliers to ensure the purity of your e-liquid. Some of the key ingredients you’ll need include propylene glycol (PG), vegetable glycerin (VG), nicotine (if desired), and flavor concentrates. It’s also important to properly store your ingredients in a cool, dry place to maintain their quality.

Advertisement

In addition to the necessary ingredients, you’ll need to have the proper equipment for mixing and storing your e-liquid. This includes a scale for accurate measurements, syringes for precise dispensing, mixing containers, and bottles for storing your finished product. It’s also important to prioritize equipment maintenance to ensure the longevity and accuracy of your tools. Regularly clean your equipment and replace any worn or damaged components. By gathering the necessary ingredients and equipment and prioritizing ingredient safety and equipment maintenance, you’ll be well on your way to crafting your own custom e-liquid with confidence.

As you gather your ingredients and equipment, it’s important to keep in mind the flavor profile you want to achieve in your e-liquid. In the next section, we’ll discuss how to choose your flavor profile and create a unique and satisfying vaping experience.

Choose Your Flavor Profile

When it comes to choosing a flavor profile for my vape juice, I like to consider whether I want a single flavor or a combination of flavors. Experimenting with different combinations can lead to unique and interesting results.

Additionally, adjusting the intensity of the flavors can greatly affect the overall taste of the vape juice. It’s important to keep in mind that finding the perfect flavor profile may take some trial and error, but the end result is worth it.

Single Flavor vs. Combination

Deciding between using a single flavor or combining flavors can be a tough choice, but it ultimately depends on personal preference and taste.

Advertisement

There are pros and cons to both options. Using a single flavor can be simple and straightforward, making it easier to control the taste and nicotine strength. However, it can also be limiting in terms of variety and complexity.

On the other hand, combining flavors can open up a whole new world of possibilities, allowing you to create unique and complex blends. The downside is that it can be tricky to get the ratios right and achieve a balanced flavor.

When it comes to popular combinations, there are endless options to choose from. Some common pairings include fruit and menthol, dessert and cream, and tobacco and caramel. However, don’t be afraid to get creative and experiment with different flavors to find the perfect mix for you.

Remember, taste is subjective, so what works for one person may not work for another. The key is to start with small batches and adjust the ratios until you find the right balance of flavor and nicotine strength. With a bit of trial and error, you’ll be able to create your own unique vape juice that perfectly suits your taste buds.

Experimenting with Flavors

Combining different flavor profiles can lead to a multitude of unique and unexpected tastes, allowing for an exciting exploration of the vast world of vaping. However, it’s important to be mindful of certain flavor combinations to avoid.

Advertisement

For example, mixing mint and cinnamon can create an overpowering taste that can be unpleasant to some. Similarly, combining citrus and dairy flavors can result in a curdled and unappetizing vape juice.

On the other hand, finding inspiration for unique flavors can lead to great success. Experimenting with combining fruits like strawberry and kiwi, or mixing dessert flavors like caramel and vanilla can create a delicious and complex vape juice.

It’s also helpful to try out pre-made flavor concentrates from reputable brands to get a sense of different flavor profiles and how they can be mixed together. With a bit of creativity and caution, the possibilities for creating your own unique vape juice flavors are endless.

Now, let’s move on to adjusting flavor intensity.

Adjusting Flavor Intensity

To add an extra kick to your flavor, try using a drop or two of flavor enhancers like EM or AP, which are available at most vape shops. These flavor enhancers are meant to balance out the overall flavor profile of your vape juice.

Advertisement

For example, if you feel like your fruit flavor is lacking some sweetness, you can add a drop of EM, which is ethyl maltol, to enhance the sweetness. On the other hand, if you feel like your bakery flavor is too overpowering, you can add a drop of AP, which is acetyl pyrazine, to tone down the bakery notes.

It’s important to note that when adjusting the flavor intensity, you should always taste your vape juice after adding the enhancer to avoid overdoing it. Additionally, steeping techniques can also affect the overall strength of the flavor.

Steeping is the process of letting your vape juice sit in a cool, dark place for a period of time, allowing the flavors to meld together and become more pronounced. Depending on the flavor and the recipe, some vape juices may need to steep for a few days or even a few weeks.

Once you’ve adjusted the flavor intensity and determined the steeping time, it’s time to move on to determining the pg/vg ratio.

Determine the PG/VG Ratio

Finding the perfect PG/VG ratio can truly make or break the flavor and overall vaping experience. PG and VG are the two main components of vape juice, and they each have their own properties that affect the final product.

Advertisement

PG is thinner and has a stronger throat hit, which is great for those who want a stronger sensation when vaping. On the other hand, VG is thicker and produces more vapor, making it ideal for cloud chasers.

When deciding on the PG/VG ratio for your vape juice, it’s important to consider your personal preferences and vaping style. If you want a stronger throat hit, a higher PG ratio may be better for you. However, if you prefer bigger clouds and a smoother vaping experience, a higher VG ratio may be the way to go. Additionally, you can adjust the throat hit in your vape juice by adding more or less PG, depending on your desired effect.

Moving on to the next step, calculating the recipe for your vape juice involves taking into account the flavorings, nicotine, and PG/VG ratio.

Calculate the Recipe

To calculate the recipe for my DIY vape juice, I need to use a mixing calculator. This tool will help me determine the exact measurements of each ingredient based on my desired nicotine strength, flavor intensity, and PG/VG ratio.

It’s important to measure the ingredients accurately to ensure consistency and safety, and to adjust the recipe for different batch sizes.

Advertisement

Using a Mixing Calculator

Using a mixing calculator can be a game-changer for DIY vape juice makers. It simplifies the process and ensures accurate measurements, making it a piece of cake.

One of the benefits of DIY vape juice is the ability to customize the flavor to your liking. However, this can be challenging without the right tools. Using a mixing calculator eliminates the guesswork and ensures that you have the right amount of each ingredient.

Common mixing mistakes can lead to an unpleasant vaping experience, such as too much flavoring or not enough nicotine. A mixing calculator takes into account the specific gravity and concentration of each ingredient to ensure that you have the perfect balance.

It also allows you to adjust the recipe based on the size of the batch you want to make. With a mixing calculator, you can confidently create your own unique vape juice flavors without worrying about making mistakes that could ruin the final product.

Accurately measuring ingredients is crucial for creating a successful vape juice recipe. In the next section, I’ll discuss the importance of using precise measurements and how to do it correctly.

Advertisement

Measuring Ingredients Accurately

Now that we’ve got the hang of using a mixing calculator, let’s talk about the importance of precision in measuring the ingredients for our vape juice.

Measuring ingredients accurately is crucial to the success of our mix. Even the slightest variation in measurements can greatly affect the flavor and consistency of our final product. That’s why it’s important to use the appropriate tools, such as a graduated cylinder or a scale, for measuring each ingredient.

Common measuring mistakes include eyeballing measurements, using the wrong measuring tools, and not properly leveling off dry ingredients. These mistakes can lead to an imbalanced flavor profile, harsh throat hits, or even a ruined batch.

To avoid these issues, it’s essential to follow the recipe and measure each ingredient carefully. Remember, precision is key when it comes to making your own vape juice.

Now that we understand the importance of accurate measurements, let’s move on to the next step: adjusting for batch size.

Advertisement

Adjusting for Batch Size

When we want to mix up a bigger or smaller batch of our delicious e-liquid, we need to adjust the ingredients accordingly to ensure the perfect balance of flavors. Here are some tips and tricks for adjusting for batch size:

  1. Use a calculator to scale the recipe: This is the easiest and most accurate way to adjust for batch size. Simply multiply the ingredients by the desired batch size and divide by the original batch size. For example, if the original recipe is for a 100ml batch and you want to make a 50ml batch, you would multiply all the ingredients by 0.5.

  2. Be mindful of flavor concentration: Some flavorings can be very potent, and a little goes a long way. When adjusting for batch size, make sure to adjust the flavoring accordingly. For example, if the original recipe calls for 10% flavoring in a 100ml batch, you may only need 5% in a 50ml batch.

  3. Keep track of your adjustments: It’s important to keep a record of the adjustments you make to the recipe. This will help you replicate the recipe in the future and make adjustments as needed.

Now that we’ve discussed adjusting for batch size, it’s time to mix the ingredients.

Mix the Ingredients

As I mix the ingredients for my own vape juice, I need to be aware of the different mixing techniques to achieve the desired result. One common mistake that beginners make is not mixing the ingredients thoroughly, resulting in an uneven distribution of flavors. To prevent this, I need to use a magnetic stirrer or a handheld mixer to ensure that the ingredients are well-blended.

Another important factor to consider is the order in which the ingredients are mixed. I usually start by adding the base liquid, followed by the flavorings, and then the nicotine (if desired). This ensures that the flavors are evenly distributed and that the nicotine is evenly dispersed throughout the mixture.

As I mix the ingredients, I can already start to imagine the flavor profile of my vape juice. But before I can enjoy it, I need to steep the e-liquid to allow the flavors to fully develop.

Advertisement

Once the ingredients are mixed, it’s time to let the e-liquid steep and mature, enhancing the flavors and improving the overall vaping experience.

Steep the E-Liquid

To fully develop the flavors of your e-liquid, steeping is essential. Steeping is the process of letting the e-liquid mixture sit for a certain period of time to allow the flavors to blend together. This process is necessary because some of the ingredients used in the mixture may not be fully incorporated at first, resulting in a harsh or unpleasant taste if vaped immediately.

Steeping techniques vary depending on the recipe and the desired outcome, but the general rule is to store the e-liquid in a cool, dark place and shake it regularly. The importance of patience in steeping can’t be overstated. Some e-liquids may require a few days to a few weeks of steeping before they’re ready to vape. It can be tempting to try the e-liquid right away, but the flavors won’t be as developed as they could be.

Patience is key to achieving the best possible flavor from your homemade e-liquid. Once the steeping process is complete, it’s time to move on to the next step: testing and adjusting the e-liquid to your preference.

Test and Adjust

Now that I’ve steeped my e-liquid, it’s time to test and adjust the flavor and nicotine levels to my liking.

Advertisement

I’ll begin by testing the e-liquid by dripping a small amount onto my atomizer and taking a few puffs.

From there, I can adjust the flavor or nicotine levels accordingly and make notes for future batches.

By taking the time to test and adjust my e-liquid, I can ensure a satisfying experience every time I vape.

Testing the E-Liquid

Before you start vaping your homemade juice, make sure you test it first to ensure the flavor and nicotine levels are to your liking. To test the e-liquid, you can use various flavor testing techniques such as dripper testing or tank testing.

Dripper testing involves adding a small amount of the e-liquid onto a dripper and vaping it without any previous juice in the tank.

Advertisement

Tank testing involves filling your vape tank with the e-liquid and vaping it. This method is best for evaluating how the e-liquid tastes when it is heated.

It’s also important to keep in mind the steeping time for e-liquids. Steeping is the process of letting e-liquids age to improve their flavor. It’s recommended that you let your e-liquid steep for at least a week before testing it. You can steep your e-liquid by letting it sit in a cool, dark place and shaking it every day.

Once you’ve tested your e-liquid and determined the flavor and nicotine levels, you can move on to adjusting flavor or nicotine to your liking.

Adjusting Flavor or Nicotine

Once you’ve tested your e-liquid and determined the flavor and nicotine levels, it’s time to personalize your vaping experience by customizing the nicotine strength and balancing the flavor profile.

To adjust nicotine levels, you’ll need to add more or less nicotine concentrate to your e-liquid base. It’s important to measure the nicotine concentrate accurately to avoid ending up with a nicotine level that’s too strong or too weak. You can use an online calculator to determine the amount of nicotine concentrate to add, based on the strength of your base and the desired nicotine level.

Advertisement

When it comes to balancing the flavor profile, you can adjust the amount of flavoring used to make it stronger or weaker. Be careful not to add too much flavoring, as this can overpower the other flavors and make the e-liquid taste artificial.

It’s a good idea to start with small adjustments and test the e-liquid again before making any major changes. Once you’ve achieved the perfect balance of nicotine and flavor, you can make notes for future batches to ensure consistency.

Making Notes for Future Batches

To ensure consistency in your e-liquid batches, it’s crucial to jot down notes like a baker writing down a recipe for their signature dish. By keeping track of your flavor notes and recipe adjustments, you can easily replicate your favorite e-juice flavors that suit your taste buds.

Here are a few tips on how to make notes for future batches:

  • Start with the basics: Write down the name of the recipe, the date it was made, the nicotine level, and the VG/PG ratio. This will help you keep track of the different batches you make.

  • Flavor notes: Write down the flavors you used, their brand, and the percentage used. This will help you remember which flavors work well together and which ones need to be adjusted.

  • Recipe adjustments: If you made any adjustments to the recipe, like increasing or decreasing the percentage of a flavor, write it down. This will help you achieve the desired taste in future batches.

  • Personal preferences: If you made a recipe that you loved, write down any personal preferences you have, like increasing the sweetness or adding menthol. This will help you customize the recipe to suit your taste buds.

By taking notes, you can easily replicate your favorite e-juice flavors and make any necessary adjustments. Now that you’ve got your notes, it’s time to store the e-liquid properly to ensure it stays fresh and flavorful.

Advertisement

Store the E-Liquid

Storing your homemade e-liquid properly is crucial to maintaining its flavor and nicotine potency. Proper storage ensures that your e-liquid lasts longer and maintains its quality. The shelf life of e-liquid depends on various factors such as nicotine strength, flavoring, and the base used.

To store your e-liquid, you’ll need to keep it away from heat and direct sunlight. Heat and sunlight can cause the nicotine to degrade and alter the flavor. It’s best to store your e-liquid in a cool, dark place, such as a cabinet or drawer. Additionally, make sure to keep your e-liquid away from children and pets, as nicotine is poisonous if ingested. The table below summarizes the proper ways to store your e-liquid.

Factor to Consider Proper Storage
Temperature Cool and dark place
Sunlight Keep away from direct sunlight
Children and pets Keep out of reach

Now that you’ve learned about proper storage for your e-liquid, you can enjoy your custom vape juice!

Enjoy Your Custom Vape Juice!

After properly storing your homemade e-liquid, savoring its flavor and potency is like taking a sip of a fine wine. The customized flavor combinations and tailored nicotine strengths are just some of the benefits of making your own vape juice.

Compared to store-bought options, DIY e-liquids offer more control over the ingredients, allowing you to adjust the flavor and nicotine levels to your liking. To enjoy your custom vape juice, it’s important to use the right equipment and technique.

Advertisement

First, ensure that your vape device is compatible with the e-liquid you made. Then, prime your coil to prevent dry hits and burnt flavors. Finally, start with a low wattage setting and gradually increase it until you find the sweet spot for your desired flavor and vapor production.

With practice, you’ll be able to create a perfect blend that suits your taste and vaping preferences. Enjoy your custom vape juice!

Frequently Asked Questions

Is it safe to make my own vape juice at home?

When making vape juice at home, home safety and ingredients quality are key factors to consider. Ensure proper storage, handling, and labeling of ingredients. Purchase high-quality ingredients from reputable sources.

How much money can I save by making my own vape juice compared to buying it pre-made?

I saved a ton of money by making my own vape juice compared to buying pre-made. DIY vape juice cost comparison showed a 75% reduction in cost. Homemade e liquid quality analysis is crucial for safe and satisfying vaping.

Can I make vape juice without nicotine?

Yes, it is possible to make vape juice without nicotine. There are nicotine-free options available, and flavor customization is still possible without nicotine. It’s important to carefully measure ingredients and follow safety precautions when making your own vape juice.

Advertisement

How long does it take to steep the e-liquid, and why is this step necessary?

Like aging wine, steeping e-liquid is a crucial process that allows flavors to develop fully. The steeping process can take anywhere from a few days to several weeks, depending on the recipe. It’s necessary to achieve optimal taste and quality.

Are there any special precautions I need to take when mixing the ingredients or handling nicotine?

When mixing vape juice, it’s crucial to take mixing precautions and handle nicotine safely. Nicotine is a toxic substance that can cause harm if ingested or absorbed through the skin, so gloves and eye protection should be worn.

Conclusion

Well, after all that effort, I’ve finally made my own vape juice.

I followed all the steps, gathered all the ingredients and equipment, and calculated the perfect recipe for my desired flavor profile.

I steeped the e-liquid, tested and adjusted it to my liking, and stored it in a cool, dark place.

Advertisement

It’s ironic that after all that work, I’m left wondering if it was worth it.

Sure, I have a unique blend of vape juice that no one else has, but was the time and effort worth the end result?

Maybe it’s just me, but I think I’ll stick to buying pre-made vape juice from now on.

At least I know exactly what I’m getting and can save myself the hassle of making it myself.

Advertisement

Continue Reading
Advertisement

Affiliate disclaimer
As an affiliate, we may earn a commission from qualifying purchases. We get commissions for purchases made through links on this website from Amazon and other third parties.

Advertisement

Trending

Copyright © 2024 The Graceful Kitchen Affiliate disclaimer As an affiliate, we may earn a commission from qualifying purchases. We get commissions for purchases made through links on this website from Amazon and other third parties.