Making juice goes beyond just squeezing fruit. With years of experience in the juice industry, I have witnessed firsthand the hard work and attention to detail needed to create top-quality juice. From choosing the right fruits or vegetables to determining the best juice extraction method, each step in the process is crucial in producing a delicious and nutritious juice.
In this article, I’ll be sharing my expertise on how juice is made. We’ll cover everything from washing and preparing the produce to pasteurization and preservation techniques. Whether you’re a juice enthusiast or just curious about the process, this article will give you a detailed look into what goes into making that refreshing glass of juice.
So, let’s get started!
Key Takeaways
- Fresh, seasonal, and organic produce is ideal for maximum nutrients and flavor
- Different extraction methods can produce different results in flavor and texture
- Proper packaging and storage are important to maintain freshness and safety of juice
- Consuming freshly made juice regularly can boost immunity, improve digestion, and detoxify the body
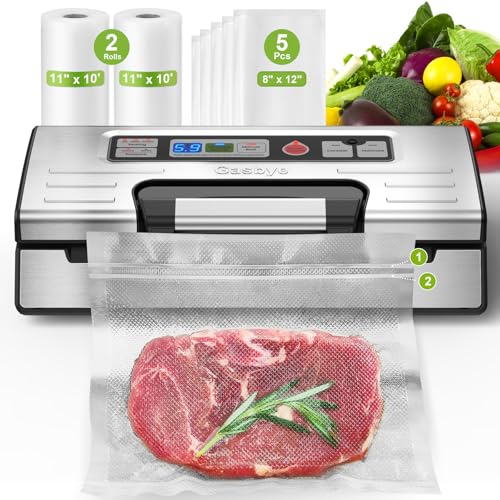
Gasbye 95kPa Precision Vacuum Sealer Machine, Double Heat Seal for Dry/Moist Food, Easy-Lock Handle, Built-in Bag Storage & Cutter, Progress Display, Pulse Mode, Removable Drip Tray, Silver
[95kPa Powerful Suction + Pulse Mode Control] Use Auto Vac & Seal for one-touch everyday sealing—powerful 95kPa suction...
As an affiliate, we earn on qualifying purchases.
The Importance of Fresh Produce
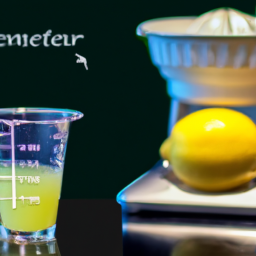
You gotta use fresh produce if you want your juice to be packed with nutrients and flavor. Choosing the right produce is vital to ensure that your juice is full of vitamins, minerals, and antioxidants.
The importance of seasonal produce cannot be overstated. Fruits and vegetables that are in season are more likely to be fresher, as they don’t have to travel as far to reach your local grocery store. They are also more likely to be cheaper than out-of-season produce, making it easier for you to get your daily dose of fruits and vegetables.
Another important factor to consider when choosing produce for your juice is whether to go with organic or conventional options. While organic produce may be more expensive, it is grown without the use of harmful pesticides or fertilizers. This means that your juice won’t contain any harmful chemicals, and you’ll be doing your part to support sustainable farming practices. However, conventional produce can still be a good choice if you can’t afford organic or can’t find it in your local store. Just be sure to wash it thoroughly before juicing it.
When it comes to washing and preparing the produce, there are a few key things to keep in mind.

Vacuum Sealer Machine 75KPa Food with 6-in-1 Dry/Moist Modes & Digital Timer, Compact Lightweight Design, Built-in Cutter + 10 Bags (white)
【6-in-1 Includes Cutter Functions】Moist & Dry Modes - Maximize freshness for different types of food; Vac Seal- One...
As an affiliate, we earn on qualifying purchases.
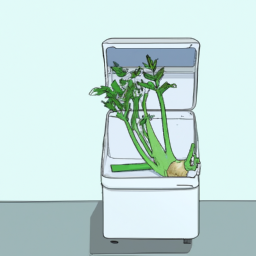
Washing and Preparing the Produce
Before any delicious juice can be enjoyed, the fruits and vegetables must first be thoroughly washed and prepared. Produce safety is of utmost importance, as unwashed produce can harbor harmful bacteria that can cause foodborne illness.
To prevent this, it’s essential to wash all fruits and vegetables before juicing. Washing techniques vary depending on the type of produce. Soft fruits such as berries can be rinsed gently under running water, while tough produce such as ginger or beets may require scrubbing with a brush.
After washing, it’s important to dry the produce thoroughly to prevent any water from diluting the juice. Once the produce is washed and dried, it can be prepared for juicing by cutting it into smaller pieces. Cutting the produce into smaller pieces makes it easier for the juicer to extract the maximum amount of juice.
It’s important to note that some juicers may require produce to be cut into smaller pieces than others. By properly washing and preparing the produce, the juicing process can be efficient and safe, resulting in a delicious and nutritious juice.

95kPa Vacuum Sealer Machine with AquaLock Technology, for Moist Seals, 2X Seal & 130W, Fully Automatic Food Sealer, Built-In Cutter
【𝟏𝟎-𝐢𝐧-𝟏 𝐕𝐞𝐫𝐬𝐚𝐭𝐢𝐥𝐢𝐭𝐲 𝐟𝐨𝐫 𝐀𝐥𝐥 𝐘𝐨𝐮𝐫 𝐍𝐞𝐞𝐝𝐬】The 10-in-1 is perfectly suited for all scenarios in your life. Choose from...
As an affiliate, we earn on qualifying purchases.
Cutting the Produce
As you slice through the produce like a hot knife through butter, remember that cutting it into smaller pieces can result in a more efficient juicing process. It’s important to exercise knife safety while doing so. Make sure your knife is sharp and use a cutting board to prevent accidents.
Additionally, keep portion control in mind when cutting your produce. Too large of pieces can result in clogging the juicer and too small of pieces can result in losing valuable juice.
When cutting your produce, consider the following:
-
For hard produce such as carrots or beets, cut into smaller chunks to prevent clogging the juicer.
-
For soft produce such as berries or grapes, no cutting may be necessary as the juicer can handle them whole.
-
For citrus fruits, remove the peel and cut into wedges before juicing.
Choosing the right method for extracting juice is important to achieving the desired consistency and flavor.

POTANE Precision Vacuum Sealer Machine, Powerful Pro Vacuum Food Sealer, 8-in-1 Easy Presets, 4 Food Modes, Dry&Moist&Soft&Delicate with Starter Kit, Compact Design(Silver)
KEEP FOOD FRESHER & SAVE MONEY: The POTANE VS2690 vacuum sealers use enhanced heating wires and brushless motor....
As an affiliate, we earn on qualifying purchases.
Choosing the Right Method for Extracting Juice
When deciding how to extract juice, it’s important to consider which method will result in the desired texture and taste. There are two main methods for extracting juice: manual and electric.
Manual juicers are typically less expensive than electric juicers and do not require electricity to operate. They are also quieter and more portable, making them a good option for those who want to juice on the go. However, manual juicers can be time-consuming and require more effort to use.
On the other hand, electric juicers are more efficient and can handle a larger volume of produce in a shorter amount of time. They also offer more options for texture and consistency, such as adjustable pulp settings. However, electric juicers can be more expensive and require a power source to operate.
When it comes to choosing the right method for extracting juice, there are pros and cons to both manual and electric options. The decision ultimately depends on your personal preferences and needs.
In the next section, we will explore the advantages and disadvantages of different extraction methods in more detail.
Advantages and Disadvantages of Different Extraction Methods
To determine the most suitable extraction method for your needs, consider the advantages and disadvantages of each option.
Blending and pressing are two common methods of extracting juice. Blending involves chopping fruits and vegetables into small pieces and blending them until they form a pulp. The pulp is then strained to remove the juice. Pressing, on the other hand, involves applying pressure to the fruit to extract the juice.
Manual and electric juicers are another consideration. Manual juicers are a good option if you’re looking for a low-cost, easy-to-use option. However, they may not be efficient for larger quantities of juice. Electric juicers, on the other hand, are more expensive but can be more efficient for larger quantities. Additionally, they may be able to handle a wider variety of fruits and vegetables.
When choosing an extraction method, consider your needs, budget, and the types of produce you’ll be using.
When considering the flavor and texture of your juice, it’s important to note that different extraction methods can produce different results. For example, blending may produce a thicker, pulpier juice, while pressing may produce a thinner, smoother juice. Additionally, certain fruits and vegetables may be better suited for certain extraction methods. For example, soft fruits like berries may be better suited for blending, while harder fruits like apples may be better suited for pressing.
Ultimately, the best extraction method for your needs will depend on your preferences and the specific produce you’re using.
Flavor and Texture Considerations
When it comes to creating juice blends, there are a few factors to consider in order to achieve optimal flavor and texture. Mixing different fruits and vegetables can create a complex flavor profile, but it’s important to balance the sweetness and acidity of each component to avoid overpowering any one flavor.
Additionally, adding sweeteners can enhance the taste of the juice, but it’s crucial to use the right type and amount to avoid making the juice too sugary or artificial-tasting.
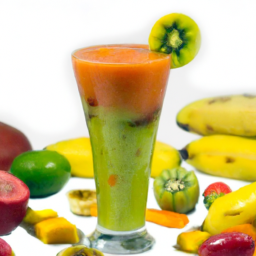
Mixing Different Fruits and Vegetables
Mixing various fruits and veggies together creates a colorful and flavorful combination that will tantalize your taste buds. Blending techniques and juicing equipment play a vital role in creating the perfect mix.
The following are some tips to ensure you create the best blend possible:
- Use a high-powered blender or juicer to ensure you extract as much juice as possible.
- Experiment with different combinations of fruits and vegetables to find a mix that suits your taste. Some popular combinations include apples and carrots, spinach and pineapple, and beetroot and orange.
- Don’t be afraid to add herbs and spices to your mix. Mint, ginger, and cinnamon are all great options that can add an extra kick to your juice.
Once you have blended your fruits and vegetables, it’s time to add some sweetness to your mix. While some fruits like bananas and mangoes are naturally sweet, others may require a bit of added sugar or honey. By finding the perfect balance of sweet and sour, you can create a juice that is both delicious and nutritious.
Adding Sweeteners
Hey, sugar lover, if you want to take your blended fruits and veggies to the next level, try adding a touch of honey or a sprinkle of cinnamon for a flavor explosion in your mouth. But before you do, it’s important to consider the type of sweetener you’re using.
Natural sweeteners like honey or maple syrup are a great option, as they provide a more complex flavor profile and contain beneficial nutrients. On the other hand, artificial sweeteners like Splenda or aspartame may be lower in calories, but they can have negative effects on your health if consumed in excess.
It’s important to note that adding sweeteners can also negate some of the health benefits of the fruits and vegetables in your juice. The high sugar content in some sweeteners can cause a spike in blood sugar levels, which can lead to inflammation and other health issues.
Ultimately, it’s up to you to decide if and how much sweetener to add to your juice. Just remember to choose natural options and consume in moderation.
Now, let’s move on to the next section about pasteurization and preservation.
Pasteurization and Preservation
Pasteurization and preservation are essential steps in making juice, ensuring the safety and shelf life of the final product. Pasteurization is the process of heating the juice to a specific temperature for a set amount of time in order to kill any harmful bacteria, viruses, or pathogens. This step is crucial to guarantee that the juice is safe to consume, especially if it is not going to be consumed immediately. There are several pasteurization techniques that can be used, including flash pasteurization, high-temperature short-time (HTST) pasteurization, and ultra-high temperature (UHT) pasteurization.
Preservation techniques are also used to extend the shelf life of the juice. This involves adding preservatives or altering the pH level of the juice to prevent the growth of microorganisms that can spoil the product. Some common preservatives used in juice production include citric acid, ascorbic acid, and benzoic acid. Additionally, the juice may be stored in airtight containers to maintain its freshness and prevent contamination. Proper preservation techniques can significantly prolong the shelf life of the juice, allowing it to be transported and sold in various locations. Next, we will discuss how packaging and storage play a crucial role in ensuring the quality of the final product.
Packaging and Storage
When it comes to packaging and storing juice, there are several important factors to consider. First and foremost, choosing the right container is crucial to ensure the juice stays fresh and safe to consume.
Additionally, properly storing the juice in either the refrigerator or freezer can greatly impact its shelf life and quality. As someone who’s worked in the food industry, I understand the importance of these factors and I’ll provide a detailed analysis of how to effectively package and store juice.
Choosing the Right Container
Choosing the right container for juicing is crucial. It can affect the taste and quality of the juice, according to a survey by the Juice Products Association. Glass is the preferred choice for preserving freshness. It is non-reactive and doesn’t absorb odors or flavors, ensuring that the juice retains its natural taste. Additionally, glass containers are eco-friendly and can be reused or recycled, making them a sustainable choice.
When choosing a container for juicing, consider the following options:
-
Glass jars or bottles: ideal for preserving freshness and flavor, and can be reused or recycled.
-
Stainless steel bottles: durable and reusable, but not ideal for long-term storage as they can affect the taste of the juice.
-
Plastic bottles or containers: convenient and lightweight, but not eco-friendly and can affect the taste of the juice over time.
After selecting the appropriate container, it’s important to store the juice properly to maintain its freshness.
Storing in the Refrigerator or Freezer
Now that we’ve discussed the importance of choosing the right container for your homemade juice, let’s talk about proper storage. Storing juice properly is crucial to maintaining its freshness and ensuring that it stays safe for consumption. Generally, there are two options for storing juice: room temperature or refrigeration. While room temperature storage may seem convenient, it can significantly reduce the shelf life of your juice and increase the risk of bacterial growth. Therefore, it is recommended to store your juice in the refrigerator or freezer to ensure its quality and safety.
It is also important to consider the effect of light exposure on your juice. Light can cause the breakdown of certain vitamins and nutrients in your juice, leading to a loss of flavor and nutritional value. To prevent this, store your juice in a dark, opaque container or place it in a location where it won’t be exposed to direct sunlight. By following these tips, you can help extend the shelf life of your homemade juice and ensure that it remains fresh and nutritious for as long as possible.
Now, let’s move on to the next step in our juice-making process: quality control.
Quality Control
As a juice maker, I’m responsible for ensuring that the juice we produce is of the highest quality.
To achieve this, we implement rigorous quality control measures that include testing for consistency and monitoring for contamination.
We examine the juice for its texture, flavor, and color to ensure that it meets our standards, and use advanced technologies to identify any potential contaminants that could compromise the quality of the product.
By taking these steps, we can guarantee that our customers are getting a safe and consistent product every time they purchase our juice.
Testing for Consistency
To ensure your juice has the perfect texture, you’ll want to keep stirring it until it’s smooth and creamy, allowing the flavors to blend together harmoniously. Testing for consistency is an essential part of quality control in juice production. It involves checking the acidity levels and adjusting the sugar content to make sure that each batch of juice meets the desired flavor profile.
To check the acidity levels, a pH meter is used to measure the pH of the juice. The ideal pH range for juice is between 3.0 and 4.0, depending on the type of fruit used. If the pH is too high, the juice will taste sour, while a pH that is too low will make the juice taste sweet. Adjusting the sugar content is done by adding sugar or water to the juice until the desired sweetness is achieved.
As we move forward with production, we must also monitor for contamination to ensure that the juice is safe for consumption.
Monitoring for Contamination
Monitoring for contamination is crucial during the production process to ensure the purity and safety of our refreshing elixir. Contamination prevention is achieved through strict sanitation procedures that minimize the risk of harmful intruders.
To achieve this, our manufacturing facility is regularly cleaned and sanitized to eliminate potential sources of contamination. We also have a team of trained professionals who monitor the production process. They ensure that all equipment is sanitized and that employees adhere to strict hygiene standards.
By taking a proactive approach to contamination prevention, we can ensure that our juice is safe and healthy for our consumers to enjoy.
Enjoying Your Freshly Made Juice
Once you’ve got your freshly made juice, take a deep breath and savor the vibrant colors and aromas. Drinking freshly made juice isn’t just refreshing, it also offers numerous health benefits. The vitamins, minerals, and enzymes present in the juice are essential for a healthy body and mind. Consuming freshly made juice regularly can boost immunity, improve digestion, and detoxify the body.
Apart from the health benefits, freshly made juice can also be paired with various foods, enhancing their flavors and nutritional value. For instance, a glass of freshly made carrot juice can be paired with a bowl of roasted vegetables, a turkey sandwich, or even a spicy curry. Similarly, a glass of beetroot juice can be paired with a green salad, grilled fish, or a bowl of quinoa. The possibilities are endless, and experimenting with different juice pairing suggestions can add excitement to your daily meals.
So, go ahead and indulge in the goodness of freshly made juice. Experience the health benefits and culinary delights it has to offer. Enjoying freshly made juice is not only a sensory experience but also a healthy one. The benefits of consuming freshly made juice are numerous, and it can be paired with various foods to enhance their flavor and nutritional value. Make the most of your freshly made juice by experimenting with different pairings and savoring the goodness it has to offer.
Frequently Asked Questions
How long can freshly made juice be stored?
To preserve the nutritional value of freshly made juice, it should be stored in an airtight container in the refrigerator for up to 72 hours. Adding lemon juice or using a cold press juicer can also extend the storage duration.
Does the type of juicer used affect the nutritional content of the juice?
The type of juicer used can affect the nutritional content of the juice. Juicer efficiency and nutrient retention are key factors. Centrifugal juicers may result in lower nutrient retention compared to masticating juicers due to heat and oxidation.
Can you use frozen fruits and vegetables to make juice?
Yes, frozen produce can be used to make juice. The juicing benefits remain intact as long as the produce is not thawed before juicing. Frozen fruits and vegetables are convenient and can be less expensive than fresh options.
Are there any safety precautions to take when making juice at home?
When making juice at home, it’s important to prioritize safety. Always sanitize your equipment before and after use to prevent contamination. Practice safe food handling techniques to avoid foodborne illness.
How does the nutritional value of store-bought juice compare to freshly made juice?
Freshly made juice typically has a higher nutritional value than store-bought juice due to enzymatic degradation during processing and pasteurization. However, the nutritional content may vary depending on the type of fruit or vegetable used.
Conclusion
In conclusion, making juice is a process that requires attention to detail and a commitment to quality. Every step matters, from choosing the right produce to selecting the right extraction method. As the adage goes, ‘you reap what you sow,’ and this is especially true when it comes to juicing.
By using fresh, high-quality produce and taking care to preserve its natural flavors and nutrients, you can create a delicious and healthy beverage that will nourish your body and delight your taste buds. To achieve the best results, it’s important to follow a rigorous quality control process at every step of the way.
This includes washing and preparing the produce thoroughly, choosing the right equipment for extraction, and carefully packaging and storing the juice to maintain its freshness and flavor. By taking these steps, you can ensure that your juice is not only tasty and refreshing but also packed with the essential vitamins and minerals that your body needs to thrive.
So, if you’re looking for a healthy and delicious way to stay hydrated and energized, why not try making your own juice today?