TL;DR

Get kitchen staples and gadgets delivered free — and shop member deals
- Fast, free delivery on millions of items
- Access to Prime Big Deal Days deals on October 6–7
- Prime Video, Amazon Music and more included
Halloween-themed cookie cutters turn firm, chilled dough into ghosts, pumpkins, bats, and other seasonal treats. Stainless steel cutters cut sharply, plastic can be easier for supervised children to grip, and simple shapes are easier to decorate than intricate ones. Chill the dough, press and lift cleanly, and follow the cutter maker’s care instructions.
A ghost cookie with one missing arm can turn your neat Halloween tray into a batch of cheerful blobs. Halloween-themed cookie cutters make it easy to create seasonal shapes, but the cutter is only half the job: dough texture, material, and a little patience all affect the result.
This guide covers how to choose themed cookie cutters, get crisp edges, and decorate without turning your kitchen into a flour-covered haunted house. You’ll also find practical food-safety tips for baking with kids and cleaning cutters after the last cookie disappears.
Choose stainless steel for a sharp cut, plastic for easier supervised handling, and a simple outline when you want easy decorating.
Chill rolled dough before cutting and chill cut shapes again if they soften before baking.
Press straight down, lift straight up, and leave space between cookies on the tray.
Cool cookies completely before icing or stacking; label recipe allergens for guests.
Check food-contact details and cleaning directions, then dry cutters thoroughly before storing.
Choose cutters that match your dough and decorating plans
Halloween cookie cutters work best when their material and shape suit your dough and decorating style. Stainless steel usually cuts cleanly and lasts well; plastic can be easier for small hands to grip, while copper offers a handsome, long-lasting option that may cost more. For a first batch, a simple pumpkin, ghost, or cat is easier to cut and decorate than a haunted house with narrow windows.
Think about the finished cookie, too. A basic outline leaves room for your own icing design, while an embossing cutter presses details into the dough before baking. If you want matching faces or lettering, sets designed to work with stencils or decorating templates can save time. These are seasonal baking tools, and sellers offer many bundles and personalized shapes, but materials and food-contact suitability vary—check the product details before buying.
| What to compare | Stainless steel | Plastic | Copper |
|---|---|---|---|
| Cutting edge | Usually sharp and clean | May struggle with thick or chilled dough | Often cuts well |
| Handling | Check for sharp edges | Often easier for children to grip | Use care around edges |
| Care | Dry thoroughly to limit rust | Follow maker’s cleaning directions | Clean carefully; may need extra attention |
Before ordering, check the dimensions and set contents. A tiny bat may suit cupcake toppers, while a palm-size pumpkin makes a better centerpiece. For example, a family baking afternoon might call for chunky plastic ghosts, while a gift box of decorated cookies benefits from sturdy metal cutters with clear outlines.
Top picks for "halloween cookie cutter"
As an affiliate, we earn on qualifying purchases.
Keep ghosts and bats from spreading in the oven
Halloween-themed cookie cutters give you the cleanest outlines when the dough is firm and cold. A soft dough smears as you press, then spreads in the oven, rounding off pointed ears and tiny pumpkin stems. Sugar-cookie dough and gingerbread dough are common choices because you can roll and chill them before cutting.
Suppose your bat’s wings keep turning into smooth bumps. The dough may have warmed while you worked, especially in a cozy kitchen or after several trips to the oven. Chill the rolled dough before cutting; if the shapes feel soft when you transfer them, place the tray in the fridge briefly before baking.
Cutters also have their limits. Thin bridges in a detailed witch’s hat or haunted house can tear when you lift the shape, and no amount of icing will put a missing dough corner back where it belongs. Try a simpler silhouette for a busy decorating session, and save intricate cutters for a cooler day when you can work in smaller batches.
Quick test: If a cut shape slumps as you move it, pause and chill the dough. Cold, firm shapes are easier to transfer and more likely to keep their character in the oven.
Follow five steps for crisp Halloween shapes
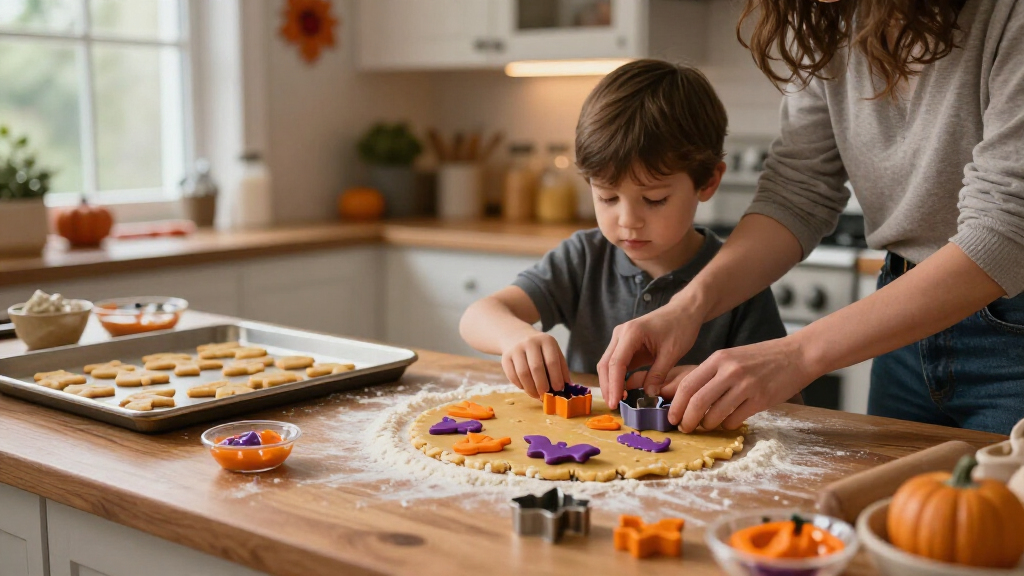
Halloween cookie cutters are easier to use when you work in a short, repeatable sequence. Keep the dough cold, use only a light dusting of flour if it sticks, and lift each cut shape carefully. If a preschooler is helping, give them blunt-edged plastic cutters and stay nearby while they press.
- Chill the dough. Roll it to an even thickness, then refrigerate it until firm enough to handle.
- Prepare the cutter. Dip it in flour or dust it lightly only if the dough sticks. Brush excess flour off the surface.
- Press straight down. Lift straight up instead of twisting, which can distort the outline.
- Move shapes to the tray. Leave room between them, especially if your recipe spreads. Chill the tray briefly if the dough has softened.
- Cool before decorating. Let cookies cool completely before adding icing or stacking them.
Here’s what that looks like in practice: cut six pumpkins, transfer them with a thin spatula, and return the remaining dough to the fridge while those bake. That small pause keeps the next batch firm instead of sticky. For cookies filled with perishable toppings, refrigerate them promptly; otherwise, store baked cookies in a clean, covered container once fully cool.
Pick shapes that are fun to decorate and easy to serve
Simple silhouettes give you the most decorating freedom, while cutters with pressed details provide a pattern even if you skip elaborate icing. A plain ghost can become a whole parade of expressions with dots of icing, and an embossed skull already has lines to guide your design. Match the shape to the time you have: one tray of detailed haunted houses takes longer than a bowl of quick pumpkin cookies.
There’s another useful trick: cutters shaped like Halloween icons can do more than cut cookies, depending on the material and design. Many can cut fondant, sandwiches, fruit, or cheese, making them handy for a school snack plate. Wash the cutter between foods, and keep tools used for crafts—such as cutting modeling materials—separate from food-use cutters.
For a party, make a few sizes instead of one giant cookie. Small bats fit beside a mug of cider, while larger pumpkins can carry names or a generous swirl of icing. If you’re preparing treats for guests, label common allergens such as wheat, milk, eggs, soy, peanuts, and tree nuts when they appear in your recipe or decorations; check packaged ingredients rather than guessing.
Take a quick look at key facts for your specific set before the party: whether it includes multiple sizes, duplicates, an embossing stamp, or a storage case. A set with three pumpkin sizes can help you build a varied platter, while an intricate cutter may suit a single showpiece. You can turn that decision into a blog article for friends, too—show the cutter, the raw shape, and the finished cookie so they can see what actually worked.
Clean and store cutters so they’re ready next October
Care depends on the cutter material, so follow the maker’s cleaning instructions. Hand-washing and thorough drying are sensible for metal cutters that may rust or have delicate seams; not every cutter belongs in the dishwasher. A quick wash after baking also keeps dried dough from hiding in narrow details.
For example, dough packed into a bat’s wing can harden while you decorate the rest of the tray. Rinse it away promptly, wash the cutter, and dry it fully before storage. Keep the pieces in a box, bag, or organizer so thin edges do not bend and small cutters do not vanish into the kitchen drawer.
Use cutters made for food contact when you’re baking. Personalized or 3D-printed shapes can look playful, but quality and food-contact suitability vary, so check the seller’s material and care specifications. Around young children, avoid exposing them to sharp metal edges; supervised use of easier-to-grip plastic cutters can make the activity simpler and safer.
Frequently Asked Questions
What dough works best with Halloween cookie cutters?
Firm sugar-cookie or gingerbread dough works well because you can roll and chill it before cutting. If the dough feels soft as you work, refrigerate it until firm again.
How do I stop dough from sticking to a cutter?
Start with cold dough and a clean cutter. If it still sticks, dip the cutter lightly in flour, then brush away extra flour so the cookie surface does not turn dry.
Are metal or plastic Halloween cookie cutters better?
Metal cutters generally cut sharply and hold up well, while plastic cutters may be easier for children to grip. Choose based on the dough and who is helping; supervise children and keep sharp edges away from small hands.
Can Halloween cookie cutters go in the dishwasher?
Check the manufacturer’s care directions, since dishwasher safety depends on the material and design. Hand-wash delicate cutters or metal cutters that may rust, then dry them thoroughly before storing.
Can I use cookie cutters for sandwiches or fruit?
Many cutters can shape sandwiches, fruit, cheese, or fondant, depending on their design. Wash them between uses, and keep cutters used with craft materials separate from tools used for food.
Conclusion
Start with a simple ghost or pumpkin, keep the dough cold, and let the shape do the storytelling. A tray of crisp-edged cookies needs no haunted-house engineering—just a good cutter, a cool dough, and a little icing after the oven.
NFL season / tailgating Picks
team gear
As an affiliate, we earn on qualifying purchases.